DAEWOO NUBIRA 2004 Service Repair Manual
Manufacturer: DAEWOO, Model Year: 2004, Model line: NUBIRA, Model: DAEWOO NUBIRA 2004Pages: 2643, PDF Size: 80.54 MB
Page 1031 of 2643
HYDRAULIC BRAKES 4A – 15
DAEWOO V–121 BL4
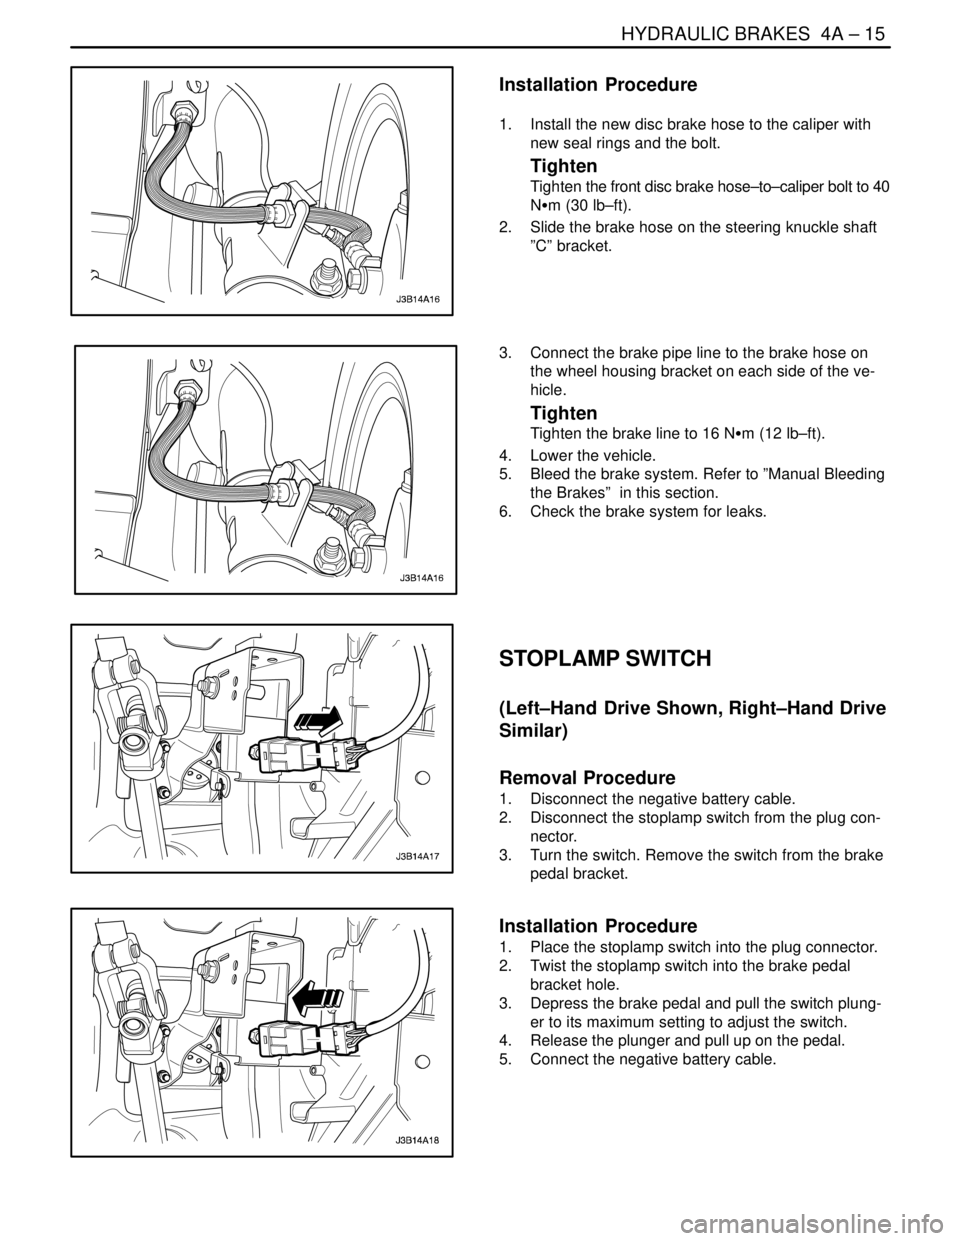
Installation Procedure
1. Install the new disc brake hose to the caliper with
new seal rings and the bolt.
Tighten
Tighten the front disc brake hose–to–caliper bolt to 40
NSm (30 lb–ft).
2. Slide the brake hose on the steering knuckle shaft
”C” bracket.
3. Connect the brake pipe line to the brake hose on
the wheel housing bracket on each side of the ve-
hicle.
Tighten
Tighten the brake line to 16 NSm (12 lb–ft).
4. Lower the vehicle.
5. Bleed the brake system. Refer to ”Manual Bleeding
the Brakes” in this section.
6. Check the brake system for leaks.
STOPLAMP SWITCH
(Left–Hand Drive Shown, Right–Hand Drive
Similar)
Removal Procedure
1. Disconnect the negative battery cable.
2. Disconnect the stoplamp switch from the plug con-
nector.
3. Turn the switch. Remove the switch from the brake
pedal bracket.
Installation Procedure
1. Place the stoplamp switch into the plug connector.
2. Twist the stoplamp switch into the brake pedal
bracket hole.
3. Depress the brake pedal and pull the switch plung-
er to its maximum setting to adjust the switch.
4. Release the plunger and pull up on the pedal.
5. Connect the negative battery cable.
Page 1032 of 2643
4A – 16IHYDRAULIC BRAKES
DAEWOO V–121 BL4
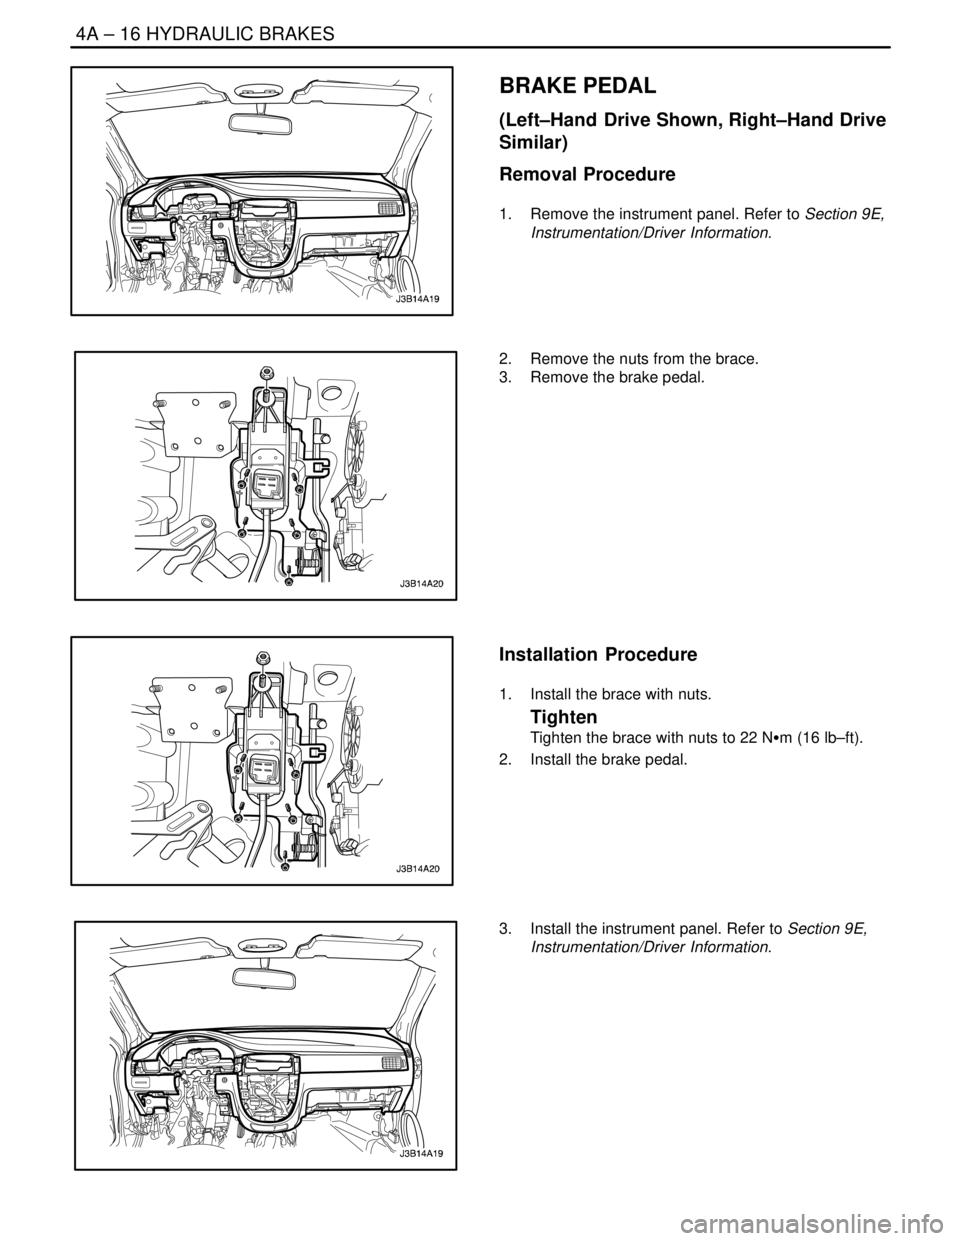
BRAKE PEDAL
(Left–Hand Drive Shown, Right–Hand Drive
Similar)
Removal Procedure
1. Remove the instrument panel. Refer to Section 9E,
Instrumentation/Driver Information.
2. Remove the nuts from the brace.
3. Remove the brake pedal.
Installation Procedure
1. Install the brace with nuts.
Tighten
Tighten the brace with nuts to 22 NSm (16 lb–ft).
2. Install the brake pedal.
3. Install the instrument panel. Refer to Section 9E,
Instrumentation/Driver Information.
Page 1033 of 2643

HYDRAULIC BRAKES 4A – 17
DAEWOO V–121 BL4
GENERAL DESCRIPTION
AND SYSTEM OPERATION
WARNING LAMP OPERATION
This brake system uses a BRAKE warning lamp located
in the instrument panel cluster. When the ignition switch
is in the START position, the BRAKE warning lamp should
illuminate. It should go off when the ignition switch returns
to the ON position.The following conditions will activate the BRAKE warning
lamp:
S The lamp should be on whenever the parking brake
is applied and the ignition switch is in the ON posi-
tion.
S A low fluid level in the master cylinder will turn the
BRAKE lamp on.
Page 1034 of 2643

SECTION : 4B
MASTER CYLINDER
TABLE OF CONTENTS
SPECIFICATIONS4B–1 . . . . . . . . . . . . . . . . . . . . . . . . . .
Fastener Tightening Specifications 4B–1. . . . . . . . . .
DIAGNOSIS4B–2 . . . . . . . . . . . . . . . . . . . . . . . . . . . . . . . .
Checking Brake Proportioning Valve 4B–2. . . . . . . . .
MAINTENANCE AND REPAIR4B–3 . . . . . . . . . . . . . . .
ON–VEHICLE SERVICE 4B–3. . . . . . . . . . . . . . . . . . . . .
Master Cylinder Assembly 4B–3. . . . . . . . . . . . . . . . . . Brake Fluid Reservoir 4B–4. . . . . . . . . . . . . . . . . . . . . .
UNIT REPAIR 4B–7. . . . . . . . . . . . . . . . . . . . . . . . . . . . . .
Master Cylinder Overhaul 4B–7. . . . . . . . . . . . . . . . . . .
GENERAL DESCRIPTION AND SYSTEM
OPERATION4B–9 . . . . . . . . . . . . . . . . . . . . . . . . . . . . . .
Master Cylinder 4B–9. . . . . . . . . . . . . . . . . . . . . . . . . . .
Fluid Level Sensor 4B–9. . . . . . . . . . . . . . . . . . . . . . . .
SPECIFICATIONS
FASTENER TIGHTENING SPECIFICATIONS
ApplicationNSmLb–FtLb–In
Brake Lines1612–
Master Cylinder Attaching Nuts1813–
Proportioning Valves2216–
Page 1035 of 2643

4B – 2IMASTER CYLINDER
DAEWOO V–121 BL4
DIAGNOSIS
CHECKING BRAKE
PROPORTIONING VALVE
Use two brake pressure gauges to check the brake pro-
portioning valves that are attached to the master cylinder
on non–ABS braking systems. These valves limit the out-
let pressure to the rear brakes after a predetermined mas-
ter cylinder pressure has been reached. (On ABS braking
systems, the hydraulic modulator/motor pack assembly
controls the hydraulic pressure to both the rear wheel cyl-
inders or rear calipers, and the front calipers.)
When checking the brake proportioning valves, be sure
that the hydraulic line pressure is measured simulta-
neously and diagonally on the front and the rear axles.To measure the pressure, use the following steps.
1. Remove the bleeder valve and install a pressure
gauge to one of the rear brake cylinders.
2. Install another bleeder valve and install another
pressure gauge to the diagonally opposite front
brake.
3. Build pressure by pressing firmly on the brake ped-
al several times. (The pressure indicated on the
gauge is not regulated and represents the actual
brake system hydraulic pressure.)
4. Build pressure until the test values in the following
proportioning valve test chart are achieved.
Model
Reference Number for
Gradient and Switching
Pressure on the Valve
HousingInput Pressure Read on
the Manometer at the
Front Axle in kPa (psi)Output Pressure Read
on the Manometer at the
Front Axle in kPa (psi)
500 (73)500 (73)
N/B, H/B0.3/304 500 (653) 3 450 ± 200(500 ± 29)
10 000 (1,450)5 100 ± 300(740 ± 44)
500 (73)500 (73)
WAGON0.3/405 500 (798)4 450 ± 200(645 ± 29)
10 000 (1,450)5 800 ± 300(841 ± 44)
Important : If the pressure exceeds 10 000 kPa (1,450
psi), the pressure reading on the rear gauge will not be ac-
curate.5. Remove the gauges from the tested brake circuit
and repeat the test on the remaining circuit.
Page 1036 of 2643
MASTER CYLINDER 4B – 3
DAEWOO V–121 BL4
MAINTENANCE AND REPAIR
ON–VEHICLE SERVICE
MASTER CYLINDER ASSEMBLY
(Left–Hand Drive Shown, Right–Hand Drive
Similar)
Removal Procedure
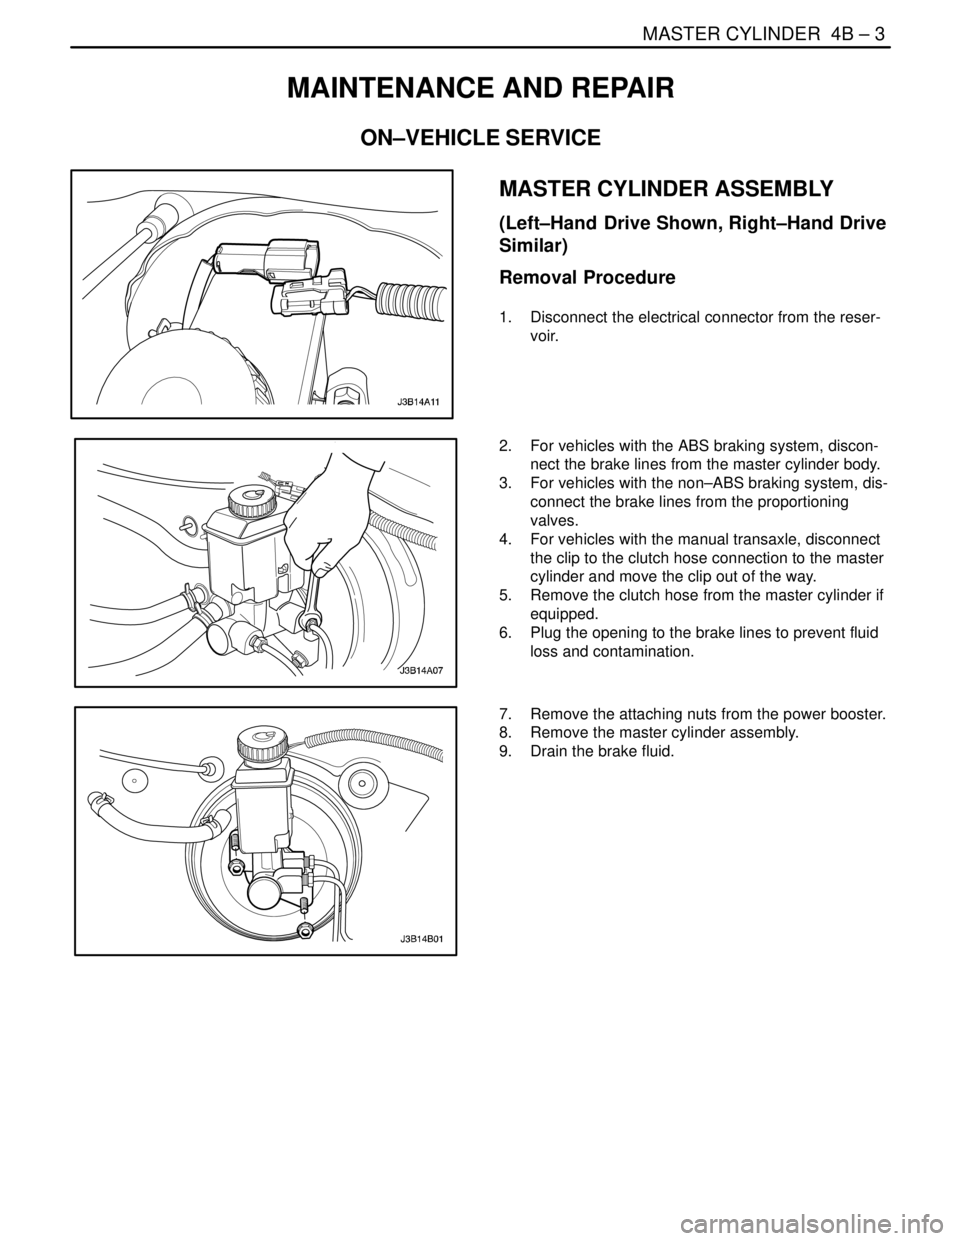
1. Disconnect the electrical connector from the reser-
voir.
2. For vehicles with the ABS braking system, discon-
nect the brake lines from the master cylinder body.
3. For vehicles with the non–ABS braking system, dis-
connect the brake lines from the proportioning
valves.
4. For vehicles with the manual transaxle, disconnect
the clip to the clutch hose connection to the master
cylinder and move the clip out of the way.
5. Remove the clutch hose from the master cylinder if
equipped.
6. Plug the opening to the brake lines to prevent fluid
loss and contamination.
7. Remove the attaching nuts from the power booster.
8. Remove the master cylinder assembly.
9. Drain the brake fluid.
Page 1037 of 2643
4B – 4IMASTER CYLINDER
DAEWOO V–121 BL4
Installation Procedure
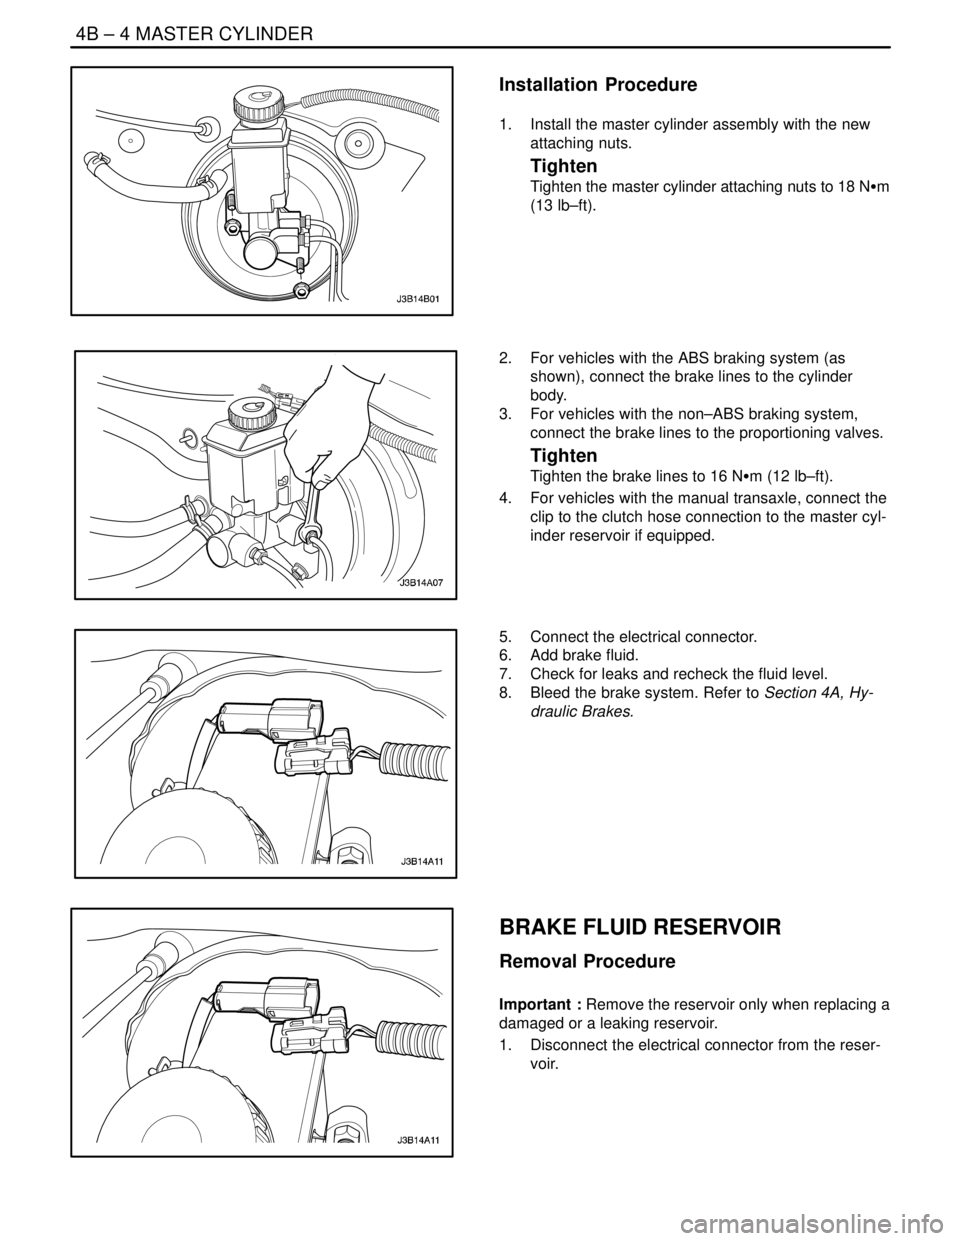
1. Install the master cylinder assembly with the new
attaching nuts.
Tighten
Tighten the master cylinder attaching nuts to 18 NSm
(13 lb–ft).
2. For vehicles with the ABS braking system (as
shown), connect the brake lines to the cylinder
body.
3. For vehicles with the non–ABS braking system,
connect the brake lines to the proportioning valves.
Tighten
Tighten the brake lines to 16 NSm (12 lb–ft).
4. For vehicles with the manual transaxle, connect the
clip to the clutch hose connection to the master cyl-
inder reservoir if equipped.
5. Connect the electrical connector.
6. Add brake fluid.
7. Check for leaks and recheck the fluid level.
8. Bleed the brake system. Refer to Section 4A, Hy-
draulic Brakes.
BRAKE FLUID RESERVOIR
Removal Procedure
Important : Remove the reservoir only when replacing a
damaged or a leaking reservoir.
1. Disconnect the electrical connector from the reser-
voir.
Page 1038 of 2643
MASTER CYLINDER 4B – 5
DAEWOO V–121 BL4
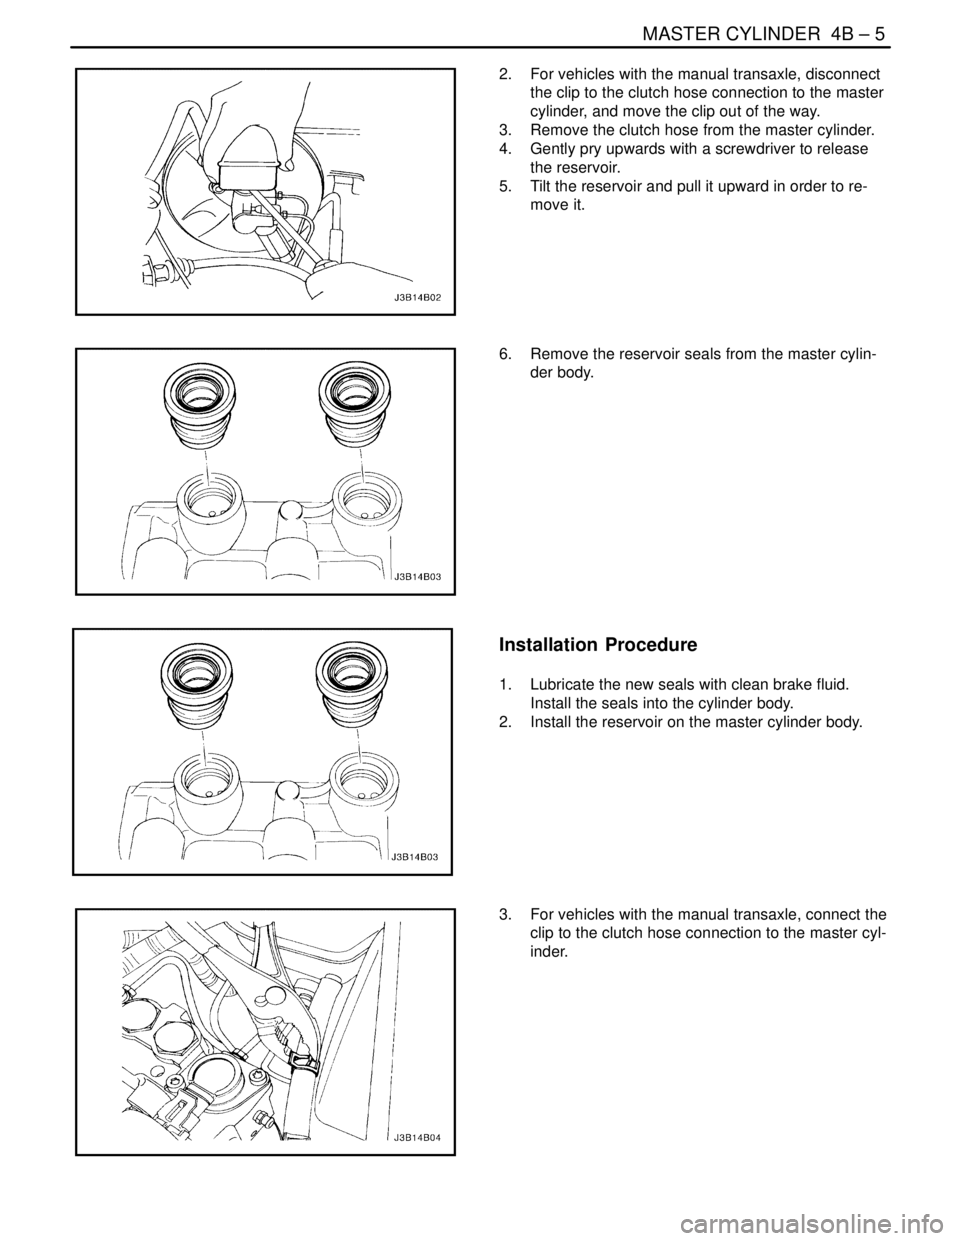
2. For vehicles with the manual transaxle, disconnect
the clip to the clutch hose connection to the master
cylinder, and move the clip out of the way.
3. Remove the clutch hose from the master cylinder.
4. Gently pry upwards with a screwdriver to release
the reservoir.
5. Tilt the reservoir and pull it upward in order to re-
move it.
6. Remove the reservoir seals from the master cylin-
der body.
Installation Procedure
1. Lubricate the new seals with clean brake fluid.
Install the seals into the cylinder body.
2. Install the reservoir on the master cylinder body.
3. For vehicles with the manual transaxle, connect the
clip to the clutch hose connection to the master cyl-
inder.
Page 1039 of 2643
4B – 6IMASTER CYLINDER
DAEWOO V–121 BL4
4. Add brake fluid.
5. Raise and suitably support the vehicle.
6. Bleed the braking system. Refer to Section 4A, Hy-
draulic Brakes orSection 4F, Antilock Brake Sys-
tem.Bleed the clutch master cylinder. Refer to Sec-
tion 5C, Clutch.
7. Lower the vehicle.
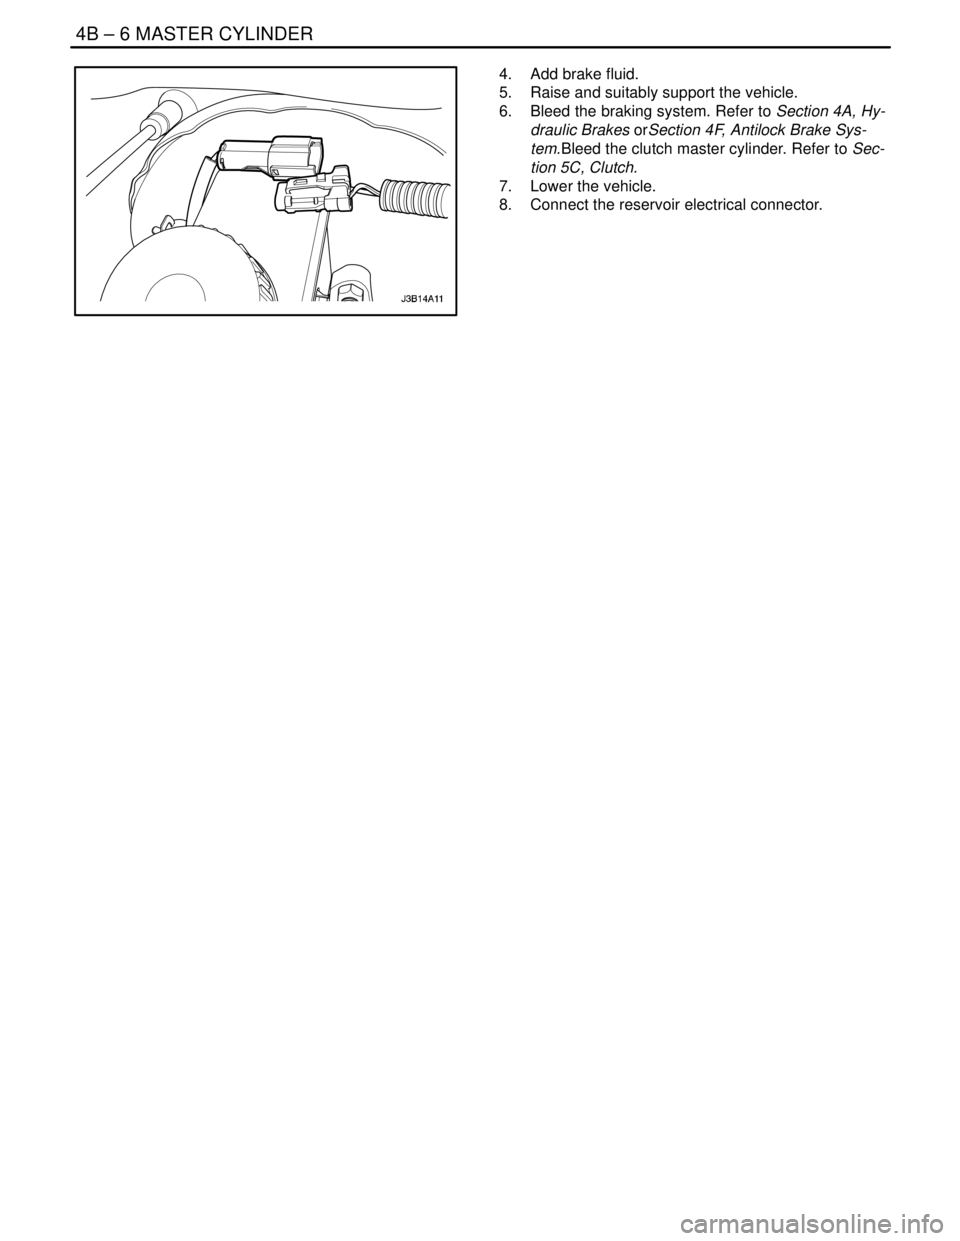
8. Connect the reservoir electrical connector.
Page 1040 of 2643
MASTER CYLINDER 4B – 7
DAEWOO V–121 BL4
UNIT REPAIR
MASTER CYLINDER OVERHAUL
Disassembly Procedure
1. Remove the master cylinder. Refer to ”Master Cyl-
inder Assembly” in this section.
2. Remove the brake fluid reservoir. Refer to ”Brake
Fluid Reservoir” in this section.
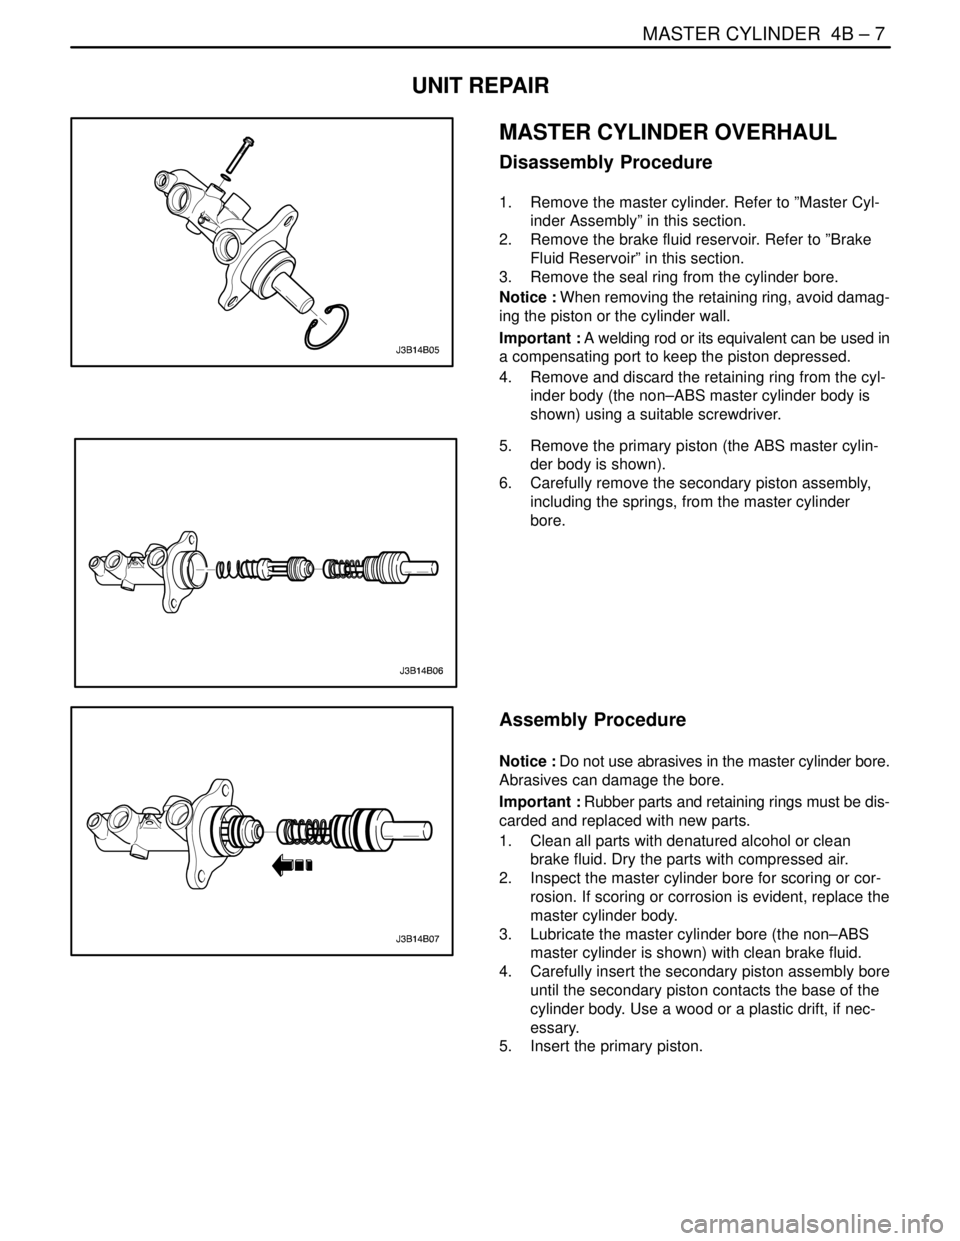
3. Remove the seal ring from the cylinder bore.
Notice : When removing the retaining ring, avoid damag-
ing the piston or the cylinder wall.
Important : A welding rod or its equivalent can be used in
a compensating port to keep the piston depressed.
4. Remove and discard the retaining ring from the cyl-
inder body (the non–ABS master cylinder body is
shown) using a suitable screwdriver.
5. Remove the primary piston (the ABS master cylin-
der body is shown).
6. Carefully remove the secondary piston assembly,
including the springs, from the master cylinder
bore.
Assembly Procedure
Notice : Do not use abrasives in the master cylinder bore.
Abrasives can damage the bore.
Important : Rubber parts and retaining rings must be dis-
carded and replaced with new parts.
1. Clean all parts with denatured alcohol or clean
brake fluid. Dry the parts with compressed air.
2. Inspect the master cylinder bore for scoring or cor-
rosion. If scoring or corrosion is evident, replace the
master cylinder body.
3. Lubricate the master cylinder bore (the non–ABS
master cylinder is shown) with clean brake fluid.
4. Carefully insert the secondary piston assembly bore
until the secondary piston contacts the base of the
cylinder body. Use a wood or a plastic drift, if nec-
essary.
5. Insert the primary piston.