ECU DATSUN 610 1969 User Guide
[x] Cancel search | Manufacturer: DATSUN, Model Year: 1969, Model line: 610, Model: DATSUN 610 1969Pages: 171, PDF Size: 10.63 MB
Page 48 of 171
CLUTCH
PEDAL
Adjusting
400
and
1600
cc
models
Adjust
the
pedal
height
to
209
mm
8
22
in
with
the
pedal
stop
slackened
off
by
altering
the
length
of
the
master
cylinder
push
rod
See
Fig
E
13
Tighten
the
pedal
stop
and
obtain
a
pedal
height
of
207
ffim
8
15
in
for
Left
Hand
drive
models
or
182
mID
7
I7
in
for
Right
Hand
drive
models
Secure
the
stop
by
tightening
the
locknut
and
make
sure
that
the
points
illustrated
are
correctly
greased
CLlTfCH
PEDAL
Adjusting
1800cc
models
Adjust
the
pedal
height
to
175
mm
6
89
in
by
adjusting
the
pedal
stop
See
Fig
E
13
then
retighten
the
locknut
A
to
a
torque
reading
of
0
79
1
07
kgm
6
8Ib
ft
Turn
the
master
cylinder
push
rod
to
obtain
a
play
between
1
Smm
0
04
0
2
in
at
the
clevis
pin
then
tighten
the
locknut
B
to
a
torque
reading
of
0
79
1
07
kgm
6
8
Ib
ft
Ensure
when
adjusting
the
play
that
the
port
on
the
master
cylinder
is
not
blocked
too
small
a
play
at
the
clevis
pin
may
block
the
port
Bend
the
clevis
pin
over
completely
CLlTfCH
MASTER
CYLINDER
Removal
and
Dismantling
Disconnect
the
push
rod
from
the
clevis
Fig
E
14
Detach
the
fluid
line
from
the
master
cylinder
and
pump
the
fluid
into
a
suitable
container
3
Withdraw
the
retaining
bolts
and
remove
the
master
cylinder
assembly
from
the
vehicle
To
dismantle
the
master
cylinder
remove
the
filler
cap
and
drain
away
the
fluid
Pull
back
the
dust
cover
and
remove
the
snap
ring
the
stopper
push
rod
piston
assembly
and
return
spring
Oean
the
components
in
brake
fluid
and
check
them
for
wear
or
damage
Renew
the
cylinder
and
piston
if
uneven
wear
has
taken
place
the
clearance
between
the
cylinder
and
piston
must
not
exceed
0
13
mm
0
005
in
Renew
the
dust
cover
oil
reservoir
filler
cap
and
fluid
line
if
necessary
Reassembly
of
the
master
cylinder
is
a
reversal
of
the
dismantling
procedure
take
care
to
soak
the
components
in
brake
fluid
and
assemble
them
while
still
wet
When
the
master
cylinder
is
installed
in
the
vehicle
make
sure
that
the
pedal
height
is
adjusted
as
previously
described
and
bleed
the
hydraulic
system
by
following
the
procedures
given
under
the
heading
CLlTfCH
SYSTEM
Bleeding
CLlTfCH
SLAVE
CYLINDER
Removal
and
Dismantling
Remove
the
return
spring
2
Disconnect
the
fluid
line
from
the
slave
cylinder
D
3
Disconnect
the
push
rod
from
the
clutch
withdrawal
lever
4
Take
out
the
mounting
bolts
and
withdraw
the
slave
cylinder
from
the
clutch
housing
To
dismantle
the
slave
cylinder
remove
the
dust
cover
and
snap
ring
and
withdraw
the
remaining
parts
from
the
cylinder
Oean
all
components
carefully
and
check
them
for
signs
of
damage
or
wear
renew
any
part
found
to
be
defective
and
fit
a
new
piston
seal
CLUTCH
SLAVE
CYLINDER
Assembly
and
Installation
Reassembly
is
a
reversal
of
the
dismantling
procedure
Ensure
that
the
parts
are
dipped
in
brake
flu
d
before
assembling
and
that
the
piston
seal
is
correctly
installed
When
the
slave
cylinder
is
installed
in
the
vehicle
bleed
the
hydraulic
system
by
following
the
procedures
given
under
the
heading
CLlTfCH
SYSTEM
Bleeding
The
push
rod
must
be
adjusted
so
that
the
withdrawal
lever
has
an
end
play
of
2
0
2
3
mm
0
078
0
091
in
details
of
this
operation
are
given
below
CLlTfCH
WITHDRAWAL
LEVER
Adjusting
The
correct
adjustment
of
the
clutch
withdrawal
lever
is
most
essential
as
insufficient
clearance
between
the
clutch
release
bearing
and
the
diaphragm
will
cause
the
clutch
to
slip
On
the
other
hand
an
excessive
clearance
will
prevent
the
clutch
from
disengaging
correctly
The
clearance
between
the
release
bearing
and
diaphragm
or
release
levers
can
be
adjusted
in
the
following
manner
Slacken
the
locknut
Fig
E
IS
and
screw
the
push
rod
fully
home
with
the
adjusting
nut
Return
the
adjusting
nut
I
3
4
turns
to
adjust
the
play
at
the
end
of
the
clutch
withdrawal
lever
to
2
0
2
3
mm
0
078
0
091
in
This
will
give
a
clear
ance
of
approximately
1
3
mm
0
051
in
between
the
release
bearing
and
the
diaphragm
spring
or
release
levers
NOTE
When
adjusting
clutch
pedal
free
travel
at
the
withdrawal
lever
it
is
essential
to
check
that
the
clutch
driven
plate
has
not
worn
by
more
than
2mm
0
08
in
otherwise
the
clutch
will
slip
even
if
it
is
correctly
adjusted
See
Technical
Data
for
the
relevant
clutch
driven
plate
thickness
CLUTCH
SYSTEM
Bleeding
The
clutch
system
must
be
bled
after
it
has
been
dismantled
or
if
any
part
of
the
circuit
has
been
opened
This
operation
should
also
be
carried
out
if
the
fluid
level
in
the
reservoir
has
been
allowed
to
fall
and
pennit
air
to
enter
the
system
The
presence
of
air
in
the
system
may
be
noticed
by
incorrect
disengagement
of
the
clutch
but
in
any
case
if
air
is
suspected
the
clutch
must
be
bled
in
the
following
manner
Remove
the
dust
cap
from
the
slave
cylinder
bleed
screw
Connect
a
length
of
tube
to
the
bleed
screw
and
immerse
the
47
Page 52 of 171
Gearbox
GEARBOX
Removal
GEARBOX
Dismantling
GEARBOX
Inspection
and
Overhaul
GEARBOX
Assembling
THREE
SPEED
GEARBOX
GEARCHANGE
CONTROL
Removal
and
Adjusting
AUTOMATIC
TRANSMISSION
Gearchange
control
linkage
DESCRIPTION
Three
types
of
transmission
are
available
for
the
Datsun
models
covered
by
this
manual
Either
a
three
speed
gearbox
a
four
speed
gearbox
or
three
speed
automatic
transmission
can
be
fitted
The
three
and
four
speed
gearboxes
are
equipped
with
nchromesh
on
all
forward
gears
with
the
three
speed
gearbox
operated
by
a
steering
column
gearchange
system
and
the
four
speed
gearbox
by
a
floor
mounted
gear
lever
Two
types
of
synchromesh
are
used
in
the
four
speed
gearboxes
Either
Borg
Warner
or
Servo
types
may
be
fitted
The
gearboxes
differ
only
in
the
synchromesh
devices
whereby
the
baulk
rings
synchronize
the
coupling
sleeve
with
the
main
shaft
gear
on
the
Warner
gearbox
This
action
is
accomplished
by
a
synchrcrring
on
the
servo
gearbox
THREE
SPEED
GEARBOX
Removal
I
Jack
up
the
vehicle
and
support
it
on
stands
2
Disconnect
the
hand
brake
cable
at
the
equalizer
bracket
Slacken
the
two
exhaust
pipe
centre
clamps
and
turn
the
centre
section
of
the
exhaust
assembly
to
the
left
as
shown
in
Fig
F
2
3
Disconnect
the
propeller
shaft
from
the
rear
axle
drive
flange
by
removing
the
four
securing
bolts
Seal
off
the
gearbox
extension
housing
to
prevent
the
loss
of
oil
and
withdraw
the
shaft
to
the
rear
4
Disconnect
the
speedometer
drive
cable
from
the
adaptor
in
the
gearbox
extension
housing
Fig
F3
S
Disconnect
the
lower
shift
rods
from
the
shift
levers
Fig
F
4
and
remove
the
cross
shaft
assembly
from
the
gearbox
casing
Remove
the
clutch
slave
cylinder
from
the
clutch
housing
Fig
F
5
6
Support
the
engine
with
ajack
positioned
underneath
the
oil
sump
making
sure
that
the
jack
does
not
foul
the
drain
plug
A
block
of
wood
should
be
placed
between
the
sump
and
jack
to
avoid
damaging
the
sump
7
Remove
the
bolts
securing
the
rear
engine
mounting
to
the
crossmember
Position
ajack
under
the
gearbox
and
remove
the
bolts
attaching
the
crossmember
to
the
body
Lower
the
jack
under
the
engine
so
that
the
engine
is
tilted
to
the
rear
Remove
the
starter
motor
and
the
bolts
securing
the
clutch
housing
to
the
engine
Lower
the
jack
slowly
and
withdraw
the
gearbox
towards
the
rear
of
the
vehicle
THREE
SPEED
GEARBOX
Dismantling
Drain
the
gearbox
oil
Remove
the
dust
cover
release
the
retainer
spring
and
remove
the
withdrawal
lever
complete
with
release
bearing
from
the
clutch
housing
See
section
CLUTCH
Remove
the
gearbox
bottom
cover
the
speedometer
drive
pinion
assembly
and
the
rear
extension
housing
Take
out
the
cross
shaft
retaining
rings
and
unscrew
the
nuts
securing
the
operating
lever
lock
pins
Use
a
hammer
and
punch
to
drive
out
the
pins
and
withdraw
both
cross
shafts
Fig
F
6
Remove
the
fr
mt
cover
and
withdraw
the
counter
shaft
Lift
out
the
countersbaft
gear
cluster
together
with
the
needle
roller
bearings
and
spacers
Fig
F
7
Remove
the
reverse
idler
gear
shaft
lock
bolt
and
remove
the
shaft
and
the
idler
gear
Fig
F
B
Drive
out
the
pins
securing
the
selector
forks
to
the
selector
rods
Unscrew
the
interlock
plug
and
remove
the
detent
ball
and
spring
Fig
F
9
Remove
the
first
reverse
speed
and
second
third
speed
selector
rods
and
lift
out
the
selector
forks
Withdraw
the
main
shaft
assembly
and
the
drive
shaft
assembly
from
the
gearbox
See
Fig
F
1O
and
F
11
To
dismantle
the
mainshaft
release
the
circlip
from
the
front
of
the
mainshaft
as
shown
in
Fig
F
12
and
remove
the
second
and
third
speed
synchronizer
hub
and
second
speed
gearwheel
Fig
F
13
Remove
the
circlip
securing
the
speedo
meter
drive
gear
and
withdraw
the
gear
together
with
the
ball
and
spacer
Fig
F
14
Remove
the
mainshaft
bearing
using
a
press
Hold
the
rnainshaft
reverse
gear
and
tap
the
shaft
on
a
piece
of
wood
to
release
the
reverse
gear
assembly
together
with
the
first
speed
gearwheel
GEARBOX
Inspection
and
Overhaul
Oean
all
parts
thoroughly
and
examine
the
gearbox
case
and
extension
housing
for
cracks
If
the
joint
faces
are
burred
or
pitted
it
may
be
necessary
to
replace
the
units
if
repair
cannot
be
carried
out
satisfactorily
Remove
any
adhesive
which
remains
on
the
faces
The
rear
extension
housing
bush
should
be
renewed
if
worn
unevenly
Clean
the
bearings
and
dry
with
compressed
air
taking
care
that
the
bearings
do
not
spin
Turn
the
ball
bearings
to
make
sure
that
they
run
smoothly
and
without
play
Replace
the
needle
bearings
if
worn
or
damaged
in
any
way
It
is
advisable
to
renew
the
needle
roller
bearings
after
they
have
been
installed
for
a
considerable
period
as
it
is
difficult
51
Page 56 of 171
to
ascertain
the
amount
of
wear
that
has
taken
place
Check
the
teeth
of
the
gearwheels
and
the
machined
surfaces
for
signs
of
wear
scoring
pitting
and
burrs
Ensure
that
the
synchronizer
hubs
slide
freely
on
the
splines
of
the
main
shaft
with
minimum
clearance
Check
the
mainshaft
for
run
out
using
V
blocks
and
a
dial
gauge
as
shown
in
Fig
F
15
Renew
the
mainshaft
if
the
run
out
exceeds
0
15mm
0
0059
in
Check
the
synchronizer
rings
for
wear
and
renew
them
if
necessary
Place
the
rings
in
position
on
their
respective
gear
wheel
cones
and
check
the
gap
between
the
end
of
the
ring
and
the
front
face
of
the
teeth
Fig
F
16
The
correct
gap
should
be
within
1
2
1
6mm
0
047
0
063
in
Renew
the
synchronizer
ring
if
the
gap
is
less
than
0
8mm
0
0315
in
Place
the
selector
rods
on
a
flat
surface
and
check
them
for
traightness
Renew
any
rod
which
is
bent
Renew
the
locking
pins
and
interlock
balls
if
they
are
worn
or
damaged
The
standard
clearance
between
the
selector
forks
and
operating
sleeve
groove
is
0
15
0
30mm
0
006
0
012
in
Make
sure
that
the
oil
seals
are
satisfactory
and
discard
the
O
rings
THREE
SPEED
GEARBOX
Assembly
Press
the
main
drive
gear
bearing
onto
the
main
drive
shaft
and
fit
the
spacer
Select
a
snap
ring
of
suitable
thickness
so
that
all
play
is
eliminated
between
the
bearing
and
snap
ring
Seven
sizes
of
snap
rings
are
available
and
vary
in
thickness
from
1
52mm
0
0598
in
to
1
89mm
0
0747in
The
synchromesh
unit
consists
of
a
coupling
sleeve
baulk
ring
spring
synchronizer
hub
and
insert
When
assembling
the
unit
make
sure
that
the
correct
insert
pressure
springs
are
fitted
to
the
relevant
speed
unit
The
first
reverse
gear
synchronizer
should
be
fitted
with
the
three
coil
spring
type
and
the
second
third
gear
synchronizer
with
the
two
expanding
springs
To
assemble
the
fiI3t
speed
synchronizer
insert
the
sliding
insert
snap
ring
onto
the
synchronizer
hub
as
shown
in
Fig
F
17
Fit
the
sliding
inserts
Fig
F
18
and
the
synchronizer
springs
on
the
synchronizer
hub
and
assemble
the
synchronizer
hub
complete
with
inserts
into
the
coupling
sleeve
Fig
F
19
Assemble
the
second
third
gear
synchronizer
hub
and
coupling
sleeve
making
sure
that
the
sleeve
slides
freely
on
the
hub
splines
Fit
the
three
shifting
inserts
and
install
a
spring
ring
on
each
side
of
the
hub
Fig
F
20
To
assemble
the
mainshaft
start
from
the
front
end
of
the
shaft
and
slide
the
second
speed
gearwheel
on
to
the
shaft
with
the
tapered
cone
facing
forwards
Install
the
baulk
ring
on
the
gearwheel
and
place
the
second
third
speed
synchronizer
assembly
on
the
front
end
of
the
shaft
and
retain
it
with
a
snap
ring
which
will
give
an
end
play
of
0
05
0
25
mm
0
002
0
009
in
Snap
rings
are
available
in
five
sizes
from
1
60
1
80
mm
0
063
0
071
in
Fit
the
first
speed
gear
and
baulk
ring
on
the
rear
of
the
shaft
so
that
the
tapered
cone
faces
to
the
rear
Assemble
the
first
speed
synchronizer
and
reverse
gear
on
the
shaft
Fit
the
spacer
and
press
the
mainshaft
bearing
complete
with
retainer
onto
the
shaft
Install
the
spacer
ball
and
speedometer
drive
pinion
Select
a
snap
ring
which
will
give
an
end
float
of
0
05
0
22mm
0
002
0
009
in
on
the
mainshaft
first
gear
Snap
rings
are
available
in
eight
thicknesses
from
1
30mrn
0
0512
in
to
1
70mm
0
0669
in
Secure
the
drive
gear
with
the
selected
snap
ring
and
check
the
end
float
of
the
gearwheels
as
shown
in
Fig
F
21
The
correct
end
float
should
be
as
follows
I
st
speed
gearwheel
0
2
o
3mm
0
008
0
012
in
0
2
0
3mm
0
008
0
012
in
2nd
speed
gearwheel
Fit
the
main
drive
gear
and
mainshaft
assembly
into
the
gearbox
casing
Fit
the
selector
rods
and
forks
as
follows
Turn
the
gearbox
casing
so
that
the
detent
ball
hole
is
uppermost
and
insert
the
spring
and
ball
in
the
bottom
of
the
hole
Hold
the
ball
witb
a
dummy
shaft
and
install
tbe
first
reverse
selector
fork
and
rod
pushing
the
dummy
shaft
out
of
position
Insert
the
interlocking
plunger
and
fit
the
second
third
speed
selector
fork
and
rod
Insert
the
steel
ball
and
spring
and
refit
the
interlocking
plug
after
coating
the
threads
of
the
plug
with
sealing
compound
See
Fig
F
22
Secure
the
selector
forks
to
the
rods
by
inserting
the
retaining
pins
Fit
the
reverse
idler
gear
and
shaft
and
secure
the
shaft
with
the
lock
bolt
and
plate
Insert
the
counter
gear
cluster
and
shaft
using
a
suitable
thrust
washer
to
obtain
an
end
float
of
0
04
0
12
mm
0
0016
0
0047
in
Thrust
washers
are
available
in
five
sizes
from
3
85
4
05
mm
0
1516
0
1594
in
thickness
in
increments
of
0
05
mm
0
002
in
Fit
the
cross
shafts
1
in
Fig
F
23
the
thrust
washers
2
and
the
operating
levers
3
Secure
the
cross
shafts
with
the
retaining
rings
5
and
lock
the
operating
levers
to
the
shafts
with
the
pins
4
Locate
the
rear
extension
housing
on
the
gearbox
case
and
tighten
the
bolts
to
a
torque
reading
of
2
8
4
4
kgm
20
32
Ib
ft
Insert
the
speedometer
drive
pinion
and
retain
it
with
the
set
bolt
and
lock
plate
Check
the
backlash
of
all
the
gears
using
a
dial
gauge
as
shown
in
Fig
F
24
The
backlash
should
be
between
0
05
0
20
mm
0
002
0
008
in
Fit
the
gearbox
front
cover
and
tighten
the
fixing
bolts
to
a
torque
reading
of
1
I
1
7
kgm
8
0
12
3
lb
ft
taking
care
not
to
damage
the
oil
seal
Fit
the
clutch
release
bearing
and
with
drawallever
Fig
F
25
Replace
the
bottom
cover
and
tighten
the
bolts
to
a
torque
reading
of
1
I
1
7
kgm
8
0
12
31b
ft
THREE
SPEED
GEARBOX
Installation
Installation
of
the
gearbox
is
a
reversal
of
the
removal
procedure
noting
the
following
points
Fit
the
gearbox
with
I
7
litre
0
45
US
gall
0
37
Imp
gall
of
MP
90
gear
oil
Adjust
the
clutch
slave
cylinder
push
rod
as
described
in
the
section
CLUTCH
to
provide
a
free
play
of
2
2
mm
0
087in
at
the
withdrawal
lever
55
Page 58 of 171
FOUR
SPEED
GEARBOX
Removal
and
Installation
The
removal
and
installation
procedures
for
the
four
speed
gearbox
are
similar
to
those
previously
described
for
the
three
speed
gearbox
However
the
floor
mounted
gear
lever
must
be
removed
from
the
controllevef
bracket
in
addition
to
the
operations
already
detailed
FOUR
SPEED
GEARBOX
Dismantling
Drain
the
oil
from
the
gearbox
Remove
the
dust
coveT
and
release
the
spring
securing
the
clutch
withdrawal
lever
Remove
the
withdrawal
lever
and
release
bearing
from
the
clutch
housing
as
described
in
the
section
CLurCH
Remove
the
clevis
pin
securing
the
striking
rod
to
the
control
lever
Remove
the
speedometer
drive
pinion
assembly
and
with
draw
the
rear
extension
housing
Disengage
the
striking
rod
from
the
selector
rod
gates
Remove
the
gearbox
covers
See
Figs
F
26
and
F
27
Unscrew
the
three
detent
ball
plugs
and
remove
the
spriags
and
detent
balls
Drive
out
the
pins
securing
the
selector
forks
to
the
rods
and
withdraw
the
forks
and
rods
Lock
the
main
shaft
by
moving
the
first
second
and
third
fourth
coupling
sleeve
into
gear
at
the
same
time
and
release
the
ffiainshaft
nut
Remove
the
countershaft
and
the
gear
cluster
together
with
the
two
needle
roller
bearings
and
spacers
Remove
the
snap
ring
holding
the
revep
e
idler
gear
and
withdraw
the
reverse
idler
gears
and
shaft
Fig
F
28
Take
off
the
bolts
securing
the
mainshaft
bearing
retainer
to
the
gearbox
case
Fig
F
29
Withdraw
the
mainshaft
assembly
Fig
F
30
and
the
main
drive
shaft
The
mainshaft
can
be
dismantled
in
the
following
manner
Release
the
third
fourth
synchronizer
unit
snap
ring
and
with
draw
the
hub
complete
with
coupling
sleeve
Remove
the
third
speed
gearwheel
and
the
needle
roller
bearing
from
the
main
shaft
Take
off
the
mainshaft
nut
and
locking
plate
Remove
the
speedometer
drive
gear
with
the
retaining
ball
Withdraw
the
mainshaft
reverse
gear
and
the
hub
Press
off
the
mainshaft
bearing
complete
with
the
bearing
retainer
Remove
the
thrust
washer
and
the
first
speed
gear
together
with
the
needle
roller
bearing
taking
care
not
to
lose
the
small
baU
used
to
locate
the
thrust
washer
Slide
off
the
first
speed
gearwheel
bush
Withdraw
the
first
second
synchronizer
and
hub
Remove
the
second
speed
gearwheel
and
needle
roller
bearing
FOUR
SPEED
GEARBOX
Installation
Refer
to
the
instructions
given
for
the
three
speed
gearbox
and
to
Technical
Data
for
the
specifications
applicable
to
the
different
gearboxes
FOUR
SPEED
GEARBOX
Assembly
Assembly
of
the
gearbox
is
similar
to
the
procedures
previously
described
for
the
three
speed
gearbox
with
the
following
exceptions
When
assembling
the
main
drive
gear
bearing
on
the
shaft
insiall
the
spacer
and
select
a
new
snap
ring
to
eliminate
all
end
float
between
bearing
and
snap
ring
Snap
rings
are
available
in
five
thicknesses
from
1
52
1
77mm
0
06
0
07
in
The
assembly
procedures
for
the
Warner
type
synchronizers
are
similar
to
the
instructions
previously
described
for
the
three
speed
gearbox
Refer
to
THREE
SPEED
GEARBOX
Assembly
for
further
details
To
assemble
the
Servo
F4C63
type
synchronizers
proceed
as
follows
Place
the
gear
on
a
clean
flat
surface
and
install
the
synchronizer
ring
on
the
inner
side
of
theclutch
gear
Fit
the
thrust
block
into
place
as
shown
in
Fig
F
31
Place
the
anchor
block
and
brake
band
into
position
and
fit
the
circlip
into
the
groove
in
the
gear
to
secure
the
synchromesh
assembly
When
assembling
the
mainshaft
select
a
snap
ring
which
will
give
an
end
float
between
0
05
0
15
mm
0
002
0
006in
to
the
third
speed
gearwheel
Snap
rings
are
available
in
five
sizes
from
1
40
mm
0
0551
in
to
1
60
mm
0
0630
in
thick
ness
Tighten
the
locknut
at
the
rear
of
the
mainshaft
to
a
torque
reading
of
7
1
kgm
51
87Ib
ft
Assemble
the
reverse
idler
gear
as
shown
in
Fig
F
32
The
reverse
idler
driven
gear
3
should
be
placed
on
the
end
of
the
reverse
shaft
1
with
the
longest
spline
and
retained
with
a
suitable
snap
ring
2
Install
the
reverse
shaft
and
gear
assembly
into
the
gearbox
case
from
the
rear
with
the
thrust
washer
4
between
the
gear
and
the
case
Fit
the
thrust
washer
5
and
idler
gear
6
18
teeth
and
secure
with
a
suitable
snap
ring
2
The
end
float
of
the
gear
should
be
checked
and
adjusted
to
0
1
O
3mm
0
004
0
012
in
by
selecting
a
suitable
snap
ring
2
Five
thicknesses
of
snap
rings
are
available
from
I
lmm
0
043in
to
1
5mm
0
06in
See
Technical
Data
for
F4W63
and
F4C63
gearboxes
Adjust
the
counter
gear
end
float
to
0
05
0
15
mm
0
002
0
006in
by
selecting
a
thrust
washer
of
the
required
thickness
Thrust
washers
are
available
in
five
thicknesses
from
2
40
2
60
mm
0
094
0
102
in
When
assembling
the
selector
mechanisms
Fig
F
33
fit
the
first
second
selector
forks
I
and
the
third
fourth
selector
forks
2
onto
the
coupling
sleeves
and
insert
the
first
second
fork
rod
3
Fit
an
interlock
plunger
4
and
the
third
fourth
speed
selector
rod
5
Do
not
forget
the
interlock
pin
7
A
section
through
the
selector
and
interlock
mechanism
is
given
in
Fig
F
34
Install
an
interlock
plunger
6
and
assemble
the
reverse
selector
fork
8
and
fork
rod
9
Secure
the
selector
forks
to
the
rods
with
the
retaining
pins
10
Place
a
check
ball
and
spring
into
each
of
the
holes
and
screw
the
plug
down
to
a
torque
reading
of
1
7
2
1
Jegm
12
3
15
2
Ib
ft
after
coating
the
threads
with
sealing
com
pound
Install
the
rear
extension
housing
engaging
the
striking
rod
with
the
fork
rod
gates
and
tighten
the
housing
bolts
to
a
torque
reading
of
1
6
2
5
kgm
12
18Ib
ft
Fit
the
front
and
bottom
covers
and
tighten
the
bolts
to
a
torque
reading
of
1
1
1
8
kgm
8
13Ib
ft
57
Page 60 of 171
THREE
SPEED
GEARBOX
GEARCHANGE
CONTROL
LINKAGE
Fig
F
35
As
previously
described
the
three
speed
gearbox
is
equipped
with
a
steering
column
gearchange
linkage
system
which
incorporates
a
collapsible
control
rod
when
combined
with
the
collapsible
type
of
steering
column
assembly
The
gearchange
linkage
can
be
removed
and
inspected
in
the
following
manner
Remove
the
steering
wheel
Fig
F
36
and
take
off
the
steering
column
shell
cover
Remove
the
turn
signal
and
lighting
switch
Fig
F
37
These
removal
details
can
also
be
found
in
the
section
STEERING
Remove
the
C
washer
I
in
Fig
F
38
and
the
washer
then
remove
the
upper
support
bracket
by
releasing
the
locating
bolt
and
screw
The
control
rod
insert
with
bush
and
return
spring
can
now
be
removed
Remove
the
snap
and
gear
lever
pivot
pin
and
withdraw
the
gearlever
Remove
the
cotter
pin
plain
washer
and
spring
washer
and
disconnect
the
shift
rods
from
the
gear
selector
levers
Fig
F
39
Unscrew
the
bolts
securing
the
lower
support
bracket
and
the
clamp
Remove
the
clamp
and
gear
change
lever
retainer
Remove
the
second
third
speed
selector
lever
the
lower
support
bracket
and
the
first
reverse
selector
lever
from
the
control
rod
Withdraw
the
control
rod
Disconnect
the
gear
change
rods
by
removing
the
cotter
pins
and
remove
the
cross
shaft
bracket
from
the
side
member
Withdraw
the
cross
shaft
assembly
Fig
F
40
Examine
the
components
for
signs
of
wear
and
damage
and
replace
if
necessary
Installation
is
a
reversal
of
the
removal
procedure
noting
the
following
points
Take
care
not
to
strike
or
apply
a
load
to
the
collapsible
type
of
control
rod
or
the
rod
may
be
damaged
The
rod
should
not
be
slack
in
the
axial
direction
when
installed
and
must
be
removed
if
slackness
is
detected
Coat
the
sliding
surfaces
with
grease
before
assembling
them
Acijusting
Set
the
gear
lever
to
the
neutral
position
and
temporarily
connect
the
trunnion
on
the
lower
support
bracket
to
each
rod
Fig
F41
Set
the
rod
on
the
lever
so
that
the
neutral
adjustment
grooves
on
the
upper
surface
of
the
lower
support
bracket
are
aligned
with
the
grooves
on
each
lever
When
the
adjustment
is
completed
operate
the
gear
lever
to
select
each
gear
and
make
sure
that
the
lever
can
be
moved
smoothly
and
positively
AUTOMATIC
TRANSMISSION
Gearchange
control
linkage
The
automatic
transmission
gear
change
control
linkage
can
be
removed
in
a
similar
manner
to
the
three
speed
gearbox
linkage
Carry
out
the
operations
previously
described
under
the
relevant
heading
as
far
as
the
removal
of
the
gear
lever
and
proceed
as
follows
Disconnect
the
upper
selector
rod
from
the
selector
lever
by
removing
the
cotter
pin
plain
washer
and
lock
washer
See
Fig
F
42
Remove
the
speed
range
position
plate
the
snap
ring
at
the
lower
end
of
the
control
rod
and
unscrew
and
remove
the
lower
support
bracket
Release
the
locking
screw
and
with
draw
the
selector
lever
assembly
Withdraw
the
control
rod
disconnect
the
selector
rods
and
remove
the
cross
shaft
bracket
and
cross
shaft
assembly
Clean
all
parts
and
repair
or
renew
any
part
which
is
worn
or
damaged
Installation
is
a
reversal
of
the
removal
procedure
noting
the
following
points
Coat
all
the
sliding
surfaces
with
chassis
grease
prior
to
assembling
Set
the
converter
side
lever
and
the
gear
lever
in
the
neutral
position
Install
the
upper
selector
rod
to
the
selector
lever
and
adjust
the
gear
position
plate
to
give
a
clearance
of
0
5
I
Omm
0
02
0
04
in
between
the
selector
lever
stop
pin
and
the
position
plate
The
adjustment
can
be
obtained
by
turning
the
selector
rod
adjusting
nuts
Finally
tighten
the
nuts
on
each
side
of
the
trunnion
S9
Page 64 of 171
Propeller
Shaft
and
DIfferentIaJ
DESCRIPTION
PROPELLER
SHAFT
DIFFERENTIAL
Removal
and
Dismantling
DIFFERENTIAL
Assembly
and
Adj
Jstment
DIFFERENTIAL
Installation
DIFFERENTIAL
Estate
car
and
van
TOOTH
CONTACT
PATTERN
Checking
DESCRIPTION
The
tubular
steel
propeller
shafts
are
shown
in
Fig
G
1
The
shaft
is
connected
to
the
drive
pinion
flange
by
a
yoke
flange
at
the
rear
and
to
the
transmission
output
shaft
by
a
splined
yoke
sleeve
at
the
front
The
Datsum
I800ce
station
wagon
and
van
has
a
three
section
shaft
in
contrast
to
the
two
piece
shaft
used
on
the
other
models
covered
by
this
manual
The
differential
carrier
houses
a
hypoid
bevel
gear
assembly
Although
this
manual
contains
dismantling
and
adjustment
procedures
for
the
differential
assembly
it
must
be
pointed
out
that
only
workshops
with
specialized
tools
and
equipment
will
be
able
to
carry
out
the
work
involved
PROPELLER
SHAFT
Removal
1
Release
the
hand
brake
jack
up
the
vehicle
at
the
fear
and
support
it
on
stands
2
Loosen
the
clamps
and
turn
the
pre
silencer
to
the
left
saloon
only
3
Remove
the
adjuster
nut
from
the
handbrake
cable
rear
adjuster
and
disconnect
the
left
hand
cable
Saloon
only
Remove
the
bolts
securing
the
centre
bearing
bracket
1800
cc
stati
n
wagon
4
Disconnect
the
fear
flange
from
the
rear
axle
flange
With
draw
the
propeller
shaft
to
the
rear
away
from
the
gear
box
mainshaft
Take
care
that
the
shaft
is
not
dropped
during
removal
or
the
balance
of
the
shaft
may
be
altered
5
Plug
the
gearbox
rear
extension
to
prevent
the
loss
of
oil
PROPELLER
SHAFT
Dismantling
and
Inspection
Oean
all
components
and
mark
them
before
dismantling
so
that
they
can
be
reassembled
in
their
original
positions
Correct
reassembly
is
most
important
otherwise
the
balance
of
the
shaft
may
be
affected
Remove
the
four
snap
rings
from
the
journal
assembly
and
withdraw
the
needle
bearing
cap
by
tapping
the
yoke
with
a
wooden
mallet
The
wear
on
the
spider
journal
diameter
must
not
exceed
0
15mm
0
006
in
the
standard
size
of
a
new
journal
is
14
7mm
0
579
in
Check
the
spider
seal
rings
and
replace
them
if
necessary
The
radial
backlash
of
the
sleeve
yoke
splines
to
gearbox
splines
should
not
exceed
0
5mm
0
002
in
Renew
the
sleeve
yoke
if
the
figures
are
in
excess
of
the
specified
value
E
Mount
the
shaft
between
the
centres
of
a
suitable
fixture
and
use
a
dial
gauge
to
check
that
the
run
out
of
the
shaft
does
not
exceed
0
6mm
0
024
in
at
the
centre
of
the
tubular
portion
The
shaft
can
only
be
straightened
with
a
hydraulic
press
it
is
advisable
however
to
renew
the
shaft
if
the
run
out
is
excessive
Check
that
the
dynamic
balance
of
the
shaft
does
not
exceed
15
grm
cm
0
208
oz
in
at
4000
r
p
m
PROPELLER
SHAFT
Assembly
and
11Istallation
r
Assembly
and
installation
is
a
reversal
of
the
removal
and
dismantling
procedures
not
the
following
points
Grease
the
needle
rollers
with
wheel
bearing
grease
before
placing
them
into
the
bearing
race
Lubricate
all
splines
with
gear
oil
Adjust
the
journal
radial
end
float
to
within
0
02mm
0
0008
in
using
a
suitable
snap
ring
Snap
rings
are
available
in
eight
thicknesses
from
2
00mm
0
079
in
to
2
14mm
0
084
in
and
are
colour
coded
as
detailed
in
Technical
Data
at
the
end
of
this
section
DIFFERENTIAL
Removal
Saloons
with
independent
rear
suspension
Remove
the
hand
brake
rear
cable
remove
the
propeller
shaft
and
drive
shafts
as
described
in
their
relevant
sections
2
Support
the
differential
with
ajack
and
remove
the
nuts
securing
the
differential
mounting
crossmemb
er
Fig
G
3
3
Remove
the
bolts
holding
the
differential
to
the
suspension
member
Withdraw
the
differential
and
jack
to
the
rear
4
Support
the
suspension
member
with
a
stand
to
prevent
the
mountings
from
becoming
twisted
or
damaged
DIFFERENTIAL
Dismantling
Before
dismantling
place
the
carrier
assembly
in
a
suitable
mounting
stand
or
special
stand
ST
06270001
and
carry
out
preliminary
checks
as
follows
Check
the
tooth
contact
pattern
of
the
crownwheel
and
pinion
by
applying
lead
oxide
to
three
or
four
teeth
of
the
crownwheel
Turn
the
crownwheel
several
times
to
obtain
an
impression
of
the
tooth
contact
pattern
Check
the
backlash
between
the
teeth
of
the
crownwheel
and
pinion
using
a
dial
gauge
The
backlash
should
be
within
0
10
0
20mm
0
004
0
008
in
63
Page 68 of 171
cage
Mcasure
the
clearance
between
the
rear
face
of
thc
side
gear
and
the
differential
cage
as
shown
in
Fig
G
ll
and
if
necessary
use
a
tluust
washer
which
will
given
a
clearance
of
0
1
0
2mm
0
004
0
008
in
Fit
the
pinion
shaft
lock
pin
and
secure
it
by
caulking
with
a
punch
Lubricate
the
gear
teeth
and
check
the
gear
for
freedom
of
rotation
Install
the
crown
wheel
in
the
differential
cage
and
insert
the
bolts
with
new
lock
straps
Tap
the
head
of
each
bolt
lightly
and
tighten
the
bolts
in
a
diagonal
pattern
to
a
torque
reading
of
7
0
8
0
kgm
51
58Ib
ft
Measure
the
width
of
the
side
bearings
before
installing
them
Place
a
weight
of
2
5
kg
5
5
1b
on
the
bearings
and
check
the
nominal
width
which
should
be
20mm
0
787
in
Press
the
side
bearings
into
the
differential
cage
Adjustment
of
drive
pinion
preload
This
adjustment
is
carried
out
without
fitting
the
oil
seal
Press
the
front
and
rear
bearing
outer
races
into
the
gear
carrier
and
fit
the
pinion
height
adjusting
washer
Fig
G
12
the
shims
and
the
rear
bearing
inner
race
onto
a
dummy
shaft
special
tool
ST
31
120000
The
old
washers
and
shims
can
be
re
used
if
the
tooth
contact
pattern
was
found
to
be
correct
on
the
pre
dismantling
check
Fit
the
drive
pinion
bearing
spacer
the
washer
ans
special
collar
5T
312140000
or
5T
31500000
and
the
drive
flange
on
to
the
dummy
shaft
Tighten
the
drive
pinion
nut
to
a
torque
reading
of
17
20
kgm
123
145
Ib
ft
Measure
the
drive
pinion
bearing
pre
load
and
select
washers
and
spacers
to
give
a
pre
load
of
7
1
0
kg
cm
6
9Ib
in
with
new
bearings
or
3
6
kg
cm
2
6
5
Ib
in
with
used
bearings
Adjusting
spacers
are
available
in
lengths
of
56
2
57
2
mm
2
2126
2
2520
in
and
adjusting
washers
in
thicknesses
of
59
2
31
mm
0
1020
0
0909
in
Adjustment
of
pinion
height
The
pinion
height
or
distance
of
the
face
of
the
pinion
to
the
axis
of
the
crownwheel
is
adjusted
by
the
thickness
of
the
adjusting
washer
behind
the
drive
pinion
gcar
The
drive
pinion
has
a
tolerance
mark
etched
on
its
face
this
tokrance
is
accompanied
by
a
or
sign
to
show
the
deviation
from
the
nominal
dimension
Thc
plus
sign
indicates
that
the
nominal
distance
must
be
increased
and
the
minus
sign
that
it
mllst
be
decreased
The
tolerances
are
shown
in
Fig
G
I3
The
pinion
height
can
be
adjusted
using
the
original
adjusting
washer
and
shims
between
the
rear
bearing
cone
and
the
drive
pinion
Install
the
setting
gauge
5T
31210000
on
the
carrier
with
the
dummy
pinion
installed
Sce
Fig
G
14
Measure
the
clearance
between
the
head
of
the
dummy
shaft
and
the
tip
of
the
setting
g
wge
using
a
feeler
gauge
as
shown
in
Fig
G
15
The
clearance
is
also
shown
at
the
point
T
in
Fig
G
14
The
required
thickness
of
the
adj
lsting
washer
can
be
obtained
using
the
following
formula
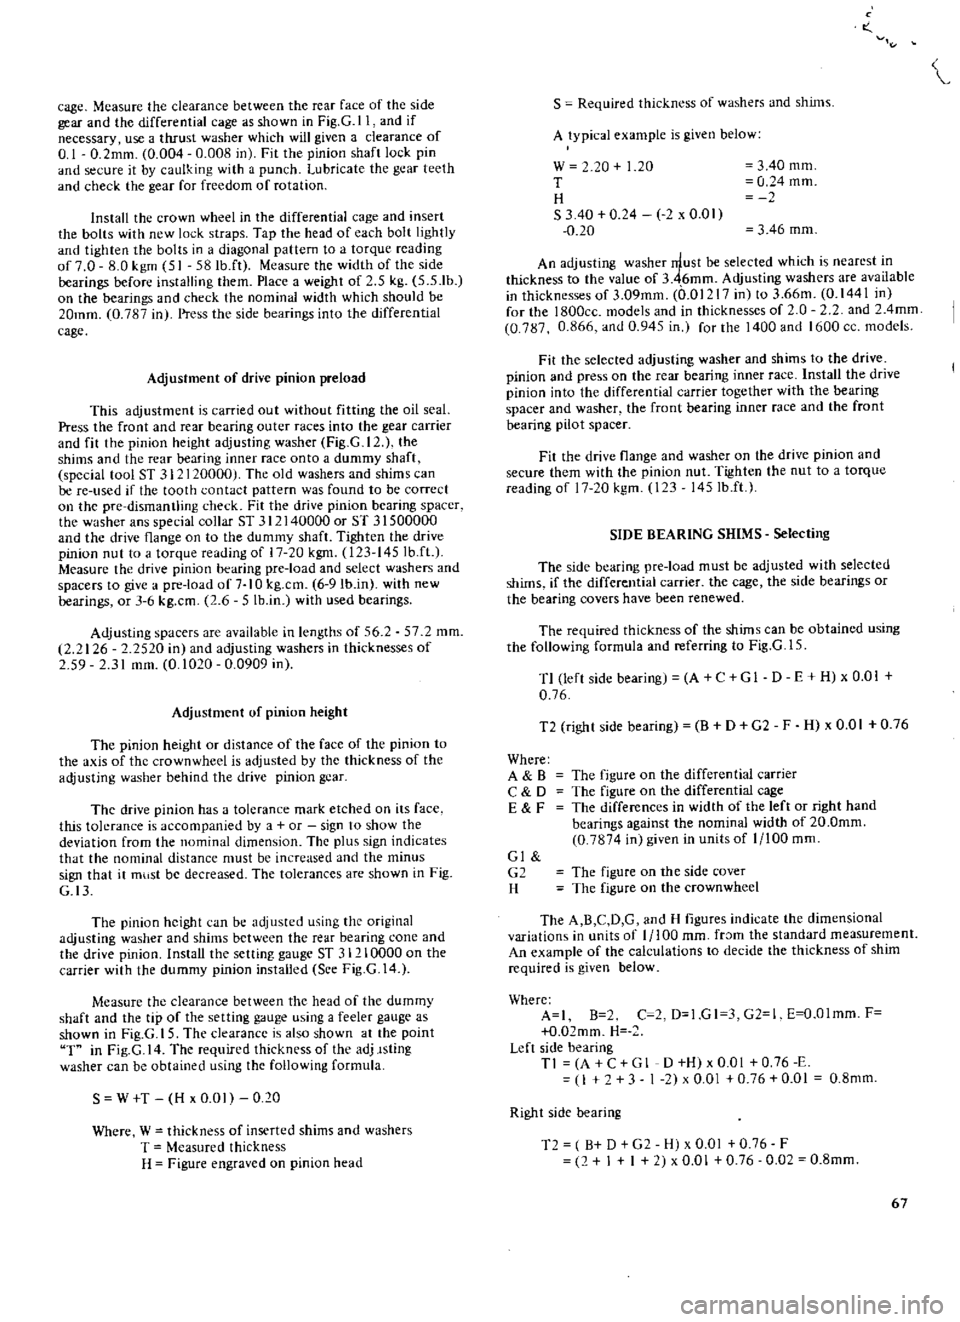
S
W
T
H
x
0
01
0
20
Where
W
thickness
of
inserted
shims
and
washers
T
Measured
thickness
H
Figure
engraved
on
pinion
head
o
S
Required
thickn
ss
of
washers
and
shims
A
typical
example
is
given
below
w
20
1
20
T
H
S
340
0
24
2
x
0
01
0
20
3
40
mm
0
24
mm
3
46
mm
An
adjusting
washer
rrlust
be
selected
which
is
nearest
in
thickness
to
the
value
of
3
46mm
Adjusting
washers
are
available
in
thicknesses
of
3
09mm
0
01217
in
to
3
66m
0
1441
in
for
the
l800cc
models
and
in
thicknesses
of
O
2
and
2
4mm
0
787
0
866
and
0
945
in
for
the
1400
and
1600
cc
models
Fit
the
selected
adjusting
washer
and
shims
to
the
drive
pinion
and
press
on
the
rear
bearing
inner
race
Install
the
drive
pinion
into
the
differential
carrier
together
with
the
bearing
spacer
and
washer
the
front
bearing
inner
race
and
the
front
bearing
pilot
spacer
Fit
the
drive
flange
and
washer
on
the
drive
pinion
and
secure
them
with
the
pinion
nut
Tighten
the
nut
to
a
torque
reading
of
17
20
kgm
123
145Ib
ft
SIDE
BEARING
SHIMS
Selecting
The
side
bearing
pre
load
must
be
adjusted
with
selected
shims
if
the
differential
carrier
the
cage
the
side
bearings
or
the
bearing
covers
have
been
renewed
The
required
thickness
of
the
shims
can
be
obtained
using
the
following
formula
and
referring
to
Fig
G
l
5
T1
left
side
bearing
A
C
GI
D
E
H
x
0
01
0
76
T2
right
side
bearing
B
D
G2
F
H
x
0
01
0
76
Where
A
B
C
D
E
F
The
figure
on
the
differential
carrier
The
figure
on
the
differential
cage
The
differences
in
width
of
the
left
or
right
hand
bearings
against
the
nominal
width
of
20
0mm
0
7874
in
given
in
units
of
1
100
mm
Gl
G2
H
The
figure
on
the
side
cover
The
figure
on
the
crownwheel
The
A
B
C
D
G
and
H
figures
indicate
the
dimensional
variations
in
units
of
1
100
mm
fr
Jm
the
standard
measurement
An
example
of
the
calculations
to
decide
the
thickness
of
shim
required
is
given
below
Where
A
I
B
2
C
2
D
1
GI
3
G2
1
E
O
Olmm
F
O
02mm
H
Left
side
bearing
Tl
A
C
G
1
D
H
x
0
01
0
76
E
I
3
1
2
x
0
01
0
76
0
01
0
8mm
Right
side
bearing
T2
B
D
G2
H
x
0
01
0
76
F
2
I
I
2
x
0
01
0
76
0
02
0
8mm
67
Page 70 of 171
The
standard
width
of
the
side
bearings
is
20
0mm
0
7874
this
width
must
be
measured
before
attempting
to
calculate
the
thickness
of
the
adjusting
shims
Use
a
dial
gauge
and
surface
plate
to
ohtain
the
measurement
Place
a
weight
of
approximately
2
5
kg
5
5
lb
on
the
bearing
to
obtain
steady
readings
Install
the
differential
cage
assembly
in
the
carrier
Fit
the
sckcted
shims
and
O
rings
into
both
differential
side
bearing
covers
and
install
the
covers
in
the
carrier
using
the
special
tool
ST
33720000
Fig
G
16
l
Make
sure
that
the
side
bearing
outer
races
are
not
damaged
by
the
roller
Measure
the
backlash
between
the
teeth
of
the
crown
wheel
and
drive
pinion
with
a
dial
gauge
as
shown
in
Fig
G
I
Sct
the
dial
gauge
to
0
10
f
O
mm
0
004
0
008
in
I
If
the
backlash
is
less
than
the
specifIed
value
move
he
left
side
adjusting
shim
to
the
right
side
and
vice
versa
if
the
backlash
exceeds
the
specified
figure
Check
that
the
run
out
at
the
rear
of
the
crownwheel
does
not
excecd
O
OSmm
0
002
in
for
the
1800ce
model
or
O
08mm
0
003
in
for
the
1400
Check
the
drive
pinion
turning
torque
Thc
turning
torque
should
be
higher
by
I
3
kg
em
compared
with
the
turning
torque
obtained
before
fitting
the
differential
cage
in
the
carrier
The
higher
value
can
be
provided
if
necessary
by
dmnging
the
jde
cover
shims
Note
howcver
that
any
decrease
or
increase
in
the
thickncss
of
shims
wjJl
alter
tht
budlush
between
the
teeth
of
the
crownwhee1
and
pinion
Check
the
tooth
contact
pat
tern
of
the
crown
wheel
and
pinion
as
described
under
the
appropriate
heading
DIFFERENTIAL
Installation
Secure
the
differential
carrier
on
the
rear
suspension
mem
ber
using
the
four
bolts
and
washers
Fit
the
differential
mounting
member
to
thc
mounting
holes
by
pushing
it
forwards
with
a
suitable
lever
Fig
G
18
Tighten
the
nuts
to
a
torque
reading
of
8
5
kgm
61
5
Ib
ft
Tighten
the
bolts
attaching
the
gear
carrier
to
the
suspension
member
to
a
torque
reading
of
6
7
kg
36
5Ilb
ft
t
The
rcmainder
of
the
installation
operations
are
a
reversal
of
thc
removal
procedure
Fill
the
differential
with
the
correct
quantity
of
recommended
oil
DIFFERENTIAL
CARRIER
Removal
and
Dismantling
Estate
car
alld
Vanl
To
remove
the
differential
carrier
disconnect
and
remove
rhe
propeller
shaft
as
previously
described
and
remove
the
two
rear
axle
shafts
as
described
in
the
section
REAR
AXLL
With
draw
the
nuts
securing
the
differential
and
remove
the
carrier
from
the
rear
axle
Mount
the
unit
on
the
special
attachment
as
shown
in
Fig
G
19
and
carry
out
a
preliminary
check
before
dismantling
Oleck
the
tooth
contact
of
the
crownwheel
and
pinion
by
applying
lead
oxide
to
three
or
four
teeth
of
the
crownwheel
Turn
the
crown
wheel
several
times
to
obtain
an
impression
of
the
tooth
contact
pattern
Check
the
backlash
between
the
teeth
of
the
crownwheel
and
pinion
with
a
dial
gauge
Hold
the
drive
pinion
with
one
hand
and
move
the
crown
wheel
backwards
and
forwards
to
check
that
the
backlash
is
Io
ithin
thL
speL
ified
limits
Shims
and
adjusting
washers
must
bL
altered
if
the
tooth
con
tact
pattern
and
backlash
is
incorre
L
the
neL
cssary
details
for
these
operations
can
be
found
towards
the
end
of
this
section
under
the
appropriate
he
Jdjn
s
Fil1JJly
mark
the
bearing
caps
with
a
hammer
and
punch
to
ensure
correct
t1ignment
on
re
assembly
Remove
the
bearing
caps
nd
withdraw
the
differ
ntial
cage
make
a
note
of
the
left
and
right
hand
positions
so
h
Jt
the
bearing
caps
and
outer
race
can
be
re
assembled
in
their
original
positions
Withdraw
the
side
beJrings
with
the
s
cjal
puller
as
shown
in
Fig
G
20
taking
care
not
to
catch
the
edge
of
the
bearing
inner
races
Place
the
assembly
in
a
vice
and
detach
the
crownwheel
by
slackening
the
retaining
bolts
in
a
diagonal
patter
Fig
G
lf
Drive
out
th
pinion
shaft
lock
pin
from
left
to
right
using
a
suitable
punch
or
special
tool
ST
23520000
Fig
C
22
With
draw
the
pinion
shaft
and
take
out
the
pinions
side
gears
and
thrust
washers
Store
the
gears
and
thrust
washers
so
that
they
can
be
assembled
in
their
original
positions
Check
the
initial
turning
torque
of
the
drive
pinion
with
the
preload
gauge
ST
3190000
and
measure
the
height
of
the
drive
pinion
with
the
special
gauge
ST
31941000
Compare
the
figures
obtained
with
those
givcn
in
Technical
Data
at
the
end
of
this
section
Hold
the
drive
pinion
with
the
speciaJ
wrench
ST
3
J
530000
as
shown
in
Fig
C
23
and
unscrew
the
drivc
pinion
nut
then
pull
out
the
drive
pjnion
flange
Tap
the
drive
pinion
assembly
to
the
rear
with
a
plastic
mallet
and
withdraw
it
together
with
the
rear
bearing
inner
race
bearing
spacer
and
adjusting
washer
Remove
and
discard
the
oil
seal
and
withdraw
thc
front
bearing
inner
race
Drive
out
the
outer
races
of
the
front
and
rear
bearings
with
a
suitable
drift
Fig
G
25
The
drive
pinion
rear
bearing
inncr
race
can
be
removed
with
the
special
tool
ST
300310000
as
shown
in
Fig
G
24
DIFFE
l
ENTlAL
Inspection
Clean
all
components
thoroughly
and
examine
for
signs
of
wear
or
damage
Check
the
teeth
of
the
crownwhcel
and
pinion
for
scoring
and
hipping
Ii
should
be
noted
that
the
crownwhecl
and
pinion
are
supplied
as
a
matched
set
and
if
either
part
is
damaged
the
complete
set
must
be
replaced
Examine
the
inner
faces
of
the
side
gears
and
seats
on
the
differential
case
Inspect
the
bearing
races
and
rollers
and
replace
them
if
necessary
Small
defects
on
the
faces
of
the
thrust
washers
can
be
corrected
using
emery
cloth
however
if
the
clearance
between
side
gear
and
thrust
washer
exceeds
0
1
O
2mm
0
0039
0
0079
in
it
ill
be
necessary
to
replace
the
washer
Various
sizes
of
washers
are
available
and
the
thicknesses
arc
detailed
under
the
heading
DIFFERENTIA
L
GEAR
CAGE
Assembling
69
Page 76 of 171
Rear
Axle
Rear
SuspensIon
DESCRIPTION
REAR
AXLE
AND
SUSPENSION
Removal
Saloons
COIL
SPRINGS
Saloons
REAR
SHOCK
ABSORBERS
Saloons
REAR
SUSPENSION
ARM
Saloons
DESCRIPTION
Saloon
models
are
fitted
with
independent
rear
suspension
with
semi
trailing
arms
suspension
arms
coil
springs
and
telescopic
hydraulic
double
acting
shock
absorbers
The
differ
ential
gear
carrier
and
suspension
member
is
mounted
directly
onto
the
body
structure
via
rubber
mountings
See
Fig
H
I
Estate
cars
and
1800
ce
Vans
are
fitted
with
a
semi
floating
rear
axle
with
semi
elliptic
leaf
springs
and
telescopic
hydraulic
shock
absorbers
mounted
on
rubrer
bushes
See
Fig
H
2
REAR
AXLE
AND
SUSPENSION
Removal
Saloon
models
I
Jack
up
the
rear
of
the
vehicle
and
support
it
on
stands
2
Remove
the
road
wheels
disconnect
the
hand
brake
linkage
and
the
return
spring
Fig
H
3
3
Remove
the
exhaust
tail
pipe
and
silencer
4
Disconnect
the
brake
hoses
and
plug
the
openings
to
prevent
the
ingress
of
dirt
5
Remove
the
propeller
shaft
assembly
as
described
in
the
relevant
section
after
marking
the
propeller
rear
flange
and
differential
pinion
flange
6
Jack
up
the
suspension
ann
and
remove
the
shock
absorber
lower
mountings
taking
care
not
to
lose
the
rubber
bushings
7
Place
ajack
under
the
centre
of
the
suspension
member
and
differential
carrier
and
remove
the
nuts
securing
the
suspension
member
to
the
body
7
in
Fig
H
3
Remove
the
differential
mounting
nuts
8
8
Carefully
lower
and
remove
the
suspension
assembly
REAR
SUSPENSION
Inspection
Saloons
Examine
all
parts
for
wear
and
damage
paying
particular
attention
to
the
rubber
bushes
in
the
suspension
arms
and
the
bump
rubbers
Check
the
condition
of
the
spring
rubber
insulators
in
the
suspension
member
and
differential
mounting
memrer
The
rubber
insulators
must
be
replaced
if
the
dimension
A
in
Fig
H
4
is
less
than
5mm
0
2
in
REAR
AXLE
SHAFTS
BEARINGS
AND
SEALS
Saloons
DRNE
SHAFTS
REAR
AXLE
Removal
Estate
cars
and
Vans
REAR
SPRING
Estate
cars
and
Vans
REAR
SHOCK
ABSORBERS
Estate
cars
and
Vans
REAR
SUSPENSION
Installation
Saloons
Installation
is
a
reversal
of
the
removal
procedures
noting
the
following
points
Ensure
that
the
suspension
member
and
differential
mount
ing
member
are
correctly
aligned
as
shown
in
Fig
U
5
and
insert
the
rubber
insulators
from
the
underside
of
the
vehicle
Tighten
the
differential
mounting
member
the
suspension
member
and
lower
shock
absorber
nuts
to
the
specified
tighten
ing
torques
COIL
SPRINGS
Removal
Saloons
Jack
up
the
rear
of
the
vehicle
and
support
it
on
stands
2
Remove
the
road
wheels
and
disconnect
the
handbrake
linkage
and
return
spring
3
Remove
the
drive
shaft
flange
nuts
at
the
wheel
side
Fig
H
6
and
the
bump
rubber
securing
nuts
4
Place
ajack
under
the
suspension
ann
and
remove
the
shock
absorber
from
the
lower
mounting
bracket
Carefully
lower
the
jack
and
remove
the
coil
spring
spring
scat
and
bump
rubber
Fig
H7
COIL
SPRINGS
Installation
Saloons
Oleck
the
coil
springs
for
signs
of
deformation
or
cracks
Test
the
spring
for
its
free
length
and
height
under
load
and
compare
the
figures
obtained
with
the
information
in
Technical
Data
Inspect
all
rubber
parts
and
replace
any
which
are
damaged
or
deformed
Installation
is
a
reversal
of
the
removal
procedure
making
sure
that
the
flat
face
of
the
spring
is
at
the
top
REAR
SHOCK
ABSORBERS
Removal
and
Installation
Saloons
Remove
the
trim
in
the
boot
trunk
and
take
off
the
two
nuts
securing
the
upper
shock
absorber
mounting
See
Fig
H
S
Detach
the
shock
absorber
from
the
lower
mounting
bracket
The
shock
absorber
should
be
tested
and
the
fIgUres
com
pared
with
the
specifications
in
Technical
Data
Cbeck
for
oil
leaks
and
cracks
Make
sure
that
the
shaft
is
straight
and
that
the
rubber
bushes
are
not
damaged
or
defonned
Renew
all
unsatis
75
Page 80 of 171
factory
parts
Installation
is
a
reversal
of
the
removal
procedure
REAR
SUSPENSION
ARM
Removal
and
Installation
Saloon
I
J
ad
up
the
car
at
the
rear
and
support
it
on
stands
2
Remove
the
road
wheel
and
brake
drum
as
described
in
the
section
BRAKES
3
Disconnect
the
drive
shaft
from
the
axle
shaft
4
Disconnect
the
handbrake
cable
from
the
equalizer
bracket
and
the
wheel
cylinder
lever
Disconnect
the
brake
hose
from
the
brake
line
by
removing
the
lock
spring
and
then
withdrawing
through
the
connector
Plug
the
end
of
the
brake
line
to
avoid
loss
of
fluid
and
ingress
of
dirt
5
Remove
the
wheel
bearing
locknut
Fig
H
9
the
rear
axle
shaft
wheel
bearings
and
oil
seal
Remove
the
rear
brake
assembly
from
the
suspension
ann
See
section
BRAKES
6
Jack
up
the
suspension
arm
to
relieve
the
tension
on
the
shock
absorber
and
disconnect
the
shock
absorber
from
the
lower
mounting
Lower
the
jack
gradually
and
remove
the
coil
spring
seat
and
bump
rubber
7
Remove
the
bolts
securing
the
suspension
arm
to
the
suspension
member
Fig
H
IO
and
withdraw
the
suspension
arm
The
rubber
bushes
can
be
drawn
out
of
the
suspension
arm
if
necessary
using
the
special
tool
ST
38280000
Fig
H
Il
O1eck
the
suspension
arm
for
distortion
or
cracks
and
inspect
the
rubber
bushes
for
signs
of
wear
or
damage
Renew
any
part
which
is
unsatisfactory
Installation
is
a
reversal
of
the
removal
procedure
Tighten
all
the
suspension
arm
mounting
bolts
with
the
weight
of
the
vehicle
resting
on
the
rear
wheels
The
self
locking
nuts
must
be
renewed
at
each
overhaul
REAR
AXLE
SHAFTS
BEARINGS
AND
SEALS
Saloon
Removal
and
Dismantling
I
Raise
the
vehicle
at
the
rear
and
place
stands
under
the
body
member
2
Remove
the
road
wheel
and
brake
drum
3
Disconnect
the
drive
shaft
from
the
axle
shaft
and
remove
the
wheel
bearing
locknut
The
special
wrench
ST
38060001
can
be
used
to
hold
the
flange
as
shownin
Fig
H
12
4
Withdraw
the
axle
shaft
assembly
as
shown
in
Fig
H
13
using
the
special
tool
ST
07640000
and
sliding
hammer
ST
36230000
Remove
the
rear
axle
drive
flange
5
Use
a
suitable
drift
or
special
tool
ST
37750000
See
Fig
H
14
to
drive
out
the
inner
bearing
and
oil
seal
F
6
Remove
the
grease
retainer
and
withdraw
the
outer
bearing
with
a
conventional
puller
DO
NOT
re
use
this
outer
bearing
REAR
AXLE
SHAFTS
BEARINGS
AND
SEALS
Saloon
Assembly
and
Installation
Oleck
the
axle
shaft
for
straightness
make
sure
that
it
is
not
cracked
or
damaged
in
any
way
00
NOT
heat
the
shaft
if
attempting
to
re
straighten
Make
sure
that
the
lip
of
the
oil
seal
is
not
damaged
or
distorted
Check
the
bearing
for
excessive
wear
and
damage
Oean
the
wheel
bearings
the
oil
seal
and
the
inside
of
the
axle
housing
When
installing
the
wheel
bearings
the
sealed
side
of
the
outer
bearing
should
face
the
wheel
and
the
sealed
side
of
the
inner
bearing
should
face
the
differential
See
Fig
H
IS
Pressure
must
be
applied
to
the
inner
race
when
fitting
When
replacing
the
suspension
arm
check
that
the
distance
piece
is
0
05
mm
0
002
in
shorter
than
the
length
of
the
housing
dimension
LI
See
Fig
H
16
The
distance
piece
and
axle
housing
code
markings
must
coincide
The
wheel
bearing
grease
must
be
replaced
every
50
000
km
30
000
miles
Pack
the
wheel
bearings
with
grease
at
the
positions
shown
in
Fig
H
IS
and
coat
the
lip
of
the
oil
seal
Renew
the
locknut
and
oil
seal
at
each
overhaul
Wheel
bearing
adjustment
Tighten
the
locknut
to
the
specified
torque
reading
of
25
33
kgm
181
239
lb
ft
and
check
that
the
rear
axle
shaft
end
play
does
not
exceed
0
15
mm
0
006
in
with
a
turning
torque
of
less
than
7
kg
em
6
11b
in
for
the
1400
and
1600cc
models
510
series
or
4
5
kg
em
3
91b
in
for
the
1800cc
610
series
If
the
correct
end
play
or
turning
torque
cannot
be
obtained
it
will
be
necessary
to
change
the
distance
piece
See
above
DRIVE
SHAFTS
Removal
and
Dismantlill8
Disconnect
the
end
flanges
and
remove
the
shaft
See
Fig
H
17
The
drive
shaft
should
only
be
dismantled
to
lubricate
the
splines
This
operation
will
only
be
necessary
every
two
years
or
50
000
km
30
000
miles
Remove
the
universal
joint
spider
at
the
differential
side
Refer
to
the
propeller
shaft
section
Remove
the
snap
ring
securiilg
the
sleeve
yoke
plug
and
take
out
the
plug
Compress
the
drive
shaft
and
remove
the
snap
ring
and
stopper
Fig
H
17
Disconnect
the
boot
and
split
the
shaft
Make
sure
that
the
balls
and
spacers
are
retained
DRIVE
SHAFTS
Inspection
and
Assembly
The
drive
shaft
should
be
replaced
as
an
assembly
if
any
part
is
found
to
be
defective
Check
the
shaft
for
straightness
damage
or
wear
Old
79