check oil DATSUN 610 1969 User Guide
[x] Cancel search | Manufacturer: DATSUN, Model Year: 1969, Model line: 610, Model: DATSUN 610 1969Pages: 171, PDF Size: 10.63 MB
Page 36 of 171
and
seats
or
a
weak
diaphragm
return
spring
A
pressure
above
the
specified
figure
may
be
due
to
an
excessively
strong
and
tight
diaphragm
Capacity
test
The
capacity
test
can
be
carried
out
when
the
static
pressure
has
been
tested
and
conforms
with
the
specified
figure
of
0
18
kg
sq
cm
2
6Ib
sq
inJ
Disconnect
the
fuel
line
at
the
carburettor
and
place
a
container
under
the
end
of
the
pipe
to
act
as
a
fuel
sump
Start
the
engine
and
run
it
at
a
speed
of
1000
Lp
m
The
amount
of
fuel
delivered
from
the
pump
in
one
minutc
should
be
1000
cc
2
1
US
pt
If
petrol
does
not
flow
from
the
opcned
end
of
the
pipe
at
the
correct
rate
then
either
the
fuel
pipe
is
clogged
or
the
pump
is
not
operating
correctly
If
the
latter
cause
is
suspected
the
pump
must
be
removed
and
inspected
as
described
below
FUEL
PUMP
Removing
and
Dismantling
Before
removing
the
pump
take
off
the
petrol
tank
cap
and
disconnect
the
pump
inlet
and
outlet
pipes
Blow
through
the
pipes
with
compressed
air
to
make
sure
that
they
are
not
clogged
Remove
the
pump
retaining
nuts
withdraw
the
pump
and
dismantle
it
in
the
following
order
Referring
to
Fig
D
l
Take
out
the
screws
holding
the
two
body
halves
together
and
scparate
the
upper
body
from
the
lower
body
2
Remove
the
cap
and
cap
gasket
3
Unscrew
the
eI
bow
and
connector
4
Take
off
the
valve
retainer
and
remove
the
two
valves
5
To
remove
the
diaphragm
diaphragm
spring
and
lower
body
sealing
washer
press
the
diaphragm
down
against
the
force
of
the
spring
and
tilt
the
diaphragm
at
the
same
time
so
that
the
pull
rod
can
be
unhooked
from
the
rocker
arm
link
Fig
D
7
The
rocker
arm
pin
can
be
driven
out
with
a
suitable
drift
FUEL
PUMP
Inspection
and
Assembly
Check
the
uppcr
and
lower
body
halves
for
cracks
Inspect
the
valve
and
valve
spring
assembly
for
signs
of
wear
and
make
sure
that
the
diaphragm
is
not
holed
or
cracked
also
make
sure
that
the
rocker
arm
is
not
worn
at
the
point
of
contact
with
the
camshaft
The
rocker
arm
pin
may
cause
oil
leakage
if
worn
and
should
be
renewed
Assembly
is
a
reversal
of
the
dismantling
procedure
noting
the
following
points
Fit
new
gaskets
and
lubricate
the
rocker
arm
link
and
the
rocker
arm
pin
before
installing
The
pump
can
be
tested
by
holding
it
approximately
I
metre
3
feet
above
the
level
of
fuel
and
with
a
pipe
connected
between
the
pump
and
fuel
strainer
Operate
the
rocker
ann
by
hand
the
pump
is
operating
correctly
if
fuel
is
drawn
up
soon
after
the
rocker
ann
is
released
CARBURETTOR
IDLING
ADJUSTMENT
The
idling
speed
cannot
be
adjusted
satisfactorily
if
the
ignition
timing
is
incorrect
if
the
spark
plugs
are
dirty
or
if
the
valve
clearances
are
not
correctly
adjusted
Before
adjusting
the
idling
speed
set
the
hot
valve
clearances
t
o
0
25
mm
0
0098
in
for
the
intake
valves
and
0
30
mm
0
0118
in
for
the
exhaust
valves
as
described
in
the
ENGINE
section
Idling
adjustment
is
carried
out
with
the
throttle
stop
screw
in
conjunction
with
the
idling
adjustment
screw
See
Fig
D
8
Run
the
engine
until
it
attains
its
normal
operating
temperature
and
then
switch
off
Starting
from
the
fully
closed
position
unscrew
the
idling
adjustment
screw
by
approximately
three
turns
Screw
the
throttle
stop
screw
in
by
two
or
tftr
e
turns
and
start
th
engine
Unscrew
the
throttle
stop
screw
until
the
engine
commences
to
run
unevenly
then
screw
in
the
idling
adjustment
screw
so
that
the
engine
runs
smoothly
at
the
highest
speed
Readjust
the
throttle
stop
screw
to
drop
the
engine
speed
of
approximately
600
r
p
m
is
obtained
WARNING
Do
not
attempt
to
screw
the
idling
adjustment
screw
down
completely
or
the
tip
of
the
screw
may
be
damaged
FAST
IDLE
OPENING
ADJUSTMENT
The
choke
valve
is
synchronized
with
the
throttle
valve
and
connected
to
it
by
levers
as
shown
in
Fig
D
9
The
fast
idle
opening
can
be
check
by
fully
closing
the
choke
valve
and
measuring
the
clearance
between
the
primary
throttle
valve
and
the
wall
of
the
throttle
chamber
This
clearance
being
shown
as
A
in
the
illustration
The
clearance
for
the
carburettor
types
is
as
follows
Carburettor
type
Throttle
opening
angle
180
180
190
Dimension
A
213304
361
13304
4
I
13282
331
1
55mm
0
06lin
1
55mm
0
06Iin
1
3
mm
0
051
in
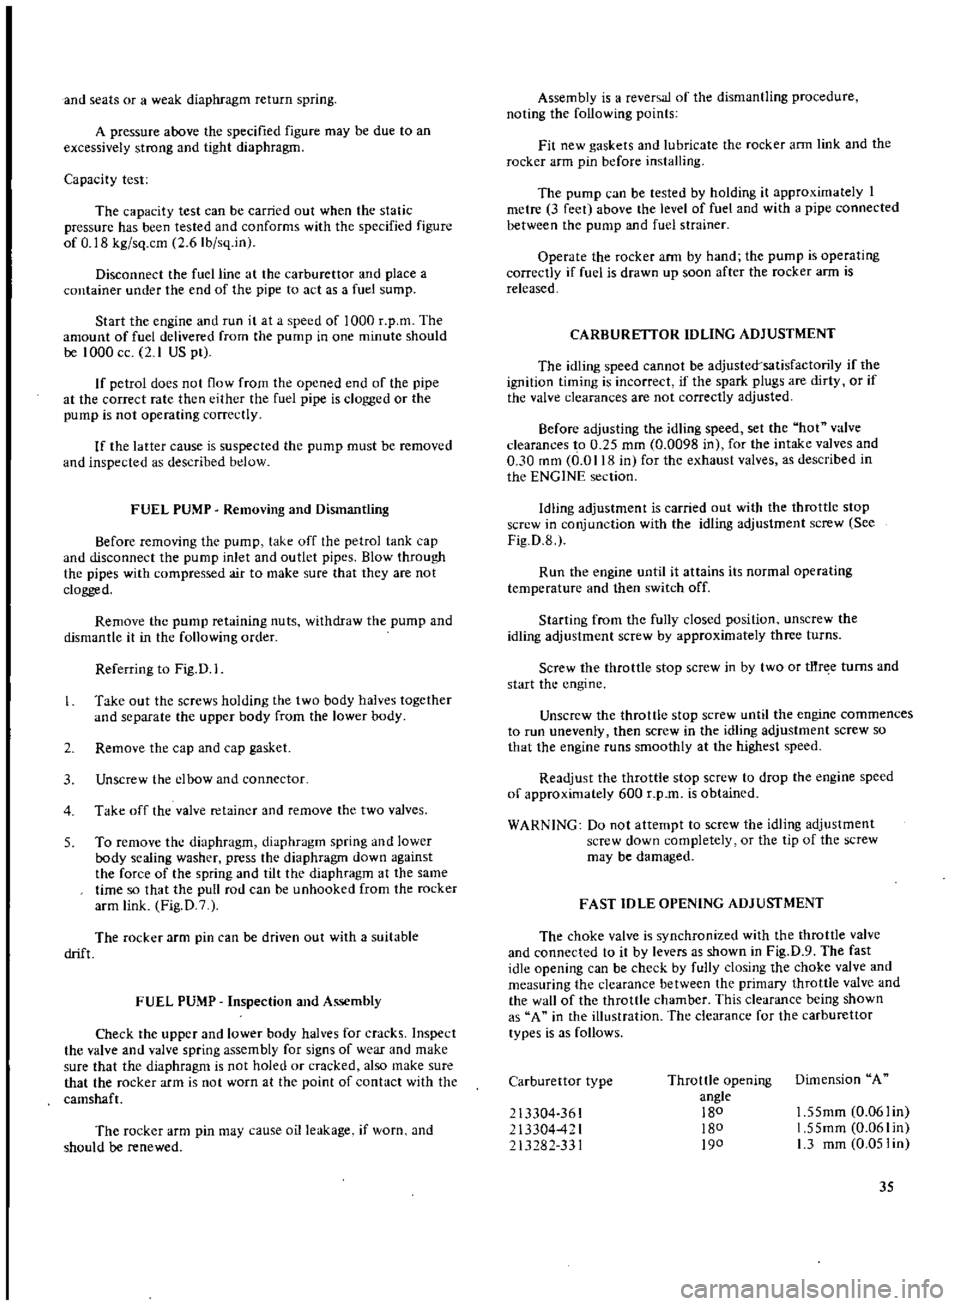
35
Page 40 of 171
FLOAT
LEVEL
Adjustment
A
constant
fuel
level
in
the
float
chamber
is
maintained
by
the
float
and
ball
valve
Fig
D
12
If
the
fuel
level
is
not
in
accordance
with
the
level
gauge
line
it
will
be
necessary
to
care
fully
bend
the
float
seat
until
the
float
upper
position
is
correctly
set
Fig
D
13
The
clearance
H
between
the
valve
stem
and
float
seat
should
be
1
0
mm
0
039
in
with
the
float
fully
lifted
as
shown
Adjustment
can
be
carried
out
by
carefully
bending
the
float
stopper
Fig
D
14
until
the
required
clearance
is
obtained
SU
TWIN
CARBURETTORS
Adjustments
It
is
essential
that
the
two
carburettors
are
correctly
adjusted
if
peak
m3l1ce
and
economical
fuel
consumption
is
to
be
realized
Incorrect
carburettor
a
ljustment
will
have
an
adverse
affect
during
idling
and
on
acceleration
etc
Carburettor
synchronization
and
idling
adjustment
Run
the
engine
until
it
reaches
its
normal
operating
temperature
remove
the
air
cleaner
and
slacken
the
front
and
rear
throttle
adjusting
screws
the
balance
screw
and
the
fast
idling
setting
screw
Make
sure
that
the
front
and
rear
throttle
shafts
are
not
connected
Fully
tighten
the
idling
adjustment
nuts
of
the
front
and
rear
carburettors
Fig
D
15
the
back
off
each
nut
by
an
equal
amount
and
by
one
and
a
half
to
two
tUrns
Screw
in
the
front
and
rear
throttle
adjusting
screws
by
a
few
turns
and
start
the
engine
Allow
the
engine
to
reach
its
normal
operating
temperature
before
proceding
to
the
next
stage
Adjust
the
front
and
rear
throttle
adjusting
screws
until
the
engine
speed
is
reduced
to
approximately
600
700
r
p
m
The
engine
should
turn
over
smoothly
and
consistently
Apply
a
flow
meter
to
the
front
carburettor
air
cleaner
flange
and
turn
the
adjustment
screw
on
the
flow
meter
so
that
the
upper
end
of
the
float
in
the
glass
tube
is
in
line
with
the
scale
Uft
off
the
flow
meter
and
apply
it
to
the
rear
carburettor
air
cleaner
flange
without
altering
the
setting
of
the
flow
meter
adjusting
screw
If
the
position
of
the
flow
meter
float
is
not
aligned
with
the
scale
adjust
the
rear
carburettor
throttle
adjusting
screw
to
align
the
float
with
the
mark
on
the
scale
With
the
carburettor
flow
correctly
adjusted
turn
the
idling
adjustment
nuts
of
both
carburettors
approximately
1
8
of
a
turn
either
way
to
obtain
a
fast
and
stable
engine
speed
Both
nuts
must
be
turned
by
an
equal
amount
Back
off
the
front
and
rear
throttle
adjusting
screws
and
adjust
the
engine
speed
to
the
specified
value
of
650
r
p
m
for
the
standard
engine
or
700
r
p
m
with
vehicles
fitted
with
automatic
transmission
Make
sure
that
the
air
flow
of
both
carburettors
remains
unchanged
Screw
in
the
balance
screw
until
the
screw
head
contacts
the
throttle
shafts
without
changing
the
idling
speed
setting
Move
the
throttle
connecting
shaft
and
accelerate
the
engine
a
few
times
then
check
that
the
idling
speed
is
unchanged
Turn
the
fast
idle
setting
screw
to
increase
the
engine
speed
to
approximately
1500
r
p
m
and
recheck
with
the
flow
meter
that
the
air
flow
for
both
carburettors
is
correctly
matched
If
the
air
flow
is
uneven
it
will
be
necessary
to
readjust
the
balance
screw
Finally
back
off
the
fast
idle
setting
screw
Fig
D
16
and
decrease
the
engine
speed
Apply
the
flow
meter
to
the
carburettors
to
confirm
that
the
float
positions
are
even
Re
adjust
if
necessary
by
means
of
the
throttle
adjusting
screws
Stop
the
engine
and
fit
the
air
cleaner
SU
TWIN
CARBURETTOR
Dismantling
Piston
and
suction
chamber
Dismantling
Unscrew
the
plug
and
withdraw
the
piston
damper
Fig
D
17
Remove
the
four
set
screws
and
lift
out
the
suction
chamber
withdraw
the
spring
nylon
washer
and
the
piston
Take
care
not
the
damage
the
jet
needle
and
the
interior
of
the
suction
chamber
Do
not
remove
the
jet
needle
from
the
piston
unless
absolutely
necessary
If
a
replacement
is
to
be
fitted
ensure
that
the
shoulder
of
the
needle
is
flush
with
the
lower
face
of
the
piston
This
operation
can
be
accomplished
by
holding
a
strai
edge
over
the
shoulder
of
the
needle
and
then
tightening
the
set
screw
as
shown
in
Fig
D
18
Wash
the
suction
chamber
and
piston
with
dean
solvent
and
dry
with
compressed
air
Lubricate
the
piston
rod
with
a
light
oil
Do
NOT
lubricate
the
large
end
of
the
piston
or
the
interior
of
the
suction
chamber
NOZZLE
Dismantling
The
nozzle
See
Fig
D
19
can
be
removed
quite
easily
but
should
not
be
dismantled
unless
absolutely
necessary
as
reassembly
of
the
nozzle
sleeve
washer
and
nozzle
sleeve
set
screw
is
an
extremely
intricate
operation
To
remove
the
nozzle
detach
the
connecting
plate
from
the
nozzle
head
pulling
lightly
on
the
starter
lever
to
ease
the
operation
Loosen
the
retaining
clip
take
off
the
fuel
line
and
remove
the
nozzle
Be
careful
not
to
damage
either
the
jet
needle
oc
the
nozzle
Remove
the
idle
adjusting
nut
and
spring
The
nozzle
sleeve
can
be
removed
if
necessary
by
taking
out
the
set
screw
but
as
previously
stated
should
not
be
dismantled
unless
absolutely
necessary
SU
TWIN
CARBUREfTOR
Assembly
Assemble
the
piston
assembly
into
position
but
do
not
fill
with
damper
oil
Assemble
the
nozzle
sleeve
washec
and
set
screw
by
temporarily
tightening
the
set
screw
Set
the
piston
to
its
fully
closed
position
and
insert
the
nozzle
until
it
contacts
the
nozzle
sleeve
When
the
nozzle
jet
contacts
the
jet
needle
the
nozzle
sleeve
must
be
slightly
adjusted
so
that
it
is
at
right
angles
to
the
centre
axis
and
positioned
to
leave
the
nozzle
jet
clear
of
the
jet
needle
Raise
the
piston
without
disturbing
the
setting
and
allow
it
to
drop
The
piston
should
drop
smoothly
until
the
stop
pin
strikes
the
venturi
with
a
liaht
metallic
click
See
below
under
Centering
the
jet
Tighten
the
nozzle
sleeve
set
screw
remove
the
nozzle
install
the
idle
adjustinJ
spring
and
adjusting
nut
on
the
nozzle
sleeve
and
refit
the
nozzle
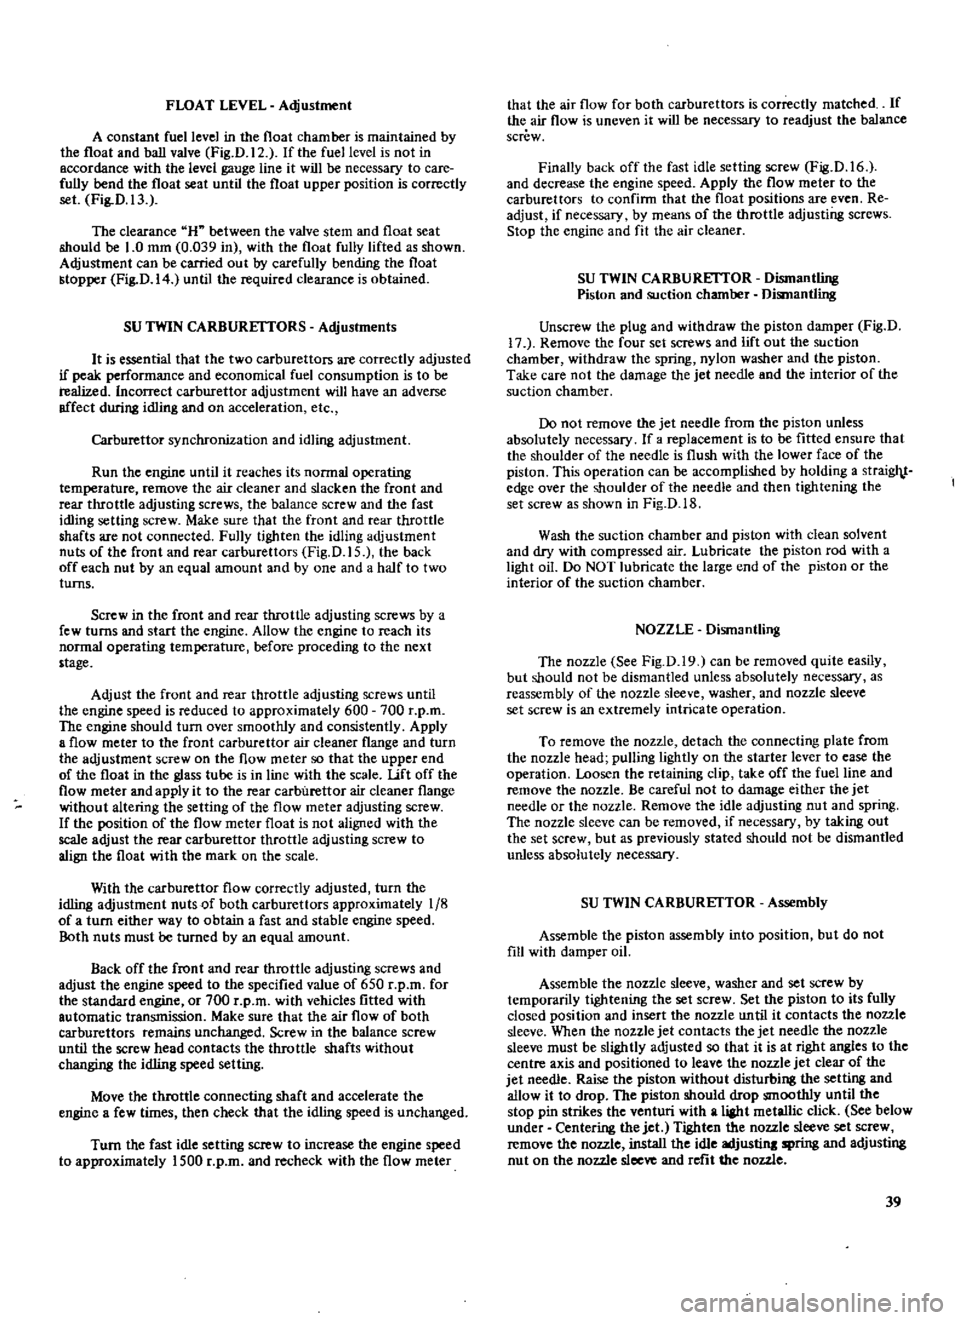
39
Page 42 of 171
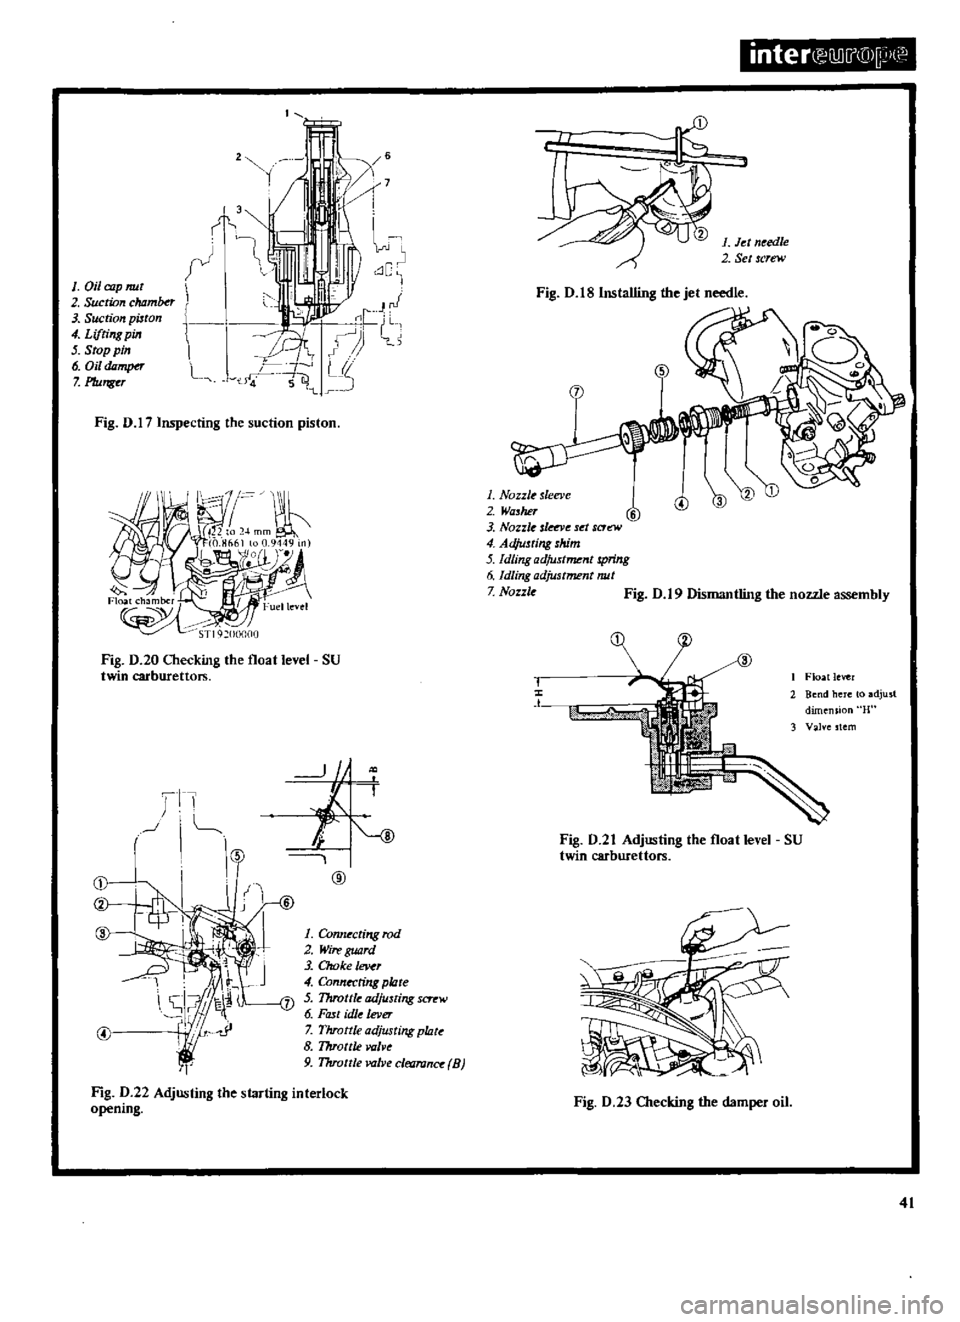
1
Oil
cap
nut
2
Suction
chomber
3
Suction
piston
4
Li
tingpin
S
Stop
pin
6
Oil
dDmper
7
Plunger
3
j
I
r
L
2
1
Fig
0
17
Inspecting
the
suction
piston
STlq
O
OO
Fig
D
20
Checking
the
float
level
SU
twin
carburettors
q
J
iT
j
I
@
@
J
1
Conn
ctingrod
2
Wi
guard
3
Choke
lever
4
Connecting
plate
7
S
Thrott
adjusting
SC
Tt
W
6
Fast
id
lever
7
Throttle
adjusting
p1at
8
Throttle
valv
9
Throttlevalv
cletlran
B
Fig
D
22
Adjusting
the
starting
interlock
opening
inteN
lli
i
D
U
I
i
n
1
Jet
n
edle
2
Set
screw
Fig
D
18
Installing
the
jet
needle
1
Nozzle
sleeve
2
Wa
sher
3
Nozz
det
V
d
C1e
W
4
Ad
u
ting
him
5
dlingadjustment
spring
6
Idling
adjustment
nut
Z
Nozz
c
J
Fig
D
l9
Dismantling
the
nozzle
assembly
3
I
Float
lever
2
Bend
here
loadju5t
dimension
H
3
Va
veslem
r
F
Fig
D
21
Adjusting
the
float
level
SU
twin
carburettors
Fig
D
23
Checking
the
damper
oil
41
Page 43 of 171
Connect
the
fuel
line
from
the
float
chamber
to
the
nozzle
nipple
and
tighten
the
retaining
clip
Pull
out
the
choke
lever
and
place
the
connecting
plaie
betw
n
the
washer
and
sleeve
collar
Screw
the
plate
to
the
nozzle
head
and
check
that
the
collar
is
installed
in
the
hole
in
the
plate
by
mo
ing
the
choke
lever
as
necessary
Recheck
the
piston
to
make
sure
that
it
falls
freely
without
binding
SU
TWIN
CARBURETTOR
Centering
the
jet
Remove
the
damper
oil
cap
nut
and
gradually
raise
the
lifter
pin
4
in
Fig
D
17
Continue
to
raise
the
lifter
pin
until
the
head
of
the
pin
raises
the
piston
by
approximately
8
mm
0
31
in
When
the
lifter
pin
is
released
the
piston
should
drop
freely
and
strike
the
venturi
with
a
light
metallic
click
If
the
pi
ston
does
not
fall
freely
it
will
be
necessary
to
dismantle
the
carburettor
in
the
manner
previously
described
SU
TWIN
CARBURETTOR
FLOAT
LEVEL
Inspection
and
Adjustment
The
fuel
level
in
the
float
chamber
can
be
checked
using
the
special
gauge
ST
19200000
Remove
the
float
chamber
drain
plug
and
install
the
special
gauge
as
shown
in
Fig
D
20
Start
the
engine
and
allow
it
to
run
at
idling
speed
The
fuel
level
is
conect
if
it
is
indicated
on
the
glass
tu
be
at
a
distance
of
22
24
mm
0
866
0
945
in
below
the
top
of
the
float
chamber
The
level
of
the
fuel
can
be
corrected
if
necessary
by
adjusting
the
float
level
in
the
following
manner
Take
out
the
float
chamber
coveT
securing
screws
and
lift
off
the
cover
and
attached
float
lever
Hold
the
cover
so
that
the
float
lev
r
is
facing
upwards
Lift
the
float
lever
and
then
lower
it
until
the
float
lever
seat
just
contacts
the
valve
stem
The
dimension
uH
in
Fig
D
1
should
be
11
12
mm
0
43
0
47
in
and
can
be
corrected
by
bending
the
float
lever
at
the
point
indicated
SU
TWIN
CARBURETTOR
Starting
interlock
valve
opening
adjustment
To
adjust
the
starting
interlock
opening
the
connecting
rod
4
in
Fig
D
22
1
must
be
bent
using
a
suitable
pair
of
pliers
The
throttle
opening
can
be
increased
by
lengthening
the
connecting
rod
or
reduced
by
shortening
the
rod
The
throttle
opening
is
correctly
adjusted
when
the
clearance
8
between
the
throttle
valve
and
throttle
chamber
is
set
to
0
6
mm
0
023
in
with
the
choke
lever
half
completely
out
HYDRAULIC
DAMPER
The
damper
oil
should
be
checked
approximately
every
5000
km
3000
miles
To
check
the
oil
level
remove
the
oil
cap
nut
as
shown
in
Fig
D
23
and
check
the
level
of
oil
against
the
two
grooves
on
the
plunger
rod
Top
up
with
SAE
20
engine
oil
if
the
oil
level
is
below
the
lower
of
the
two
grooves
Take
care
not
to
bend
the
plunger
rod
when
removing
and
replacing
the
oil
cap
nut
and
make
sure
that
the
nut
is
sufficiently
tightened
by
hand
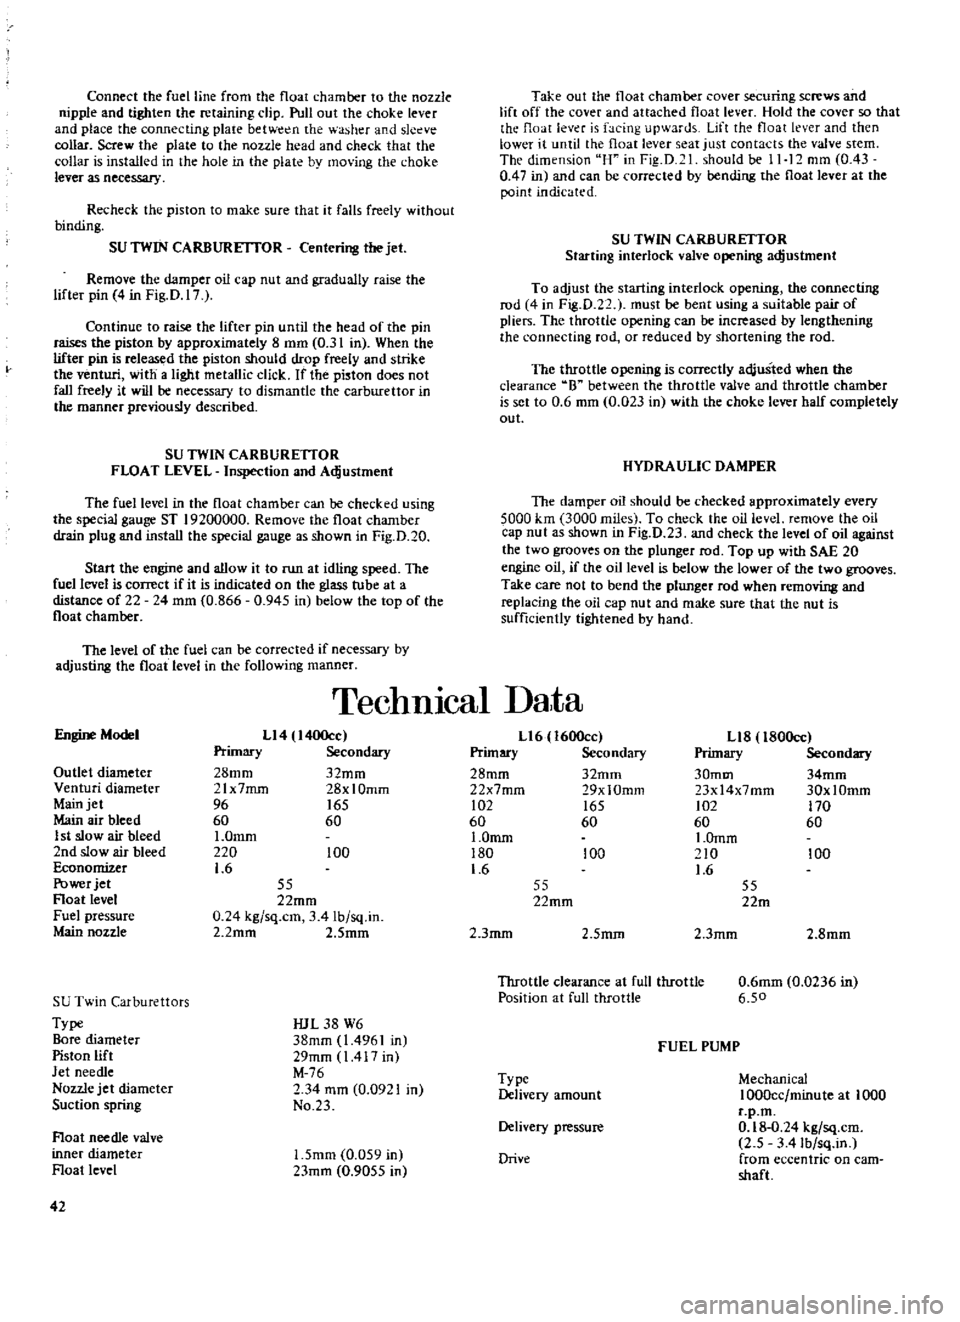
TechnIcal
Data
Engine
Model
Ll4
I400cc
Primary
Secondary
28mm
32mm
21x7mrn
28xlOmm
96
165
60
60
I
Omm
220
100
1
6
Outlet
diameter
Venturi
diameter
Main
jet
Main
air
bleed
1
st
slow
air
bleed
2nd
slow
air
bleed
Economizer
Power
jet
Float
level
Fuel
pressure
Main
nozzle
55
22mm
0
24
kg
sq
cm
3
41b
sq
in
2
2mm
2
Smm
SU
Twin
Carburettors
Type
Bore
diameter
Piston
lift
Jet
needle
Nozzle
jet
diameter
Suction
spring
IUL
38
W6
38mm
1
4961
in
29mm
1417
in
M
76
2
34
mm
0
0921
in
No
23
Float
needle
valve
inner
diameter
Float
level
1
5mm
0
059
in
23mm
0
9055
in
42
Ll6
1600cc
Primary
Secondary
28mm
32mm
22x7mm
29xlOmm
102
165
60
60
1
0mm
180
100
1
6
Ll8
l80Occ
Primary
Secondary
30mm
34mm
23x14x7mm
30xlOmm
102
170
60
60
I
Omm
210
100
1
6
55
22mm
55
22m
2
3mm
2
5mm
2
3mm
2
8mm
Throttle
clearance
at
full
throttle
Position
at
full
throttle
0
6mm
0
0236
in
6
50
FUEL
PUMP
Type
Delivery
amount
Mechanical
1000cc
minute
at
1000
r
p
m
0
18
0
24
kg
sq
cm
2
5
3
41b
sq
in
from
eccentric
on
cam
shaft
Delivery
pressure
Drive
Page 44 of 171
Clutch
DESCRIPTION
CLUTCH
Removal
and
Dismantling
CLUTCH
Inspection
and
Adjustment
CLUTCH
Installation
CLUTCH
PEDAL
Removal
and
Installation
DESCRIPTION
Either
a
diaphragm
spring
or
coil
spring
type
clutch
is
fitted
to
the
vehicle
The
component
parts
of
the
diaphragm
spring
clutch
are
shown
in
Fig
E
l
and
the
component
parts
of
the
coil
spring
clutch
are
shown
in
Fig
E
2
The
clutch
is
of
the
single
dry
plate
type
consisting
of
the
drive
plate
clutch
coveT
and
pressure
plate
and
release
bearing
The
driven
plate
comprises
a
flexible
disc
and
splined
hub
which
slides
on
the
clutch
shaft
Friction
linings
are
rivetted
to
both
sides
of
the
disc
The
clutch
cover
and
pressure
plate
are
combined
by
nine
spring
setting
bolts
The
diaphragm
is
dished
to
maintain
a
constant
pressure
on
the
pressure
plate
which
in
turn
holds
the
driven
plate
in
contact
with
the
flywheel
The
release
bearing
is
a
sealed
type
ball
bearing
mounted
on
a
bearing
sleeve
Both
bearing
and
sleeve
are
operated
by
the
withdrawalleveT
when
the
clutch
pedal
is
operated
The
clutch
pedal
actuates
a
master
cylinder
which
transmits
fluid
under
pressure
to
a
slave
cylinder
The
movement
of
the
slave
cylinder
piston
operates
the
clutch
withdrawal
lever
via
a
push
rod
See
Fig
E
14
CLUTCH
Removal
and
Dismantling
The
gearbox
must
be
removed
from
the
vehicle
before
the
clutch
can
be
withdrawn
The
procedures
for
removing
the
gearbox
can
be
found
in
the
section
GEARBOX
If
a
diaphragm
clutch
is
fitted
insert
a
spare
clutch
shaft
or
a
special
alignment
tool
ST20600000
into
the
splines
of
the
driven
plate
So
that
the
dutch
is
supported
Slacken
the
six
bolts
securing
the
clutch
cover
to
the
flywheel
by
a
single
turn
at
a
time
and
in
a
diagonal
pattern
until
the
spring
pressure
is
relieved
Remove
the
bolts
completely
and
lift
away
the
clutch
assembly
When
removing
the
coil
spring
type
clutch
it
will
be
necessary
to
insert
suitable
hooks
under
the
release
levers
to
restrain
the
tension
of
the
clutch
spring
before
removing
the
clutch
cover
lx
llts
Ensure
that
the
friction
linings
of
the
driven
plate
do
not
become
comtaminated
with
oil
or
grease
when
removing
the
plate
from
the
splined
shaft
Diaphragm
clutch
The
clutch
cover
and
pressure
plate
assembly
should
not
be
dismantled
and
must
be
replaced
if
wear
or
damage
has
occurred
Make
sure
that
the
friction
face
of
the
pressure
plate
CLUTCH
PEDAL
Adjusting
CLUTCH
MASTER
CYLINDER
CLUTCH
SLAVE
CYLINDER
CLUTCH
WITHDRAWAL
LEVER
Adjusting
CLUTCH
SYSTEM
Bleeding
is
perfectly
flat
and
smooth
Coil
spring
clutch
A
special
tool
No
ST200S0000
is
available
to
ensure
that
the
clutch
can
be
dismantled
and
accurately
reassembled
The
tool
shown
in
Fig
E
3
consists
of
a
Base
plate
I
Centre
spigot
2
Distance
pieces
3
Height
gauge
4
Operating
lever
5
Securing
bolts
6
A
chart
is
included
to
indicate
the
various
parts
to
be
used
for
each
type
of
clutch
To
dismantle
the
clutch
place
the
distance
pieces
on
the
base
plate
as
shown
and
arrange
the
clutch
cover
on
the
base
plate
so
that
the
cover
holes
coincide
with
the
threaded
holes
in
the
base
plate
Insert
the
securing
bolts
provided
in
the
kit
and
tighten
them
gradually
and
evenly
in
a
diagonal
pattern
until
the
cover
is
firmly
attached
to
the
base
plate
Mark
the
clutch
cover
the
pressure
plate
lugs
and
the
release
levers
with
a
centre
punch
so
that
they
can
be
reassembled
in
their
original
positions
Remove
the
restraining
hooks
from
the
release
levers
and
unscrew
the
three
nuts
from
the
eye
bolts
Slowly
release
the
pressure
on
the
clutch
coil
springs
by
unscrewing
the
bolts
securing
the
cover
to
the
base
plate
and
lift
off
the
cover
springs
and
pressure
plate
CLUTCH
Inspection
and
Adjustment
Use
a
solvent
to
clean
the
dismantled
parts
with
the
exception
of
the
disc
linings
and
the
release
bearing
Check
the
clutch
cover
diaphragm
spring
and
pressure
plate
assembly
for
wear
or
damage
and
renew
the
complete
assembly
if
necessary
The
pressure
plate
on
the
coil
spring
clutch
can
be
lapped
if
necessary
as
described
below
Ensure
that
the
disc
rivets
are
not
loosened
and
inspect
the
linings
for
contamination
Grease
or
oil
should
be
removed
and
the
linings
dressed
using
a
wire
brush
Check
the
disc
for
run
ut
using
a
dial
gauge
as
shown
in
Fig
E
4
Position
the
dial
gauge
at
a
point
approximately
9Smm
3
74
in
from
the
centre
of
the
disc
and
check
that
the
run
out
does
not
exceed
the
permissible
limit
of
0
5
mm
0
02in
A
slight
deflection
can
be
corrected
by
hand
pressure
with
the
disc
mounted
on
the
gearbox
shaft
The
disc
must
be
renewed
or
relined
if
the
height
of
the
linings
above
the
rivets
is
less
than
0
3mm
0
012
in
Replace
the
bearing
sleeve
if
it
shows
signs
of
wear
at
the
point
of
contact
with
the
withdrawal
lever
Replace
the
release
bearing
if
grease
is
leaking
from
it
or
if
it
is
noisy
when
turned
43
Page 46 of 171
The
coil
spring
clutch
pressure
plate
can
be
lapped
with
a
surface
grinder
to
remove
dents
or
scratches
only
the
minimum
amount
of
metal
should
be
removed
to
restore
the
surface
Check
the
plate
for
distortion
by
placing
it
on
a
surface
plate
with
the
friction
face
towards
the
surface
plate
Press
the
pressure
plate
down
and
insert
a
feeler
gauge
of
1
0mm
0
0039
in
between
the
pressure
plate
and
surface
plate
If
it
is
possible
to
insert
the
feeler
gauge
then
the
pressure
plate
must
be
repaired
or
replaced
The
plate
can
be
skimmed
but
the
maximum
amount
of
metal
that
can
be
removed
is
1
0mm
0
0039in
CLUTCH
SPRING
Diaphragm
clutch
With
the
diaphragm
spring
assembled
to
the
pressure
plate
inspect
the
spring
height
and
load
in
the
following
manner
Place
distance
pieces
of
7
8
mm
0
307
in
on
the
base
plate
as
shown
in
Fig
E
3
and
bolt
down
the
clutch
cover
using
the
special
bolts
provided
with
the
kit
Meas
Jre
the
height
B
in
Fig
E
5
at
a
diameter
of
44mm
1
732
in
The
release
fingers
should
not
exceed
a
height
of
43
45
mm
1
693
1
772
in
from
the
base
plate
Replace
the
spring
if
the
height
is
in
excess
of
the
figures
quoted
Press
the
dutch
down
as
shown
in
Fig
E
6
to
a
depth
of
7
8mm
0
307
in
or
until
the
clutch
driven
plate
upper
surface
lines
up
with
the
clutch
cover
mounting
face
If
the
load
applied
is
less
than
350
kg
770
lbs
it
will
be
necessary
to
renew
the
diaphragm
spring
Do
not
press
the
clutch
disc
down
by
more
than
9mm
0
35
in
or
the
diaphragm
spring
may
be
broken
CLUTCH
SPRINGS
Coil
spring
clutch
The
clutch
springs
must
be
replaced
as
a
set
if
any
of
the
springs
are
found
to
be
defective
Specifications
for
the
springs
are
given
in
Technical
Data
at
the
end
of
this
section
Generally
a
spring
may
be
considered
faulty
if
when
assembled
the
load
is
reduced
by
more
than
15
or
if
the
free
length
has
altered
by
more
than
1
5mm
0
0590
in
or
if
the
deflection
B
to
A
in
Fig
E
7
exceeds
5mm
per
100mm
0
2
in
per
3
94
in
Release
Bearing
The
release
bearing
should
be
renewed
if
excessively
worn
or
if
roughness
can
be
felt
when
the
bearing
is
turned
by
hand
The
bearing
should
also
be
renewed
if
the
grease
has
leaked
away
or
if
the
clearance
between
the
clutch
cover
and
inner
diameter
of
the
sleeve
is
more
than
0
5
mm
0
0197
in
The
bearing
can
be
removed
using
a
conventional
puller
as
shown
in
Fig
E
8
Two
types
of
release
bearings
are
available
and
care
must
be
taken
when
fitting
onto
the
bearing
sleeve
The
release
bearing
should
be
pressed
into
place
on
the
diaphragm
spring
type
of
clutch
with
a
force
of
400
kg
880
lbs
applied
at
the
outer
race
as
shown
in
Fig
E
9
On
the
coil
spring
clutch
the
same
force
must
be
applied
at
the
inner
race
as
shown
in
Fig
E
IO
It
should
be
possible
to
turn
the
bearing
freely
and
smoothly
when
it
is
pressed
into
place
CLUTCH
Assembly
Coil
spring
type
Press
the
pin
into
the
eyebolt
and
through
the
lug
on
the
pressure
plate
Place
the
three
distance
pieces
on
the
surface
of
the
base
plate
of
the
special
tool
ST20050000
and
position
the
pressure
plate
pressure
springs
and
retainers
on
the
plate
Set
the
retracting
springs
on
the
cover
and
insert
the
release
levers
through
the
spring
Place
the
clutch
cover
over
the
pressure
plate
and
springs
making
sure
that
the
retracting
springs
do
not
become
dislodged
or
distorted
Compress
the
pressure
springs
by
screwing
the
special
set
bolts
into
the
holes
in
the
cover
Tighten
the
bolts
gradually
in
a
diagonal
pattern
to
avoid
distorting
the
cover
Place
the
release
levers
on
the
eye
bolts
and
screw
OR
the
securing
nuts
Place
retaining
hooks
under
the
release
levers
and
remove
the
clutch
assembly
from
the
base
plate
slackening
the
set
bolts
in
a
diagonal
pattern
COIL
SPRING
CLUTCH
Adjusting
Screw
the
centre
pillar
into
the
base
plate
and
place
the
high
finger
over
the
pillar
The
height
of
the
release
levers
must
be
adjusted
by
turning
the
eye
bolt
nuts
until
the
tops
of
the
release
levers
are
just
touching
the
tip
of
the
gauge
See
Fig
E
11
Remove
the
centre
pillar
when
the
release
levers
are
correctly
adjusted
and
screw
in
the
actuating
lever
Fig
E
12
Turn
the
actuating
mechanism
several
times
to
bed
down
the
parts
and
then
recheck
the
height
of
the
release
levers
Check
for
run
out
as
near
to
the
edge
as
possible
and
readjust
if
the
deviation
is
more
than
0
5
mrn
0
020
in
CLUTCH
InsWlation
Ensure
that
the
friction
faces
are
free
from
oil
and
grease
and
place
the
driven
plate
on
the
flywheel
The
longer
chamfered
splined
end
of
the
assembly
should
face
the
gearbox
Use
a
spare
drive
shaft
to
align
the
driven
plate
The
shaft
must
be
inserted
through
the
splined
hub
of
the
driven
plate
and
into
the
pilot
bearing
of
the
flywheel
Place
the
clutch
cover
into
position
on
the
flywheel
and
tighten
the
dutch
bolts
gradually
in
a
diagonal
pattern
to
a
torque
reading
of
1
5
2
2
kgm
11
16Ib
ft
Remove
the
dummy
shaft
and
the
restraining
hooks
from
the
release
levers
Refit
the
release
bearing
and
the
bell
housing
CLUTCH
PEDAL
Removal
and
Installation
Remove
the
clevis
pin
from
the
end
of
the
master
cylinder
pushrod
and
disconnect
the
pushrod
Remove
the
return
spring
Remove
the
pushrod
after
slackening
the
pushrod
adjuster
Coil
spring
clutch
only
Remove
the
pedal
lever
securing
bolt
slacken
the
handbrake
bracket
bolts
and
lift
out
the
pedal
Clean
all
parts
thoroughly
and
check
them
for
wear
or
damage
paying
particular
attention
to
the
rubber
parts
return
spring
and
pedal
lever
bush
Installation
of
the
clutch
pedal
is
a
reversal
of
the
removal
procedures
45
Page 47 of 171

J
Ie
T
I
Baseplate
@
2
Czn
e
piUfU
i
y
3
Distance
preces
4
height
iPuge
P
5
Actuilting
mechanl
sQ
6
Set
bolt
I
e
r
ft
I
Fig
E
3
autch
assembly
tool
Fig
E
4
Checking
the
driven
plate
for
run
out
81
I
1
1111
11
I
r
A
I
1
1111111111
if
jI
4
J
J
J
FiB
E
5
Checking
the
height
of
the
diaphragm
spring
Fig
E
6
Olecking
the
load
of
the
d
t
b
spring
I
I
I
A
j
I
1
1
I
l
i
y
8
Fig
E
7
Inspecting
the
clutch
spnngs
for
distortion
Fig
E
8
Removing
the
releaSe
bearing
p
l
0
I
0
W
Illmi
i
hm
17
9
FiB
E
9
Installing
the
lea
bearing
diaphragm
spring
FiB
E
I
0
Installing
the
lease
bearing
coil
spring
46
Page 48 of 171
CLUTCH
PEDAL
Adjusting
400
and
1600
cc
models
Adjust
the
pedal
height
to
209
mm
8
22
in
with
the
pedal
stop
slackened
off
by
altering
the
length
of
the
master
cylinder
push
rod
See
Fig
E
13
Tighten
the
pedal
stop
and
obtain
a
pedal
height
of
207
ffim
8
15
in
for
Left
Hand
drive
models
or
182
mID
7
I7
in
for
Right
Hand
drive
models
Secure
the
stop
by
tightening
the
locknut
and
make
sure
that
the
points
illustrated
are
correctly
greased
CLlTfCH
PEDAL
Adjusting
1800cc
models
Adjust
the
pedal
height
to
175
mm
6
89
in
by
adjusting
the
pedal
stop
See
Fig
E
13
then
retighten
the
locknut
A
to
a
torque
reading
of
0
79
1
07
kgm
6
8Ib
ft
Turn
the
master
cylinder
push
rod
to
obtain
a
play
between
1
Smm
0
04
0
2
in
at
the
clevis
pin
then
tighten
the
locknut
B
to
a
torque
reading
of
0
79
1
07
kgm
6
8
Ib
ft
Ensure
when
adjusting
the
play
that
the
port
on
the
master
cylinder
is
not
blocked
too
small
a
play
at
the
clevis
pin
may
block
the
port
Bend
the
clevis
pin
over
completely
CLlTfCH
MASTER
CYLINDER
Removal
and
Dismantling
Disconnect
the
push
rod
from
the
clevis
Fig
E
14
Detach
the
fluid
line
from
the
master
cylinder
and
pump
the
fluid
into
a
suitable
container
3
Withdraw
the
retaining
bolts
and
remove
the
master
cylinder
assembly
from
the
vehicle
To
dismantle
the
master
cylinder
remove
the
filler
cap
and
drain
away
the
fluid
Pull
back
the
dust
cover
and
remove
the
snap
ring
the
stopper
push
rod
piston
assembly
and
return
spring
Oean
the
components
in
brake
fluid
and
check
them
for
wear
or
damage
Renew
the
cylinder
and
piston
if
uneven
wear
has
taken
place
the
clearance
between
the
cylinder
and
piston
must
not
exceed
0
13
mm
0
005
in
Renew
the
dust
cover
oil
reservoir
filler
cap
and
fluid
line
if
necessary
Reassembly
of
the
master
cylinder
is
a
reversal
of
the
dismantling
procedure
take
care
to
soak
the
components
in
brake
fluid
and
assemble
them
while
still
wet
When
the
master
cylinder
is
installed
in
the
vehicle
make
sure
that
the
pedal
height
is
adjusted
as
previously
described
and
bleed
the
hydraulic
system
by
following
the
procedures
given
under
the
heading
CLlTfCH
SYSTEM
Bleeding
CLlTfCH
SLAVE
CYLINDER
Removal
and
Dismantling
Remove
the
return
spring
2
Disconnect
the
fluid
line
from
the
slave
cylinder
D
3
Disconnect
the
push
rod
from
the
clutch
withdrawal
lever
4
Take
out
the
mounting
bolts
and
withdraw
the
slave
cylinder
from
the
clutch
housing
To
dismantle
the
slave
cylinder
remove
the
dust
cover
and
snap
ring
and
withdraw
the
remaining
parts
from
the
cylinder
Oean
all
components
carefully
and
check
them
for
signs
of
damage
or
wear
renew
any
part
found
to
be
defective
and
fit
a
new
piston
seal
CLUTCH
SLAVE
CYLINDER
Assembly
and
Installation
Reassembly
is
a
reversal
of
the
dismantling
procedure
Ensure
that
the
parts
are
dipped
in
brake
flu
d
before
assembling
and
that
the
piston
seal
is
correctly
installed
When
the
slave
cylinder
is
installed
in
the
vehicle
bleed
the
hydraulic
system
by
following
the
procedures
given
under
the
heading
CLlTfCH
SYSTEM
Bleeding
The
push
rod
must
be
adjusted
so
that
the
withdrawal
lever
has
an
end
play
of
2
0
2
3
mm
0
078
0
091
in
details
of
this
operation
are
given
below
CLlTfCH
WITHDRAWAL
LEVER
Adjusting
The
correct
adjustment
of
the
clutch
withdrawal
lever
is
most
essential
as
insufficient
clearance
between
the
clutch
release
bearing
and
the
diaphragm
will
cause
the
clutch
to
slip
On
the
other
hand
an
excessive
clearance
will
prevent
the
clutch
from
disengaging
correctly
The
clearance
between
the
release
bearing
and
diaphragm
or
release
levers
can
be
adjusted
in
the
following
manner
Slacken
the
locknut
Fig
E
IS
and
screw
the
push
rod
fully
home
with
the
adjusting
nut
Return
the
adjusting
nut
I
3
4
turns
to
adjust
the
play
at
the
end
of
the
clutch
withdrawal
lever
to
2
0
2
3
mm
0
078
0
091
in
This
will
give
a
clear
ance
of
approximately
1
3
mm
0
051
in
between
the
release
bearing
and
the
diaphragm
spring
or
release
levers
NOTE
When
adjusting
clutch
pedal
free
travel
at
the
withdrawal
lever
it
is
essential
to
check
that
the
clutch
driven
plate
has
not
worn
by
more
than
2mm
0
08
in
otherwise
the
clutch
will
slip
even
if
it
is
correctly
adjusted
See
Technical
Data
for
the
relevant
clutch
driven
plate
thickness
CLUTCH
SYSTEM
Bleeding
The
clutch
system
must
be
bled
after
it
has
been
dismantled
or
if
any
part
of
the
circuit
has
been
opened
This
operation
should
also
be
carried
out
if
the
fluid
level
in
the
reservoir
has
been
allowed
to
fall
and
pennit
air
to
enter
the
system
The
presence
of
air
in
the
system
may
be
noticed
by
incorrect
disengagement
of
the
clutch
but
in
any
case
if
air
is
suspected
the
clutch
must
be
bled
in
the
following
manner
Remove
the
dust
cap
from
the
slave
cylinder
bleed
screw
Connect
a
length
of
tube
to
the
bleed
screw
and
immerse
the
47
Page 56 of 171
to
ascertain
the
amount
of
wear
that
has
taken
place
Check
the
teeth
of
the
gearwheels
and
the
machined
surfaces
for
signs
of
wear
scoring
pitting
and
burrs
Ensure
that
the
synchronizer
hubs
slide
freely
on
the
splines
of
the
main
shaft
with
minimum
clearance
Check
the
mainshaft
for
run
out
using
V
blocks
and
a
dial
gauge
as
shown
in
Fig
F
15
Renew
the
mainshaft
if
the
run
out
exceeds
0
15mm
0
0059
in
Check
the
synchronizer
rings
for
wear
and
renew
them
if
necessary
Place
the
rings
in
position
on
their
respective
gear
wheel
cones
and
check
the
gap
between
the
end
of
the
ring
and
the
front
face
of
the
teeth
Fig
F
16
The
correct
gap
should
be
within
1
2
1
6mm
0
047
0
063
in
Renew
the
synchronizer
ring
if
the
gap
is
less
than
0
8mm
0
0315
in
Place
the
selector
rods
on
a
flat
surface
and
check
them
for
traightness
Renew
any
rod
which
is
bent
Renew
the
locking
pins
and
interlock
balls
if
they
are
worn
or
damaged
The
standard
clearance
between
the
selector
forks
and
operating
sleeve
groove
is
0
15
0
30mm
0
006
0
012
in
Make
sure
that
the
oil
seals
are
satisfactory
and
discard
the
O
rings
THREE
SPEED
GEARBOX
Assembly
Press
the
main
drive
gear
bearing
onto
the
main
drive
shaft
and
fit
the
spacer
Select
a
snap
ring
of
suitable
thickness
so
that
all
play
is
eliminated
between
the
bearing
and
snap
ring
Seven
sizes
of
snap
rings
are
available
and
vary
in
thickness
from
1
52mm
0
0598
in
to
1
89mm
0
0747in
The
synchromesh
unit
consists
of
a
coupling
sleeve
baulk
ring
spring
synchronizer
hub
and
insert
When
assembling
the
unit
make
sure
that
the
correct
insert
pressure
springs
are
fitted
to
the
relevant
speed
unit
The
first
reverse
gear
synchronizer
should
be
fitted
with
the
three
coil
spring
type
and
the
second
third
gear
synchronizer
with
the
two
expanding
springs
To
assemble
the
fiI3t
speed
synchronizer
insert
the
sliding
insert
snap
ring
onto
the
synchronizer
hub
as
shown
in
Fig
F
17
Fit
the
sliding
inserts
Fig
F
18
and
the
synchronizer
springs
on
the
synchronizer
hub
and
assemble
the
synchronizer
hub
complete
with
inserts
into
the
coupling
sleeve
Fig
F
19
Assemble
the
second
third
gear
synchronizer
hub
and
coupling
sleeve
making
sure
that
the
sleeve
slides
freely
on
the
hub
splines
Fit
the
three
shifting
inserts
and
install
a
spring
ring
on
each
side
of
the
hub
Fig
F
20
To
assemble
the
mainshaft
start
from
the
front
end
of
the
shaft
and
slide
the
second
speed
gearwheel
on
to
the
shaft
with
the
tapered
cone
facing
forwards
Install
the
baulk
ring
on
the
gearwheel
and
place
the
second
third
speed
synchronizer
assembly
on
the
front
end
of
the
shaft
and
retain
it
with
a
snap
ring
which
will
give
an
end
play
of
0
05
0
25
mm
0
002
0
009
in
Snap
rings
are
available
in
five
sizes
from
1
60
1
80
mm
0
063
0
071
in
Fit
the
first
speed
gear
and
baulk
ring
on
the
rear
of
the
shaft
so
that
the
tapered
cone
faces
to
the
rear
Assemble
the
first
speed
synchronizer
and
reverse
gear
on
the
shaft
Fit
the
spacer
and
press
the
mainshaft
bearing
complete
with
retainer
onto
the
shaft
Install
the
spacer
ball
and
speedometer
drive
pinion
Select
a
snap
ring
which
will
give
an
end
float
of
0
05
0
22mm
0
002
0
009
in
on
the
mainshaft
first
gear
Snap
rings
are
available
in
eight
thicknesses
from
1
30mrn
0
0512
in
to
1
70mm
0
0669
in
Secure
the
drive
gear
with
the
selected
snap
ring
and
check
the
end
float
of
the
gearwheels
as
shown
in
Fig
F
21
The
correct
end
float
should
be
as
follows
I
st
speed
gearwheel
0
2
o
3mm
0
008
0
012
in
0
2
0
3mm
0
008
0
012
in
2nd
speed
gearwheel
Fit
the
main
drive
gear
and
mainshaft
assembly
into
the
gearbox
casing
Fit
the
selector
rods
and
forks
as
follows
Turn
the
gearbox
casing
so
that
the
detent
ball
hole
is
uppermost
and
insert
the
spring
and
ball
in
the
bottom
of
the
hole
Hold
the
ball
witb
a
dummy
shaft
and
install
tbe
first
reverse
selector
fork
and
rod
pushing
the
dummy
shaft
out
of
position
Insert
the
interlocking
plunger
and
fit
the
second
third
speed
selector
fork
and
rod
Insert
the
steel
ball
and
spring
and
refit
the
interlocking
plug
after
coating
the
threads
of
the
plug
with
sealing
compound
See
Fig
F
22
Secure
the
selector
forks
to
the
rods
by
inserting
the
retaining
pins
Fit
the
reverse
idler
gear
and
shaft
and
secure
the
shaft
with
the
lock
bolt
and
plate
Insert
the
counter
gear
cluster
and
shaft
using
a
suitable
thrust
washer
to
obtain
an
end
float
of
0
04
0
12
mm
0
0016
0
0047
in
Thrust
washers
are
available
in
five
sizes
from
3
85
4
05
mm
0
1516
0
1594
in
thickness
in
increments
of
0
05
mm
0
002
in
Fit
the
cross
shafts
1
in
Fig
F
23
the
thrust
washers
2
and
the
operating
levers
3
Secure
the
cross
shafts
with
the
retaining
rings
5
and
lock
the
operating
levers
to
the
shafts
with
the
pins
4
Locate
the
rear
extension
housing
on
the
gearbox
case
and
tighten
the
bolts
to
a
torque
reading
of
2
8
4
4
kgm
20
32
Ib
ft
Insert
the
speedometer
drive
pinion
and
retain
it
with
the
set
bolt
and
lock
plate
Check
the
backlash
of
all
the
gears
using
a
dial
gauge
as
shown
in
Fig
F
24
The
backlash
should
be
between
0
05
0
20
mm
0
002
0
008
in
Fit
the
gearbox
front
cover
and
tighten
the
fixing
bolts
to
a
torque
reading
of
1
I
1
7
kgm
8
0
12
3
lb
ft
taking
care
not
to
damage
the
oil
seal
Fit
the
clutch
release
bearing
and
with
drawallever
Fig
F
25
Replace
the
bottom
cover
and
tighten
the
bolts
to
a
torque
reading
of
1
I
1
7
kgm
8
0
12
31b
ft
THREE
SPEED
GEARBOX
Installation
Installation
of
the
gearbox
is
a
reversal
of
the
removal
procedure
noting
the
following
points
Fit
the
gearbox
with
I
7
litre
0
45
US
gall
0
37
Imp
gall
of
MP
90
gear
oil
Adjust
the
clutch
slave
cylinder
push
rod
as
described
in
the
section
CLUTCH
to
provide
a
free
play
of
2
2
mm
0
087in
at
the
withdrawal
lever
55
Page 58 of 171
FOUR
SPEED
GEARBOX
Removal
and
Installation
The
removal
and
installation
procedures
for
the
four
speed
gearbox
are
similar
to
those
previously
described
for
the
three
speed
gearbox
However
the
floor
mounted
gear
lever
must
be
removed
from
the
controllevef
bracket
in
addition
to
the
operations
already
detailed
FOUR
SPEED
GEARBOX
Dismantling
Drain
the
oil
from
the
gearbox
Remove
the
dust
coveT
and
release
the
spring
securing
the
clutch
withdrawal
lever
Remove
the
withdrawal
lever
and
release
bearing
from
the
clutch
housing
as
described
in
the
section
CLurCH
Remove
the
clevis
pin
securing
the
striking
rod
to
the
control
lever
Remove
the
speedometer
drive
pinion
assembly
and
with
draw
the
rear
extension
housing
Disengage
the
striking
rod
from
the
selector
rod
gates
Remove
the
gearbox
covers
See
Figs
F
26
and
F
27
Unscrew
the
three
detent
ball
plugs
and
remove
the
spriags
and
detent
balls
Drive
out
the
pins
securing
the
selector
forks
to
the
rods
and
withdraw
the
forks
and
rods
Lock
the
main
shaft
by
moving
the
first
second
and
third
fourth
coupling
sleeve
into
gear
at
the
same
time
and
release
the
ffiainshaft
nut
Remove
the
countershaft
and
the
gear
cluster
together
with
the
two
needle
roller
bearings
and
spacers
Remove
the
snap
ring
holding
the
revep
e
idler
gear
and
withdraw
the
reverse
idler
gears
and
shaft
Fig
F
28
Take
off
the
bolts
securing
the
mainshaft
bearing
retainer
to
the
gearbox
case
Fig
F
29
Withdraw
the
mainshaft
assembly
Fig
F
30
and
the
main
drive
shaft
The
mainshaft
can
be
dismantled
in
the
following
manner
Release
the
third
fourth
synchronizer
unit
snap
ring
and
with
draw
the
hub
complete
with
coupling
sleeve
Remove
the
third
speed
gearwheel
and
the
needle
roller
bearing
from
the
main
shaft
Take
off
the
mainshaft
nut
and
locking
plate
Remove
the
speedometer
drive
gear
with
the
retaining
ball
Withdraw
the
mainshaft
reverse
gear
and
the
hub
Press
off
the
mainshaft
bearing
complete
with
the
bearing
retainer
Remove
the
thrust
washer
and
the
first
speed
gear
together
with
the
needle
roller
bearing
taking
care
not
to
lose
the
small
baU
used
to
locate
the
thrust
washer
Slide
off
the
first
speed
gearwheel
bush
Withdraw
the
first
second
synchronizer
and
hub
Remove
the
second
speed
gearwheel
and
needle
roller
bearing
FOUR
SPEED
GEARBOX
Installation
Refer
to
the
instructions
given
for
the
three
speed
gearbox
and
to
Technical
Data
for
the
specifications
applicable
to
the
different
gearboxes
FOUR
SPEED
GEARBOX
Assembly
Assembly
of
the
gearbox
is
similar
to
the
procedures
previously
described
for
the
three
speed
gearbox
with
the
following
exceptions
When
assembling
the
main
drive
gear
bearing
on
the
shaft
insiall
the
spacer
and
select
a
new
snap
ring
to
eliminate
all
end
float
between
bearing
and
snap
ring
Snap
rings
are
available
in
five
thicknesses
from
1
52
1
77mm
0
06
0
07
in
The
assembly
procedures
for
the
Warner
type
synchronizers
are
similar
to
the
instructions
previously
described
for
the
three
speed
gearbox
Refer
to
THREE
SPEED
GEARBOX
Assembly
for
further
details
To
assemble
the
Servo
F4C63
type
synchronizers
proceed
as
follows
Place
the
gear
on
a
clean
flat
surface
and
install
the
synchronizer
ring
on
the
inner
side
of
theclutch
gear
Fit
the
thrust
block
into
place
as
shown
in
Fig
F
31
Place
the
anchor
block
and
brake
band
into
position
and
fit
the
circlip
into
the
groove
in
the
gear
to
secure
the
synchromesh
assembly
When
assembling
the
mainshaft
select
a
snap
ring
which
will
give
an
end
float
between
0
05
0
15
mm
0
002
0
006in
to
the
third
speed
gearwheel
Snap
rings
are
available
in
five
sizes
from
1
40
mm
0
0551
in
to
1
60
mm
0
0630
in
thick
ness
Tighten
the
locknut
at
the
rear
of
the
mainshaft
to
a
torque
reading
of
7
1
kgm
51
87Ib
ft
Assemble
the
reverse
idler
gear
as
shown
in
Fig
F
32
The
reverse
idler
driven
gear
3
should
be
placed
on
the
end
of
the
reverse
shaft
1
with
the
longest
spline
and
retained
with
a
suitable
snap
ring
2
Install
the
reverse
shaft
and
gear
assembly
into
the
gearbox
case
from
the
rear
with
the
thrust
washer
4
between
the
gear
and
the
case
Fit
the
thrust
washer
5
and
idler
gear
6
18
teeth
and
secure
with
a
suitable
snap
ring
2
The
end
float
of
the
gear
should
be
checked
and
adjusted
to
0
1
O
3mm
0
004
0
012
in
by
selecting
a
suitable
snap
ring
2
Five
thicknesses
of
snap
rings
are
available
from
I
lmm
0
043in
to
1
5mm
0
06in
See
Technical
Data
for
F4W63
and
F4C63
gearboxes
Adjust
the
counter
gear
end
float
to
0
05
0
15
mm
0
002
0
006in
by
selecting
a
thrust
washer
of
the
required
thickness
Thrust
washers
are
available
in
five
thicknesses
from
2
40
2
60
mm
0
094
0
102
in
When
assembling
the
selector
mechanisms
Fig
F
33
fit
the
first
second
selector
forks
I
and
the
third
fourth
selector
forks
2
onto
the
coupling
sleeves
and
insert
the
first
second
fork
rod
3
Fit
an
interlock
plunger
4
and
the
third
fourth
speed
selector
rod
5
Do
not
forget
the
interlock
pin
7
A
section
through
the
selector
and
interlock
mechanism
is
given
in
Fig
F
34
Install
an
interlock
plunger
6
and
assemble
the
reverse
selector
fork
8
and
fork
rod
9
Secure
the
selector
forks
to
the
rods
with
the
retaining
pins
10
Place
a
check
ball
and
spring
into
each
of
the
holes
and
screw
the
plug
down
to
a
torque
reading
of
1
7
2
1
Jegm
12
3
15
2
Ib
ft
after
coating
the
threads
with
sealing
com
pound
Install
the
rear
extension
housing
engaging
the
striking
rod
with
the
fork
rod
gates
and
tighten
the
housing
bolts
to
a
torque
reading
of
1
6
2
5
kgm
12
18Ib
ft
Fit
the
front
and
bottom
covers
and
tighten
the
bolts
to
a
torque
reading
of
1
1
1
8
kgm
8
13Ib
ft
57