differential DATSUN 610 1969 User Guide
[x] Cancel search | Manufacturer: DATSUN, Model Year: 1969, Model line: 610, Model: DATSUN 610 1969Pages: 171, PDF Size: 10.63 MB
Page 72 of 171
greased
Install
the
flange
washer
and
pinion
nut
Tighten
the
nut
to
a
torque
reading
of
14
17
kgm
101
130
Ib
fL
If
the
cotter
pin
hole
is
not
correctly
aligned
a
suitable
washer
should
be
fitted
Do
NOT
adjust
by
overtightening
the
pinion
nul
Van
Lubricate
the
front
bearing
with
oil
and
place
it
in
the
carrier
Grease
the
lip
of
the
oil
seal
and
install
it
to
the
final
drive
housing
Install
the
drive
pinion
the
new
collapsible
spacer
and
the
drive
flange
Fit
the
drive
pinion
nut
and
tighten
temporarily
until
all
slackness
is
eliminated
from
the
front
and
rear
of
the
drive
pinion
NOTE
Ensure
that
oil
and
grease
have
been
completely
removed
from
the
threads
of
the
pinion
gear
the
pinion
nut
and
the
washer
Tighten
the
pinion
nut
and
check
the
preload
with
a
preload
gauge
As
the
nut
is
tightened
to
the
specified
torque
reading
of
13
20
kgm
94
0
144
6Ib
fL
the
preload
must
be
measured
at
every
five
to
ten
degrees
turn
of
the
pinion
nut
As
the
pinion
nut
is
tightened
the
stepped
portion
of
the
spacer
is
deformed
See
Fig
G
29
J
and
the
length
between
the
bearings
adjusted
The
drive
pinion
bearing
preload
with
oil
seal
and
new
bearing
is
7
15
kg
cm
6
1
13
0
lb
in
Turn
the
drive
pinion
to
settle
the
bearing
and
re
check
the
preload
and
tightening
torque
If
the
preload
rate
is
exceeded
it
will
be
necessry
to
fit
a
new
spacer
the
old
spa
cr
cannot
be
reused
and
the
preload
must
not
be
adjusted
by
loosening
the
pinion
nul
Side
bearing
pre
load
adjusting
If
the
original
side
bearings
arc
to
be
used
the
shims
must
be
of
the
same
thickness
as
those
previously
fitted
To
select
shims
for
new
side
bearings
proceed
as
follows
The
standard
width
of
the
side
bearings
is
given
in
Technical
Data
This
width
must
be
measured
before
attempting
to
calculate
the
required
thickness
of
the
adjusting
shims
Place
a
weight
of
approximately
5
kg
5
5
lb
and
of
predetermined
height
onto
the
side
bearing
as
shown
in
Fig
G
30
Mcasure
the
width
of
the
bearing
with
a
dial
gauge
as
illustrated
turning
the
bearing
two
or
three
times
to
gain
an
accurate
meaSurement
Dimensional
variations
from
the
standard
measurements
are
marked
on
the
left
side
bearing
housing
of
the
gear
carrier
on
the
right
side
bearing
housing
of
the
gear
carrier
and
on
the
differential
case
These
variations
are
marked
in
units
of
l
lOOmm
and
are
used
for
the
f
rmula
to
calculate
t1H
thickness
of
the
adjusting
shims
in
the
following
manner
Where
TI
equals
the
left
side
bearing
shim
crownwhecl
side
T2
equals
the
right
side
bearing
shim
pinion
gear
A
equals
the
figure
marked
on
the
left
side
bearing
housing
B
equals
the
figure
marked
on
the
right
side
bearing
housing
C
and
0
equals
the
figure
marked
on
the
differential
case
and
E
and
F
is
the
difference
bctween
the
width
of
the
side
bearings
and
the
standard
bearing
width
H
the
figure
marked
on
the
crownwhcel
Fig
G
31
The
following
formulae
can
now
be
used
to
deter
mine
the
required
shim
thicknessl
s
for
both
side
bearings
I
OOcc
Estate
car
Left
side
bearing
TI
A
C
D
H
x
0
01
0
100
E
Right
side
bearingT2
B
D
H
x
0
01
0
090
F
I800cc
Van
Left
side
bearingTI
A
C
D
H
xO
OI
0
175
E
Right
side
bcaringT2
8
D
H
x
0
01
0
150
F
As
an
example
where
A
1
B
C
2
D
3
E
0
02mm
H
I
The
formula
for
the
left
side
bearing
is
T
I
I
1
3
1
x
0
01
0
175
0
02
0
205mm
1400
and
1600cc
Estate
car
The
required
thickness
of
shim
can
be
found
using
the
following
formula
in
a
similar
manner
to
that
previously
described
for
the
1800cc
models
Left
side
bearing
T
I
A
C
D
E
7
Right
side
bearing
T2
B
D
F
6
Shims
are
available
in
five
thicknesses
of
0
05
0
07
0
10
0
20
and
0
50
mm
0
002
0
0028
0
0039
0
0079
and
0
0197
in
Fit
the
selected
side
bearing
adjusting
shims
on
the
differential
cage
and
press
in
the
side
bearing
inner
races
using
a
suitable
ddfL
nstall
the
differential
cage
into
the
carrier
and
fit
the
bearing
caps
Ensure
that
the
marks
on
the
caps
coincide
with
the
marks
on
the
carrier
Tighten
the
bearing
cap
bolts
to
the
specified
torque
reading
See
Tighte
ing
torques
Measure
the
dimension
between
the
outer
edges
of
the
left
and
right
hand
caps
using
a
large
micrometer
as
shown
in
Fig
G
32
This
dimension
should
be
198
40
198
55
mm
7
8110
7
8169
in
for
the
1400
and
1600
ce
Estate
cars
and
1800
ce
Van
and
173
23
17329
mm
6
8201
6
8244
inl
for
the
1800
cc
Estate
cars
Measure
the
backlash
of
the
crownwhcel
and
pinion
with
a
dial
gauge
The
backlash
must
be
adjusted
to
0
13
0
18
mm
0
005
0
007
in
on
the
1800
CC
models
and
to
0
15
0
20mm
0
006
0
008
in
on
the
1400
and
1600
cc
models
Adjustment
can
be
carried
out
by
moving
side
bearing
shims
from
the
right
hand
side
to
the
left
hand
side
if
the
backlash
is
too
high
or
vice
verca
if
the
backlash
is
too
low
Tighten
the
bearing
cap
bolts
to
the
specified
torque
reading
after
adjusting
Ensure
that
the
run
out
at
the
rear
of
the
crown
wheel
does
not
exceed
O
05mm
0
002
in
Finally
heck
the
tooth
contact
pattern
as
described
below
TOOTH
CONTACT
PATTERN
Checking
The
final
check
on
reassembly
is
an
inspection
of
the
tooth
contact
markings
of
the
crownwhed
and
pinion
Apply
a
coal
of
red
lead
in
oil
to
4
or
5
teeth
of
the
crown
wheel
Turn
the
crownwheel
backwards
and
forwards
several
times
to
obtain
a
clear
impression
of
the
contact
areas
Heel
contact
Fig
G
3
1
71
Page 73 of 171
inter
Q1Ju@
j1l
J
Ikli
l1t
J
T
II
ill
4
LU
I
Il
lJr
I
I
II
Ii
wrllJ
I
l
Y
1iJ
u
r
1
o
77
1
I
l
0
L
J
Dm
hJtl
lllL
l
m
h
t
l
u
c
N
I
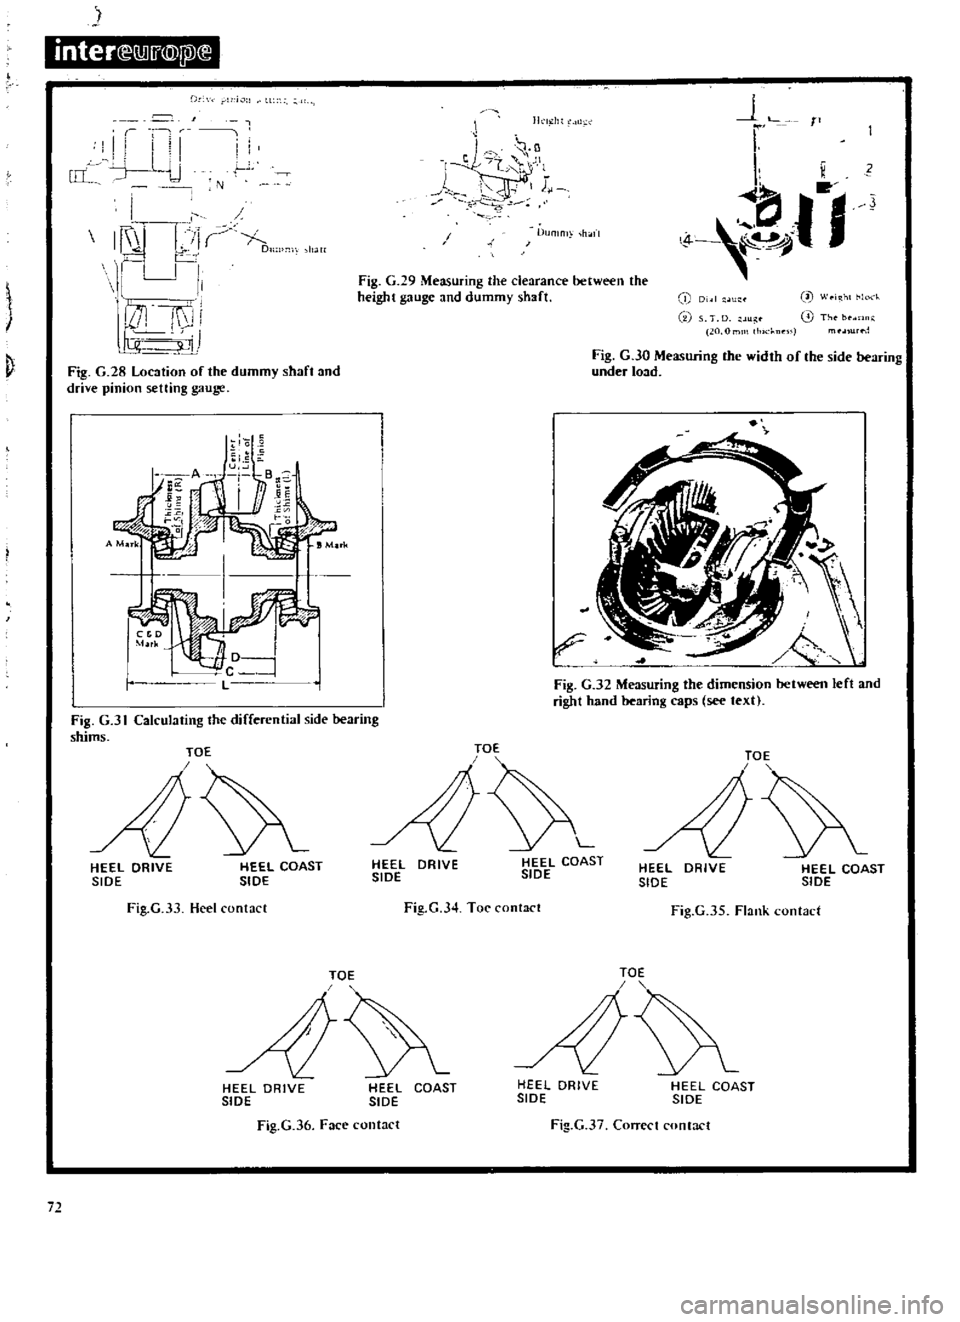
Fig
G
29
Measuring
the
clearance
between
the
height
gauge
and
dummy
shaft
3
i
T
O
O
1
L
Th
t
nn
mu
U
J
Fig
G
28
Location
of
the
dummy
shaft
and
drive
pinion
setting
gauge
Fig
G
JO
Measuring
the
width
of
the
side
bearing
under
load
j
Fig
G
32
Measuring
the
dimension
between
left
and
right
hand
bearing
caps
see
text
Fig
G
3
Calculating
the
differential
side
bearing
shims
Af
A
A
HEEL
DRIVE
HEEL
COAST
HEEL
DRIVE
HEEL
COAST
HEEL
DRIVE
HEEL
COAST
SIDE
SIDE
SlOE
SIDE
SIDE
SIDE
Fig
G
33
Heel
contact
Fig
G
34
Toe
contact
Fig
G
35
Flank
contact
TOE
TOE
A
A
HEEL
DRIVE
HEEL
COAST
HEEL
DRIVE
HEEL
COAST
SIDE
SIDE
SIDE
SIDE
Fig
G
36
Face
contact
Fig
G
37
Correct
contact
72
Page 74 of 171
increase
the
thickness
of
the
drive
pinion
adjusting
shim
and
washer
to
move
the
drive
pinion
closer
to
the
crown
wheel
A
correct
contact
pattern
showing
the
impressioll
ithill
a
range
of
2
3
to
4
of
the
distance
bct
l
en
t
h
tip
lllU
till
root
of
the
teeth
under
no
load
Toe
contact
Fig
G
34
Rcdu
e
the
thickness
of
the
drive
pinion
adjusting
shim
and
washer
to
move
the
drive
pinion
away
from
the
crown
wheel
It
will
be
neCL
ssary
to
rc
check
the
backlash
bl
tW
Cl1
drivt
pinion
and
crown
wheel
if
the
adjusting
shim
1l1d
washer
arc
changed
Flank
contact
Fig
G
35
DIFFERENTIAL
Installation
This
pattern
should
be
adjusted
in
a
similar
manner
to
toe
contact
Face
contact
Fig
G
36
Installation
of
the
differential
carrier
is
J
reversal
of
the
removal
procedure
Reference
should
be
made
to
the
section
REAR
AXLE
AND
REAR
SUSPENSION
for
a
dl
saipIion
of
the
operations
required
to
replace
the
axle
shafts
This
pattern
should
be
adjusted
in
a
similar
manner
to
heel
contact
Correct
contact
Fig
G
37
Technical
Data
PROPELLER
SHAFT
Axial
play
of
spider
journal
0800
Axial
play
of
spider
journal
1400
and
1600
cc
0
Q2
mm
0
0008
in
0
08
mm
0
003
in
Max
run
out
of
shaft
Wear
limit
of
spider
diameter
0
6
mm
0
024
in
0
15
mm
0
006
in
Permissible
dynamic
unbalance
Two
joint
shaft
Three
joint
sh
lft
15
gr
em
0
208
in
oz
at
4000
rpm
35
gr
cm
0
5
in
oz
at
5800
rpm
FINAL
GEAR
RATIOS
1800cc
Saloon
6101
ISOOcc
Estate
Car
610
1800cc
Van
610
1600cl
SJloon
610
1400
and
1600cc
510
4
Door
Saloon
RHO
4
Door
Saloon
LHD
De
Lu
e
4
Door
Saloon
RHO
SSS
4
Door
Saloon
RHO
Door
Saloon
LHO
3700
3
889
4
375
3
900
4375
4111
3
889
3
900
3
700
DRIVE
PINION
InitiJI
turning
torque
without
oil
sea
Saloon
modds
Estate
CJr
models
7
10
kg
em
0
506
0
723Ib
ft
10
13
kg
em
0
723
0
940Ib
ft
Thickness
of
pinion
height
adjusting
washers
1400
and
1600
CC
Saloon
1400
and
1600cc
510
Thickncss
of
pinion
height
adjusting
washers
0800
cc
Saloon
0
4
mm
0
078
0
086
0
094
in
3
09
3
66mm
0
1
17
0
1441
in
in
increments
of
0
03
mm
0
00
I
in
Thickness
of
pinion
height
adjusting
washers
0800
n
Estate
car
0
050
0
070
0
100
0
200
0
500mm
0
0020
0
0028
0
0039
0
0079
0
0197
in
Thickness
of
pinion
height
adjusting
washers
1800
CL
Van
37
97111m
0
0933
0
I
69
in
in
increments
of
0
03
mm
0
00
I
in
73
Page 75 of 171
J
Thickness
of
pinion
height
adjusting
shims
1400
and
160Occ
Saloon
Thickness
of
pinion
height
adjusting
shims
1400
and
1600
cc
Estate
Length
of
drive
pinion
bearing
adjusting
washers
Saloon
Estate
Length
of
drive
pinion
bearing
aqjusting
screws
Saloon
y
Length
of
drive
pinion
bearing
adjusting
spacers
1400
and
1600
cc
Estate
Length
of
drive
pinion
bearing
alljusting
spacer
1800cc
Estate
1800
cc
Van
Backlash
between
gears
Saloon
1400
1600
cc
Estate
1800
cc
Estate
Van
Run
out
at
rear
of
crown
wheel
1800
cc
1400
1600cc
Estate
1400
1600cc
Saloon
Thickness
of
side
gear
thrust
washers
Saloon
Estate
Qearance
between
side
gear
and
washer
Saloon
aearance
between
side
gear
and
washer
Estate
74
L09
1
27
mm
0
0429
0
0500
in
in
increments
of
0
02
mm
0
0008
in
0
75
0
50
0
25
0
125
mm
0
0295
0
0197
0
0098
0
0049
in
2
31
2
59mm
0
0909
0
1020
in
in
increments
of
0
02
mm
0
0008
in
56
20
57
20
mm
2
213
2
252
in
in
increments
of
0
02
mm
0
0008
in
59
25
59
50
597Omm
2
338
2
343
2
358
in
48
4
48
6
48
8
49
0
0
9055
1
9134
1
9213
1
9291
in
Non
adjustable
collapsible
SP3
O
L
CROWNWHEEL
0
10
0
20
mm
0
004
0
008
in
0
15
0
20
mm
0
006
0
008
in
0
13
0
18
mm
0
005
0
007
in
Less
than
0
05
mm
0
002
in
Less
than
0
08
mm
0
003
in
DIFFERENTIAL
GEARS
0
775
0
825
0
875
mm
0
0305
0
0325
0
0344
in
0
78
0
83
0
88
1
03
1
23
mm
0
10
0
20
mm
0
004
0
008
in
0
05
0
20
mm
0
002
0
008
in
Page 76 of 171
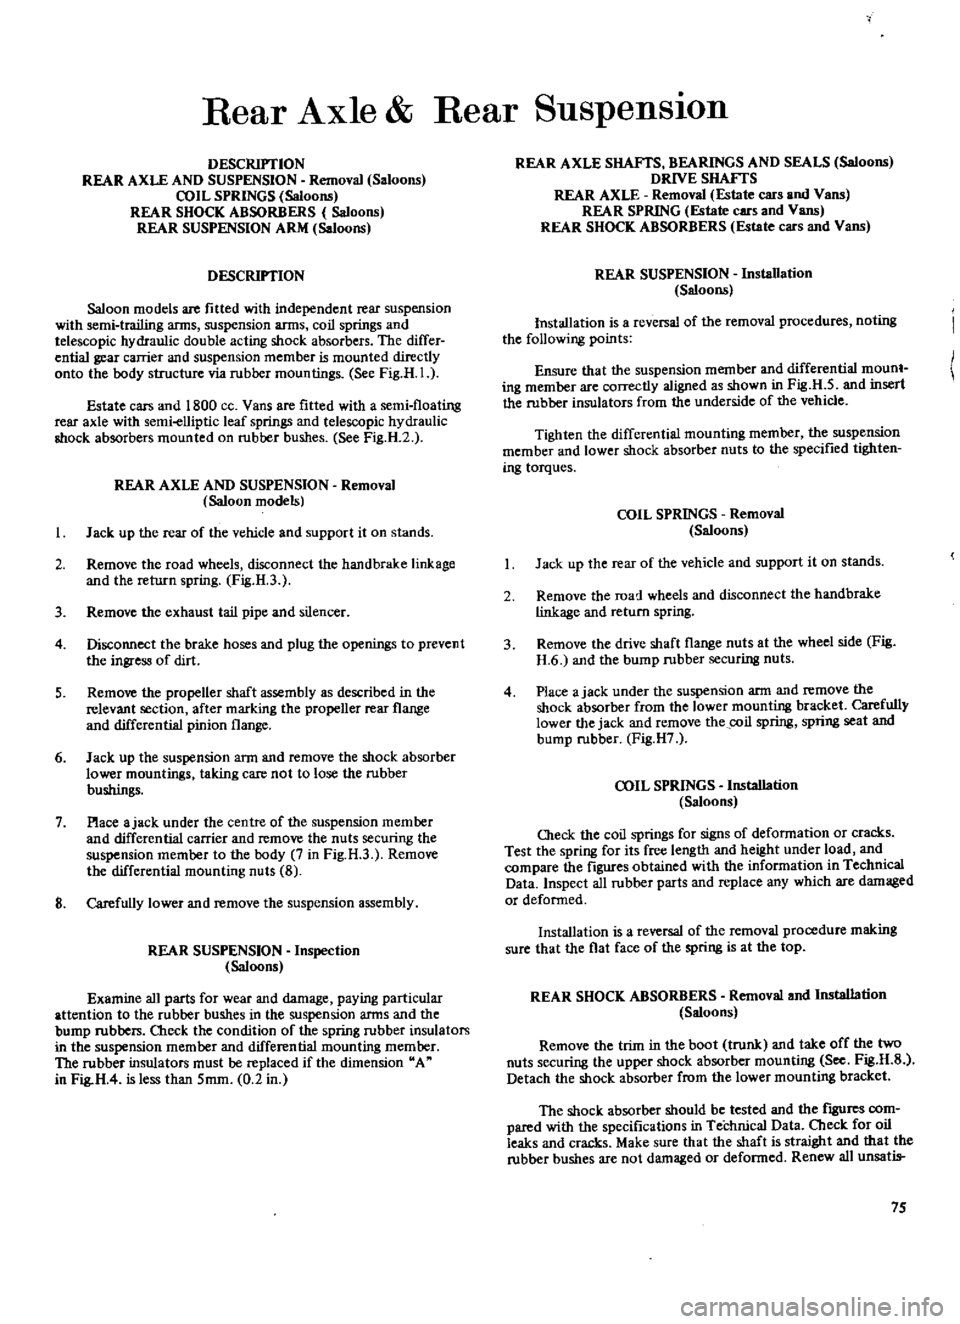
Rear
Axle
Rear
SuspensIon
DESCRIPTION
REAR
AXLE
AND
SUSPENSION
Removal
Saloons
COIL
SPRINGS
Saloons
REAR
SHOCK
ABSORBERS
Saloons
REAR
SUSPENSION
ARM
Saloons
DESCRIPTION
Saloon
models
are
fitted
with
independent
rear
suspension
with
semi
trailing
arms
suspension
arms
coil
springs
and
telescopic
hydraulic
double
acting
shock
absorbers
The
differ
ential
gear
carrier
and
suspension
member
is
mounted
directly
onto
the
body
structure
via
rubber
mountings
See
Fig
H
I
Estate
cars
and
1800
ce
Vans
are
fitted
with
a
semi
floating
rear
axle
with
semi
elliptic
leaf
springs
and
telescopic
hydraulic
shock
absorbers
mounted
on
rubrer
bushes
See
Fig
H
2
REAR
AXLE
AND
SUSPENSION
Removal
Saloon
models
I
Jack
up
the
rear
of
the
vehicle
and
support
it
on
stands
2
Remove
the
road
wheels
disconnect
the
hand
brake
linkage
and
the
return
spring
Fig
H
3
3
Remove
the
exhaust
tail
pipe
and
silencer
4
Disconnect
the
brake
hoses
and
plug
the
openings
to
prevent
the
ingress
of
dirt
5
Remove
the
propeller
shaft
assembly
as
described
in
the
relevant
section
after
marking
the
propeller
rear
flange
and
differential
pinion
flange
6
Jack
up
the
suspension
ann
and
remove
the
shock
absorber
lower
mountings
taking
care
not
to
lose
the
rubber
bushings
7
Place
ajack
under
the
centre
of
the
suspension
member
and
differential
carrier
and
remove
the
nuts
securing
the
suspension
member
to
the
body
7
in
Fig
H
3
Remove
the
differential
mounting
nuts
8
8
Carefully
lower
and
remove
the
suspension
assembly
REAR
SUSPENSION
Inspection
Saloons
Examine
all
parts
for
wear
and
damage
paying
particular
attention
to
the
rubber
bushes
in
the
suspension
arms
and
the
bump
rubbers
Check
the
condition
of
the
spring
rubber
insulators
in
the
suspension
member
and
differential
mounting
memrer
The
rubber
insulators
must
be
replaced
if
the
dimension
A
in
Fig
H
4
is
less
than
5mm
0
2
in
REAR
AXLE
SHAFTS
BEARINGS
AND
SEALS
Saloons
DRNE
SHAFTS
REAR
AXLE
Removal
Estate
cars
and
Vans
REAR
SPRING
Estate
cars
and
Vans
REAR
SHOCK
ABSORBERS
Estate
cars
and
Vans
REAR
SUSPENSION
Installation
Saloons
Installation
is
a
reversal
of
the
removal
procedures
noting
the
following
points
Ensure
that
the
suspension
member
and
differential
mount
ing
member
are
correctly
aligned
as
shown
in
Fig
U
5
and
insert
the
rubber
insulators
from
the
underside
of
the
vehicle
Tighten
the
differential
mounting
member
the
suspension
member
and
lower
shock
absorber
nuts
to
the
specified
tighten
ing
torques
COIL
SPRINGS
Removal
Saloons
Jack
up
the
rear
of
the
vehicle
and
support
it
on
stands
2
Remove
the
road
wheels
and
disconnect
the
handbrake
linkage
and
return
spring
3
Remove
the
drive
shaft
flange
nuts
at
the
wheel
side
Fig
H
6
and
the
bump
rubber
securing
nuts
4
Place
ajack
under
the
suspension
ann
and
remove
the
shock
absorber
from
the
lower
mounting
bracket
Carefully
lower
the
jack
and
remove
the
coil
spring
spring
scat
and
bump
rubber
Fig
H7
COIL
SPRINGS
Installation
Saloons
Oleck
the
coil
springs
for
signs
of
deformation
or
cracks
Test
the
spring
for
its
free
length
and
height
under
load
and
compare
the
figures
obtained
with
the
information
in
Technical
Data
Inspect
all
rubber
parts
and
replace
any
which
are
damaged
or
deformed
Installation
is
a
reversal
of
the
removal
procedure
making
sure
that
the
flat
face
of
the
spring
is
at
the
top
REAR
SHOCK
ABSORBERS
Removal
and
Installation
Saloons
Remove
the
trim
in
the
boot
trunk
and
take
off
the
two
nuts
securing
the
upper
shock
absorber
mounting
See
Fig
H
S
Detach
the
shock
absorber
from
the
lower
mounting
bracket
The
shock
absorber
should
be
tested
and
the
fIgUres
com
pared
with
the
specifications
in
Technical
Data
Cbeck
for
oil
leaks
and
cracks
Make
sure
that
the
shaft
is
straight
and
that
the
rubber
bushes
are
not
damaged
or
defonned
Renew
all
unsatis
75
Page 80 of 171
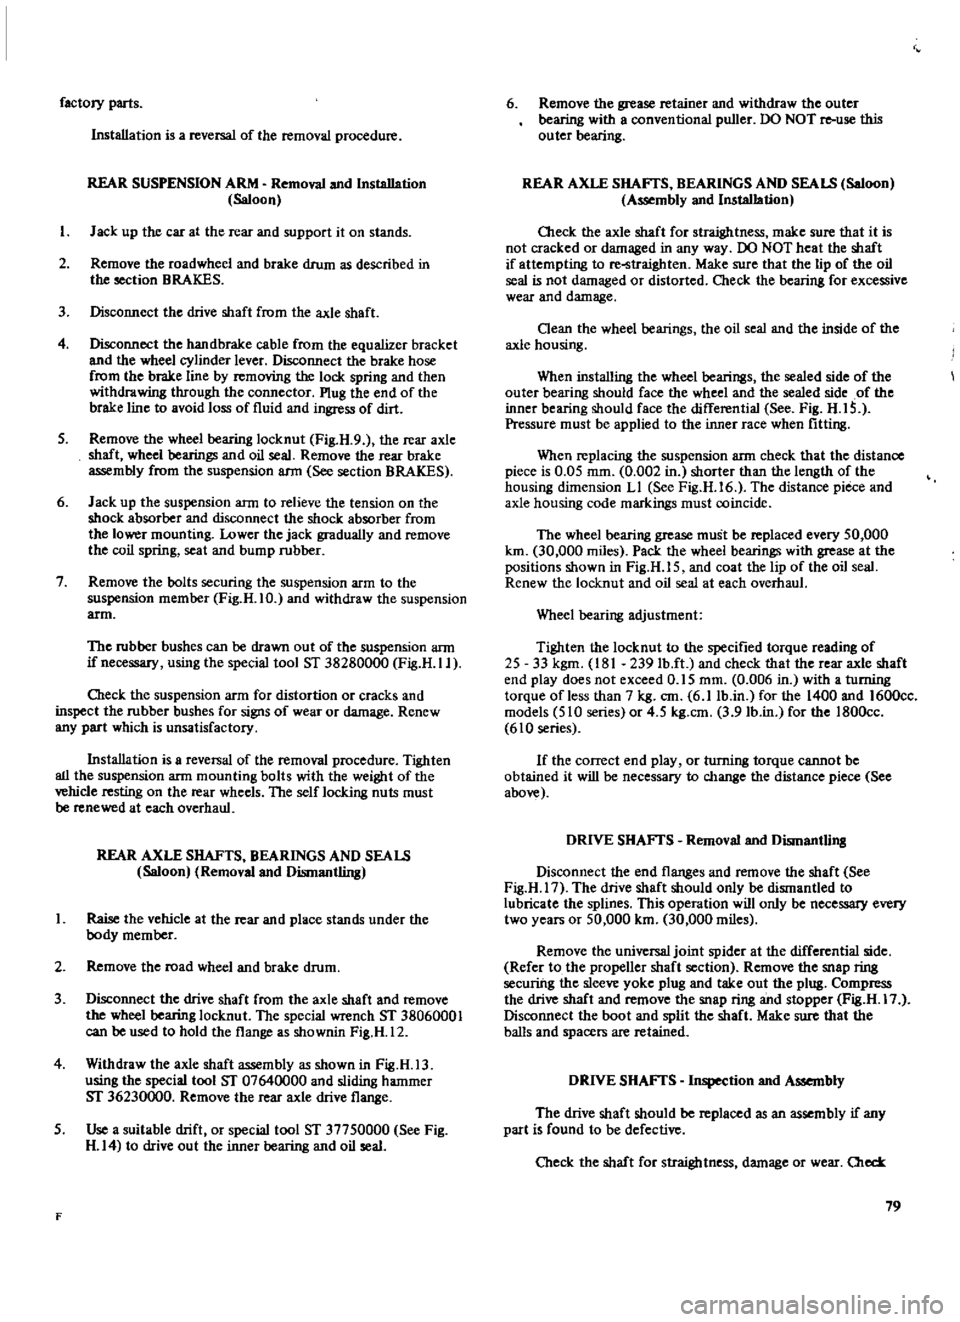
factory
parts
Installation
is
a
reversal
of
the
removal
procedure
REAR
SUSPENSION
ARM
Removal
and
Installation
Saloon
I
J
ad
up
the
car
at
the
rear
and
support
it
on
stands
2
Remove
the
road
wheel
and
brake
drum
as
described
in
the
section
BRAKES
3
Disconnect
the
drive
shaft
from
the
axle
shaft
4
Disconnect
the
handbrake
cable
from
the
equalizer
bracket
and
the
wheel
cylinder
lever
Disconnect
the
brake
hose
from
the
brake
line
by
removing
the
lock
spring
and
then
withdrawing
through
the
connector
Plug
the
end
of
the
brake
line
to
avoid
loss
of
fluid
and
ingress
of
dirt
5
Remove
the
wheel
bearing
locknut
Fig
H
9
the
rear
axle
shaft
wheel
bearings
and
oil
seal
Remove
the
rear
brake
assembly
from
the
suspension
ann
See
section
BRAKES
6
Jack
up
the
suspension
arm
to
relieve
the
tension
on
the
shock
absorber
and
disconnect
the
shock
absorber
from
the
lower
mounting
Lower
the
jack
gradually
and
remove
the
coil
spring
seat
and
bump
rubber
7
Remove
the
bolts
securing
the
suspension
arm
to
the
suspension
member
Fig
H
IO
and
withdraw
the
suspension
arm
The
rubber
bushes
can
be
drawn
out
of
the
suspension
arm
if
necessary
using
the
special
tool
ST
38280000
Fig
H
Il
O1eck
the
suspension
arm
for
distortion
or
cracks
and
inspect
the
rubber
bushes
for
signs
of
wear
or
damage
Renew
any
part
which
is
unsatisfactory
Installation
is
a
reversal
of
the
removal
procedure
Tighten
all
the
suspension
arm
mounting
bolts
with
the
weight
of
the
vehicle
resting
on
the
rear
wheels
The
self
locking
nuts
must
be
renewed
at
each
overhaul
REAR
AXLE
SHAFTS
BEARINGS
AND
SEALS
Saloon
Removal
and
Dismantling
I
Raise
the
vehicle
at
the
rear
and
place
stands
under
the
body
member
2
Remove
the
road
wheel
and
brake
drum
3
Disconnect
the
drive
shaft
from
the
axle
shaft
and
remove
the
wheel
bearing
locknut
The
special
wrench
ST
38060001
can
be
used
to
hold
the
flange
as
shownin
Fig
H
12
4
Withdraw
the
axle
shaft
assembly
as
shown
in
Fig
H
13
using
the
special
tool
ST
07640000
and
sliding
hammer
ST
36230000
Remove
the
rear
axle
drive
flange
5
Use
a
suitable
drift
or
special
tool
ST
37750000
See
Fig
H
14
to
drive
out
the
inner
bearing
and
oil
seal
F
6
Remove
the
grease
retainer
and
withdraw
the
outer
bearing
with
a
conventional
puller
DO
NOT
re
use
this
outer
bearing
REAR
AXLE
SHAFTS
BEARINGS
AND
SEALS
Saloon
Assembly
and
Installation
Oleck
the
axle
shaft
for
straightness
make
sure
that
it
is
not
cracked
or
damaged
in
any
way
00
NOT
heat
the
shaft
if
attempting
to
re
straighten
Make
sure
that
the
lip
of
the
oil
seal
is
not
damaged
or
distorted
Check
the
bearing
for
excessive
wear
and
damage
Oean
the
wheel
bearings
the
oil
seal
and
the
inside
of
the
axle
housing
When
installing
the
wheel
bearings
the
sealed
side
of
the
outer
bearing
should
face
the
wheel
and
the
sealed
side
of
the
inner
bearing
should
face
the
differential
See
Fig
H
IS
Pressure
must
be
applied
to
the
inner
race
when
fitting
When
replacing
the
suspension
arm
check
that
the
distance
piece
is
0
05
mm
0
002
in
shorter
than
the
length
of
the
housing
dimension
LI
See
Fig
H
16
The
distance
piece
and
axle
housing
code
markings
must
coincide
The
wheel
bearing
grease
must
be
replaced
every
50
000
km
30
000
miles
Pack
the
wheel
bearings
with
grease
at
the
positions
shown
in
Fig
H
IS
and
coat
the
lip
of
the
oil
seal
Renew
the
locknut
and
oil
seal
at
each
overhaul
Wheel
bearing
adjustment
Tighten
the
locknut
to
the
specified
torque
reading
of
25
33
kgm
181
239
lb
ft
and
check
that
the
rear
axle
shaft
end
play
does
not
exceed
0
15
mm
0
006
in
with
a
turning
torque
of
less
than
7
kg
em
6
11b
in
for
the
1400
and
1600cc
models
510
series
or
4
5
kg
em
3
91b
in
for
the
1800cc
610
series
If
the
correct
end
play
or
turning
torque
cannot
be
obtained
it
will
be
necessary
to
change
the
distance
piece
See
above
DRIVE
SHAFTS
Removal
and
Dismantlill8
Disconnect
the
end
flanges
and
remove
the
shaft
See
Fig
H
17
The
drive
shaft
should
only
be
dismantled
to
lubricate
the
splines
This
operation
will
only
be
necessary
every
two
years
or
50
000
km
30
000
miles
Remove
the
universal
joint
spider
at
the
differential
side
Refer
to
the
propeller
shaft
section
Remove
the
snap
ring
securiilg
the
sleeve
yoke
plug
and
take
out
the
plug
Compress
the
drive
shaft
and
remove
the
snap
ring
and
stopper
Fig
H
17
Disconnect
the
boot
and
split
the
shaft
Make
sure
that
the
balls
and
spacers
are
retained
DRIVE
SHAFTS
Inspection
and
Assembly
The
drive
shaft
should
be
replaced
as
an
assembly
if
any
part
is
found
to
be
defective
Check
the
shaft
for
straightness
damage
or
wear
Old
79
Page 82 of 171
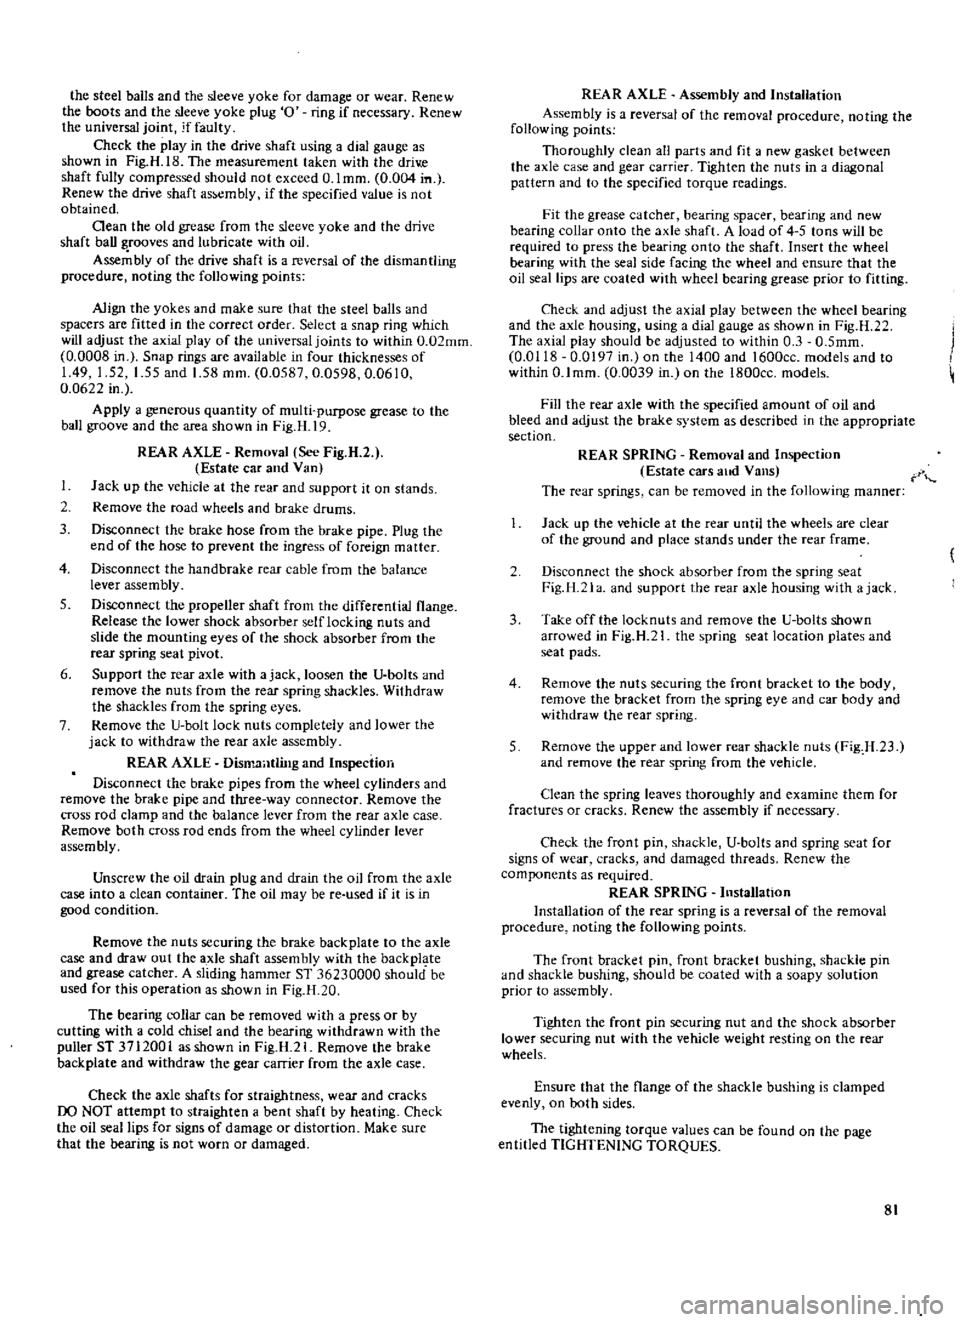
the
steel
balls
and
the
sleeve
yoke
for
damage
or
wear
Renew
the
boots
and
the
sleeve
yoke
plug
0
ring
if
necessary
Renew
the
universal
joint
jf
faulty
Check
the
play
in
the
drive
shaft
using
a
dial
gauge
as
shown
in
Fig
H
18
The
measurement
taken
with
the
dri
le
shaft
fully
compressed
should
not
exceed
O
lmm
0
004
in
Renew
the
drive
shaft
as
embly
if
the
specified
value
is
not
obtained
Oean
the
old
grease
from
the
sleeve
yoke
and
the
drive
shaft
ball
grooves
and
lubricate
with
oil
Asse
bly
of
the
drive
shaft
is
a
reversal
of
the
dismantling
procedure
noting
the
following
points
Align
the
yokes
and
make
sure
that
the
steel
balls
and
spacers
are
fitted
in
the
correct
order
Select
a
snap
ring
which
will
adjust
the
axial
play
of
the
universaIjoints
to
within
0
02mm
0
0008
in
Snap
rings
are
available
in
four
thicknesses
of
1
49
1
52
1
55
and
1
58
mm
0
0587
0
0598
0
0610
0
0622
in
Apply
a
generous
quantity
of
multi
purpose
grease
to
the
ball
groove
and
the
area
shown
in
Fig
H
19
REAR
AXLE
Removal
See
Fig
H
2
Estate
car
and
Van
Jack
up
the
vehicle
at
the
rear
and
support
it
on
stands
Remove
the
road
wheels
and
brake
drums
I
3
Disconnect
the
brake
hose
from
the
brake
pipe
Plug
the
end
of
the
hose
to
prevent
the
ingress
of
foreign
matter
4
Disconnect
the
handbrake
rear
cable
from
the
balance
lever
assembly
5
Disconnect
the
propeller
shaft
from
the
differential
flange
Release
the
lower
shock
absorber
self
locking
nuts
and
slide
the
mounting
eyes
of
the
shock
absorber
from
the
rear
spring
seat
pivot
6
Support
the
rear
axle
with
ajack
loosen
the
U
bolts
and
remove
the
nuts
from
the
rear
spring
shackles
Withdraw
the
shackles
from
the
spring
eyes
7
Remove
the
V
bolt
lock
nuts
completely
and
lower
the
jack
to
withdraw
the
rear
axle
assembly
REAR
AXLE
Dismailtling
and
Inspection
Disconnect
the
brake
pipes
from
the
wheel
cylinders
and
remove
the
brake
pipe
and
three
way
connector
Remove
the
cross
rod
clamp
and
the
balance
lever
from
the
rear
axle
case
Remove
both
cross
rod
ends
from
the
wheel
cylinder
lever
assembly
Unscrew
the
oil
drain
plug
and
drain
the
oil
from
the
axle
case
into
a
clean
container
The
oil
may
be
re
used
if
it
is
in
good
condition
Remove
the
nuts
securing
the
brake
backplate
to
the
axle
case
and
draw
out
the
axle
shaft
assembly
with
the
backpl
te
and
grease
catcher
A
sliding
hammer
ST
36230000
should
be
used
for
this
operation
as
shown
in
Fig
H
2Q
The
bearing
collar
can
be
removed
with
a
press
or
by
cutting
with
a
cold
chisel
and
the
bearing
withdrawn
with
the
puller
ST
3712001
as
shown
in
Fig
H
2t
Remove
the
brake
backplate
and
withdraw
the
gear
carrier
from
the
axle
case
Check
the
axle
shafts
for
straightness
wear
and
cracks
00
NOT
attempt
to
straighten
a
bent
shaft
by
heating
Check
the
oil
seal
lips
for
signs
of
damage
or
distortion
Make
sure
that
the
bearing
is
not
worn
or
damaged
REAR
AXLE
Assembly
and
Installation
Assembly
is
a
reversal
of
the
removal
procedure
noting
the
following
points
Thoroughly
clean
all
parts
and
fit
a
new
gasket
between
the
axle
case
and
gear
carrier
Tighten
the
nuts
in
a
diagonal
pattern
and
to
the
specified
torque
readings
Fit
the
grease
catcher
bearing
spacer
bearing
and
new
bearing
collar
onto
the
axle
shaft
A
load
of
4
5
tons
will
be
required
to
press
the
bearing
onto
the
shaft
Insert
the
wheel
bearing
with
the
seal
side
facing
the
wheel
and
ensure
that
the
oil
seal
lips
are
coated
with
wheel
bearing
grease
prior
to
fitting
Check
and
adjust
the
axial
play
between
the
wheel
bearing
and
the
axle
housing
using
a
dial
gauge
as
shown
in
Fig
H
22
The
axial
play
should
be
adjusted
to
within
0
3
0
5mm
0
0118
0
0197
in
on
the
1400
and
1600cc
models
and
to
within
O
lmm
0
0039
in
on
the
1800cc
models
Fill
the
rear
axle
with
the
specified
amount
of
oil
and
bleed
and
adjust
the
brake
system
as
described
in
the
appropriate
section
REAR
SPRING
Removal
and
Inspection
Estate
cars
aud
Vans
The
rear
springs
can
be
removed
in
the
following
manner
Jack
up
the
vehicle
at
the
rear
until
the
wheels
are
clear
of
the
ground
and
place
stands
under
the
rear
frame
Disconnect
the
shock
absorber
from
the
spring
seat
Fig
H
21a
and
support
the
rear
axle
housing
with
ajack
3
Take
off
the
locknuts
and
remove
the
U
bolts
shown
arrowed
in
Fig
H
2t
the
spring
seat
location
plates
and
seat
pads
4
Remove
the
nuts
securing
the
front
bracket
to
the
body
remove
the
bracket
from
the
spring
eye
and
car
body
and
withdraw
the
rear
spring
5
Remove
the
upper
and
lower
rear
shackle
nuts
Fig
H
23
and
remove
the
rear
spring
from
the
vehicle
Clean
the
spring
leaves
thoroughly
and
examine
them
for
fractures
or
cracks
Renew
the
assembly
if
necessary
Check
the
front
pin
shackle
U
boIts
and
spring
seat
for
signs
of
wear
cracks
and
damaged
threads
Renew
the
components
as
required
REAR
SPRING
Installation
Installation
of
the
rear
spring
is
a
reversal
of
the
removal
procedure
noting
the
following
points
The
front
bracket
pin
front
bracket
bushing
shackle
pin
and
shackle
bushing
should
be
coated
with
a
soapy
solution
prior
to
assembly
Tighten
the
front
pin
securing
nut
and
the
shock
absorber
lower
securing
nut
with
the
vehicle
weight
resting
on
the
rear
wheels
Ensure
that
the
flange
of
the
shackle
bushing
is
clamped
evenly
on
both
sides
The
tightening
torque
values
can
be
found
on
the
page
entitled
TIGHTENING
TORQUES
81
Page 130 of 171
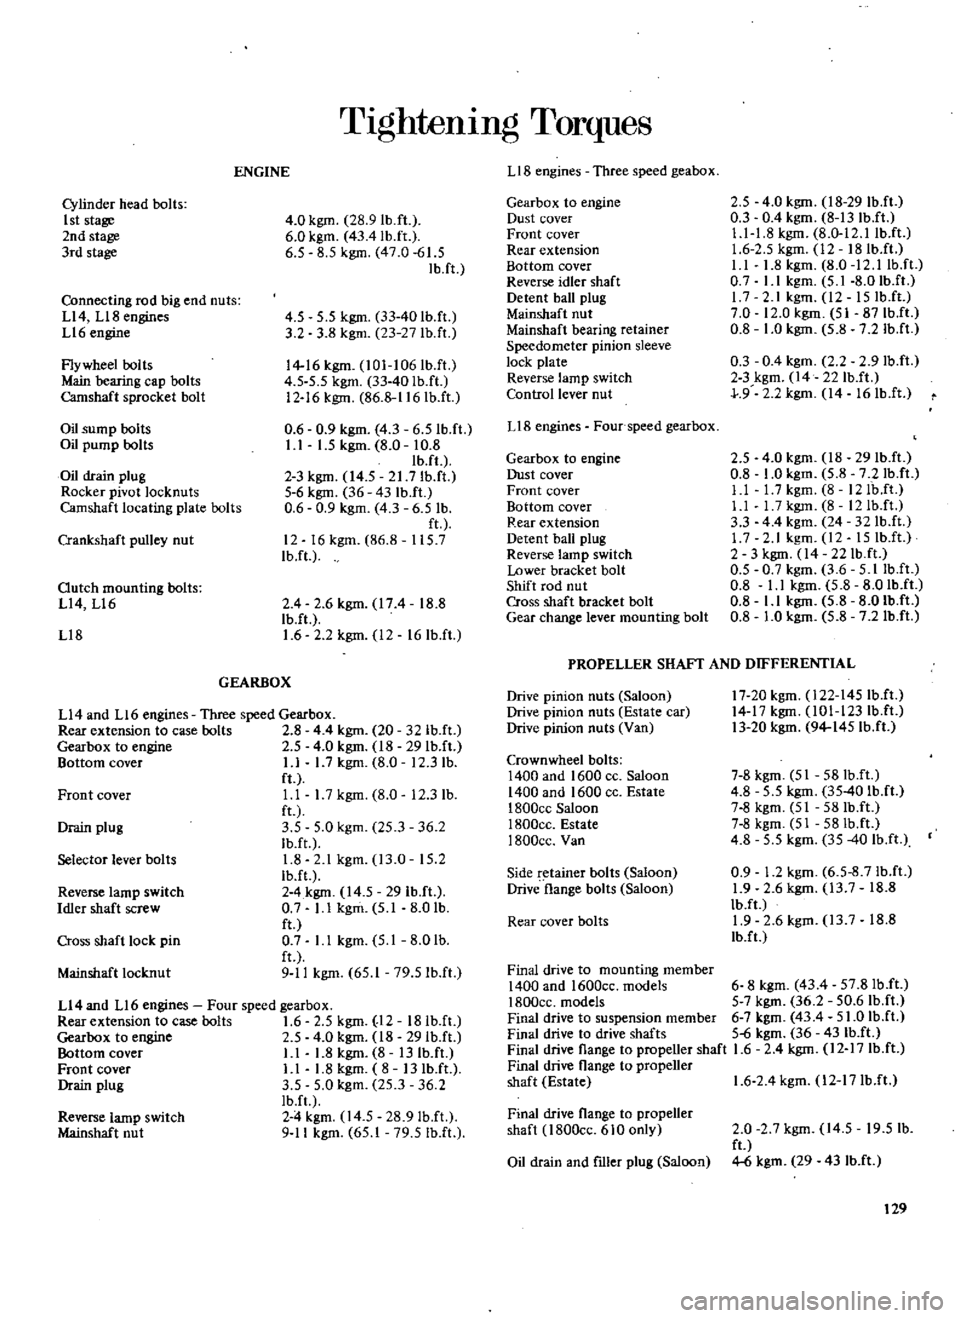
TIghtenIng
Torques
LIB
engines
Three
speed
geabox
ENGINE
2
5
4
0
kgm
18
29
Ib
ft
0
3
0
4
kgm
8
13
IbJI
Ll
1
8
kgm
8
0
12
llbJt
1
6
2
5
kgm
12
18Ib
ft
I
I
1
8
kgm
8
0
12
llbJt
0
7
I
I
kgm
5
1
8
0
IbJt
17
2
lkgm
l2
15IbJI
7
0
12
0
kgm
51
87IbJI
0
8
1
0
kgm
5
8
7
2
IbJI
0
3
0
4
kgm
2
2
2
9Ib
ft
2
3
kgm
14
22IbJI
J
9
2
2
kgm
14
16IbJI
Gearbox
to
engine
Dust
cover
Front
cover
Rear
extension
Bottom
cover
Reverse
idler
shaft
Detent
ball
plug
Mainshaft
nut
Mainshaft
bearing
retainer
Speedometer
pinion
sleeve
lock
plate
Reverse
lamp
switch
Control
lever
nut
Cylinder
head
bolts
1st
stage
2nd
stage
3rd
slage
4
0
kgm
28
9Ib
ft
6
0
kgm
43
4lb
ft
6
5
8
5
kgm
47
0
61
5
Ib
ft
Connecting
rod
big
end
nuts
Ll4
Ll8
engines
Ll6
engine
Flywheel
bolls
Main
bearing
cap
bolts
Camshaft
sprocket
bolt
4
5
5
5
kgm
33
40
Ib
fl
3
2
3
8
kgm
23
27
lb
ft
14
16
kgm
l01
106Ib
ft
4
5
5
5
kgm
33
40Ib
ft
12
16
kgm
86
8
116IbJt
0
6
0
9
kgm
4
3
6
5IbJt
I
I
1
5
kgm
8
0
10
8
Ib
fl
2
3
kgm
14
5
21
7Ib
ft
5
6
kgm
36
43
Ib
ft
0
6
0
9
kgm
4
3
6
5
Ib
ft
12
16kgm
86
8
115
7
IbJt
LIB
engines
Four
speed
gearbox
Oil
sump
bolts
Oil
pump
bolts
Oil
drain
plug
Rocker
pivot
locknuts
Camshaft
locating
plate
bolts
2
5
4
0
kgm
18
29
IbJt
0
8
1
0
kgm
5
8
7
2Ib
ft
Ll
l
7kgm
8
12IbJt
Ll
I
7kgm
8
12Ib
ft
3
3
44
kgm
24
32IbJI
1
7
2
1
kgm
12
15
IbJt
2
3
kgm
14
22Ib
ft
0
5
0
7
kgm
3
6
5
IlbJI
0
8
I
I
kgm
5
8
8
0Ib
ft
0
8
Ll
kgm
5
8
8
01b
ft
0
8
1
0
kgm
5
8
7
2Ib
ft
Gearbox
to
engine
Dust
cover
Front
cover
Bottom
cover
Rear
extension
Detent
ball
plug
Reverse
lamp
switch
Lower
bracket
bolt
Shift
rod
nut
Cross
shaft
bracket
bolt
Gear
change
lever
mounting
bolt
Crankshaft
pulley
nut
Outch
mounting
bolts
L14
Ll6
Ll8
2
4
2
6kgm
174
18
8
Ib
ft
1
6
2
2
kgm
12
16Ib
fl
PROPELLER
SHAFf
AND
DIFFERENTIAL
GEARBOX
17
20kgm
l22
145IbJI
14
17
kgm
101
123Ib
ft
13
20
kgm
94
145Ib
fI
Drive
pinion
nuts
Saloon
Drive
pinion
nuts
Estate
car
Drive
pinion
nuts
Van
Ll4
and
L16
engines
Three
speed
Gearbox
Rear
extension
to
case
bolts
2
8
4
4
kgm
20
32lb
ft
Gearbox
10
engine
2
5
4
0
kgm
18
29Ib
fI
Bnttom
cover
L1
1
7
kgm
8
0
12
3
lb
ft
Ll
1
7
kgm
8
0
12
3
lb
fl
3
5
5
0
kgm
25
3
36
2
Ib
ft
1
8
2
1
kgm
13
0
15
2
Ib
ft
2
4
kgm
14
5
29
Ib
ft
0
7
L1
kgm
5
1
8
0
lb
ft
0
7
Ll
kgm
5
1
8
0
lb
fl
9
11
kgm
65
1
79
51b
ft
Crown
wheel
bolts
1400
and
1600
cc
Saloon
1400
and
1600
cc
Eslale
1800ce
Saloon
I800cc
Estate
1800cc
Van
7
8
kgm
51
58Ib
ft
4
8
5
5
kgm
35
40
Ib
ft
7
8
kgm
51
58Ib
ft
7
8
kgm
51
58Ib
ft
4
8
5
5
kgm
35
40
Ib
ft
0
9
1
2
kgm
6
5
8
7Ib
ft
1
9
2
6
kgm
13
7
18
8
IbJI
1
9
2
6
kgm
13
7
18
8
Ib
f
Front
cover
Drain
plug
Selector
lever
bolts
Side
retainer
bolts
Saloon
Drive
flange
bolts
Saloon
Reverse
lamp
switch
Idler
shaft
screw
Rear
cover
bolts
Cross
shaft
lock
pin
Final
drive
to
mounting
member
1400
and
1600cc
models
6
8
kgm
43
4
57
8IbJI
1800cc
models
5
7
kgm
36
2
50
6Ib
fI
Final
drive
to
suspension
member
6
7
kgm
43
4
51
0
Ib
ft
Final
drive
to
drive
shafls
5
6
kgm
36
431b
ft
Final
drive
flange
to
propeller
shaft
1
6
2
4
kgm
12
17
Ib
ft
Final
drive
flange
to
propeller
shaft
Eslale
1
6
2
4
kgm
l2
17Ib
ft
Mainshafl
locknut
Ll4
and
L16
engines
Four
speed
gearbox
Rearexlension
to
case
bolts
1
6
2
5
kgm
12
18Ib
ft
Gearbox
to
engine
2
5
4
0
kgm
18
29Ib
ft
Bottnm
cnver
L1
1
8
kgm
8
13
Ib
ft
Fronl
cover
L1
1
8
kgm
8
13
IbJI
Drain
plug
3
5
5
0
kgm
25
3
36
2
Ib
f
2
4
kgm
14
5
28
9IbJt
9
11
kgm
65
1
79
5Ib
ft
Final
drive
flange
to
propeller
shaft
l800cc
610
only
Reverse
lamp
switch
Mainshaft
nut
2
0
2
7
kgm
14
5
19
5
lb
ft
4
6
kgm
29
43
Ib
ft
Oil
drain
and
flller
plug
Saloon
129
Page 131 of 171
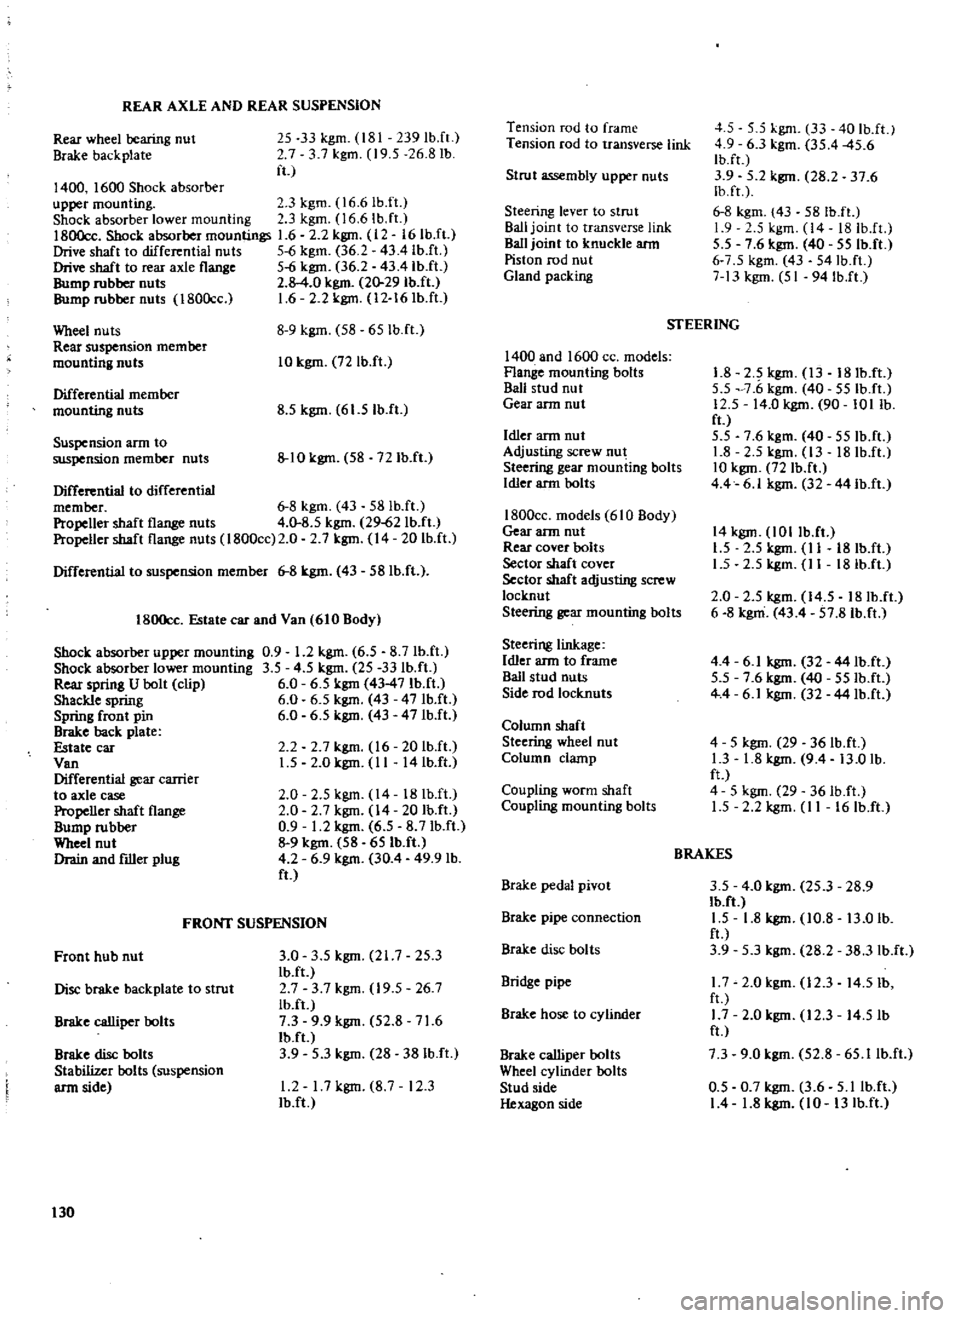
REAR
AXLE
AND
REAR
SUSPENSION
Rear
wheel
bearing
nut
Brake
backplate
25
33
kgm
181
239
IbJt
7
3
7
kgm
19
5
26
8
lb
ft
1400
1600
Shock
absorber
upper
mounting
3
kgm
l6
61b
ft
Shock
absorber
lower
mounting
3
kgm
16
6
Ih
ft
1800cc
Shock
absorber
mountings
1
6
2
2
kgm
12
161b
ft
Drive
shaft
to
differential
nuts
5
6
kgm
36
2
4341b
ft
Drive
shaft
to
rear
axle
flange
5
6
kgm
36
2
43
4lb
ft
Bump
rubber
nuts
2
8
4
0
kgm
20
29
Ib
ft
Bump
rubber
nuts
180Occ
1
6
2
2
kgm
12
16
Ib
ft
Wheel
nuts
Rear
suspension
member
mounting
nuts
8
9
kgm
58
651b
ft
10
kgm
72
Ib
ft
Differential
member
mounting
nuts
8
5
kgm
61
5Ib
ft
Suspension
arm
to
suspension
member
nuts
10
kgm
58
72
Ib
ft
Differential
to
differential
member
6
8
kgm
43
581b
fl
Propeller
shaft
flange
nuts
4
0
8
5
kgm
29
62
Ib
ft
Propeller
shaft
flange
nuts
I
800cc
2
0
2
7
kgm
14
201b
fl
Differential
to
suspension
member
6
8
kgm
43
58Ib
ft
1800cc
Estate
car
and
Van
610
Body
Shock
absorber
upper
mounting
0
9
1
2
kgm
6
5
8
7Ih
fl
Shock
absorber
lower
mounting
3
5
4
5
kgm
25
33Ib
ft
Rear
spring
U
bolt
clip
6
0
6
5
kgm
43
47
Ib
ft
Shackle
spring
6
0
6
5
kgm
43
47Ib
ft
Spring
front
pin
6
0
6
5
kgm
43
47Ib
ft
Brake
back
plate
Estate
car
Van
Differential
gear
carrier
to
axle
case
Propeller
shaft
flange
Bump
rubber
Wheel
nut
Drain
and
filler
plug
2
2
2
7
kgm
16
20IbJt
L5
2
0
kgm
II
14
Ib
ft
2
0
2
5
kgm
14
18Ib
ft
2
0
2
7kgm
14
20Ib
ft
0
9
1
2
kgm
6
5
8
7Ib
ft
9
kgm
58
65Ib
ft
4
2
6
9
kgm
30
4
49
9
lb
ft
FRONT
SUSPENSION
Front
hub
nut
3
0
3
5
kgm
21
7
25
3
Ib
ft
Disc
brake
backplate
to
strut
2
7
3
7
kgm
19
5
26
7
Ib
ft
Brake
ca1liper
bolts
7
3
9
9
kgm
52
8
71
6
Ib
ft
Brake
disc
bolts
3
9
5
3
kgm
28
381b
ft
Stabilizer
bolts
suspension
arm
side
1
2
I
7kgm
8
7
12
3
Ib
ft
130
Tension
rod
to
frame
Tension
rod
to
transverse
link
Strut
assembly
upper
nuts
Steering
lever
to
strut
Ball
joint
to
transverse
link
Ball
joint
to
knuckle
ann
Piston
rod
nut
Gland
packing
1400
and
1600
CC
models
Flange
mounting
bolts
Bali
stud
nut
Gear
ann
nut
Idler
ann
nut
Adjusting
screw
nut
Steering
gear
mounting
bolts
Idler
arm
bolts
1800cc
models
610
Body
Gear
ann
nut
Rear
cover
bolts
Sector
shaft
cover
Sector
shaft
adjusting
screw
locknut
Steering
gear
mounting
bolts
Steering
linkage
Idler
arm
to
frame
Ball
stud
nuts
Side
rod
locknuts
Column
shaft
Steering
wheel
nut
Column
clamp
COll
piing
worm
shaft
Coupling
mounting
bolts
Brake
pedal
pivot
Brake
pipe
connection
Brake
disc
bolts
Bridge
pipe
Brake
hose
to
cylinder
Brake
calliper
bolts
Wheel
cylinder
bolts
Stud
side
Hexagon
side
4
5
5
5
kgm
33
40Ib
ft
4
9
6
3
kgm
35
4
45
6
Ib
ft
3
9
5
2
kgm
28
2
37
6
Ib
fr
6
8
kgm
43
581b
ft
1
9
5
kgm
14
18Ib
fL
5
5
7
6
kgm
40
55Ib
ft
6
7
5
kgm
43
54Ib
ft
7
13
kgm
51
94Ib
ft
STEERING
1
8
2
5
kgm
13
18Ib
ft
5
5
7
6
kgm
40
55Ib
ft
12
5
14
0
kgm
90
101
lb
ft
5
5
7
6
kgm
40
55Ib
ft
1
8
2
5
kgm
13
18Ib
ft
10
kgm
72
Ib
ft
4
4
6
1
kgm
32
44Ib
ft
14
kgm
lOllb
ft
L5
2
5
kgm
II
18Ib
ft
1
5
2
5
kgm
II
18Ib
ft
2
0
2
5
kgm
14
5
18Ib
ft
6
8
kgm
43
4
57
8Ib
ft
4
4
6
1
kgm
32
44Ib
ft
5
5
7
6
kgm
40
55Ib
ft
4
4
6
1
kgm
32
44lb
ft
4
5
kgm
29
36
Ib
ft
1
3
1
8
kgm
9
4
13
0
lb
ft
4
5
kgm
29
36Ib
ft
L5
2
2
kgm
II
16Ib
ft
BRAKES
3
5
4
0
kgm
25
3
28
9
Ib
ft
1
5
1
8
kgm
10
8
13
0
lb
ft
3
9
5
3
kgm
28
2
38
3
IbJt
1
7
2
0
kgm
12
3
14
51b
fl
1
7
2
0
kgm
12
3
14
5lb
ft
7
3
9
0
kgm
52
8
65
llb
ft
0
5
0
7
kgm
3
6
5
llb
ft
1
4
1
8
kgm
10
13
Ib
ft
Page 162 of 171
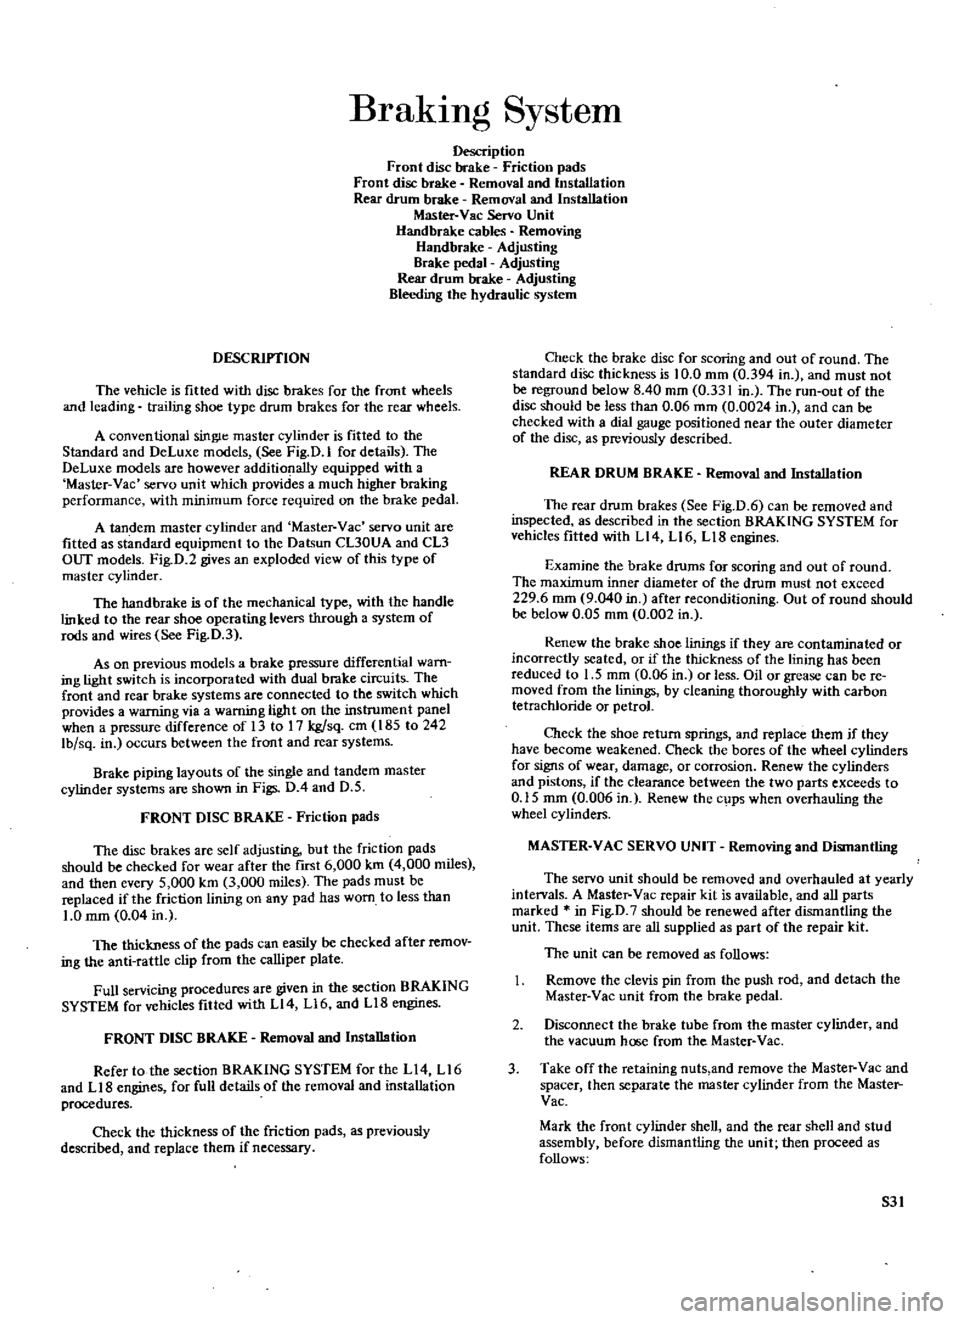
BrakIng
System
Description
Front
disc
brake
Friction
pads
Front
disc
brake
Removal
and
Installation
Rear
drum
brake
Removal
and
Installation
Master
Vac
Servo
Unit
Handbrake
cables
Removing
Handbrake
Adjusting
Brake
pedal
Adjusting
Rear
drum
brake
Adjusting
Bleeding
the
hydraulic
system
DESCRIPTION
The
vehicle
is
fitted
with
disc
brakes
for
the
front
wheels
and
leading
trailing
shoe
type
drum
brakes
for
the
rear
wheels
A
conventional
single
master
cylinder
is
fitted
to
the
Standard
and
DeLuxe
models
See
Fig
D
I
for
details
The
DeLuxe
models
are
however
additio
ally
equipped
with
a
Master
Vae
servo
unit
which
provides
a
much
higher
braking
performance
with
minimum
force
required
on
the
brake
pedal
A
tandem
master
cylinder
and
Master
Vac
servo
unit
are
fitted
as
standard
equipment
to
the
Datsun
CL30UA
and
CL3
OUT
models
Fig
D
2
gives
an
exploded
view
of
this
type
of
master
cylinder
The
handbrake
is
of
the
mechanical
type
with
the
handle
linked
to
the
rear
shoe
operating
lever
through
a
system
of
rods
and
wires
See
Fig
D
3
As
on
previous
models
a
brake
pressure
differential
warn
ing
light
switch
is
incorporated
with
dual
brake
circuits
The
front
and
rear
brake
systems
are
connected
to
the
switch
which
provides
a
warning
via
a
warning
light
on
the
instnllnent
panel
when
a
pressure
difference
of
13
to
17
kg
sq
cm
IB5
to
242
lb
sq
in
occurs
between
the
front
and
rear
systems
Brake
piping
layouts
of
the
single
and
tandem
master
cylinder
systems
are
shown
in
Figs
D
4
and
0
5
FRONT
DISC
BRAKE
Friction
pads
The
disc
brakes
are
self
adjusting
but
the
friction
pads
should
be
checked
for
wear
after
the
fIrst
6
000
un
4
000
miles
and
then
every
5
000
km
3
000
miles
The
pads
must
be
replaced
if
the
friction
lining
on
any
pad
has
worn
to
less
than
1
0
mm
0
04
in
The
thickness
of
the
pads
can
easily
be
checked
after
remov
ing
the
anti
rattle
clip
from
the
calliper
plate
Full
servicing
procedures
are
given
in
the
section
BRAKING
SYSTEM
for
vehicles
fitted
with
Ll4
Ll6
and
Ll8
engines
FRONT
DISC
BRAKE
Removal
and
Installation
Refer
to
the
section
BRAKING
SYSTEM
for
the
Ll4
L16
and
LIB
engines
for
full
details
of
the
removal
and
installation
procedures
Check
the
thickness
of
the
friction
pads
as
previously
described
and
replace
them
if
necessary
Check
the
brake
disc
for
scoring
and
out
of
round
The
standard
diSc
thickness
is
10
0
mm
0
394
in
and
must
not
be
reground
below
8
40
mm
0
331
in
The
run
out
of
the
disc
should
be
less
than
0
06
mm
0
0024
in
and
can
be
checked
with
a
dial
gauge
positioned
near
the
outer
diameter
of
the
disc
as
previously
described
REAR
DRUM
BRAKE
Removal
and
Installation
The
rear
drum
brakes
See
Fig
D
6
can
be
removed
and
inspected
as
described
in
the
section
BRAKING
SYSTEM
for
vehicles
fItted
with
L14
L16
LIB
engines
Examine
the
brake
drums
for
scoring
and
out
of
round
The
maximum
inner
diameter
of
the
drum
must
not
exceed
229
6
mm
9
040
in
after
reconditioning
Out
of
round
should
be
below
0
05
mm
0
002
in
Renew
the
brake
shoe
linings
if
they
are
contaminated
or
incorrectly
seated
or
if
the
thickness
of
the
lining
has
been
reduced
to
1
5
mm
0
06
in
or
less
Oil
or
grease
can
be
re
moved
from
the
linings
by
cleaning
thoroughly
with
carbon
tetrachloride
or
petrol
Check
the
shoe
return
springs
and
replace
them
if
they
have
become
weakened
Check
the
bores
of
the
wheel
cylinders
for
signs
of
wear
damage
or
corrosion
Renew
the
cylinders
and
pistons
if
the
clearance
between
the
two
parts
exceeds
to
0
15
mm
0
006
in
Renew
the
c
ps
when
overhauling
the
wheel
cylinders
MASTER
V
AC
SERVO
UNIT
Removing
and
Dismantling
The
servo
unit
should
be
removed
and
overhauled
at
yearly
intervals
A
Master
Vac
repair
kit
is
available
and
all
parts
marked
in
Fig
D
7
should
be
renewed
after
dismantling
the
unit
These
items
are
all
supplied
as
part
of
the
repair
kit
The
unit
can
be
removed
as
follows
Remove
the
clevis
pin
from
the
push
rod
and
detach
the
Master
V
ac
unit
from
the
brake
pedal
2
Disconnect
the
brake
tube
from
the
master
cylinder
and
the
vacuum
hooe
from
the
Master
Vac
3
Take
off
the
retaining
nuts
and
remove
the
Master
Vac
and
spacer
then
separate
the
master
cylinder
from
the
Master
Vac
Mark
the
front
cylinder
shell
and
the
rear
shell
and
stud
assembly
before
dismantling
the
unit
then
proceed
as
follows
S31