instrument panel DODGE AVENGER 2008 Owners Manual
[x] Cancel search | Manufacturer: DODGE, Model Year: 2008, Model line: AVENGER, Model: DODGE AVENGER 2008Pages: 467, PDF Size: 7.16 MB
Page 258 of 467
REAR WINDOW FEATURES
Electric Rear Window Defroster Ð If Equipped
The electric Rear Window Defroster Control is
located on the climate control. Press this button to
turn on the rear window defroster and the heated side
mirrors (if equipped). An LED in the button will illumi-
nate when the rear window defroster is ON. The de-
froster automatically turns off after approximately 10
minutes of operation for the first push of the button, and
will turn off after approximately five minutes for the
second push of the button. CAUTION!To avoid damaging the electrical conductors of the
rear window defroster, do not use scrapers, sharp
instruments, or abrasive window cleaners on the
interior surface of the window.
Labels can be peeled off after soaking with warm
water.256 UNDERSTANDING YOUR INSTRUMENT PANEL
Page 330 of 467
ADDING FUEL
FUEL FILLER CAP (GAS CAP)
As a reminder, a fuel icon with an arrow
indicating which side of the vehicle the fuel
filler door is located on, is located in the
instrument cluster.
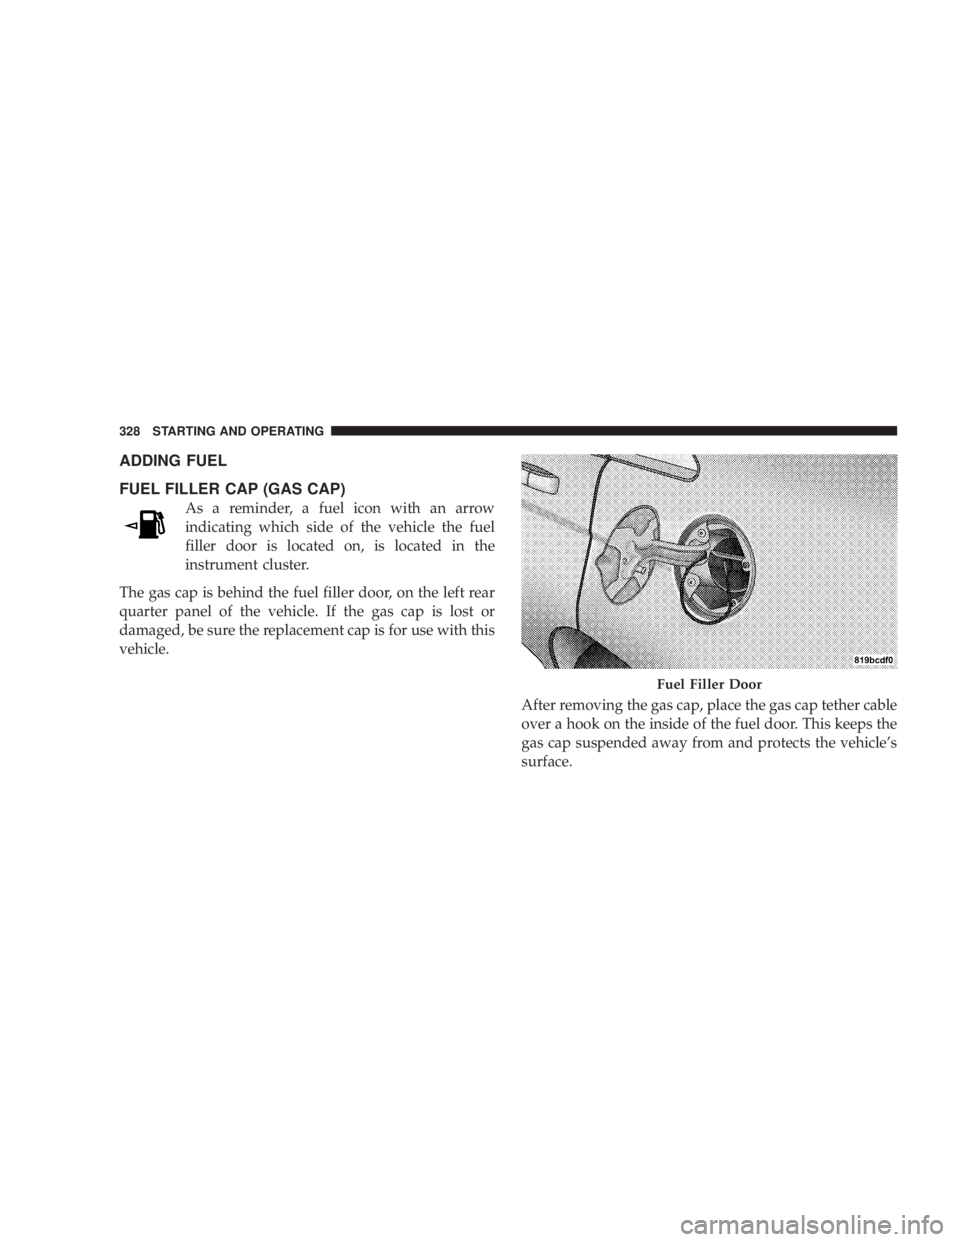
The gas cap is behind the fuel filler door, on the left rear
quarter panel of the vehicle. If the gas cap is lost or
damaged, be sure the replacement cap is for use with this
vehicle.
After removing the gas cap, place the gas cap tether cable
over a hook on the inside of the fuel door. This keeps the
gas cap suspended away from and protects the vehicle's
surface. Fuel Filler Door328 STARTING AND OPERATING
Page 350 of 467
HAZARD WARNING FLASHER
The flasher switch is located on the instrument
panel, below the radio. Depress the switch and
both cluster indicators and all front and rear direc-
tional signals will flash. Depress the switch again to turn
Hazard Warning Flashers off.
Do not use this emergency warning system when the
vehicle is in motion. Use it when your vehicle is disabled
and it is creating a safety hazard for other motorists.
If it is necessary to leave the vehicle to go for service, the
flasher system will continue to operate with the ignition
key removed and the vehicle locked.
NOTE: With extended use, the flasher may wear down
your battery. IF YOUR ENGINE OVERHEATS
In any of the following situations, you can reduce the
potential for overheating by taking the appropriate ac-
tion.
² On the highways Ð Slow down.
² In city traffic Ð While stopped, put transaxle in
NEUTRAL, but do not increase engine idle speed.
If the pointer rises to the H (red) mark, the instrument
cluster will sound a chime. Pull over and stop the vehicle
with the engine at idle, when safe. Turn off the air
conditioning and wait until the pointer drops back into
the normal range. If the pointer remains on the H (red)
mark for more than a minute, turn the engine off imme-
diately and call for service.348 WHAT TO DO IN EMERGENCIES
Page 386 of 467
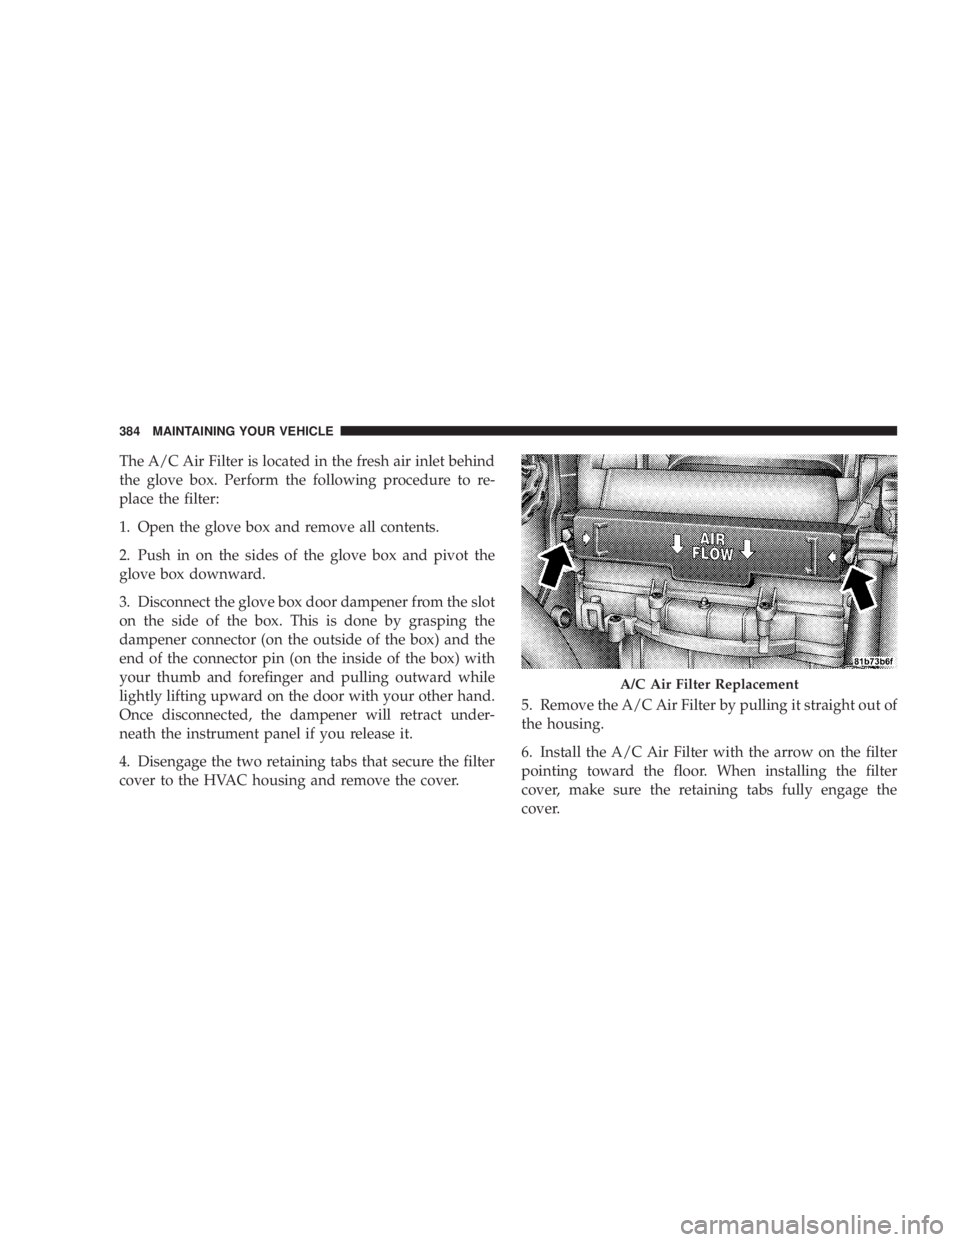
The A/C Air Filter is located in the fresh air inlet behind
the glove box. Perform the following procedure to re-
place the filter:
1. Open the glove box and remove all contents.
2. Push in on the sides of the glove box and pivot the
glove box downward.
3. Disconnect the glove box door dampener from the slot
on the side of the box. This is done by grasping the
dampener connector (on the outside of the box) and the
end of the connector pin (on the inside of the box) with
your thumb and forefinger and pulling outward while
lightly lifting upward on the door with your other hand.
Once disconnected, the dampener will retract under-
neath the instrument panel if you release it.
4. Disengage the two retaining tabs that secure the filter
cover to the HVAC housing and remove the cover. 5. Remove the A/C Air Filter by pulling it straight out of
the housing.
6. Install the A/C Air Filter with the arrow on the filter
pointing toward the floor. When installing the filter
cover, make sure the retaining tabs fully engage the
cover. A/C Air Filter Replacement384 MAINTAINING YOUR VEHICLE
Page 405 of 467

Do not use abrasive cleaning components, solvents, steel
wool or other aggressive material to clean the lenses.
Interior Care
Instrument Panel Cover
The instrument panel cover has a low glare surface,
which minimizes reflections in the windshield. Do not
use protectants or other products, which may cause
undesirable reflections. Use soap and warm water to
restore the low glare surface.
Cleaning Interior Trim
Interior Trim should be cleaned starting with a damp
cloth, a damp cloth with Mopar t Total Clean, then
Mopar t Spot & Stain Remover if absolutely necessary. Do
not use harsh cleaners or Armorall. Use Mopar t Total
Clean to clean vinyl upholstery Cleaning Leather Upholstery
Mopar t Total Clean is specifically recommended for
leather upholstery.
Your leather upholstery can be best preserved by regular
cleaning with a damp soft cloth. Small particles of dirt
can act as an abrasive and damage the leather upholstery
and should be removed promptly with a damp cloth.
Stubborn soils can be removed easily with a soft cloth
and Mopar t Total Clean. Care should be taken to avoid
soaking your leather upholstery with any liquid. Please
do not use polishes, oils, cleaning fluids, solvents, deter-
gents, or ammonia-based cleaners to clean your leather
upholstery. Application of a leather conditioner is not
required to maintain the original condition. MAINTAINING YOUR VEHICLE 403
7
Page 454 of 467
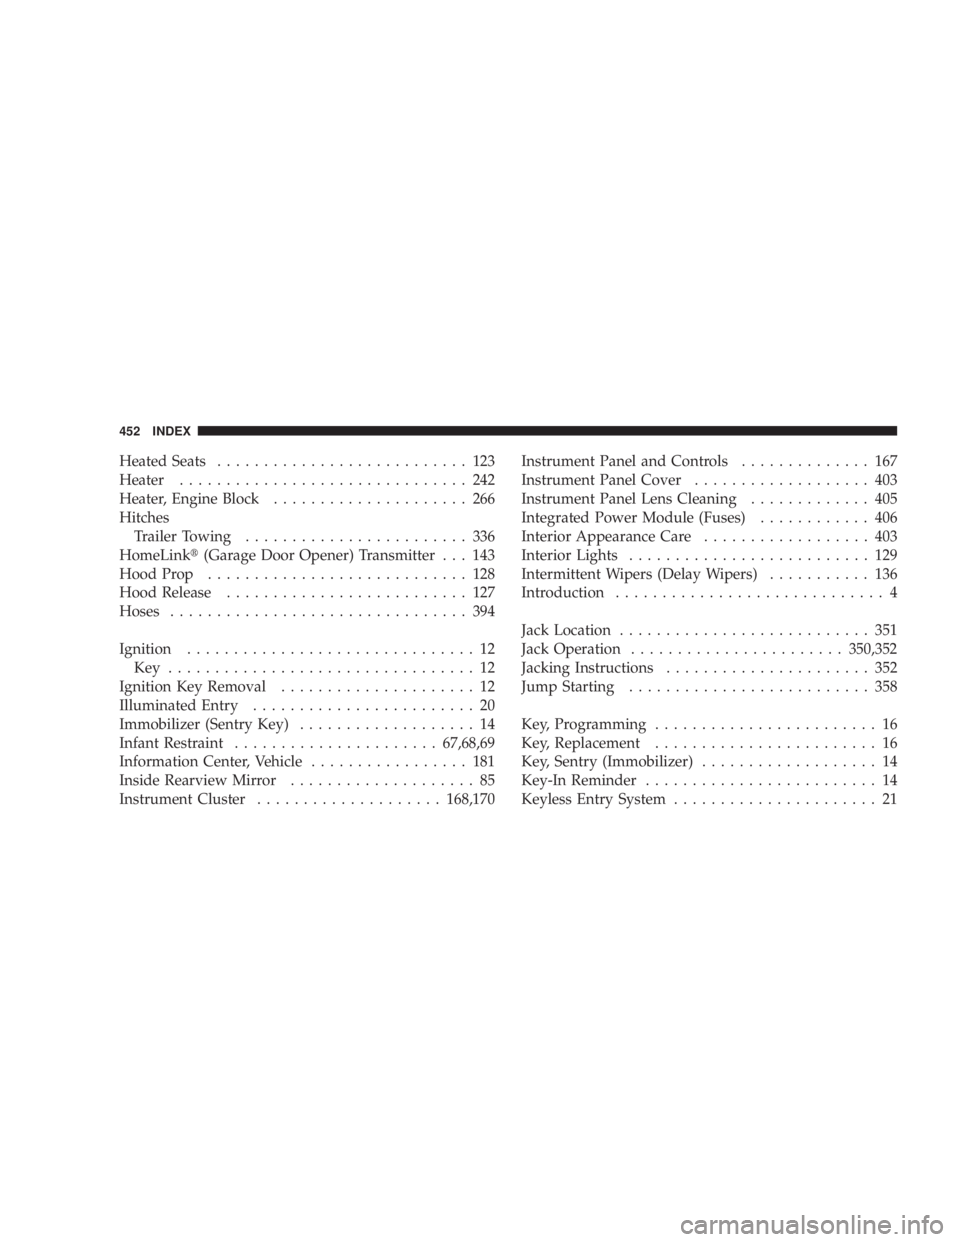
Heated Seats ........................... 123
Heater ............................... 242
Heater, Engine Block ..................... 266
Hitches
Trailer Towing ........................ 336
HomeLink t (Garage Door Opener) Transmitter . . . 143
Hood Prop ............................ 128
Hood Release .......................... 127
Hoses ................................ 394
Ignition ............................... 12
Key ................................. 12
Ignition Key Removal ..................... 12
Illuminated Entry ........................ 20
Immobilizer (Sentry Key) ................... 14
Infant Restraint ...................... 67,68,69
Information Center, Vehicle ................. 181
Inside Rearview Mirror .................... 85
Instrument Cluster .................... 168,170 Instrument Panel and Controls .............. 167
Instrument Panel Cover ................... 403
Instrument Panel Lens Cleaning ............. 405
Integrated Power Module (Fuses) ............ 406
Interior Appearance Care .................. 403
Interior Lights .......................... 129
Intermittent Wipers (Delay Wipers) ........... 136
Introduction ............................. 4
Jack Location ........................... 351
Jack Operation ....................... 350,352
Jacking Instructions ...................... 352
Jump Starting .......................... 358
Key, Programming ........................ 16
Key, Replacement ........................ 16
Key, Sentry (Immobilizer) ................... 14
Key-In Reminder ......................... 14
Keyless Entry System ...................... 21452 INDEX
Page 464 of 467
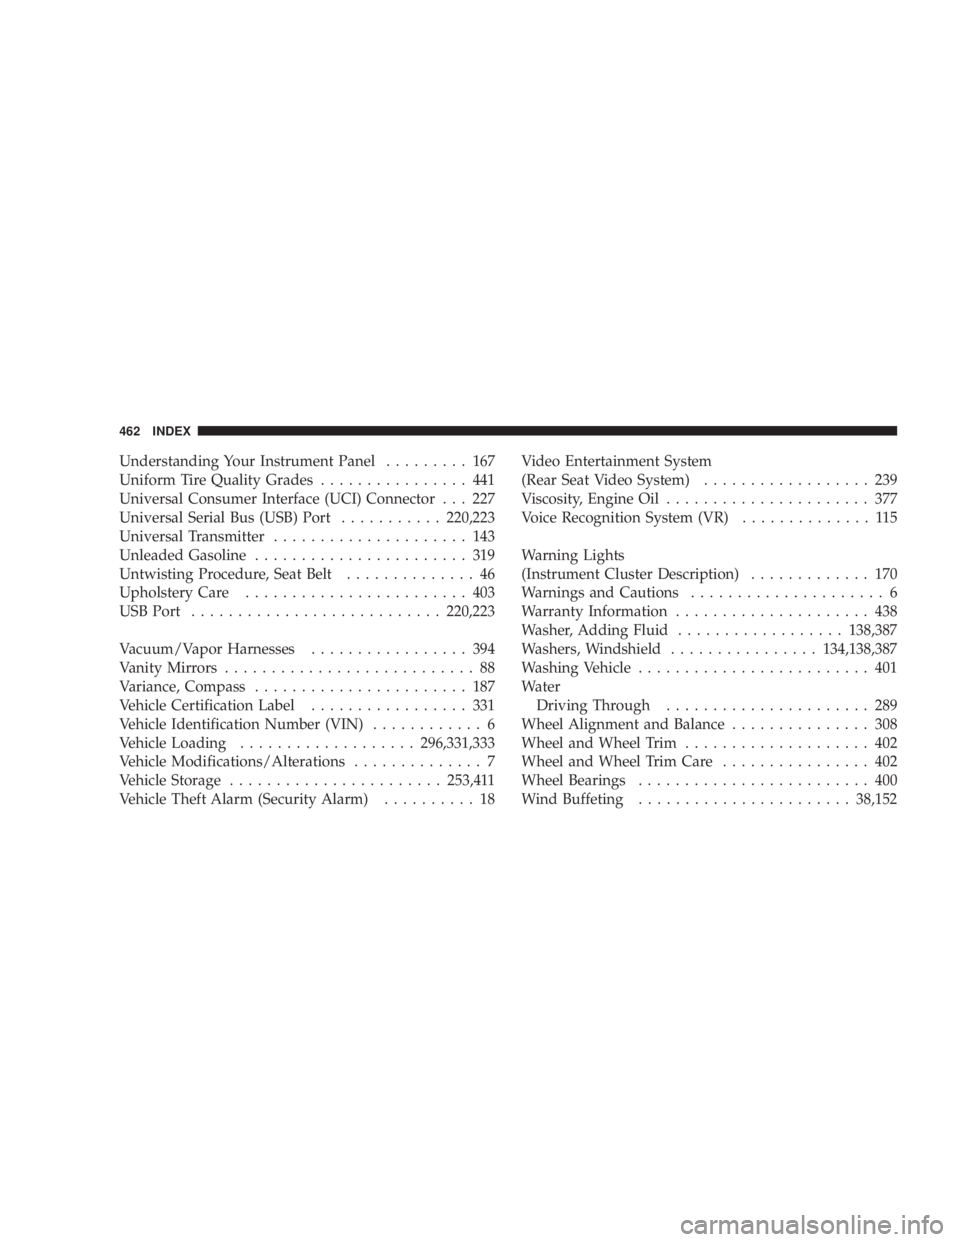
Understanding Your Instrument Panel ......... 167
Uniform Tire Quality Grades ................ 441
Universal Consumer Interface (UCI) Connector . . . 227
Universal Serial Bus (USB) Port ........... 220,223
Universal Transmitter ..................... 143
Unleaded Gasoline ....................... 319
Untwisting Procedure, Seat Belt .............. 46
Upholstery Care ........................ 403
USB Port ........................... 220,223
Vacuum/Vapor Harnesses ................. 394
Vanity Mirrors ........................... 88
Variance, Compass ....................... 187
Vehicle Certification Label ................. 331
Vehicle Identification Number (VIN) ............ 6
Vehicle Loading ................... 296,331,333
Vehicle Modifications/Alterations .............. 7
Vehicle Storage ....................... 253,411
Vehicle Theft Alarm (Security Alarm) .......... 18 Video Entertainment System
(Rear Seat Video System) .................. 239
Viscosity, Engine Oil ...................... 377
Voice Recognition System (VR) .............. 115
Warning Lights
(Instrument Cluster Description) ............. 170
Warnings and Cautions ..................... 6
Warranty Information ..................... 438
Washer, Adding Fluid .................. 138,387
Washers, Windshield ................ 134,138,387
Washing Vehicle ......................... 401
Water
Driving Through ...................... 289
Wheel Alignment and Balance ............... 308
Wheel and Wheel Trim .................... 402
Wheel and Wheel Trim Care ................ 402
Wheel Bearings ......................... 400
Wind Buffeting ....................... 38,152462 INDEX