instrument panel DODGE CALIBER 2011 1.G Owners Manual
[x] Cancel search | Manufacturer: DODGE, Model Year: 2011, Model line: CALIBER, Model: DODGE CALIBER 2011 1.GPages: 486, PDF Size: 2.88 MB
Page 3 of 486
TABLE OF CONTENTSSECTIONPAGE
1INTRODUCTION............................................................3
2THINGS TO KNOW BEFORE STARTING YOUR VEHICLE..............................9
3UNDERSTANDING THE FEATURES OF YOUR VEHICLE............................. 89
4UNDERSTANDING YOUR INSTRUMENT PANEL.................................. 185
5STARTING AND OPERATING................................................289
6WHAT TO DO IN EMERGENCIES............................................. 371
7MAINTAINING YOUR VEHICLE..............................................391
8MAINTENANCE SCHEDULES.................................................439
9IF YOU NEED CONSUMER ASSISTANCE........................................ 455
10INDEX...................................................................465
1
2
3
4
5
6
7
8
9
10
Page 8 of 486
WARNINGS AND CAUTIONS
This Owner’s Manual containsWARNINGSagainst op-
erating procedures that could result in a collision or
bodily injury. It also contains CAUTIONSagainst proce-
dures that could result in damage to your vehicle. If you
do not read this entire manual, you may miss important
information. Observe all Warnings and Cautions.
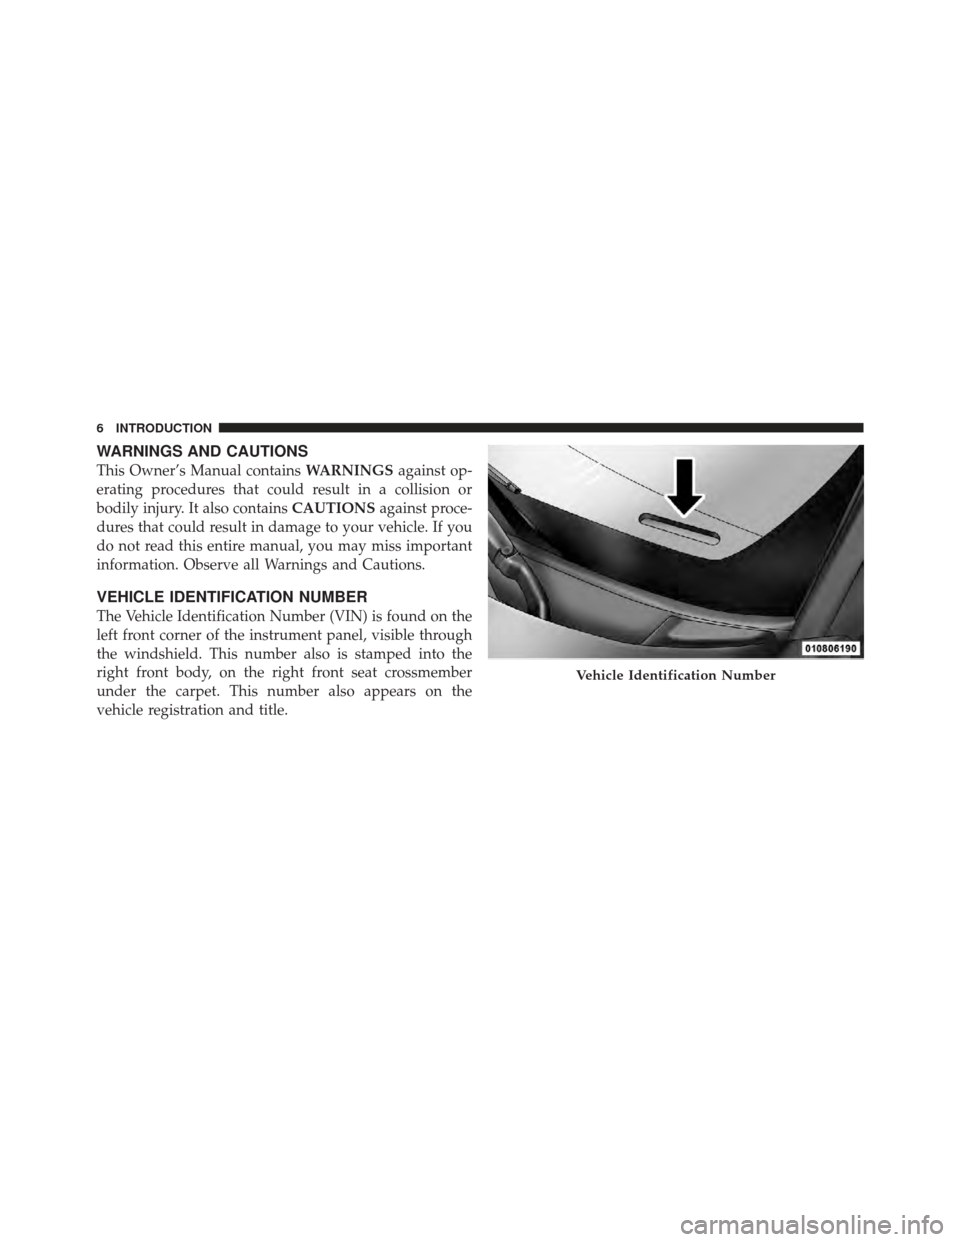
VEHICLE IDENTIFICATION NUMBER
The Vehicle Identification Number (VIN) is found on the
left front corner of the instrument panel, visible through
the windshield. This number also is stamped into the
right front body, on the right front seat crossmember
under the carpet. This number also appears on the
vehicle registration and title.
Vehicle Identification Number
6 INTRODUCTION
Page 21 of 486
NOTE:The line of transmission must not be blocked
with metal objects.
To Unlock The Doors And Liftgate
Press and release the UNLOCK button on the RKE
transmitter once to unlock the driver ’s door, or twice
within five seconds to unlock all doors and liftgate. The
turn signal lights will flash to acknowledge the unlock
signal. The illuminated entry system will also turn on.
Remote Key Unlock, Driver Door/All First Press
This feature lets you program the system to unlock either
the driver ’s door or all doors on the first press of the
UNLOCK button on the RKE transmitter. To change the
current setting, proceed as follows:
•For vehicles equipped with the Electronic Vehicle
Information Center (EVIC), refer to “Electronic Vehicle
Information Center (EVIC)/Personal Settings (Cus-
tomer-Programmable Features)” in “Understanding
Your Instrument Panel” for further information.
•For vehicles not equipped with the EVIC, perform the
following steps:
1. Press and hold the LOCK button on a programmed
RKE transmitter for at least 4 seconds, but no longer than
10 seconds. Then, press and hold the UNLOCK button
while still holding the LOCK button.
2. Release both buttons at the same time.
3. Test the feature while outside of the vehicle by press-
ing the LOCK/UNLOCK buttons on the RKE transmitter
with the ignition switch in the LOCK position and the
key removed.
4. Repeat these steps if you want to return this feature to
its previous setting.
2
THINGS TO KNOW BEFORE STARTING YOUR VEHICLE 19
Page 22 of 486
NOTE:Pressing the LOCK button on the RKE transmit-
ter while you are inside the vehicle will activate the
Vehicle Security Alarm. Opening a door with the Vehicle
Security Alarm activated will cause the alarm to sound.
Press the UNLOCK button to deactivate the Vehicle
Security Alarm.
Illuminated Approach — If Equipped
This feature activates the headlights for up to 90 seconds
when the doors are unlocked with the RKE transmitter.
The time for this feature is programmable on vehicles
equipped with the EVIC. Refer to “Electronic Vehicle
Information Center (EVIC)/Personal Settings (Customer-
Programmable Features)” in “Understanding Your In-
strument Panel” for further information.
NOTE: None of the courtesy lights will operate if the
dimmer control is in the “defeat” position (extreme
downward position), unless the overhead map/reading
lights are turned on manually.
To Lock The Doors And Liftgate
Press and release the LOCK button on the RKE transmit-
ter to lock all doors and liftgate. The turn signal lights
will flash and the horn will chirp to acknowledge the
signal.
Sound Horn With Remote Key Lock
This feature will cause the horn to chirp when the doors
are locked with the RKE transmitter. This feature can be
turned on or turned off. To change the current setting,
proceed as follows:
•For vehicles equipped with the EVIC, refer to “Elec-
tronic Vehicle Information Center (EVIC)/Personal
Settings (Customer-Programmable Features)” in “Un-
derstanding Your Instrument Panel” for further infor-
mation.
20 THINGS TO KNOW BEFORE STARTING YOUR VEHICLE
Page 23 of 486
•For vehicles not equipped with the EVIC, perform the
following steps:
1. Press the LOCK button on a programmed RKE trans-
mitter for at least 4 seconds, but no longer than 10 sec-
onds. Then, press the PANIC button while still holding
the LOCK button.
2. Release both buttons at the same time.
3. Test the feature while outside of the vehicle by press-
ing the LOCK button on the RKE transmitter with the
ignition switch in the LOCK position and the key re-
moved.
4. Repeat these steps if you want to return this feature to
its previous setting. NOTE:
Pressing the LOCK button on the RKE transmit-
ter while you are in the vehicle will activate the Vehicle
Security Alarm. Opening a door with the Vehicle Security
Alarm activated will cause the alarm to sound. Press the
UNLOCK button to deactivate the Vehicle Security
Alarm.
Flash Lights With Remote Key Lock/Unlock
This feature will cause the turn signal lights to flash when
the doors are locked or unlocked with the RKE transmit-
ter. This feature can be turned on or turned off. To change
the current setting, proceed as follows:
•For vehicles equipped with the EVIC, refer to “Elec-
tronic Vehicle Information Center (EVIC)/Personal
Settings (Customer-Programmable Features)” in “Un-
derstanding Your Instrument Panel” for further infor-
mation.
2
THINGS TO KNOW BEFORE STARTING YOUR VEHICLE 21
Page 31 of 486
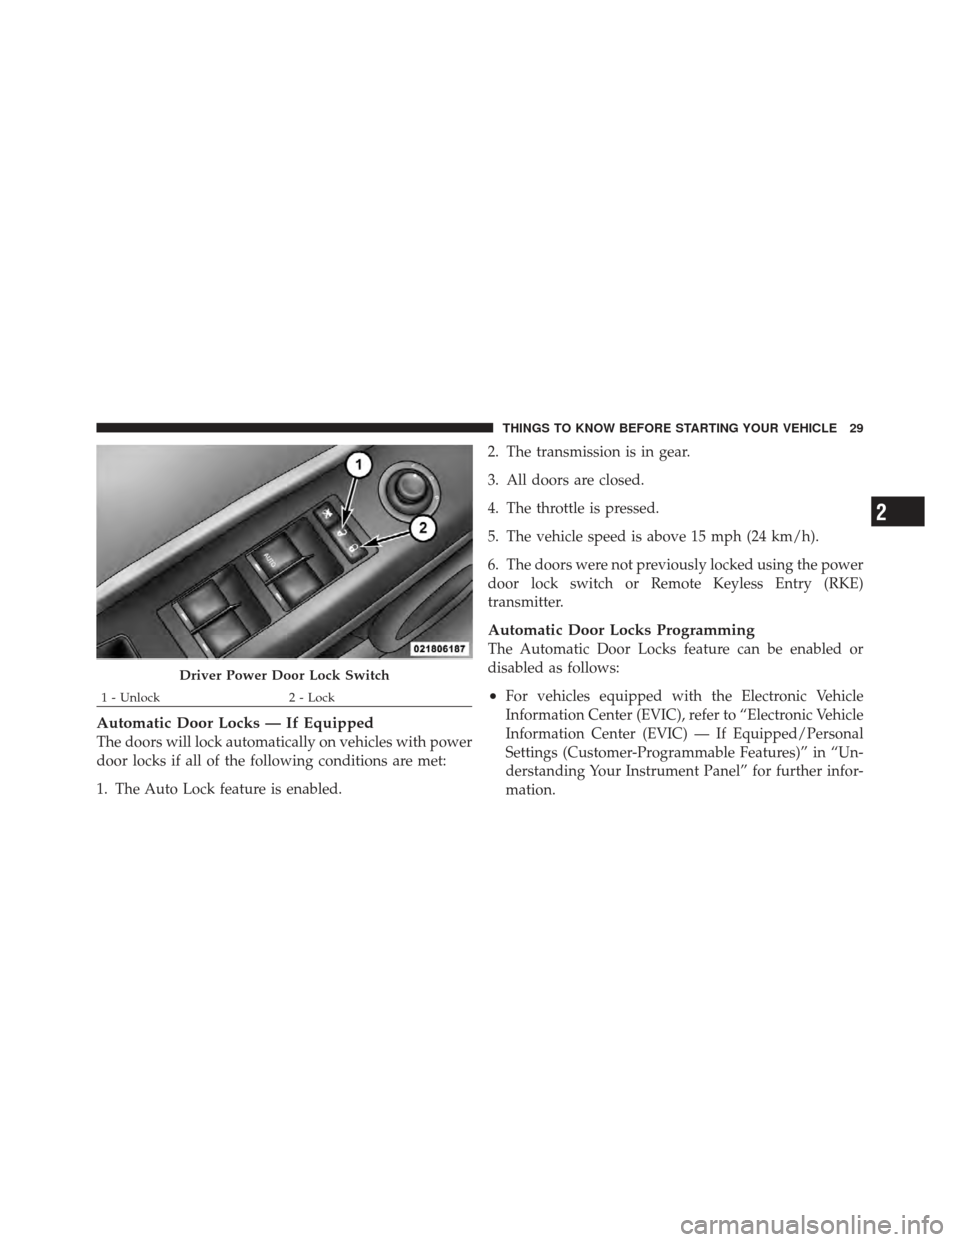
Automatic Door Locks — If Equipped
The doors will lock automatically on vehicles with power
door locks if all of the following conditions are met:
1. The Auto Lock feature is enabled.2. The transmission is in gear.
3. All doors are closed.
4. The throttle is pressed.
5. The vehicle speed is above 15 mph (24 km/h).
6. The doors were not previously locked using the power
door lock switch or Remote Keyless Entry (RKE)
transmitter.
Automatic Door Locks Programming
The Automatic Door Locks feature can be enabled or
disabled as follows:
•For vehicles equipped with the Electronic Vehicle
Information Center (EVIC), refer to “Electronic Vehicle
Information Center (EVIC) — If Equipped/Personal
Settings (Customer-Programmable Features)” in “Un-
derstanding Your Instrument Panel” for further infor-
mation.
Driver Power Door Lock Switch
1 - Unlock
2 - Lock
2
THINGS TO KNOW BEFORE STARTING YOUR VEHICLE 29
Page 33 of 486
Automatic Unlock Doors On Exit Programming
The Automatic Unlock Doors On Exit feature can be
enabled or disabled as follows:
•For vehicles equipped with the EVIC, refer to “Elec-
tronic Vehicle Information Center (EVIC)/Personal
Settings (Customer-Programmable Features)” in “Un-
derstanding Your Instrument Panel” for further infor-
mation.
•For vehicles not equipped with the EVIC, perform the
following procedure:
1. Close all doors and place the key in the ignition.
2. Within 15 seconds, cycle the ignition switch between
LOCK and ON/RUN and then back to LOCK four times
ending up in the LOCK position (do not start the engine).
3. Within 30 seconds, press the power door UNLOCK
switch to unlock the doors. 4. A single chime will indicate the completion of the
programming.
5. Repeat these steps if you want to return this feature to
its previous setting.
NOTE:
•If you do not hear the chime it means that the system
did not enter the programming mode and you will
need to repeat the procedure.
•Use the Automatic Unlock Doors On Exit feature in
accordance with local laws.
Child-Protection Door Lock System
(Rear Doors) — If Equipped
To provide a safer environment for small children riding
in the rear seats, the rear doors are equipped with
Child-Protection Door Lock system.
2
THINGS TO KNOW BEFORE STARTING YOUR VEHICLE 31
Page 35 of 486
NOTE:For emergency exit with the system engaged,
move the lock knob up (unlocked position), roll down the
window and open the door with the outside door handle.
POWER WINDOWS — IF EQUIPPED
Power Window Switches
The window controls on the driver ’s door trim panel
control all the door windows. There are single window
controls on each passenger door trim panel, which oper-
ate the passenger door windows. The window controls
will operate when the ignition switch is in the ON/RUN
or ACC position. NOTE:
•For vehicles not equipped with the Electronic Vehicle
Information Center (EVIC), the power window
switches will remain active for 45 seconds after the
ignition switch is turned to the LOCK position. Open-
ing either front door will cancel this feature.
•For vehicles equipped with the EVIC, the power
window switches will remain active for up to 10 min-
utes after the ignition switch is turned to the LOCK
position. Opening either front door will cancel this
feature. The time for this feature is programmable.
Refer to “Electronic Vehicle Information Center
(EVIC)/Personal Settings (Customer-Programmable
Features)” in “Understanding Your Instrument Panel”
for further information.
2
THINGS TO KNOW BEFORE STARTING YOUR VEHICLE 33
Page 42 of 486
WARNING!
•Relying on the air bags alone could lead to more
severe injuries in a collision. The air bags work
with your seat belt to restrain you properly. In
some collisions, the air bags won’t deploy at all.
Always wear your seat belts even though you have
air bags.
•Being too close to the steering wheel or instrument
panel during Advanced Front Air Bag deployment
could cause serious injury, including death. Air
Bags need room to inflate. Sit back, comfortably
extending your arms to reach the steering wheel or
instrument panel.(Continued)
WARNING! (Continued)
•Supplemental Side Air Bag Inflatable Curtain
(SABIC) and Seat-Mounted Side Air Bags (SAB)
also need room to inflate. Do not lean against the
door or window. Sit upright in the center of the
seat.
•In an accident, you and your passengers can suffer
much greater injuries if you are not properly
buckled up. You can strike the interior of your
vehicle or other passengers, or you can be thrown
out of the vehicle. Always be sure you and others
in your vehicle are buckled up properly.
Buckle up even though you are an excellent driver, even
on short trips. Someone on the road may be a poor driver
and cause an accident that includes you. This can happen
far away from home or on your own street.
40 THINGS TO KNOW BEFORE STARTING YOUR VEHICLE
Page 61 of 486
Seat Belt Extender
If a seat belt is too short, even when fully extended, and
when the adjustable upper shoulder belt anchorage (if
equipped) is in its lowest position, your authorized
dealer can provide you with a seat belt extender. This
extender should be used only if the existing belt is not
long enough. When it is not required, remove the ex-
tender and store it.
WARNING!
Using a seat belt extender when not needed can
increase the risk of injury in an accident. Only use
when the seat belt is not long enough when it is worn
low and snug, and in the recommended seating
positions. Remove and store the extender when not
needed.
Seat Belts And Pregnant Women
We recommend that pregnant women use the seat belts
throughout their pregnancy. Keeping the mother safe is
the best way to keep the baby safe.
Pregnant women should wear the lap part of the belt
across the thighs and as snug across the hips as possible.
Keep the belt low so that it does not come across the
abdomen. That way the strong bones of the hips will take
the force if there is an accident.
Supplemental Restraint System (SRS) — Air Bags
This vehicle has Advanced Front Air Bags for both the
driver and front passenger as a supplement to the seat
belt restraint systems. The driver’s Advanced Front Air
Bag is mounted in the center of the steering wheel. The
passenger’s Advanced Front Air Bag is mounted in the
instrument panel, above the glove compartment. The
words SRS AIRBAG are embossed on the air bag covers.
2
THINGS TO KNOW BEFORE STARTING YOUR VEHICLE 59