turn signal bulb DODGE CARAVAN 2008 5.G Owners Manual
[x] Cancel search | Manufacturer: DODGE, Model Year: 2008, Model line: CARAVAN, Model: DODGE CARAVAN 2008 5.GPages: 531, PDF Size: 7.72 MB
Page 96 of 531
Airbag Light
The light should come on and remain on for four seconds
as a bulb check when the ignition switch is first turned
ON. If the LED is not lit during starting and/or the light
stays on or comes ON while driving, have the system
checked by an authorized dealer.
Defroster
Check operation by selecting the defrost mode and place
the blower control on high speed. You should be able to
feel the air directed against the windshield.
NOTE:If the defroster is not working or you are unable
to feel air against the windshield in defrost mode, please
see your authorized dealer service center for repairs.
PERIODIC SAFETY CHECKS YOU SHOULD MAKE
OUTSIDE THE VEHICLE
Tires
Examine tires for excessive tread wear or uneven wear
patterns. Check for stones, nails, glass, or other objects
lodged in the tread. Inspect tread and sidewall for cuts or
cracks. Check wheel nuts for tightness, and tires (includ-
ing spare) for proper pressure.
Lights
Have someone observe the operation of exterior lights
while you work the controls. Check turn signal and high
beam indicator lights on the instrument panel.
Fluid Leaks
Check area under vehicle after overnight parking for fuel,
engine coolant, oil or other fluid leaks. Also, if gasoline
fumes are detected or fuel, power steering fluid, trans-
mission fluid or brake fluid leaks are suspected, the cause
should be located and corrected immediately.
94 THINGS TO KNOW BEFORE STARTING YOUR VEHICLE
Page 169 of 531
If either indicator flashes at a rapid rate, check for a
defective outside turn signal light bulb. If one of the
indicators fails to light when the lever is moved, it would
suggest that the indicator light is defective.
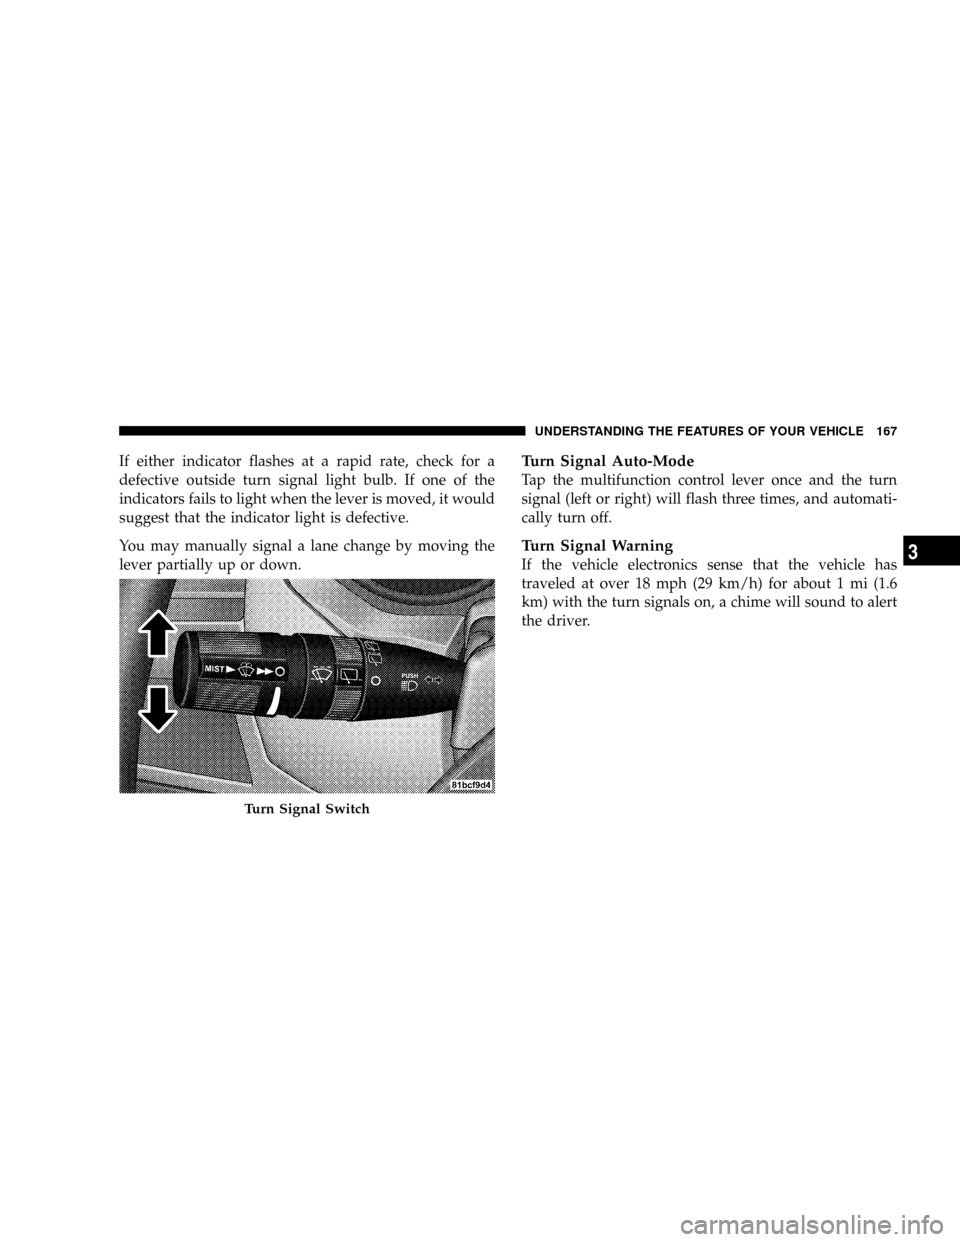
You may manually signal a lane change by moving the
lever partially up or down.Turn Signal Auto-Mode
Tap the multifunction control lever once and the turn
signal (left or right) will flash three times, and automati-
cally turn off.
Turn Signal Warning
If the vehicle electronics sense that the vehicle has
traveled at over 18 mph (29 km/h) for about 1 mi (1.6
km) with the turn signals on, a chime will sound to alert
the driver.
Turn Signal Switch
UNDERSTANDING THE FEATURES OF YOUR VEHICLE 167
3
Page 229 of 531
WARNING!
A hot engine cooling system is dangerous. You or
others could be badly burned by steam or boiling
coolant. You may want to call an authorized dealer if
your vehicle overheats. If you decide to look under
the hood yourself, see Section 7 of this manual.
Follow the warnings under the Cooling System Pres-
sure Cap paragraph.
4. Speedometer
Indicates vehicle speed.
5. Turn Signal Indicators
The arrow will flash with the exterior turn signal
when the turn signal lever is operated.
If the vehicle electronics sense that the vehicle has
traveled about one mile with the turn signals on, acontinuous chime will sound to alert you to turn the
signals off. If either indicator flashes at a rapid rate, check
for a defective outside light bulb.
6. High Beam Light
This light shows that the headlights are on high
beam. Pull the turn signal lever towards the
steering wheel to switch the headlights from high or low
beam.
7. Anti-Lock Brake System Light
This light monitors the Anti-Lock Brake Sys-
tem. The light will turn on when the ignition
switch is turned to the ON position and may
stay on for as long as four seconds.
If the ABS light remains on or turns on while driving, it
indicates that the Anti-Lock portion of the brake system
is not functioning and that service is required. However,
the conventional brake system will continue to operate
normally if the BRAKE warning light is not on.
UNDERSTANDING YOUR INSTRUMENT PANEL 227
4
Page 341 of 531
WARNING!
²The Anti-Lock Brake System cannot prevent acci-
dents, including those resulting from excessive
speed in turns, following another vehicle too
closely, or hydroplaning. Only a safe, attentive,
and skillful driver can prevent accidents.
²The capabilities of an ABS-equipped vehicle must
never be exploited in a reckless or dangerous
manner which could jeopardize the user's safety
or the safety of others.
All vehicle wheels and tires must be the same size and
type, and tires must be properly inflated to produce
accurate signals for the computer.
Anti-Lock Brake Light
The ABS light monitors the Anti-Lock System.
The light will come on when the ignition
switch is turned to the ON position and may
stay on for as long as four seconds.
If the ABS light remains on or comes on while driving, it
indicates that the Anti-Lock portion of the brake system
is not functioning and that service is required. However,
the conventional brake system will continue to operate
normally if the BRAKE warning light is not on.
If the ABS light is on, the brake system should be serviced
as soon as possible to restore the benefits of anti-lock
brakes. If the ABS light does not come on when the
ignition switch is turned to the ON position, have the
bulb repaired as soon as possible.
If both the Brake Warning Light and the ABS Light
remain on, the ABS and Electronic Brake Force Distribu-
tion (EBD) systems are not functioning. Immediate repair
STARTING AND OPERATING 339
5
Page 434 of 531
NPower Steering Ð Fluid Check............452
NFront Suspension Ð Ball Joints............453
NSteering Shaft Seal....................453
NDrive Shaft Universal Joints..............454
NBody Lubrication.....................454
NWindshield Wiper Blades................454
NCooling System.......................456
NHoses And Vacuum/Vapor Harnesses.......461
NFuel System Connections................461
NBrakes.............................462
NAutomatic Transaxle...................464
NFront And Rear Wheel Bearings...........467NAppearance Care And Protection From
Corrosion...........................467
NCleaning The Instrument Panel Cup Holders . . 473
mFuses/Totally Integrated Power Module
(TIPM)..............................474
mVehicle Storage........................481
mReplacement Light Bulbs.................481
mBulb Replacement......................482
NHeadlights..........................482
NFront Park/Turn Signal And Side Marker
Lights.............................483
NFog Lights..........................483
NRear Tail, Stop, Turn Signal, Side Marker And
Backup Lights........................484
432 MAINTAINING YOUR VEHICLE
Page 484 of 531
NOTE:For lighted switches, see your dealer for replace-
ment.
All of the interior bulbs are glass wedge base or glass
cartridge types. Aluminum base bulbs are not approved
and should not be used for replacement.
LIGHT BULBS Ð Exterior Bulb Number
Backup, Tail, Stop Light...................3157
Center High-Mounted Stop Light. . . LED (See Note 1)
Fog Light Ð If Equipped..................9145
Front Side Marker,
Park/Turn Signal............... P27/7Wor3157
Headlight............................. H13
License................................ 168
Note 1: The Center High-Mounted Stop Light (CHMSL)
uses LED lights that are not serviceable separately. The
CHMSL must be replaced as an assembly, see your
authorized Dealer.BULB REPLACEMENT
Headlights
1.Raise the hood to access the rear of the headlight housing.
2. Slide the red lock tab rearward on the connector, then
depress the tab and remove the connector from the bulb.
3. Twist the headlight bulb and pull the bulb from
headlight housing.
4. Install the new headlight bulb and twist until locked
into the headlight housing.
CAUTION!
Do not touch the new bulb with your fingers. Oil
contamination will severely shorten bulb life. If the
bulb comes in contact with an oily surface, clean the
bulb with rubbing alcohol.
482 MAINTAINING YOUR VEHICLE
Page 485 of 531
5. Connect the wiring connector to bulb and slide red
lock tab forward.
Front Park/Turn Signal and Side Marker Lights
1. Raise the hood to access the rear of the headlight
housing.
2. Twist the turn signal socket and remove from the
headlight housing, then pull the bulb out.
3. Push the new bulb into the socket and reinstall the
socket by twisting until locked into the headlight hous-
ing.
Fog Lights
NOTE:Access to the fog light bulb is from the rear of
the fascia. On the left rear side of the fascia, remove the
push pin and lower the hinged access door on the air
dam.1. From behind the bumper fascia, or the access panel on
the air dam, twist the bulb counterclockwise, and remove
bulb.
CAUTION!
Do not touch the new bulb with your fingers. Oil
contamination will severely shorten bulb life. If the
bulb comes in contact with an oily surface, clean the
bulb with rubbing alcohol.
2. Disconnect wire harness from the bulb.
3. Reconnect the wiring harness to the new bulb and
reinstall the bulb by twisting clockwise.
MAINTAINING YOUR VEHICLE 483
7
Page 487 of 531
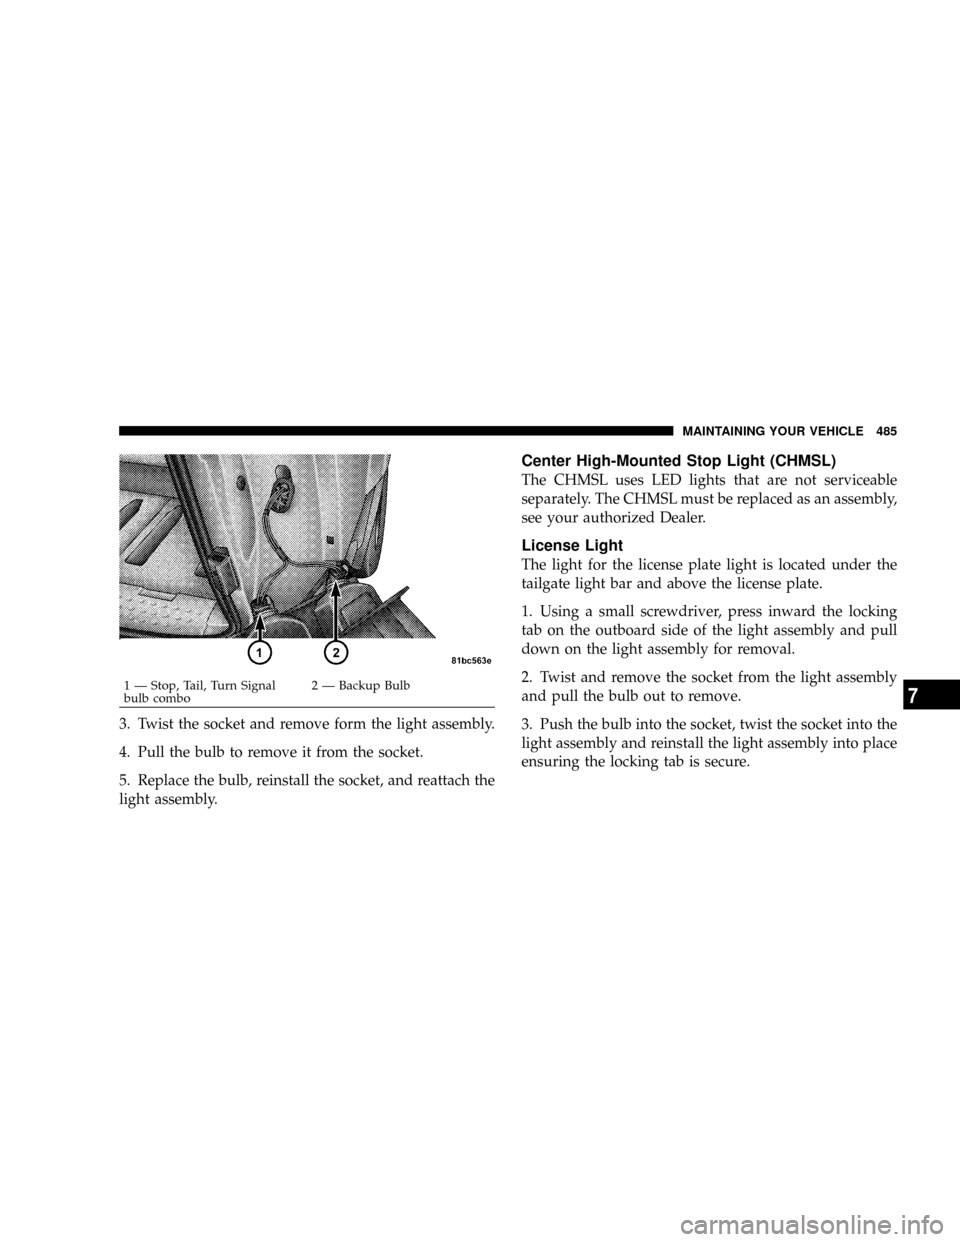
3. Twist the socket and remove form the light assembly.
4. Pull the bulb to remove it from the socket.
5. Replace the bulb, reinstall the socket, and reattach the
light assembly.
Center High-Mounted Stop Light (CHMSL)
The CHMSL uses LED lights that are not serviceable
separately. The CHMSL must be replaced as an assembly,
see your authorized Dealer.
License Light
The light for the license plate light is located under the
tailgate light bar and above the license plate.
1. Using a small screwdriver, press inward the locking
tab on the outboard side of the light assembly and pull
down on the light assembly for removal.
2. Twist and remove the socket from the light assembly
and pull the bulb out to remove.
3. Push the bulb into the socket, twist the socket into the
light assembly and reinstall the light assembly into place
ensuring the locking tab is secure.
1 Ð Stop, Tail, Turn Signal
bulb combo2 Ð Backup BulbMAINTAINING YOUR VEHICLE 4857