trunk DODGE CHALLENGER 2011 3.G User Guide
[x] Cancel search | Manufacturer: DODGE, Model Year: 2011, Model line: CHALLENGER, Model: DODGE CHALLENGER 2011 3.GPages: 88, PDF Size: 4.02 MB
Page 10 of 88
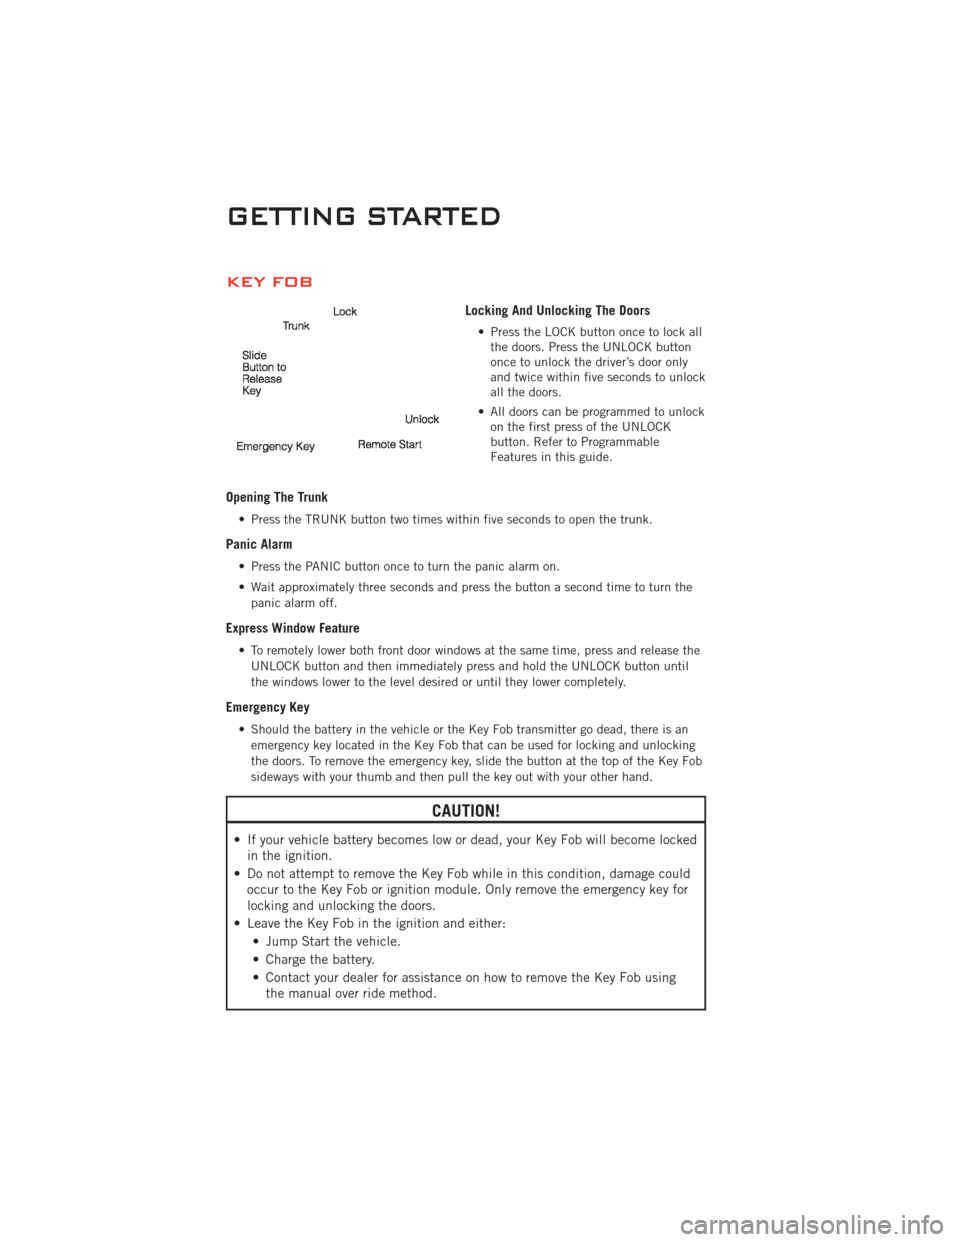
KEY FOB
Locking And Unlocking The Doors
• Press the LOCK button once to lock allthe doors. Press the UNLOCK button
once to unlock the driver’s door only
and twice within five seconds to unlock
all the doors.
• All doors can be programmed to unlock on the first press of the UNLOCK
button. Refer to Programmable
Features in this guide.
Opening The Trunk
• Press the TRUNK button two times within five seconds to open the trunk.
Panic Alarm
• Press the PANIC button once to turn the panic alarm on.
• Wait approximately three seconds and press the button a second time to turn the
panic alarm off.
Express Window Feature
• To remotely lower both front door windows at the same time, press and release theUNLOCK button and then immediately press and hold the UNLOCK button until
the windows lower to the level desired or until they lower completely.
Emergency Key
• Should the battery in the vehicle or the Key Fob transmitter go dead, there is anemergency key located in the Key Fob that can be used for locking and unlocking
the doors. To remove the emergency key, slide the button at the top of the Key Fob
sideways with your thumb and then pull the key out with your other hand.
CAUTION!
• If your vehicle battery becomes low or dead, your Key Fob will become lockedin the ignition.
• Do not attempt to remove the Key Fob while in this condition, damage could occur to the Key Fob or ignition module. Only remove the emergency key for
locking and unlocking the doors.
• Leave the Key Fob in the ignition and either: • Jump Start the vehicle.
• Charge the battery.
• Contact your dealer for assistance on how to remove the Key Fob usingthe manual over ride method.
GETTING STARTED
8
Page 11 of 88
WARNING!
• Leaving unattended children in a vehicle is dangerous for a number ofreasons. A child or others could be severely injured or killed. Children should
be warned not to touch the parking brake, brake pedal, or the shift lever. Do
not leave the Key Fob inside the vehicle or in the ignition. A child could start
the vehicle, operate power windows, other controls, or move the vehicle.
• Do not leave children or animals inside parked vehicles in hot weather. Interior heat build-up may cause them to be severely injured or killed.
• Keep Key Fob transmitters away from children. Operation of the Remote Start System, windows, door locks or other controls could cause serious injury or
death.
REMOTE START
• Press the REMOTE START buttonx2twice within five seconds. Pressing the
REMOTE START button a third time shuts the engine off.
• To drive the vehicle, press the UNLOCK button, insert the Key Fob in the ignition and turn to the ON/RUN position.
• With remote start, the engine will only run for 15 minutes (timeout) unless the ignition Key Fob is placed in the ON/RUN position.
• The vehicle must be started with the Key Fob after two consecutive timeouts.
WARNING!
• Do not start or run an engine in a closed garage or confined area. Exhaust gas contains Carbon Monoxide (CO) which is odorless and colorless. Carbon
Monoxide is poisonous and can cause you or others to be severely injured or
killed when inhaled.
• Keep Key Fob transmitters away from children. Operation of the Remote Start System, windows, door locks or other controls could cause you and others to
be severely injured or killed.
KEYLESS ENTER-N-GO
• The Keyless Enter-N-Go system is an enhancement to the vehicle's Key Fob. This
feature allows you to lock and unlock the vehicle's door(s) and trunk without
having to press the Key Fob lock or unlock buttons, as well as starting and
stopping the vehicle with the press of a button.
To Unlock From The Driver or Passenger Side:
• With a valid Keyless Enter-N-Go Key Fob located outside the vehicle and within5 ft (1.5m) of the driver or passenger side door handle, grab either front door
handle to unlock the door automatically.
GETTING STARTED
9
Page 12 of 88
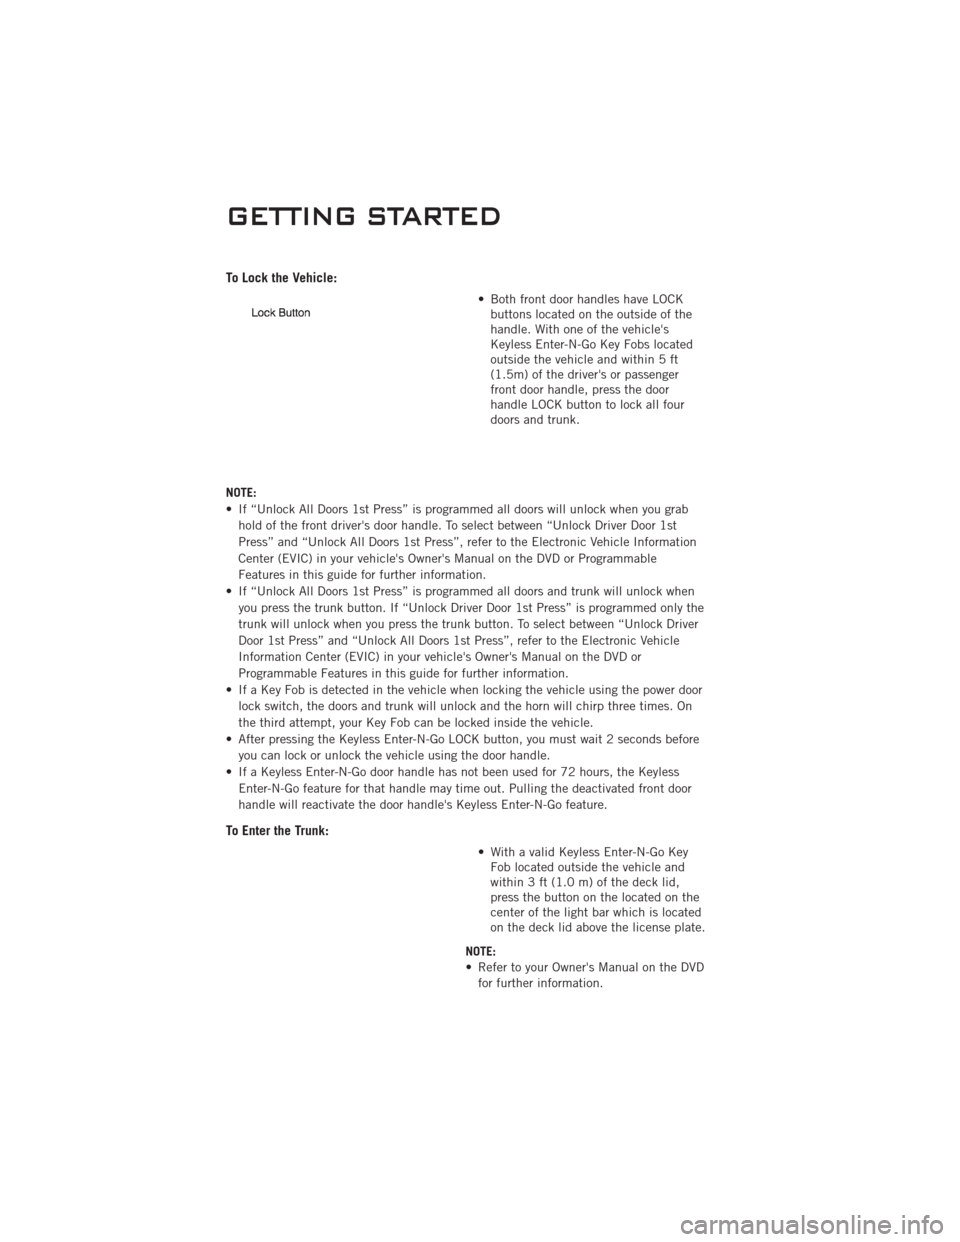
To Lock the Vehicle:
• Both front door handles have LOCKbuttons located on the outside of the
handle. With one of the vehicle's
Keyless Enter-N-Go Key Fobs located
outside the vehicle and within 5 ft
(1.5m) of the driver's or passenger
front door handle, press the door
handle LOCK button to lock all four
doors and trunk.
NOTE:
• If “Unlock All Doors 1st Press” is programmed all doors will unlock when you grab hold of the front driver's door handle. To select between “Unlock Driver Door 1st
Press” and “Unlock All Doors 1st Press”, refer to the Electronic Vehicle Information
Center (EVIC) in your vehicle's Owner's Manual on the DVD or Programmable
Features in this guide for further information.
• If “Unlock All Doors 1st Press” is programmed all doors and trunk will unlock when you press the trunk button. If “Unlock Driver Door 1st Press” is programmed only the
trunk will unlock when you press the trunk button. To select between “Unlock Driver
Door 1st Press” and “Unlock All Doors 1st Press”, refer to the Electronic Vehicle
Information Center (EVIC) in your vehicle's Owner's Manual on the DVD or
Programmable Features in this guide for further information.
• If a Key Fob is detected in the vehicle when locking the vehicle using the power door lock switch, the doors and trunk will unlock and the horn will chirp three times. On
the third attempt, your Key Fob can be locked inside the vehicle.
• After pressing the Keyless Enter-N-Go LOCK button, you must wait 2 seconds before you can lock or unlock the vehicle using the door handle.
• If a Keyless Enter-N-Go door handle has not been used for 72 hours, the Keyless Enter-N-Go feature for that handle may time out. Pulling the deactivated front door
handle will reactivate the door handle's Keyless Enter-N-Go feature.
To Enter the Trunk:
• With a valid Keyless Enter-N-Go KeyFob located outside the vehicle and
within 3 ft (1.0 m) of the deck lid,
press the button on the located on the
center of the light bar which is located
on the deck lid above the license plate.
NOTE:
• Refer to your Owner's Manual on the DVD for further information.
GETTING STARTED
10
Page 60 of 88
JUMP-STARTING
• If your vehicle has a discharged batteryit can be jumpstarted using a set of
jumper cables and a battery in another
vehicle or by using a portable battery
booster pack.
• Jump-starting can be dangerous if done improperly so please follow the
procedures in this section carefully.
NOTE: When using a portable battery
booster pack follow the manufacturer’s
operating instructions and precautions.
Preparations for Jump-Start
• The battery is stored under an access cover in the trunk. Remote battery posts are
located on the right side of the engine compartment for jump-starting.
NOTE: The remote battery posts are viewed by standing on the right side of the vehicle
looking over the fender.
• Set the parking brake, shift the automatic transmission into PARK and turn theignition to LOCK.
• Turn off the heater, radio, and all unnecessary electrical accessories.
• If using another vehicle to jump-start the battery, park the vehicle within the jumper cables reach, set the parking brake and make sure the ignition is OFF.
Jump-Starting Procedure
• Connect the positive (+) end of the jumper cable to the remote positive (+) post ofthe discharged vehicle.
• Connect the opposite end of the positive (+) jumper cable to the positive (+) post of the booster battery.
• Connect the negative end (-) of the jumper cable to the negative (-) post of the booster battery.
• Connect the opposite end of the negative (-) jumper cable to the remote negative (-) post of the vehicle with the discharged battery.
• Start the engine in the vehicle that has the booster battery, let the engine idle a few minutes, and then start the engine in the vehicle with the discharged battery.
Once the engine is started, remove the jumper cables in the reverse sequence:
• Disconnect the negative (-) jumper cable from the remote negative (-) post of the vehicle with the discharged battery.
• Disconnect the negative end (-) of the jumper cable from the negative (-) post of the booster battery.
WHAT TO DO IN EMERGENCIES
58
Page 75 of 88
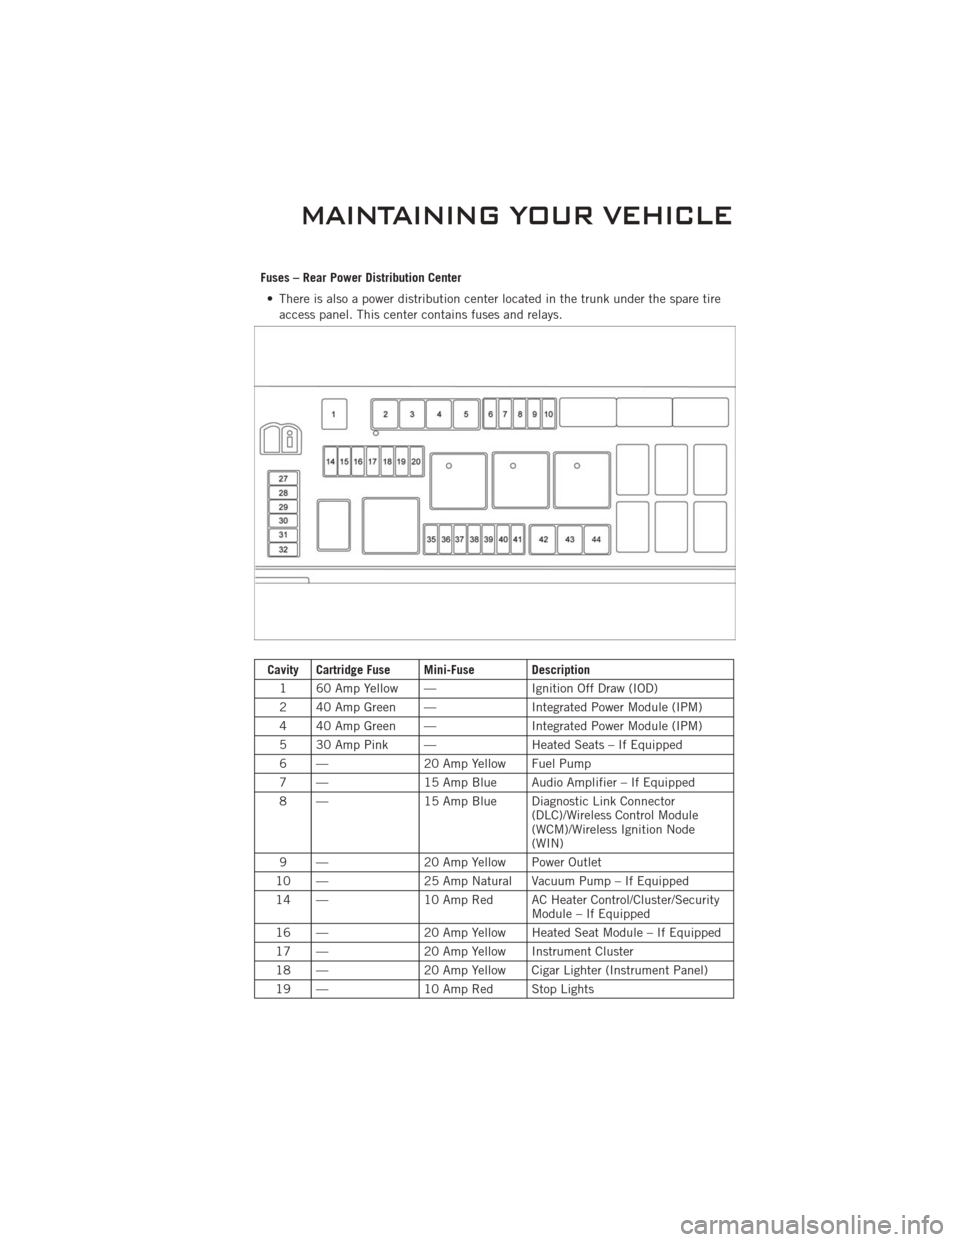
Fuses – Rear Power Distribution Center• There is also a power distribution center located in the trunk under the spare tire access panel. This center contains fuses and relays.
Cavity Cartridge Fuse Mini-Fuse Description
1 60 Amp Yellow — Ignition Off Draw (IOD)
2 40 Amp Green — Integrated Power Module (IPM)
4 40 Amp Green — Integrated Power Module (IPM)
5 30 Amp Pink — Heated Seats – If Equipped
6 — 20 Amp Yellow Fuel Pump
7 — 15 Amp Blue Audio Amplifier – If Equipped
8 — 15 Amp Blue Diagnostic Link Connector
(DLC)/Wireless Control Module
(WCM)/Wireless Ignition Node
(WIN)
9 — 20 Amp Yellow Power Outlet
10 — 25 Amp Natural Vacuum Pump – If Equipped
14 — 10 Amp Red AC Heater Control/Cluster/Security
Module – If Equipped
16 — 20 Amp Yellow Heated Seat Module – If Equipped
17 — 20 Amp Yellow Instrument Cluster
18 — 20 Amp Yellow Cigar Lighter (Instrument Panel)
19 — 10 Amp Red Stop Lights
MAINTAINING YOUR VEHICLE
73