light DODGE CHALLENGER 2014 3.G User Guide
[x] Cancel search | Manufacturer: DODGE, Model Year: 2014, Model line: CHALLENGER, Model: DODGE CHALLENGER 2014 3.GPages: 148, PDF Size: 3.71 MB
Page 3 of 148
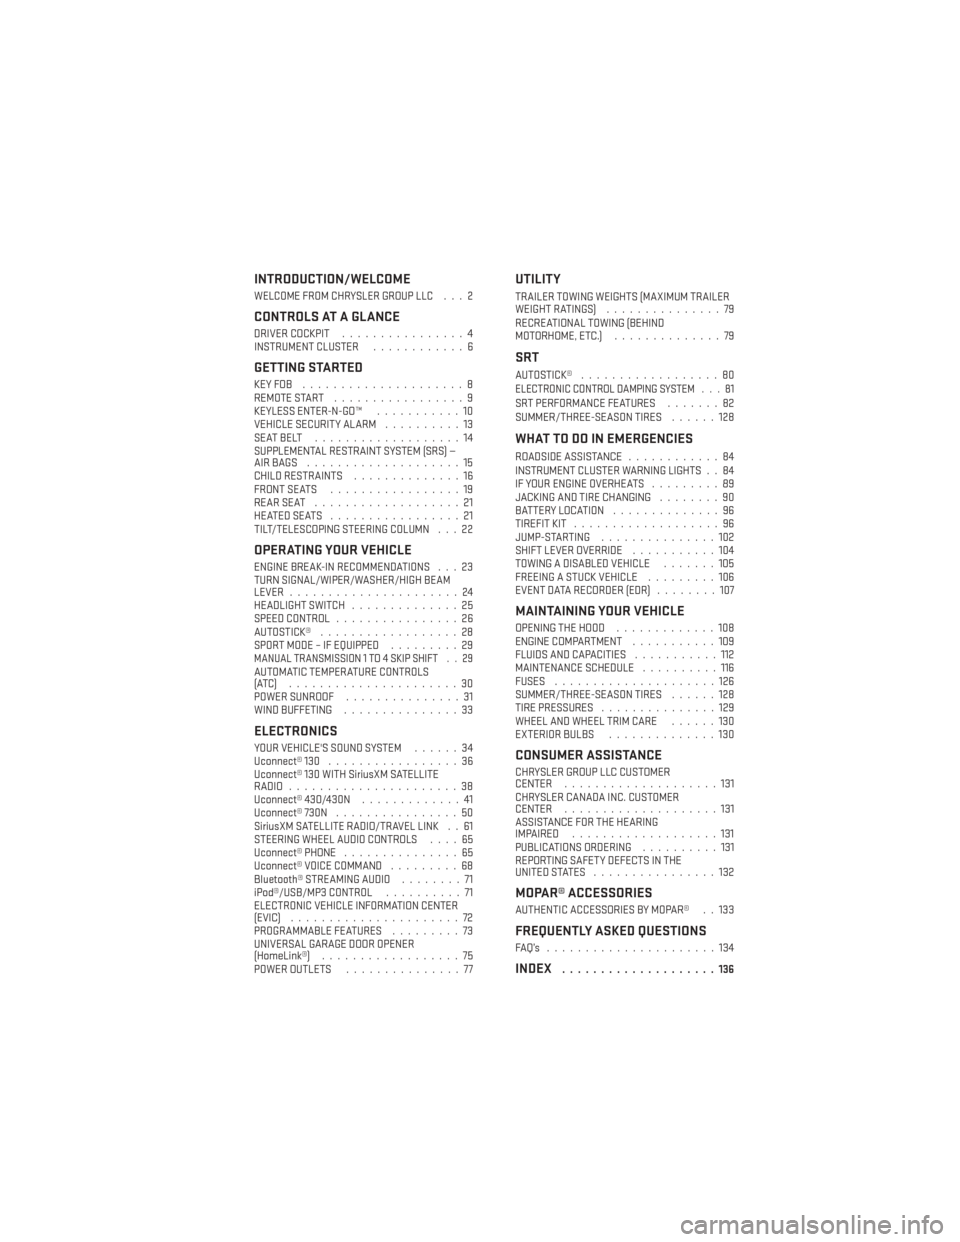
INTRODUCTION/WELCOME
WELCOME FROM CHRYSLER GROUP LLC . . . 2
CONTROLS AT A GLANCE
DRIVER COCKPIT................4
INSTRUMENT CLUSTER ............6
GETTING STARTED
KEYFOB .....................8
REMOTE START.................9
KEYLESS ENTER-N-GO™ ...........10
VEHICLE SECURITY ALARM ..........13
SEATBELT ...................14
SUPPLEMENTAL RESTRAINT SYSTEM (SRS) —
AIRBAGS ....................15
CHILD RESTRAINTS ..............16
FRONT SEATS .................19
REARSEAT ...................21
HEATEDSEATS .................21
TILT/TELESCOPING STEERING COLUMN . . . 22
OPERATING YOUR VEHICLE
ENGINE BREAK-IN RECOMMENDATIONS . . . 23
TURN SIGNAL/WIPER/WASHER/HIGH BEAM
LEVER ......................24
HEADLIGHT SWITCH ..............25
SPEED CONTROL ................26
AUTOSTICK® ..................28
SPORT MODE – IF EQUIPPED .........29
MANUAL TRANSMISSION 1 TO 4 SKIP SHIFT . . 29AUTOMATIC TEMPERATURE CONTROLS
(ATC) ......................30
POWER SUNROOF...............31
WIND BUFFETING ...............33
ELECTRONICS
YOUR VEHICLE'S SOUND SYSTEM ......34
Uconnect® 130 .................36
Uconnect® 130 WITH SiriusXM SATELLITE
RADIO ......................38
Uconnect® 430/430N .............41
Uconnect® 730N ................50
SiriusXM SATELLITE RADIO/TRAVEL LINK . . 61
STEERING WHEEL AUDIO CONTROLS ....65
Uconnect® PHONE ...............65
Uconnect® VOICE COMMAND .........68
Bluetooth® STREAMING AUDIO ........71
iPod®/USB/MP3 CONTROL ..........71
ELECTRONIC VEHICLE INFORMATION CENTER
(EVIC) ......................72
PROGRAMMABLE FEATURES .........73
UNIVERSAL GARAGE DOOR OPENER
(HomeLink®) ..................75
POWER OUTLETS ...............77
UTILITY
TRAILER TOWING WEIGHTS (MAXIMUM TRAILER
WEIGHTRATINGS) ...............79
RECREATIONAL TOWING (BEHIND
MOTORHOME, ETC.) ..............79
SRT
AUTOSTICK®..................80ELECTRONIC CONTROL DAMPING SYSTEM . . . 81SRT PERFORMANCE FEATURES .......82
SUMMER/THREE-SEASON TIRES ......128
WHAT TO DO IN EMERGENCIES
ROADSIDE ASSISTANCE............84
INSTRUMENT CLUSTER WARNING LIGHTS . . 84
IF YOUR ENGINE OVERHEATS .........89
JACKING AND TIRE CHANGING ........90
BATTERY LOCATION ..............96
TIREFIT KIT ...................96
JUMP-STARTING ...............102
SHIFT LEVER OVERRIDE ...........104
TOWING A DISABLED VEHICLE .......105
FREEING A STUCK VEHICLE .........106
EVENT DATA RECORDER (EDR) ........107
MAINTAINING YOUR VEHICLE
OPENING THE HOOD.............108
ENGINE COMPARTMENT ...........109
FLUIDS AND CAPACITIES ...........112
MAINTENANCE SCHEDULE ..........116
FUSES .....................126
SUMMER/THREE-SEASON TIRES ......128
TIRE PRESSURES ...............129
WHEEL AND WHEEL TRIM CARE ......130
EXTERIOR BULBS ..............130
CONSUMER ASSISTANCE
CHRYSLER GROUP LLC CUSTOMER
CENTER....................131
CHRYSLER CANADA INC. CUSTOMER
CENTER ....................131
ASSISTANCE FOR THE HEARING
IMPAIRED ...................131
PUBLICATIONS ORDERING ..........131
REPORTING SAFETY DEFECTS IN THE
UNITEDSTATES ................132
MOPAR® ACCESSORIES
AUTHENTIC ACCESSORIES BY MOPAR® . . 133
FREQUENTLY ASKED QUESTIONS
FAQ’s ......................134
INDEX....................136
TABLE OF CONTENTS
Page 6 of 148
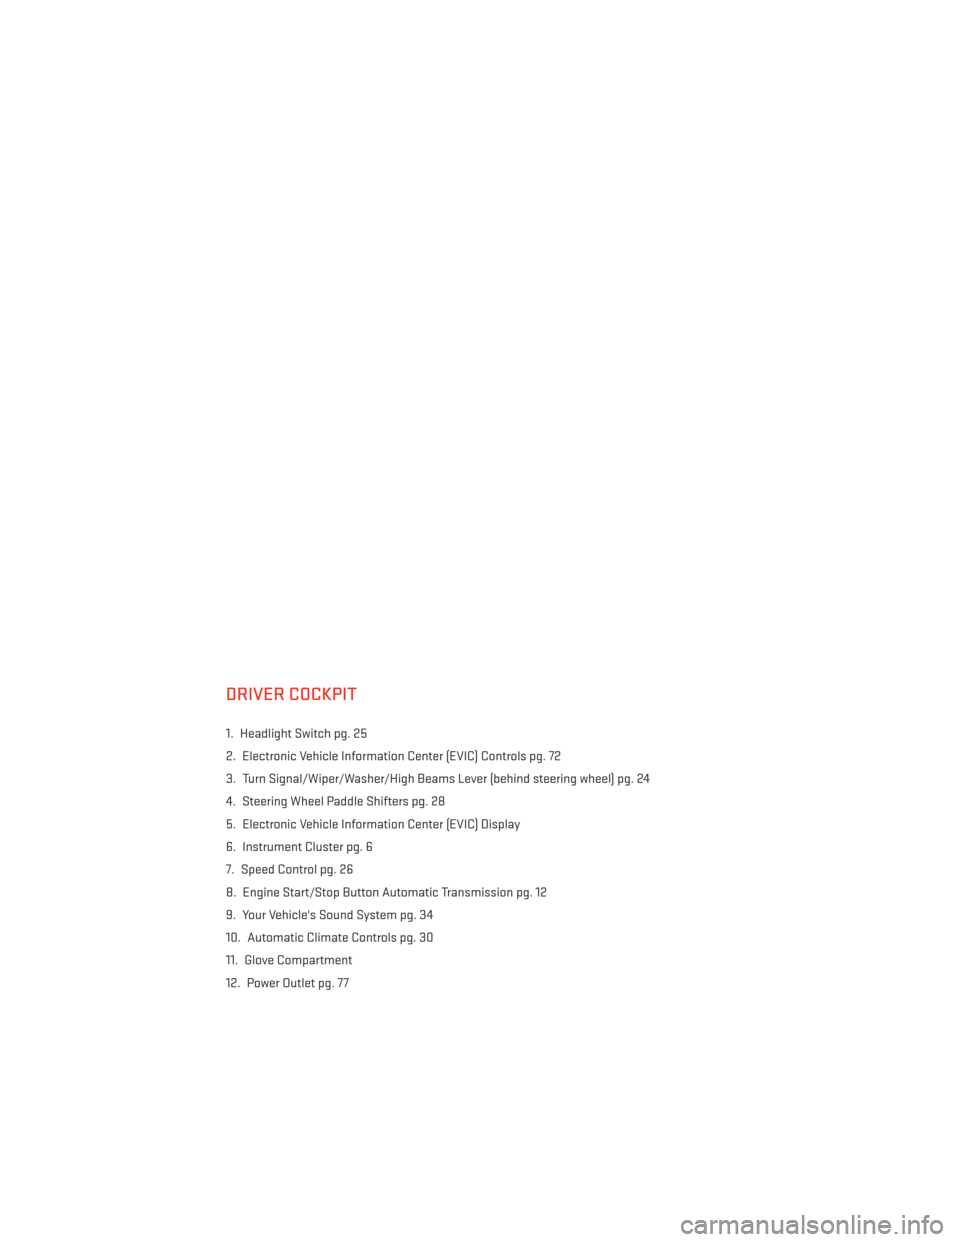
DRIVER COCKPIT
1. Headlight Switch pg. 25
2. Electronic Vehicle Information Center (EVIC) Controls pg. 72
3. Turn Signal/Wiper/Washer/High Beams Lever (behind steering wheel) pg. 24
4. Steering Wheel Paddle Shifters pg. 28
5. Electronic Vehicle Information Center (EVIC) Display
6. Instrument Cluster pg. 6
7. Speed Control pg. 26
8. Engine Start/Stop Button Automatic Transmission pg. 12
9. Your Vehicle's Sound System pg. 34
10. Automatic Climate Controls pg. 30
11. Glove Compartment
12. Power Outlet pg. 77
CONTROLS AT A GLANCE
4
Page 8 of 148
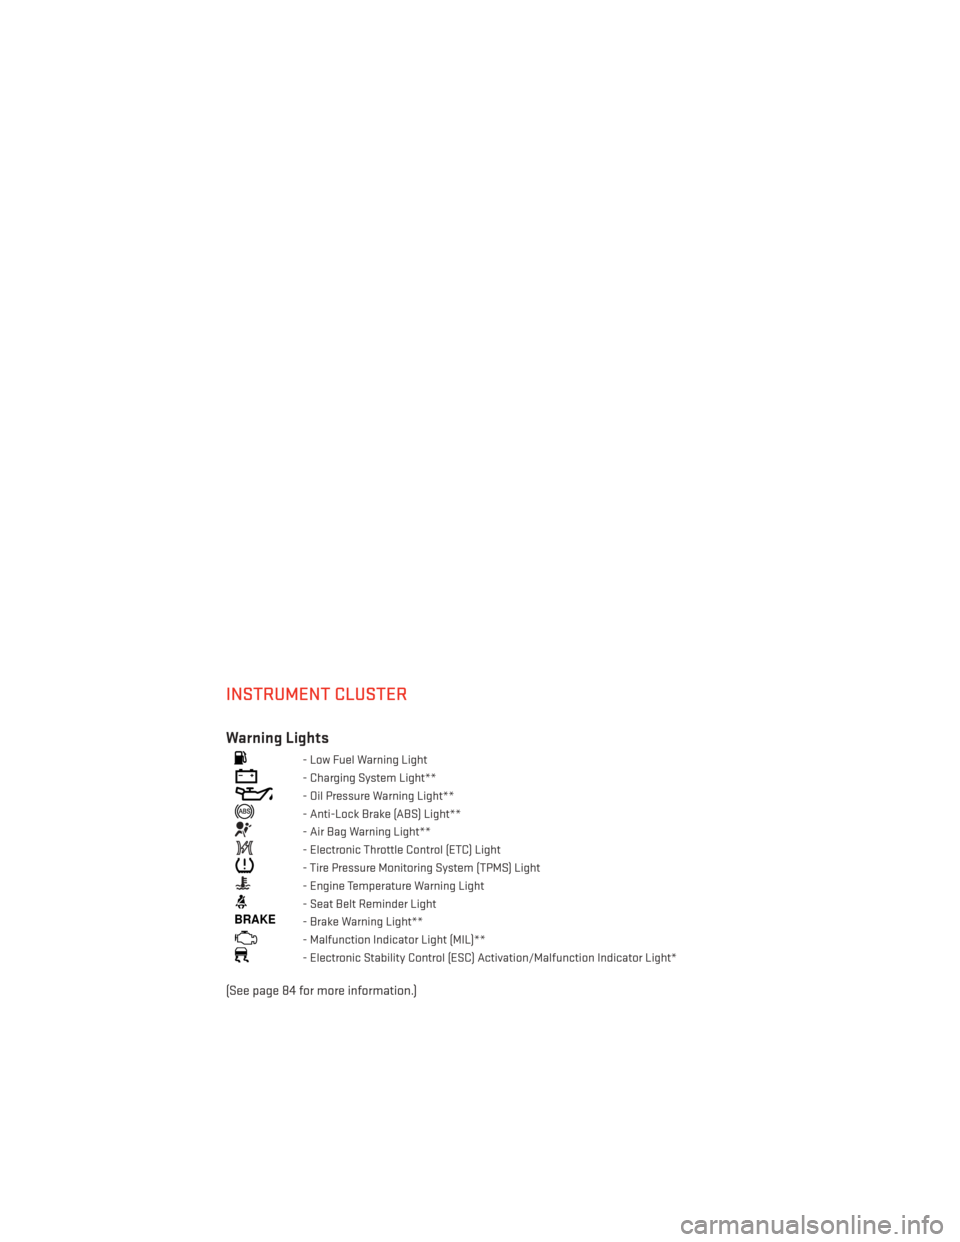
INSTRUMENT CLUSTER
Warning Lights
- Low Fuel Warning Light
- Charging System Light**
- Oil Pressure Warning Light**
- Anti-Lock Brake (ABS) Light**
- Air Bag Warning Light**
- Electronic Throttle Control (ETC) Light
- Tire Pressure Monitoring System (TPMS) Light
- Engine Temperature Warning Light
- Seat Belt Reminder Light
BRAKE- Brake Warning Light**
- Malfunction Indicator Light (MIL)**
- Electronic Stability Control (ESC) Activation/Malfunction Indicator Light*
(See page 84 for more information.)
CONTROLS AT A GLANCE
6
Page 9 of 148
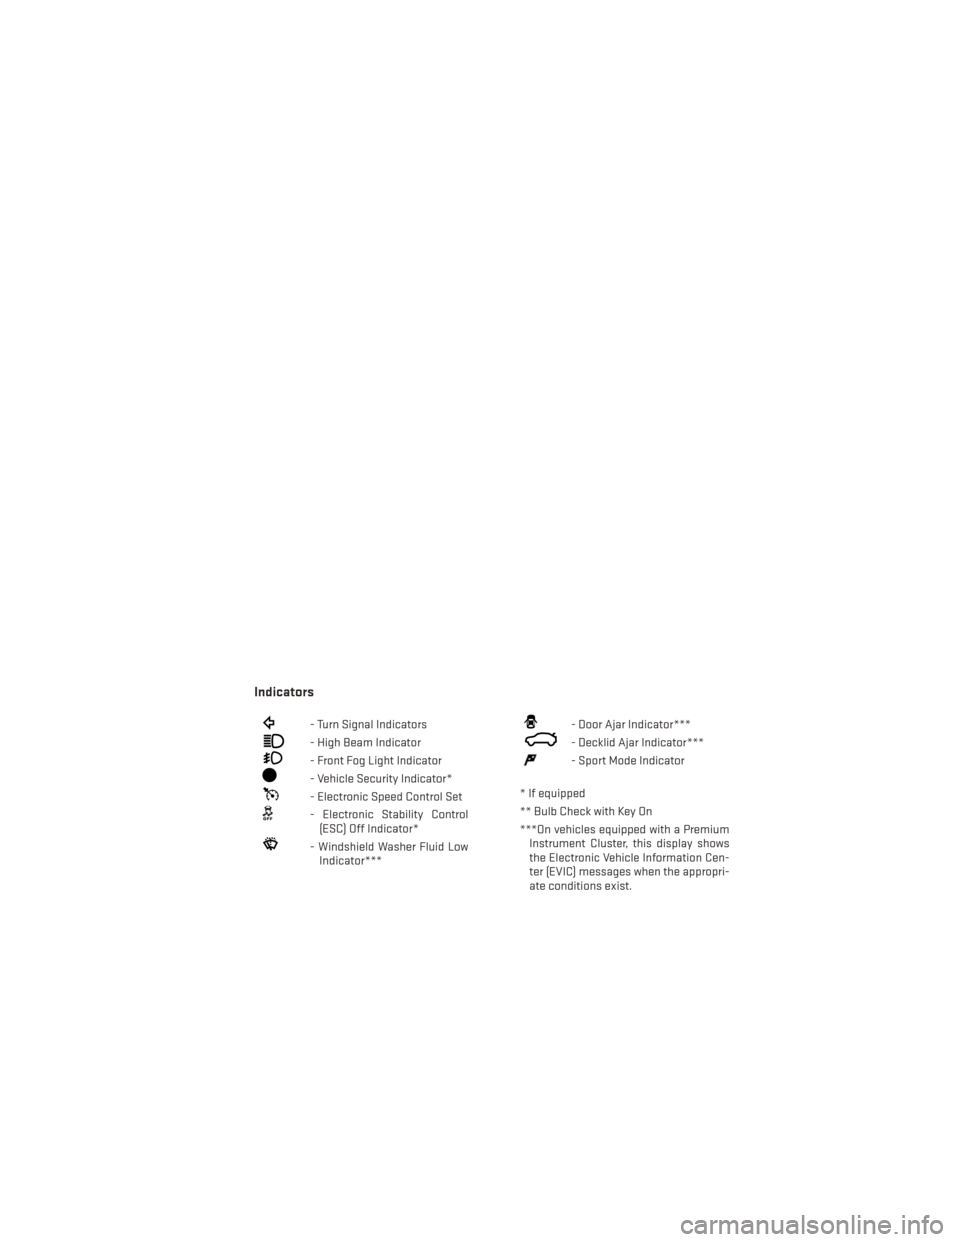
Indicators
- Turn Signal Indicators
- High Beam Indicator
- Front Fog Light Indicator
- Vehicle Security Indicator*
- Electronic Speed Control Set
- Electronic Stability Control(ESC) Off Indicator*
- Windshield Washer Fluid LowIndicator***
- Door Ajar Indicator***
- Decklid Ajar Indicator***
- Sport Mode Indicator
* If equipped
** Bulb Check with Key On
***On vehicles equipped with a Premium Instrument Cluster, this display shows
the Electronic Vehicle Information Cen-
ter (EVIC) messages when the appropri-
ate conditions exist.
CONTROLS AT A GLANCE
7
Page 10 of 148
KEY FOB
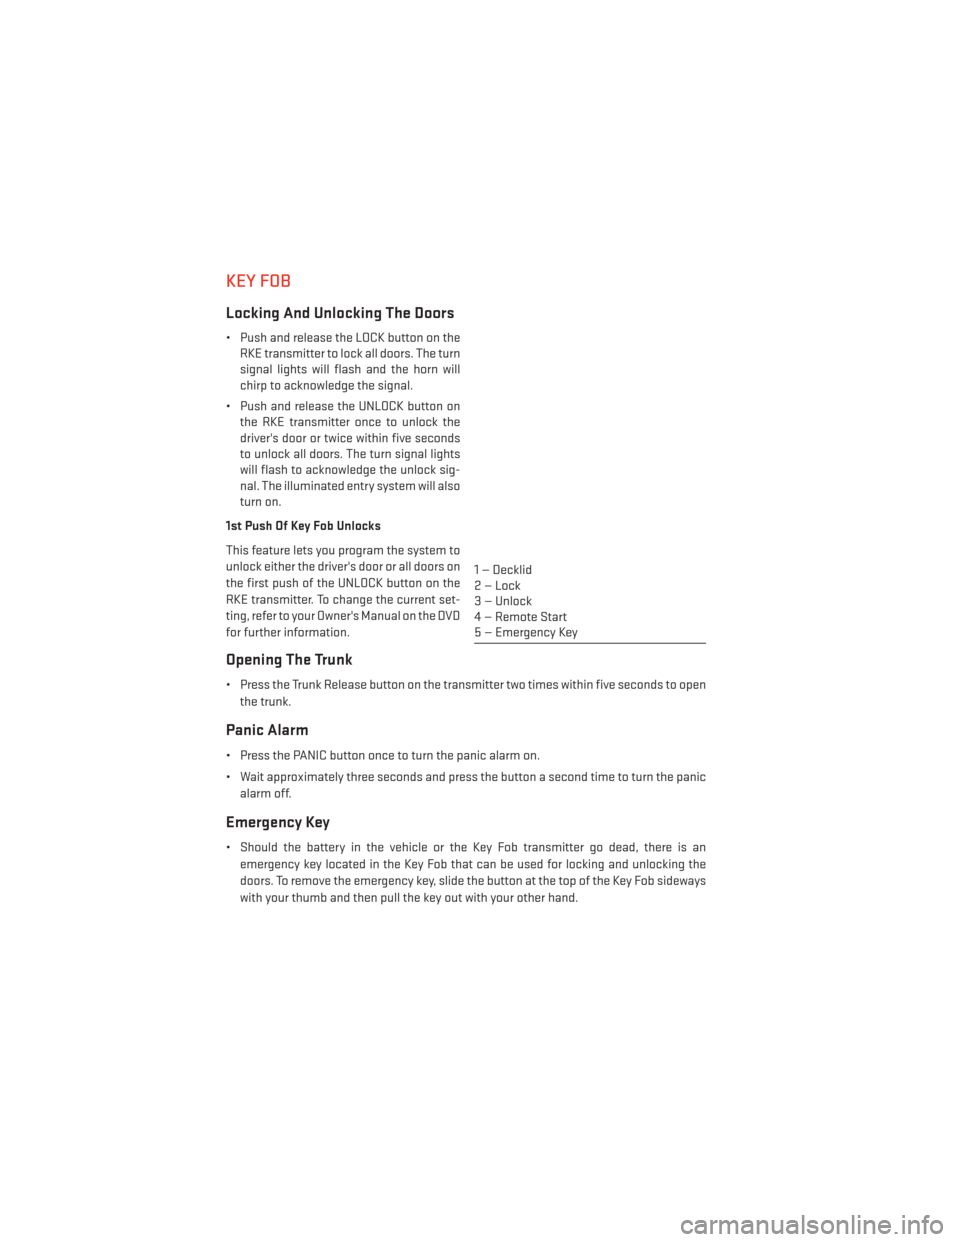
Locking And Unlocking The Doors
• Push and release the LOCK button on theRKE transmitter to lock all doors. The turn
signal lights will flash and the horn will
chirp to acknowledge the signal.
• Push and release the UNLOCK button on the RKE transmitter once to unlock the
driver's door or twice within five seconds
to unlock all doors. The turn signal lights
will flash to acknowledge the unlock sig-
nal. The illuminated entry system will also
turn on.
1st Push Of Key Fob Unlocks
This feature lets you program the system to
unlock either the driver's door or all doors on
the first push of the UNLOCK button on the
RKE transmitter. To change the current set-
ting, refer to your Owner's Manual on the DVD
for further information.
Opening The Trunk
• Press the Trunk Release button on the transmitter two times within five seconds to open the trunk.
Panic Alarm
• Press the PANIC button once to turn the panic alarm on.
• Wait approximately three seconds and press the button a second time to turn the panicalarm off.
Emergency Key
• Should the battery in the vehicle or the Key Fob transmitter go dead, there is anemergency key located in the Key Fob that can be used for locking and unlocking the
doors. To remove the emergency key, slide the button at the top of the Key Fob sideways
with your thumb and then pull the key out with your other hand.
1 — Decklid
2—Lock
3 — Unlock
4 — Remote Start
5 — Emergency Key
GETTING STARTED
8
Page 13 of 148
• If “Unlock All Doors 1st Press” is programmed all doors and trunk will unlock when youpress the trunk button. If “Unlock Driver Door 1st Press” is programmed only the trunk will
unlock when you press the trunk button. To select between “Unlock Driver Door 1st Press”
and “Unlock All Doors 1st Press”, refer to the Electronic Vehicle Information Center (EVIC)
in your vehicle's Owner's Manual on the DVD or Programmable Features in this guide for
further information.
• If a Key Fob is detected in the vehicle when locking the vehicle using the power door lock switch, the doors and trunk will unlock and the horn will chirp three times. On the third
attempt, your Key Fob can be locked inside the vehicle.
• After pressing the Keyless Enter-N-Go™ LOCK button, you must wait two seconds before you can lock or unlock the vehicle using the door handle. This is done to allow you to
check if the vehicle is locked by pulling the door handle, without the vehicle reacting and
unlocking.
• If a Keyless Enter-N-Go™ door handle has not been used for 72 hours, the Keyless Enter-N-Go™ feature for that handle may time out. Pulling the deactivated front door
handle will reactivate the door handle's Keyless Enter-N-Go™ feature.
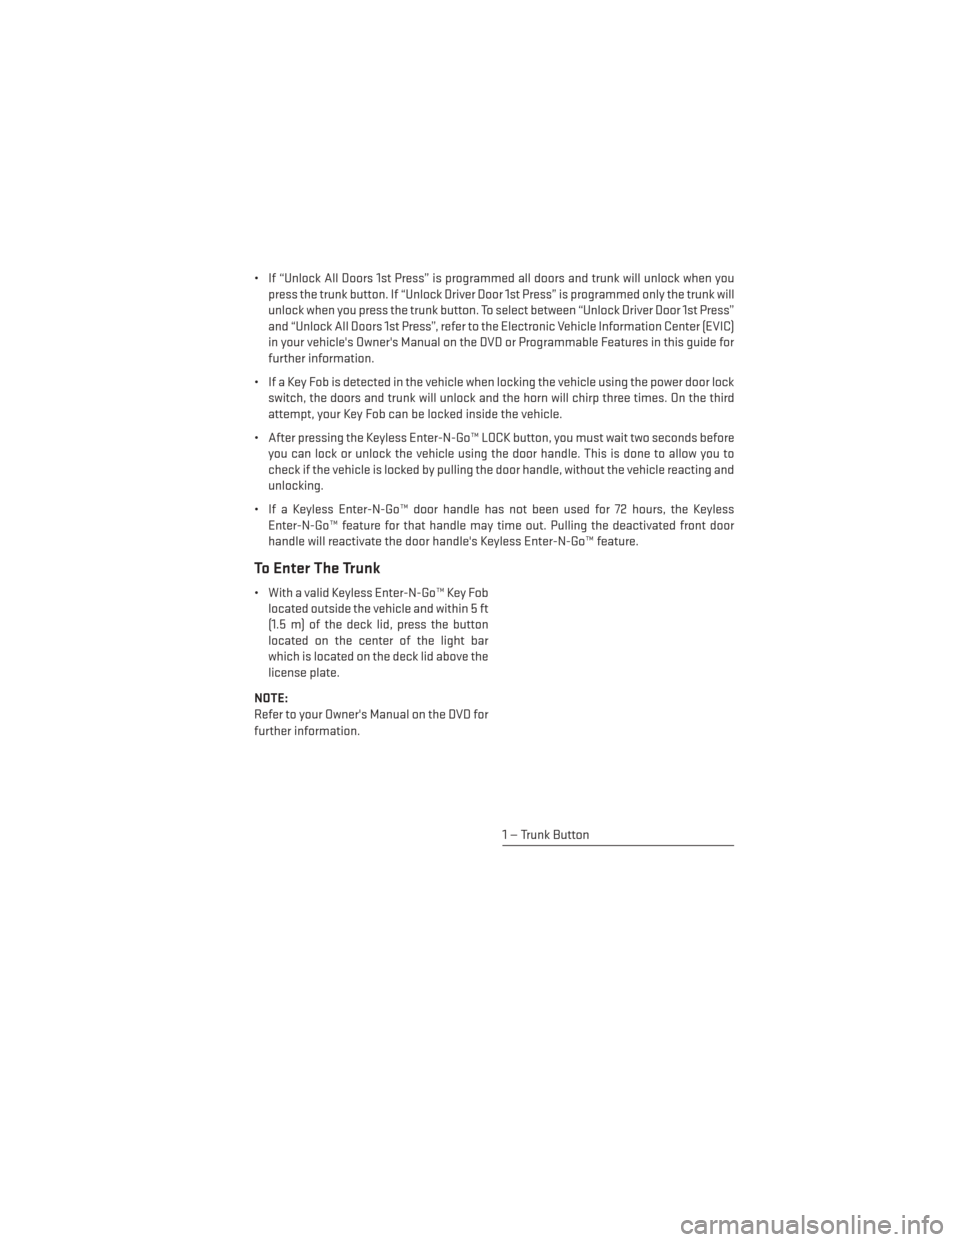
To Enter The Trunk
• With a valid Keyless Enter-N-Go™ Key Foblocated outside the vehicle and within 5 ft
(1.5 m) of the deck lid, press the button
located on the center of the light bar
which is located on the deck lid above the
license plate.
NOTE:
Refer to your Owner's Manual on the DVD for
further information.
1 — Trunk Button
GETTING STARTED
11
Page 17 of 148
SUPPLEMENTAL RESTRAINT SYSTEM (SRS) — AIR BAGS
This vehicle has Advanced Front Air Bags for both the driver and right front passenger as a
supplement to the seat belt restraint system. The Advanced Front Air Bags will not deploy in
every type of collision.
Advanced Front Air Bags are designed to provide additional protection by supplementing
the seat belts in certain frontal collisions depending on several factors, including the
severity and type of collision. Advanced Front Air Bags are not expected to reduce the risk
of injury in rear, side, or rollover collisions.
• This vehicle may be equipped with Supplemental Side Air Bag Inflatable Curtains toprotect the driver, front and rear passengers sitting next to a window.
• This vehicle is equipped with Supplemental Seat-Mounted Side Air Bags to provide enhanced protection to help protect an occupant during a side impact.
If the Air Bag Warning Light
is not on during starting, stays on, or turns on while driving,
have the vehicle serviced by an authorized service center immediately.
Refer to the Owner's Manual on the DVD for further details regarding the “Supplemental
Restraint System (SRS) in Things To Know Before Starting”.
WARNING!
• Relying on the air bags alone could lead to more severe injuries in a collision. The air bags work with your seat belt to restrain you properly. In some collisions, the air bags
won't deploy at all. Always wear your seat belts even though you have air bags.
• Being too close to the steering wheel or instrument panel during Advanced Front Air
Bag deployment could cause serious injury, including death. Air bags need room to
inflate. Sit back, comfortably extending your arms to reach the steering wheel or
instrument panel.
• Supplemental Side Air Bag Inflatable Curtains and Supplemental Seat-Mounted Side
Air Bags need room to inflate. Do not lean against the door or window. Sit upright in
the center of the seat.
• Being too close to the Supplemental Side Air Bag Inflatable Curtain and/or Seat-
Mounted Side Air Bag during deployment could cause you to be severely injured or
killed.
• Do not drive your vehicle after the air bags have deployed. If you are involved in
another collision, the air bags will not be in place to protect you.
• After any collision, the vehicle should be taken to an authorized dealer immediately.
GETTING STARTED
15
Page 26 of 148
TURN SIGNAL/WIPER/WASHER/HIGH BEAM LEVER
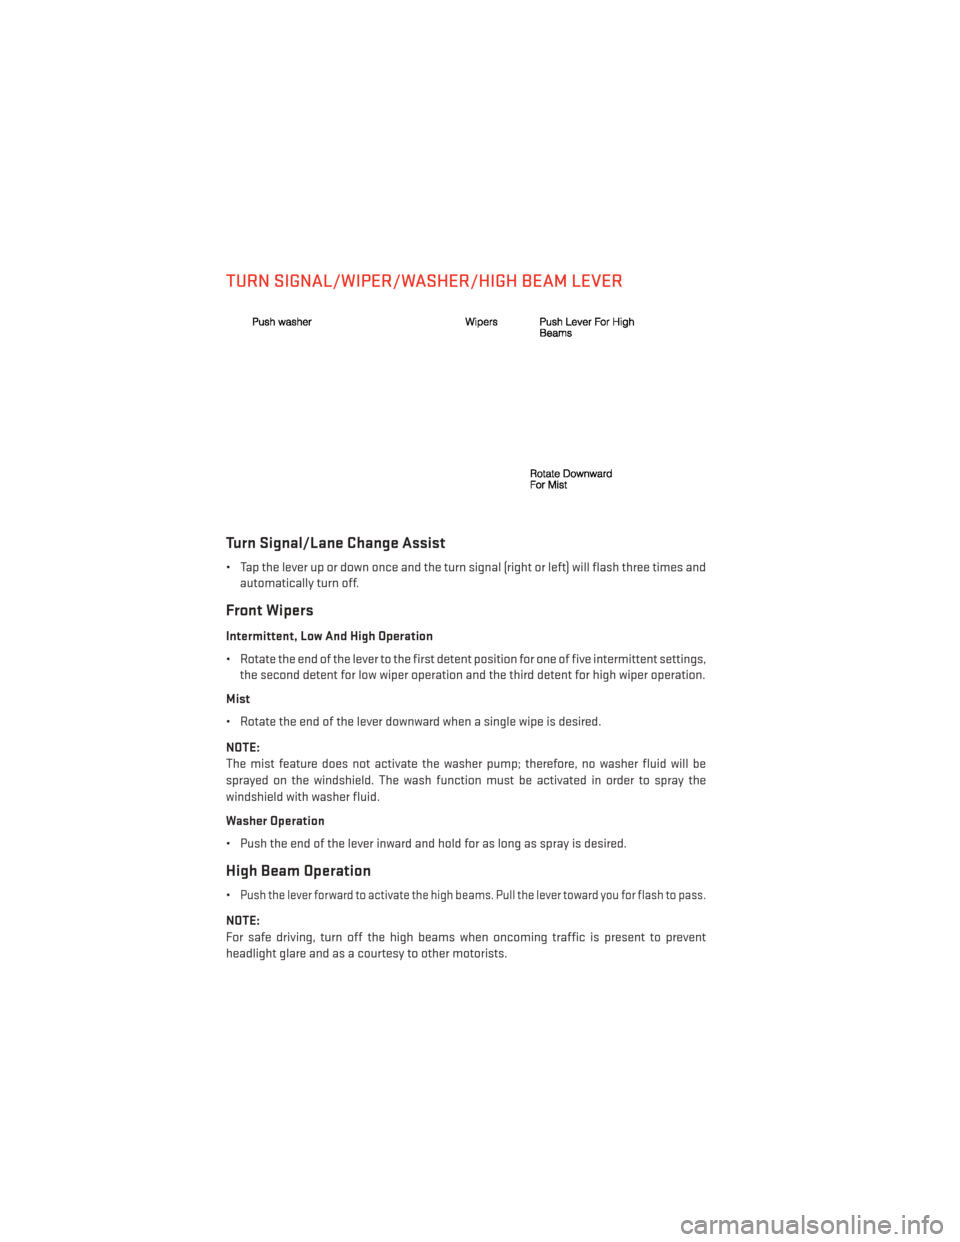
Turn Signal/Lane Change Assist
• Tap the lever up or down once and the turn signal (right or left) will flash three times andautomatically turn off.
Front Wipers
Intermittent, Low And High Operation
• Rotate the end of the lever to the first detent position for one of five intermittent settings,the second detent for low wiper operation and the third detent for high wiper operation.
Mist
• Rotate the end of the lever downward when a single wipe is desired.
NOTE:
The mist feature does not activate the washer pump; therefore, no washer fluid will be
sprayed on the windshield. The wash function must be activated in order to spray the
windshield with washer fluid.
Washer Operation
• Push the end of the lever inward and hold for as long as spray is desired.
High Beam Operation
•Push the lever forward to activate the high beams. Pull the lever toward you for flash to pass.
NOTE:
For safe driving, turn off the high beams when oncoming traffic is present to prevent
headlight glare and as a courtesy to other motorists.
OPERATING YOUR VEHICLE
24
Page 27 of 148
HEADLIGHT SWITCH
Automatic Headlights/Parking
Lights/Headlights
• Rotate the headlight switch, located onthe instrument panel to the left of the
steering wheel, to the first detent for park-
ing lights
and to the second detent
for headlights
.
• With the parking lights or low beam head- lights on, push the headlight switch once
for fog lights.
• Rotate the headlight switch to “A” for AUTO headlights.
• When set to “A” (AUTO), the system auto- matically turns the headlights on or off
based on ambient light levels.
Fog Lights
• Turn the headlights or parking lights onand push the headlight switch once to
turn the fog lights on. Push the switch a second time to turn the fog lights off. Fog lights
will not operate when high beams are on.
• A fog light symbol will illuminate in the cluster to indicate the fog lights are on.
Instrument Panel Dimmer
• Rotate the dimmer control to the extreme bottom position to fully dim the instrument panel lights and prevent the interior lights from illuminating when a door is opened.
• Rotate the dimmer control up to increase the brightness of the instrument panel when the parking lights or headlights are on.
• Rotate the dimmer control up to the next detent position to fully brighten the odometer and radio when the parking lights or headlights are on.
• Rotate the dimmer control up to the last detent position to turn on the interior lighting.
• If your vehicle is equipped with a touchscreen, the dimming is programmable through the Uconnect® system. Refer to “Uconnect® Settings ” in “Understanding Your Instru-
ment Panel” in the Owner's Manual on the DVD for further details.
1 — Automatic Headlights
2 — Rotate Dimmer
3 — Push Fog Lights
4 — Rotate Headlight Switch
OPERATING YOUR VEHICLE
25
Page 32 of 148
AUTOMATIC TEMPERATURE CONTROLS (ATC)
Automatic Operation
• Turn the Mode and Blower Controls to the AUTO position.
• Select the desired temperature by rotating the Temperature Control.
• The system will maintain the set temperature automatically.
Air Conditioning (A/C)
• If the air conditioning button is pressed while in the AUTO mode, the indicator light mayflash three times to indicate the cabin air is being controlled automatically.
Air Recirculation
• Use Recirculation for maximum A/C operation.
• For window defogging, turn the Recirculation button off.
• If the Recirculation button is pressed while in the AUTO mode, the indicator light mayflash three times to indicate the cabin air is being controlled automatically.
Heated Mirrors
• The mirrors are heated to melt frost or ice. This feature is activated whenever you turn onthe rear window defroster.
OPERATING YOUR VEHICLE
30