wheel size DODGE CHALLENGER 2015 3.G Owners Manual
[x] Cancel search | Manufacturer: DODGE, Model Year: 2015, Model line: CHALLENGER, Model: DODGE CHALLENGER 2015 3.GPages: 603, PDF Size: 14.97 MB
Page 59 of 603
On the other hand, depending on the type and location of
impact, Advanced Front Air Bags may deploy in crashes
with little vehicle front-end damage but that produce a
severe initial deceleration.
Because air bag sensors measure vehicle deceleration
over time, vehicle speed and damage by themselves are
not good indicators of whether or not an air bag should
have deployed.
Seat belts are necessary for your protection in all colli-
sions, and also are needed to help keep you in position,
away from an inflating air bag.
When the ORC detects a collision requiring the Ad-
vanced Front Air Bags, it signals the inflator units. A large
quantity of non-toxic gas is generated to inflate the
Advanced Front Air Bags.
The steering wheel hub trim cover and the upper right
side of the instrument panel separate and fold out of the
way as the air bags inflate to their full size. The Advanced
Front Air Bags fully inflate in less time than it takes to
blink your eyes. The air bags then quickly deflate while
helping to restrain the driver and front passenger.
Knee Impact Bolsters
The Knee Impact Bolsters help protect the knees of the
driver and front passenger, and position the front occu-
pants for improved interaction with the Advanced Front
Air Bags.
WARNING!
•Do not drill, cut, or tamper with the knee impact
bolsters in any way.
•Do not mount any accessories to the knee impact
bolsters such as alarm lights, stereos, citizen band
radios, etc.
2
THINGS TO KNOW BEFORE STARTING YOUR VEHICLE 57
Page 234 of 603
CAUTION!
The TPMS has been optimized for the original
equipment tires and wheels. TPMS pressures and
warning have been established for the tire size
equipped on your vehicle. Undesirable system opera-
tion or sensor damage may result when using re-
placement equipment that is not of the same size,
type, and/or style. Aftermarket wheels can cause
sensor damage. Do not use tire sealant from a can or
balance beads if your vehicle is equipped with a
TPMS, as damage to the sensors may result.
18. Electronic Stability Control (ESC) OFF Indicator
Light — If Equipped
This light indicates the Electronic Stability Con-
trol (ESC) is off.
With Drive Modes the ESC OFF indicator will
be lit any time the Traction modes is set to Sport, Track or
Full OFF.
232 UNDERSTANDING YOUR INSTRUMENT PANEL
Page 385 of 603
WARNING!
•The Anti-Lock Brake System (ABS) contains so-
phisticated electronic equipment that may be sus-
ceptible to interference caused by improperly in-
stalled or high output radio transmitting
equipment. This interference can cause possible
loss of anti-lock braking capability. Installation of
such equipment should be performed by qualified
professionals.
•Pumping of the Anti-Lock Brakes will diminish
their effectiveness and may lead to a collision.
Pumping makes the stopping distance longer. Just
press firmly on your brake pedal when you need to
slow down or stop.
(Continued)
WARNING!(Continued)
•The Anti-Lock Brake System (ABS) cannot prevent
the natural laws of physics from acting on the
vehicle, nor can it increase braking or steering
efficiency beyond that afforded by the condition of
the vehicle brakes and tires or the traction afforded.
•The Anti-Lock Brake System (ABS) cannot prevent
collisions, including those resulting from excessive
speed in turns, following another vehicle too
closely, or hydroplaning.
•The capabilities of an Anti-Lock Brake System
(ABS) equipped vehicle must never be exploited in
a reckless or dangerous manner, that could jeopar-
dize the user’s safety or the safety of others.
All vehicle wheels and tires must be the same size and
type and tires must be properly inflated to produce
accurate signals for the computer.
5
STARTING AND OPERATING 383
Page 412 of 603
equipment tire and wheel found on the front or rear axle
of your vehicle. This spare tire may be used in the tire
rotation for your vehicle. If your vehicle has this option,
refer to an authorized tire dealer for the recommended
tire rotation pattern.
Compact Spare Tire — If Equipped
The compact spare is for temporary emergency use only.
You can identify if your vehicle is equipped with a
compact spare by looking at the spare tire description on
the Tire and Loading Information Placard located on the
driver ’s side door opening or on the sidewall of the tire.
Compact spare tire descriptions begin with the letter “T”
or “S” preceding the size designation. Example: T145/
80D18 103M.
T, S = Temporary Spare Tire
Since this tire has limited tread life, the original equip-
ment tire should be repaired (or replaced) and reinstalled
on your vehicle at the first opportunity.
Do not install a wheel cover or attempt to mount a
conventional tire on the compact spare wheel, since the
wheel is designed specifically for the compact spare tire.
Do not install more than one compact spare tire and
wheel on the vehicle at any given time.
WARNING!
Compact spares are for temporary emergency use
only. With these spares, do not drive more than
50 mph (80 km/h). Temporary use spares have limited
tread life. When the tread is worn to the tread wear
indicators, the temporary use spare tire needs to be
replaced. Be sure to follow the warnings, which
apply to your spare. Failure to do so could result in
spare tire failure and loss of vehicle control.
410 STARTING AND OPERATING
Page 413 of 603
Full Size Spare — If Equipped
The full size spare is for temporary emergency use only.
This tire may look like the originally equipped tire on the
front or rear axle of your vehicle, but it is not. This spare
tire may have limited tread life. When the tread is worn
to the tread wear indicators, the temporary use full size
spare tire needs to be replaced. Since it is not the same as
your original equipment tire, replace (or repair) the
original equipment tire and reinstall on the vehicle at the
first opportunity.
Limited-Use Spare — If Equipped
The limited-use spare tire is for temporary emergency
use only. This tire is identified by a label located on the
limited-use spare wheel. This label contains the driving
limitations for this spare. This tire may look like the
original equipped tire on the front or rear axle of your
vehicle, but it is not. Installation of this limited-use spare
tire affects vehicle handling. Since it is not the same as
your original equipment tire, replace (or repair) the
original equipment tire and reinstall on the vehicle at the
first opportunity.
WARNING!
Limited-use spares are for emergency use only. In-
stallation of this limited-use spare tire affects vehicle
handling. With this tire, do not drive more than the
speed listed on the limit-use spare wheel. Keep
inflated to the cold tire inflation pressures listed on
your Tire and Loading Information Placard located
on the driver ’s side B-Pillar or the rear edge of the
driver ’s side door. Replace (or repair) the original
equipment tire at the first opportunity and reinstall it
on your vehicle. Failure to do so could result in loss
of vehicle control.
5
STARTING AND OPERATING 411
Page 416 of 603
wear and correct cold tire inflation pressures. The manu-
facturer strongly recommends that you use tires equiva-
lent to the originals in size, quality and performance
when replacement is needed. Refer to the paragraph on
“Tread Wear Indicator.” Refer to the Tire and Loading
Information placard or the Vehicle Certification Label for
the size designation of your tire. The Load Index and
Speed Symbol for your tire will be found on the original
equipment tire sidewall. See the Tire Sizing Chart ex-
ample found in the Tire Safety Information section of this
manual for more information relating to the Load Index
and Speed Symbol of a tire.
It is recommended to replace the two front tires or two
rear tires as a pair. Replacing just one tire can seriously
affect your vehicle’s handling. If you ever replace a
wheel, make sure that the wheel’s specifications match
those of the original wheels.
It is recommended you contact your authorized tire
dealer or original equipment dealer with any questions
you may have on tire specifications or capability. Failure
to use equivalent replacement tires may adversely affect
the safety, handling, and ride of your vehicle.
WARNING!
•Do not use a tire, wheel size or rating other than
that specified for your vehicle. Some combinations
of unapproved tires and wheels may change sus-
pension dimensions and performance characteris-
tics, resulting in changes to steering, handling, and
braking of your vehicle. This can cause unpredict-
able handling and stress to steering and suspen-
sion components. You could lose control and have
a collision resulting in serious injury or death. Use
only the tire and wheel sizes with load ratings
approved for your vehicle.
(Continued)
414 STARTING AND OPERATING
Page 421 of 603
For example, your vehicle may have a recommended
cold (parked for more than three hours) placard pressure
of 30 psi (207 kPa). If the ambient temperature is 68°F
(20°C) and the measured tire pressure is 27 psi (186 kPa),
a temperature drop to 20°F (-7°C) will decrease the tire
pressure to approximately 23 psi (158 kPa). This tire
pressure is sufficiently low enough to turn ON the “TPM
Telltale Light.” Driving the vehicle may cause the tire
pressure to rise to approximately 27 psi (186 kPa), but the
“TPM Telltale Light” will still be ON. In this situation, the
“TPM Telltale Light” will turn OFF only after the tires are
inflated to the vehicle’s recommended cold placard pres-
sure value.
CAUTION!
•The TPMS has been optimized for the original
equipment tires and wheels. TPMS pressures and
warning have been established for the tire size
equipped on your vehicle. Undesirable system op-
eration or sensor damage may result when using
replacement equipment that is not of the same size,
type, and/or style. Aftermarket wheels can cause
sensor damage. Using aftermarket tire sealants may
cause the Tire Pressure Monitoring System (TPMS)
sensor to become inoperable. After using an after-
market tire sealant it is recommended that you take
your vehicle to your local dealer to have your
sensor function checked.
•After inspecting or adjusting the tire pressure,
always reinstall the valve stem cap. This will
prevent moisture and dirt from entering the valve
stem, which could damage the TPM sensor.
5
STARTING AND OPERATING 419
Page 439 of 603
WARNING!
It is important that you do not exceed the maximum
front or rear GAWR. A dangerous driving condition
can result if either rating is exceeded. You could lose
control of the vehicle and have a collision.
Tongue Weight (TW)
The tongue weight is the downward force exerted on the
hitch ball by the trailer. In most cases it should not be less
than 10% of the trailer load. You must consider this as
part of the load on your vehicle.
Frontal Area
The frontal area is the maximum height multiplied by the
maximum width of the front of a trailer.
Trailer Sway Control
The trailer sway control can be a mechanical telescoping
link that can be installed between the hitch receiver and
the trailer tongue that typically provides adjustable fric-
tion associated with the telescoping motion to dampen
any unwanted trailer swaying motions while traveling.
If equipped, the electronic Trailer Sway Control (TSC)
recognizes a swaying trailer and automatically applies
individual wheel brakes and/or reduces engine power to
attempt to eliminate the trailer sway.
Weight-Carrying Hitch
A weight-carrying hitch supports the trailer tongue
weight, just as if it were luggage located at a hitch ball or
some other connecting point of the vehicle. These kinds
of hitches are the most popular on the market today and
they are commonly used to tow small and medium sized
trailers.
5
STARTING AND OPERATING 437
Page 467 of 603
WHEEL AND TIRE TORQUE SPECIFICATIONS
Proper lug nut/bolt torque is very important to ensure
that the wheel is properly mounted to the vehicle. Any
time a wheel has been removed and reinstalled on the
vehicle the lug nuts/bolts should be torqued using a
properly calibrated torque wrench.
Torque Specifications
Lug Nut/Bolt Torque **Lug Nut/
Bolt Size
Lug Nut/
Bolt Socket
Size
130 Ft-Lbs (176 N·m) M14 x 1.50 22 mm
**Use only Chrysler recommended lug nuts/bolts and
clean or remove any dirt or oil before tightening.
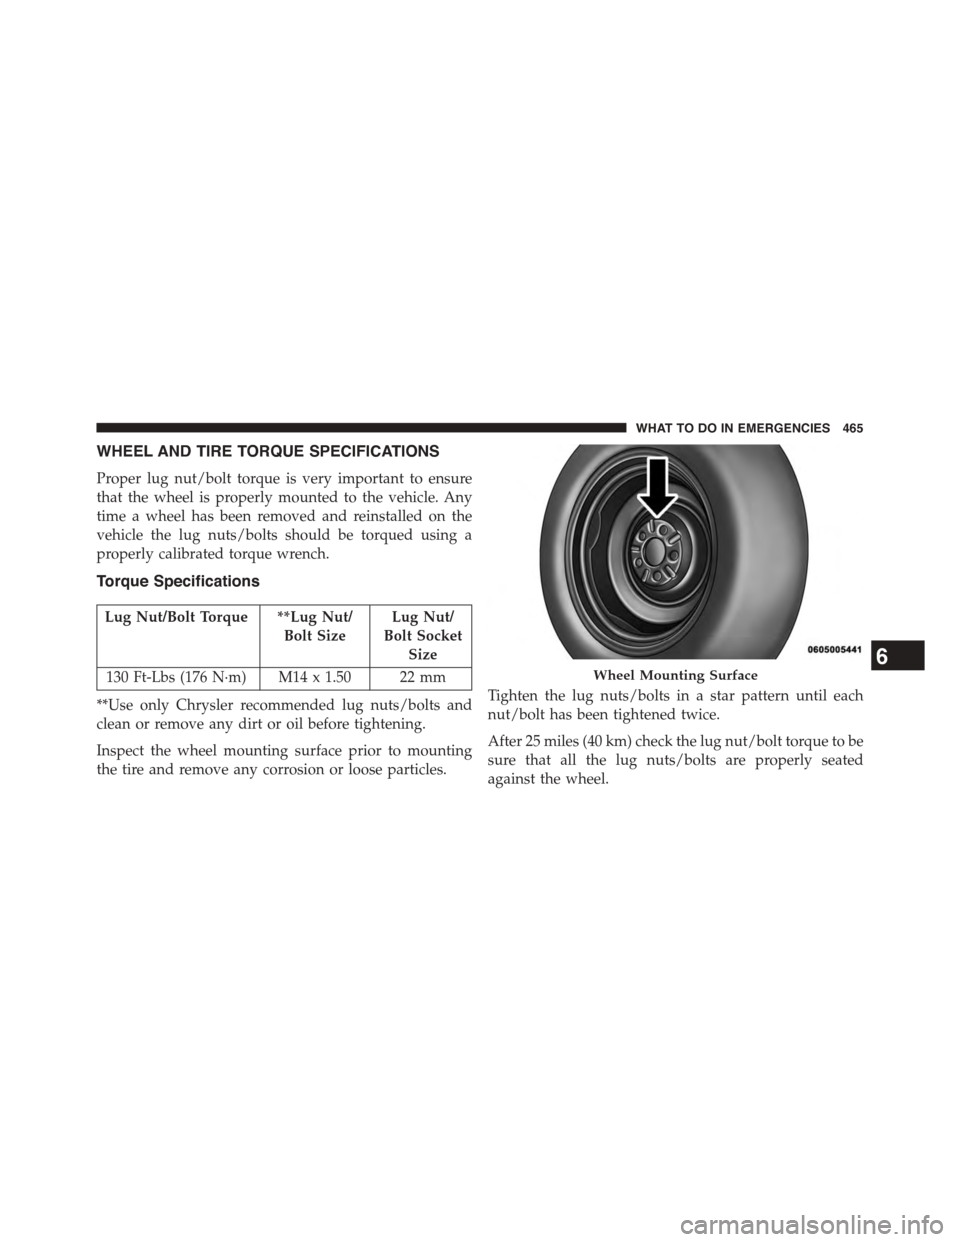
Inspect the wheel mounting surface prior to mounting
the tire and remove any corrosion or loose particles.
Tighten the lug nuts/bolts in a star pattern until each
nut/bolt has been tightened twice.
After 25 miles (40 km) check the lug nut/bolt torque to be
sure that all the lug nuts/bolts are properly seated
against the wheel.
Wheel Mounting Surface6
WHAT TO DO IN EMERGENCIES 465