stop start DODGE CHALLENGER 2015 3.G User Guide
[x] Cancel search | Manufacturer: DODGE, Model Year: 2015, Model line: CHALLENGER, Model: DODGE CHALLENGER 2015 3.GPages: 220, PDF Size: 30.96 MB
Page 8 of 220
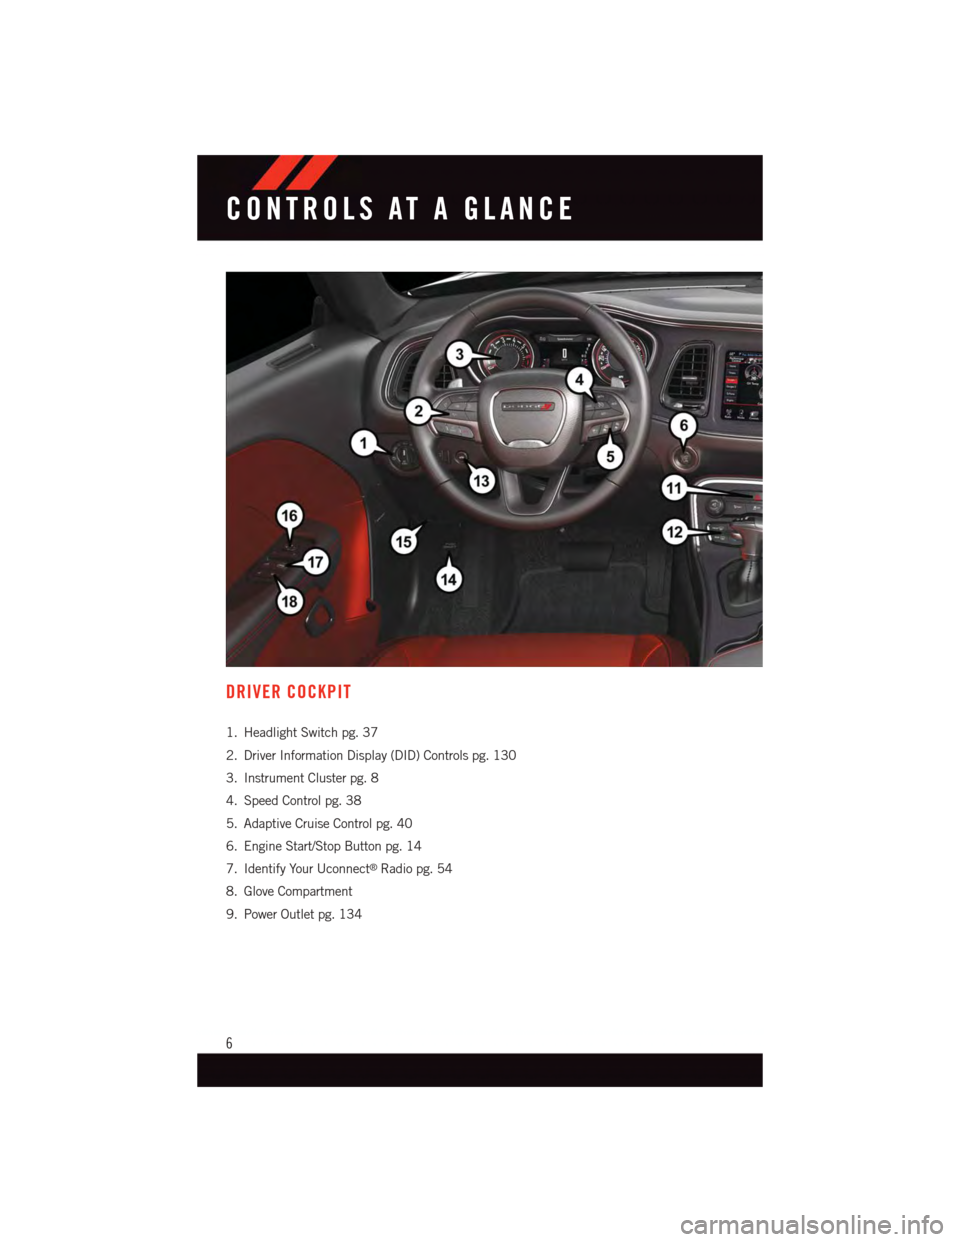
DRIVER COCKPIT
1. Headlight Switch pg. 37
2. Driver Information Display (DID) Controls pg. 130
3. Instrument Cluster pg. 8
4. Speed Control pg. 38
5. Adaptive Cruise Control pg. 40
6. Engine Start/Stop Button pg. 14
7. Identify Your Uconnect®Radio pg. 54
8. Glove Compartment
9. Power Outlet pg. 134
CONTROLS AT A GLANCE
6
Page 14 of 220
REMOTE START
•PushtheREMOTESTARTbuttonx2on the Key Fob twice within five seconds.
Pushing the REMOTE START button a third time shuts the engine off.
•Todrivethevehicle,pushtheUNLOCKbutton,inserttheKeyFobintheignitionand
turn to the ON/RUN position.
•Withremotestart,theenginewillonlyrunfor15minutes(timeout)unlesstheignition
Key Fob is placed in the ON/RUN position.
•ThevehiclemustbestartedwiththeKeyFobaftertwoconsecutivetimeouts.
WARNING!
•Donotstartorrunanengineinaclosedgarageorconfinedarea.Exhaustgas
contains Carbon Monoxide (CO) which is odorless and colorless. Carbon Monoxide
is poisonous and can cause you or others to be severely injured or killed when
inhaled.
•KeepKeyFobtransmittersawayfromchildren.OperationoftheRemoteStart
System, windows, door locks or other controls could cause you and others to be
severely injured or killed.
KEYLESS ENTER-N-GO™
The Keyless Enter-N-Go™ system is an enhancement to the vehicle's Key Fob. This
feature allows you to lock and unlock the vehicle's door(s) and trunk without having to
push the Key Fob lock or unlock buttons, as well as starting and stopping the vehicle with
the push of a button.
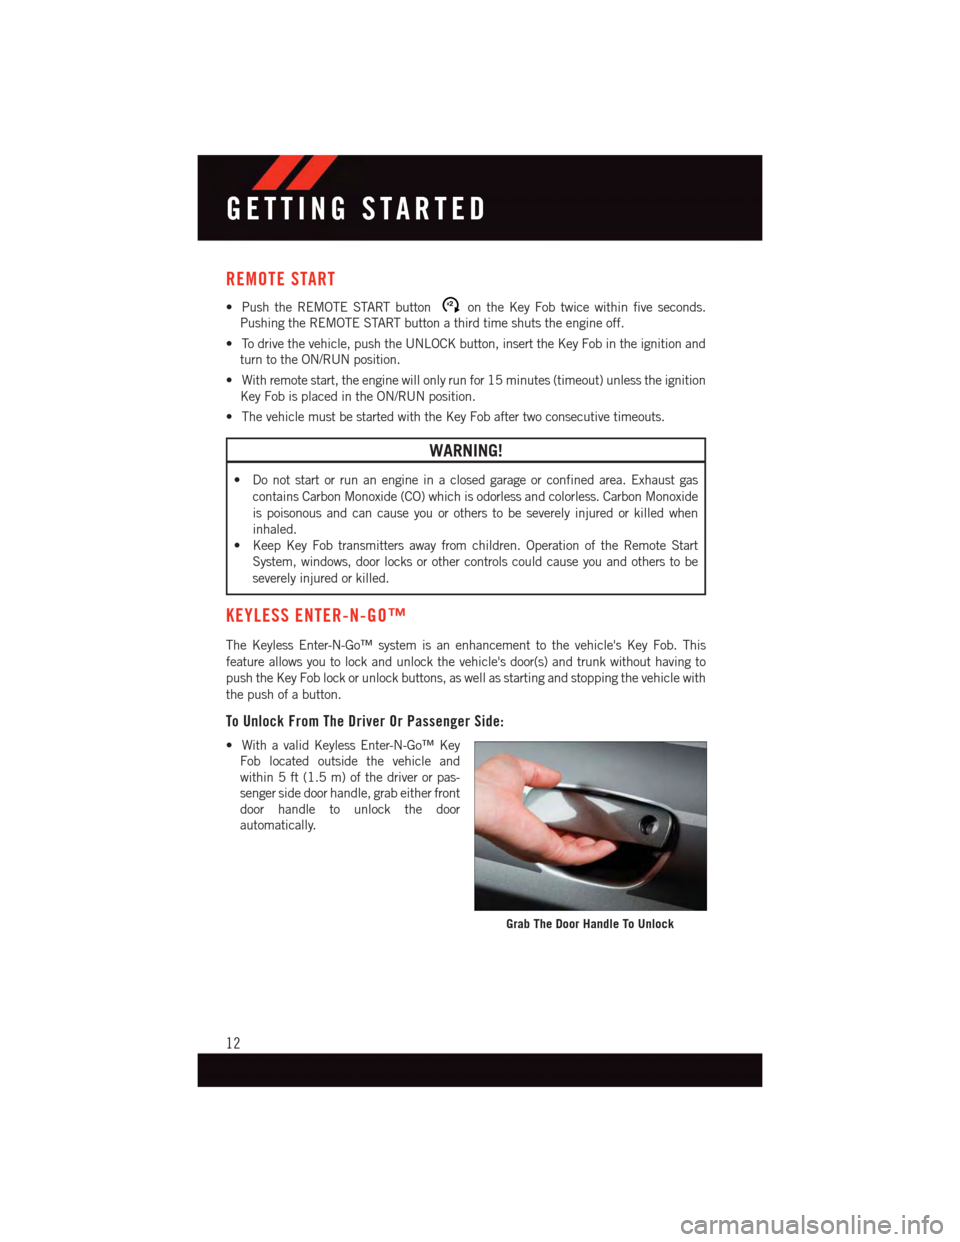
To Unlock From The Driver Or Passenger Side:
•WithavalidKeylessEnter-N-Go™Key
Fob located outside the vehicle and
within 5 ft (1.5 m) of the driver or pas-
senger side door handle, grab either front
door handle to unlock the door
automatically.
Grab The Door Handle To Unlock
GETTING STARTED
12
Page 16 of 220
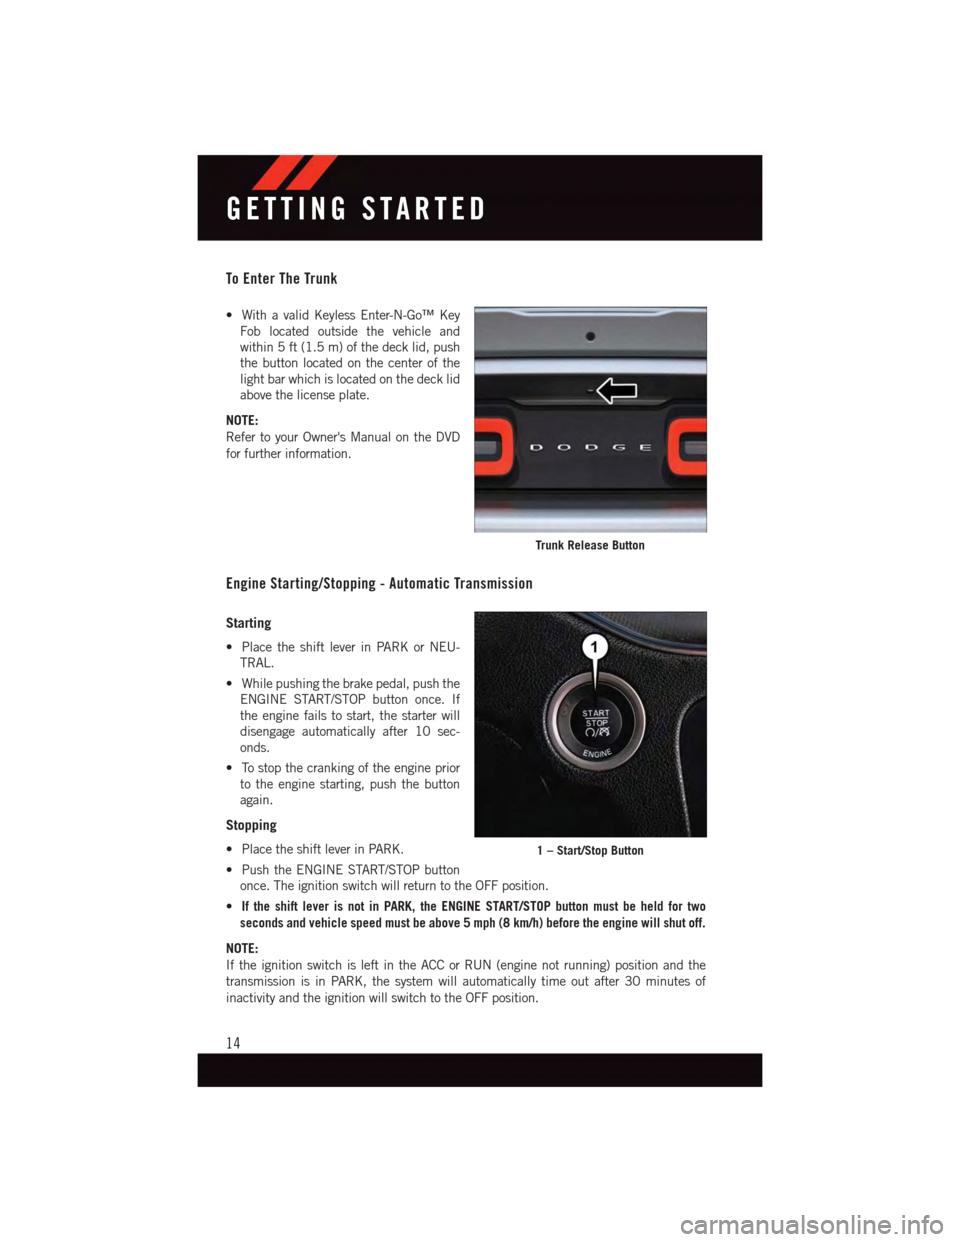
To Enter The Trunk
•WithavalidKeylessEnter-N-Go™Key
Fob located outside the vehicle and
within 5 ft (1.5 m) of the deck lid, push
the button located on the center of the
light bar which is located on the deck lid
above the license plate.
NOTE:
Refer to your Owner's Manual on the DVD
for further information.
Engine Starting/Stopping - Automatic Transmission
Starting
•PlacetheshiftleverinPARKorNEU-
TRAL.
•Whilepushingthebrakepedal,pushthe
ENGINE START/STOP button once. If
the engine fails to start, the starter will
disengage automatically after 10 sec-
onds.
•Tostopthecrankingoftheengineprior
to the engine starting, push the button
again.
Stopping
•PlacetheshiftleverinPARK.
•PushtheENGINESTART/STOPbutton
once. The ignition switch will return to the OFF position.
•If the shift lever is not in PARK, the ENGINE START/STOP button must be held for two
seconds and vehicle speed must be above 5 mph (8 km/h) before the engine will shut off.
NOTE:
If the ignition switch is left in the ACC or RUN (engine not running) position and the
transmission is in PARK, the system will automatically time out after 30 minutes of
inactivity and the ignition will switch to the OFF position.
Trunk Release Button
1 – Start/Stop Button
GETTING STARTED
14
Page 17 of 220
Engine Starting/Stopping — Manual Transmission
Starting
•PushandholdtheclutchpedalwhilepushingandholdingtheENGINESTART/STOPbutton. Release the button when the engine starts. If the engine fails to start within 15seconds, release the button, wait 10 to 15 seconds, then repeat.
•Tostopthecrankingoftheenginepriortotheenginestarting,releasethebutton.
Stopping
•Withthevehiclestopped,placetheshiftleverinNEUTRAL.
•PushtheENGINESTART/STOPbuttononce.TheignitionswitchwillreturntotheOFF
position.
•If the vehicle speed is above 5 mph (8 km/h), the ENGINE START/STOP button must be
held for two seconds before the engine will shut off. The ignition switch position will
remain in the ACC position until the vehicle is stopped and the button is pressed twice
to the OFF position.
NOTE:If the ignition switch is left in the ACC position, the system will automatically time out
after 60 minutes of inactivity and the ignition will switch to the OFF position.
Additional Functions
NOTE:
The following functions are with the driver’s foot OFF the Brake Pedal/Clutch Pedal
(Transmission in PARK or NEUTRAL Position).
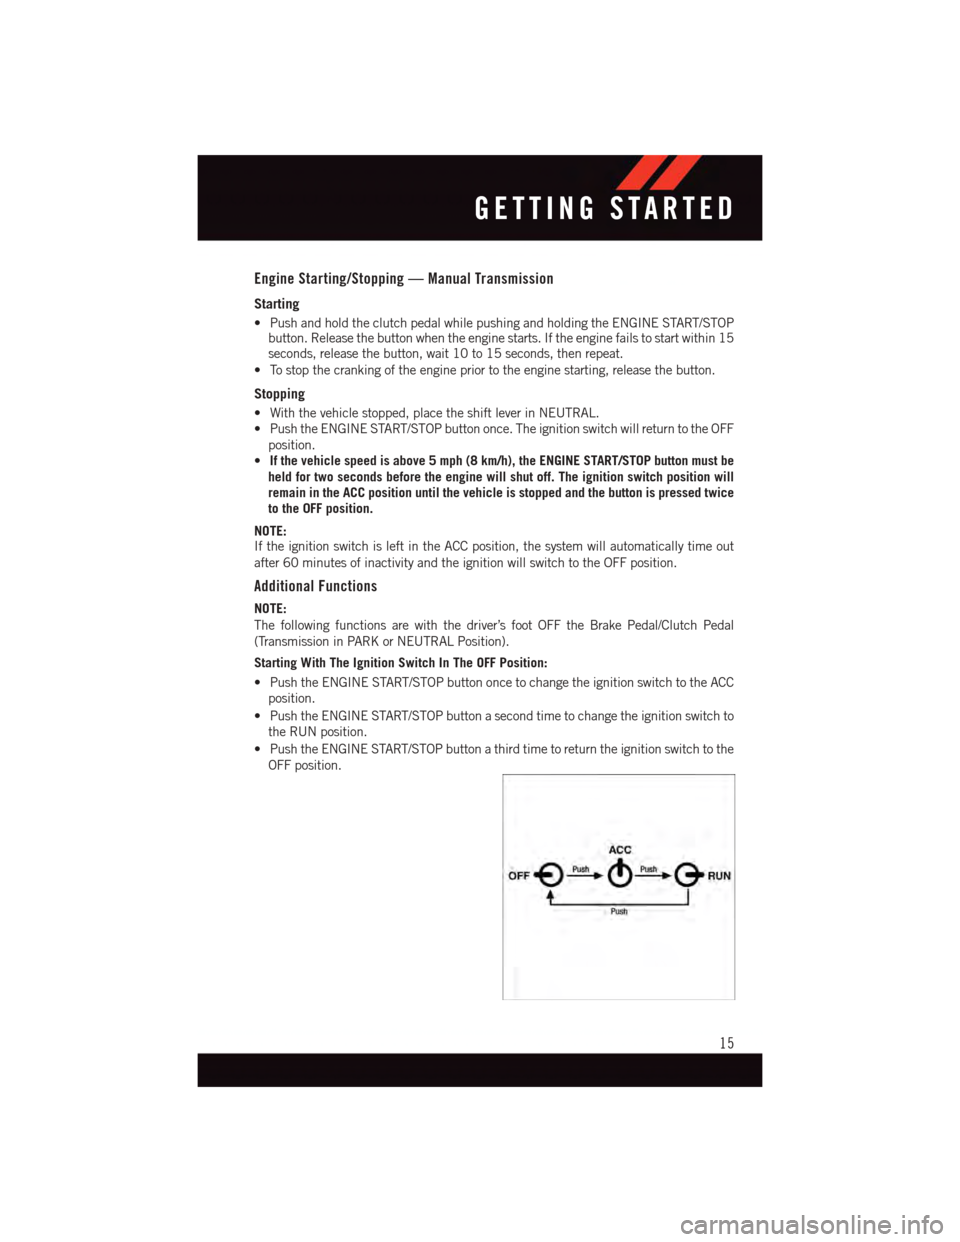
Starting With The Ignition Switch In The OFF Position:
•PushtheENGINESTART/STOPbuttononcetochangetheignitionswitchtotheACC
position.
•PushtheENGINESTART/STOPbuttonasecondtimetochangetheignitionswitchto
the RUN position.
•PushtheENGINESTART/STOPbuttonathirdtimetoreturntheignitionswitchtothe
OFF position.
GETTING STARTED
15
Page 18 of 220
VEHICLE SECURITY ALARM
The Vehicle Security Alarm monitors the vehicle doors for unauthorized entry and the
Keyless Enter-N-Go™ START/STOP button for unauthorized operation. While the Vehicle
Security Alarm is armed, interior switches for door locks and decklid release are disabled.
If something triggers the alarm, the Vehicle Security Alarm will provide the following
audible and visible signals: the horn will pulse, the park lamps and/or turn signals will
flash, and the Vehicle Security Light in the instrument cluster will flash.
To Arm
•Keyless Enter-N-Go™ button installed:Push the Keyless Enter-N-Go™ START/STOP
button until the Driver Information Display (DID) indicates that the vehicle ignition is
“OFF”. Push the power door LOCK switch while the door is open, Push the Key Fob
LOCK button, or with one of the Key Fobs located outside the vehicle and within 5 ft
(1.5 m) of the driver's and passenger front door handles, push the Keyless Enter-N-
Go™ LOCK button located on the door handle.
•Keyless Enter-N-Go™ button not installed:Tu r n t h e i g n i t i o n s w i t c h t o t h e “ O F F ”
position. Push the power door lock switch while the door is open, push the Key Fob
LOCK button, or with one of the Key Fobs located outside the vehicle and within 5 ft
(1.5 m) of the driver's and passenger front door handles, push the Keyless Enter-N-
Go™ LOCK button located on the door handle.
NOTE:
After pushing the Keyless Enter-N-Go™ LOCK button, you must wait two seconds before
you can lock or unlock the vehicle via the door handle.
To Disarm
•Keyless Enter-N-Go™ button installed:Push the Key Fob UNLOCK button or with one
of the Key Fobs located outside the vehicle and within 5 ft (1.5 m) of the driver's and
passenger front door handles, grab the Keyless Enter-N-Go™ door handle and enter the
vehicle, then push the Keyless Enter-N-Go™ START/STOP button (requires at least one
valid Key Fob in the vehicle).
•Keyless Enter-N-Go™ button not installed:Push the Key Fob UNLOCK button or with
one of the Key Fobs located outside the vehicle and within 5 ft (1.5 m) of the driver's
and passenger front door handles, grab the Keyless Enter-N-Go™ door handle and
enter the vehicle, then turn the ignition to the ON/RUN position.
GETTING STARTED
16
Page 19 of 220
SEAT BELT SYSTEMS
Lap/Shoulder Belts
•Allseatingpositionsinyourvehicleareequippedwithlap/shoulderbelts.
•Besureeveryoneinyourvehicleisinaseatandusingaseatbeltproperly.
•Positionthelapbeltsothatitissnugandlieslowacrossyourhips,belowyour
abdomen. To remove slack in the lap belt portion, pull up on the shoulder belt. To loosen
the lap belt if it is too tight, tilt the latch plate and pull on the lap belt. A snug seat belt
reduces the risk of sliding under the seat belt in a collision.
•Positiontheshoulderbeltacrosstheshoulderandchestwithminimal,ifanyslackso
that it is comfortable and not resting on your neck. The retractor will withdraw any slack
in the shoulder belt.
Seat Belt Pretensioner
•Thefrontseatbeltsystemisequippedwithpretensioningdevicesthataredesignedto
remove slack from the seat belt in the event of a collision.
•Adeployedpretensioneroradeployedairbagmustbereplacedimmediately.
WARNING!
•Inacollision,youandyourpassengerscansuffermuchgreaterinjuriesifyouare
not properly buckled up. You can strike the interior of your vehicle or other
passengers, or you can be thrown out of the vehicle. Always be sure you and others
in your vehicle are buckled up properly.
•Ashoulderbeltplacedbehindyouwillnotprotectyoufrominjuryduringacollision.
Yo u a r e m o r e l i k e l y t o h i t y o u r h e a d i n a c o l l i s i o n i f y o u d o n o t w e a r y o u r s h o u l d e r
belt. The lap and shoulder belt are meant to be used together.
•Aseatbeltthatistooloosewillnotprotectyouproperly.Inasuddenstop,youcould
move too far forward, increasing the possibility of injury. Wear your seat belt snugly.
•Afrayedortornseatbeltcouldripapartinacollisionandleaveyouwithno
protection. Inspect the seat belt system periodically, checking for cuts, frays, or
loose parts. Damaged parts must be replaced immediately. Do not disassemble or
modify the system. Seat belt assemblies must be replaced after a collision.
GETTING STARTED
17
Page 29 of 220
Easy Entry Seats
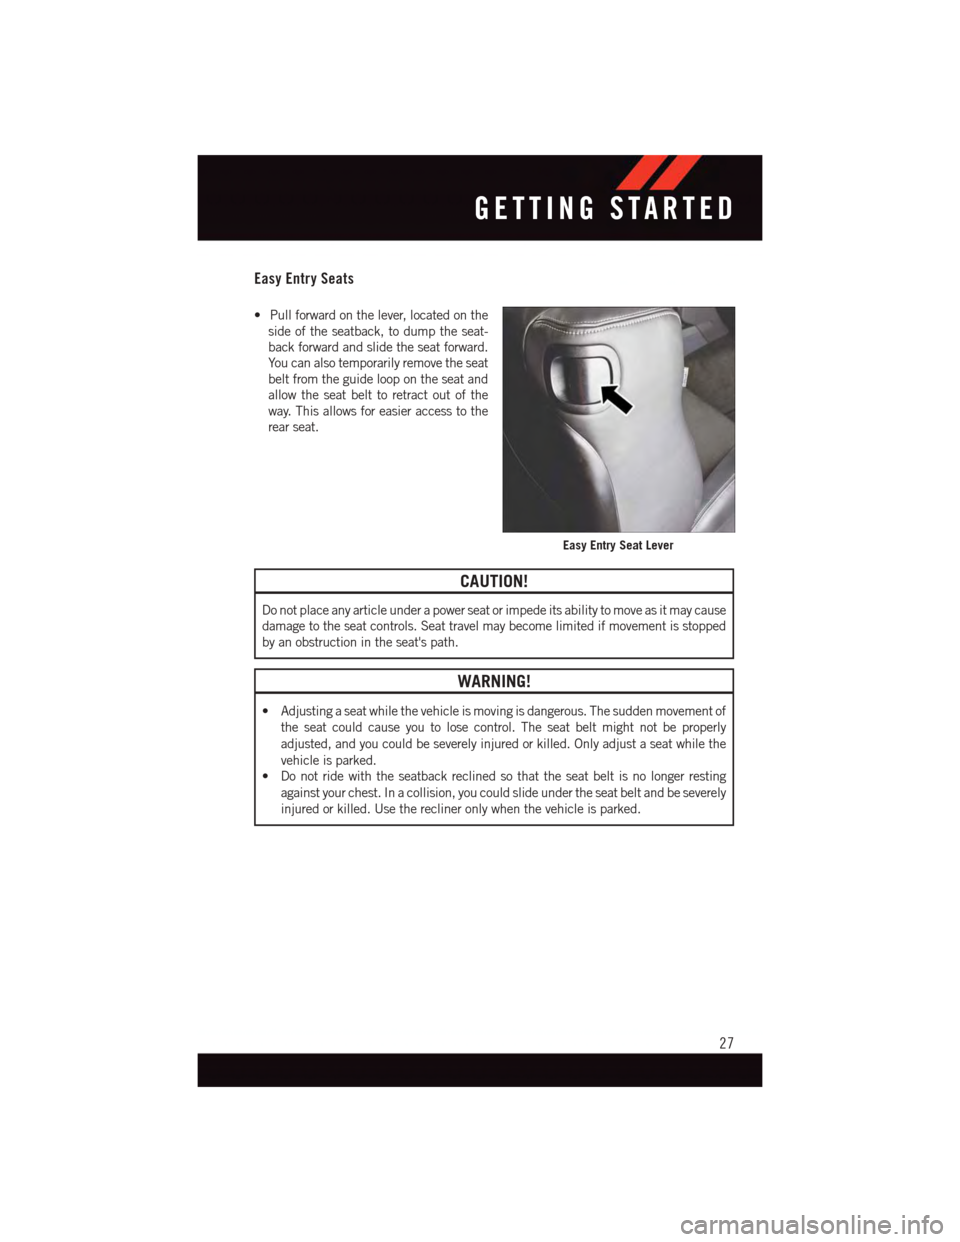
•Pullforwardonthelever,locatedonthe
side of the seatback, to dump the seat-
back forward and slide the seat forward.
Yo u c a n a l s o t e m p o r a r i l y r e m o v e t h e s e a t
belt from the guide loop on the seat and
allow the seat belt to retract out of the
way. This allows for easier access to the
rear seat.
CAUTION!
Do not place any article under a power seat or impede its ability to move as it may cause
damage to the seat controls. Seat travel may become limited if movement is stopped
by an obstruction in the seat's path.
WARNING!
•Adjustingaseatwhilethevehicleismovingisdangerous.Thesuddenmovementof
the seat could cause you to lose control. The seat belt might not be properly
adjusted, and you could be severely injured or killed. Only adjust a seat while the
vehicle is parked.
•Donotridewiththeseatbackreclinedsothattheseatbeltisnolongerresting
against your chest. In a collision, you could slide under the seat belt and be severely
injured or killed. Use the recliner only when the vehicle is parked.
Easy Entry Seat Lever
GETTING STARTED
27
Page 34 of 220
Power Tilt/Telescoping Steering Column
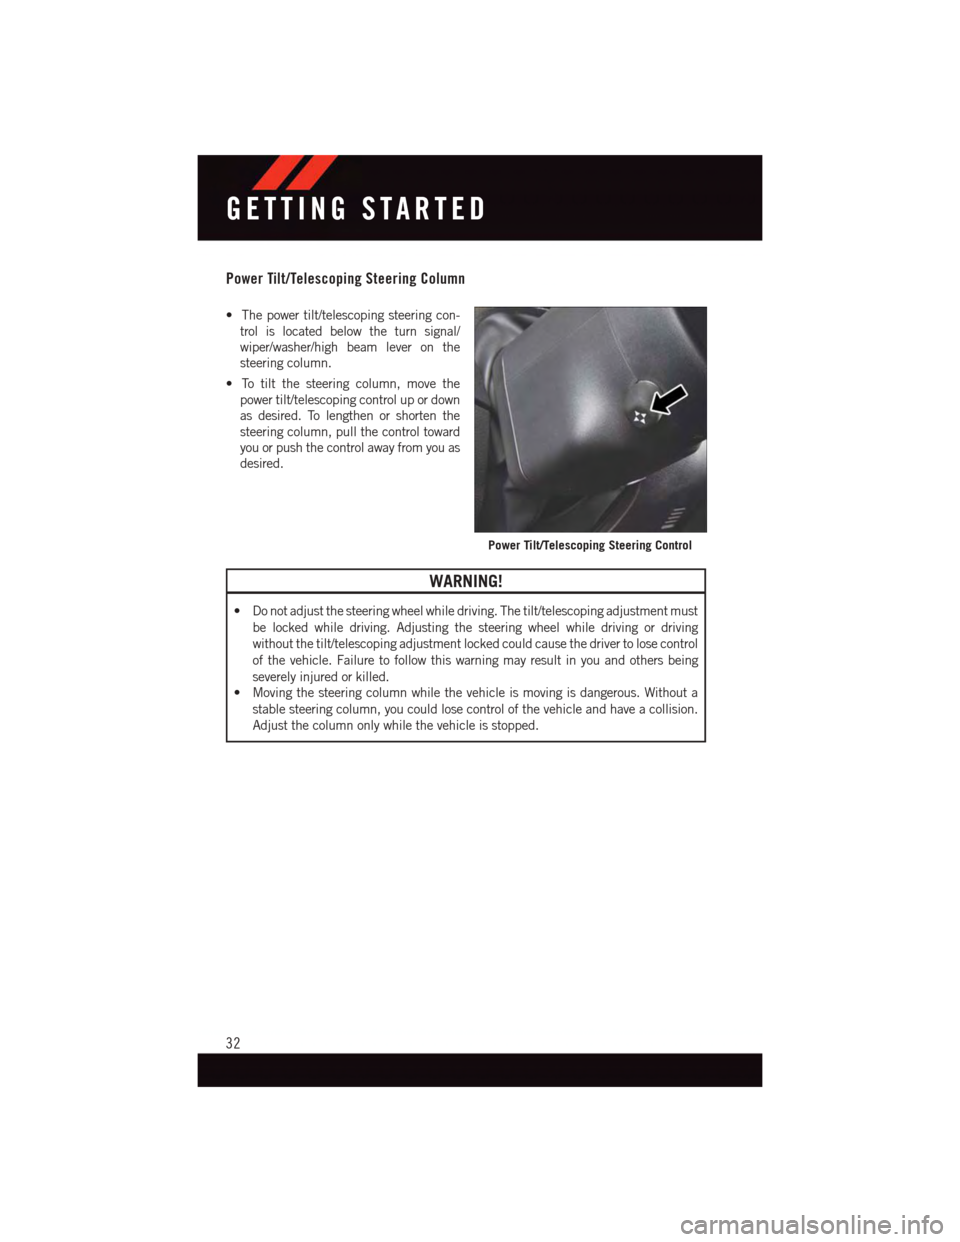
•Thepowertilt/telescopingsteeringcon-
trol is located below the turn signal/
wiper/washer/high beam lever on the
steering column.
•Totiltthesteeringcolumn,movethe
power tilt/telescoping control up or down
as desired. To lengthen or shorten the
steering column, pull the control toward
you or push the control away from you as
desired.
WARNING!
•Donotadjustthesteeringwheelwhiledriving.Thetilt/telescopingadjustmentmust
be locked while driving. Adjusting the steering wheel while driving or driving
without the tilt/telescoping adjustment locked could cause the driver to lose control
of the vehicle. Failure to follow this warning may result in you and others being
severely injured or killed.
•Movingthesteeringcolumnwhilethevehicleismovingisdangerous.Withouta
stable steering column, you could lose control of the vehicle and have a collision.
Adjust the column only while the vehicle is stopped.
Power Tilt/Telescoping Steering Control
GETTING STARTED
32
Page 46 of 220
NOTE:
Ta p p i n g o n e o f t h e s t e e r i n g w h e e l - m o u n t e d s h i f t p a d d l e s ( + / - ) , i f e q u i p p e d , w h i l e t h e s h i f t
lever is in DRIVE, will activate a temporary AutoStick mode. Tapping (-) to enter AutoStick
mode will downshift the transmission to the next lower gear, while using (+) to enter
AutoStick mode will retain the current gear. The current gear will be displayed in the
instrument cluster, but the "M" will not be highlighted. The transmission will revert back
to normal operation (if the shift lever remains in DRIVE) after a period of time, depending
on accelerator pedal activity.
In AutoStick mode, the transmission will shift up or down when (+/-) is manually selected
by the driver (using the shift lever, or the shift paddles [if equipped]), unless an engine
lugging or overspeed condition would result. It will remain in the selected gear until
another upshift or downshift is chosen, except as described below.
•IntemporaryAutoStickmode(shiftleverinDRIVE),thetransmissionwillautomatically
shift up when maximum engine speed is reached. If the accelerator is fully depressed,
the transmission will downshift when possible (based on current vehicle speed and
gear). Lack of accelerator pedal activity will cause the transmission to revert to
automatic operation.
•IfnormalAutoStickmodeisengaged(shiftleverinMANUALposition),manualgear
selection will be maintained until the shift lever is returned to DRIVE, or as described
below. The transmission will not upshift automatically at redline in this mode, nor will
downshifts be obtained if the accelerator pedal is pressed to the floor.
•Thetransmissionwillautomaticallydownshiftasthevehicleslows(topreventengine
lugging) and will display the current gear.
•Thetransmissionwillautomaticallydownshifttofirstgearwhencomingtoastop.After
astop,thedrivershouldmanuallyupshift(+)thetransmissionasthevehicleis
accelerated.
•Youcanstartout,fromastop,infirstorsecondgear.Tapping(+)(atastop)willallow
starting in second gear. Starting out in second gear can be helpful in snowy or icy
conditions.
•Ifarequesteddownshiftwouldcausetheenginetoover-speed,thatshiftwillnotoccur.
•Thesystemwillignoreattemptstoupshiftattoolowofavehiclespeed.
•Holdingthe(-)paddledepressed(ifequipped),orholdingtheshiftleverinthe(-)
position, will downshift the transmission to the lowest gear possible at the current
speed.
•TransmissionshiftingwillbemorenoticeablewhenAutoStickisengaged.
•Thesystemmayreverttoautomaticshiftmodeifafaultoroverheatconditionis
detected.
OPERATING YOUR VEHICLE
44
Page 59 of 220
NOTE:
For security reasons, this link is valid for 72 hours from the time you’ve submitted your
email address into the radio touchscreen. If the link has expired, simply re-enter your
email address into the Uconnect®Registration App on the radio touchscreen to receive
another link. The secured registration link will take you through the Uconnect®Access
registration process step by step.
7. To unlock the full potential of Uconnect®Access in your vehicle, you will need to create
or validate an existing Mopar Owner Connect account previously (Owner Center).
Uconnect®along with Mopar Owner Connect have joined forces to create one
destination to manage all of your vehicle needs, from managing your Uconnect®
Access account, to tracking service history and finding recommended accessories for
your vehicle. If you already have a Mopar Owner Connect account, log in to the website
with your existing username/email and password. For assistance with this web based
registration process, call Uconnect®Care at 1-855-792-4241.
8. Once you are logged in to your Mopar Owner Connect account, you will create a
personal Uconnect®Security PIN. The Uconnect®Security PIN will be required to
authenticate you when accessing your account via Uconnect®Care or performing any
remote services such as Remote Door Lock/Unlock, Remote Horn & Lights or Starting
and Stopping the engine.
9. If your vehicle qualifies for a trial package it will be presented. Simply agree to the
Uconnect®Te r m s o f S e r v i c e ( c h e c k b o x ) a n d t h e n s e l e c t t h e “ S t a r t S e r v i c e ” b u t t o n .
At this point your vehicle is registered with Uconnect®Access. Continue to set up Via
Mobile. Apps will be downloaded the next time you start your vehicle. If the Apps have not
appeared after 24 hours, please contact Uconnect®Care.
Download The Uconnect® Access App
The Uconnect®Access smartphone app allows you to remotely lock or unlock your doors,
start your engine (if equipped) and activate your horn and lights from virtually anywhere.
The smartphone app also features Via Mobile (if equipped) which uses your smartphone’s
data plan to access your personal Pandora®,iHeartRadio,SlackerRadioandAha™by
HARMAN accounts and control them using your vehicle touchscreen.
The Uconnect®Access app is only compatible with select iPhone®and Android smart-
phones. Visit UconnectPhone.com or call 1-877-855-8400 to confirm that your smart-
phone is compatible with Uconnect®.Onceyou’veconfirmedyoursmartphoneis
compatible, Android and iPhone®users should visit their respective app store and search
for “Uconnect Access” to download the app.
Set Up Your Via Mobile Profile — If Equipped
Setting up your Via Mobile profile means entering your login information for each App so
that they can work in your vehicle. Complete your Via Mobile Profile online during
registration of your Uconnect®Access system. Access this page by logging into your
Mopar Owner Connect account (moparownerconnect.com), going to Edit Profile, then Via
Mobile Profile.
ELECTRONICS
57