battery DODGE CHALLENGER 2019 Owners Manual
[x] Cancel search | Manufacturer: DODGE, Model Year: 2019, Model line: CHALLENGER, Model: DODGE CHALLENGER 2019Pages: 532, PDF Size: 5.01 MB
Page 21 of 532
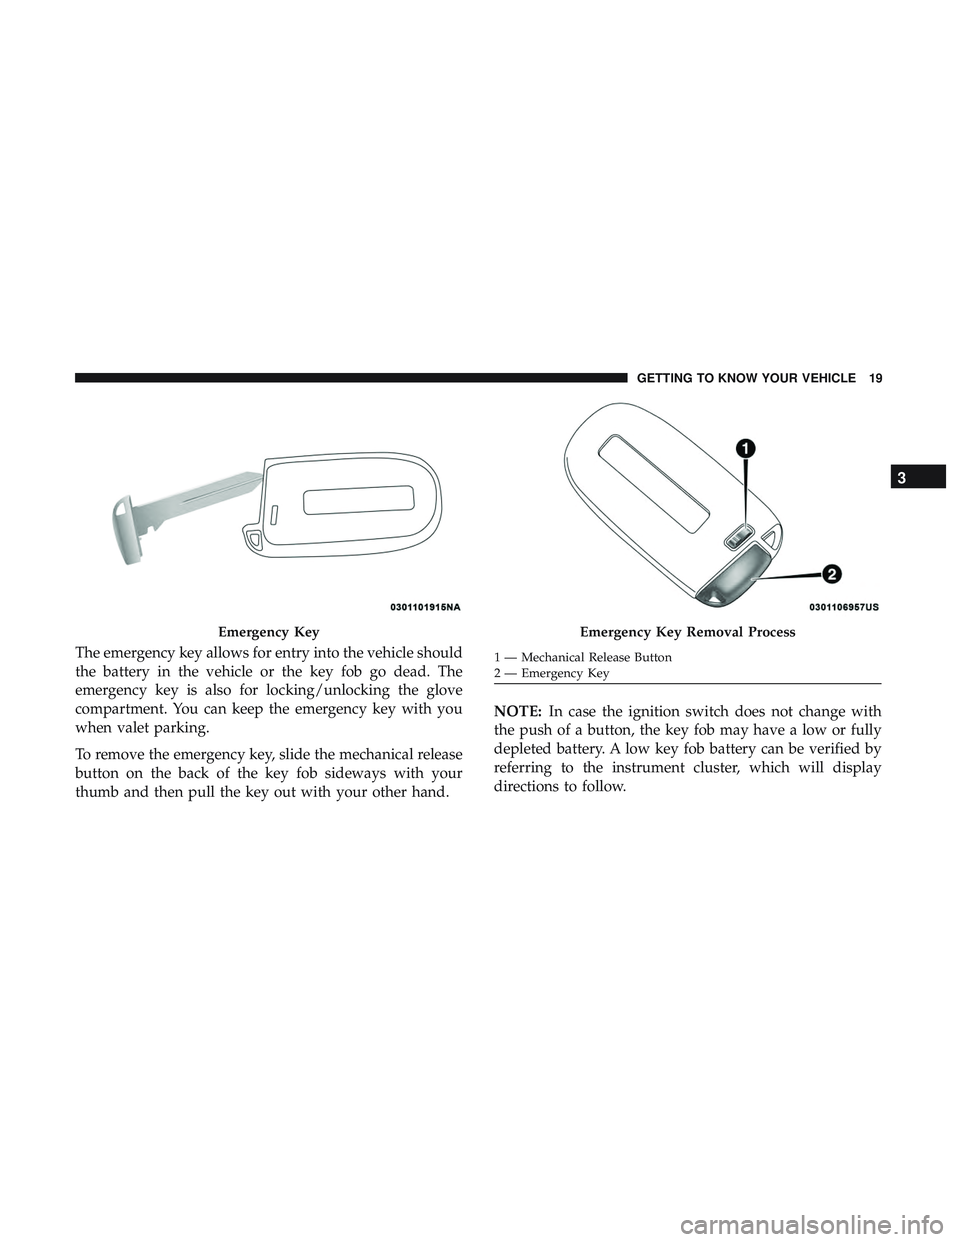
The emergency key allows for entry into the vehicle should
the battery in the vehicle or the key fob go dead. The
emergency key is also for locking/unlocking the glove
compartment. You can keep the emergency key with you
when valet parking.
To remove the emergency key, slide the mechanical release
button on the back of the key fob sideways with your
thumb and then pull the key out with your other hand.NOTE:
In case the ignition switch does not change with
the push of a button, the key fob may have a low or fully
depleted battery. A low key fob battery can be verified by
referring to the instrument cluster, which will display
directions to follow.
Emergency KeyEmergency Key Removal Process
1 — Mechanical Release Button
2 — Emergency Key
3
GETTING TO KNOW YOUR VEHICLE 19
Page 24 of 532
NOTE:
•The interior lights will turn off if you place the ignition
in the ACC or ON/RUN position while the Panic Alarm
is activated. However, the exterior lights and horn will
remain on.
• You may need to be less than 35 ft (11 m) from the
vehicle when using the key fob to turn off the Panic
Alarm due to the radio frequency noises emitted by the
system.
Key Fob Battery Replacement
The recommended replacement battery is one CR2032
battery.
NOTE:
• Perchlorate Material — special handling may apply. See
www.dtsc.ca.gov/hazardouswaste/perchlorate for fur-
ther information.
• Do not touch the battery terminals that are on the back
housing or the printed circuit board.
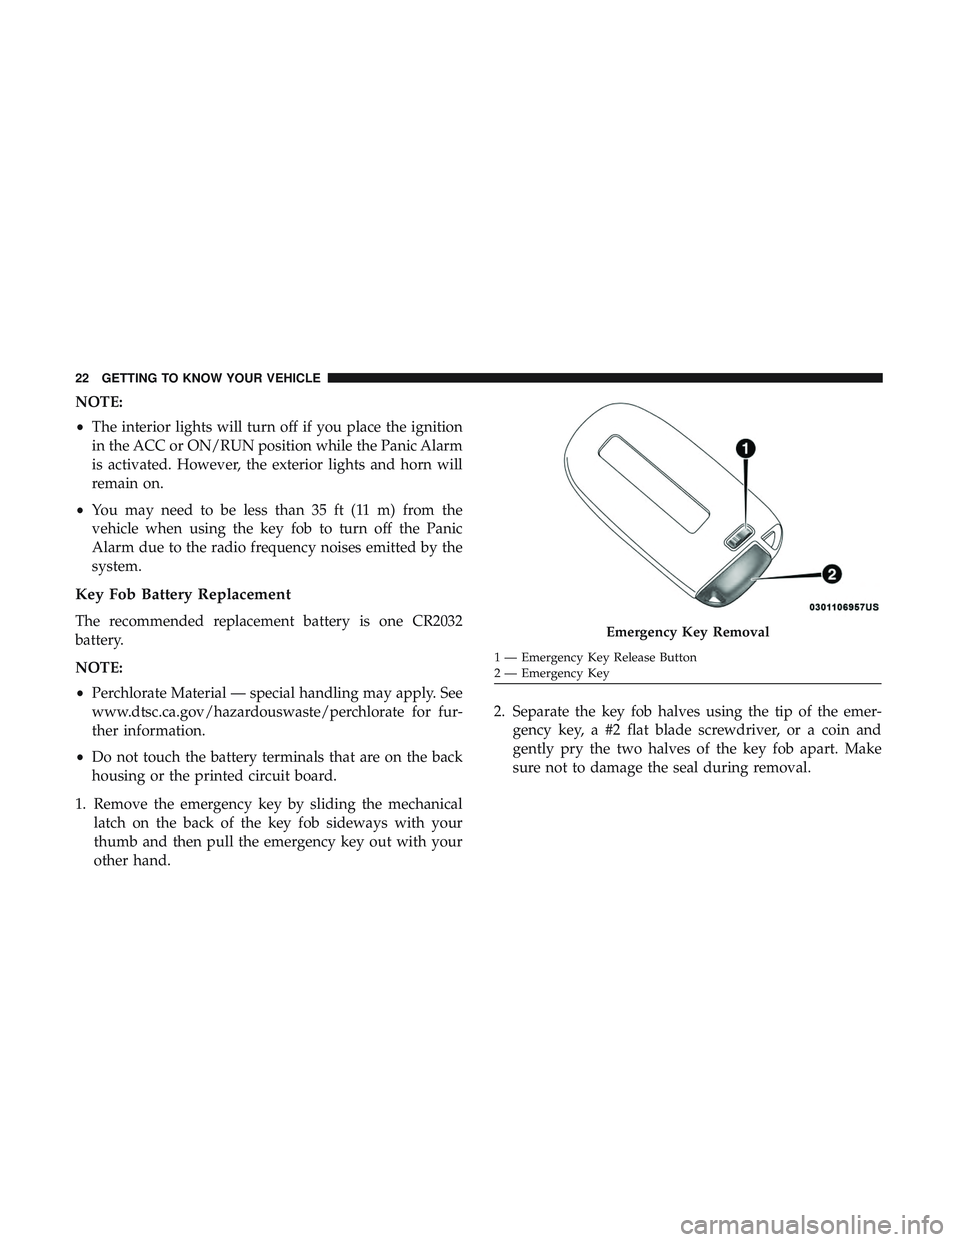
1. Remove the emergency key by sliding the mechanical latch on the back of the key fob sideways with your
thumb and then pull the emergency key out with your
other hand. 2. Separate the key fob halves using the tip of the emer-
gency key, a #2 flat blade screwdriver, or a coin and
gently pry the two halves of the key fob apart. Make
sure not to damage the seal during removal.Emergency Key Removal
1 — Emergency Key Release Button
2 — Emergency Key
22 GETTING TO KNOW YOUR VEHICLE
Page 26 of 532
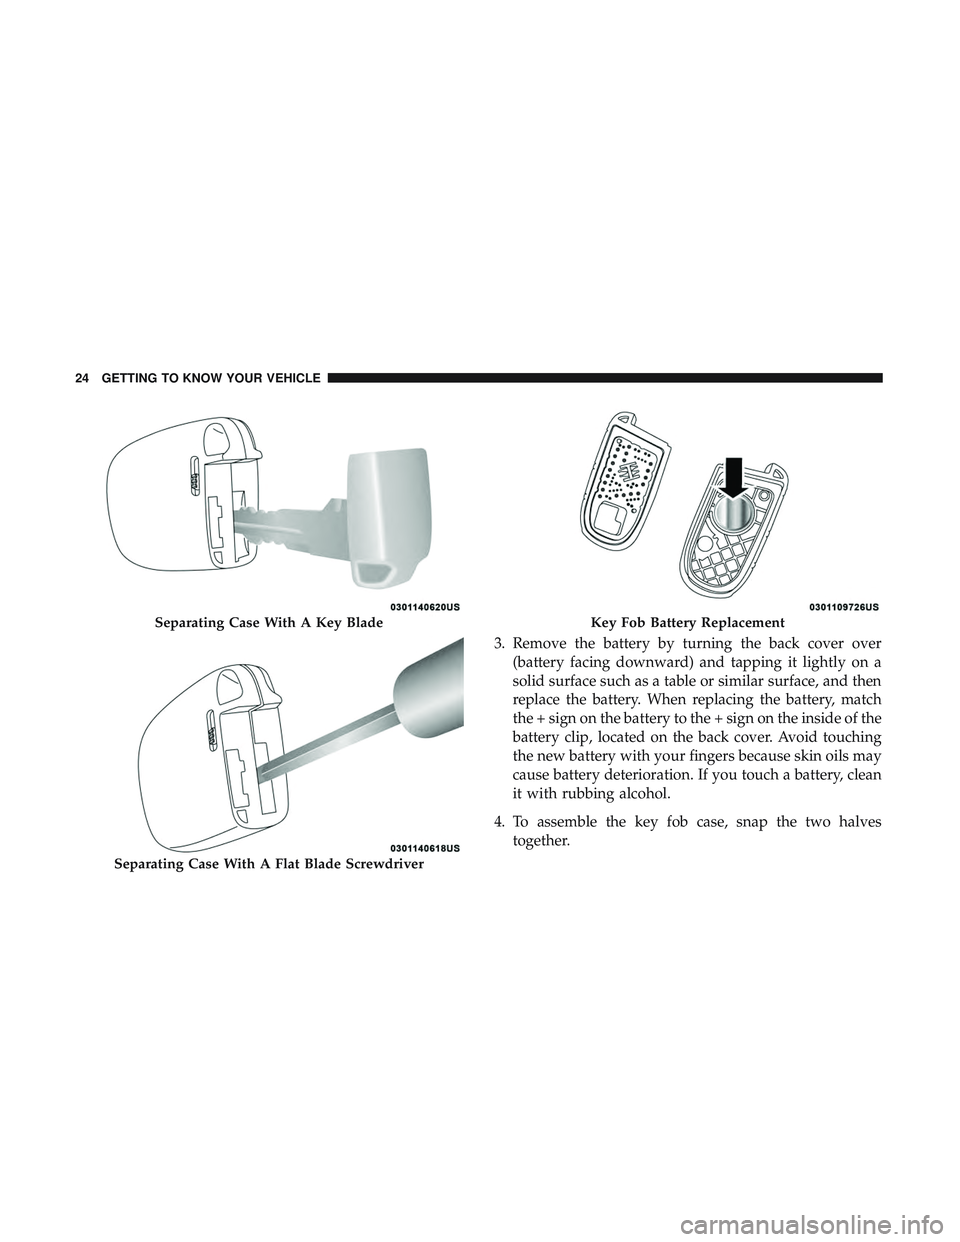
3. Remove the battery by turning the back cover over(battery facing downward) and tapping it lightly on a
solid surface such as a table or similar surface, and then
replace the battery. When replacing the battery, match
the + sign on the battery to the + sign on the inside of the
battery clip, located on the back cover. Avoid touching
the new battery with your fingers because skin oils may
cause battery deterioration. If you touch a battery, clean
it with rubbing alcohol.
4. To assemble the key fob case, snap the two halves together.
Separating Case With A Key Blade
Separating Case With A Flat Blade Screwdriver
Key Fob Battery Replacement
24 GETTING TO KNOW YOUR VEHICLE
Page 28 of 532
IGNITION SWITCH
Keyless Push Button Ignition
This feature allows the driver to operate the ignition with
the push of a button as long as the key fob is in the
passenger compartment.
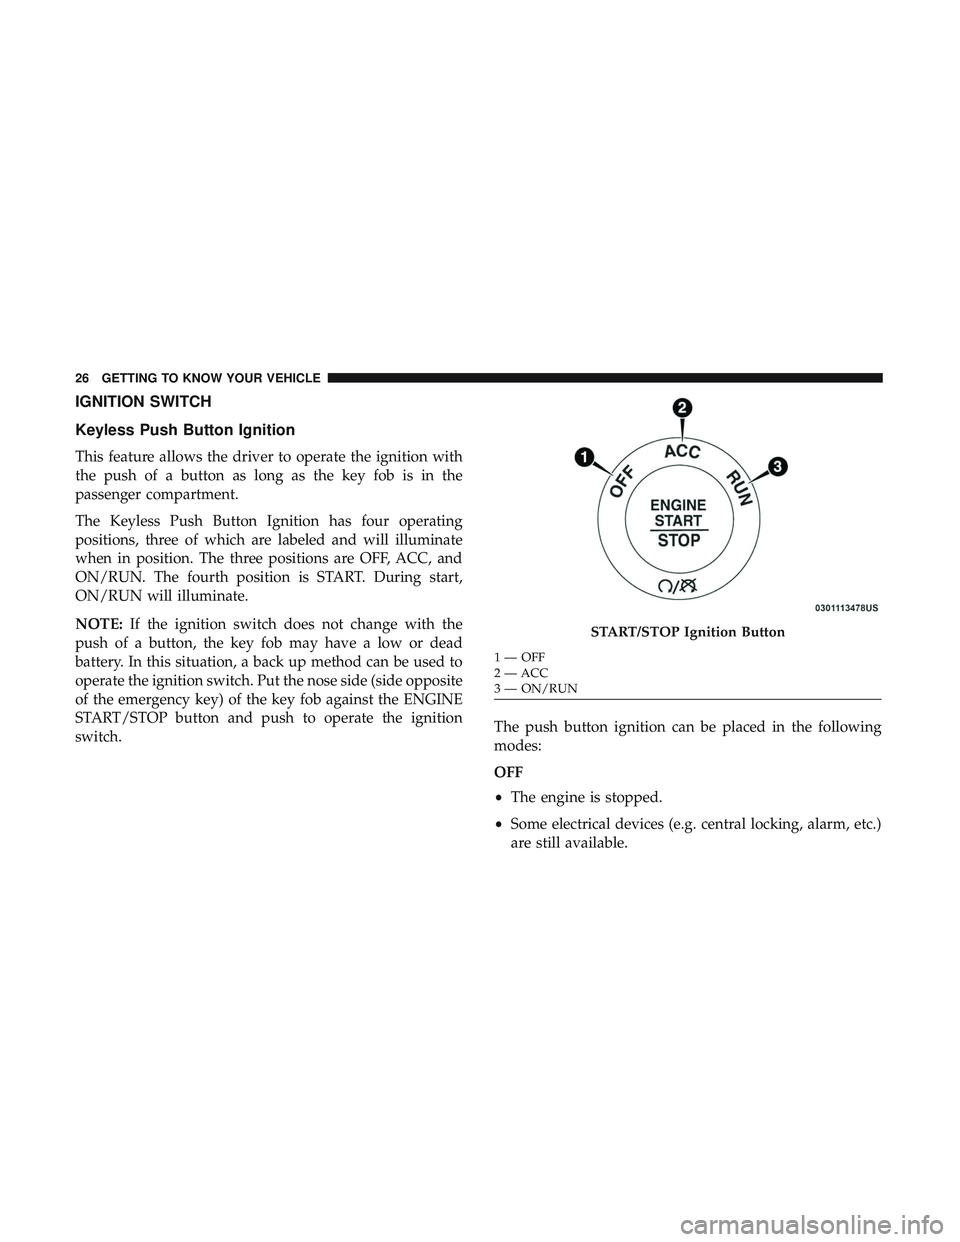
The Keyless Push Button Ignition has four operating
positions, three of which are labeled and will illuminate
when in position. The three positions are OFF, ACC, and
ON/RUN. The fourth position is START. During start,
ON/RUN will illuminate.
NOTE:If the ignition switch does not change with the
push of a button, the key fob may have a low or dead
battery. In this situation, a back up method can be used to
operate the ignition switch. Put the nose side (side opposite
of the emergency key) of the key fob against the ENGINE
START/STOP button and push to operate the ignition
switch. The push button ignition can be placed in the following
modes:
OFF
•
The engine is stopped.
• Some electrical devices (e.g. central locking, alarm, etc.)
are still available.
START/STOP Ignition Button
1—OFF
2 — ACC
3 — ON/RUN
26 GETTING TO KNOW YOUR VEHICLE
Page 31 of 532
REMOTE START — IF EQUIPPED
How To Use Remote Start — If Equipped
Push remote start button on the key fob twice
within five seconds. Pushing the remote start
button a third time shuts the engine off.
To drive the vehicle, push the unlock button, and push the
ignition to the ON/RUN position.
NOTE:
• With remote start, the engine will only run for 15
minutes (timeout) unless the ignition is placed in the
ON/RUN position.
• The vehicle must be started with the key after two
consecutive timeouts.
All of the following conditions must be met before the
engine will remote start:
• Gear selector in PARK
• Doors closed
• Hood closed
• Trunk closed •
Hazard switch off
• Brake switch inactive (brake pedal not pushed)
• Battery at an acceptable charge level
• Check engine light shall not be present
• PANIC button not pushed
• System not disabled from previous remote start event
• Vehicle alarm system indicator flashing
• Ignition in STOP/OFF position
• Fuel level meets minimum requirement
• Vehicle Security Alarm is not signaling an intrusion
WARNING!
•Do not start or run an engine in a closed garage or
confined area. Exhaust gas contains Carbon Monox-
ide (CO) which is odorless and colorless. Carbon
Monoxide is poisonous and can cause serious injury
or death when inhaled.
• Keep key fobs away from children. Operation of the
Remote Start System, windows, door locks or other
controls could cause serious injury or death.
3
GETTING TO KNOW YOUR VEHICLE 29
Page 37 of 532
security alarm will arm regardless of whether you are in
the vehicle or not. If you remain in the vehicle and open a
door, the alarm will sound. If this occurs, disarm the
vehicle security alarm.
If the vehicle security alarm is armed and the battery
becomes disconnected, the vehicle security alarm will
remain armed when the battery is reconnected; the exterior
lights will flash, the horn will sound. If this occurs, disarm
the vehicle security alarm.
Rearming Of The System
If something triggers the alarm, and no action is taken to
disarm it, the vehicle security alarm will turn the horn off
after 29 seconds, five seconds between cycles, up to eight
cycles if the trigger remains active and the vehicle security
alarm will rearm itself.
Tamper Alert
If something has triggered the vehicle security alarm in
your absence, the horn will sound three times and the
exterior lights will blink three times when you disarm the
vehicle security alarm. Check the vehicle for tampering.
DOORS
Manual Door Locks
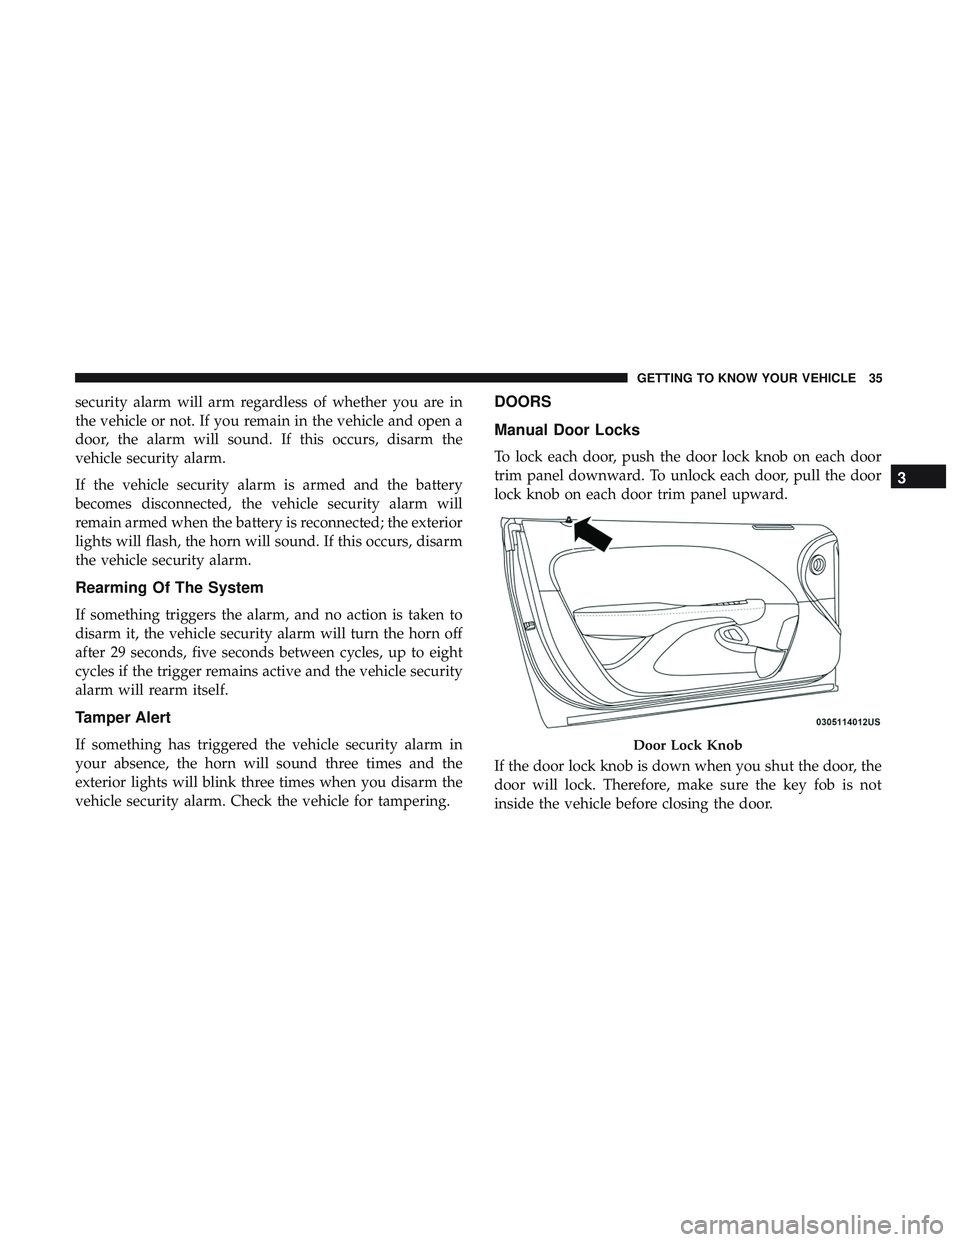
To lock each door, push the door lock knob on each door
trim panel downward. To unlock each door, pull the door
lock knob on each door trim panel upward.
If the door lock knob is down when you shut the door, the
door will lock. Therefore, make sure the key fob is not
inside the vehicle before closing the door.
Door Lock Knob
3
GETTING TO KNOW YOUR VEHICLE 35
Page 42 of 532
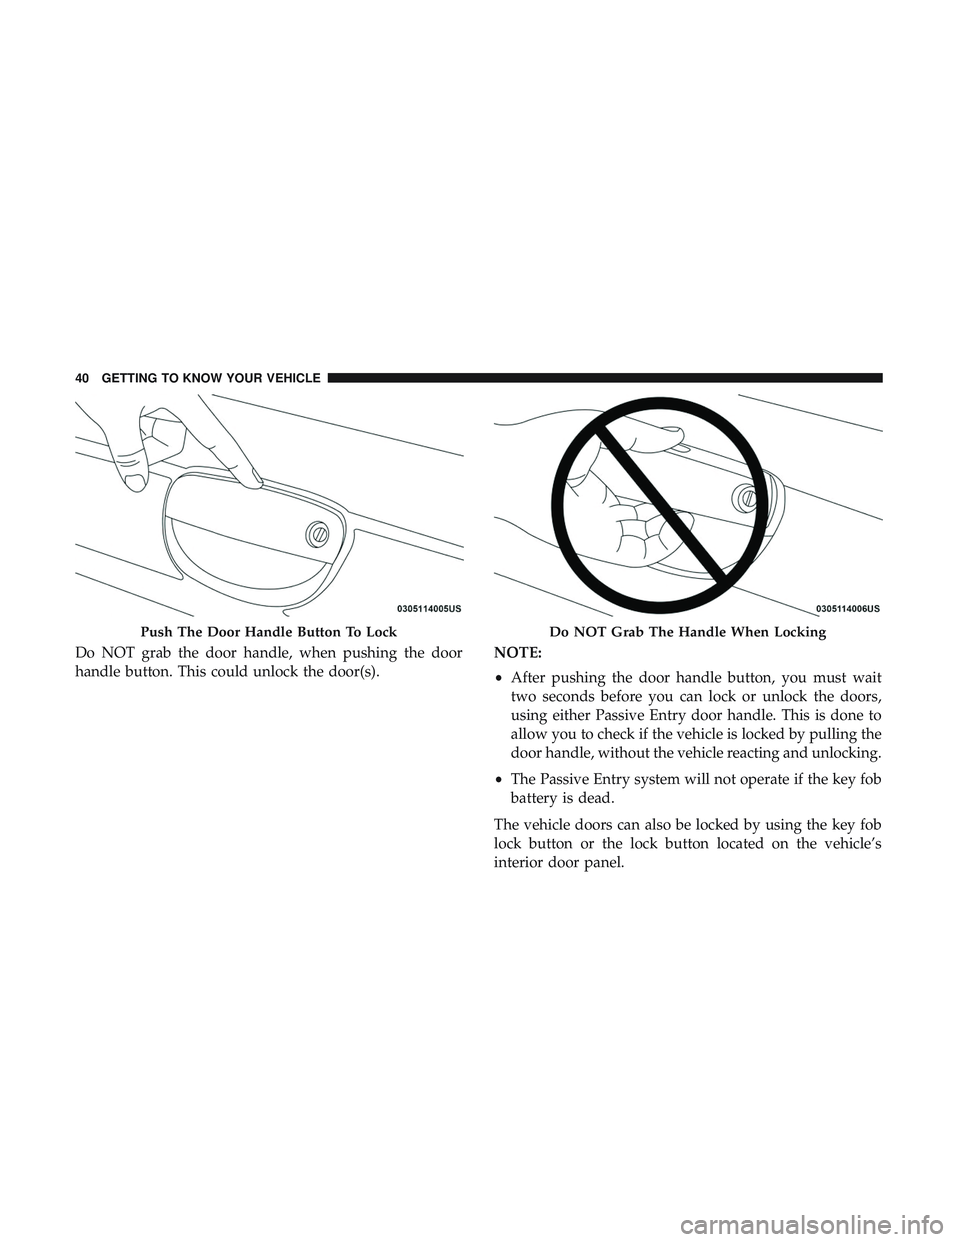
Do NOT grab the door handle, when pushing the door
handle button. This could unlock the door(s).NOTE:
•
After pushing the door handle button, you must wait
two seconds before you can lock or unlock the doors,
using either Passive Entry door handle. This is done to
allow you to check if the vehicle is locked by pulling the
door handle, without the vehicle reacting and unlocking.
• The Passive Entry system will not operate if the key fob
battery is dead.
The vehicle doors can also be locked by using the key fob
lock button or the lock button located on the vehicle’s
interior door panel.
Push The Door Handle Button To LockDo NOT Grab The Handle When Locking
40 GETTING TO KNOW YOUR VEHICLE
Page 66 of 532
INTERIOR LIGHTS
The interior lights come on when a door is opened.
To protect the battery, the interior lights will turn off
automatically ten minutes after the ignition is moved to the
OFF position. This will occur if the interior lights were
switched on manually or are on because a door is open.
The Battery Protection also includes the glove compart-
ment light and the trunk light. To restore interior light
operation after automatic battery protection is enabled
(lights off), either place the ignition in the ON/RUN
position or cycle the light switch.
Map/Reading Lights
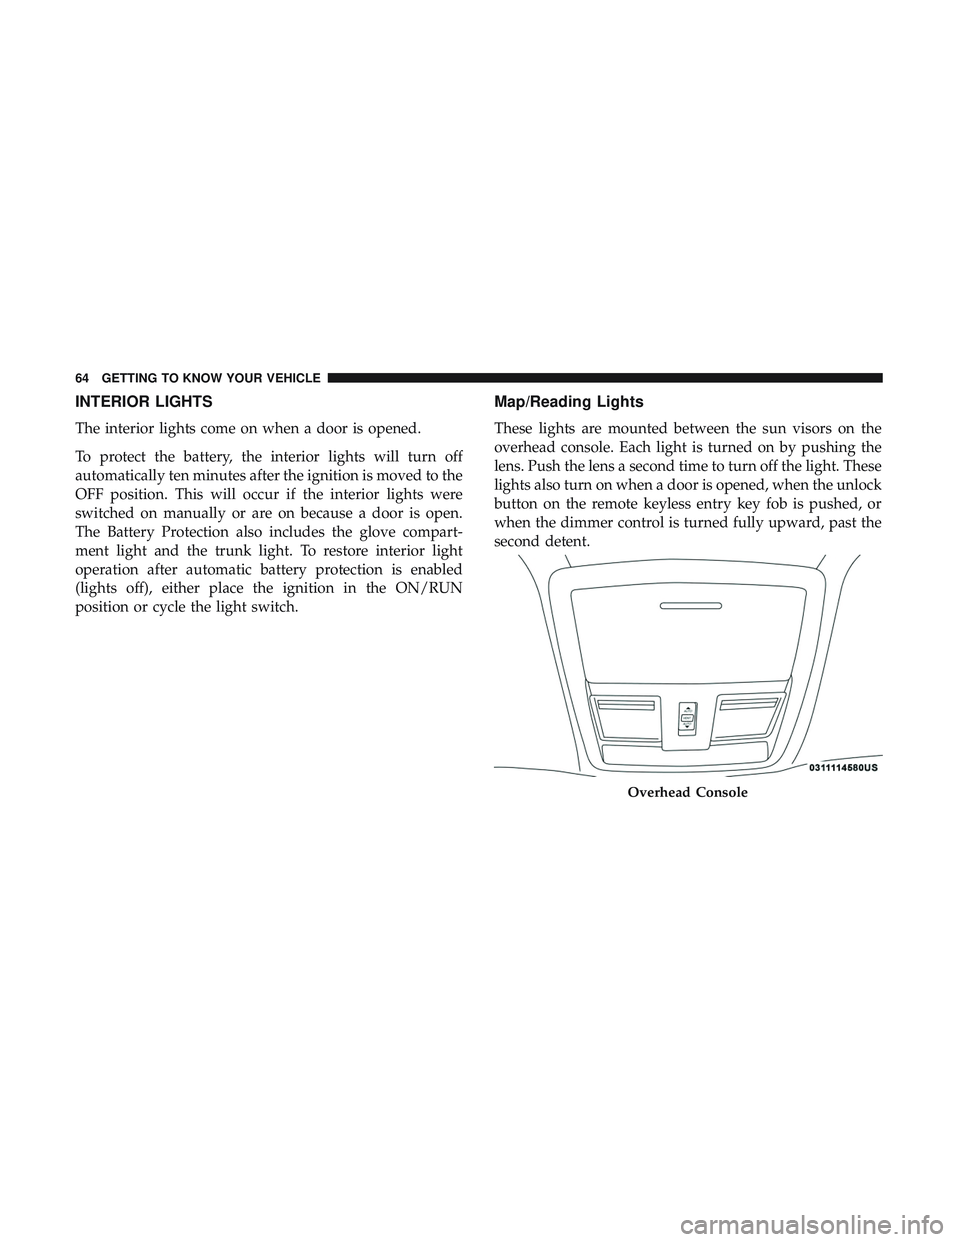
These lights are mounted between the sun visors on the
overhead console. Each light is turned on by pushing the
lens. Push the lens a second time to turn off the light. These
lights also turn on when a door is opened, when the unlock
button on the remote keyless entry key fob is pushed, or
when the dimmer control is turned fully upward, past the
second detent.
Overhead Console
64 GETTING TO KNOW YOUR VEHICLE
Page 89 of 532
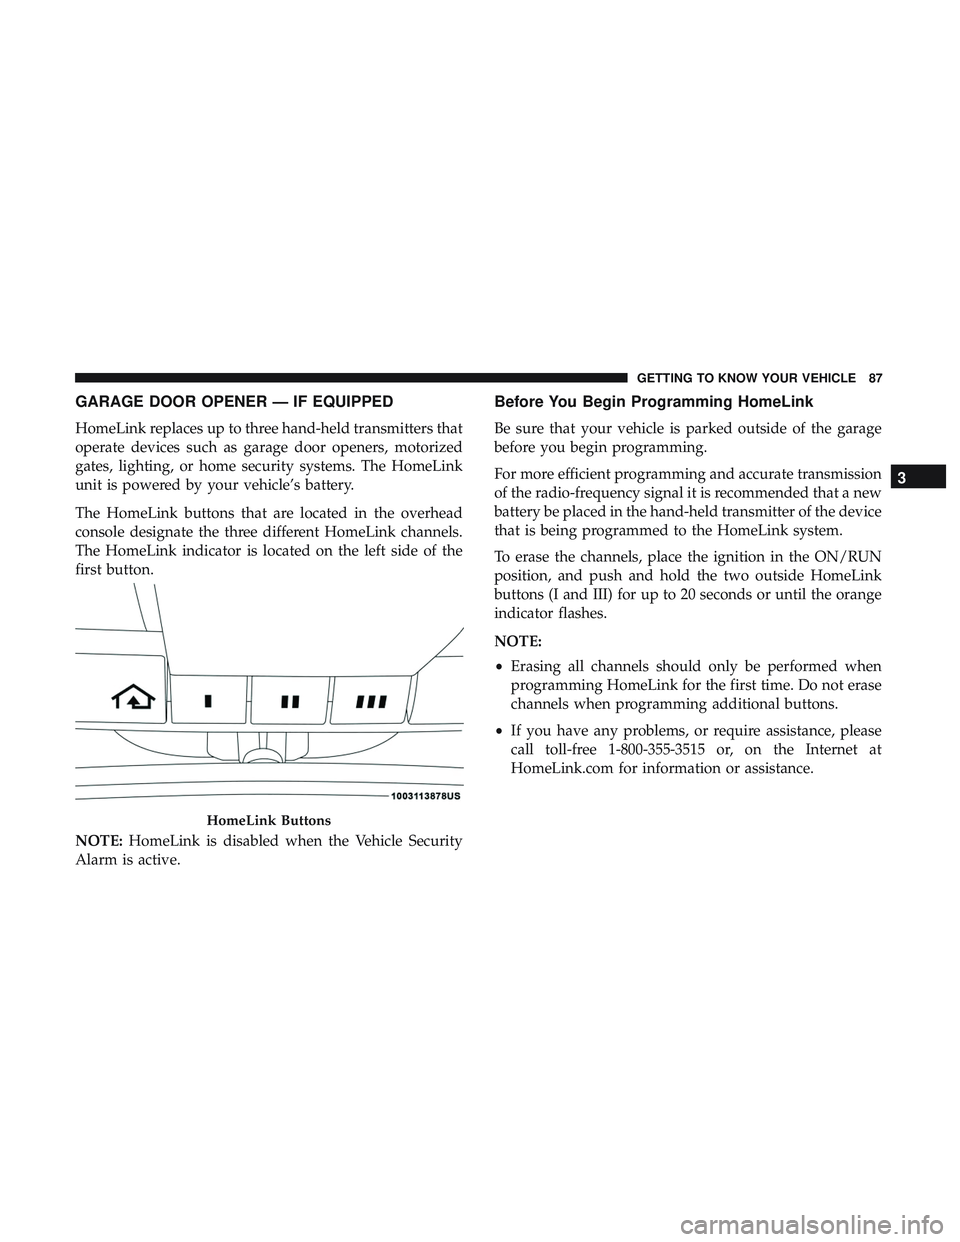
GARAGE DOOR OPENER — IF EQUIPPED
HomeLink replaces up to three hand-held transmitters that
operate devices such as garage door openers, motorized
gates, lighting, or home security systems. The HomeLink
unit is powered by your vehicle’s battery.
The HomeLink buttons that are located in the overhead
console designate the three different HomeLink channels.
The HomeLink indicator is located on the left side of the
first button.
NOTE:HomeLink is disabled when the Vehicle Security
Alarm is active.
Before You Begin Programming HomeLink
Be sure that your vehicle is parked outside of the garage
before you begin programming.
For more efficient programming and accurate transmission
of the radio-frequency signal it is recommended that a new
battery be placed in the hand-held transmitter of the device
that is being programmed to the HomeLink system.
To erase the channels, place the ignition in the ON/RUN
position, and push and hold the two outside HomeLink
buttons (I and III) for up to 20 seconds or until the orange
indicator flashes.
NOTE:
• Erasing all channels should only be performed when
programming HomeLink for the first time. Do not erase
channels when programming additional buttons.
• If you have any problems, or require assistance, please
call toll-free 1-800-355-3515 or, on the Internet at
HomeLink.com for information or assistance.
HomeLink Buttons
3
GETTING TO KNOW YOUR VEHICLE 87
Page 93 of 532

•To program the two remaining HomeLink buttons,
repeat each step for each remaining button. DO NOT
erase the channels.
If you unplugged the garage door opener/device for
programming, plug it back in at this time.
Reprogramming A Single HomeLink Button (Canadian/
Gate Operator)
To reprogram a channel that has been previously trained,
follow these steps:
1. Cycle the ignition to the ON/RUN position.
2. Press and hold the desired HomeLink button until the indicator light begins to flash after 20 seconds. Do not
release the button.
3. Without releasing the button, proceed with “Canadian/ Gate Operator Programming” step 2 and follow all
remaining steps.
Using HomeLink
To operate, push and release the programmed HomeLink
button. Activation will now occur for the programmed
device (i.e. garage door opener, gate operator, security sys-
tem, entry door lock, home/office lighting, etc.). The hand-
held transmitter of the device may also be used at any time.
Security
It is advised to erase all channels before you sell or turn in
your vehicle.
To do this, push and hold the two outside buttons for 20
seconds until the orange indicator flashes. Note that all
channels will be erased. Individual channels cannot be
erased.
The HomeLink Universal Transceiver is disabled when the
Vehicle Security Alarm is active.
Troubleshooting Tips
If you are having trouble programming HomeLink, here
are some of the most common solutions:
•Replace the battery in the Garage Door Opener hand-
held transmitter.
• Push the LEARN button on the Garage Door Opener to
complete the training for a Rolling Code.
• Did you unplug the device for programming and re-
member to plug it back in?
If you have any problems, or require assistance, please call
toll-free 1-800-355-3515 or, on the Internet at
HomeLink.com for information or assistance.
3
GETTING TO KNOW YOUR VEHICLE 91