check engine light DODGE CHALLENGER 2021 User Guide
[x] Cancel search | Manufacturer: DODGE, Model Year: 2021, Model line: CHALLENGER, Model: DODGE CHALLENGER 2021Pages: 328, PDF Size: 15 MB
Page 202 of 328
200SAFETY
Some of the safety features described in this
section may be standard equipment on some
models, or may be optional equipment on others. If
you are not sure, ask an authorized dealer.
The air bag system must be ready to protect you in
a collision. The Occupant Restraint Controller
(ORC) monitors the internal circuits and
interconnecting wiring associated with the
electrical Air Bag System Components. Your
vehicle may be equipped with the following Air Bag
System Components:
Air Bag System Components
Occupant Restraint Controller (ORC)
Air Bag Warning Light
Steering Wheel and Column
Instrument Panel
Knee Impact Bolsters
Driver and Front Passenger Air Bags
Seat Belt Buckle Switch
Supplemental Side Air Bags
Front and Side Impact Sensors
Seat Belt Pretensioners
Seat Track Position Sensors
NOTE:Vehicles with front passenger seat deleted will not
be equipped with the Seat Belt Buckle Switch, Seat
Belt Pretensioner, Supplemental Seat Mounted
Side Airbag, and Seat Track Position Sensors for
the front passenger.
All passenger occupants within the vehicle must be
in a seat equipped with a Seat Belt System and
Head Restraint for the safety of the passenger.
If the front passenger and/or rear seats have been
removed do not ride in those areas.
Air Bag Warning Light
The Occupant Restraint Controller (ORC)
monitors the readiness of the electronic
parts of the air bag system whenever the
ignition switch is in the START or ON/
RUN position. If the ignition switch is in the OFF
position or in the ACC position, the air bag system
is not on and the air bags will not inflate.
The ORC contains a backup power supply system
that may deploy the air bag system even if the
battery loses power or it becomes disconnected
prior to deployment.
The ORC turns on the Air Bag Warning Light in the
instrument panel for approximately four to eight
seconds for a self-check when the ignition switch is
first in the ON/RUN position. After the self-check,
the Air Bag Warning Light will turn off. If the ORC
detects a malfunction in any part of the system, it turns on the Air Bag Warning Light, either
momentarily or continuously. A single chime will
sound to alert you if the light comes on again after
initial startup.
The ORC also includes diagnostics that will
illuminate the instrument panel Air Bag Warning
Light if a malfunction is detected that could affect
the air bag system. The diagnostics also record the
nature of the malfunction. While the air bag system
is designed to be maintenance free, if any of the
following occurs, have an authorized dealer
service the air bag system immediately.The Air Bag Warning Light does not come on
during the four to eight seconds when the igni
-
tion switch is first in the ON/RUN position.
The Air Bag Warning Light remains on after the
four to eight-second interval.
The Air Bag Warning Light comes on intermit -
tently or remains on while driving.
NOTE:If the speedometer, tachometer, or any engine
related gauges are not working, the Occupant
Restraint Controller (ORC) may also be disabled. In
this condition the air bags may not be ready to
inflate for your protection. Have an authorized
dealer service the air bag system immediately.
21_LA_OM_EN_USC_t.book Page 200
Page 209 of 328
SAFETY207
NOTE:After an accident, remember to cycle the ignition to
the STOP (OFF/LOCK) position and remove the key
from the ignition switch to avoid draining the
battery. Carefully check the vehicle for fuel leaks in
the engine compartment and on the ground near
the engine compartment and fuel tank before
resetting the system and starting the engine. If
there are no fuel leaks or damage to the vehicle
electrical devices (e.g. headlights) after an
accident, reset the system by following the
procedure described below. If you have any doubt,
contact an authorized dealer.
Enhanced Accident Response System
Reset Procedure
In order to reset the Enhanced Accident Response
System functions after an event, the ignition switch
must be changed from ignition START or ON/RUN
to ignition OFF. Carefully check the vehicle for fuel
leaks in the engine compartment and on the
ground near the engine compartment and fuel
tank before resetting the system and starting the
engine.
After an accident, if the vehicle will not start after
performing the reset procedure, the vehicle must
be towed to an authorized dealer to be inspected
and to have the Enhanced Accident Response
System reset.
Maintaining Your Air Bag System Event Data Recorder (EDR)
This vehicle is equipped with an event data
recorder (EDR). The main purpose of an EDR is to
record, in certain crash or near crash-like
situations, such as an air bag deployment or hitting
a road obstacle, data that will assist in
understanding how a vehicle’s systems performed.
The EDR is designed to record data related to
vehicle dynamics and safety systems for a short
period of time, typically 30 seconds or less. The
EDR in this vehicle is designed to record such data
as:
How various systems in your vehicle were oper -
ating;
Whether or not the driver and passenger safety
belts were buckled/fastened;
How far (if at all) the driver was depressing the
accelerator and/or brake pedal; and,
How fast the vehicle was traveling.
These data can help provide a better
understanding of the circumstances in which
crashes and injuries occur.
WARNING!
Modifications to any part of the air bag system
could cause it to fail when you need it. You
could be injured if the air bag system is not
there to protect you. Do not modify the compo -
nents or wiring, including adding any kind of
badges or stickers to the steering wheel hub
trim cover or the upper passenger side of the
instrument panel. Do not modify the front
fascia/bumper, vehicle body structure, or add
aftermarket side steps or running boards.
It is dangerous to try to repair any part of the air
bag system yourself. Be sure to tell anyone who
works on your vehicle that it has an air bag system.
Do not attempt to modify any part of your air
bag system. The air bag may inflate accidentally
or may not function properly if modifications are
made. Take your vehicle to an authorized dealer
for any air bag system service. If your seat,
including your trim cover and cushion, needs to
be serviced in any way (including removal or
loosening/tightening of seat attachment bolts),
take the vehicle to an authorized dealer. Only
manufacturer approved seat accessories may
be used. If it is necessary to modify the air bag
system for persons with disabilities, contact an
authorized dealer.
6
21_LA_OM_EN_USC_t.book Page 207
Page 226 of 328
224SAFETY
(Continued)
(Continued)
Floor Mat Safety Information
Always use floor mats designed to fit your vehicle.
Only use a floor mat that does not interfere with the
operation of the accelerator, brake or clutch
pedals. Only use a floor mat that is securely
attached using the floor mat fasteners so it cannot
slip out of position and interfere with the
accelerator, brake or clutch pedals or impair safe
operation of your vehicle in other ways.
WARNING!
An improperly attached, damaged, folded, or
stacked floor mat, or damaged floor mat
fasteners may cause your floor mat to interfere
with the accelerator, brake, or clutch pedals and
cause a loss of vehicle control. To prevent
SERIOUS INJURY or DEATH:
ALWAYS securely attach your floor mat
using the floor mat fasteners. DO NOT install
your floor mat upside down or turn your floor
mat over. Lightly pull to confirm mat is
secured using the floor mat fasteners on a
regular basis.
ALWAYS REMOVE THE EXISTING FLOOR MAT
FROM THE VEHICLE before installing any
other floor mat. NEVER install or stack an
additional floor mat on top of an existing floor
mat.
ONLY install floor mats designed to fit your
vehicle. NEVER install a floor mat that cannot
be properly attached and secured to your
vehicle. If a floor mat needs to be replaced,
only use a FCA approved floor mat for the
specific make, model, and year of your
vehicle.
ONLY use the driver’s side floor mat on the
driver’s side floor area. To check for interfer
-
ence, with the vehicle properly parked with the
engine off, fully depress the accelerator, the
brake, and the clutch pedal (if present) to
check for interference. If your floor mat inter -
feres with the operation of any pedal, or is not
secure to the floor, remove the floor mat from
the vehicle and place the floor mat in your
trunk.
ONLY use the passenger’s side floor mat on
the passenger’s side floor area.
WARNING!
ALWAYS make sure objects cannot fall or slide
into the driver’s side floor area when the
vehicle is moving. Objects can become
trapped under accelerator, brake, or clutch
pedals and could cause a loss of vehicle
control.
NEVER place any objects under the floor mat
(e.g., towels, keys, etc.). These objects could
change the position of the floor mat and may
cause interference with the accelerator,
brake, or clutch pedals.
If the vehicle carpet has been removed and
re-installed, always properly attach carpet to
the floor and check the floor mat fasteners are
secure to the vehicle carpet. Fully depress
each pedal to check for interference with the
accelerator, brake, or clutch pedals then
re-install the floor mats.
It is recommended to only use mild soap and
water to clean your floor mats. After cleaning,
always check your floor mat has been properly
installed and is secured to your vehicle using
the floor mat fasteners by lightly pulling mat.
WARNING!
21_LA_OM_EN_USC_t.book Page 224
Page 227 of 328
SAFETY225
PERIODIC SAFETY CHECKS YOU SHOULD
M
AKE OUTSIDE THE VEHICLE
Tires
Examine tires for excessive tread wear and uneven
wear patterns. Check for stones, nails, glass, or
other objects lodged in the tread or sidewall.
Inspect the tread for cuts and cracks. Inspect
sidewalls for cuts, cracks, and bulges. Check the
lug nuts/bolt torque for tightness. Check the tires
(including spare) for proper cold inflation pressure.
Lights
Have someone observe the operation of brake
lights and exterior lights while you work the
controls. Check turn signal and high beam
indicator lights on the instrument panel.
Door Latches
Check for proper closing, latching, and locking.
Fluid Leaks
Check area under the vehicle after overnight
parking for fuel, coolant, oil, or other fluid leaks.
Also, if gasoline fumes are detected or if fuel or
brake fluid leaks are suspected, the cause should
be located and corrected immediately.
EXHAUST GAS
The best protection against carbon monoxide entry
into the vehicle body is a properly maintained
engine exhaust system.
Whenever a change is noticed in the sound of the
exhaust system, when exhaust fumes can be
detected inside the vehicle, or when the underside
or rear of the vehicle is damaged, have an authorized dealer inspect the complete exhaust
system and adjacent body areas for broken,
damaged, deteriorated, or mispositioned parts.
Open seams or loose connections could permit
exhaust fumes to seep into the passenger
compartment. In addition, inspect the exhaust
system each time the vehicle is raised for
lubrication or oil change. Replace as required.
CARBON MONOXIDE WARNINGS
WARNING!
Exhaust gases can injure or kill. They contain
carbon monoxide (CO), which is colorless and
odorless. Breathing it can make you
unconscious and can eventually poison you. To
avoid breathing (CO), follow these safety tips:
Do not run the engine in a closed garage or in
confined areas any longer than needed to
move your vehicle in or out of the area.
If you are required to drive with the trunk/lift
-
gate/rear doors open, make sure that all
windows are closed and the climate control
BLOWER switch is set at high speed. DO NOT
use the recirculation mode.
If it is necessary to sit in a parked vehicle with
the engine running, adjust your heating or
cooling controls to force outside air into the
vehicle. Set the blower at high speed.
WARNING!
Carbon monoxide (CO) in exhaust gases is
deadly. Follow the precautions below to prevent
carbon monoxide poisoning:
Do not inhale exhaust gases. They contain
carbon monoxide, a colorless and odorless gas,
which can kill. Never run the engine in a closed
area, such as a garage, and never sit in a parked
vehicle with the engine running for an extended
period. If the vehicle is stopped in an open area
with the engine running for more than a short
period, adjust the ventilation system to force
fresh, outside air into the vehicle.
Guard against carbon monoxide with proper
maintenance. Have the exhaust system
inspected every time the vehicle is raised.
Have any abnormal conditions repaired
promptly. Until repaired, drive with all side
windows fully open.
6
21_LA_OM_EN_USC_t.book Page 225
Page 248 of 328
246
SERVICING AND MAINTENANCE
SCHEDULED SERVICING
3.6L AND 5.7L ENGINES
These engines are equipped with an automatic oil
change indicator system. The oil change indicator
system will remind you that it is time to take your
vehicle in for scheduled maintenance.
Based on engine operation conditions, the oil
change indicator message will illuminate. This
means that service is required for the vehicle.
Operating conditions such as frequent short-trips,
trailer tow, and extremely hot or cold ambient
temperatures will influence when the “Change Oil”
or “Oil Change Required” message is displayed.
Have your vehicle serviced as soon as possible,
within the next 500 miles (805 km).The “Oil Change Required” message will be
displayed in the instrument cluster and a single
chime will sound, indicating that an oil change is
necessary.
An authorized dealer will reset the oil change
indicator message after completing the scheduled
oil change.
NOTE:Under no circumstances should oil change
intervals exceed 10,000 miles (16,000 km),
12 months or 350 hours of engine run time,
whichever comes first. The 350 hours of engine
run or idle time is generally only a concern for fleet
customers.
Once A Month Or Before A Long Trip:
Check engine oil level.
Check windshield washer fluid level.
Check tire pressure and look for unusual wear
or damage. Rotate tires at the first sign of irreg
-
ular wear, even if it occurs before your next
scheduled service.
Check the fluid levels of the coolant reservoir,
brake master cylinder, and power steering (if
equipped) and fill as needed.
Check function of all interior and exterior lights.
21_LA_OM_EN_USC_t.book Page 246
Page 259 of 328
SERVICING AND MAINTENANCE257
T/A Air Filter Maintenance — If Equipped
Clean Engine Air Filter
The scheduled air filter cleaning interval is
30,000 miles (48,280 km), or if in a dusty
environment the engine air filter should be
checked periodically to ensure optimal air flow.
Cleaning your engine air filter with the
recommended Mopar® Performance Air Filter
Service Kit is not required if you can still see any
part the wire screen on the entire air filter
regardless of how dirty it may appear. When any
part of the wire screen is no longer visible on the air
filter, that is an indication it is time to clean the air
filter.
1. Spray the air filter with the recommended
Mopar® air filter cleaner and let sit for at
least 10 minutes to loosen dirt, before
rinsing.
NOTE:Never use strong detergents, high pressure, or
gasoline on air filter.
2. Rinse the air filter with cool low-pressure water applied from the inside (clean side) out in
order to flush the dirt out of the filter. Continue
to rinse the filter until all traces of the cleaner
have been removed.
NOTE:It may be necessary to repeat steps 1 and 2 if the
air filter is not completely clean.
3. After rinsing the air filter, gently shake off the excess water and allow air filter to dry
naturally. Do not apply oil until air filter is
completely dry.
NOTE:Do not use forced air pressure as it may damage
the filtering capabilities of the filter’s microfibers
and also void its warranty.
4. Using the Mopar® Performance Air Filter Service Kit, spray oil evenly along the crown of
each filter pleat holding the nozzle about
3 inches (76 mm) away from the air filter. One
spray per 2 square inches (1,290 square mm)
of air filter. With one complete coat of oil, let it
wick (saturate) for about 20 minutes, and if
required touch up any light areas on either
side of the filter.
AIR CONDITIONER MAINTENANCE
For best possible performance, your air conditioner
should be checked and serviced by an authorized
dealer at the start of each warm season. This
service should include cleaning of the condenser
fins and a performance test. Drive belt tension
should also be checked at this time.
WARNING!
Use only refrigerants and compressor lubri -
cants approved by the manufacturer for your
air conditioning system. Some unapproved
refrigerants are flammable and can explode,
injuring you. Other unapproved refrigerants or
lubricants can cause the system to fail,
requiring costly repairs. Refer to Warranty
Information Book, for further warranty infor -
mation.
The air conditioning system contains refrig -
erant under high pressure. To avoid risk of
personal injury or damage to the system,
adding refrigerant or any repair requiring lines
to be disconnected should be done by an
experienced technician.
CAUTION!
Do not use chemical flushes in your air
conditioning system as the chemicals can
damage your air conditioning components. Such
damage is not covered by the New Vehicle
Limited Warranty.8
21_LA_OM_EN_USC_t.book Page 257
Page 267 of 328
SERVICING AND MAINTENANCE265
(Continued)
Make sure that the coolant expansion bottle
overflow hoses are not kinked or obstructed.
Keep the front of the radiator clean. If your
vehicle is equipped with air conditioning, keep
the front of the condenser clean.
Do not change the thermostat for Summer or
Winter operation. If replacement is ever neces -
sary, install ONLY the correct type thermostat.
Other designs may result in unsatisfactory
engine cooling performance, poor gas mileage,
and increased emissions.
BRAKE SYSTEM
In order to ensure brake system performance, all
brake system components should be inspected
periodically Ú page 247.
Fluid Level Check — Brake Master Cylinder
Check the fluid level in the master cylinder
immediately if the Brake System Warning Light
indicates system failure.
Check the fluid level in the master cylinder when
performing underhood services.
Clean the top of the master cylinder area before
removing the cap. Add fluid to bring the level up to
the top of the “FULL” mark on the side of the
master cylinder reservoir.
Overfilling of fluid is not recommended because it
may cause leaking in the system.
Add enough fluid to bring the level up to the
requirements described on the brake fluid
reservoir. With disc brakes, fluid level can be
expected to fall as the brake pads wear. However,
low fluid level may be caused by a leak and a
checkup may be needed.
Use only brake fluid that has been recommended
by the manufacturer, and has been kept in a tightly
closed container to avoid contamination from
foreign matter or moisture Ú page 306.
WARNING!
Riding the brakes can lead to brake failure and
possibly a collision. Driving with your foot resting
or riding on the brake pedal can result in
abnormally high brake temperatures, excessive
lining wear, and possible brake damage. You
would not have your full braking capacity in an
emergency.
WARNING!
Use only manufacturer's recommended brake
fluid Úpage 306. Using the wrong type of
brake fluid can severely damage your brake
system and/or impair its performance. The
proper type of brake fluid for your vehicle is
also identified on the original factory installed
hydraulic master cylinder reservoir.
To avoid contamination from foreign matter or
moisture, use only new brake fluid or fluid that
has been in a tightly closed container. Keep
the master cylinder reservoir cap secured at
all times. Brake fluid in a open container
absorbs moisture from the air resulting in a
lower boiling point. This may cause it to boil
unexpectedly during hard or prolonged
braking, resulting in sudden brake failure. This
could result in a collision.
Overfilling the brake fluid reservoir can result
in spilling brake fluid on hot engine parts,
causing the brake fluid to catch fire. Brake
fluid can also damage painted and vinyl
surfaces, care should be taken to avoid its
contact with these surfaces.8
21_LA_OM_EN_USC_t.book Page 265
Page 304 of 328
302TECHNICAL SPECIFICATIONS
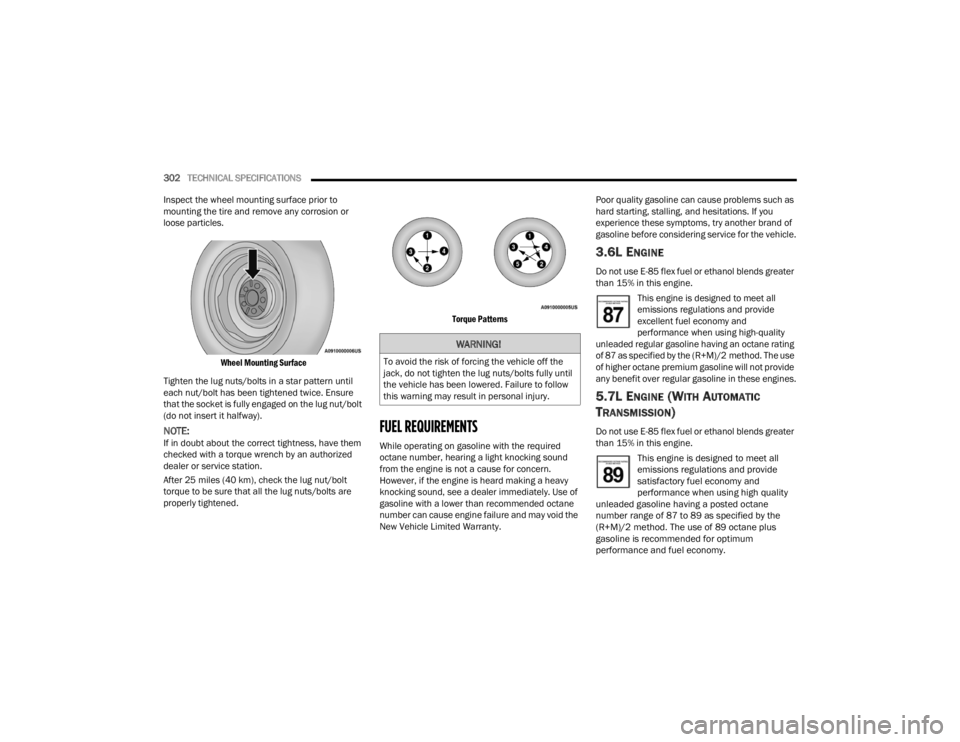
Inspect the wheel mounting surface prior to
mounting the tire and remove any corrosion or
loose particles.
Wheel Mounting Surface
Tighten the lug nuts/bolts in a star pattern until
each nut/bolt has been tightened twice. Ensure
that the socket is fully engaged on the lug nut/bolt
(do not insert it halfway).
NOTE:If in doubt about the correct tightness, have them
checked with a torque wrench by an authorized
dealer or service station.
After 25 miles (40 km), check the lug nut/bolt
torque to be sure that all the lug nuts/bolts are
properly tightened.
Torque Patterns
FUEL REQUIREMENTS
While operating on gasoline with the required
octane number, hearing a light knocking sound
from the engine is not a cause for concern.
However, if the engine is heard making a heavy
knocking sound, see a dealer immediately. Use of
gasoline with a lower than recommended octane
number can cause engine failure and may void the
New Vehicle Limited Warranty.Poor quality gasoline can cause problems such as
hard starting, stalling, and hesitations. If you
experience these symptoms, try another brand of
gasoline before considering service for the vehicle.
3.6L ENGINE
Do not use E-85 flex fuel or ethanol blends greater
than 15% in this engine.
This engine is designed to meet all
emissions regulations and provide
excellent fuel economy and
performance when using high-quality
unleaded regular gasoline having an octane rating
of 87 as specified by the (R+M)/2 method. The use
of higher octane premium gasoline will not provide
any benefit over regular gasoline in these engines.
5.7L ENGINE (WITH AUTOMATIC
T
RANSMISSION)
Do not use E-85 flex fuel or ethanol blends greater
than 15% in this engine.
This engine is designed to meet all
emissions regulations and provide
satisfactory fuel economy and
performance when using high quality
unleaded gasoline having a posted octane
number range of 87 to 89 as specified by the
(R+M)/2 method. The use of 89 octane plus
gasoline is recommended for optimum
performance and fuel economy.
WARNING!
To avoid the risk of forcing the vehicle off the
jack, do not tighten the lug nuts/bolts fully until
the vehicle has been lowered. Failure to follow
this warning may result in personal injury.
21_LA_OM_EN_USC_t.book Page 302
Page 314 of 328
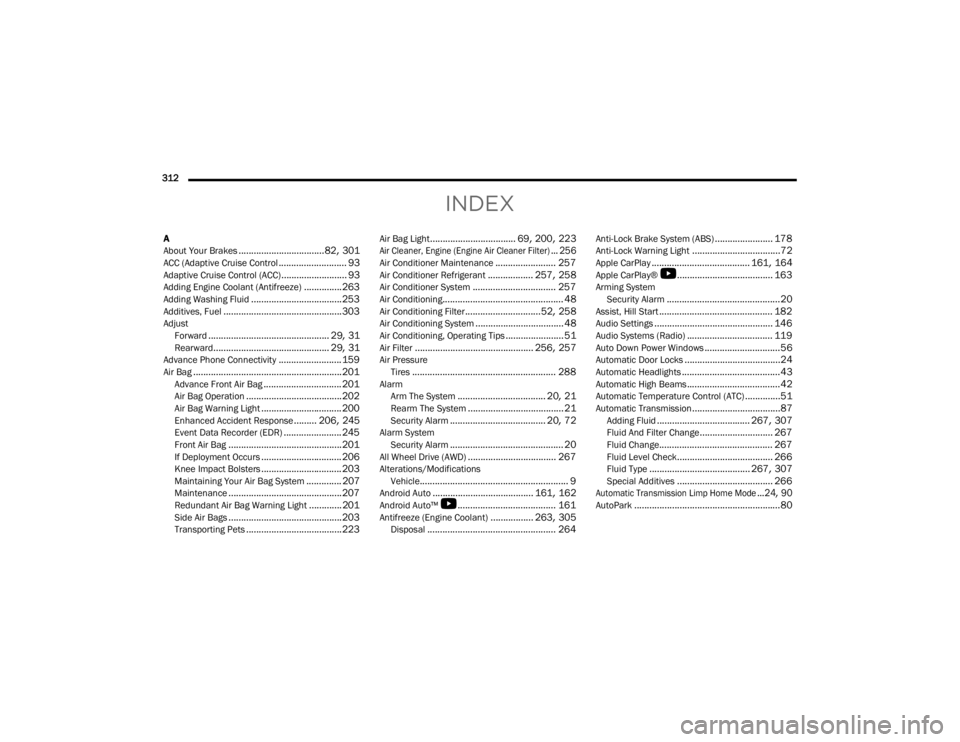
312
INDEX
A
About Your Brakes.................................. 82, 301ACC (Adaptive Cruise Control........................... 93Adaptive Cruise Control (ACC).......................... 93Adding Engine Coolant (Antifreeze)............... 263Adding Washing Fluid.................................... 253Additives, Fuel............................................... 303AdjustForward................................................ 29, 31Rearward.............................................. 29, 31Advance Phone Connectivity......................... 159Air Bag........................................................... 201Advance Front Air Bag............................... 201Air Bag Operation...................................... 202Air Bag Warning Light................................ 200Enhanced Accident Response......... 206, 245Event Data Recorder (EDR)....................... 245Front Air Bag............................................. 201If Deployment Occurs................................ 206Knee Impact Bolsters................................ 203Maintaining Your Air Bag System.............. 207Maintenance............................................. 207Redundant Air Bag Warning Light.............201Side Air Bags............................................. 203Transporting Pets...................................... 223
Air Bag Light.................................. 69, 200, 223
Air Cleaner, Engine (Engine Air Cleaner Filter)... 256
Air Conditioner Maintenance........................ 257Air Conditioner Refrigerant.................. 257, 258Air Conditioner System................................. 257Air Conditioning................................................ 48Air Conditioning Filter..............................52, 258Air Conditioning System................................... 48Air Conditioning, Operating Tips....................... 51Air Filter............................................... 256, 257Air PressureTires......................................................... 288AlarmArm The System................................... 20, 21Rearm The System...................................... 21Security Alarm...................................... 20, 72Alarm SystemSecurity Alarm............................................. 20All Wheel Drive (AWD)................................... 267Alterations/ModificationsVehicle........................................................... 9Android Auto........................................ 161, 162Android Auto™
b
....................................... 161Antifreeze (Engine Coolant)................. 263, 305Disposal................................................... 264
Anti-Lock Brake System (ABS)....................... 178Anti-Lock Warning Light...................................72Apple CarPlay....................................... 161, 164Apple CarPlay®
b
...................................... 163Arming SystemSecurity Alarm.............................................20Assist, Hill Start............................................. 182Audio Settings............................................... 146Audio Systems (Radio).................................. 119Auto Down Power Windows..............................56Automatic Door Locks......................................24Automatic Headlights.......................................43Automatic High Beams.....................................42Automatic Temperature Control (ATC)..............51Automatic Transmission...................................87Adding Fluid..................................... 267, 307Fluid And Filter Change............................. 267Fluid Change............................................. 267Fluid Level Check...................................... 266Fluid Type........................................ 267, 307Special Additives...................................... 266
Automatic Transmission Limp Home Mode...24, 90
AutoPark..........................................................80
21_LA_OM_EN_USC_t.book Page 312
Page 315 of 328

313
Autostick Operation
.................................................... 91Axle Fluid....................................................... 307Axle Lubrication............................................. 307
B
Back-Up......................................................... 108Battery.................................................... 70, 254Charging System Light................................. 70Keyless Key Fob Replacement.................... 14Location.................................................... 254Belts, Seat..................................................... 223Blind Spot Monitoring.................................... 184BluetoothConnecting To A Particular Mobile Phone Or Audio Device After Pairing
................154Body Mechanism Lubrication........................ 260B-Pillar Location............................................. 285Brake Assist System...................................... 179Brake Control System.................................... 179Brake Fluid.......................................... 265, 307Brake System...................................... 265, 301Fluid Check..................................... 265, 307Master Cylinder......................................... 265Parking........................................................ 82Warning Light..................................... 70, 301
Brake/Transmission Interlock......................... 87Break-In Recommendations, New Vehicle....... 82Brightness, Interior Lights................................ 45Bulb Replacement........................................ 276Bulbs, Light.......................................... 225, 276
C
Camera, Rear................................................ 108Capacities, Fluid........................................... 305Caps, FillerFuel.......................................................... 109Oil (Engine)............................................... 251Radiator (Coolant Pressure)..................... 264Car Washes................................................... 298Carbon Monoxide Warning............................ 225CargoVehicle Loading........................................ 110CD................................................................. 148Cellular Phone.............................................. 177Certification Label......................................... 110Chains, Tire................................................... 295Chart, Tire Sizing........................................... 281Check Engine Light
(Malfunction Indicator Light)............................ 77Checking Your Vehicle For Safety................. 223Checks, Safety.............................................. 223Child Restraint.............................................. 208
Child RestraintsBooster Seats........................................... 211Child Seat Installation............................... 221How To Stow An unused ALR Seat Belt..... 217Infant And Child Restraints....................... 210Lower Anchors And Tethers For Children.. 213Older Children And Child Restraints.......... 210Seating Positions...................................... 212Clean Air Gasoline......................................... 303CleaningWheels...................................................... 294Climate Control................................................48Cold Weather Operation...................................81Compact Spare Tire...................................... 292Contract, Service........................................... 309Controls........................................................ 140Cooling Pressure Cap (Radiator Cap)............ 264Cooling System............................................. 262Adding Coolant (Antifreeze)...................... 263Coolant Level................................... 262, 264Cooling Capacity....................................... 305Disposal Of Used Coolant......................... 264Drain, Flush, And Refill............................. 262Inspection................................................. 264Points To Remember................................ 264Pressure Cap............................................ 264Radiator Cap............................................. 264Selection Of Coolant (Antifreeze)......................... 263, 305, 306
11
21_LA_OM_EN_USC_t.book Page 313