instrument cluster DODGE CHALLENGER 2021 Owners Manual
[x] Cancel search | Manufacturer: DODGE, Model Year: 2021, Model line: CHALLENGER, Model: DODGE CHALLENGER 2021Pages: 328, PDF Size: 15 MB
Page 5 of 328

3
Programming HomeLink® To A Garage Door
Opener ..............................................................39
Programming HomeLink® To A Miscellaneous
Device ...............................................................40
Reprogramming A Single HomeLink® Button .. 40
Canadian/Gate Operator Programming .........40
EXTERIOR LIGHTS.................................................. 41
Headlight Switch...............................................41
Multifunction Lever ..........................................42
Daytime Running Lights (DRLs) —
If Equipped........................................................42
High/Low Beam Switch....................................42
Automatic High Beam Headlamp Control —
If Equipped .......................................................42
Flash-To-Pass....................................................43
Automatic Headlights ......................................43
Parking Lights ..................................................43
Automatic Headlights With Wipers..................43
Headlight Time Delay ......................................43
Lights-On Reminder .........................................43
Fog Lights — If Equipped ..................................44
Turn Signals .....................................................44
Lane Change Assist — If Equipped ..................44
INTERIOR LIGHTS ................................................. 44
Front Map/Reading Lights ..............................45
Ambient Light — If Equipped ............................45
Dimmer Control ................................................45 WINDSHIELD WIPERS AND WASHERS............... 46
Windshield Wiper Operation ............................46
Rain Sensing Wipers — If Equipped ................47
CLIMATE CONTROLS .............................................48
Automatic Climate Control Descriptions
And Functions ..................................................48
Automatic Temperature Control (ATC) ...........51
Climate — Voice Recognition ...........................51
Operating Tips .................................................51
INTERIOR STORAGE AND EQUIPMENT ............... 53
Storage..............................................................53
Illuminated Cupholders — If Equipped............53
USB/AUX Control ..............................................54
Power Outlets ...................................................54
WINDOWS ..............................................................56
Power Window Controls ...................................56
Wind Buffeting ..................................................56
POWER SUNROOF — IF EQUIPPED ...................... 56
Opening And Closing The Sunroof...................57
Pinch Protect Feature — If Equipped ..............57
Venting Sunroof................................................57
Sunshade Operation ........................................57
Sunroof Maintenance ......................................58
Ignition Off Operation.......................................58 HOOD....................................................................... 58
Opening The Hood ..........................................58
Closing The Hood ............................................. 58
TRUNK ..................................................................... 59
Opening The Trunk ........................................... 59
Closing The Trunk............................................. 59
Trunk Safety ..................................................... 60
GETTING TO KNOW YOUR
INSTRUMENT PANEL
INSTRUMENT CLUSTER ........................................ 61Instrument Cluster Descriptions ..................... 62
INSTRUMENT CLUSTER DISPLAY ........................ 62
Location And Controls...................................... 63
Engine Oil Life Reset ........................................ 64
Performance Shift Indicator (PSI) —
If Equipped .......................................................64
Instrument Cluster Display Selectable
Menu Items ...................................................... 64
Battery Saver On/Battery Saver Mode
Message — Electrical Load Reduction
Actions — If Equipped ..................................... 68
21_LA_OM_EN_USC_t.book Page 3
Page 15 of 328
13
GETTING TO KNOW YOUR VEHICLE
KEYS
KEY FOB
Your vehicle is equipped with a key fob which
supports Passive Entry, Remote Keyless Entry
(RKE), Keyless Enter ‘n Go™ (if equipped), Remote
Start (if equipped), and remote trunk operation.
The key fob allows you to lock or unlock the doors
and trunk from distances up to approximately 66 ft
(20 m). The key fob does not need to be pointed at
the vehicle to activate the system. The key fob also
contains an emergency key, which is stored in the
rear of the key fob.
NOTE:
The key fob’s wireless signal may be blocked if
the key fob is located next to a mobile phone,
laptop, or other electronic device. This may
result in poor performance.
With ignition in the ON position and the vehicle
moving at 2 mph (4 km/h), all RKE commands are disabled.
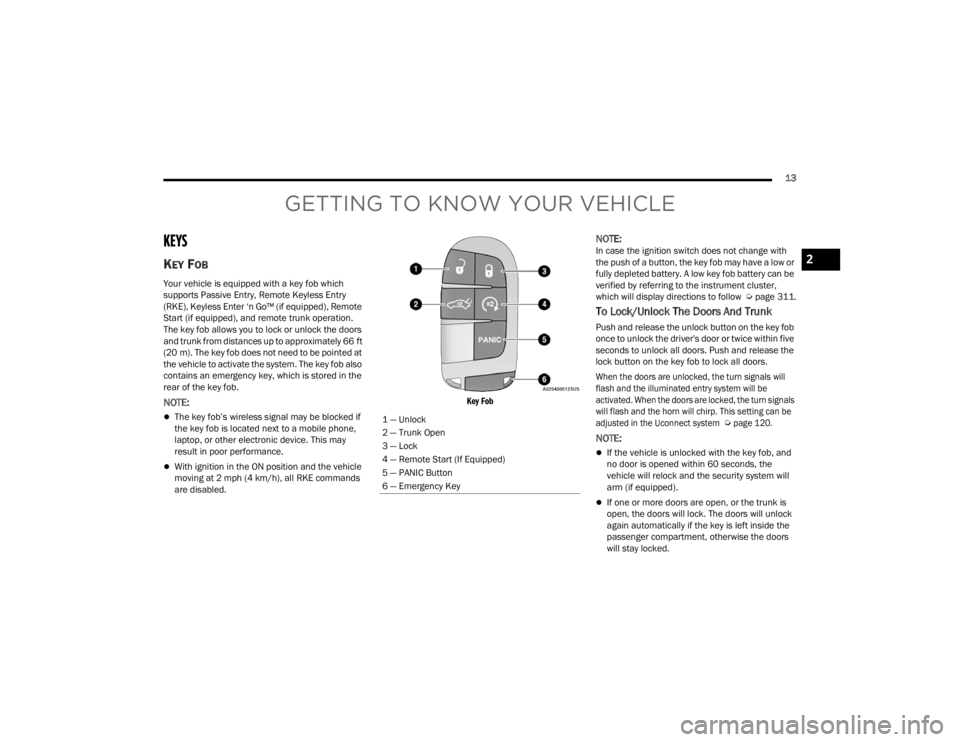
Key Fob
NOTE:In case the ignition switch does not change with
the push of a button, the key fob may have a low or
fully depleted battery. A low key fob battery can be
verified by referring to the instrument cluster,
which will display directions to follow
Úpage 311.
To Lock/Unlock The Doors And Trunk
Push and release the unlock button on the key fob
once to unlock the driver's door or twice within five
seconds to unlock all doors. Push and release the
lock button on the key fob to lock all doors.
When the doors are unlocked, the turn signals will
flash and the illuminated entry system will be
activated. When the doors are locked, the turn signals
will flash and the horn will chirp. This setting can be
adjusted in the Uconnect system
Ú
page 120.
NOTE:
If the vehicle is unlocked with the key fob, and
no door is opened within 60 seconds, the
vehicle will relock and the security system will
arm (if equipped).
If one or more doors are open, or the trunk is
open, the doors will lock. The doors will unlock
again automatically if the key is left inside the
passenger compartment, otherwise the doors
will stay locked.
1 — Unlock
2 — Trunk Open
3 — Lock
4 — Remote Start (If Equipped)
5 — PANIC Button
6 — Emergency Key
2
21_LA_OM_EN_USC_t.book Page 13
Page 21 of 328

GETTING TO KNOW YOUR VEHICLE19
The Remote Start system will turn the engine off
with another push and release of the Remote Start
button on the key fob, or if the engine is allowed to
run for the entire 15 minute cycle. Once the
ignition is placed in the ON/RUN position, the
climate controls will resume the previously set
operations (temperature, blower control, etc.).
NOTE:
To avoid unintentional shutdowns, the system
will disable for two seconds after receiving a
valid Remote Start request.
For vehicles equipped with the Keyless Enter ‘n
Go™ — Passive Entry feature, the message
“Remote Start Active — Push Start Button” will
show in the instrument cluster display until you
push the START/STOP ignition button.
Remote Start will also cancel if any of the following
occur:
The engine stalls or engine speed exceeds
2500 RPM.
Any engine warning lights come on.
The Low Fuel Light turns on.
The hood is opened.
The hazard switch is pushed.
The gear selector is moved out of PARK.
The brake pedal is pressed.
REMOTE START FRONT DEFROST
A
CTIVATION — IF EQUIPPED
When Remote Start is active, and the outside
ambient temperature is 40°F (4.5°C) or below, the
system will automatically activate front defrost for
15 minutes or less. The time is dependent on the
ambient temperature. Once the timer expires, the
system will automatically adjust the settings
depending on ambient conditions. See “Remote
Start Comfort Systems — If Equipped” in the next
section for detailed operation.
REMOTE START COMFORT SYSTEMS —
I
F EQUIPPED
When Remote Start is activated, the front and rear
defrost will automatically turn on in cold weather.
The heated steering wheel and driver heated seat
feature will turn on if selected in the comfort menu
screen within Uconnect Settings Ú page 120. In
warm weather, the driver vented seat feature will
automatically turn on when Remote Start is
activated, if programmed in the comfort menu
screen. The vehicle will adjust the climate control
settings depending on the outside ambient
temperature. Automatic Temperature Control (ATC) —
If Equipped
The climate controls will be automatically adjusted
to the optimal temperature and mode settings
depending on the outside ambient temperature.
This will occur until the ignition is placed in the ON/
RUN position where the climate controls will
resume their previous settings.
Manual Temperature Control (MTC) — If Equipped
In ambient temperatures at 40°F (4.5°C) or
below, the climate settings will default to
maximum heat, with fresh air entering the
cabin. If the front defrost timer expires, the
vehicle will enter Mix Mode.
In ambient temperatures from 40°F (4.5°C) to
78°F (26°C), the climate settings will be based
on the last settings selected by the driver.
In ambient temperatures at 78°F (26°C) or
above, the climate settings will default to MAX
A/C, Bi-Level Mode, with Recirculation on.
For more information on ATC, MTC, and climate
control settings, see Ú page 48.
2
21_LA_OM_EN_USC_t.book Page 19
Page 22 of 328

20GETTING TO KNOW YOUR VEHICLE
NOTE:These features will stay on through the duration of
Remote Start until the ignition is placed in the ON/
RUN position. The climate control settings will
change if manually adjusted by the driver while the
vehicle is in Remote Start mode, and exit auto -
matic override. This includes the OFF button on the
climate controls, which will turn the system off.
REMOTE START WINDSHIELD WIPER
D
E–ICER ACTIVATION — IF EQUIPPED
When Remote Start is active and the outside
ambient temperature is less than 33°F (0.6°C),
the Windshield Wiper De-Icer will be enabled.
Exiting Remote Start will resume its previous
operation. If the Windshield Wiper De-Icer was
active, the timer and operation will continue.
REMOTE START CANCEL MESSAGE —
I
F EQUIPPED
One of the following messages will display in the
instrument cluster display if the vehicle fails to
remote start or exits Remote Start prematurely:
Remote Start Cancelled — Door Open
Remote Start Cancelled — Hood Open
Remote Start Cancelled — Fuel Low
Remote Start Cancelled — Trunk Open
Remote Start Disabled — Start Vehicle To Reset The message will stay active until the ignition is
placed in the ON/RUN position.
VEHICLE SECURITY SYSTEM — IF EQUIPPED
The Vehicle Security system monitors the vehicle
doors for unauthorized entry and the Keyless Enter
‘n Go™ Ignition for unauthorized operation. While
the Vehicle Security system is armed, interior
switches for door locks and trunk release are
disabled. If something triggers the alarm, the
Vehicle Security system will provide the following
audible and visible signals:
The horn will pulse
The turn signals will flash
The Vehicle Security Light in the instrument
cluster will flash
TO ARM THE SYSTEM
Follow these steps to arm the Vehicle Security
system:
1. Make sure the vehicle’s ignition is placed in
the OFF position.
2. Perform one of the following methods to lock the vehicle:
Push lock on the interior power door lock
switch with the driver and/or passenger
door open.
Push the lock button on the exterior Passive
Entry door handle with a valid key fob avail -
able in the same exterior zone Ú page 22.
Push the lock button on the key fob.
3. If any doors are open, close them.
TO DISARM THE SYSTEM
The Vehicle Security system can be disarmed using
any of the following methods:
Push the unlock button on the key fob.
Grab the Passive Entry door handle to unlock
the door Ú page 22.
Push the START/STOP ignition button (requires
at least one valid key fob in the vehicle).
NOTE:
The driver's door key cylinder and the trunk
button on the key fob cannot arm or disarm the
Vehicle Security system.
When the Vehicle Security system is armed, the
interior power door lock switches will not unlock
the doors.
The Vehicle Security system is designed to protect
your vehicle. However, you can create conditions
where the system will give you a false alarm. If one
of the previously described arming sequences has
occurred, the Vehicle Security system will arm,
regardless of whether you are in the vehicle or not.
21_LA_OM_EN_USC_t.book Page 20
Page 30 of 328

28GETTING TO KNOW YOUR VEHICLE
PROGRAMMING THE MEMORY FEATURE
To create a new memory profile, perform the
following:
NOTE:Saving a new memory profile will erase the
selected profile from memory.
1. Place the vehicle’s ignition in the ON/RUN
position (do not start the engine).
2. Adjust all memory profile settings to desired preferences (i.e., seat, side mirror, power tilt
and telescopic steering column [if equipped],
and radio station presets).
3. Push and release the set (S) button on the memory switch, and then push the desired
memory button (1 or 2) within five seconds.
The instrument cluster display will display
which memory position has been set.
NOTE:Memory profiles can be set without the vehicle in
PARK, but the vehicle must be in PARK to recall a
memory profile.
LINKING AND UNLINKING THE KEY FOB
T
O MEMORY
Your key fobs can be programmed to recall one of
two saved memory profiles.
NOTE:Before programming your key fobs you must select
the “Personal Settings Linked To Key Fob” feature
through the Uconnect system Ú page 120.
To program your key fobs, perform the following:
1. Place the vehicle’s ignition in the OFF position.
2. Select a desired memory profile, 1 or 2.
3. Once the profile has been recalled, push and release the set (S) button on the memory
switch.
4. Within five seconds, push and release button (1) or (2) accordingly. “Memory Profile Set” (1
or 2) will display in the instrument cluster.
5. Push and release the lock button on the key fob within 10 seconds.
NOTE:Your key fob can be unlinked from your memory
settings by pushing the set (S) button, followed by
pushing the unlock button on the key fob within 10
seconds.
MEMORY POSITION RECALL
NOTE:If a recall is attempted when the vehicle is not in
PARK, a message will be displayed in the
instrument cluster display.
To recall the memory settings for driver one or two,
push the desired memory button number (1 or 2)
or the unlock button on the key fob linked to the
desired memory position.
A recall can be canceled by pushing any of the
memory buttons (S, 1, or 2) during a recall. When
a recall is canceled, the driver seat will stop
moving. A delay of one second will occur before
another recall can be selected.
NOTE:If the vehicle is equipped with Passive Entry, the
memory settings are recalled when using Passive
Entry to unlock the driver's door with a linked key
fob.
21_LA_OM_EN_USC_t.book Page 28
Page 46 of 328
44GETTING TO KNOW YOUR VEHICLE
FOG LIGHTS — IF EQUIPPED
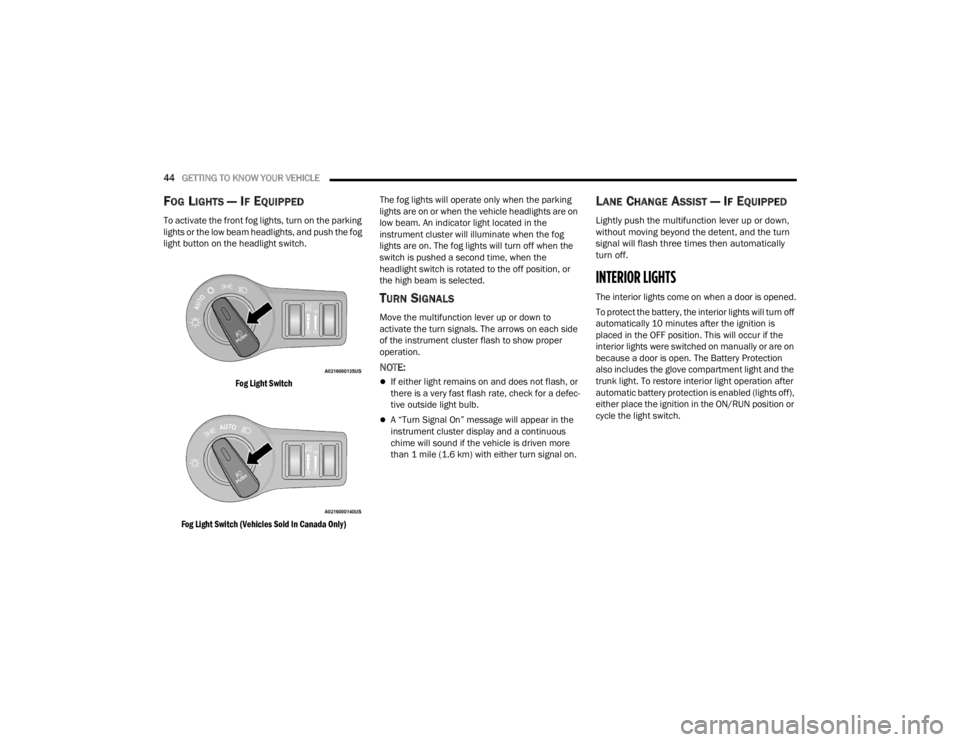
To activate the front fog lights, turn on the parking
lights or the low beam headlights, and push the fog
light button on the headlight switch.
Fog Light Switch
Fog Light Switch (Vehicles Sold In Canada Only)
The fog lights will operate only when the parking
lights are on or when the vehicle headlights are on
low beam. An indicator light located in the
instrument cluster will illuminate when the fog
lights are on. The fog lights will turn off when the
switch is pushed a second time, when the
headlight switch is rotated to the off position, or
the high beam is selected.
TURN SIGNALS
Move the multifunction lever up or down to
activate the turn signals. The arrows on each side
of the instrument cluster flash to show proper
operation.
NOTE:
If either light remains on and does not flash, or
there is a very fast flash rate, check for a defec
-
tive outside light bulb.
A “Turn Signal On” message will appear in the
instrument cluster display and a continuous
chime will sound if the vehicle is driven more
than 1 mile (1.6 km) with either turn signal on.
LANE CHANGE ASSIST — IF EQUIPPED
Lightly push the multifunction lever up or down,
without moving beyond the detent, and the turn
signal will flash three times then automatically
turn off.
INTERIOR LIGHTS
The interior lights come on when a door is opened.
To protect the battery, the interior lights will turn off
automatically 10 minutes after the ignition is
placed in the OFF position. This will occur if the
interior lights were switched on manually or are on
because a door is open. The Battery Protection
also includes the glove compartment light and the
trunk light. To restore interior light operation after
automatic battery protection is enabled (lights off),
either place the ignition in the ON/RUN position or
cycle the light switch.
21_LA_OM_EN_USC_t.book Page 44
Page 48 of 328
46GETTING TO KNOW YOUR VEHICLE
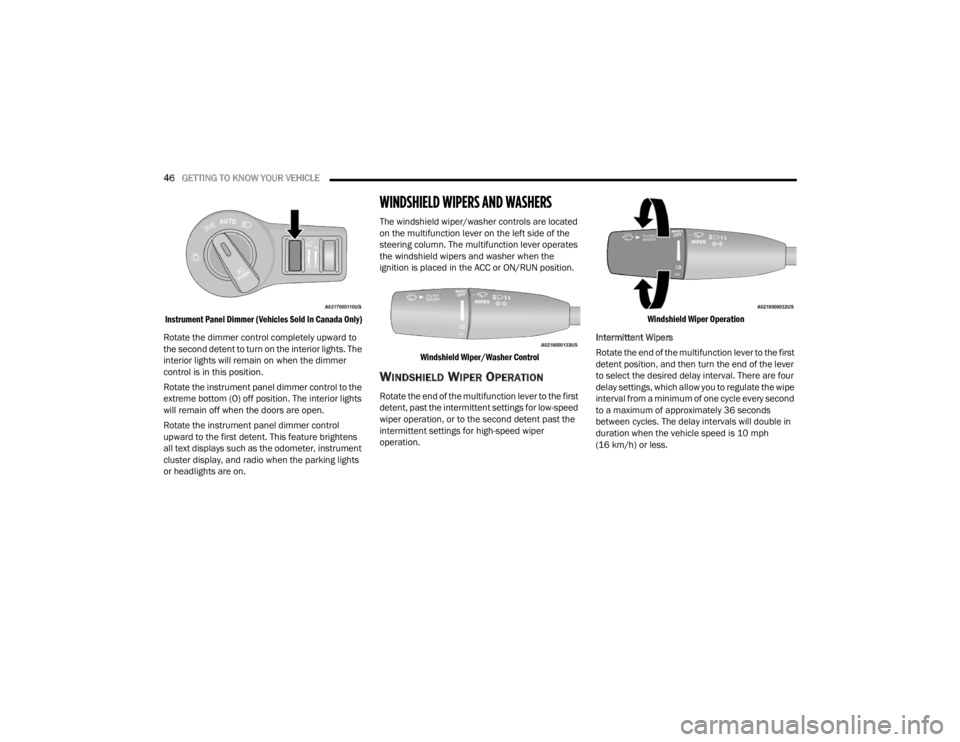
Instrument Panel Dimmer (Vehicles Sold In Canada Only)
Rotate the dimmer control completely upward to
the second detent to turn on the interior lights. The
interior lights will remain on when the dimmer
control is in this position.
Rotate the instrument panel dimmer control to the
extreme bottom (O) off position. The interior lights
will remain off when the doors are open.
Rotate the instrument panel dimmer control
upward to the first detent. This feature brightens
all text displays such as the odometer, instrument
cluster display, and radio when the parking lights
or headlights are on.
WINDSHIELD WIPERS AND WASHERS
The windshield wiper/washer controls are located
on the multifunction lever on the left side of the
steering column. The multifunction lever operates
the windshield wipers and washer when the
ignition is placed in the ACC or ON/RUN position.
Windshield Wiper/Washer Control
WINDSHIELD WIPER OPERATION
Rotate the end of the multifunction lever to the first
detent, past the intermittent settings for low-speed
wiper operation, or to the second detent past the
intermittent settings for high-speed wiper
operation.
Windshield Wiper Operation
Intermittent Wipers
Rotate the end of the multifunction lever to the first
detent position, and then turn the end of the lever
to select the desired delay interval. There are four
delay settings, which allow you to regulate the wipe
interval from a minimum of one cycle every second
to a maximum of approximately 36 seconds
between cycles. The delay intervals will double in
duration when the vehicle speed is 10 mph
(16 km/h) or less.
21_LA_OM_EN_USC_t.book Page 46
Page 61 of 328
GETTING TO KNOW YOUR VEHICLE59
TRUNK
OPENING THE TRUNK
The trunk may be opened in several ways:
Power trunk release button on the instrument
panel
Trunk button on the key fob
Trunk Passive Entry button Úpage 22
External release switch located on the under -
side of the decklid overhang
NOTE:The release feature will function only when the
vehicle is unlocked.
With the ignition in the ON/RUN position, the trunk
open symbol will display in the instrument cluster
indicating that the trunk is open. The odometer
display will reappear once the trunk is closed.
With the ignition in the OFF position, the trunk
open symbol will display until the trunk is closed. Power Trunk Release Button
The trunk can be opened from inside the
vehicle using the power trunk release
button located on the instrument panel
to the left of the steering wheel.
NOTE:The automatic transmission must be in PARK
before the button will operate. For manual trans -
missions, the vehicle must be in NEUTRAL.
Key Fob Trunk Release Button
Push the power trunk button on the key
fob twice within five seconds to release
the trunk.
Passive Entry Button
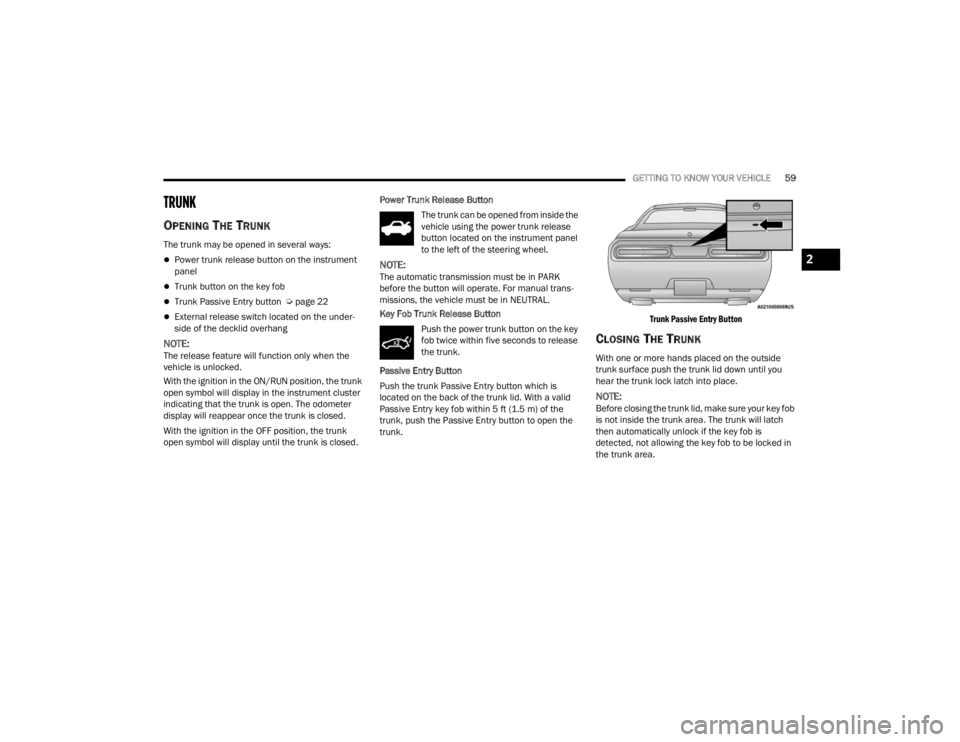
Push the trunk Passive Entry button which is
located on the back of the trunk lid. With a valid
Passive Entry key fob within 5 ft (1.5 m) of the
trunk, push the Passive Entry button to open the
trunk.
Trunk Passive Entry Button
CLOSING THE TRUNK
With one or more hands placed on the outside
trunk surface push the trunk lid down until you
hear the trunk lock latch into place.
NOTE:Before closing the trunk lid, make sure your key fob
is not inside the trunk area. The trunk will latch
then automatically unlock if the key fob is
detected, not allowing the key fob to be locked in
the trunk area.
2
21_LA_OM_EN_USC_t.book Page 59
Page 63 of 328
61
GETTING TO KNOW YOUR INSTRUMENT PANEL
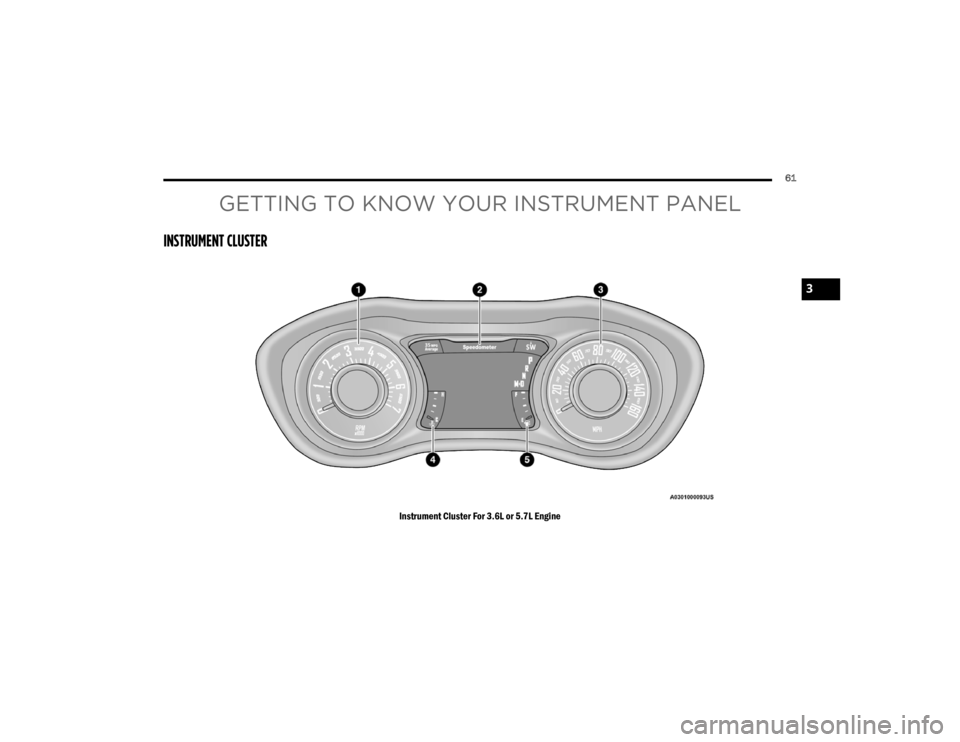
INSTRUMENT CLUSTER
Instrument Cluster For 3.6L or 5.7L Engine
3
21_LA_OM_EN_USC_t.book Page 61
Page 64 of 328
62GETTING TO KNOW YOUR INSTRUMENT PANEL
INSTRUMENT CLUSTER DESCRIPTIONS
1. Tachometer
Indicates the engine speed in revolutions
per minute (RPM x 1000).
2. Instrument Cluster Display
When the appropriate conditions exist, this
display shows the instrument cluster
display messages Ú page 62.
3. Speedometer
Indicates vehicle speed.
4. Temperature Gauge
The temperature gauge shows engine
coolant temperature. Any reading within the
normal range indicates that the engine
cooling system is operating satisfactorily.
The gauge pointer will likely indicate a
higher temperature when driving in hot
weather, up mountain grades, or when
towing a trailer. It should not be allowed to
exceed the upper limits of the normal oper -
ating range. 5. Fuel Gauge
The pointer shows the level of fuel in the
fuel tank when the Keyless Push Button
Ignition is in the ON/RUN position.
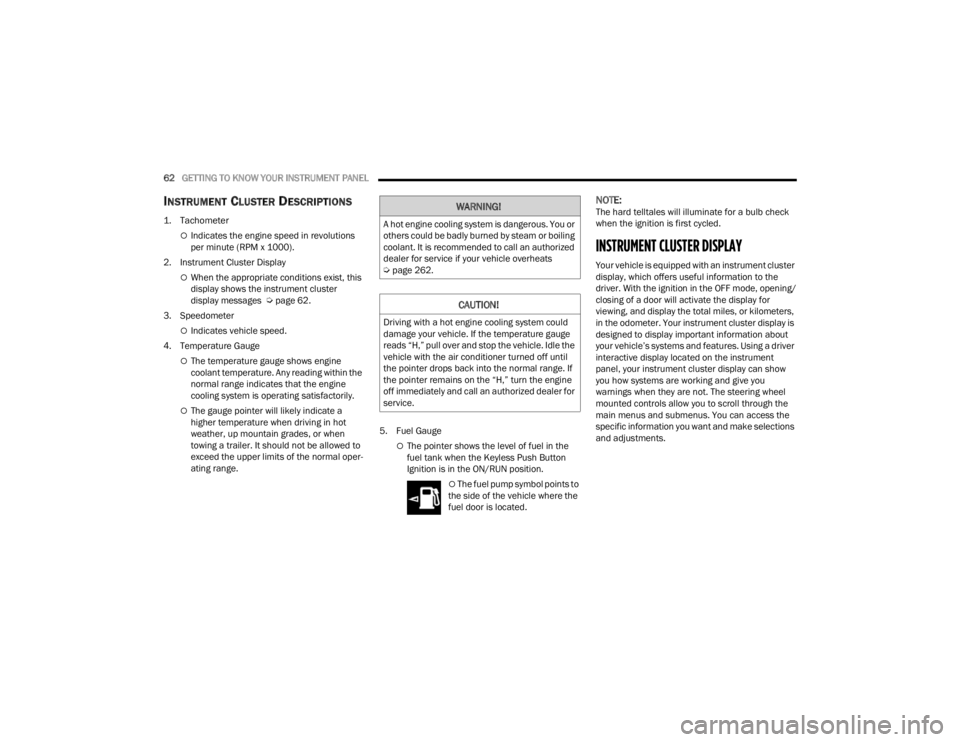
The fuel pump symbol points to
the side of the vehicle where the
fuel door is located.
NOTE:The hard telltales will illuminate for a bulb check
when the ignition is first cycled.
INSTRUMENT CLUSTER DISPLAY
Your vehicle is equipped with an instrument cluster
display, which offers useful information to the
driver. With the ignition in the OFF mode, opening/
closing of a door will activate the display for
viewing, and display the total miles, or kilometers,
in the odometer. Your instrument cluster display is
designed to display important information about
your vehicle’s systems and features. Using a driver
interactive display located on the instrument
panel, your instrument cluster display can show
you how systems are working and give you
warnings when they are not. The steering wheel
mounted controls allow you to scroll through the
main menus and submenus. You can access the
specific information you want and make selections
and adjustments.
WARNING!
A hot engine cooling system is dangerous. You or
others could be badly burned by steam or boiling
coolant. It is recommended to call an authorized
dealer for service if your vehicle overheats
Ú page 262.
CAUTION!
Driving with a hot engine cooling system could
damage your vehicle. If the temperature gauge
reads “H,” pull over and stop the vehicle. Idle the
vehicle with the air conditioner turned off until
the pointer drops back into the normal range. If
the pointer remains on the “H,” turn the engine
off immediately and call an authorized dealer for
service.
21_LA_OM_EN_USC_t.book Page 62