park assist DODGE CHALLENGER 2021 Owners Manual
[x] Cancel search | Manufacturer: DODGE, Model Year: 2021, Model line: CHALLENGER, Model: DODGE CHALLENGER 2021Pages: 328, PDF Size: 15 MB
Page 5 of 328
3
Programming HomeLink® To A Garage Door
Opener ..............................................................39
Programming HomeLink® To A Miscellaneous
Device ...............................................................40
Reprogramming A Single HomeLink® Button .. 40
Canadian/Gate Operator Programming .........40
EXTERIOR LIGHTS.................................................. 41
Headlight Switch...............................................41
Multifunction Lever ..........................................42
Daytime Running Lights (DRLs) —
If Equipped........................................................42
High/Low Beam Switch....................................42
Automatic High Beam Headlamp Control —
If Equipped .......................................................42
Flash-To-Pass....................................................43
Automatic Headlights ......................................43
Parking Lights ..................................................43
Automatic Headlights With Wipers..................43
Headlight Time Delay ......................................43
Lights-On Reminder .........................................43
Fog Lights — If Equipped ..................................44
Turn Signals .....................................................44
Lane Change Assist — If Equipped ..................44
INTERIOR LIGHTS ................................................. 44
Front Map/Reading Lights ..............................45
Ambient Light — If Equipped ............................45
Dimmer Control ................................................45 WINDSHIELD WIPERS AND WASHERS............... 46
Windshield Wiper Operation ............................46
Rain Sensing Wipers — If Equipped ................47
CLIMATE CONTROLS .............................................48
Automatic Climate Control Descriptions
And Functions ..................................................48
Automatic Temperature Control (ATC) ...........51
Climate — Voice Recognition ...........................51
Operating Tips .................................................51
INTERIOR STORAGE AND EQUIPMENT ............... 53
Storage..............................................................53
Illuminated Cupholders — If Equipped............53
USB/AUX Control ..............................................54
Power Outlets ...................................................54
WINDOWS ..............................................................56
Power Window Controls ...................................56
Wind Buffeting ..................................................56
POWER SUNROOF — IF EQUIPPED ...................... 56
Opening And Closing The Sunroof...................57
Pinch Protect Feature — If Equipped ..............57
Venting Sunroof................................................57
Sunshade Operation ........................................57
Sunroof Maintenance ......................................58
Ignition Off Operation.......................................58 HOOD....................................................................... 58
Opening The Hood ..........................................58
Closing The Hood ............................................. 58
TRUNK ..................................................................... 59
Opening The Trunk ........................................... 59
Closing The Trunk............................................. 59
Trunk Safety ..................................................... 60
GETTING TO KNOW YOUR
INSTRUMENT PANEL
INSTRUMENT CLUSTER ........................................ 61Instrument Cluster Descriptions ..................... 62
INSTRUMENT CLUSTER DISPLAY ........................ 62
Location And Controls...................................... 63
Engine Oil Life Reset ........................................ 64
Performance Shift Indicator (PSI) —
If Equipped .......................................................64
Instrument Cluster Display Selectable
Menu Items ...................................................... 64
Battery Saver On/Battery Saver Mode
Message — Electrical Load Reduction
Actions — If Equipped ..................................... 68
21_LA_OM_EN_USC_t.book Page 3
Page 6 of 328

4
WARNING LIGHTS AND MESSAGES ................... 69 Red Warning Lights ..........................................69
Yellow Warning Lights ......................................72
Yellow Indicator Lights .....................................75
Green Indicator Lights......................................75
White Indicator Lights ......................................76
Blue Indicator Lights ........................................76
ONBOARD DIAGNOSTIC SYSTEM — OBD II ....... 76
Onboard Diagnostic System
(OBD II) Cybersecurity ......................................76
EMISSIONS INSPECTION AND MAINTENANCE
PROGRAMS ............................................................ 77
STARTING AND OPERATING
STARTING THE ENGINE ........................................ 78
Manual Transmission — If Equipped ...............78
Automatic Transmission —
If Equipped........................................................78
Normal Starting ................................................79
AutoPark ...........................................................80
Cold Weather Operation (Below –22°F
Or −30°C) ........................................................81
If Engine Fails To Start .....................................81
After Starting.....................................................81 ENGINE BLOCK HEATER — IF EQUIPPED ...........81
ENGINE BREAK-IN RECOMMENDATIONS —
3.6L & 5.7L ............................................................82
PARKING BRAKE ....................................................82
MANUAL TRANSMISSION — IF EQUIPPED ..........83
Six-Speed Manual Transmission .....................83
Shifting ..............................................................84
Recommended Shift Speeds...........................85
1–4 Skip Shift .................................................86
Downshifting.....................................................86
AUTOMATIC TRANSMISSION —
IF EQUIPPED .......................................................... 86
Ignition Park Interlock ......................................87
Brake Transmission Shift Interlock (BTSI)
System .............................................................87
Eight-Speed Automatic Transmission .............87
SPORT MODE — WITHOUT PERFORMANCE
CONTROL................................................................. 92
FUEL SAVER TECHNOLOGY 5.7L —
IF EQUIPPED ...........................................................93
ELECTRIC POWER STEERING ...............................93
CRUISE CONTROL SYSTEMS — IF EQUIPPED .....93
Cruise Control ..................................................94
Adaptive Cruise Control (ACC) .........................95 PARKSENSE REAR PARK ASSIST —
IF EQUIPPED ......................................................... 103
ParkSense Sensors ....................................... 104
ParkSense Display ........................................ 104
ParkSense Warning Display ......................... 107
Enabling And Disabling ParkSense.............. 107
Service The ParkSense Rear Park
Assist System ................................................ 107
Cleaning The ParkSense System ................. 107
ParkSense System Usage Precautions........ 107
PARKVIEW REAR BACK UP CAMERA ............... 108
REFUELING THE VEHICLE ................................... 109 Loose Fuel Filler Cap Message .................... 110
VEHICLE LOADING .............................................. 110
Vehicle Certification Label............................ 110
Gross Vehicle Weight Rating (GVWR) .......... 110
Gross Axle Weight Rating (GAWR) ............... 111
Overloading ................................................... 111
Loading ......................................................... 111
21_LA_OM_EN_USC_t.book Page 4
Page 40 of 328
38GETTING TO KNOW YOUR VEHICLE
HEATED MIRRORS — IF EQUIPPED
These mirrors are heated to melt frost or
ice. This feature will be activated
whenever you turn on the rear window
defroster (if equipped) Úpage 48.
UNIVERSAL GARAGE DOOR OPENER
(HOMELINK®)
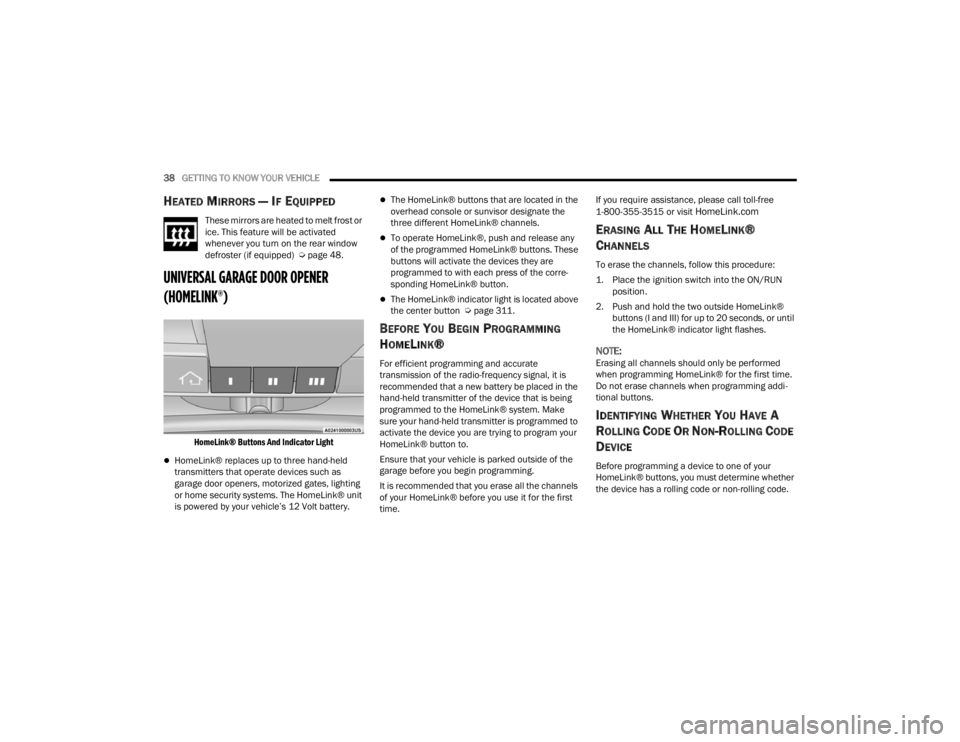
HomeLink® Buttons And Indicator Light
HomeLink® replaces up to three hand-held
transmitters that operate devices such as
garage door openers, motorized gates, lighting
or home security systems. The HomeLink® unit
is powered by your vehicle’s 12 Volt battery.
The HomeLink® buttons that are located in the
overhead console or sunvisor designate the
three different HomeLink® channels.
To operate HomeLink®, push and release any
of the programmed HomeLink® buttons. These
buttons will activate the devices they are
programmed to with each press of the corre -
sponding HomeLink® button.
The HomeLink® indicator light is located above
the center button Ú page 311.
BEFORE YOU BEGIN PROGRAMMING
H
OMELINK®
For efficient programming and accurate
transmission of the radio-frequency signal, it is
recommended that a new battery be placed in the
hand-held transmitter of the device that is being
programmed to the HomeLink® system. Make
sure your hand-held transmitter is programmed to
activate the device you are trying to program your
HomeLink® button to.
Ensure that your vehicle is parked outside of the
garage before you begin programming.
It is recommended that you erase all the channels
of your HomeLink® before you use it for the first
time. If you require assistance, please call toll-free
1-800-355-3515 or visit
HomeLink.com
ERASING ALL THE HOMELINK®
C
HANNELS
To erase the channels, follow this procedure:
1. Place the ignition switch into the ON/RUN
position.
2. Push and hold the two outside HomeLink® buttons (I and III) for up to 20 seconds, or until
the HomeLink® indicator light flashes.
NOTE:Erasing all channels should only be performed
when programming HomeLink® for the first time.
Do not erase channels when programming addi -
tional buttons.
IDENTIFYING WHETHER YOU HAVE A
R
OLLING CODE OR NON-ROLLING CODE
D
EVICE
Before programming a device to one of your
HomeLink® buttons, you must determine whether
the device has a rolling code or non-rolling code.
21_LA_OM_EN_USC_t.book Page 38
Page 45 of 328
GETTING TO KNOW YOUR VEHICLE43
If the windshield or Automatic High Beam Head -
lamp Control mirror is replaced, the mirror must
be re-aimed to ensure proper performance. See
a local authorized dealer.
FLASH-TO-PASS
You can signal another vehicle with your headlights
by lightly pulling the multifunction lever toward you.
This will cause the high beam headlights to turn on,
and remain on, until the lever is released.
NOTE:If the multifunction lever is held in the flash-to pass
position for more than 20 seconds, the high beams
will shut off.
AUTOMATIC HEADLIGHTS
This system automatically turns the headlights on
or off according to ambient light levels. To turn the
system on, rotate the headlight switch
counterclockwise to the AUTO position. When the
system is on, the headlight time delay feature is
also on.
When the system is on, the Headlight Delay feature
is also on. This means the headlights will stay on
for up to 90 seconds after you place the ignition
into the OFF position. To turn the automatic
headlights off, turn the headlight switch out of the
AUTO position.
NOTE:The engine must be running before the headlights
will come on in the automatic mode.
PARKING LIGHTS
To turn on the parking lights and instrument panel
lights, rotate the headlight switch clockwise. To
turn off the parking lights, rotate the headlight
switch back to the O (off) position.
NOTE:Vehicles sold in Canada are equipped with a head -
light switch with an AUTO and ON detent but
without an OFF detent. Headlights will be deacti -
vated when the headlight switch is placed in the
parking lights position. However, the Daytime
Running Lights (DRLs) will be activated along with
the front and rear marker lights. The DRLs may be
deactivated when the parking brake is engaged.
AUTOMATIC HEADLIGHTS WITH WIPERS
If your vehicle is equipped with Automatic
Headlights, it also has this
customer-programmable feature. When your
headlights are in the automatic mode and the
engine is running, they will automatically turn on
when the wiper system is on. This feature is
programmable through the Uconnect system
Ú page 120. In addition, the headlights will turn off when the
wipers are turned off if they were turned on by this
feature.
HEADLIGHT TIME DELAY
To assist when exiting the vehicle, the headlight
delay feature will leave the headlights on for up to
90 seconds. This delay is initiated when the
ignition is placed in the OFF position while the
headlight switch is on, and then the headlight
switch is cycled off within 45 seconds. Headlight
delay can be canceled by either turning the
headlight switch on then off, or by placing the
ignition in the ON position.
NOTE:
This feature can be programmed through the
Uconnect system Ú
page 120.
If you turn the headlights off before the ignition,
they will turn off in the normal manner.
LIGHTS-ON REMINDER
If the headlights or parking lights are on after the
ignition is placed in the OFF position, the vehicle
will chime when the driver's door is opened.
2
21_LA_OM_EN_USC_t.book Page 43
Page 46 of 328
44GETTING TO KNOW YOUR VEHICLE
FOG LIGHTS — IF EQUIPPED
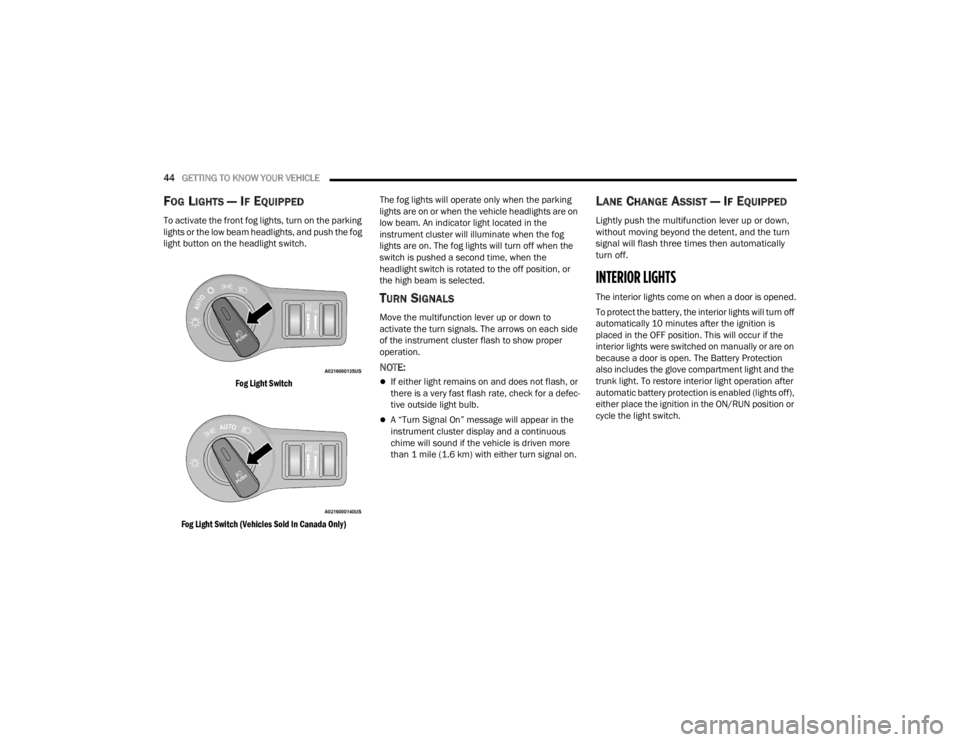
To activate the front fog lights, turn on the parking
lights or the low beam headlights, and push the fog
light button on the headlight switch.
Fog Light Switch
Fog Light Switch (Vehicles Sold In Canada Only)
The fog lights will operate only when the parking
lights are on or when the vehicle headlights are on
low beam. An indicator light located in the
instrument cluster will illuminate when the fog
lights are on. The fog lights will turn off when the
switch is pushed a second time, when the
headlight switch is rotated to the off position, or
the high beam is selected.
TURN SIGNALS
Move the multifunction lever up or down to
activate the turn signals. The arrows on each side
of the instrument cluster flash to show proper
operation.
NOTE:
If either light remains on and does not flash, or
there is a very fast flash rate, check for a defec
-
tive outside light bulb.
A “Turn Signal On” message will appear in the
instrument cluster display and a continuous
chime will sound if the vehicle is driven more
than 1 mile (1.6 km) with either turn signal on.
LANE CHANGE ASSIST — IF EQUIPPED
Lightly push the multifunction lever up or down,
without moving beyond the detent, and the turn
signal will flash three times then automatically
turn off.
INTERIOR LIGHTS
The interior lights come on when a door is opened.
To protect the battery, the interior lights will turn off
automatically 10 minutes after the ignition is
placed in the OFF position. This will occur if the
interior lights were switched on manually or are on
because a door is open. The Battery Protection
also includes the glove compartment light and the
trunk light. To restore interior light operation after
automatic battery protection is enabled (lights off),
either place the ignition in the ON/RUN position or
cycle the light switch.
21_LA_OM_EN_USC_t.book Page 44
Page 73 of 328
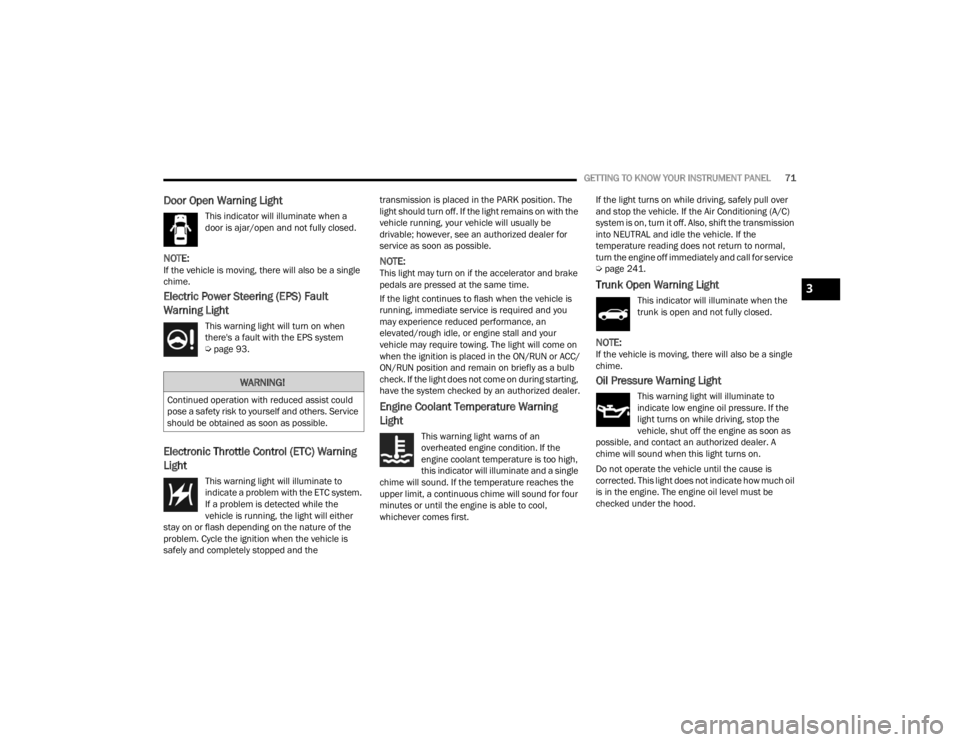
GETTING TO KNOW YOUR INSTRUMENT PANEL71
Door Open Warning Light
This indicator will illuminate when a
door is ajar/open and not fully closed.
NOTE:If the vehicle is moving, there will also be a single
chime.
Electric Power Steering (EPS) Fault
Warning Light
This warning light will turn on when
there's a fault with the EPS system
Úpage 93.
Electronic Throttle Control (ETC) Warning
Light
This warning light will illuminate to
indicate a problem with the ETC system.
If a problem is detected while the
vehicle is running, the light will either
stay on or flash depending on the nature of the
problem. Cycle the ignition when the vehicle is
safely and completely stopped and the transmission is placed in the PARK position. The
light should turn off. If the light remains on with the
vehicle running, your vehicle will usually be
drivable; however, see an authorized dealer for
service as soon as possible.
NOTE:This light may turn on if the accelerator and brake
pedals are pressed at the same time.
If the light continues to flash when the vehicle is
running, immediate service is required and you
may experience reduced performance, an
elevated/rough idle, or engine stall and your
vehicle may require towing. The light will come on
when the ignition is placed in the ON/RUN or ACC/
ON/RUN position and remain on briefly as a bulb
check. If the light does not come on during starting,
have the system checked by an authorized dealer.
Engine Coolant Temperature Warning
Light
This warning light warns of an
overheated engine condition. If the
engine coolant temperature is too high,
this indicator will illuminate and a single
chime will sound. If the temperature reaches the
upper limit, a continuous chime will sound for four
minutes or until the engine is able to cool,
whichever comes first. If the light turns on while driving, safely pull over
and stop the vehicle. If the Air Conditioning (A/C)
system is on, turn it off. Also, shift the transmission
into NEUTRAL and idle the vehicle. If the
temperature reading does not return to normal,
turn the engine off immediately and call for service
Ú
page 241.
Trunk Open Warning Light
This indicator will illuminate when the
trunk is open and not fully closed.
NOTE:If the vehicle is moving, there will also be a single
chime.
Oil Pressure Warning Light
This warning light will illuminate to
indicate low engine oil pressure. If the
light turns on while driving, stop the
vehicle, shut off the engine as soon as
possible, and contact an authorized dealer. A
chime will sound when this light turns on.
Do not operate the vehicle until the cause is
corrected. This light does not indicate how much oil
is in the engine. The engine oil level must be
checked under the hood.
WARNING!
Continued operation with reduced assist could
pose a safety risk to yourself and others. Service
should be obtained as soon as possible.
3
21_LA_OM_EN_USC_t.book Page 71
Page 82 of 328
80STARTING AND OPERATING
(Continued)
NOTE:If the ignition switch is left in the ACC or RUN
(engine not running) position and the transmission
is in PARK, the system will automatically time out
after 30 minutes of inactivity and the ignition will
switch to the OFF position.
AUTOPARK
AutoPark is a supplemental feature to assist in
placing the vehicle in PARK should the situations
on the following pages occur. It is a back up system
and should not be relied upon as the primary
method by which the driver shifts the vehicle into
PARK.
The conditions under which AutoPark will engage
are outlined on the following pages. If the vehicle is not in PARK and the driver turns off
the engine, the vehicle may AutoPark.
AutoPark will engage when all of these conditions
are met:
Vehicle is equipped with an eight-speed trans
-
mission
Vehicle is not in PARK
Vehicle speed is 1.2 mph (1.9 km/h) or less
Ignition switched from RUN to ACC
NOTE:For Keyless Enter ‘n Go™ equipped vehicles, the
engine will turn off and the ignition switch will
change to ACC mode. After 30 minutes, the ignition
switches to OFF automatically, unless the driver
turns the ignition switch OFF. If the vehicle is not in PARK and the driver exits the
vehicle with the engine running, the vehicle may
AutoPark.
AutoPark will engage when all of these conditions
are met:
Vehicle is equipped with an eight-speed trans
-
mission
Vehicle is not in PARK
Vehicle speed is 1.2 mph (1.9 km/h) or less
Driver’s seat belt is unbuckled
Driver’s door is ajar
Brake pedal is not pressed
The message “ AutoPark Engaged Shift to P then
Shift to Gear ” will display in the instrument cluster.
NOTE:In some cases the ParkSense graphic will be
displayed in the instrument cluster. In these cases,
the gear selector must be returned to “P” to select
desired gear.
If the driver shifts into PARK while moving, the
vehicle may AutoPark.
AutoPark will engage ONLY when vehicle speed is
1.2 mph (1.9 km/h) or less.
The message “ Vehicle Speed is Too High to Shift
to P ” will be displayed in the instrument cluster if
vehicle speed is above 1.2 mph (1.9 km/h).WARNING!
Driver inattention could lead to failure to place
the vehicle in PARK. ALWAYS DO A VISUAL
CHECK that your vehicle is in PARK by verifying
that a solid (not blinking) “P” is indicated in
the instrument cluster display and on the gear
selector. If the “P” indicator is blinking, your
vehicle is not in PARK. As an added precau -
tion, always apply the parking brake when
exiting the vehicle.
AutoPark is a supplemental feature. It is not
designed to replace the need to shift your
vehicle into PARK. It is a back up system and
should not be relied upon as the primary
method by which the driver shifts the vehicle
into PARK.
WARNING!
21_LA_OM_EN_USC_t.book Page 80
Page 95 of 328
STARTING AND OPERATING93
NOTE:If equipped with a manual transmission, the 1 - 4
Skip Shift Feature is disabled in SPORT Mode.
FUEL SAVER TECHNOLOGY 5.7L —
IF EQUIPPED
This feature offers improved fuel economy by
shutting off four of the engine's eight cylinders
during light load and cruise conditions. The system
is automatic with no driver inputs or additional
driving skills required. When the system is active,
an indication will display within the instrument
cluster “Fuel Economy” main menu screen.
NOTE:This system may take some time to return to full
functionality after a battery disconnect.
ELECTRIC POWER STEERING
The Electric Power Steering system will give you
good vehicle response and increased ease of
maneuverability in tight spaces. The system will
vary its assist to provide light efforts while parking
and good feel while driving. If the electric steering
system experiences a fault that prevents it from
providing assist, you will still have the ability to
steer the vehicle manually. Alternate electric power steering efforts can be
selected through the Uconnect System
Ú
page 120.
If the Electric Power Steering warning icon is
displayed and the “SERVICE POWER STEERING” or
the “POWER STEERING ASSIST OFF – SERVICE
SYSTEM” message is displayed within the
instrument cluster display, this indicates the
vehicle needs to be taken to the dealer for service
Ú page 69.
NOTE:
Even if the power steering assistance is no
longer operational, it is still possible to steer the
vehicle. Under these conditions there will be a
substantial increase in steering effort, espe -
cially at low speeds and during parking maneu -
vers.
If the condition persists, see an authorized
dealer for service. If the Steering icon is displayed and the “POWER
STEERING SYSTEM OVER TEMP” message is
displayed on the instrument cluster screen, they
indicate that extreme steering maneuvers may
have occurred which caused an over temperature
condition in the power steering system. Once
driving conditions are safe, pull over and let the
vehicle idle for a few moments until the icon and
message turn off.
CRUISE CONTROL SYSTEMS — IF EQUIPPED
Your vehicle may be equipped with the Cruise
Control system, or the Adaptive Cruise Control
(ACC) system:
Cruise Control will keep your vehicle at a
constant preset speed.
Adaptive Cruise Control (ACC) will adjust the
vehicle speed up to the preset speed to main
-
tain a distance with the vehicle ahead.
NOTE:
In vehicles equipped with ACC, if ACC is not
enabled, Fixed Speed Cruise Control will not
detect vehicles directly ahead of you. Always be
aware of the feature selected.
Only one Cruise Control feature can operate at a
time. For example, if Fixed Speed Cruise Control
is enabled, Adaptive Cruise Control will be
unavailable, and vice versa.
WARNING!
Continued operation with reduced assist could
pose a safety risk to yourself and others. Service
should be obtained as soon as possible.
4
21_LA_OM_EN_USC_t.book Page 93
Page 105 of 328

STARTING AND OPERATING103
NARROW VEHICLES
Some narrow vehicles traveling near the outer
edges of the lane or edging into the lane are not
detected until they have moved fully into the lane.
There may not be sufficient distance to the vehicle
ahead.
Narrow Vehicle Example
STATIONARY OBJECTS AND VEHICLES
ACC does not react to stationary objects and
stationary vehicles. For example, ACC will not react
in situations where the vehicle you are following
exits your lane and the vehicle ahead is stopped in
your lane. Always be attentive and ready to apply
the brakes if necessary.
Stationary Object And Stationary Vehicle Example
PARKSENSE REAR PARK ASSIST —
IF EQUIPPED
The ParkSense Rear Park Assist system provides
visual and audible indications of the distance
between the rear fascia/bumper and a detected
obstacle when backing up (e.g. during a parking
maneuver).
For limitations of this system and
recommendations, see Ú page 107.
ParkSense will retain the last system state
(enabled or disabled) from the previous ignition
cycle when the ignition is changed to the ON/RUN
position.
ParkSense can be active only when the gear
selector is in REVERSE. If ParkSense is enabled at
this gear selector position, the system will remain
active until the vehicle speed is increased to
approximately 7 mph (11 km/h) or above. The
system will become active again if the vehicle
speed is decreased to speeds less than
approximately 6 mph (9 km/h).
4
21_LA_OM_EN_USC_t.book Page 103
Page 109 of 328
STARTING AND OPERATING107
PARKSENSE WARNING DISPLAY
The ParkSense Warning screen will only be
displayed if Sound and Display is selected from
within the Uconnect system Úpage 120.
The ParkSense Warning screen is located within
the instrument cluster display Ú page 62. It
provides visual warnings to indicate the distance
between the rear fascia/bumper and the detected
obstacle.
ENABLING AND DISABLING PARKSENSE
ParkSense can be enabled and disabled
with the ParkSense switch, located on
the switch panel below the Uconnect
display.
When the ParkSense switch is pushed to disable
the system, the instrument cluster will display the
“ParkSense Off” message for approximately five
seconds. When the gear selector is moved to
REVERSE and the system is disabled, the
instrument cluster display will display the
“ParkSense Off” message for as long as the vehicle
is in REVERSE.
The ParkSense switch LED will be on when
ParkSense is disabled or requires service. The
ParkSense switch LED will be off when the system is
enabled. If the ParkSense switch is pushed, and the
system requires service, the ParkSense switch LED
will blink momentarily, and then the LED will be on.
SERVICE THE PARKSENSE REAR PARK
A
SSIST SYSTEM
During vehicle start up, when the ParkSense Rear
Park Assist System has detected a faulted
condition, the instrument cluster will actuate a
single chime, once per ignition cycle and it will
display the “PARKSENSE UNAVAILABLE WIPE
REAR SENSORS” or “PARKSENSE UNAVAILABLE
SERVICE REQUIRED” message for five seconds.
When the gear selector is moved to REVERSE and
the system has detected a faulted condition, the
instrument cluster display will display the
“PARKSENSE UNAVAILABLE WIPE REAR
SENSORS” or “PARKSENSE UNAVAILABLE
SERVICE REQUIRED” message for as long as the
vehicle is in REVERSE. Under this condition,
ParkSense will not operate.
If “PARKSENSE UNAVAILABLE WIPE REAR
SENSORS” appears in the instrument cluster
display, make sure the outer surface and the
inside of the rear fascia/bumper is clean and clear
of snow, ice, mud, dirt or other obstruction, and
then cycle the ignition. If the message continues to
appear see an authorized dealer.
If “PARKSENSE UNAVAILABLE SERVICE
REQUIRED” appears in the instrument cluster
display, see an authorized dealer.
CLEANING THE PARKSENSE SYSTEM
Clean the Rear Park Assist sensors with water, car
wash soap and a soft cloth. Do not use rough or
hard cloths. In washing stations, clean sensors
quickly keeping the vapor jet/high pressure
washing nozzles at least 4 inches (10 cm) from the
sensors. Do not scratch or poke the sensors.
Otherwise, you could damage the sensors.
PARKSENSE SYSTEM USAGE
P
RECAUTIONS
NOTE:
Ensure that the rear fascia/bumper is free of
snow, ice, mud, dirt and debris to keep the
ParkSense system operating properly.
Jackhammers, large trucks, and other vibra -
tions could affect the performance of
ParkSense or render the system temporarily
unavailable.
When you turn ParkSense off in DRIVE, the
instrument cluster will display "PARKSENSE
OFF" for five seconds. Furthermore, once you
turn ParkSense off, it remains off until you turn
it on again, even if you cycle the ignition.
When you move the gear selector to the
REVERSE position and ParkSense is turned off,
the instrument cluster display will show the
“PARKSENSE OFF” message for as long as the
vehicle is in REVERSE.
4
21_LA_OM_EN_USC_t.book Page 107