warning lights DODGE CHALLENGER 2021 Owners Manual
[x] Cancel search | Manufacturer: DODGE, Model Year: 2021, Model line: CHALLENGER, Model: DODGE CHALLENGER 2021Pages: 328, PDF Size: 15 MB
Page 6 of 328
4
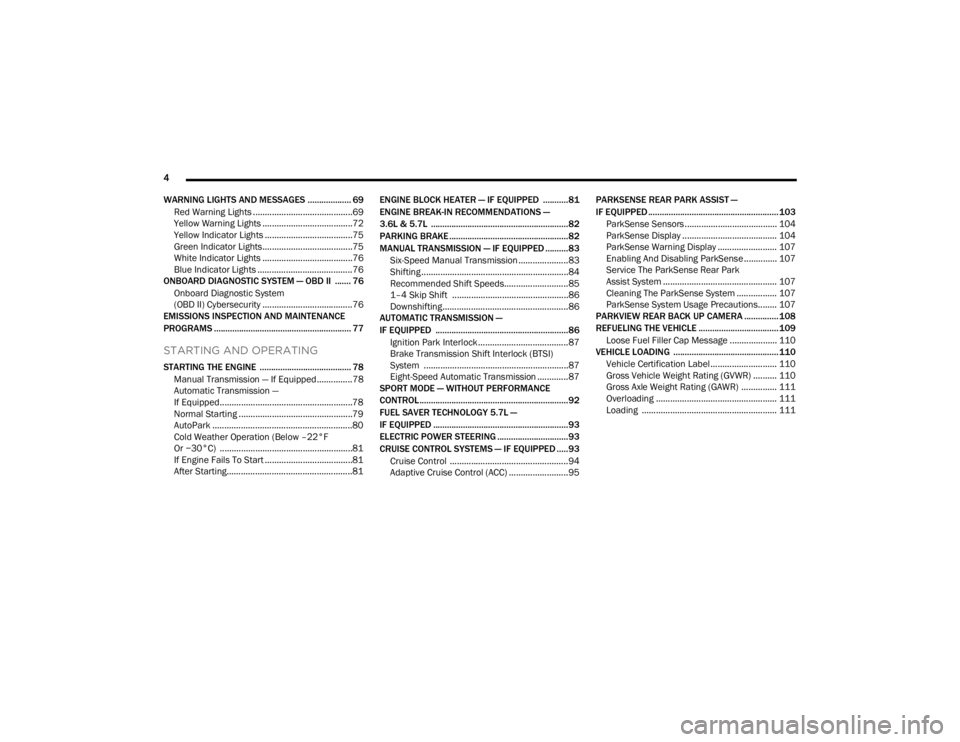
WARNING LIGHTS AND MESSAGES ................... 69 Red Warning Lights ..........................................69
Yellow Warning Lights ......................................72
Yellow Indicator Lights .....................................75
Green Indicator Lights......................................75
White Indicator Lights ......................................76
Blue Indicator Lights ........................................76
ONBOARD DIAGNOSTIC SYSTEM — OBD II ....... 76
Onboard Diagnostic System
(OBD II) Cybersecurity ......................................76
EMISSIONS INSPECTION AND MAINTENANCE
PROGRAMS ............................................................ 77
STARTING AND OPERATING
STARTING THE ENGINE ........................................ 78
Manual Transmission — If Equipped ...............78
Automatic Transmission —
If Equipped........................................................78
Normal Starting ................................................79
AutoPark ...........................................................80
Cold Weather Operation (Below –22°F
Or −30°C) ........................................................81
If Engine Fails To Start .....................................81
After Starting.....................................................81 ENGINE BLOCK HEATER — IF EQUIPPED ...........81
ENGINE BREAK-IN RECOMMENDATIONS —
3.6L & 5.7L ............................................................82
PARKING BRAKE ....................................................82
MANUAL TRANSMISSION — IF EQUIPPED ..........83
Six-Speed Manual Transmission .....................83
Shifting ..............................................................84
Recommended Shift Speeds...........................85
1–4 Skip Shift .................................................86
Downshifting.....................................................86
AUTOMATIC TRANSMISSION —
IF EQUIPPED .......................................................... 86
Ignition Park Interlock ......................................87
Brake Transmission Shift Interlock (BTSI)
System .............................................................87
Eight-Speed Automatic Transmission .............87
SPORT MODE — WITHOUT PERFORMANCE
CONTROL................................................................. 92
FUEL SAVER TECHNOLOGY 5.7L —
IF EQUIPPED ...........................................................93
ELECTRIC POWER STEERING ...............................93
CRUISE CONTROL SYSTEMS — IF EQUIPPED .....93
Cruise Control ..................................................94
Adaptive Cruise Control (ACC) .........................95 PARKSENSE REAR PARK ASSIST —
IF EQUIPPED ......................................................... 103
ParkSense Sensors ....................................... 104
ParkSense Display ........................................ 104
ParkSense Warning Display ......................... 107
Enabling And Disabling ParkSense.............. 107
Service The ParkSense Rear Park
Assist System ................................................ 107
Cleaning The ParkSense System ................. 107
ParkSense System Usage Precautions........ 107
PARKVIEW REAR BACK UP CAMERA ............... 108
REFUELING THE VEHICLE ................................... 109 Loose Fuel Filler Cap Message .................... 110
VEHICLE LOADING .............................................. 110
Vehicle Certification Label............................ 110
Gross Vehicle Weight Rating (GVWR) .......... 110
Gross Axle Weight Rating (GAWR) ............... 111
Overloading ................................................... 111
Loading ......................................................... 111
21_LA_OM_EN_USC_t.book Page 4
Page 12 of 328
10
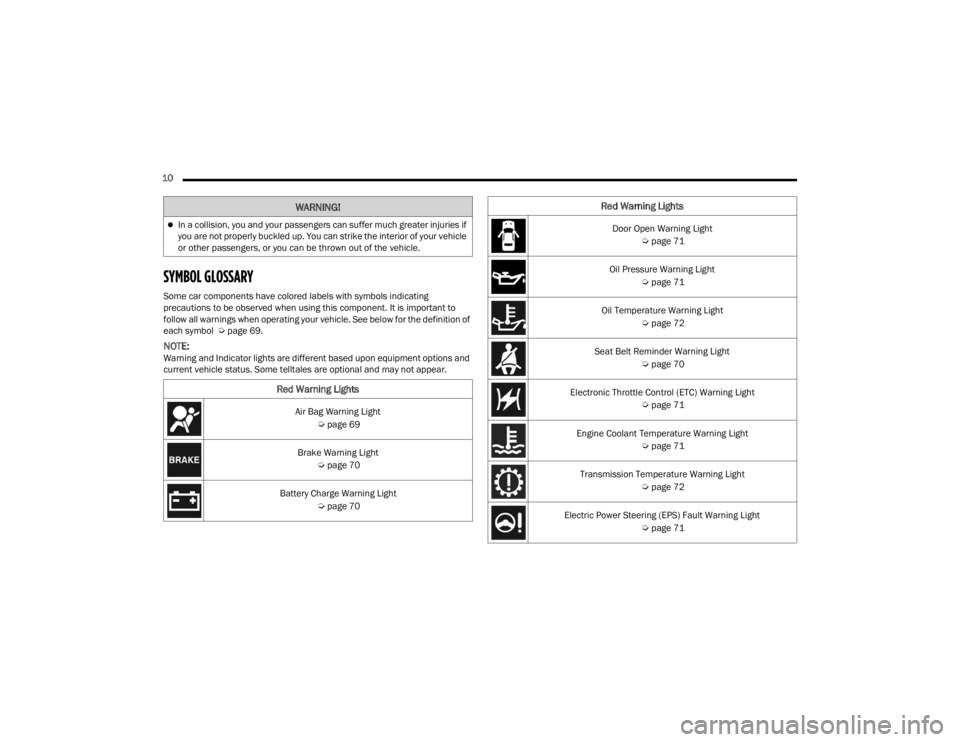
SYMBOL GLOSSARY
Some car components have colored labels with symbols indicating
precautions to be observed when using this component. It is important to
follow all warnings when operating your vehicle. See below for the definition of
each symbol Úpage 69.
NOTE:Warning and Indicator lights are different based upon equipment options and
current vehicle status. Some telltales are optional and may not appear.
In a collision, you and your passengers can suffer much greater injuries if
you are not properly buckled up. You can strike the interior of your vehicle
or other passengers, or you can be thrown out of the vehicle.
Red Warning Lights
Air Bag Warning Light
Úpage 69
Brake Warning Light Úpage 70
Battery Charge Warning Light Úpage 70
WARNING!
Door Open Warning Light
Úpage 71
Oil Pressure Warning Light Úpage 71
Oil Temperature Warning Light Úpage 72
Seat Belt Reminder Warning Light Úpage 70
Electronic Throttle Control (ETC) Warning Light Úpage 71
Engine Coolant Temperature Warning Light Úpage 71
Transmission Temperature Warning Light Úpage 72
Electric Power Steering (EPS) Fault Warning Light Úpage 71
Red Warning Lights
21_LA_OM_EN_USC_t.book Page 10
Page 13 of 328
11
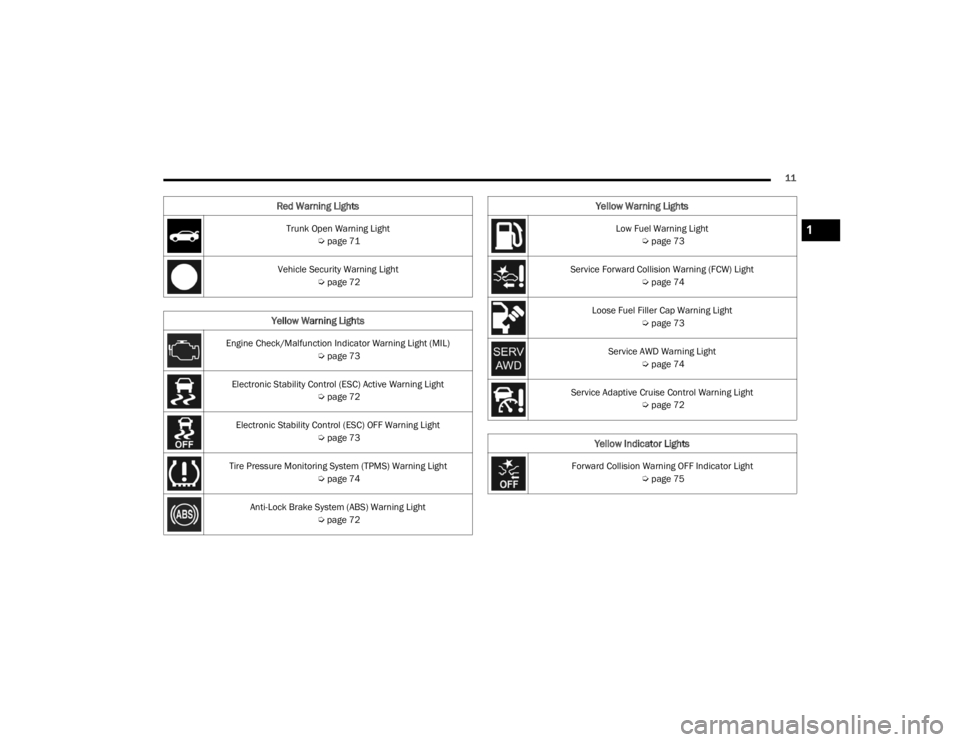
Trunk Open Warning Light Úpage 71
Vehicle Security Warning Light Úpage 72
Yellow Warning Lights
Engine Check/Malfunction Indicator Warning Light (MIL)
Úpage 73
Electronic Stability Control (ESC) Active Warning Light Úpage 72
Electronic Stability Control (ESC) OFF Warning Light Úpage 73
Tire Pressure Monitoring System (TPMS) Warning Light Úpage 74
Anti-Lock Brake System (ABS) Warning Light Úpage 72
Red Warning Lights
Low Fuel Warning Light
Úpage 73
Service Forward Collision Warning (FCW) Light Úpage 74
Loose Fuel Filler Cap Warning Light Úpage 73
Service AWD Warning Light Úpage 74
Service Adaptive Cruise Control Warning Light Úpage 72
Yellow Indicator Lights
Forward Collision Warning OFF Indicator Light
Úpage 75
Yellow Warning Lights
1
21_LA_OM_EN_USC_t.book Page 11
Page 20 of 328
18GETTING TO KNOW YOUR VEHICLE
HOW TO USE REMOTE START
Push and release the Remote Start button on the
key fob twice within five seconds. The vehicle
doors will lock, the parking lights will flash, and the
horn will chirp twice (if programmed). Then, the
engine will start, and the vehicle will remain in the
Remote Start mode for a 15 minute cycle. Pushing
the Remote Start button a third time shuts the
engine off.
To drive the vehicle, push the unlock button, and
place the ignition in the ON/RUN position.
NOTE:
With Remote Start, the engine will only run for
15 minutes.
Remote Start can only be used twice.
If an engine fault is present or fuel level is low,
the vehicle will start and then shut down in 10
seconds.
The park lamps will turn on and remain on
during Remote Start mode.
For security, power window and power sunroof
operation (if equipped) are disabled when the
vehicle is in the Remote Start mode.
The ignition must be placed in the ON/RUN posi -
tion before the Remote Start sequence can be
repeated for a third cycle.
All of the following conditions must be met before
the engine will remote start:
Gear selector in PARK
Doors closed
Hood closed
Trunk closed
Hazard switch off
Brake switch inactive (brake pedal not pressed)
Battery at an acceptable charge level
PANIC button not pushed
System not disabled from previous Remote
Start event
Vehicle Security system indicator flashing
Ignition in the OFF position
Fuel level meets minimum requirement
Vehicle Security system is not signaling an
intrusion
Malfunction Indicator Light is not illuminated
TO EXIT REMOTE START MODE
To drive the vehicle after starting the Remote Start
system, either push and release the unlock button
on the key fob to unlock the doors, or unlock the
vehicle using Keyless Enter ‘n Go™ — Passive Entry
via the door handles, and disarm the Vehicle
Security system (if equipped). Then, prior to the
end of the 15 minute cycle, push and release the
START/STOP ignition button.
WARNING!
Do not start or run an engine in a closed
garage or confined area. Exhaust gas contains
Carbon Monoxide (CO) which is odorless and
colorless. Carbon Monoxide is poisonous and
can cause serious injury or death when
inhaled.
Keep key fobs away from children. Operation
of the Remote Start system, windows, door
locks or other controls could cause serious
injury or death.
21_LA_OM_EN_USC_t.book Page 18
Page 21 of 328
GETTING TO KNOW YOUR VEHICLE19
The Remote Start system will turn the engine off
with another push and release of the Remote Start
button on the key fob, or if the engine is allowed to
run for the entire 15 minute cycle. Once the
ignition is placed in the ON/RUN position, the
climate controls will resume the previously set
operations (temperature, blower control, etc.).
NOTE:
To avoid unintentional shutdowns, the system
will disable for two seconds after receiving a
valid Remote Start request.
For vehicles equipped with the Keyless Enter ‘n
Go™ — Passive Entry feature, the message
“Remote Start Active — Push Start Button” will
show in the instrument cluster display until you
push the START/STOP ignition button.
Remote Start will also cancel if any of the following
occur:
The engine stalls or engine speed exceeds
2500 RPM.
Any engine warning lights come on.
The Low Fuel Light turns on.
The hood is opened.
The hazard switch is pushed.
The gear selector is moved out of PARK.
The brake pedal is pressed.
REMOTE START FRONT DEFROST
A
CTIVATION — IF EQUIPPED
When Remote Start is active, and the outside
ambient temperature is 40°F (4.5°C) or below, the
system will automatically activate front defrost for
15 minutes or less. The time is dependent on the
ambient temperature. Once the timer expires, the
system will automatically adjust the settings
depending on ambient conditions. See “Remote
Start Comfort Systems — If Equipped” in the next
section for detailed operation.
REMOTE START COMFORT SYSTEMS —
I
F EQUIPPED
When Remote Start is activated, the front and rear
defrost will automatically turn on in cold weather.
The heated steering wheel and driver heated seat
feature will turn on if selected in the comfort menu
screen within Uconnect Settings Ú page 120. In
warm weather, the driver vented seat feature will
automatically turn on when Remote Start is
activated, if programmed in the comfort menu
screen. The vehicle will adjust the climate control
settings depending on the outside ambient
temperature. Automatic Temperature Control (ATC) —
If Equipped
The climate controls will be automatically adjusted
to the optimal temperature and mode settings
depending on the outside ambient temperature.
This will occur until the ignition is placed in the ON/
RUN position where the climate controls will
resume their previous settings.
Manual Temperature Control (MTC) — If Equipped
In ambient temperatures at 40°F (4.5°C) or
below, the climate settings will default to
maximum heat, with fresh air entering the
cabin. If the front defrost timer expires, the
vehicle will enter Mix Mode.
In ambient temperatures from 40°F (4.5°C) to
78°F (26°C), the climate settings will be based
on the last settings selected by the driver.
In ambient temperatures at 78°F (26°C) or
above, the climate settings will default to MAX
A/C, Bi-Level Mode, with Recirculation on.
For more information on ATC, MTC, and climate
control settings, see Ú page 48.
2
21_LA_OM_EN_USC_t.book Page 19
Page 23 of 328
GETTING TO KNOW YOUR VEHICLE21
If you remain in the vehicle and open a door, the
alarm will sound. If this occurs, disarm the Vehicle
Security system.
If the Vehicle Security system is armed and the
battery becomes disconnected, the Vehicle
Security system will remain armed when the
battery is reconnected; the exterior lights will flash,
and the horn will sound. If this occurs, disarm the
Vehicle Security system.
REARMING THE SYSTEM
If something triggers the alarm and no action is
taken to disarm it, the Vehicle Security system will
turn the horn off after a 29 second cycle (with five
seconds between cycles and up to eight cycles if
the trigger remains active) and then rearm itself.
SECURITY SYSTEM MANUAL OVERRIDE
The Vehicle Security system will not arm if you lock
the doors using the manual door lock.
TAMPER ALERT
If something has triggered the Vehicle Security
system in your absence, the horn will sound three
times and the exterior lights will blink three times
when you disarm the Vehicle Security system.
DOORS
MANUAL DOOR LOCKS
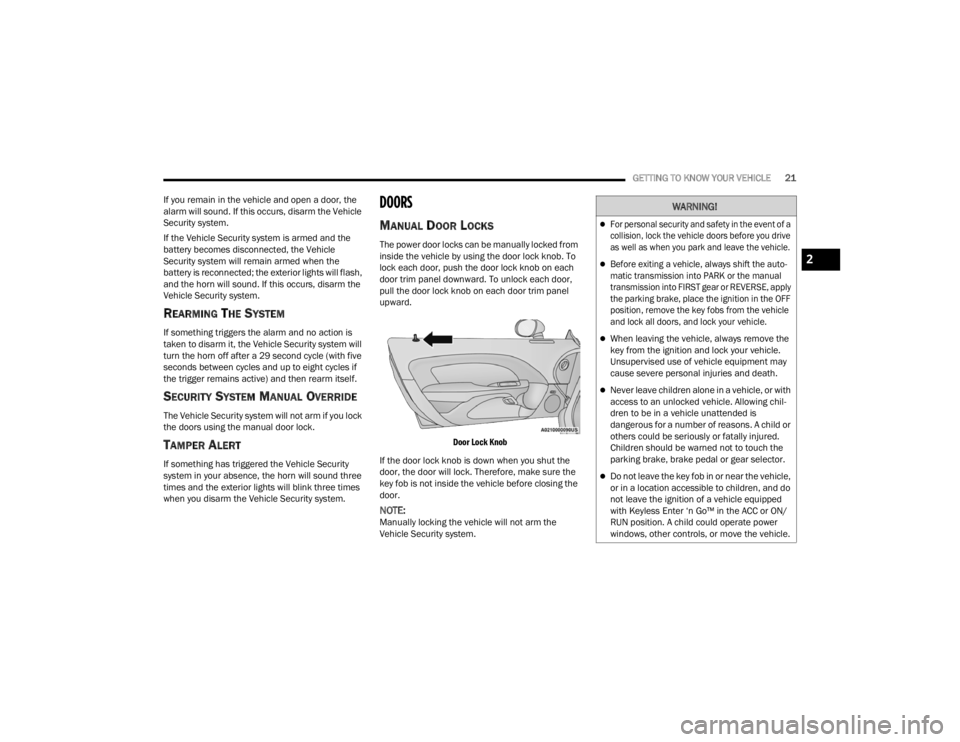
The power door locks can be manually locked from
inside the vehicle by using the door lock knob. To
lock each door, push the door lock knob on each
door trim panel downward. To unlock each door,
pull the door lock knob on each door trim panel
upward.
Door Lock Knob
If the door lock knob is down when you shut the
door, the door will lock. Therefore, make sure the
key fob is not inside the vehicle before closing the
door.
NOTE:Manually locking the vehicle will not arm the
Vehicle Security system.
WARNING!
For personal security and safety in the event of a
collision, lock the vehicle doors before you drive
as well as when you park and leave the vehicle.
Before exiting a vehicle, always shift the auto -
matic transmission into PARK or the manual
transmission into FIRST gear or REVERSE, apply
the parking brake, place the ignition in the OFF
position, remove the key fobs from the vehicle
and lock all doors, and lock your vehicle.
When leaving the vehicle, always remove the
key from the ignition and lock your vehicle.
Unsupervised use of vehicle equipment may
cause severe personal injuries and death.
Never leave children alone in a vehicle, or with
access to an unlocked vehicle. Allowing chil -
dren to be in a vehicle unattended is
dangerous for a number of reasons. A child or
others could be seriously or fatally injured.
Children should be warned not to touch the
parking brake, brake pedal or gear selector.
Do not leave the key fob in or near the vehicle,
or in a location accessible to children, and do
not leave the ignition of a vehicle equipped
with Keyless Enter ‘n Go™ in the ACC or ON/
RUN position. A child could operate power
windows, other controls, or move the vehicle.
2
21_LA_OM_EN_USC_t.book Page 21
Page 44 of 328
42GETTING TO KNOW YOUR VEHICLE
To turn on the headlights, rotate the headlight
switch clockwise. When the headlight switch is on,
the parking lights, taillights, license plate light and
instrument panel lights are also turned on. To turn
off the headlights, rotate the headlight switch back
to the O (off) position.
NOTE:For vehicles sold in Canada, rotate the headlight
switch clockwise from the parking lights and
instrument panel lights position to the first detent
to turn the headlight switch to the AUTO position.
Rotate to the second detent to turn on headlights,
parking lights, and instrument panel lights oper -
ation.
MULTIFUNCTION LEVER
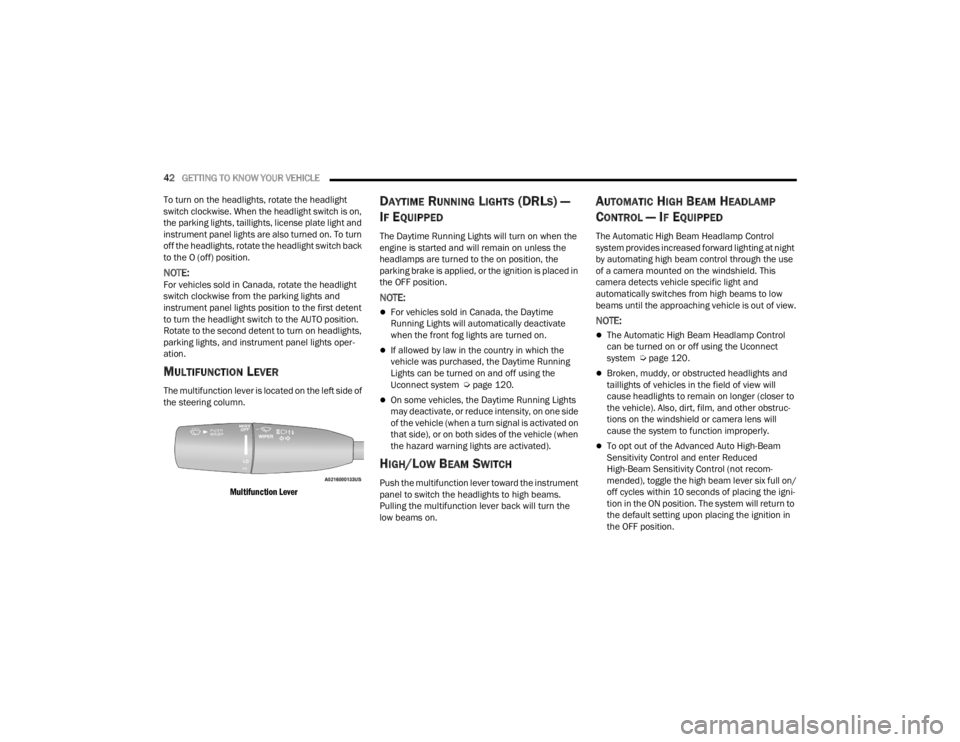
The multifunction lever is located on the left side of
the steering column.
Multifunction Lever
DAYTIME RUNNING LIGHTS (DRLS) —
I
F EQUIPPED
The Daytime Running Lights will turn on when the
engine is started and will remain on unless the
headlamps are turned to the on position, the
parking brake is applied, or the ignition is placed in
the OFF position.
NOTE:
For vehicles sold in Canada, the Daytime
Running Lights will automatically deactivate
when the front fog lights are turned on.
If allowed by law in the country in which the
vehicle was purchased, the Daytime Running
Lights can be turned on and off using the
Uconnect system Ú page 120.
On some vehicles, the Daytime Running Lights
may deactivate, or reduce intensity, on one side
of the vehicle (when a turn signal is activated on
that side), or on both sides of the vehicle (when
the hazard warning lights are activated).
HIGH/LOW BEAM SWITCH
Push the multifunction lever toward the instrument
panel to switch the headlights to high beams.
Pulling the multifunction lever back will turn the
low beams on.
AUTOMATIC HIGH BEAM HEADLAMP
C
ONTROL — IF EQUIPPED
The Automatic High Beam Headlamp Control
system provides increased forward lighting at night
by automating high beam control through the use
of a camera mounted on the windshield. This
camera detects vehicle specific light and
automatically switches from high beams to low
beams until the approaching vehicle is out of view.
NOTE:
The Automatic High Beam Headlamp Control
can be turned on or off using the Uconnect
system Ú page 120.
Broken, muddy, or obstructed headlights and
taillights of vehicles in the field of view will
cause headlights to remain on longer (closer to
the vehicle). Also, dirt, film, and other obstruc -
tions on the windshield or camera lens will
cause the system to function improperly.
To opt out of the Advanced Auto High-Beam
Sensitivity Control and enter Reduced
High-Beam Sensitivity Control (not recom -
mended), toggle the high beam lever six full on/
off cycles within 10 seconds of placing the igni -
tion in the ON position. The system will return to
the default setting upon placing the ignition in
the OFF position.
21_LA_OM_EN_USC_t.book Page 42
Page 57 of 328
GETTING TO KNOW YOUR VEHICLE55
(Continued)
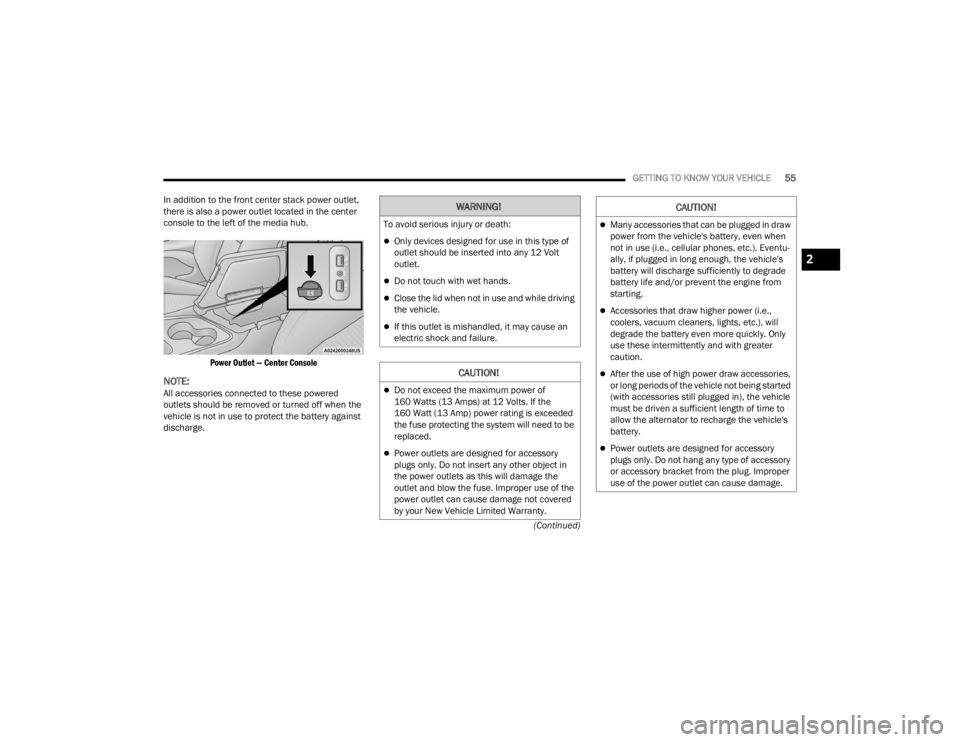
In addition to the front center stack power outlet,
there is also a power outlet located in the center
console to the left of the media hub.
Power Outlet — Center Console
NOTE:All accessories connected to these powered
outlets should be removed or turned off when the
vehicle is not in use to protect the battery against
discharge.
WARNING!
To avoid serious injury or death:
Only devices designed for use in this type of
outlet should be inserted into any 12 Volt
outlet.
Do not touch with wet hands.
Close the lid when not in use and while driving
the vehicle.
If this outlet is mishandled, it may cause an
electric shock and failure.
CAUTION!
Do not exceed the maximum power of
160 Watts (13 Amps) at 12 Volts. If the
160 Watt (13 Amp) power rating is exceeded
the fuse protecting the system will need to be
replaced.
Power outlets are designed for accessory
plugs only. Do not insert any other object in
the power outlets as this will damage the
outlet and blow the fuse. Improper use of the
power outlet can cause damage not covered
by your New Vehicle Limited Warranty.
Many accessories that can be plugged in draw
power from the vehicle's battery, even when
not in use (i.e., cellular phones, etc.). Eventu -
ally, if plugged in long enough, the vehicle's
battery will discharge sufficiently to degrade
battery life and/or prevent the engine from
starting.
Accessories that draw higher power (i.e.,
coolers, vacuum cleaners, lights, etc.), will
degrade the battery even more quickly. Only
use these intermittently and with greater
caution.
After the use of high power draw accessories,
or long periods of the vehicle not being started
(with accessories still plugged in), the vehicle
must be driven a sufficient length of time to
allow the alternator to recharge the vehicle's
battery.
Power outlets are designed for accessory
plugs only. Do not hang any type of accessory
or accessory bracket from the plug. Improper
use of the power outlet can cause damage.
CAUTION!
2
21_LA_OM_EN_USC_t.book Page 55
Page 71 of 328
GETTING TO KNOW YOUR INSTRUMENT PANEL69
Turning on all possible vehicle electrical loads
(e.g. HVAC to max settings, exterior and interior
lights, overloaded power outlets +12 Volts,
115 Volts AC, USB ports) during certain driving
conditions (city driving, towing, frequent stop-
ping).
Installing options like additional lights, upfitter
electrical accessories, audio systems, alarms
and similar devices.
Unusual driving cycles (short trips separated by
long parking periods).
The vehicle was parked for an extended period
of time (weeks, months).
The battery was recently replaced and was not
charged completely.
The battery was discharged by an electrical load
left on when the vehicle was parked.
The battery was used for an extended period
with the engine not running to supply radio,
lights, chargers, +12 Volts portable appliances
like vacuum cleaners, game consoles and
similar devices. What to do when an electrical load reduction
action message is present (“Battery Saver On” or
“Battery Saver Mode”)
During a trip:
Reduce power to unnecessary loads if possible:
Turn off redundant lights (interior or exterior)
Check what may be plugged in to power
outlets +12 Volts, 115 Volts AC, USB ports
Check HVAC settings (blower, temperature)
Check the audio settings (volume)
After a trip:
Check if any aftermarket equipment was
installed (additional lights, upfitter electrical
accessories, audio systems, alarms) and review
specifications if any (load and Ignition Off Draw
currents).
Evaluate the latest driving cycles (distance,
driving time and parking time).
The vehicle should have service performed if
the message is still present during consecutive
trips and the evaluation of the vehicle and
driving pattern did not help to identify the cause.
WARNING LIGHTS AND MESSAGES
The warning/indicator lights will illuminate in the
instrument panel together with a dedicated
message and/or acoustic signal when applicable.
These indications are indicative and precautionary
and as such must not be considered as exhaustive
and/or alternative to the information contained in
the Owner’s Manual, which you are advised to read
carefully in all cases. Always refer to the
information in this chapter in the event of a failure
indication. All active telltales will display first if
applicable. The system check menu may appear
different based upon equipment options and
current vehicle status. Some telltales are optional
and may not appear.
RED WARNING LIGHTS
Air Bag Warning Light
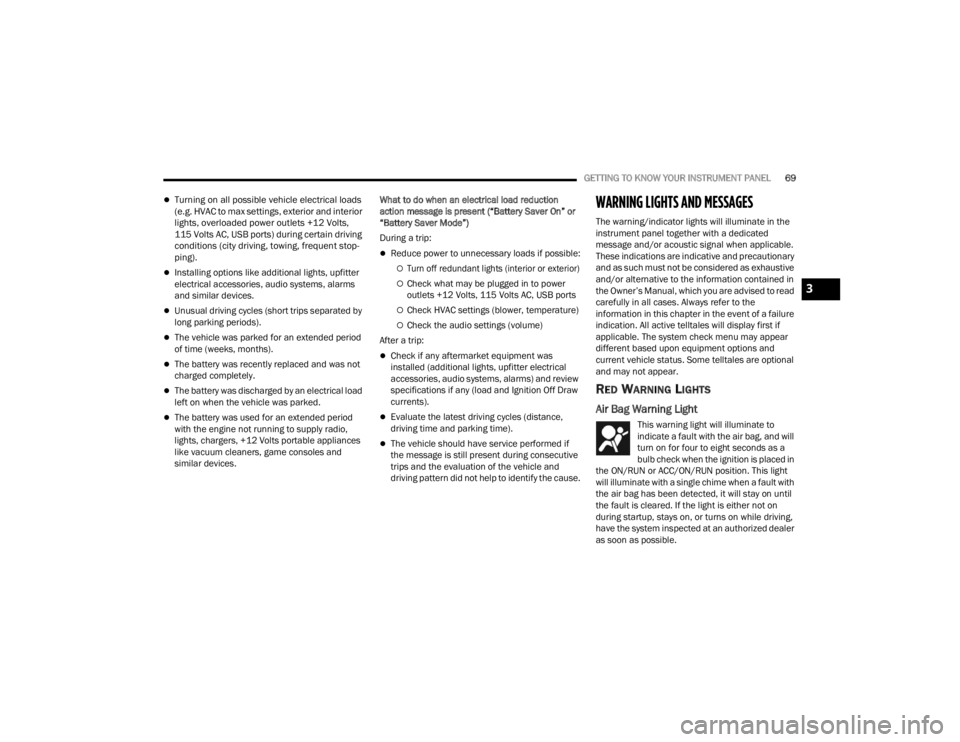
This warning light will illuminate to
indicate a fault with the air bag, and will
turn on for four to eight seconds as a
bulb check when the ignition is placed in
the ON/RUN or ACC/ON/RUN position. This light
will illuminate with a single chime when a fault with
the air bag has been detected, it will stay on until
the fault is cleared. If the light is either not on
during startup, stays on, or turns on while driving,
have the system inspected at an authorized dealer
as soon as possible.
3
21_LA_OM_EN_USC_t.book Page 69
Page 74 of 328
72GETTING TO KNOW YOUR INSTRUMENT PANEL
Oil Temperature Warning Light
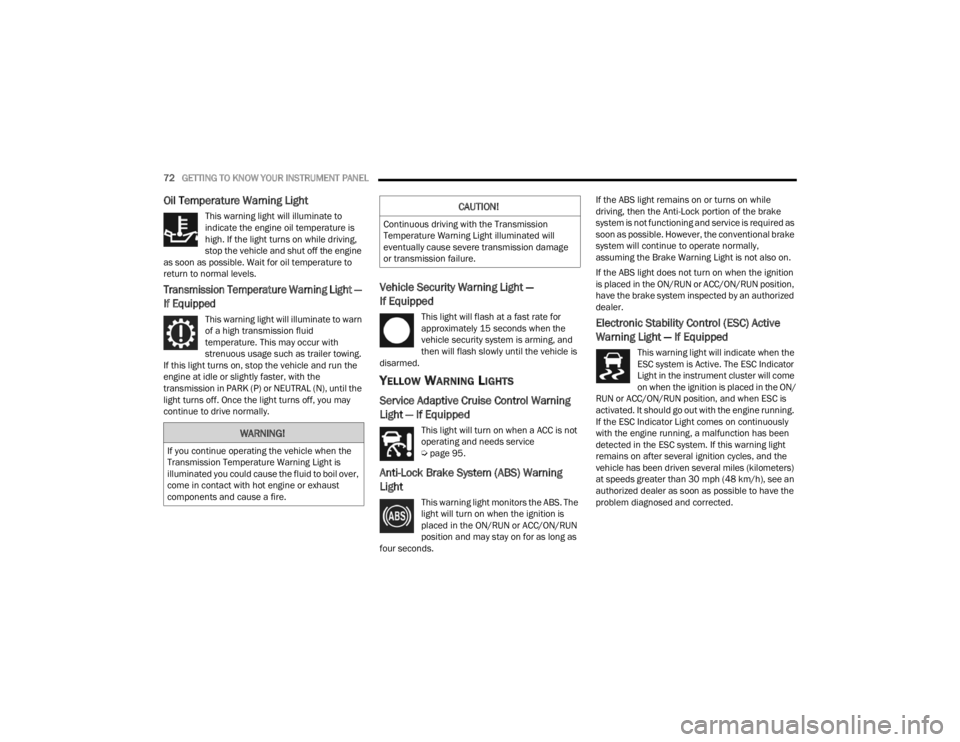
This warning light will illuminate to
indicate the engine oil temperature is
high. If the light turns on while driving,
stop the vehicle and shut off the engine
as soon as possible. Wait for oil temperature to
return to normal levels.
Transmission Temperature Warning Light —
If Equipped
This warning light will illuminate to warn
of a high transmission fluid
temperature. This may occur with
strenuous usage such as trailer towing.
If this light turns on, stop the vehicle and run the
engine at idle or slightly faster, with the
transmission in PARK (P) or NEUTRAL (N), until the
light turns off. Once the light turns off, you may
continue to drive normally.
Vehicle Security Warning Light —
If Equipped
This light will flash at a fast rate for
approximately 15 seconds when the
vehicle security system is arming, and
then will flash slowly until the vehicle is
disarmed.
YELLOW WARNING LIGHTS
Service Adaptive Cruise Control Warning
Light — If Equipped
This light will turn on when a ACC is not
operating and needs service
Ú page 95.
Anti-Lock Brake System (ABS) Warning
Light
This warning light monitors the ABS. The
light will turn on when the ignition is
placed in the ON/RUN or ACC/ON/RUN
position and may stay on for as long as
four seconds. If the ABS light remains on or turns on while
driving, then the Anti-Lock portion of the brake
system is not functioning and service is required as
soon as possible. However, the conventional brake
system will continue to operate normally,
assuming the Brake Warning Light is not also on.
If the ABS light does not turn on when the ignition
is placed in the ON/RUN or ACC/ON/RUN position,
have the brake system inspected by an authorized
dealer.
Electronic Stability Control (ESC) Active
Warning Light — If Equipped
This warning light will indicate when the
ESC system is Active. The ESC Indicator
Light in the instrument cluster will come
on when the ignition is placed in the ON/
RUN or ACC/ON/RUN position, and when ESC is
activated. It should go out with the engine running.
If the ESC Indicator Light comes on continuously
with the engine running, a malfunction has been
detected in the ESC system. If this warning light
remains on after several ignition cycles, and the
vehicle has been driven several miles (kilometers)
at speeds greater than 30 mph (48 km/h), see an
authorized dealer as soon as possible to have the
problem diagnosed and corrected.
WARNING!
If you continue operating the vehicle when the
Transmission Temperature Warning Light is
illuminated you could cause the fluid to boil over,
come in contact with hot engine or exhaust
components and cause a fire.
CAUTION!
Continuous driving with the Transmission
Temperature Warning Light illuminated will
eventually cause severe transmission damage
or transmission failure.
21_LA_OM_EN_USC_t.book Page 72