ECU DODGE CHARGER 2011 7.G Owners Manual
[x] Cancel search | Manufacturer: DODGE, Model Year: 2011, Model line: CHARGER, Model: DODGE CHARGER 2011 7.GPages: 104, PDF Size: 4.53 MB
Page 9 of 104
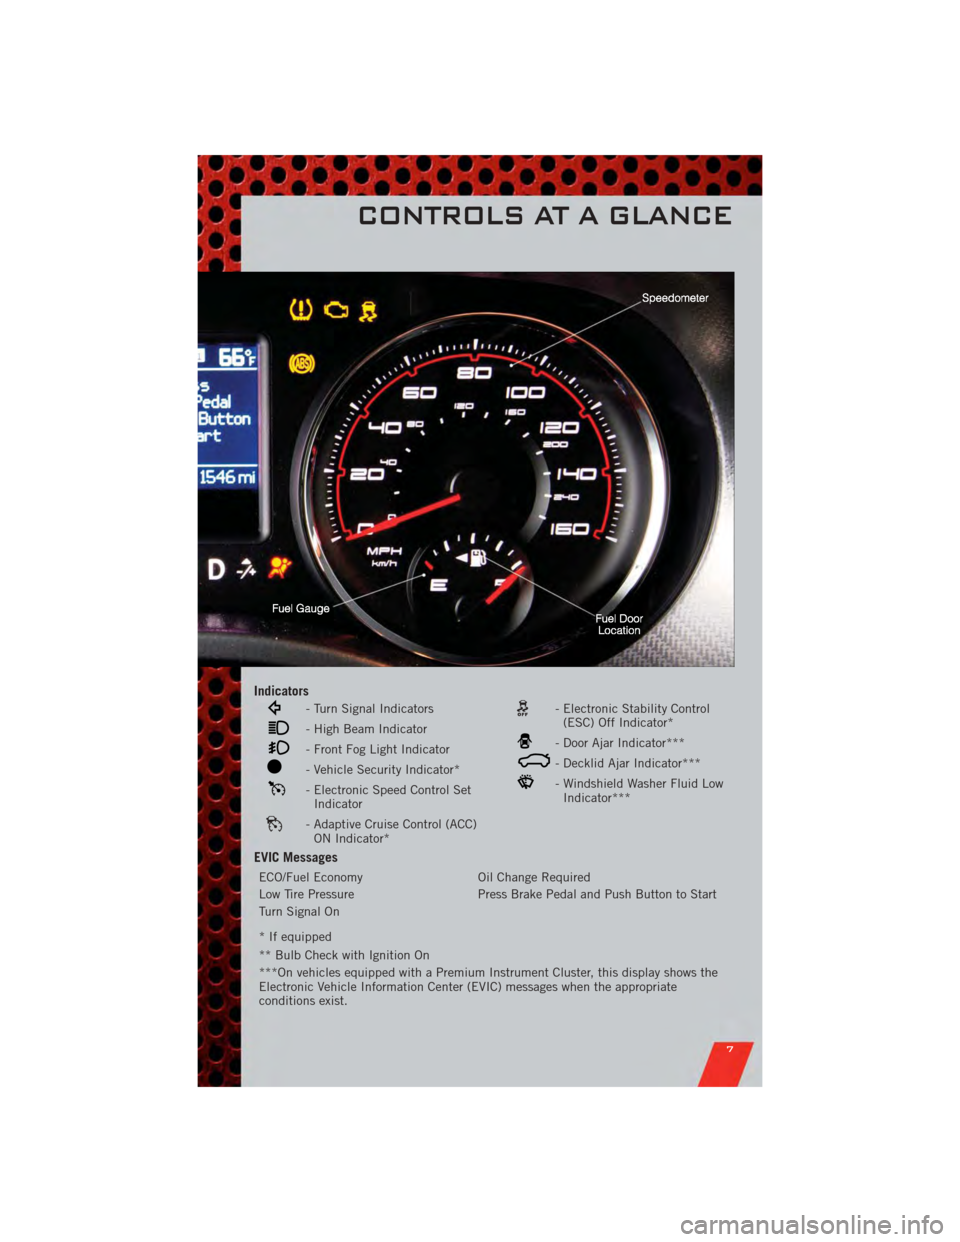
Indicators
- Turn Signal Indicators
- High Beam Indicator
- Front Fog Light Indicator
- Vehicle Security Indicator*
- Electronic Speed Control SetIndicator
- Adaptive Cruise Control (ACC)ON Indicator*
- Electronic Stability Control(ESC) Off Indicator*
- Door Ajar Indicator***
- Decklid Ajar Indicator***
- Windshield Washer Fluid LowIndicator***
EVIC Messages
ECO/Fuel Economy Oil Change Required
Low Tire Pressure Press Brake Pedal and Push Button to Start
Turn Signal On
* If equipped
** Bulb Check with Ignition On
***On vehicles equipped with a Premium Instrument Cluster, this display shows the
Electronic Vehicle Information Center (EVIC) messages when the appropriate
conditions exist.
CONTROLS AT A GLANCE
7
Page 11 of 104
REMOTE START
• Press the REMOTE START buttonx2twice within five seconds. Pressing the
REMOTE START button a third time shuts the engine off.
• To drive the vehicle, press the UNLOCK button and cycle the ignition to the ON/RUN position.
• With remote start, the engine will only run for 15 minutes (timeout) unless the ignition is cycled to the ON/RUN position.
• The vehicle must be cycled to the ON/RUN position after two consecutive timeouts.
WARNING!
• Do not start or run an engine in a closed garage or confined area. Exhaust gascontains Carbon Monoxide (CO) which is odorless and colorless. Carbon
Monoxide is poisonous and can cause you or others to be severely injured or
killed when inhaled.
• Keep Key Fob transmitters away from children. Operation of the Remote Start System, windows, door locks or other controls could cause you and others to
be severely injured or killed.
KEYLESS ENTER-N-GO
• The Keyless Enter-N-Go system is an enhancement to the vehicle's Key Fob. Thisfeature allows you to lock and unlock the vehicle's door(s) and trunk without
having to press the Key Fob lock or unlock buttons, as well as starting and
stopping the vehicle with the press of a button.
To Unlock From The Driver or Passenger Side:
• With a valid Keyless Enter-N-Go Key Fob located outside the vehicle and within5 ft (1.5m) of the driver or passenger side door handle, grab either front door
handle to unlock the door automatically.
To Lock the Vehicle:
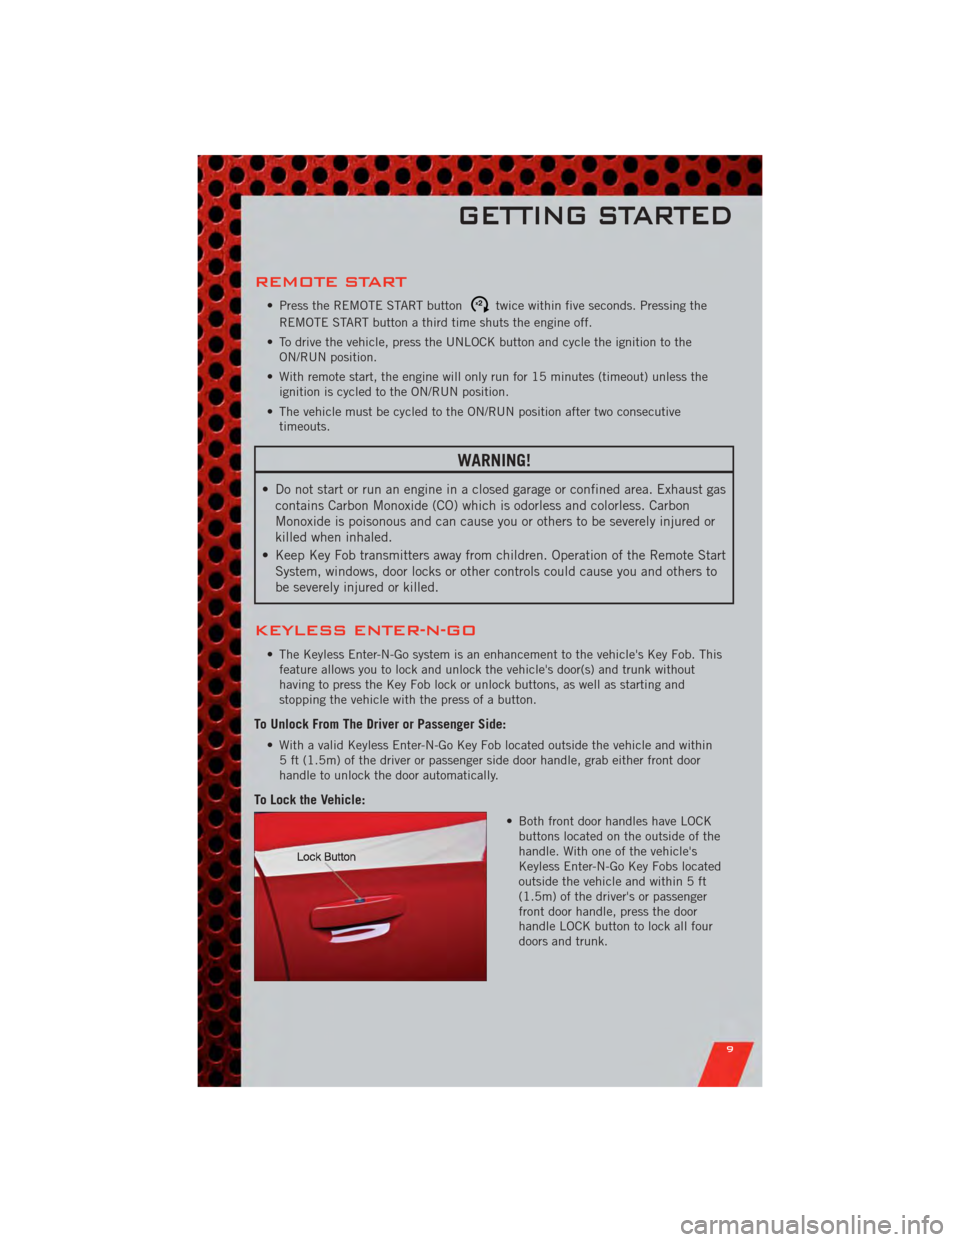
• Both front door handles have LOCKbuttons located on the outside of the
handle. With one of the vehicle's
Keyless Enter-N-Go Key Fobs located
outside the vehicle and within 5 ft
(1.5m) of the driver's or passenger
front door handle, press the door
handle LOCK button to lock all four
doors and trunk.
GETTING STARTED
9
Page 15 of 104
• If the Air Bag Warning Lightis not on during starting, stays on, or turns on
while driving, have the vehicle serviced by an authorized service center
immediately.
• Refer to the Owner's Manual on the DVD for further details regarding the Supplemental Restraint System (SRS).
WARNING!
• Relying on the air bags alone could lead to more severe injuries in a collision.The air bags work with your seat belt to restrain you properly. In some
collisions, the air bags won't deploy at all. Always wear your seat belts even
though you have air bags.
• Being too close to the steering wheel or instrument panel during Advanced Front Air Bag deployment could cause serious injury, including death. Air
bags need room to inflate. Sit back, comfortably extending your arms to
reach the steering wheel or instrument panel.
• Supplemental Side Air Bag Inflatable Curtains and Supplemental Seat-Mounted Side Air Bags need room to inflate. Do not lean against the
door or window. Sit upright in the center of the seat.
• Being too close to the Supplemental Side Air Bag Inflatable Curtain and/or Seat-Mounted Side Air Bag during deployment could cause you to be severely
injured or killed.
• Do not drive your vehicle after the air bags have deployed. If you are involved in another collision, the air bags will not be in place to protect you.
• After any collision, the vehicle should be taken to an authorized dealer immediately.
CHILD RESTRAINTS
• Children 12 years and under should ride properly buckled up in a rear seat, if
available. According to crash statistics, children are safer when properly restrained
in the rear seats rather than in the front.
• Every state in the United States and all Canadian provinces require that small children ride in proper restraint systems. This is the law, and you can be
prosecuted for ignoring it.
Installing The LATCH-Compatible Child Restraint System
• Your vehicle's second row passenger seats are equipped with the child restraintanchorage system called LATCH, which stands for Lower Anchors and Tether for
CHildren. LATCH child restraint anchorage systems are installed at all three rear
seating positions.
• Both rear outboard seating positions and the rear center seating position have lower anchors and top tether anchors.
GETTING STARTED
13
Page 17 of 104
Installing The Child Restraint Using The Vehicle Seat Belts
• To install a child restraint, first, pull enough of the seat belt webbing from theretractor to route it through the belt path of the child restraint and slide the latch
plate into the buckle.
• Next, extract all the seat belt webbing out of the retractor and then allow the belt to retract into the retractor. Finally, pull on any excess webbing to tighten the lap
portion around the child restraint. Any seat belt system will loosen with time, so
check the belt occasionally, and pull it tight if necessary.
• Rotate the cover over the anchor directly behind the seat where you are placing the child restraint. These tether strap anchorages are under a plastic cover.
• Route the tether strap to provide the most direct path for the strap between the anchor and the child seat.
• Attach the tether strap hook of the child restraint to the anchor and remove slack in the tether strap according to the child restraint manufacturer’s instructions.
WARNING!
• In a collision, an unrestrained child, even a tiny baby, can become aprojectile inside the vehicle. The force required to hold even an infant on
your lap could become so great that you could not hold the child, no matter
how strong you are. The child and others could be severely injured or killed.
Any child riding in your vehicle should be in a proper restraint for the child's
size.
• Rearward-facing child seats must never be used in the front seat of a vehicle with a front passenger air bag. An air bag deployment could cause infants in
this position to be severely injured or killed.
• Improper installation of a child restraint to the LATCH anchorages can lead to failure of an infant or child restraint. The child could be severely injured or
killed. Follow the manufacturer’s directions exactly when installing an infant
or child restraint.
• An incorrectly anchored tether strap could lead to increased head motion and possible injury to the child. Use only the anchor positions directly behind the
child seat to secure a child restraint top tether strap.
GETTING STARTED
15
Page 20 of 104
WARNING!(Continued)
• Do not ride with the seatback reclined so that the seat belt is no longerresting against your chest. In a collision, you could slide under the seat belt
and be severely injured or killed. Use the recliner only when the vehicle is
parked.
REAR SEAT
Folding Rear Seatback
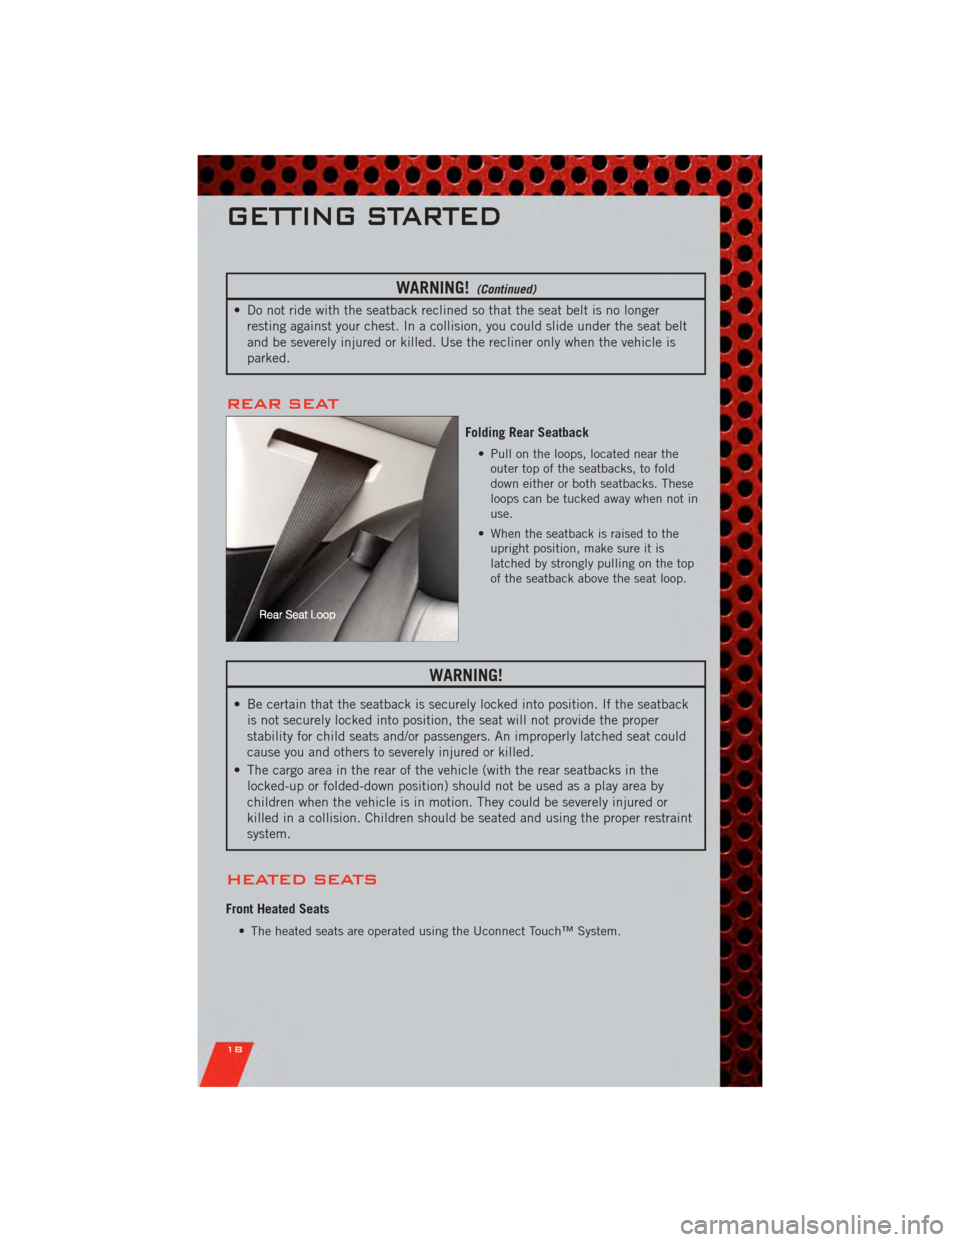
• Pull on the loops, located near theouter top of the seatbacks, to fold
down either or both seatbacks. These
loops can be tucked away when not in
use.
• When the seatback is raised to the upright position, make sure it is
latched by strongly pulling on the top
of the seatback above the seat loop.
WARNING!
• Be certain that the seatback is securely locked into position. If the seatbackis not securely locked into position, the seat will not provide the proper
stability for child seats and/or passengers. An improperly latched seat could
cause you and others to severely injured or killed.
• The cargo area in the rear of the vehicle (with the rear seatbacks in the locked-up or folded-down position) should not be used as a play area by
children when the vehicle is in motion. They could be severely injured or
killed in a collision. Children should be seated and using the proper restraint
system.
HEATED SEATS
Front Heated Seats
• The heated seats are operated using the Uconnect Touch™ System.
GETTING STARTED
18
Page 32 of 104
POWER SUNROOF
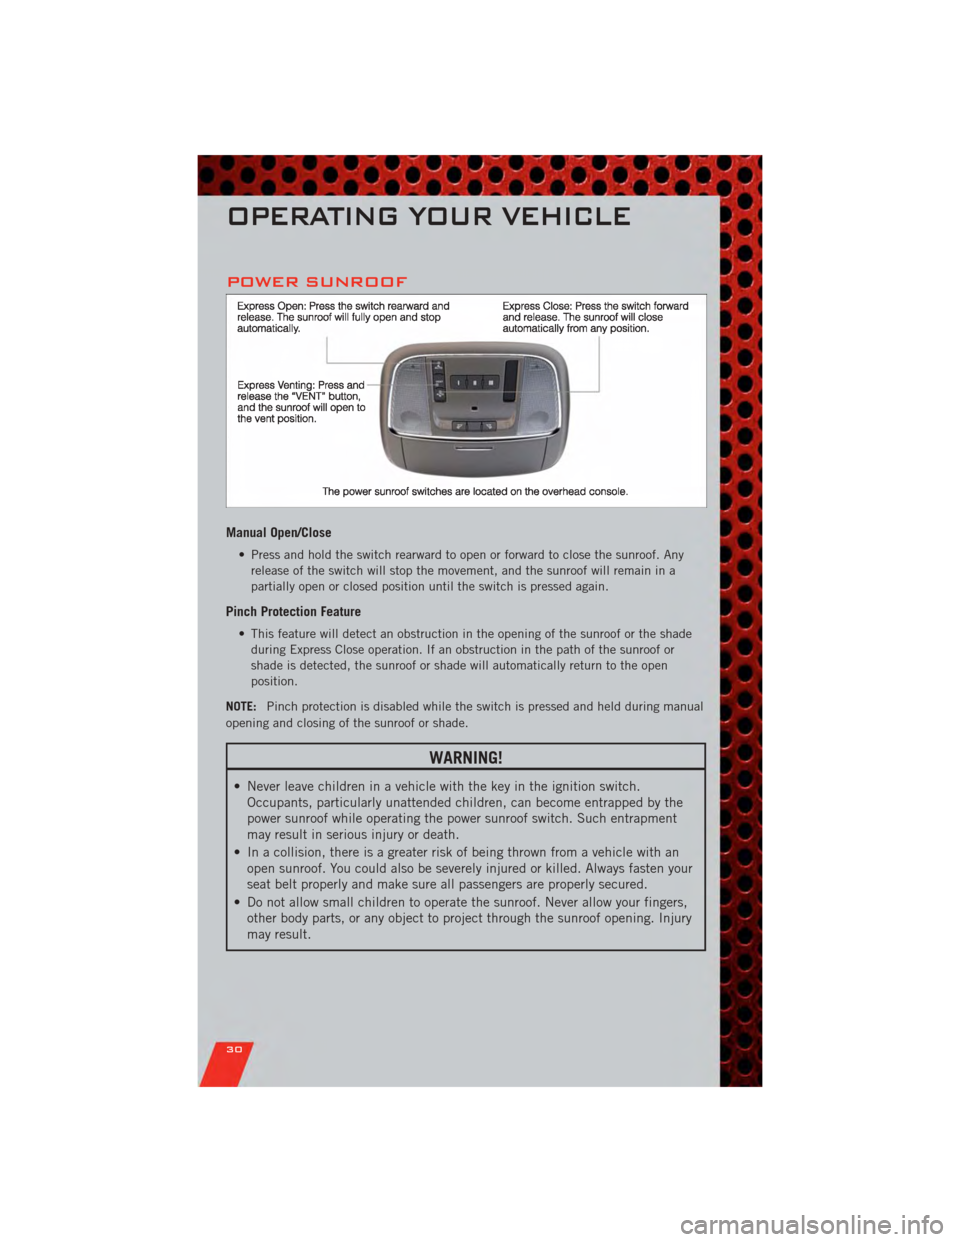
Manual Open/Close
• Press and hold the switch rearward to open or forward to close the sunroof. Anyrelease of the switch will stop the movement, and the sunroof will remain in a
partially open or closed position until the switch is pressed again.
Pinch Protection Feature
• This feature will detect an obstruction in the opening of the sunroof or the shadeduring Express Close operation. If an obstruction in the path of the sunroof or
shade is detected, the sunroof or shade will automatically return to the open
position.
NOTE: Pinch protection is disabled while the switch is pressed and held during manual
opening and closing of the sunroof or shade.
WARNING!
• Never leave children in a vehicle with the key in the ignition switch. Occupants, particularly unattended children, can become entrapped by the
power sunroof while operating the power sunroof switch. Such entrapment
may result in serious injury or death.
• In a collision, there is a greater risk of being thrown from a vehicle with an open sunroof. You could also be severely injured or killed. Always fasten your
seat belt properly and make sure all passengers are properly secured.
• Do not allow small children to operate the sunroof. Never allow your fingers, other body parts, or any object to project through the sunroof opening. Injury
may result.
OPERATING YOUR VEHICLE
30
Page 71 of 104
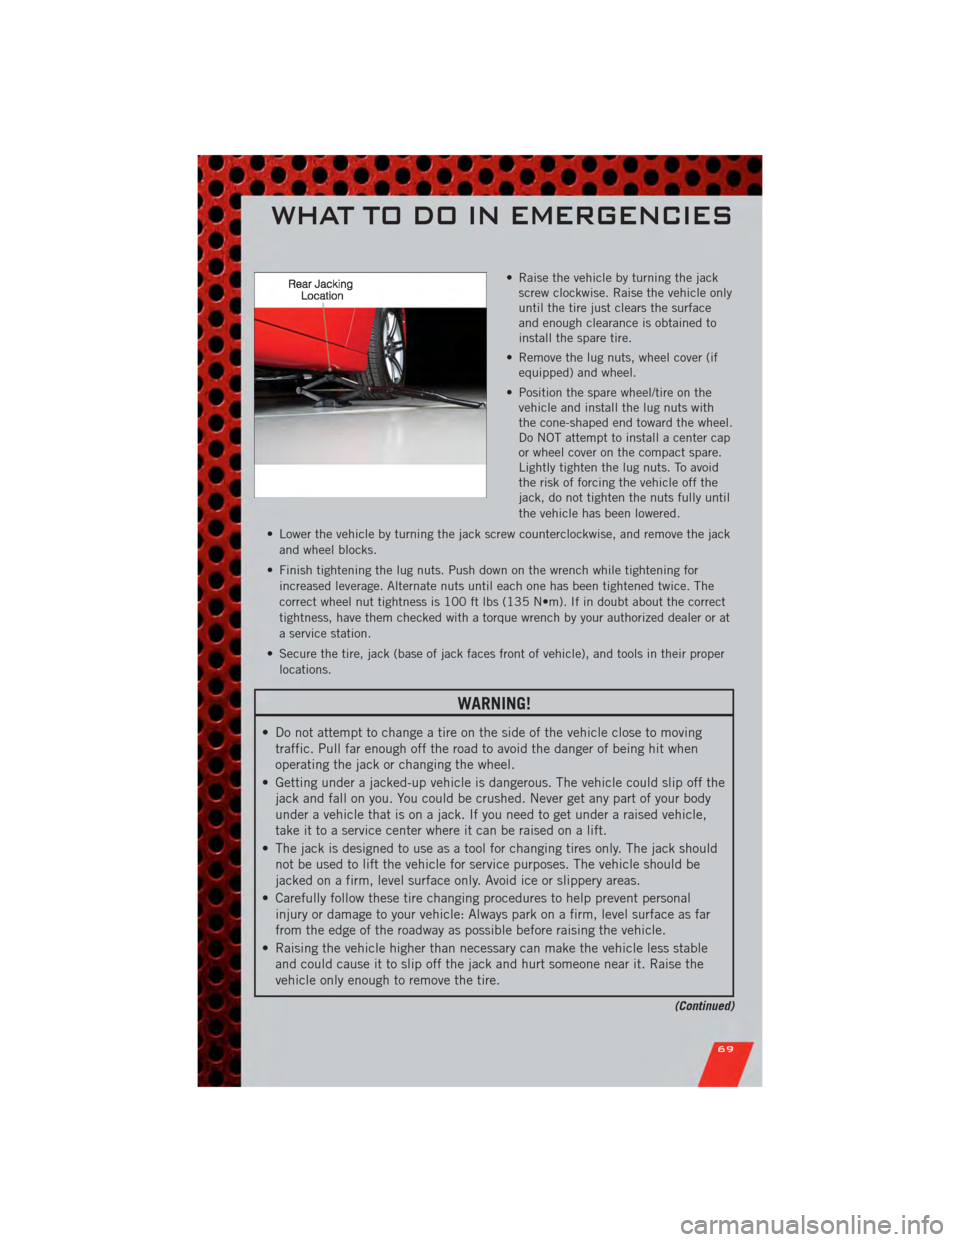
• Raise the vehicle by turning the jackscrew clockwise. Raise the vehicle only
until the tire just clears the surface
and enough clearance is obtained to
install the spare tire.
• Remove the lug nuts, wheel cover (if equipped) and wheel.
• Position the spare wheel/tire on the vehicle and install the lug nuts with
the cone-shaped end toward the wheel.
Do NOT attempt to install a center cap
or wheel cover on the compact spare.
Lightly tighten the lug nuts. To avoid
the risk of forcing the vehicle off the
jack, do not tighten the nuts fully until
the vehicle has been lowered.
• Lower the vehicle by turning the jack screw counterclockwise, and remove the jack and wheel blocks.
• Finish tightening the lug nuts. Push down on the wrench while tightening for increased leverage. Alternate nuts until each one has been tightened twice. The
correct wheel nut tightness is 100 ft lbs (135 N•m). If in doubt about the correct
tightness, have them checked with a torque wrench by your authorized dealer or at
a service station.
• Secure the tire, jack (base of jack faces front of vehicle), and tools in their proper locations.
WARNING!
• Do not attempt to change a tire on the side of the vehicle close to movingtraffic. Pull far enough off the road to avoid the danger of being hit when
operating the jack or changing the wheel.
• Getting under a jacked-up vehicle is dangerous. The vehicle could slip off the jack and fall on you. You could be crushed. Never get any part of your body
under a vehicle that is on a jack. If you need to get under a raised vehicle,
take it to a service center where it can be raised on a lift.
• The jack is designed to use as a tool for changing tires only. The jack should not be used to lift the vehicle for service purposes. The vehicle should be
jacked on a firm, level surface only. Avoid ice or slippery areas.
• Carefully follow these tire changing procedures to help prevent personal injury or damage to your vehicle: Always park on a firm, level surface as far
from the edge of the roadway as possible before raising the vehicle.
• Raising the vehicle higher than necessary can make the vehicle less stable and could cause it to slip off the jack and hurt someone near it. Raise the
vehicle only enough to remove the tire.
(Continued)
WHAT TO DO IN EMERGENCIES
69
Page 88 of 104
FUSES
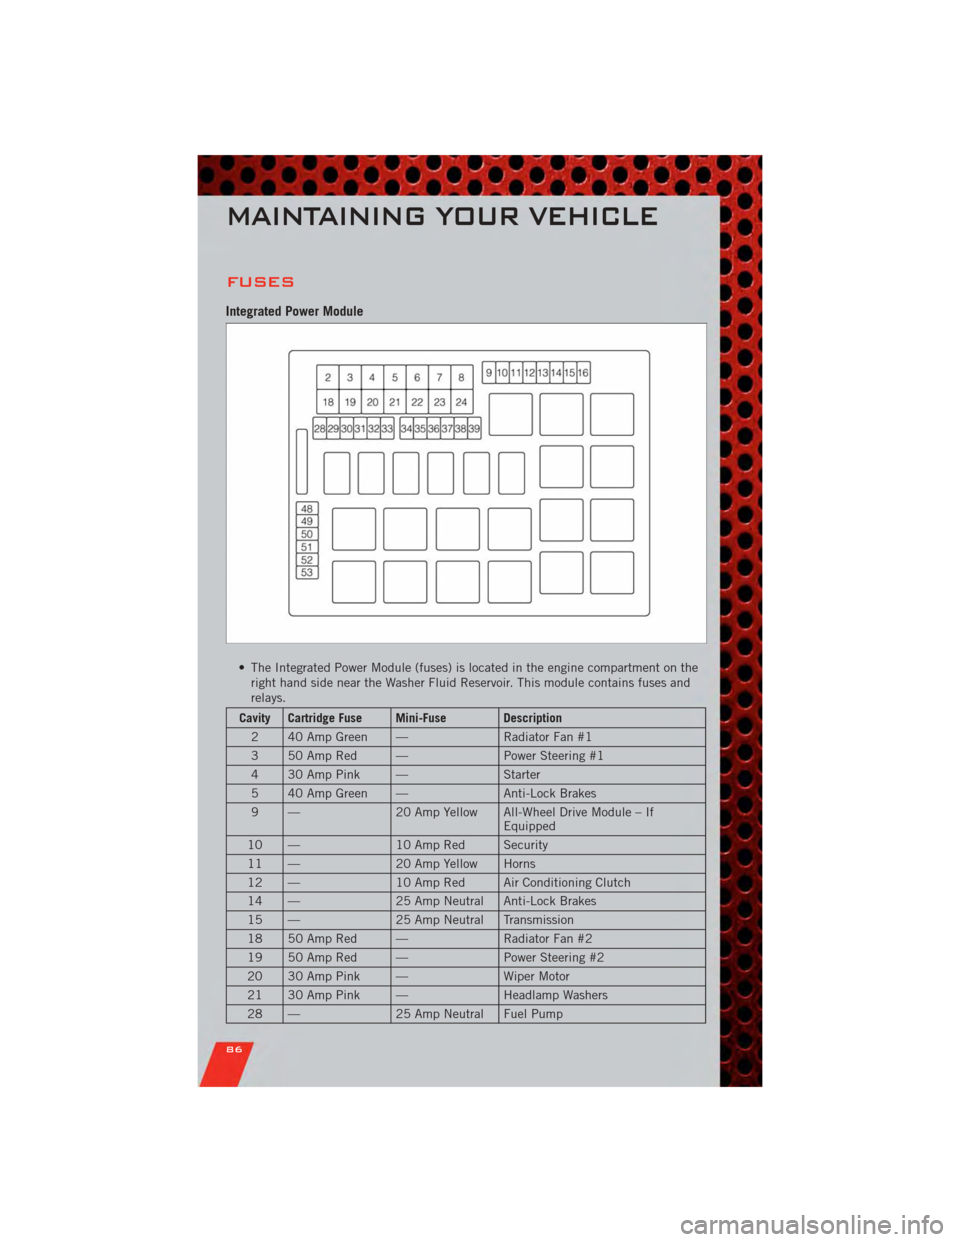
Integrated Power Module
• The Integrated Power Module (fuses) is located in the engine compartment on theright hand side near the Washer Fluid Reservoir. This module contains fuses and
relays.
Cavity Cartridge Fuse Mini-Fuse Description
2 40 Amp Green — Radiator Fan #1
3 50 Amp Red — Power Steering #1
4 30 Amp Pink — Starter
5 40 Amp Green — Anti-Lock Brakes
9 — 20 Amp Yellow All-Wheel Drive Module – If
Equipped
10 — 10 Amp Red Security
11 — 20 Amp Yellow Horns
12 — 10 Amp Red Air Conditioning Clutch
14 — 25 Amp Neutral Anti-Lock Brakes
15 — 25 Amp Neutral Transmission
18 50 Amp Red — Radiator Fan #2
19 50 Amp Red — Power Steering #2
20 30 Amp Pink — Wiper Motor
21 30 Amp Pink — Headlamp Washers
28 — 25 Amp Neutral Fuel Pump
MAINTAINING YOUR VEHICLE
86
Page 95 of 104
REPORTING SAFETY
DEFECTS IN THE 50
UNITED STATES AND
WASHINGTON, D.C.
• If you believe that your vehicle has adefect that could cause a collision or
cause injury or death, you should
immediately inform the National
Highway Traffic Safety
Administration (NHTSA) in addition
to notifying the manufacturer.
• If NHTSA receives similar complaints, it may open an
investigation, and if it finds that a
safety defect exists in a group of
vehicles, it may order a recall and
remedy campaign. However, NHTSA
cannot become involved in individual
problems between you, your
authorized dealer, and the
manufacturer.
• To contact NHTSA, you may either call the Auto Safety Hotline toll free
at 1–888–327–4236 (TTY:
1–800–424– 9153), or go to
http://www.safercar.gov; or write to:
Administrator, NHTSA, 1200 New
Jersey Avenue, SE., West Building,
Washington, D.C. 20590. You can
also obtain other information about
motor vehicle safety from
http://www.safercar.gov.
In Canada
• If you believe that your vehicle has a
safety defect, you should contact the
Customer Service Department
immediately. Canadian customers
who wish to report a safety defect to
the Canadian government should
contact Transport Canada, Motor
Vehicle Defect Investigations and
Recalls at 1-800-333-0510 or go to
http://www.tc.gc.ca/roadsafety/
• French Canadian customers who wish to report a safety defect to the
Canadian government should contact
Transport Canada, Motor Vehicle
Defect Investigations and Recalls at
1-800-333-0510 or go to
http://www.tc.gc.ca/securiteroutiere/
CONSUMER ASSISTANCE
93
Page 97 of 104
Adaptive Cruise Control (ACC) (Cruise
Control)................. 24
AdjustablePedals ........... 20
Airbag .................. 12
Alarm,Panic ............... 8
Arming Theft System
(Security Alarm) ............ 11
Audio Settings ........... 35,37
Automatic Headlights ......... 23
Automatic Temperature Control
(ATC) ................... 27
Automatic Transmission FluidType .............. 81
AxleFluid ................ 81
Belts, Seat ............... 12
Brake Fluid ............... 81
BulbReplacement ........... 91
Calibration,Compass ......... 56
ChangeOilIndicator .......... 66
Child Restraint ............. 13
Child Restraint Tether Anchors .... 13
Clock Setting ............ 35,37
Compass Calibration .......... 56
Cooling System Coolant Capacity ........... 81
Cruise Control (Speed Control) .... 24
CruiseLight ............... 24
Cupholders
Heated/Cooled (Beverage
Holder) ................ 20
Customer Assistance .......... 92
Customer Programmable
Features ............... 57,58
Defects, Reporting ........... 93
Dimmer Control ............. 23
Dimmer Switch, Headlight ...... 23
Disarming, Theft System ....... 11
Driver Cockpit .............. 4
ECO ................... 56
Electronic Speed Control
(Cruise Control) ............. 24
Electronic Vehicle Information Center
(EVIC) ................ 56,57 Electronics
Your Vehicle's Sound System .... 32
Emergency Key .............. 8
Emergency, In Case of Overheating ............. 66
Engine Compartment ............. 79
Oil Selection ............. 81
Overheating ............. 66
Starting ................ 10
Stopping ............... 10
Event Data Recorder .......... 75
Exterior Lights ............. 91
Fluid Capacities ............ 81
Fluids .................. 81
FogLights ................ 23
FoldingRearSeat ........... 18
Freeing A Stuck Vehicle ........ 74
Front Heated Seats ........... 18
Fuel Filler Door (Gas Cap) ........ 77
Filler Door Emergency Release . . . 77
Specifications ............ 81
Garage Door Opener (HomeLink
®)..58
Headlights Automatic .............. 23
Dimmer Switch ........... 23
HighBeam .............. 22
Heated Seats .............. 18
High Beam/Low Beam Select
(Dimmer) Switch ............ 22
HomeLink
®(Garage Door Opener)
Transmitter ............... 58
Hood Release .............. 76
Instrument Cluster ............ 6
Indicators ............... 7
Instrument Cluster Warning
Lights ................. 6,63
Intermittent Wipers (Delay Wipers) . . 22
Introduction ............... 2
iPod
®/USB/MP3 Control ........ 48
Bluetooth Streaming Audio ..... 49
INDEX
95