buttons DODGE CHARGER 2015 7.G User Guide
[x] Cancel search | Manufacturer: DODGE, Model Year: 2015, Model line: CHARGER, Model: DODGE CHARGER 2015 7.GPages: 236, PDF Size: 35.67 MB
Page 16 of 236
KEYLESS ENTER-N-GO™
The Keyless Enter-N-Go™ system is an enhancement to the vehicle's Key Fob. This
feature allows you to lock and unlock the vehicle's door(s) and trunk without having to
push the Key Fob lock or unlock buttons as well as starting and stopping the vehicle with
the push of a button.
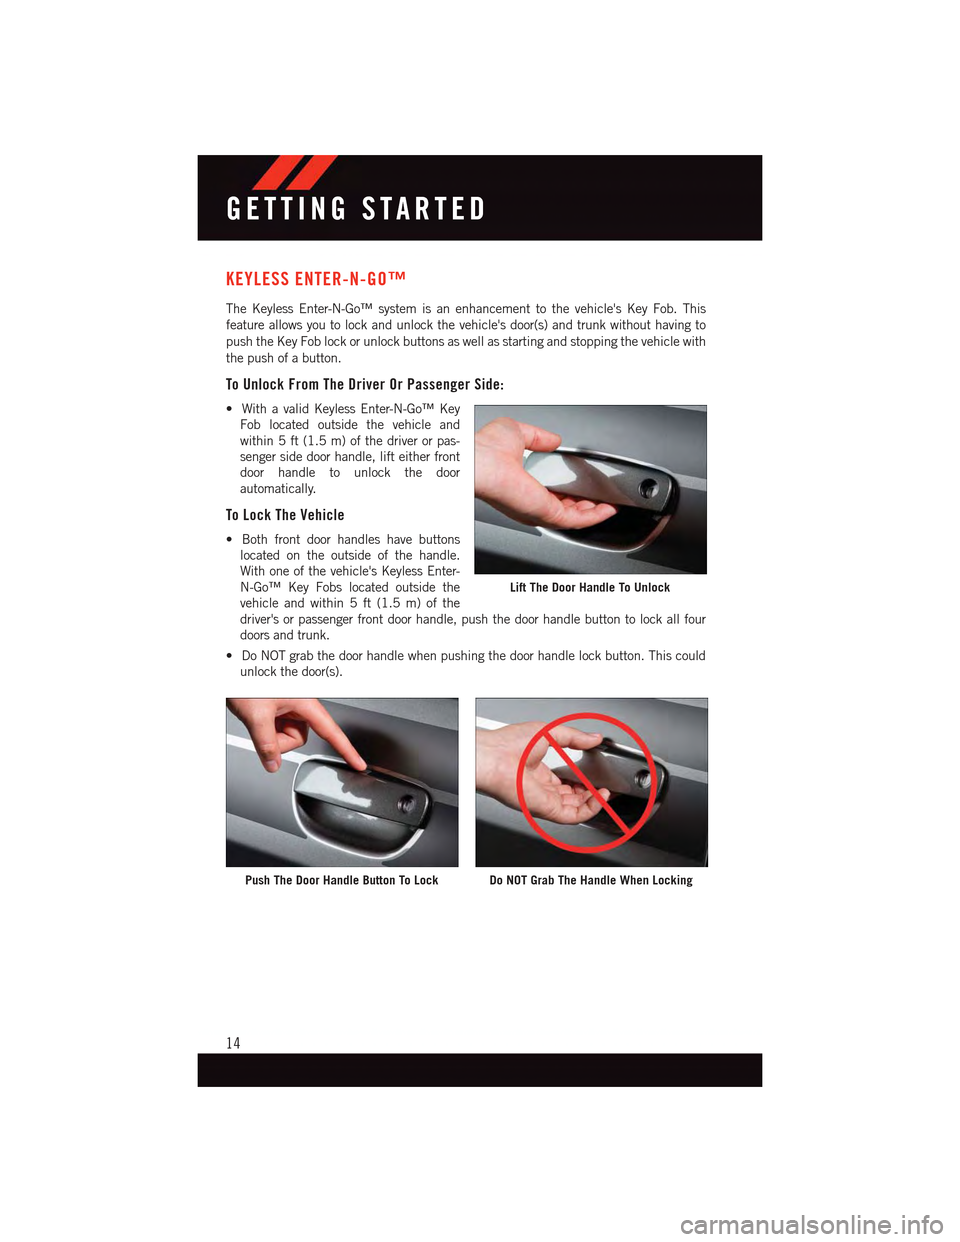
To Unlock From The Driver Or Passenger Side:
•WithavalidKeylessEnter-N-Go™Key
Fob located outside the vehicle and
within 5 ft (1.5 m) of the driver or pas-
senger side door handle, lift either front
door handle to unlock the door
automatically.
To Lock The Vehicle
•Bothfrontdoorhandleshavebuttons
located on the outside of the handle.
With one of the vehicle's Keyless Enter-
N-Go™ Key Fobs located outside the
vehicle and within 5 ft (1.5 m) of the
driver's or passenger front door handle, push the door handle button to lock all four
doors and trunk.
•DoNOTgrabthedoorhandlewhenpushingthedoorhandlelockbutton.Thiscould
unlock the door(s).
Lift The Door Handle To Unlock
Push The Door Handle Button To LockDo NOT Grab The Handle When Locking
GETTING STARTED
14
Page 31 of 236
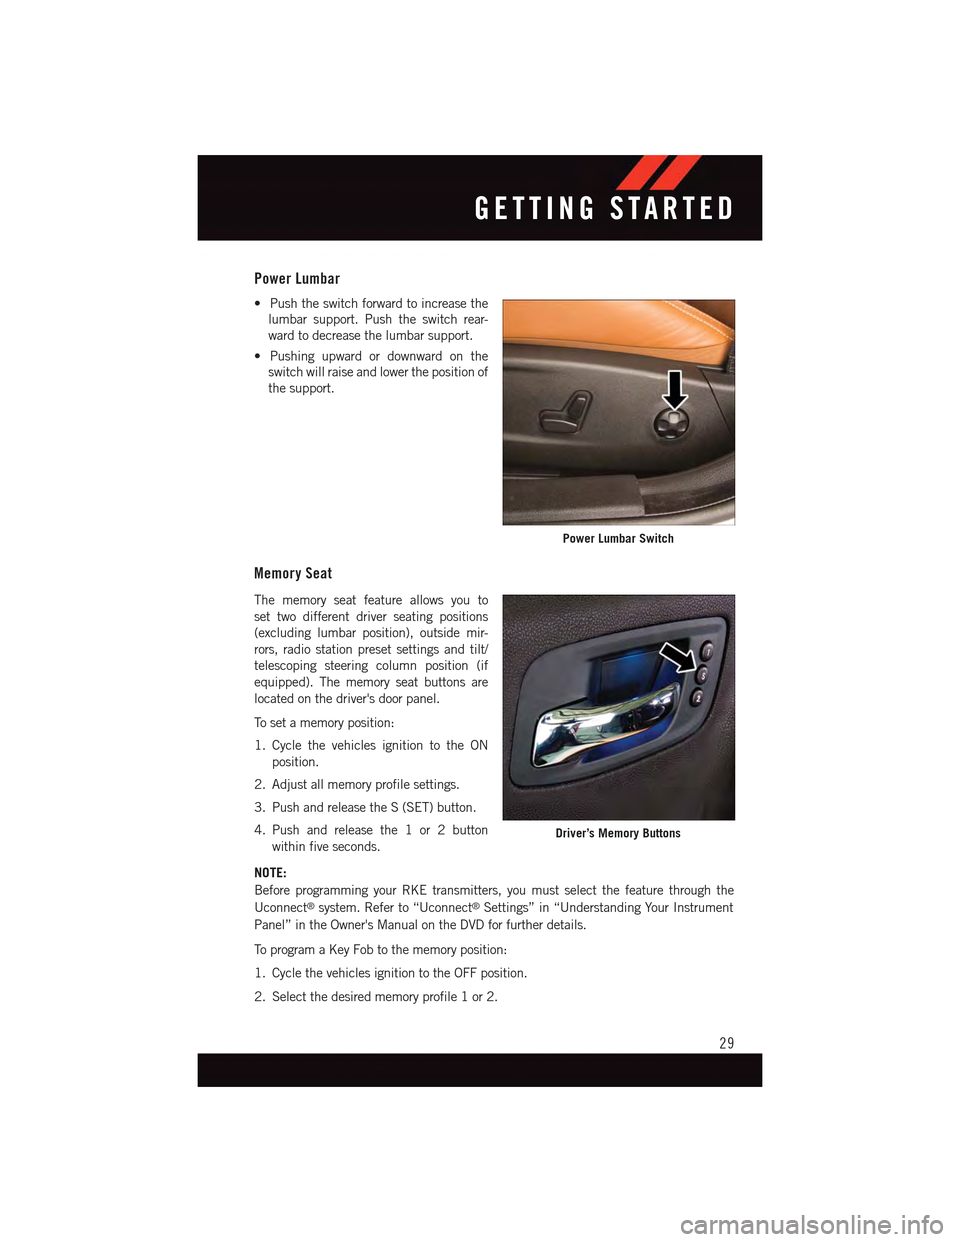
Power Lumbar
•Pushtheswitchforwardtoincreasethe
lumbar support. Push the switch rear-
ward to decrease the lumbar support.
•Pushingupwardordownwardonthe
switch will raise and lower the position of
the support.
Memory Seat
The memory seat feature allows you to
set two different driver seating positions
(excluding lumbar position), outside mir-
rors, radio station preset settings and tilt/
telescoping steering column position (if
equipped). The memory seat buttons are
located on the driver's door panel.
To s e t a m e m o r y p o s i t i o n :
1. Cycle the vehicles ignition to the ON
position.
2. Adjust all memory profile settings.
3. Push and release the S (SET) button.
4. Push and release the 1 or 2 button
within five seconds.
NOTE:
Before programming your RKE transmitters, you must select the feature through the
Uconnect®system. Refer to “Uconnect®Settings” in “Understanding Your Instrument
Panel” in the Owner's Manual on the DVD for further details.
To p r o g r a m a K e y F o b t o t h e m e m o r y p o s i t i o n :
1. Cycle the vehicles ignition to the OFF position.
2. Select the desired memory profile 1 or 2.
Power Lumbar Switch
Driver’s Memory Buttons
GETTING STARTED
29
Page 34 of 236
HEATED/VENTILATED SEATS
Heated Seats
On some models, the front and rear seats may be equipped with heaters in both the seat
cushions and seatbacks.
The front driver and passenger heated seats are operated using the Uconnect®System.
WARNING!
•Personswhoareunabletofeelpaintotheskinbecauseofadvancedage,chronic
illness, diabetes, spinal cord injury, medication, alcohol use, exhaustion or other
physical condition must exercise care when using the seat heater. It may cause
burns even at low temperatures, especially if used for long periods of time.
•Donotplaceanythingontheseatorseatbackthatinsulatesagainstheat,suchas
ablanketorcushion.Thismaycausetheseatheatertooverheat.Sittinginaseat
that has been overheated could cause serious burns due to the increased surface
temperature of the seat.
Front Heated Seats
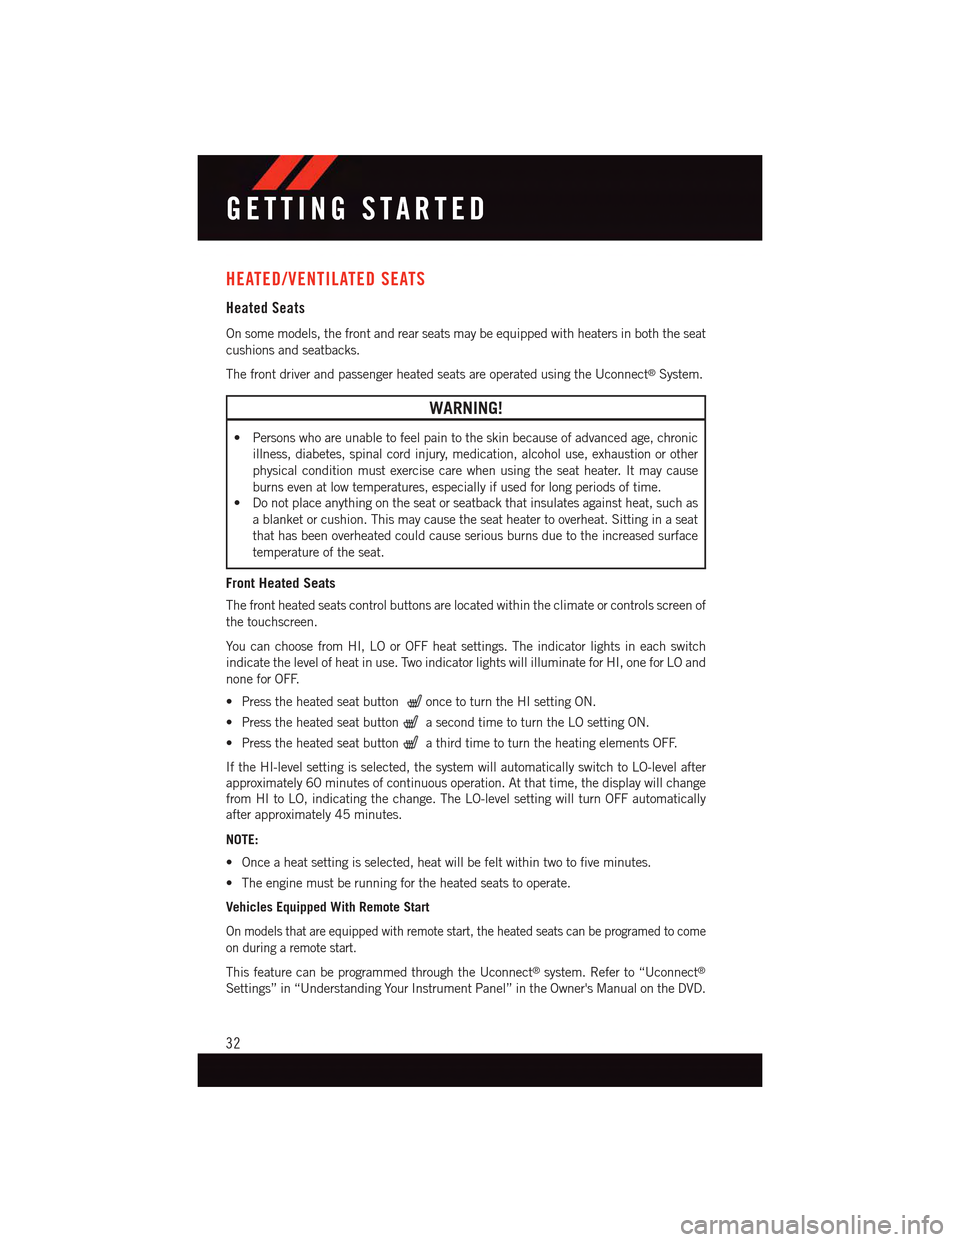
The front heated seats control buttons are located within the climate or controls screen of
the touchscreen.
Yo u c a n c h o o s e f r o m H I , L O o r O F F h e a t s e t t i n g s . T h e i n d i c a t o r l i g h t s i n e a c h s w i t c h
indicate the level of heat in use. Two indicator lights will illuminate for HI, one for LO and
none for OFF.
•Presstheheatedseatbuttononce to turn the HI setting ON.
•PresstheheatedseatbuttonasecondtimetoturntheLOsettingON.
•PresstheheatedseatbuttonathirdtimetoturntheheatingelementsOFF.
If the HI-level setting is selected, the system will automatically switch to LO-level after
approximately 60 minutes of continuous operation. At that time, the display will change
from HI to LO, indicating the change. The LO-level setting will turn OFF automatically
after approximately 45 minutes.
NOTE:
•Onceaheatsettingisselected,heatwillbefeltwithintwotofiveminutes.
•Theenginemustberunningfortheheatedseatstooperate.
Vehicles Equipped With Remote Start
On models that are equipped with remote start, the heated seats can be programed to come
on during a remote start.
This feature can be programmed through the Uconnect®system. Refer to “Uconnect®
Settings” in “Understanding Your Instrument Panel” in the Owner's Manual on the DVD.
GETTING STARTED
32
Page 35 of 236
Rear Heated Seats
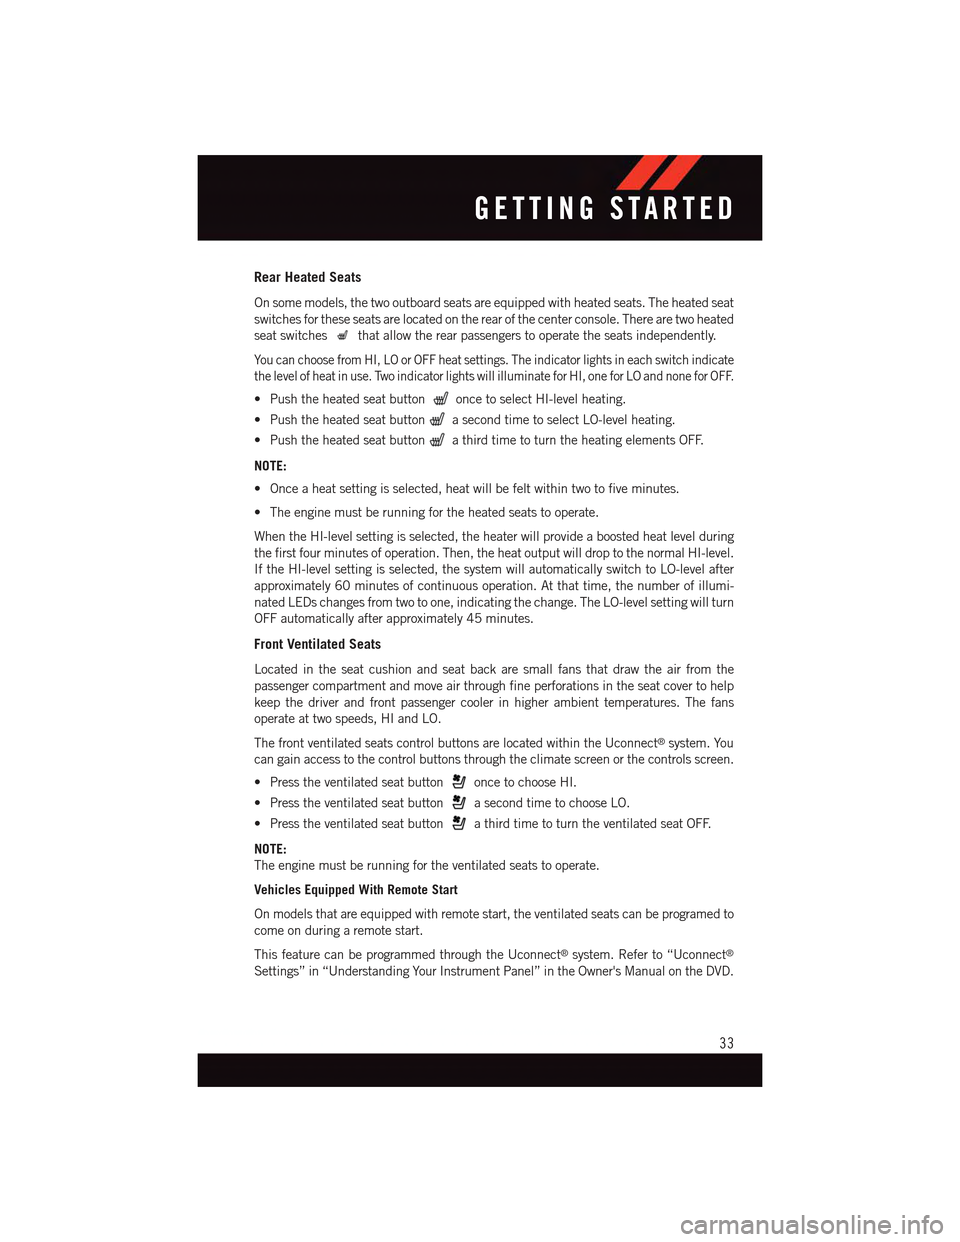
On some models, the two outboard seats are equipped with heated seats. The heated seat
switches for these seats are located on the rear of the center console. There are two heated
seat switchesthat allow the rear passengers to operate the seats independently.
Yo u c a n c h o o s e f r o m H I , L O o r O F F h e a t s e t t i n g s . T h e i n d i c a t o r l i g h t s i n e a c h s w i t c h i n d i c a t e
the level of heat in use. Two indicator lights will illuminate for HI, one for LO and none for OFF.
•Pushtheheatedseatbuttononce to select HI-level heating.
•PushtheheatedseatbuttonasecondtimetoselectLO-levelheating.
•PushtheheatedseatbuttonathirdtimetoturntheheatingelementsOFF.
NOTE:
•Onceaheatsettingisselected,heatwillbefeltwithintwotofiveminutes.
•Theenginemustberunningfortheheatedseatstooperate.
When the HI-level setting is selected, the heater will provide a boosted heat level during
the first four minutes of operation. Then, the heat output will drop to the normal HI-level.
If the HI-level setting is selected, the system will automatically switch to LO-level after
approximately 60 minutes of continuous operation. At that time, the number of illumi-
nated LEDs changes from two to one, indicating the change. The LO-level setting will turn
OFF automatically after approximately 45 minutes.
Front Ventilated Seats
Located in the seat cushion and seat back are small fans that draw the air from the
passenger compartment and move air through fine perforations in the seat cover to help
keep the driver and front passenger cooler in higher ambient temperatures. The fans
operate at two speeds, HI and LO.
The front ventilated seats control buttons are located within the Uconnect®system. You
can gain access to the control buttons through the climate screen or the controls screen.
•Presstheventilatedseatbuttononce to choose HI.
•PresstheventilatedseatbuttonasecondtimetochooseLO.
•PresstheventilatedseatbuttonathirdtimetoturntheventilatedseatOFF.
NOTE:
The engine must be running for the ventilated seats to operate.
Vehicles Equipped With Remote Start
On models that are equipped with remote start, the ventilated seats can be programed to
come on during a remote start.
This feature can be programmed through the Uconnect®system. Refer to “Uconnect®
Settings” in “Understanding Your Instrument Panel” in the Owner's Manual on the DVD.
GETTING STARTED
33
Page 36 of 236
HEATED STEERING WHEEL
The steering wheel contains a heating element that heats the steering wheel to one
temperature setting.
The heated steering wheel control button is located within the Uconnect®system. You can
gain access to the control buttons through the climate screen or the controls screen.
•Presstheheatedsteeringwheelbuttononce to turn the heating element ON.
•Presstheheatedsteeringwheelbuttonasecondtimetoturntheheatingelement
OFF.
Once the heated steering wheel has been turned on, it will operate for up to 80 minutes
before automatically shutting off. The heated steering wheel can shut off early or may not
turn on when the steering wheel is already warm.
NOTE:
On models that are equipped with Remote Start, this feature can be programmed to come
on during a Remote Start through the Uconnect®system. Refer to “Uconnect®Settings”
in “Understanding Your Instrument Panel” in the Owner's Manual on the DVD.
WARNING!
•Personswhoareunabletofeelpaintotheskinbecauseofadvancedage,chronic
illness, diabetes, spinal cord injury, medication, alcohol use, exhaustion, or other
physical conditions must exercise care when using the steering wheel heater. It may
cause burns even at low temperatures, especially if used for long periods.
•Donotplaceanythingonthesteeringwheelthatinsulatesagainstheat,suchasa
blanket or steering wheel covers of any type and material. This may cause the
steering wheel heater to overheat.
GETTING STARTED
34
Page 48 of 236
Metric Speed (km/h)
•PushingtheSET+button once will result in a 1 km/h increase in set speed. Each
subsequent tap of the button results in an increase of 1 km/h.
•If the button is continually pushed, the set speed will continue to increase in 10 km/h
increments until the button is released. The increase in set speed is reflected in the DID.
To Decrease Speed
While ACC is set, the set speed can be decreased by pushing the SET-button.
The drivers preferred units can be selected through the instrument panel settings if
equipped. Refer to “Understanding Your Instrument Panel” in the Owner’s Manual on
the DVD for more information. The speed increment shown is dependant on the speed of
U.S. (mph) or Metric (km/h) units:
U.S. Speed (mph)
•PushingtheSET-button once will result in a 1 mph decrease in set speed. Each
subsequent tap of the button results in a decrease of 1 mph.
•If the button is continually pushed, the set speed will continue to decrease in 5 mph
decrements until the button is released. The decrease in set speed is reflected in the DID.
Metric Speed (km/h)
•PushingtheSET-button once will result in a 1 km/h decrease in set speed. Each
subsequent tap of the button results in a decrease of 1 km/h.
•If the button is continually pushed, the set speed will continue to decrease in 10 km/h
decrements until the button is released. The decrease in set speed is reflected in the DID.
NOTE:
•WhenyouoverrideandpushtheSET+button or SET-buttons, the new Set Speed will
be the current speed of the vehicle.
•WhenyouusetheSET-button to decelerate, if the engine’s braking power does not
slow the vehicle sufficiently to reach the set speed, the brake system will automatically
slow the vehicle.
•TheACCsystemappliesthebrakedowntoafullstopwhenfollowingatargetvehicle.
If an ACC host vehicle follows a target vehicle to a standstill, the host vehicle will release
the vehicle brakes two seconds after coming to a full stop.
•TheACCsystemmaintainssetspeedwhendrivinguphillanddownhill.However,a
slight speed change on moderate hills is normal. In addition, downshifting may occur
while climbing uphill or descending downhill. This is normal operation and necessary
to maintain set speed. When driving up hill and down hill, the ACC system will cancel
if the braking temperature exceeds normal range (overheated).
OPERATING YOUR VEHICLE
46
Page 60 of 236
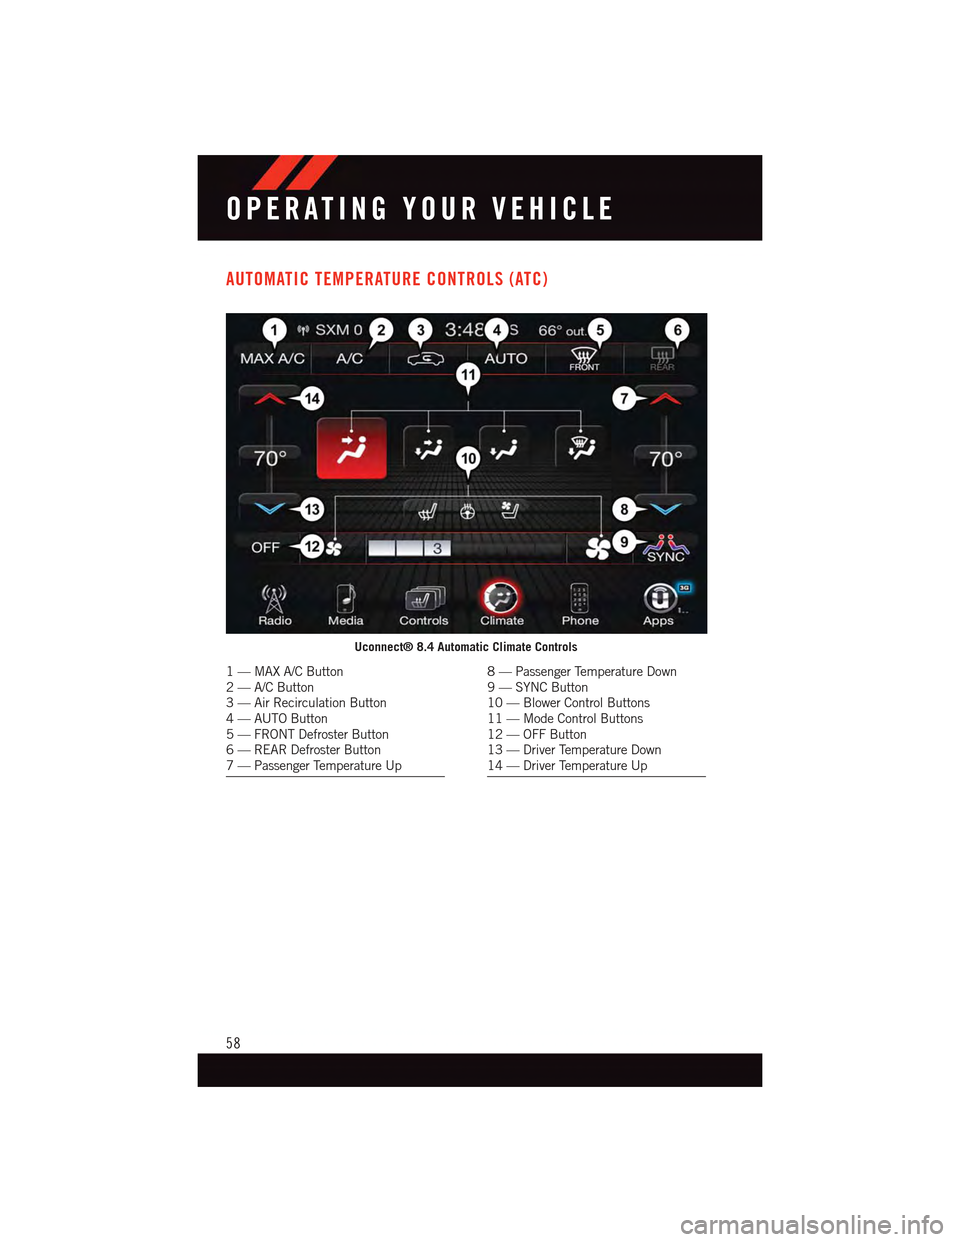
AUTOMATIC TEMPERATURE CONTROLS (ATC)
Uconnect® 8.4 Automatic Climate Controls
1—MAXA/CButton2—A/CButton3—AirRecirculationButton4—AUTOButton5—FRONTDefrosterButton6—REARDefrosterButton7—PassengerTemperatureUp
8—PassengerTemperatureDown9—SYNCButton10 — Blower Control Buttons11 — Mode Control Buttons12 — OFF Button13 — Driver Temperature Down14 — Driver Temperature Up
OPERATING YOUR VEHICLE
58
Page 66 of 236
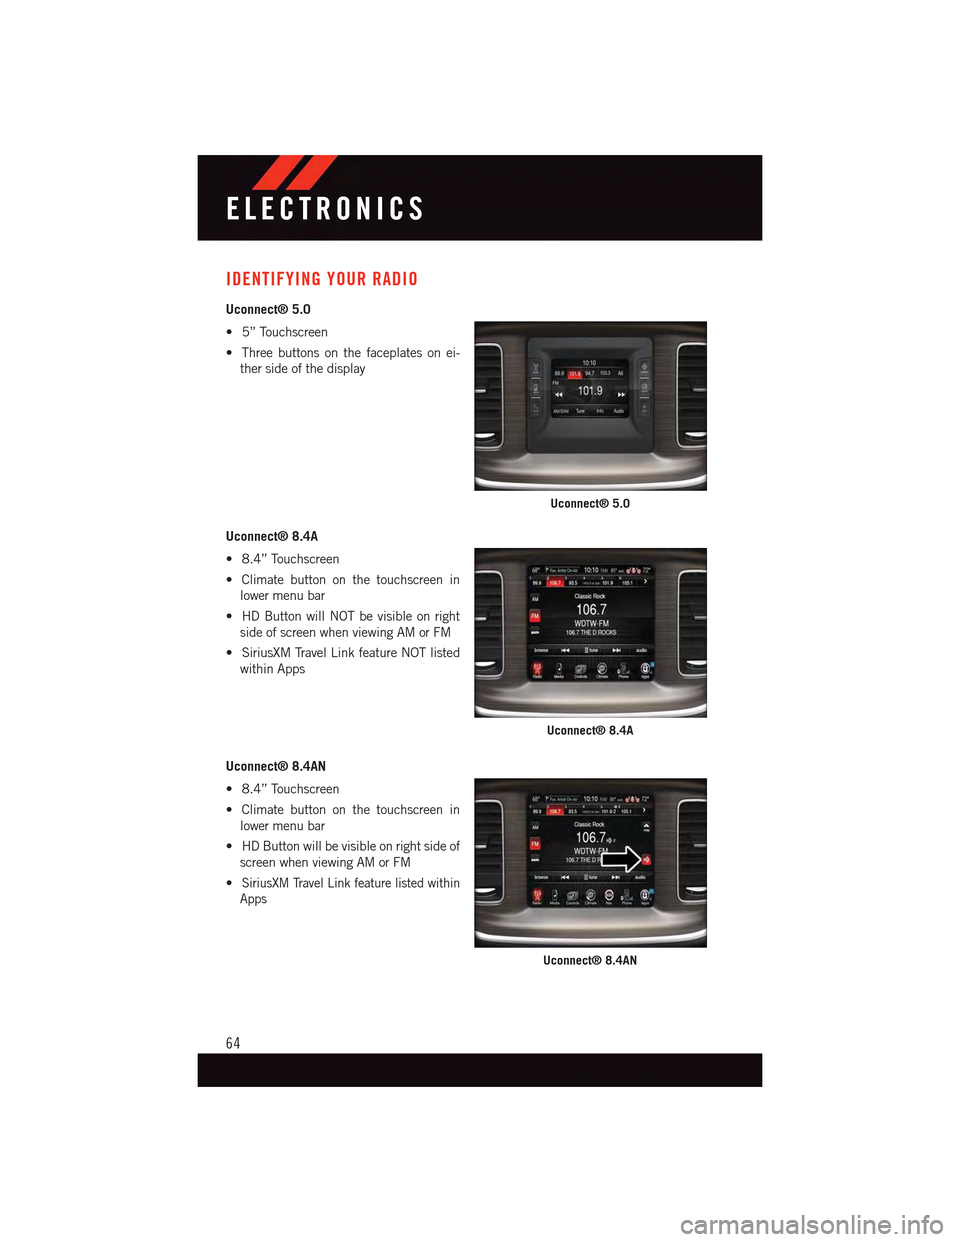
IDENTIFYING YOUR RADIO
Uconnect® 5.0
•5”Touchscreen
•Threebuttonsonthefaceplatesonei-
ther side of the display
Uconnect® 8.4A
•8.4”Touchscreen
•Climatebuttononthetouchscreenin
lower menu bar
•HDButtonwillNOTbevisibleonright
side of screen when viewing AM or FM
•SiriusXMTravelLinkfeatureNOTlisted
within Apps
Uconnect® 8.4AN
•8.4”Touchscreen
•Climatebuttononthetouchscreenin
lower menu bar
•HDButtonwillbevisibleonrightsideof
screen when viewing AM or FM
•SiriusXM Travel Link feature listed within
Apps
Uconnect® 5.0
Uconnect® 8.4A
Uconnect® 8.4AN
ELECTRONICS
64
Page 67 of 236
Uconnect® ACCESS
Uconnect® Access — If Equipped (Available On Uconnect® 8.4A/8.4AN —
U.S. Residents Only)
WARNING!
ALWAYS drive safely with your hands on the steering wheel. You have full responsibility
and assume all risks related to the use of the Uconnect®features and applications in
this vehicle. Only use Uconnect®when it is safe to do so. Failure to do so may result in
an accident involving serious injury or death.
Uconnect®Access enhances your ownership and driving experience by connecting your
vehicle with a built-in cellular connection. With Uconnect®Access, you can:
•Placeacalltoalocal9-1-1Operatorforemergencyassistance.
•Remotelylock/unlockyourdoorsandstartyourvehiclefromvirtuallyanywhere,using
the Uconnect®Access App from your smartphone. You can also do so by logging into
Mopar Owner Connect, or by calling Uconnect®Care. (Vehicle must be within the
United States and have network coverage).
•TurnyourvehicleintoaWiFiHotspotandconnectyourdevicestotheinternet.
•Receivetextoremailnotificationsifyourvehicle'stheftalarmgoesoff.
•Receivestolenvehicleassistance,usingGPStechnologytohelpauthoritieslocateyour
vehicle if it is stolen.
•Listentoyourtextmessagesorsendfree-formtextmessageswithyourvoicewhile
keeping your hands on the wheel, using the Voice Texting feature. Requires a cell phone
that supports Bluetooth Message Access Profile (MAP).
•Searchforplacestoeat,shop,relaxandplaywithYelp®,usingyourvoiceoron-screen
menu. Then navigate to them (navigation standard on Uconnect®8.4AN, optional on
Uconnect®8.4A).
•GetoperatorassistanceusingtheASSISTbuttononyourinteriorrearviewmirror.
Before you drive, familiarize yourself with the easy-to-use Uconnect® Access.
1. The ASSIST and 9-1-1 buttons are located on your rearview mirror. The ASSIST button
is used for contacting Roadside Assistance, Vehicle Care and Uconnect®Care. The
9-1-1 button connects you to emergency services.
NOTE:
Vehicles sold in Canada and Mexico DO NOT have 9-1-1 Call system capabilities. 9-1-1
or other emergency line operators in Canada and Mexico may not answer or respond to
9-1-1 system calls.
2. The Uconnect®“Apps” button on the menu bar at the bottom right corner of the radio
touchscreen. This is where you can begin your registration process, manage your Apps
and purchase WiFi on demand.
ELECTRONICS
65
Page 68 of 236
3. The Uconnect®Voice Command and Uconnect®Phone buttons are located on the left
side of your steering wheel. These buttons let you use your voice to give commands,
make phone calls, send and receive text messages hands-free, enter navigation
destinations, and control your radio and media devices.
Included Trial Period For New Vehicles
Yo u r n e w v e h i c l e m a y c o m e w i t h a n i n c l u d e d t r i a l p e r i o d f o r u s e o f t h e U c o n n e c t®Access
Services starting at the date of vehicle purchase (date based on vehicle sales notification
from your dealer).To activate the trial, you must first register with Uconnect® Access.
After the trial period, if you wish to continue your Uconnect®Access Services you can
choose to purchase a subscription.
Features And Packages
•After the trial period, you can subscribe to continue your service by visiting the Uconnect®
Store located within the Mopar Owner Connect websitemoparownerconnect.com. If you
need assistance, U.S. residents can call Uconnect®Care at 1-855-792-4241.
•Forthelatestinformationonpackagesandpricinginformation:U.S.residentsvisit
DriveUconnect.com.
Uconnect® Access Registration (Uconnect® 8.4A/8.4AN, U.S. 48 Contiguous
States, Alaska And Hawaii)
To u n l o c k t h e f u l l p o t e n t i a l o f U c o n n e c t®Access in your vehicle, you first need to register
with Uconnect®Access.
1. From the parked vehicle with the radio touchscreen powered on, select the “Apps”
button located near the bottom right-hand corner of the radio touchscreen.
NOTE:
Should you require assistance anytime during the registration process, simply call
Uconnect®Care at 1-855-792-4241.
2. Press “Start” on the reminder screen or select “Uconnect Registration” under the
“All Apps” or “Favorites Apps” tab on the Apps list.
3. The Uconnect®Access Registration App will open and display step-by-step instruc-
tions to start your registration.
4. Enter your email address into the radio touchscreen.
5. A message will display on the touchscreen indicating your email submission was
accepted. In a few minutes, you will receive an email which will allow you to register
your vehicle for Uconnect®Access. You should open this email and begin your
Uconnect®Access registration within 72 hours.
6. Check for an email from Uconnect®Access that contains your personalized registra-
tion link. If you don't see it, check your spam or junk mail folder. Open the email and
click on the link to continue registering.
ELECTRONICS
66