light DODGE CHARGER 2020 User Guide
[x] Cancel search | Manufacturer: DODGE, Model Year: 2020, Model line: CHARGER, Model: DODGE CHARGER 2020Pages: 412, PDF Size: 18.96 MB
Page 26 of 412
24GETTING TO KNOW YOUR VEHICLE
Le présent appareil est conforme aux CNR
d`Innovation, Science and Economic
Development applicables aux appareils radio
exempts de licence. L'exploitation est autorisée
aux deux conditions suivantes:
1. l'appareil ne doit pas produire de
brouillage, et
2. l'utilisateur de l'appareil doit accepter tout brouillage radioélectrique subi, même si le
brouillage est susceptible d'en compro -
mettre le fonctionnement.
La operación de este equipo está sujeta a las
siguientes dos condiciones:
1. es posible que este equipo o dispositivo no cause interferencia perjudicial y
2. este equipo o dispositivo debe aceptar cualquier interferencia, incluyendo la que
pueda causar su operación no deseada.
NOTE:
Changes or modifications not expressly
approved by the party responsible for compli -
ance could void the user’s authority to operate
the equipment.VEHICLE SECURITY ALARM — IF EQUIPPED
The vehicle security alarm monitors the vehicle
doors for unauthorized entry and the keyless
push button ignition for unauthorized operation.
While the vehicle security alarm is armed,
interior switches for door locks and trunk
release are disabled. If something triggers the
alarm, the vehicle security alarm will provide the
following audible and visible signals: the horn
will pulse, the park lamps and/or turn signals
will flash, and the vehicle security light in the
instrument cluster will flash.
TO ARM THE SYSTEM
Follow these steps to arm the vehicle security
alarm:
1. Make sure the vehicle’s ignition is placed in the OFF position . Refer to "Ignition
Switch" in this chapter for further
information.
2. Perform one of the following methods to lock the vehicle:
Push lock on the interior power door lock
switch with the driver and/or passenger
door open.
Push the lock button on the exterior
Passive Entry Door Handle with a valid
key fob available in the same exterior
zone (refer to "Keyless Enter-N-Go —
Passive Entry" in “Doors” in this chapter
for further information).
Push the lock button on the key fob.
3. If any doors are open, close them.
Security System Manual Override
The vehicle security alarm will not arm if you
lock the doors using the manual door lock.
TO DISARM THE SYSTEM
The vehicle security alarm can be disarmed
using any of the following methods:
Push the unlock button on the key fob.
Grasp the Passive Entry Door Handle (if
equipped) to unlock the door. Refer to
“Keyless Enter-N-Go — Passive Entry,” in
“Doors” in this chapter for further information.
Push the Keyless Enter-N-Go ignition button
(requires at least one valid key fob in the
vehicle).
20_LD_OM_EN_USC_t.book Page 24
Page 27 of 412
GETTING TO KNOW YOUR VEHICLE25
(Continued)
NOTE:
The driver's door key cylinder and the trunk
button on the key fob cannot arm or disarm
the vehicle security alarm.
When the vehicle security alarm is armed,
the interior power door lock switches will not
unlock the doors.
The vehicle security alarm is designed to protect
your vehicle. However, you can create
conditions where the system will give you a false
alarm. If one of the previously described arming
sequences has occurred, the vehicle security
alarm will arm regardless of whether you are in
the vehicle or not. If you remain in the vehicle
and open a door, the alarm will sound. If this
occurs, disarm the vehicle security alarm.
If the vehicle security alarm is armed and the
battery becomes disconnected, the vehicle
security alarm will remain armed when the
battery is reconnected; the exterior lights will
flash, the horn will sound. If this occurs, disarm
the vehicle security alarm.
REARMING OF THE SYSTEM
If something triggers the alarm, and no action is
taken to disarm it, the vehicle security alarm will
turn the horn off after 29 seconds, five seconds
between cycles, up to eight cycles if the trigger
remains active and the vehicle security alarm
will rearm itself.
TAMPER ALERT
If something has triggered the vehicle security
alarm in your absence, the horn will sound three
times and the exterior lights will blink three
times when you disarm the vehicle security
alarm. Check the vehicle for tampering.
DOORS
MANUAL DOOR LOCKS
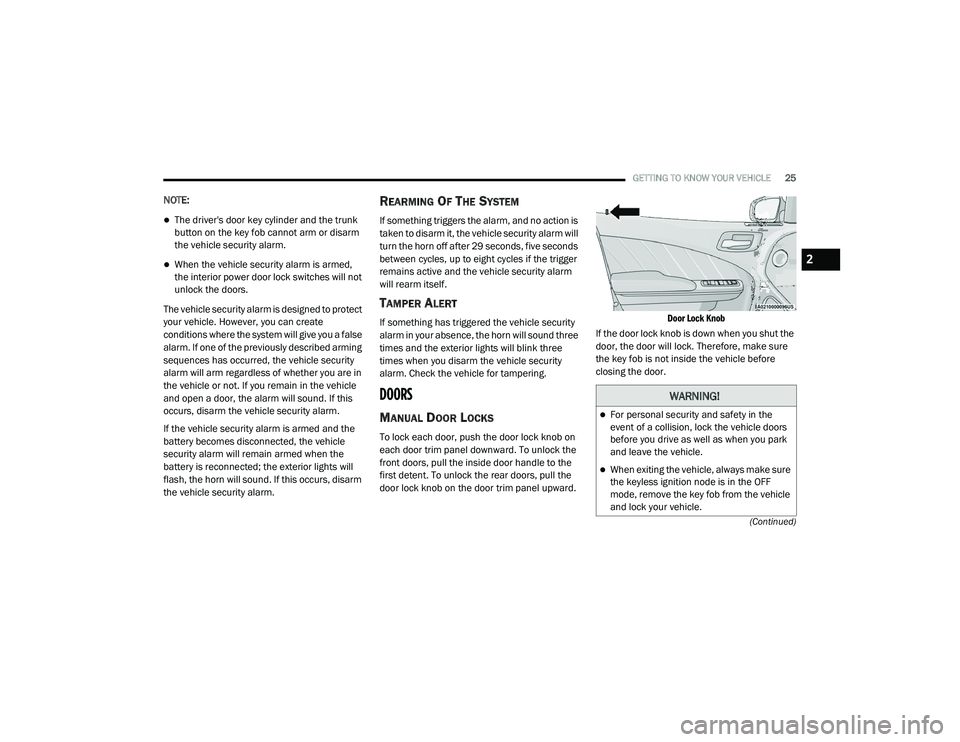
To lock each door, push the door lock knob on
each door trim panel downward. To unlock the
front doors, pull the inside door handle to the
first detent. To unlock the rear doors, pull the
door lock knob on the door trim panel upward.
Door Lock Knob
If the door lock knob is down when you shut the
door, the door will lock. Therefore, make sure
the key fob is not inside the vehicle before
closing the door.
WARNING!
For personal security and safety in the
event of a collision, lock the vehicle doors
before you drive as well as when you park
and leave the vehicle.
When exiting the vehicle, always make sure
the keyless ignition node is in the OFF
mode, remove the key fob from the vehicle
and lock your vehicle.
2
20_LD_OM_EN_USC_t.book Page 25
Page 39 of 412
GETTING TO KNOW YOUR VEHICLE37
Vehicles Equipped With Remote Start
On models that are equipped with remote start,
the heated seats can be programmed to come
on during a remote start.
This feature can be programmed through the
Uconnect system. Refer to “Uconnect Settings”
in “Multimedia” for further information.Rear Heated Seats
On some models, the two outboard seats are
equipped with heated seats. The heated seat
switches for these seats are located on the rear
of the center console. There are two heated
seat switches that allow the rear passengers
to operate the seats independently.
You can choose from HI, LO, or OFF heat
settings. The indicator lights in each switch
indicate the level of heat in use. Two indicator
lights will illuminate for HI, one for LO, and none
for off.
Push the heated seat button once to
select HI-level heating.
Push the heated seat button a second
time to select LO-level heating.
Push the heated seat button a third time
to turn the heating elements off.
NOTE:
Once a heat setting is selected, heat will be
felt within two to five minutes.
The engine must be running for the heated
seats to operate.
If the HI-level setting is selected, the system will
automatically switch to LO-level after
approximately 60 minutes of continuous
operation. At that time, the number of illuminated
LEDs changes from two to one, indicating the
change. The LO-level setting will turn off
automatically after approximately 45 minutes.
FRONT VENTILATED SEATS —
I
F EQUIPPED
Located in the seat cushion and seat back are
fans that draw the air from the passenger
compartment and move air through fine
perforations in the seat cover to help keep the
driver and front passenger cooler in higher
ambient temperatures. The fans operate at two
speeds, HI and LO.
The front ventilated seats control buttons are
located within the Uconnect system. You can
gain access to the control buttons through the
climate screen or the controls screen.
Press the ventilated seat button once to
choose HI.
Press the ventilated seat button a second
time to choose LO.
WARNING!
Persons who are unable to feel pain to the
skin because of advanced age, chronic
illness, diabetes, spinal cord injury, medica -
tion, alcohol use, exhaustion or other phys -
ical condition must exercise care when
using the seat heater. It may cause burns
even at low temperatures, especially if
used for long periods of time.
Do not place anything on the seat or seat -
back that insulates against heat, such as a
blanket or cushion. This may cause the seat
heater to overheat. Sitting in a seat that has
been overheated could cause serious
burns due to the increased surface
temperature of the seat.
2
20_LD_OM_EN_USC_t.book Page 37
Page 44 of 412
42GETTING TO KNOW YOUR VEHICLE
mirror head can be adjusted up, down, left, and
right for various drivers. The mirror should be
adjusted to center on the view through the rear
window.
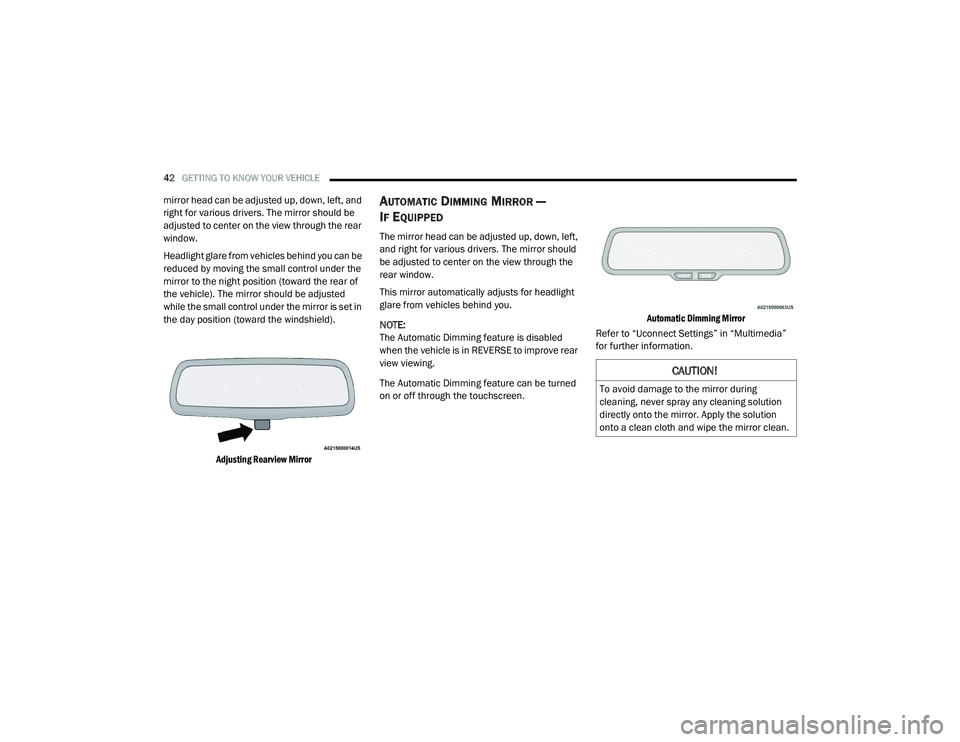
Headlight glare from vehicles behind you can be
reduced by moving the small control under the
mirror to the night position (toward the rear of
the vehicle). The mirror should be adjusted
while the small control under the mirror is set in
the day position (toward the windshield).
Adjusting Rearview Mirror
AUTOMATIC DIMMING MIRROR —
I
F EQUIPPED
The mirror head can be adjusted up, down, left,
and right for various drivers. The mirror should
be adjusted to center on the view through the
rear window.
This mirror automatically adjusts for headlight
glare from vehicles behind you.
NOTE:
The Automatic Dimming feature is disabled
when the vehicle is in REVERSE to improve rear
view viewing.
The Automatic Dimming feature can be turned
on or off through the touchscreen.
Automatic Dimming Mirror
Refer to “Uconnect Settings” in “Multimedia”
for further information.
CAUTION!
To avoid damage to the mirror during
cleaning, never spray any cleaning solution
directly onto the mirror. Apply the solution
onto a clean cloth and wipe the mirror clean.
20_LD_OM_EN_USC_t.book Page 42
Page 45 of 412
GETTING TO KNOW YOUR VEHICLE43
OUTSIDE MIRRORS
To receive maximum benefit, adjust the outside
mirror(s) to center on the adjacent lane of traffic
and a slight overlap of the view obtained from
the inside mirror.
NOTE:
The passenger side outside mirror will give a
much wider view to the rear, and especially of
the lane next to your vehicle.
DRIVER'S OUTSIDE AUTOMATIC
D
IMMING MIRROR — IF EQUIPPED
The driver’s outside mirror will automatically
adjust for glare from vehicles behind you. This
feature is controlled by the inside automatic
dimming mirror and will automatically adjust for
headlight glare when the inside mirror adjusts.
OUTSIDE MIRRORS APPROACH LIGHT —
I
F EQUIPPED
Driver and passenger outside mirrors equipped
with approach lighting contain one LED, which is
located in the upper outboard mirror glass
corner. The approach light supplies illuminated
entry lighting, which turns on in both mirrors
when you use the remote keyless entry key fob
or open any door. This LED shines outward to
illuminate the front and rear door handles. It
also shines downward to illuminate the area in
front of the doors.
POWER MIRRORS
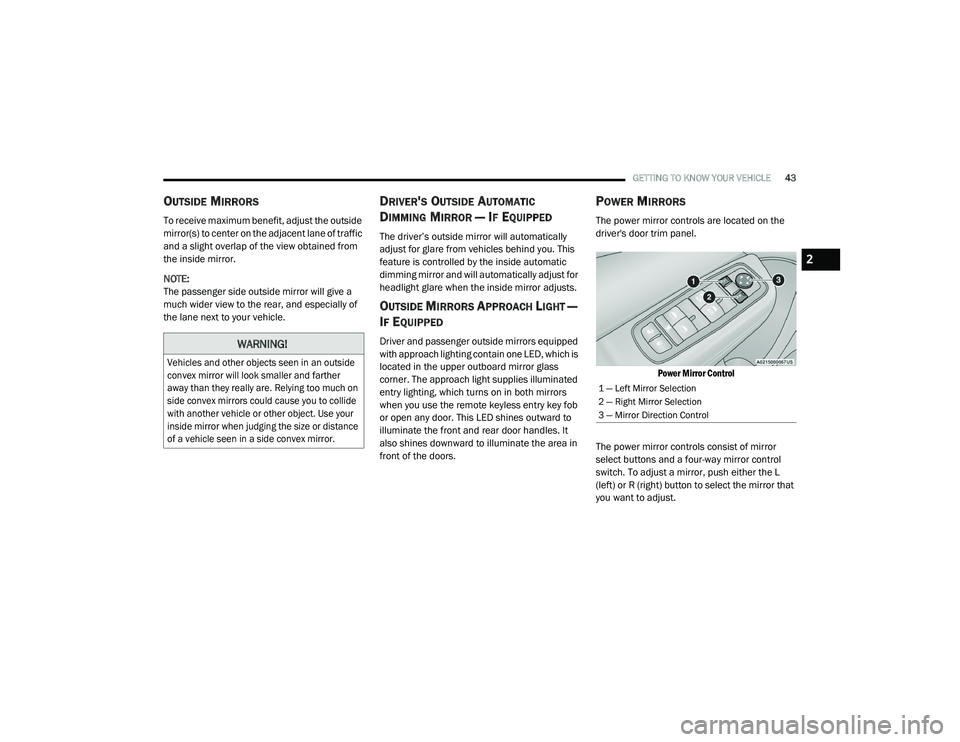
The power mirror controls are located on the
driver's door trim panel.
Power Mirror Control
The power mirror controls consist of mirror
select buttons and a four-way mirror control
switch. To adjust a mirror, push either the L
(left) or R (right) button to select the mirror that
you want to adjust.
WARNING!
Vehicles and other objects seen in an outside
convex mirror will look smaller and farther
away than they really are. Relying too much on
side convex mirrors could cause you to collide
with another vehicle or other object. Use your
inside mirror when judging the size or distance
of a vehicle seen in a side convex mirror.
1 — Left Mirror Selection
2 — Right Mirror Selection
3 — Mirror Direction Control
2
20_LD_OM_EN_USC_t.book Page 43
Page 46 of 412
44GETTING TO KNOW YOUR VEHICLE
NOTE:
A light in the select button will illuminate indi -
cating the mirror is activated and can be
adjusted.
Using the mirror control switch, push on any of
the four arrows for the direction that you want
the mirror to move.
HEATED MIRRORS — IF EQUIPPED
These mirrors are heated to melt frost
or ice. This feature will be activated
whenever you turn on the rear window
defroster (if equipped). Refer to “Climate
Controls” in this chapter for further information.
TILT SIDE MIRRORS IN REVERSE — IF
E
QUIPPED
Tilt Side Mirrors In Reverse provides automatic
outside mirror positioning which will aid the
driver’s view of the ground rearward of the front
doors. The outside mirrors will move slightly
downward from the present position when the
vehicle is shifted into REVERSE. The outside
mirrors will then return to the original position
when the vehicle is shifted out of the REVERSE
position. Each stored memory setting will have an
associated Tilt Side Mirrors In Reverse position.
NOTE:
The Tilt Side Mirrors In Reverse feature is not
turned on when delivered from the factory. The
Tilt Side Mirrors In Reverse feature can be
turned on and off using the Uconnect System.
Refer to “Uconnect Settings” in “Multimedia”
for further information.
ILLUMINATED VANITY MIRRORS — IF
E
QUIPPED
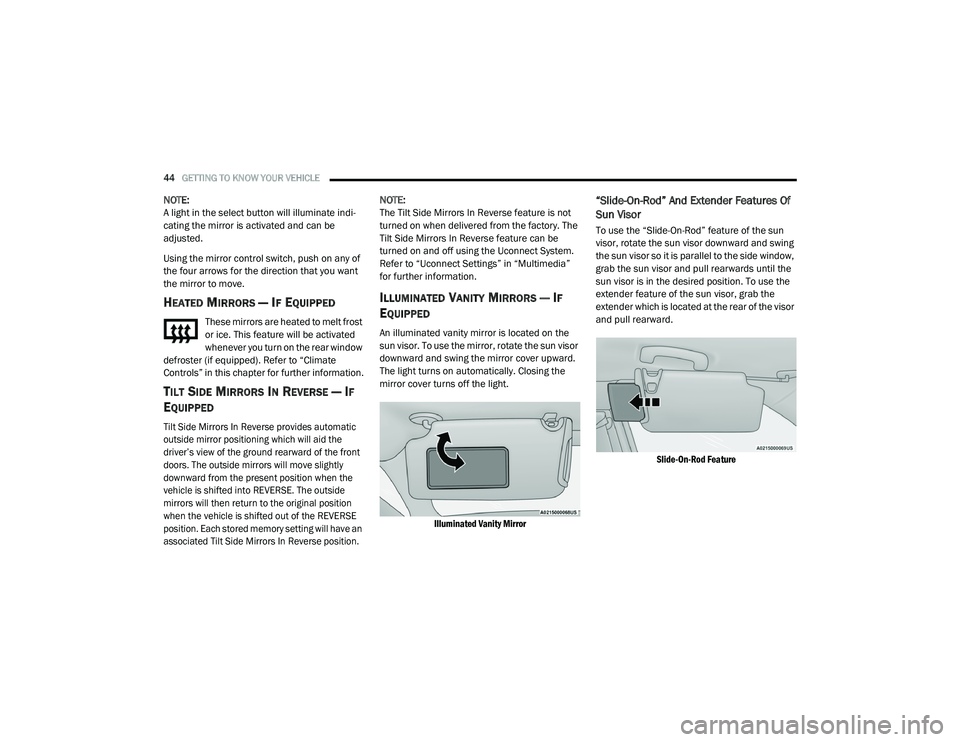
An illuminated vanity mirror is located on the
sun visor. To use the mirror, rotate the sun visor
downward and swing the mirror cover upward.
The light turns on automatically. Closing the
mirror cover turns off the light.
Illuminated Vanity Mirror
“Slide-On-Rod” And Extender Features Of
Sun Visor
To use the “Slide-On-Rod” feature of the sun
visor, rotate the sun visor downward and swing
the sun visor so it is parallel to the side window,
grab the sun visor and pull rearwards until the
sun visor is in the desired position. To use the
extender feature of the sun visor, grab the
extender which is located at the rear of the visor
and pull rearward.
Slide-On-Rod Feature
20_LD_OM_EN_USC_t.book Page 44
Page 47 of 412
GETTING TO KNOW YOUR VEHICLE45
EXTERIOR LIGHTS
HEADLIGHT SWITCH
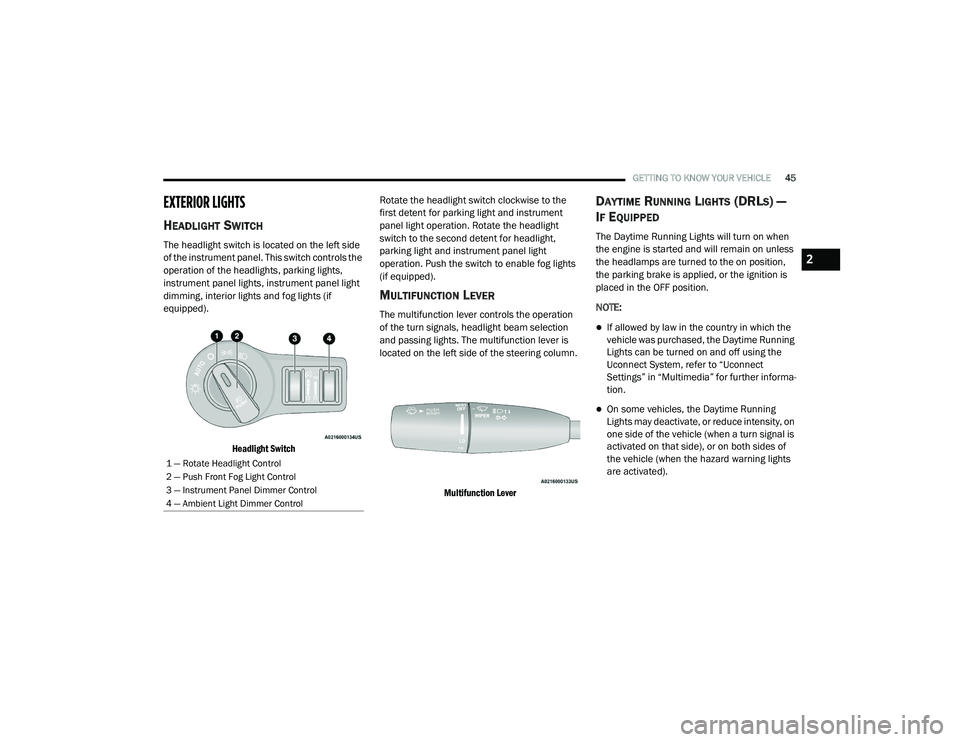
The headlight switch is located on the left side
of the instrument panel. This switch controls the
operation of the headlights, parking lights,
instrument panel lights, instrument panel light
dimming, interior lights and fog lights (if
equipped).
Headlight Switch
Rotate the headlight switch clockwise to the
first detent for parking light and instrument
panel light operation. Rotate the headlight
switch to the second detent for headlight,
parking light and instrument panel light
operation. Push the switch to enable fog lights
(if equipped).
MULTIFUNCTION LEVER
The multifunction lever controls the operation
of the turn signals, headlight beam selection
and passing lights. The multifunction lever is
located on the left side of the steering column.
Multifunction Lever
DAYTIME RUNNING LIGHTS (DRLS) —
I
F EQUIPPED
The Daytime Running Lights will turn on when
the engine is started and will remain on unless
the headlamps are turned to the on position,
the parking brake is applied, or the ignition is
placed in the OFF position.
NOTE:
If allowed by law in the country in which the
vehicle was purchased, the Daytime Running
Lights can be turned on and off using the
Uconnect System, refer to “Uconnect
Settings” in “Multimedia” for further informa -
tion.
On some vehicles, the Daytime Running
Lights may deactivate, or reduce intensity, on
one side of the vehicle (when a turn signal is
activated on that side), or on both sides of
the vehicle (when the hazard warning lights
are activated).
1 — Rotate Headlight Control
2 — Push Front Fog Light Control
3 — Instrument Panel Dimmer Control
4 — Ambient Light Dimmer Control
2
20_LD_OM_EN_USC_t.book Page 45
Page 48 of 412
46GETTING TO KNOW YOUR VEHICLE
HIGH/LOW BEAM SWITCH
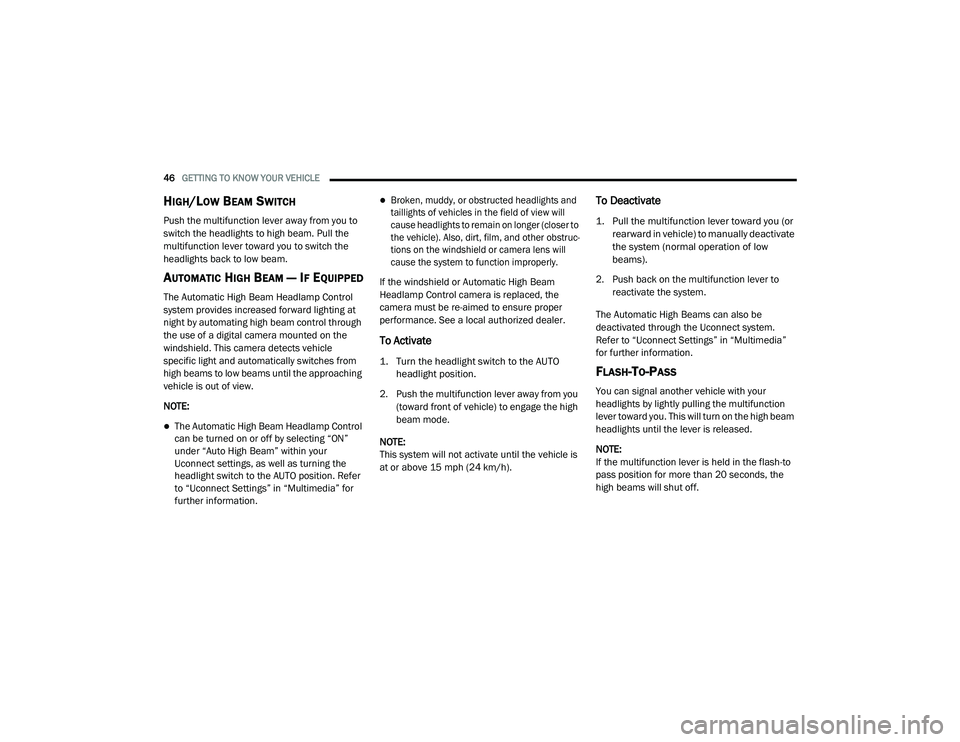
Push the multifunction lever away from you to
switch the headlights to high beam. Pull the
multifunction lever toward you to switch the
headlights back to low beam.
AUTOMATIC HIGH BEAM — IF EQUIPPED
The Automatic High Beam Headlamp Control
system provides increased forward lighting at
night by automating high beam control through
the use of a digital camera mounted on the
windshield. This camera detects vehicle
specific light and automatically switches from
high beams to low beams until the approaching
vehicle is out of view.
NOTE:
The Automatic High Beam Headlamp Control
can be turned on or off by selecting “ON”
under “Auto High Beam” within your
Uconnect settings, as well as turning the
headlight switch to the AUTO position. Refer
to “Uconnect Settings” in “Multimedia” for
further information.
Broken, muddy, or obstructed headlights and
taillights of vehicles in the field of view will
cause headlights to remain on longer (closer to
the vehicle). Also, dirt, film, and other obstruc -
tions on the windshield or camera lens will
cause the system to function improperly.
If the windshield or Automatic High Beam
Headlamp Control camera is replaced, the
camera must be re-aimed to ensure proper
performance. See a local authorized dealer.
To Activate
1. Turn the headlight switch to the AUTO headlight position.
2. Push the multifunction lever away from you (toward front of vehicle) to engage the high
beam mode.
NOTE:
This system will not activate until the vehicle is
at or above 15 mph (24 km/h).
To Deactivate
1. Pull the multifunction lever toward you (or rearward in vehicle) to manually deactivate
the system (normal operation of low
beams).
2. Push back on the multifunction lever to reactivate the system.
The Automatic High Beams can also be
deactivated through the Uconnect system.
Refer to “Uconnect Settings” in “Multimedia”
for further information.
FLASH-TO-PASS
You can signal another vehicle with your
headlights by lightly pulling the multifunction
lever toward you. This will turn on the high beam
headlights until the lever is released.
NOTE:
If the multifunction lever is held in the flash-to
pass position for more than 20 seconds, the
high beams will shut off.
20_LD_OM_EN_USC_t.book Page 46
Page 49 of 412
GETTING TO KNOW YOUR VEHICLE47
AUTOMATIC HEADLIGHTS
This system automatically turns the headlights
on or off according to ambient light levels. To
turn the system on, rotate the headlight switch
counterclockwise to the AUTO position. When
the system is on, the headlight time delay
feature is also on. This means the headlights
will stay on for up to 90 seconds after you place
the ignition into the OFF position. The headlight
time delay can be programmed 0/30/60/90
seconds.
Refer to “Uconnect Settings” in “Multimedia”
for further information.
To turn the automatic system off, move the
headlight switch out of the AUTO position.
NOTE:
The engine must be running before the head -
lights will come on in the automatic mode.
PARKING LIGHTS
Turn the headlight switch knob to the first
detent to turn the parking lights on. This also
turns on all instrument panel lighting.
HEADLIGHTS ON WITH WIPERS
When this feature is active, the headlights will
turn on after the wipers are turned on if the
headlight switch is placed in the AUTO position
and the programmable feature is set to on. In
addition, the headlights will turn off when the
wipers are turned off if they were turned on by
this feature.
NOTE:
The “Headlights On With Wipers” feature can be
turned on or off using the Uconnect system.
Refer to “Uconnect Settings” in “Multimedia”
for further information.
HEADLIGHT TIME DELAY
This feature provides the safety of headlight
illumination for up to 90 seconds when leaving
your vehicle in an unlit area with the headlight
switch in the O (off) position.
To activate the delay feature, place the ignition
in the OFF position while the headlights are still
on. Then, turn off the headlights within 45
seconds. The delay interval begins when the
headlight switch is turned off. NOTE:
The lights must be turned off within 45 seconds
of placing the ignition in the OFF position to acti
-
vate this feature.
If you turn the headlights, park lights or ignition
ON again, the system will cancel the delay.
If you turn the headlights off before the ignition,
they will turn off in the normal manner.
NOTE:
The Headlight Time Delay is programmable
using the Uconnect System, refer to “Uconnect
Settings” in “Multimedia” for further informa -
tion.
LIGHTS-ON REMINDER
If the headlights or parking lights are on after
the ignition is placed in the OFF position, a
chime will sound to alert the driver when the
driver's door is opened.
2
20_LD_OM_EN_USC_t.book Page 47
Page 50 of 412
48GETTING TO KNOW YOUR VEHICLE
FOG LIGHTS — IF EQUIPPED
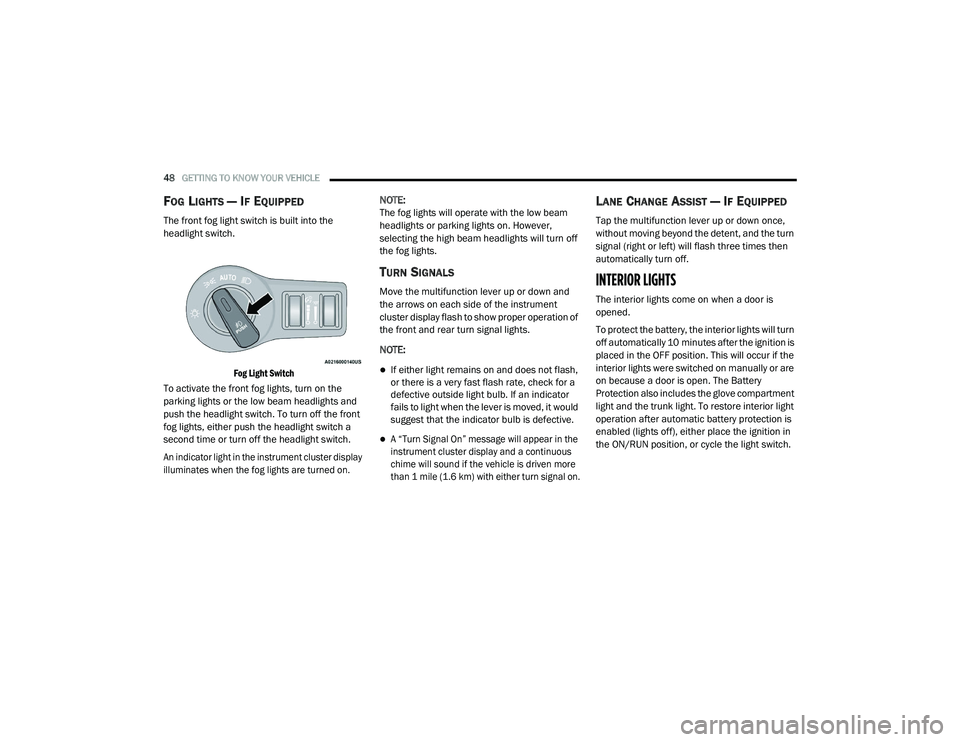
The front fog light switch is built into the
headlight switch.
Fog Light Switch
To activate the front fog lights, turn on the
parking lights or the low beam headlights and
push the headlight switch. To turn off the front
fog lights, either push the headlight switch a
second time or turn off the headlight switch.
An indicator light in the instrument cluster display
illuminates when the fog lights are turned on.
NOTE:
The fog lights will operate with the low beam
headlights or parking lights on. However,
selecting the high beam headlights will turn off
the fog lights.
TURN SIGNALS
Move the multifunction lever up or down and
the arrows on each side of the instrument
cluster display flash to show proper operation of
the front and rear turn signal lights.
NOTE:
If either light remains on and does not flash,
or there is a very fast flash rate, check for a
defective outside light bulb. If an indicator
fails to light when the lever is moved, it would
suggest that the indicator bulb is defective.
A “Turn Signal On” message will appear in the
instrument cluster display and a continuous
chime will sound if the vehicle is driven more
than 1 mile (1.6 km) with either turn signal on.
LANE CHANGE ASSIST — IF EQUIPPED
Tap the multifunction lever up or down once,
without moving beyond the detent, and the turn
signal (right or left) will flash three times then
automatically turn off.
INTERIOR LIGHTS
The interior lights come on when a door is
opened.
To protect the battery, the interior lights will turn
off automatically 10 minutes after the ignition is
placed in the OFF position. This will occur if the
interior lights were switched on manually or are
on because a door is open. The Battery
Protection also includes the glove compartment
light and the trunk light. To restore interior light
operation after automatic battery protection is
enabled (lights off), either place the ignition in
the ON/RUN position, or cycle the light switch.
20_LD_OM_EN_USC_t.book Page 48