wheel DODGE CHARGER 2020 Repair Manual
[x] Cancel search | Manufacturer: DODGE, Model Year: 2020, Model line: CHARGER, Model: DODGE CHARGER 2020Pages: 412, PDF Size: 18.96 MB
Page 236 of 412
234IN CASE OF EMERGENCY
ROAD TIRE INSTALLATION
1. Mount the road tire on the axle.
2. Install the remaining lug nuts with the cone
shaped end of the nut toward the wheel.
Lightly tighten the lug nuts. 3. Lower the vehicle to the ground by turning
the jack handle counterclockwise.
4. Refer to “Wheel And Tire Torque Specifi -
cations” in “Technical Specifications” for
proper lug nut torque.
5. After 25 miles (40 km), check the lug nut torque with a torque wrench to ensure that
all lug nuts are properly seated against the
wheel.TIRE SERVICE KIT — IF EQUIPPED
Small punctures up to 1/4 inch (6 mm) in the
tire tread can be sealed with Tire Service Kit.
Foreign objects (e.g., screws or nails) should not
be removed from the tire. Tire Service Kit can be
used in outside temperatures down to
approximately -4°F (-20°C). This kit will provide a temporary tire seal,
allowing you to drive your vehicle up to
100 miles (160 km) with a maximum speed of
50 mph (80 km/h).
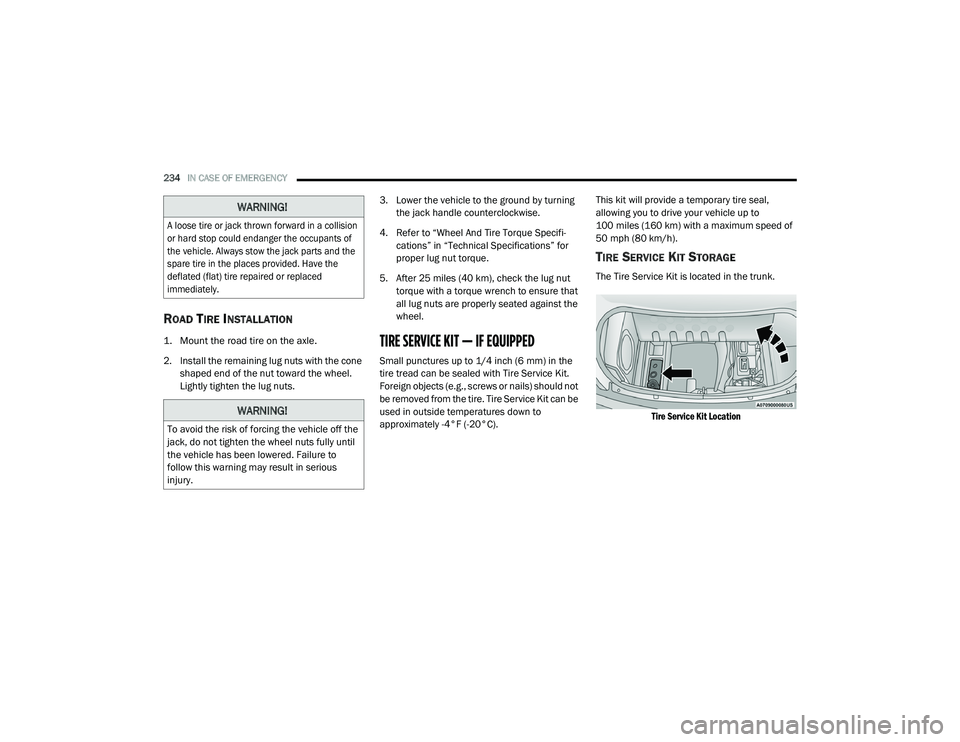
TIRE SERVICE KIT STORAGE
The Tire Service Kit is located in the trunk.
Tire Service Kit Location
WARNING!
A loose tire or jack thrown forward in a collision
or hard stop could endanger the occupants of
the vehicle. Always stow the jack parts and the
spare tire in the places provided. Have the
deflated (flat) tire repaired or replaced
immediately.
WARNING!
To avoid the risk of forcing the vehicle off the
jack, do not tighten the wheel nuts fully until
the vehicle has been lowered. Failure to
follow this warning may result in serious
injury.
20_LD_OM_EN_USC_t.book Page 234
Page 238 of 412
236IN CASE OF EMERGENCY
(Continued)
When the Tire Service Kit sealant is in a liquid
form, clean water and a damp cloth will
remove the material from the vehicle or tire
and wheel components. Once the sealant
dries, it can easily be peeled off and properly
discarded.
For optimum performance, make sure the
valve stem on the wheel is free of debris
before connecting the Tire Service Kit.
You can use the Tire Service Kit air pump to
inflate bicycle tires. The kit also comes with
two needles, located in the Accessory
Storage Compartment (on the bottom of the
air pump) for inflating sport balls, rafts, or
similar inflatable items. However, use only
the Air Pump Hose (7) and make sure the
Mode Select Knob (5) is in the Air Mode
when inflating such items to avoid injecting
sealant into them. The Tire Service Kit
Sealant is only intended to seal punctures
less than 1/4 inch (6 mm) diameter in the
tread of your tire.
Do not lift or carry the Tire Service Kit by the
hoses.
WARNING!
Do not attempt to seal a tire on the side of
the vehicle closest to traffic. Pull far enough
off the road to avoid the danger of being hit
when using the Tire Service Kit.
Do not use Tire Service Kit or drive the
vehicle under the following circumstances:
If the puncture in the tire tread is
approximately 1/4 inch (6 mm) or
larger.
If the tire has any sidewall damage.
If the tire has any damage from driving
with extremely low tire pressure.
If the tire has any damage from driving
on a flat tire.
If the wheel has any damage.
If you are unsure of the condition of the
tire or the wheel.
Keep Tire Service Kit away from open
flames or heat source.
A loose Tire Service Kit thrown forward in a
collision or hard stop could endanger the
occupants of the vehicle. Always stow the
Tire Service Kit in the place provided.
Failure to follow these warnings can result
in injuries that are serious or fatal to you,
your passengers, and others around you.
Take care not to allow the contents of Tire
Service Kit to come in contact with hair, eyes,
or clothing. Tire Service Kit sealant is
harmful if inhaled, swallowed, or absorbed
through the skin. It causes skin, eye, and
respiratory irritation. Flush immediately with
plenty of water if there is any contact with
eyes or skin. Change clothing as soon as
possible, if there is any contact with clothing.
Tire Service Kit Sealant solution contains
latex. In case of an allergic reaction or rash,
consult a physician immediately. Keep Tire
Service Kit out of reach of children. If swal-
lowed, rinse mouth immediately with plenty of
water and drink plenty of water. Do not induce
vomiting! Consult a physician immediately.
WARNING! (Continued)
20_LD_OM_EN_USC_t.book Page 236
Page 239 of 412
IN CASE OF EMERGENCY237
SEALING A TIRE WITH TIRE SERVICE KIT
(A) Whenever You Stop To Use Tire Service
Kit:
1. Pull over to a safe location and turn on the
vehicle’s Hazard Warning flashers.
2. Verify that the valve stem (on the wheel with the deflated tire) is in a position that is near
to the ground. This will allow the Tire Service
Kit Hoses (6) and (7) to reach the valve
stem and keep the Tire Service Kit flat on
the ground. This will provide the best
positioning of the kit when injecting the
sealant into the deflated tire and running
the air pump. Move the vehicle as
necessary to place the valve stem in this
position before proceeding.
3. Place the transmission in PARK (auto transmission) or in Gear (manual
transmission) and place the ignition in the
OFF position.
4. Apply the parking brake.
(B) Setting Up To Use Tire Service Kit:
1. Push in the Mode Select Knob (5) and turn to the Sealant Mode position.
2. Uncoil the Sealant Hose (6) and then
remove the cap from the fitting at the end of
the hose.
3. Place the Tire Service Kit flat on the ground next to the deflated tire.
4. Remove the cap from the valve stem and then screw the fitting at the end of the
Sealant Hose (6) onto the valve stem.
5. Uncoil the Power Plug (8) and insert the plug into the vehicle’s 12 Volt power outlet.
NOTE:
Do not remove foreign objects (e.g., screws or
nails) from the tire.
(C) Injecting Tire Service Kit Sealant Into
The Deflated Tire:
Always start the engine before turning ON the
Tire Service Kit.
NOTE:
Manual transmission vehicles must have the
parking brake engaged and the gear selector in
NEUTRAL.
After pushing the Power Button (4), the
sealant (white fluid) will flow from the Sealant
Bottle (1) through the Sealant Hose (6) and
into the tire.
NOTE:
Sealant may leak out through the puncture in
the tire.
If the sealant (white fluid) does not flow within 0
– 10 seconds through the Sealant Hose (6):
1. Push the Power Button (4) to turn Off the Tire Service Kit. Disconnect the Sealant
Hose (6) from the valve stem. Make sure
the valve stem is free of debris. Reconnect
the Sealant Hose (6) to the valve stem.
Check that the Mode Select Knob (5) is in
the Sealant Mode position and not Air
Mode. Push the Power Button (4) to turn
On the Tire Service Kit.
2. Connect the Power Plug (8) to a different 12 Volt power outlet in your vehicle or
another vehicle, if available. Make sure the
engine is running before turning ON the
Tire Service Kit.
6
20_LD_OM_EN_USC_t.book Page 237
Page 246 of 412
244IN CASE OF EMERGENCY
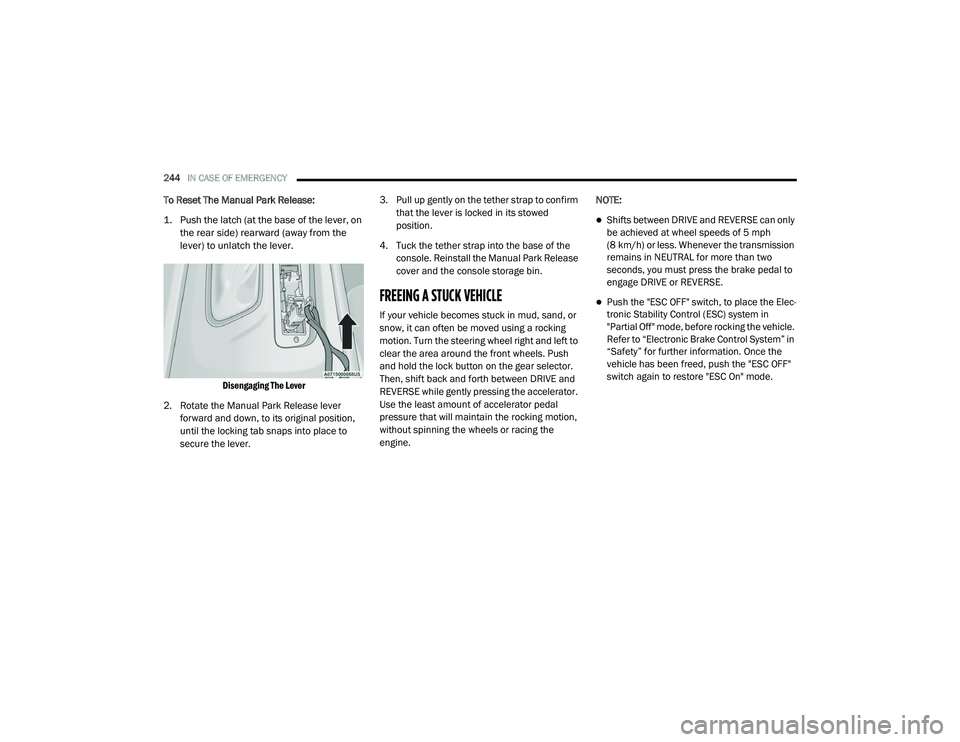
To Reset The Manual Park Release:
1. Push the latch (at the base of the lever, on
the rear side) rearward (away from the
lever) to unlatch the lever.
Disengaging The Lever
2. Rotate the Manual Park Release lever forward and down, to its original position,
until the locking tab snaps into place to
secure the lever. 3. Pull up gently on the tether strap to confirm
that the lever is locked in its stowed
position.
4. Tuck the tether strap into the base of the console. Reinstall the Manual Park Release
cover and the console storage bin.
FREEING A STUCK VEHICLE
If your vehicle becomes stuck in mud, sand, or
snow, it can often be moved using a rocking
motion. Turn the steering wheel right and left to
clear the area around the front wheels. Push
and hold the lock button on the gear selector.
Then, shift back and forth between DRIVE and
REVERSE while gently pressing the accelerator.
Use the least amount of accelerator pedal
pressure that will maintain the rocking motion,
without spinning the wheels or racing the
engine. NOTE:
Shifts between DRIVE and REVERSE can only
be achieved at wheel speeds of 5 mph
(8 km/h) or less. Whenever the transmission
remains in NEUTRAL for more than two
seconds, you must press the brake pedal to
engage DRIVE or REVERSE.
Push the "ESC OFF" switch, to place the Elec
-
tronic Stability Control (ESC) system in
"Partial Off" mode, before rocking the vehicle.
Refer to “Electronic Brake Control System” in
“Safety” for further information. Once the
vehicle has been freed, push the "ESC OFF"
switch again to restore "ESC On" mode.
20_LD_OM_EN_USC_t.book Page 244
Page 247 of 412
IN CASE OF EMERGENCY245
(Continued)
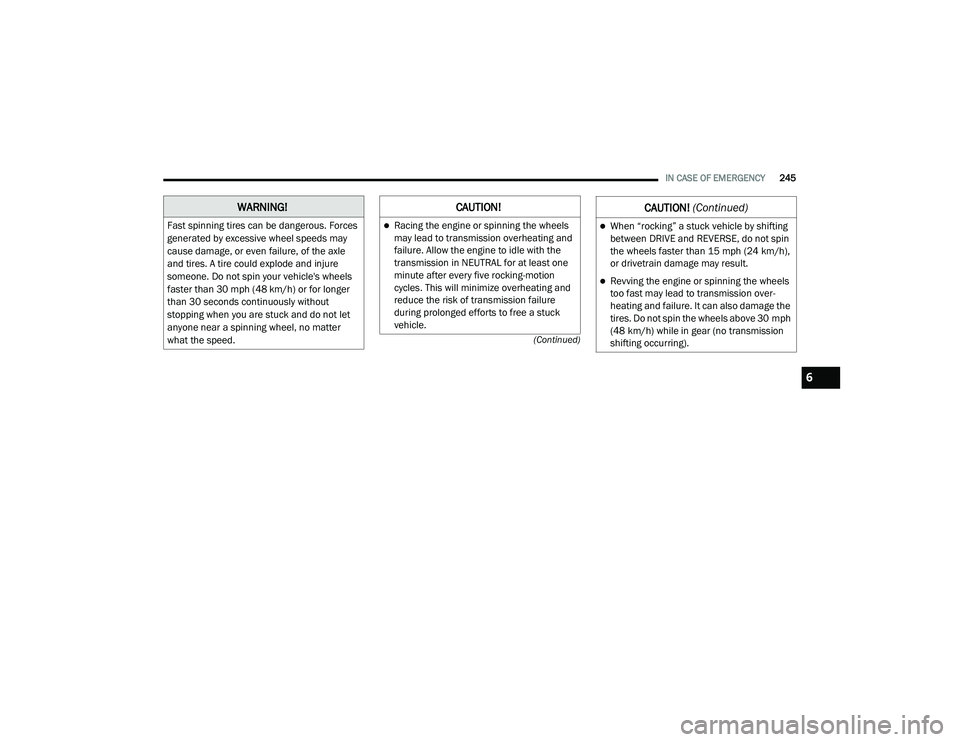
WARNING!
Fast spinning tires can be dangerous. Forces
generated by excessive wheel speeds may
cause damage, or even failure, of the axle
and tires. A tire could explode and injure
someone. Do not spin your vehicle's wheels
faster than 30 mph (48 km/h) or for longer than 30 seconds continuously without
stopping when you are stuck and do not let
anyone near a spinning wheel, no matter
what the speed.
CAUTION!
Racing the engine or spinning the wheels
may lead to transmission overheating and
failure. Allow the engine to idle with the
transmission in NEUTRAL for at least one
minute after every five rocking-motion
cycles. This will minimize overheating and
reduce the risk of transmission failure
during prolonged efforts to free a stuck
vehicle.When “rocking” a stuck vehicle by shifting
between DRIVE and REVERSE, do not spin
the wheels faster than 15 mph (24 km/h), or drivetrain damage may result.
Revving the engine or spinning the wheels
too fast may lead to transmission over -
heating and failure. It can also damage the
tires. Do not spin the wheels above 30 mph
(48 km/h) while in gear (no transmission
shifting occurring).
CAUTION! (Continued)
6
20_LD_OM_EN_USC_t.book Page 245
Page 248 of 412
246IN CASE OF EMERGENCY
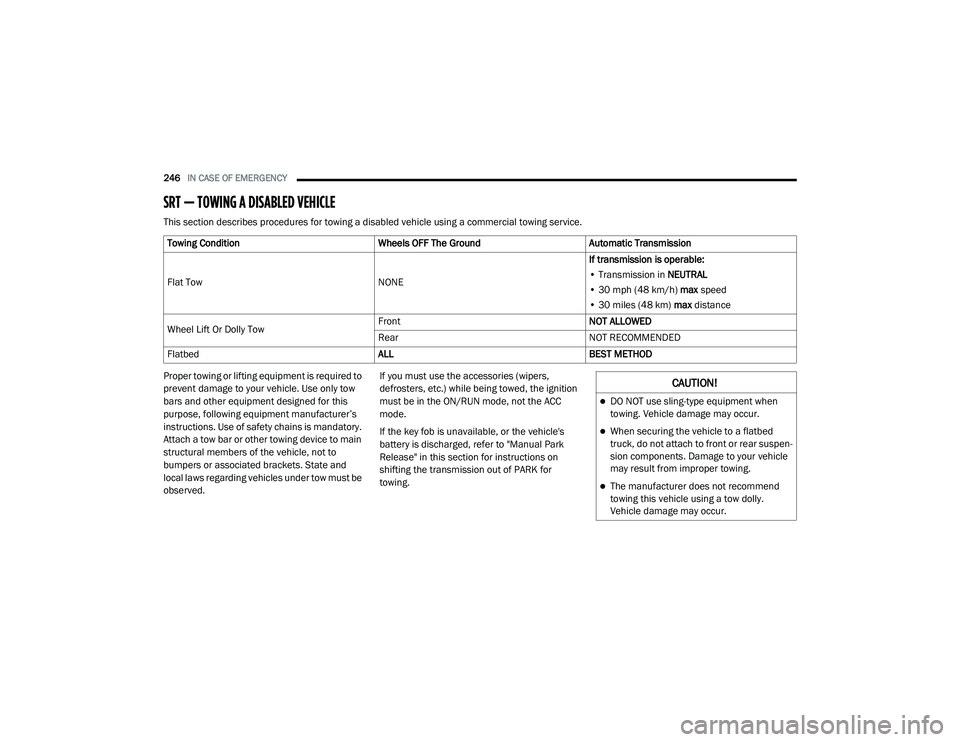
SRT — TOWING A DISABLED VEHICLE
This section describes procedures for towing a disabled vehicle using a commercial towing service.
Proper towing or lifting equipment is required to
prevent damage to your vehicle. Use only tow
bars and other equipment designed for this
purpose, following equipment manufacturer’s
instructions. Use of safety chains is mandatory.
Attach a tow bar or other towing device to main
structural members of the vehicle, not to
bumpers or associated brackets. State and
local laws regarding vehicles under tow must be
observed. If you must use the accessories (wipers,
defrosters, etc.) while being towed, the ignition
must be in the ON/RUN mode, not the ACC
mode.
If the key fob is unavailable, or the vehicle's
battery is discharged, refer to "Manual Park
Release" in this section for instructions on
shifting the transmission out of PARK for
towing.
Towing Condition
Wheels OFF The GroundAutomatic Transmission
Flat Tow NONEIf transmission is operable:
• Transmission in
NEUTRAL
• 30 mph (48 km/h) max speed
• 30 miles (48 km) max distance
Wheel Lift Or Dolly Tow Front
NOT ALLOWED
Rear NOT RECOMMENDED
Flatbed ALLBEST METHOD
CAUTION!
DO NOT use sling-type equipment when
towing. Vehicle damage may occur.
When securing the vehicle to a flatbed
truck, do not attach to front or rear suspen-
sion components. Damage to your vehicle
may result from improper towing.
The manufacturer does not recommend
towing this vehicle using a tow dolly.
Vehicle damage may occur.
20_LD_OM_EN_USC_t.book Page 246
Page 249 of 412
IN CASE OF EMERGENCY247
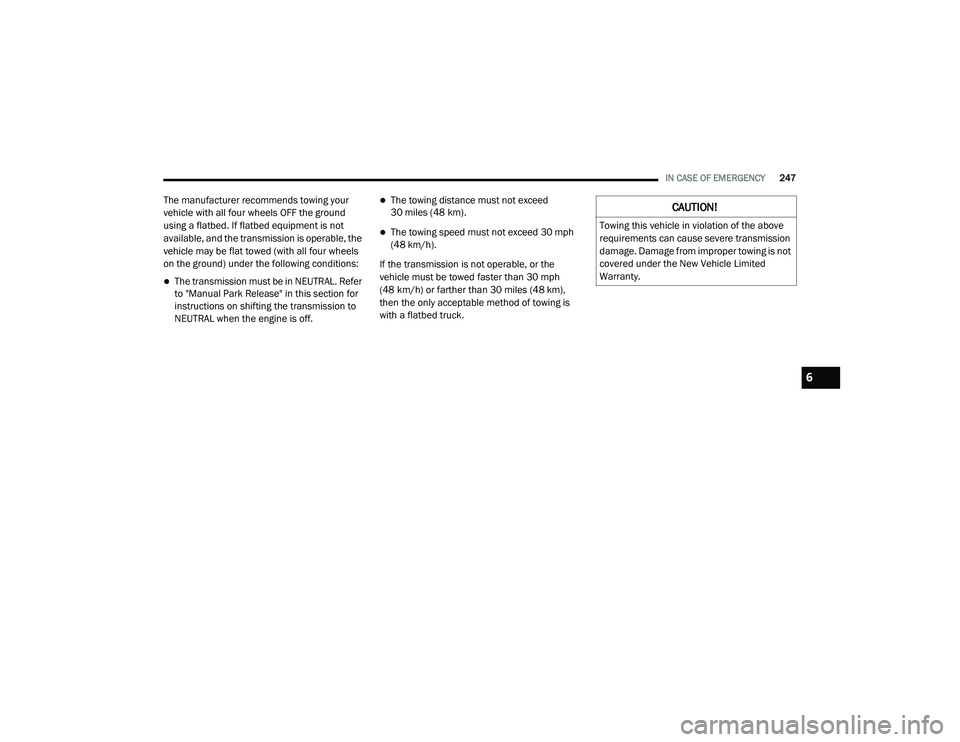
The manufacturer recommends towing your
vehicle with all four wheels OFF the ground
using a flatbed. If flatbed equipment is not
available, and the transmission is operable, the
vehicle may be flat towed (with all four wheels
on the ground) under the following conditions:
The transmission must be in NEUTRAL. Refer
to "Manual Park Release" in this section for
instructions on shifting the transmission to
NEUTRAL when the engine is off.
The towing distance must not exceed
30 miles (48 km).
The towing speed must not exceed 30 mph
(48 km/h).
If the transmission is not operable, or the
vehicle must be towed faster than 30 mph
(48 km/h) or farther than 30 miles (48 km),
then the only acceptable method of towing is
with a flatbed truck.
CAUTION!
Towing this vehicle in violation of the above
requirements can cause severe transmission
damage. Damage from improper towing is not
covered under the New Vehicle Limited
Warranty.
6
20_LD_OM_EN_USC_t.book Page 247
Page 250 of 412
248IN CASE OF EMERGENCY
(Continued)
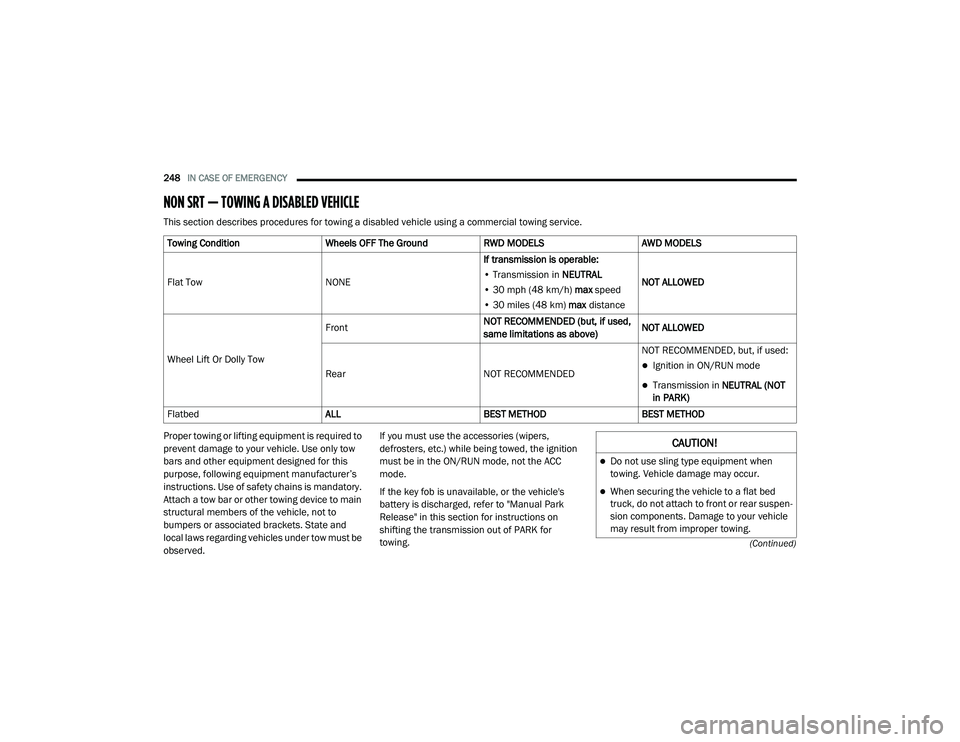
NON SRT — TOWING A DISABLED VEHICLE
This section describes procedures for towing a disabled vehicle using a commercial towing service.
Proper towing or lifting equipment is required to
prevent damage to your vehicle. Use only tow
bars and other equipment designed for this
purpose, following equipment manufacturer’s
instructions. Use of safety chains is mandatory.
Attach a tow bar or other towing device to main
structural members of the vehicle, not to
bumpers or associated brackets. State and
local laws regarding vehicles under tow must be
observed.If you must use the accessories (wipers,
defrosters, etc.) while being towed, the ignition
must be in the ON/RUN mode, not the ACC
mode.
If the key fob is unavailable, or the vehicle's
battery is discharged, refer to "Manual Park
Release" in this section for instructions on
shifting the transmission out of PARK for
towing.
Towing Condition
Wheels OFF The GroundRWD MODELSAWD MODELS
Flat Tow NONEIf transmission is operable:
• Transmission in NEUTRAL
• 30 mph (48 km/h) max speed
• 30 miles (48 km) max distance NOT ALLOWED
Wheel Lift Or Dolly Tow Front
NOT RECOMMENDED (but, if used,
same limitations as above)NOT ALLOWED
Rear NOT RECOMMENDEDNOT RECOMMENDED, but, if used:
Ignition in ON/RUN mode
Transmission in
NEUTRAL (NOT
in PARK)
Flatbed ALLBEST METHODBEST METHOD
CAUTION!
Do not use sling type equipment when
towing. Vehicle damage may occur.
When securing the vehicle to a flat bed
truck, do not attach to front or rear suspen -
sion components. Damage to your vehicle
may result from improper towing.
20_LD_OM_EN_USC_t.book Page 248
Page 251 of 412
IN CASE OF EMERGENCY249
(Continued)
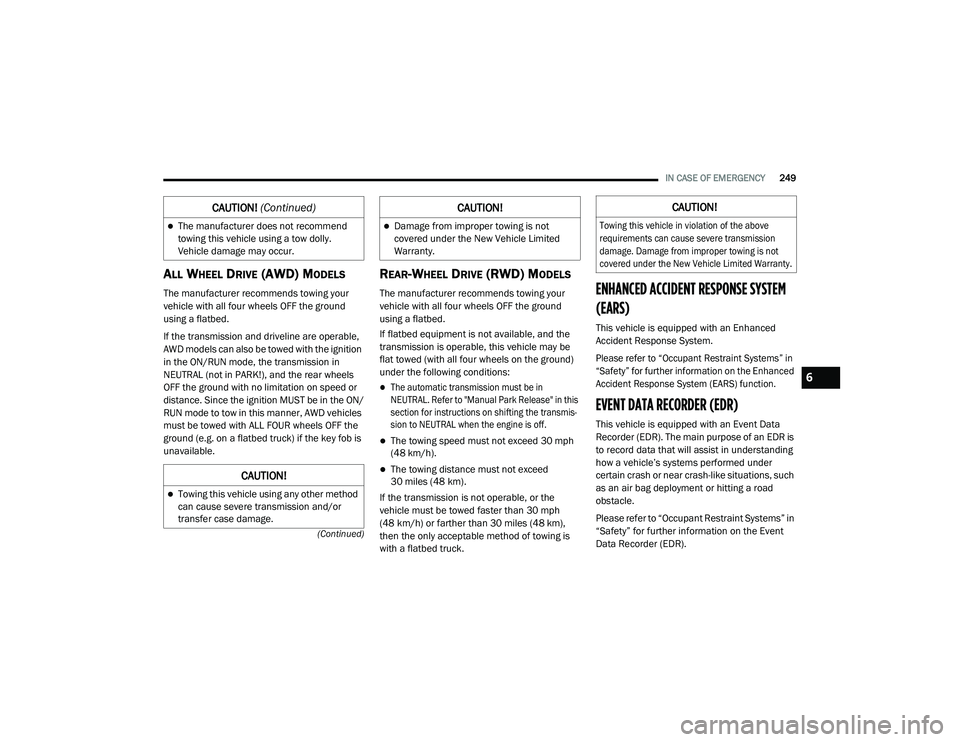
ALL WHEEL DRIVE (AWD) MODELS
The manufacturer recommends towing your
vehicle with all four wheels OFF the ground
using a flatbed.
If the transmission and driveline are operable,
AWD models can also be towed with the ignition
in the ON/RUN mode, the transmission in
NEUTRAL (not in PARK!), and the rear wheels
OFF the ground with no limitation on speed or
distance. Since the ignition MUST be in the ON/
RUN mode to tow in this manner, AWD vehicles
must be towed with ALL FOUR wheels OFF the
ground (e.g. on a flatbed truck) if the key fob is
unavailable.
REAR-WHEEL DRIVE (RWD) MODELS
The manufacturer recommends towing your
vehicle with all four wheels OFF the ground
using a flatbed.
If flatbed equipment is not available, and the
transmission is operable, this vehicle may be
flat towed (with all four wheels on the ground)
under the following conditions:
The automatic transmission must be in
NEUTRAL. Refer to "Manual Park Release" in this
section for instructions on shifting the transmis -
sion to NEUTRAL when the engine is off.
The towing speed must not exceed 30 mph
(48 km/h).
The towing distance must not exceed
30 miles (48 km).
If the transmission is not operable, or the
vehicle must be towed faster than 30 mph
(48 km/h) or farther than 30 miles (48 km),
then the only acceptable method of towing is
with a flatbed truck.
ENHANCED ACCIDENT RESPONSE SYSTEM
(EARS)
This vehicle is equipped with an Enhanced
Accident Response System.
Please refer to “Occupant Restraint Systems” in
“Safety” for further information on the Enhanced
Accident Response System (EARS) function.
EVENT DATA RECORDER (EDR)
This vehicle is equipped with an Event Data
Recorder (EDR). The main purpose of an EDR is
to record data that will assist in understanding
how a vehicle’s systems performed under
certain crash or near crash-like situations, such
as an air bag deployment or hitting a road
obstacle.
Please refer to “Occupant Restraint Systems” in
“Safety” for further information on the Event
Data Recorder (EDR).
The manufacturer does not recommend
towing this vehicle using a tow dolly.
Vehicle damage may occur.
CAUTION!
Towing this vehicle using any other method
can cause severe transmission and/or
transfer case damage.
CAUTION! (Continued)
Damage from improper towing is not
covered under the New Vehicle Limited
Warranty.
CAUTION!CAUTION!
Towing this vehicle in violation of the above
requirements can cause severe transmission
damage. Damage from improper towing is not
covered under the New Vehicle Limited Warranty.
6
20_LD_OM_EN_USC_t.book Page 249
Page 254 of 412
252SERVICING AND MAINTENANCE
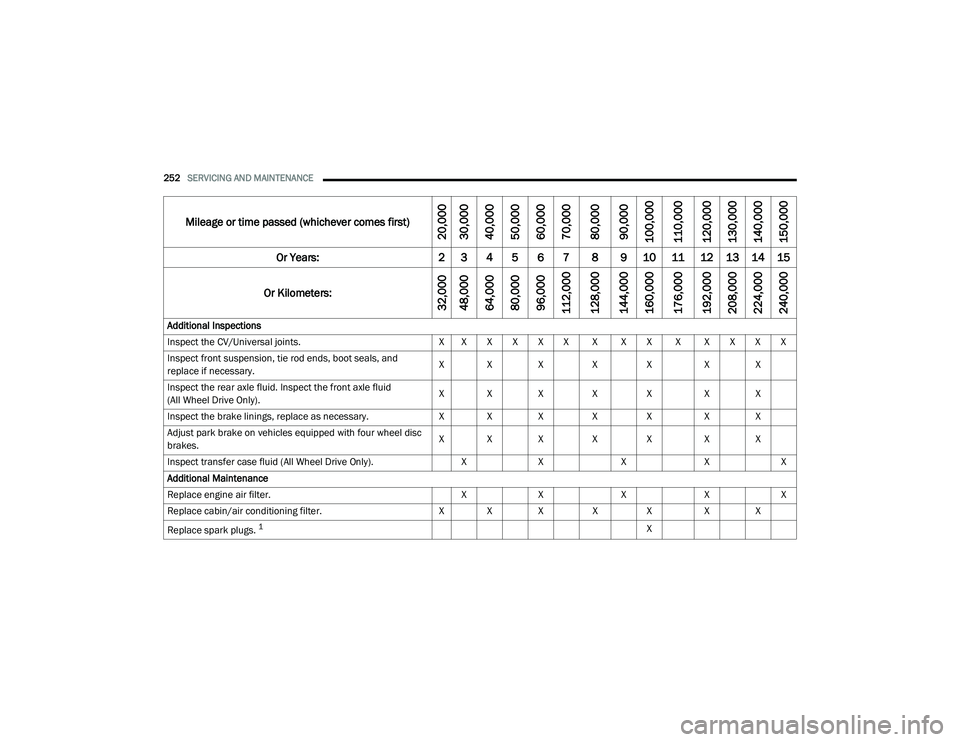
Mileage or time passed (whichever comes first)
20,000
30,000
40,000
50,000
60,000
70,000
80,000
90,000
100,000
110,000
120,000
130,000
140,000
150,000
Or Years: 2 3 4 5 6 7 8 9 10 11 12 13 14 15
Or Kilometers:
32,000
48,000
64,000
80,000
96,000
112,000
128,000
144,000
160,000
176,000
192,000
208,000
224,000
240,000
Additional Inspections
Inspect the CV/Universal joints. X X X X X X X X X X X X X X
Inspect front suspension, tie rod ends, boot seals, and
replace if necessary. X X X X X
X X
Inspect the rear axle fluid. Inspect the front axle fluid
(All Wheel Drive Only). X X X X X
X X
Inspect the brake linings, replace as necessary. X X X X XX X
Adjust park brake on vehicles equipped with four wheel disc
brakes. X X X X X
X X
Inspect transfer case fluid (All Wheel Drive Only). XX XXX
Additional Maintenance
Replace engine air filter. XX XXX
Replace cabin/air conditioning filter. X X X X XX X
Replace spark plugs.
1X
20_LD_OM_EN_USC_t.book Page 252