oil type DODGE CHARGER 2020 Owners Manual
[x] Cancel search | Manufacturer: DODGE, Model Year: 2020, Model line: CHARGER, Model: DODGE CHARGER 2020Pages: 412, PDF Size: 18.96 MB
Page 8 of 412
6
ENGINE COMPARTMENT .................................. 266 3.6L Engine ...............................................2665.7L Engine ...............................................2676.2L Supercharged Engine ......................268
6.4L Engine ...............................................269Checking Oil Level — 3.6L And 5.7L
Engine.........................................................270 Checking Oil Level — 6.2L Supercharged
Engine And 6.4L Engine ...........................270 Adding Washer Fluid..................................270Maintenance-Free Battery .......................271
Pressure Washing ......................................271
DEALER SERVICE .............................................. 272
Engine Oil .................................................. 272Engine Oil Filter ..........................................274Engine Air Cleaner Filter ...........................275
Air Conditioner Maintenance ...................275Accessory Drive Belt Inspection................276Body Lubrication ........................................277
Windshield Wiper Blades ..........................278
Exhaust System .........................................279
Cooling System .........................................280
Brake System ............................................284
Automatic Transmission ............................285
Rear Axle ....................................................286
RAISING THE VEHICLE ...................................... 286 TIRES....................................................................286
Tire Safety Information ............................. 286Tires — General Information .................... 293
Tire Types ................................................... 298
Spare Tires — If Equipped ......................... 298
Wheel And Wheel Trim Care .................... 300
Tire Chains And Traction Devices —
Non-SRT ..................................................... 301 Tire Chains And Traction Devices — SRT.. 302
Tire Rotation Recommendations —
Non-SRT ..................................................... 302
Tire Rotation Recommendations — SRT .... 303
DEPARTMENT OF TRANSPORTATION UNIFORM
TIRE QUALITY GRADES .....................................303
Treadwear .................................................. 303
Traction Grades ......................................... 303
Temperature Grades ................................. 304
VEHICLE STORAGE .............................................304
BODYWORK ........................................................ 304
Protection From Atmospheric Agents....... 304
Body And Underbody Maintenance .......... 305Preserving The Bodywork .......................... 305
INTERIORS ......................................................... 306
Seats And Fabric Parts .............................. 306
Plastic And Coated Parts ........................... 306
Leather Parts ............................................. 307
Glass Surfaces .......................................... 307
TECHNICAL SPECIFICATIONS
IDENTIFICATION DATA ...................................... 308Vehicle Identification Number .................. 308
BRAKE SYSTEM ................................................ 308
WHEEL AND TIRE TORQUE
SPECIFICATIONS ................................................ 308
Torque Specifications................................ 308
FUEL REQUIREMENTS ...................................... 309
3.6L Engine ................................................ 309
5.7L Engine ................................................ 310
6.2L And 6.4L Engine................................ 310
Reformulated Gasoline ............................ 310Materials Added To Fuel ........................... 310
Gasoline/Oxygenate Blends ..................... 311
Do Not Use E-85 In Non-Flex Fuel
Vehicles ...................................................... 311 CNG And LP Fuel System Modifications .. 312MMT In Gasoline........................................ 312
Fuel System Cautions................................ 312
Carbon Monoxide Warnings...................... 312
FLUID CAPACITIES — NON-SRT ....................... 313
FLUID CAPACITIES — SRT ................................ 314
FLUIDS AND LUBRICANTS — NON-SRT .......... 315 Engine ........................................................ 315
Chassis ....................................................... 317
FLUIDS AND LUBRICANTS — SRT ................... 318
Engine ........................................................ 318
Chassis ....................................................... 320
20_LD_OM_EN_USC_t.book Page 6
Page 221 of 412
IN CASE OF EMERGENCY219
REPLACING EXTERIOR BULBS
Front Low/High Beam Headlamp — Models
With Halogen Headlamps
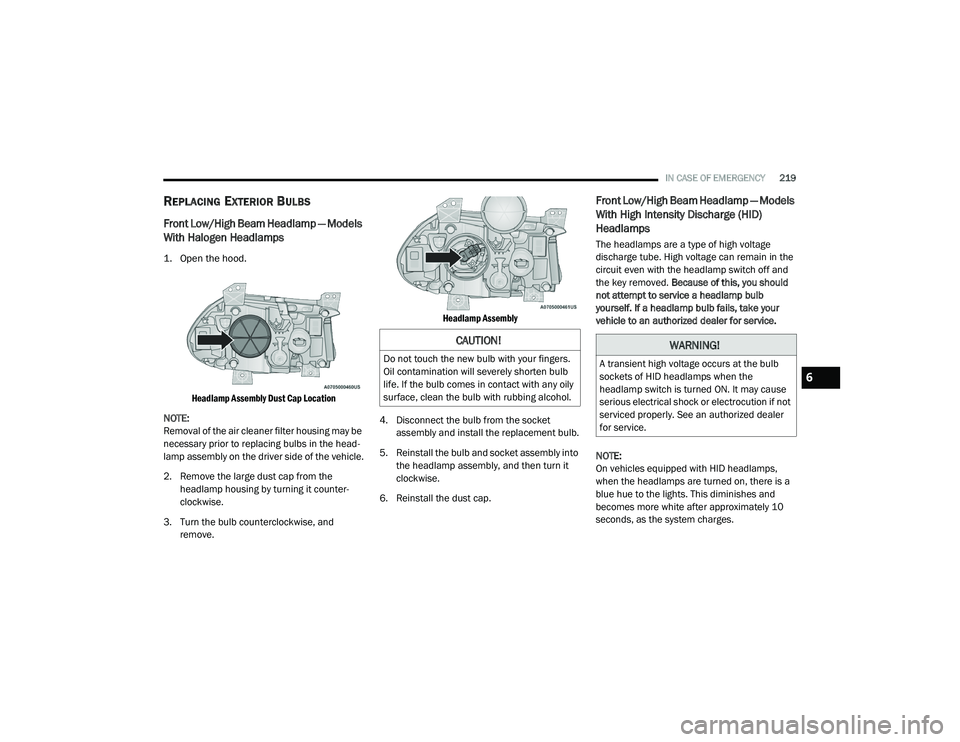
1. Open the hood.
Headlamp Assembly Dust Cap Location
NOTE:
Removal of the air cleaner filter housing may be
necessary prior to replacing bulbs in the head -
lamp assembly on the driver side of the vehicle.
2. Remove the large dust cap from the headlamp housing by turning it counter -
clockwise.
3. Turn the bulb counterclockwise, and remove.
Headlamp Assembly
4. Disconnect the bulb from the socket assembly and install the replacement bulb.
5. Reinstall the bulb and socket assembly into the headlamp assembly, and then turn it
clockwise.
6. Reinstall the dust cap.
Front Low/High Beam Headlamp — Models
With High Intensity Discharge (HID)
Headlamps
The headlamps are a type of high voltage
discharge tube. High voltage can remain in the
circuit even with the headlamp switch off and
the key removed. Because of this, you should
not attempt to service a headlamp bulb
yourself. If a headlamp bulb fails, take your
vehicle to an authorized dealer for service.
NOTE:
On vehicles equipped with HID headlamps,
when the headlamps are turned on, there is a
blue hue to the lights. This diminishes and
becomes more white after approximately 10
seconds, as the system charges.
CAUTION!
Do not touch the new bulb with your fingers.
Oil contamination will severely shorten bulb
life. If the bulb comes in contact with any oily
surface, clean the bulb with rubbing alcohol.
WARNING!
A transient high voltage occurs at the bulb
sockets of HID headlamps when the
headlamp switch is turned ON. It may cause
serious electrical shock or electrocution if not
serviced properly. See an authorized dealer
for service.
6
20_LD_OM_EN_USC_t.book Page 219
Page 252 of 412
250
SERVICING AND MAINTENANCE
SCHEDULED SERVICING
3.6L AND 5.7L ENGINES
These vehicles are equipped with an automatic
oil change indicator system. The oil change
indicator system will remind you that it is time to
take your vehicle in for scheduled maintenance.
Based on engine operation conditions, the oil
change indicator message will illuminate. This
means that service is required for your vehicle.
Operating conditions such as frequent
short-trips, trailer tow, and extremely hot or cold
ambient temperatures will influence when the
“Change Oil” or “Oil Change Required” message
is displayed. Severe Operating Conditions can
cause the change oil message to illuminate as
early as 3,500 miles (5,600 km) since last
reset. Have your vehicle serviced as soon as
possible, within the next 500 miles (805 km).
The “Oil Change Required” message will be
displayed in the instrument cluster and a single
chime will sound, indicating that an oil change
is necessary.An authorized dealer will reset the oil change
indicator message after completing the
scheduled oil change. If a scheduled oil change
is performed by someone other than an
authorized dealer, the message can be reset by
referring to “Instrument Cluster Display” in
“Getting To Know Your Instrument Panel” for
further information.
NOTE:
Under no circumstances should oil change
intervals exceed 10,000 miles (16,000 km),
12 months or 350 hours of engine run time,
whichever comes first. The 350 hours of engine
run or idle time is generally only a concern for
fleet customers.
Severe Duty All Models
Change Engine Oil at 4,000 miles (6,500 km) or
350 hours of engine run time if the vehicle is
operated in a dusty and off-road environment,
or is operated predominantly at idle or only very
low engine RPM. This type of vehicle use is
considered Severe Duty.
Once A Month Or Before A Long Trip:
Check engine oil level.
Check windshield washer fluid level.
Check tire pressure and look for unusual
wear or damage. Rotate tires at the first sign
of irregular wear, even if it occurs before your
next scheduled service.
Check the fluid levels of the coolant reservoir,
brake master cylinder, and power steering
(if equipped) and fill as needed.
Check function of all interior and exterior
lights.
Maintenance Plan — 3.6L And 5.7L
Required Maintenance Intervals:
Refer to the maintenance schedules on the
following page for the required maintenance
intervals. More frequent maintenance may be
needed in severe conditions, such as dusty
areas and very short trip driving. In some
extreme conditions, additional maintenance
not specified in the maintenance schedule may
be required.
20_LD_OM_EN_USC_t.book Page 250
Page 256 of 412
254SERVICING AND MAINTENANCE
Heavy Duty Use Of The Vehicle
Change engine oil at 4,000 miles (6,500 km) or
350 hours of engine run time if the vehicle is
operated in a dusty and off road environment or
is operated predominately at idle or only very
low engine RPM. This type of vehicle use is
considered Severe Duty.
6.2L SUPERCHARGED AND 6.4L
E
NGINES
The scheduled maintenance services listed in
this manual must be done at the times or
mileages specified to protect your vehicle
warranty and ensure the best vehicle
performance and reliability. More frequent
maintenance may be needed for vehicles in
severe operating conditions, such as dusty
areas and very short trip driving. Inspection and
service should also be done anytime a
malfunction is suspected.
The oil change indicator system will remind you
that it is time to take your vehicle in for
scheduled maintenance.
An “Oil Change Required” message will be
displayed in the instrument cluster and a single
chime will sound, indicating that an oil change
is necessary. Based on engine operation conditions, the oil
change indicator message will illuminate. This
means that service is required for your vehicle.
Have your vehicle serviced as soon as possible,
within the next 500 miles (805 km).
NOTE:
The oil change indicator message will not
monitor the time since the last oil change.
Change your vehicle's oil if it has been six
months since your last oil change, even if the
oil change indicator message is NOT illumi-
nated.
Change your engine oil more often if you drive
your vehicle off-road/track usage for an
extended period of time.
Under no circumstances should oil change
intervals exceed 6,000 miles (10,000 km) or
6 months, whichever comes first.
WARNING!
You can be badly injured working on or
around a motor vehicle. Do only service
work for which you have the knowledge and
the right equipment. If you have any doubt
about your ability to perform a service job,
take your vehicle to a competent mechanic.
Failure to properly inspect and maintain
your vehicle could result in a component
malfunction and effect vehicle handling
and performance. This could cause an
accident.
20_LD_OM_EN_USC_t.book Page 254
Page 272 of 412
270SERVICING AND MAINTENANCE
CHECKING OIL LEVEL — 3.6L AND 5.7L
E
NGINE
To ensure proper engine lubrication, the engine
oil must be maintained at the correct level.
Check the oil level at regular intervals, such as
every month. The best time to check the engine
oil level is about five minutes after a fully
warmed up engine is shut off.
Checking the oil while the vehicle is on level
ground will improve the accuracy of the oil level
readings.
There are three possible dipstick types:
Crosshatched zone.
Crosshatched zone marked SAFE.
Crosshatched zone marked with MIN at the
low end of the range and MAX at the high end
of the range.
NOTE:
Always maintain the oil level within the cross -
hatch markings on the dipstick.
Adding 1 Quart (1.0 Liter) of oil when the
reading is at the low end of the dipstick range
will raise the oil level to the high end of the
range marking.
CHECKING OIL LEVEL — 6.2L
S
UPERCHARGED ENGINE AND 6.4L
E
NGINE
To ensure proper engine lubrication, the engine
oil must be maintained at the correct level.
Check the oil level at regular intervals, such as
once a month. The best time to check the
engine oil level is about five minutes after a fully
warmed engine is shut off.
Checking the oil while the vehicle is on level
ground will improve the accuracy of the oil level
readings. Maintain the oil level in the “SAFE”
range. Adding 1.0 Quart (1 Liter) of oil when the
reading is at the bottom of the “SAFE” range will
result in an oil level at the top of the “SAFE”
range on these engines.
ADDING WASHER FLUID
The windshield washer fluid reservoir is located
in the front of the engine compartment. Be sure
to check the fluid level at regular intervals. Fill the
reservoir with windshield washer solvent (not
radiator antifreeze) and operate the system for a
few seconds to flush out the residual water.
When refilling the washer fluid reservoir, apply
some washer fluid to a cloth or towel and wipe
the wiper blades clean. This will help blade
performance.
To prevent freeze-up of your windshield washer
system in cold weather, select a solution or
mixture that meets or exceeds the temperature
range of your climate. This rating information
can be found on most washer fluid containers.
The fluid reservoir will hold nearly 1 Gallon
(4 Liters) of washer fluid when the message
“Low Washer Fluid” appears in the instrument
cluster.
CAUTION!
Overfilling or underfilling the crankcase will
cause aeration or loss of oil pressure. This
could damage your engine.
CAUTION!
Overfilling or underfilling the crankcase will
cause aeration or loss of oil pressure. This
could damage your engine.
20_LD_OM_EN_USC_t.book Page 270
Page 274 of 412
272SERVICING AND MAINTENANCE
DEALER SERVICE
An authorized dealer has the qualified service
personnel, special tools, and equipment to
perform all service operations in an expert
manner. Service Manuals are available which
include detailed service information for your
vehicle. Refer to these Service Manuals before
attempting any procedure yourself.
NOTE:
Intentional tampering with emissions control
systems may void your warranty and could
result in civil penalties being assessed against
you.
ENGINE OIL
Change Engine Oil — 3.6L And 5.7L Engine
The oil change indicator system will remind you
that it is time to take your vehicle in for
scheduled maintenance. Refer to “Scheduled
Servicing” in this section for the proper
maintenance intervals.
NOTE:
Under no circumstances should oil change
intervals exceed 10,000 miles (16,000 km),
12 months or 350 hours of engine run time,
whichever comes first. The 350 hours of engine
run or idle time is generally only a concern for
fleet customers.
Change Engine Oil — 6.2L And 6.4L Engine
The oil change indicator system will remind you
that it is time to take your vehicle in for
scheduled maintenance. Refer to “Scheduled
Servicing” in this section for the proper
maintenance intervals.
NOTE:
Under no circumstances should oil change
intervals exceed 6,000 miles (10,000 km) or
6 months, whichever occurs first.
Engine Oil Selection — 3.6L And 5.7L
Engine
For best performance and maximum protection
under all types of operating conditions, the
manufacturer only recommends engine oils
that are API Certified and meet the
requirements of FCA Material Standard
MS-6395.
NOTE:
Hemi engines (5.7L) at times can tick right after
startup and then quiet down after approxi -
mately 30 seconds. This is normal and will not
harm the engine. This characteristic can be
caused by short drive cycles. For example, if the
vehicle is started then shut off after driving a
short distance. Upon restarting, you may experi -
ence a ticking sound. Other causes could be if
the vehicle is unused for an extended period of
time, incorrect oil, extended oil changes or
extended idling. If the engine continues to tick
or if the Malfunction Indicator Light (MIL) comes
on, see the nearest authorized dealer.
WARNING!
You can be badly injured working on or
around a motor vehicle. Only do service work
for which you have the knowledge and the
proper equipment. If you have any doubt
about your ability to perform a service job,
take your vehicle to a competent mechanic.
20_LD_OM_EN_USC_t.book Page 272
Page 275 of 412
SERVICING AND MAINTENANCE273
Engine Oil Selection — 6.2L And 6.4L
Engine
For best performance and maximum protection
under all types of operating conditions, the
manufacturer only recommends full synthetic
engine oils that meet the American Petroleum
Institute (API) categories of SN.
The manufacturer recommends the use of a full
synthetic SAE 0W-40 engine oil or equivalent
meeting the requirements of FCA Material
Standard MS-12633.
NOTE:
Hemi engines at times can tick right after
startup and then quiet down after approxi -
mately 30 seconds. This is normal and will not
harm the engine. This characteristic can be
caused by short drive cycles. For example, if the
vehicle is started then shut off after driving a
short distance. Upon restarting, you may experi -
ence a ticking sound. Other causes could be if
the vehicle is unused for an extended period of
time, incorrect oil, extended oil changes or
extended idling. If the engine continues to tick
or if the Malfunction Indicator Light (MIL) comes
on, see the nearest authorized dealer.
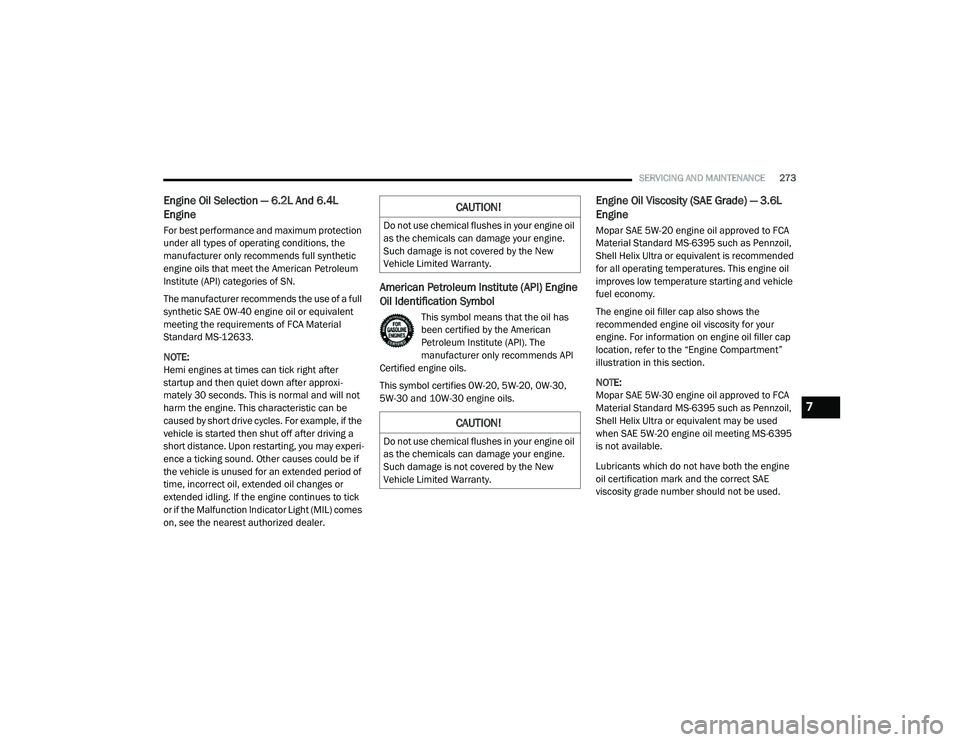
American Petroleum Institute (API) Engine
Oil Identification Symbol
This symbol means that the oil has
been certified by the American
Petroleum Institute (API). The
manufacturer only recommends API
Certified engine oils.
This symbol certifies 0W-20, 5W-20, 0W-30,
5W-30 and 10W-30 engine oils.
Engine Oil Viscosity (SAE Grade) — 3.6L
Engine
Mopar SAE 5W-20 engine oil approved to FCA
Material Standard MS-6395 such as Pennzoil,
Shell Helix Ultra or equivalent is recommended
for all operating temperatures. This engine oil
improves low temperature starting and vehicle
fuel economy.
The engine oil filler cap also shows the
recommended engine oil viscosity for your
engine. For information on engine oil filler cap
location, refer to the “Engine Compartment”
illustration in this section.
NOTE:
Mopar SAE 5W-30 engine oil approved to FCA
Material Standard MS-6395 such as Pennzoil,
Shell Helix Ultra or equivalent may be used
when SAE 5W-20 engine oil meeting MS-6395
is not available.
Lubricants which do not have both the engine
oil certification mark and the correct SAE
viscosity grade number should not be used.
CAUTION!
Do not use chemical flushes in your engine oil
as the chemicals can damage your engine.
Such damage is not covered by the New
Vehicle Limited Warranty.
CAUTION!
Do not use chemical flushes in your engine oil
as the chemicals can damage your engine.
Such damage is not covered by the New
Vehicle Limited Warranty.
7
20_LD_OM_EN_USC_t.book Page 273
Page 276 of 412
274SERVICING AND MAINTENANCE
Engine Oil Viscosity (SAE Grade) — 5.7L
Engine
Mopar SAE 5W-20 engine oil approved to FCA
Material Standard MS-6395 such as Pennzoil,
Shell Helix Ultra or equivalent is recommended
for all operating temperatures. This engine oil
improves low temperature starting and vehicle
fuel economy.
The engine oil filler cap also shows the
recommended engine oil viscosity for your
engine. For information on engine oil filler cap
location, refer to the “Engine Compartment”
illustration in this section.
NOTE:
Vehicles equipped with a 5.7L engine must use
SAE 5W-20 oil. Failure to do so may result in
improper operation of the Fuel Saver Tech -
nology. Refer to “Fuel Saver Technology – If
Equipped” in “Starting And Operating” for
further information.
Lubricants which do not have both the engine
oil certification mark and the correct SAE
viscosity grade number should not be used.
Engine Oil Viscosity — 6.2L And 6.4L
Engine
Use Pennzoil Ultra Platinum 0W-40 engine or
equivalent Mopar oil meeting the FCA Material
Standard MS-12633 for use in all operating
temperatures.
The engine oil filler cap also shows the
recommended engine oil viscosity for your
engine. For information on engine oil filler cap
location, refer to “Engine Compartment” in this
section for further information.
Synthetic Engine Oils
You may use synthetic engine oils provided the
recommended oil quality requirements are met,
and the recommended maintenance intervals
for oil and filter changes are followed.
Synthetic engine oils which do not have both the
engine oil certification mark and the correct SAE
viscosity grade number should not be used.
Materials Added To Engine Oil
The manufacturer strongly recommends
against the addition of any additives (other than
leak detection dyes) to the engine oil. Engine oil
is an engineered product and its performance
may be impaired by supplemental additives.
Disposing Of Used Engine Oil And Oil
Filters
Care should be taken in disposing of used
engine oil and oil filters from your vehicle. Used
oil and oil filters, indiscriminately discarded, can
present a problem to the environment. Contact
an authorized dealer, service station or
governmental agency for advice on how and
where used oil and oil filters can be safely
discarded in your area.
ENGINE OIL FILTER
The engine oil filter should be replaced with a
new filter at every engine oil change.
Engine Oil Filter Selection
This manufacturer's engines have a full-flow
type disposable oil filter. Use a filter of this type
for replacement. The quality of replacement
filters varies considerably. Only high quality
filters should be used to ensure most efficient
service. Mopar engine oil filters are high quality
oil filters and are recommended.
20_LD_OM_EN_USC_t.book Page 274
Page 286 of 412
284SERVICING AND MAINTENANCE
(Continued)
Keep the front of the radiator clean. If your
vehicle is equipped with air conditioning,
keep the front of the condenser clean.
Do not change the thermostat for Summer or
Winter operation. If replacement is ever
necessary, install ONLY the correct type ther-
mostat. Other designs may result in unsatis -
factory engine coolant (antifreeze)
performance, poor gas mileage, and
increased emissions.
BRAKE SYSTEM
In order to ensure brake system performance,
all brake system components should be
inspected periodically. Refer to the
“Maintenance Plan” in this section for the
proper maintenance intervals.
Fluid Level Check — Brake Master Cylinder
Check the fluid level in the master cylinder
immediately if the brake system warning light
indicates system failure.
Check the fluid level in the master cylinder
when performing underhood services.
Clean the top of the master cylinder area before
removing the cap. Add fluid to bring the level up
to the top of the “FULL” mark on the side of the
master cylinder reservoir.
Overfilling of fluid is not recommended because
it may cause leaking in the system.
Add enough fluid to bring the level up to the
requirements described on the brake fluid
reservoir. With disc brakes, fluid level can be
expected to fall as the brake pads wear.
However, low fluid level may be caused by a
leak and a checkup may be needed.
Use only brake fluid that has been
recommended by the manufacturer, and has
been kept in a tightly closed container to avoid
contamination from foreign matter or moisture.
Refer to “Fluids And Lubricants” in “Technical
Specifications” for further information.
WARNING!
Riding the brakes can lead to brake failure
and possibly a collision. Driving with your foot
resting or riding on the brake pedal can result
in abnormally high brake temperatures,
excessive lining wear, and possible brake
damage. You would not have your full braking
capacity in an emergency.
WARNING!
Use only manufacturer's recommended
brake fluid. Refer to “Fluids And Lubri -
cants” in “Technical Specifications” for
further information. Using the wrong type
of brake fluid can severely damage your
brake system and/or impair its perfor -
mance. The proper type of brake fluid for
your vehicle is also identified on the orig -
inal factory installed hydraulic master
cylinder reservoir.
To avoid contamination from foreign
matter or moisture, use only new brake
fluid or fluid that has been in a tightly
closed container. Keep the master
cylinder reservoir cap secured at all times.
Brake fluid in a open container absorbs
moisture from the air resulting in a lower
boiling point. This may cause it to boil
unexpectedly during hard or prolonged
braking, resulting in sudden brake failure.
This could result in a collision.
20_LD_OM_EN_USC_t.book Page 284
Page 309 of 412
SERVICING AND MAINTENANCE307
LEATHER PARTS
Mopar Total Clean is specifically recommended
for leather upholstery.
Your leather upholstery can be best preserved by
regular cleaning with a damp soft cloth. Small
particles of dirt can act as an abrasive and
damage the leather upholstery and should be
removed promptly with a damp cloth. Stubborn
soils can be removed easily with a soft cloth and
Mopar Total Clean. Care should be taken to avoid
soaking your leather upholstery with any liquid.
Please do not use polishes, oils, cleaning fluids,
solvents, detergents, or ammonia-based
cleaners to clean your leather upholstery.
Application of a leather conditioner is not
required to maintain the original condition.
NOTE:
If equipped with light colored leather, it tends to
show any foreign material, dirt, and fabric dye
transfer more so than darker colors. The leather
is designed for easy cleaning, and FCA recom
-
mends Mopar total care leather cleaner applied
on a cloth to clean the leather seats as needed.
GLASS SURFACES
All glass surfaces should be cleaned on a
regular basis with Mopar Glass Cleaner, or any
commercial household-type glass cleaner.
Never use an abrasive type cleaner. Use caution
when cleaning the inside rear window equipped
with electric defrosters or windows equipped
with radio antennas. Do not use scrapers or
other sharp instruments that may scratch the
elements.
When cleaning the rear view mirror, spray
cleaner on the towel or cloth that you are using.
Do not spray cleaner directly on the mirror.
CAUTION!
Do not use Alcohol and Alcohol-based and/or
Ketone based cleaning products to clean
leather upholstery, as damage to the
upholstery may result.
7
20_LD_OM_EN_USC_t.book Page 307