mirror DODGE CHARGER 2021 Owners Manual
[x] Cancel search | Manufacturer: DODGE, Model Year: 2021, Model line: CHARGER, Model: DODGE CHARGER 2021Pages: 320, PDF Size: 20.61 MB
Page 4 of 320
2
INTRODUCTION
SYMBOLS KEY ...........................................................9
VEHICLE MODIFICATIONS/ALTERATIONS .............9
SYMBOL GLOSSARY.................................................9
GETTING TO KNOW YOUR VEHICLE
KEYS ....................................................................... 13 Key Fob .............................................................13
SENTRY KEY ........................................................... 15
IGNITION SWITCH .................................................. 16
Keyless Enter ‘n Go™ Ignition .........................16
REMOTE START — IF EQUIPPED .......................... 17
How To Use Remote Start ................................17
To Exit Remote Start Mode .............................18
Remote Start Front Defrost
Activation — If Equipped ..................................19
Remote Start Comfort Systems —
If Equipped........................................................19
Remote Start Windshield Wiper De–Icer
Activation — If Equipped ..................................19
Remote Start Cancel Message —
If Equipped........................................................19
VEHICLE SECURITY SYSTEM — IF EQUIPPED .... 20
To Arm The System ..........................................20
To Disarm The System .....................................20
Rearming Of The System .................................20
Security System Manual Override ...................20
Tamper Alert .....................................................20 DOORS ....................................................................21
Manual Door Locks ..........................................21
Power Door Locks ...........................................21
Keyless Enter ‘n Go™ — Passive Entry ...........22
Automatic Unlock Doors On Exit......................24
Automatic Door Locks —
If Equipped........................................................24
Child-Protection Door Lock System —
Rear Doors .......................................................24
STEERING WHEEL ..................................................25
Manual Tilt/Telescoping Steering
Column — If Equipped .....................................25
Power Tilt/Telescoping Steering
Column — If Equipped .....................................25
Heated Steering Wheel —
If Equipped........................................................25
UCONNECT VOICE RECOGNITION ........................26
Introducing Voice Recognition.........................26
Basic Voice Commands ...................................27
Get Started .......................................................27
Additional Information .....................................27
DRIVER MEMORY SETTINGS — IF EQUIPPED ....27
Programming The Memory Feature ................28
Linking And Unlinking The Key Fob To
Memory .............................................................28
Memory Position Recall ...................................29
SEATS ......................................................................29
Manual Adjustment
(Front Seats) — If Equipped .............................29 Manual Adjustment (Rear Seats).................... 30
Power Adjustment (Front Seats) —
If Equipped .......................................................31
Heated Seats — If Equipped ............................ 32
Front Ventilated Seats —
If Equipped .......................................................34
Head Restraints .............................................. 34
MIRRORS ............................................................... 36
Inside Rearview Mirror..................................... 36
Illuminated Vanity Mirrors ............................... 36
Outside Mirrors.................................................37
Driver's Outside Automatic Dimming
Mirror — If Equipped......................................... 37
Power Mirrors ................................................... 37
Heated Mirrors — If Equipped ......................... 38
Tilt Side Mirrors In Reverse —
If Equipped .......................................................38
UNIVERSAL GARAGE DOOR OPENER
(HOMELINK®) ....................................................... 38
Before You Begin Programming
HomeLink® ...................................................... 38
Erasing All The HomeLink® Channels ............ 39
Identifying Whether You Have A Rolling
Code Or Non-Rolling Code Device ................... 39
Programming HomeLink® To A Garage
Door Opener ..................................................... 39
Programming HomeLink® To A
Miscellaneous Device ...................................... 40
Reprogramming A Single HomeLink®
Button ............................................................... 40
Canadian/Gate Operator Programming ......... 40
21_LD_OM_EN_USC_t.book Page 2
Page 7 of 320
5
PERFORMANCE PAGES ...................................... 167 Home .............................................................. 168
Timers ............................................................ 170
Gauges ........................................................... 172G-Force ........................................................... 173Engine ............................................................ 173
Dynamometer (Dyno) .................................... 174
DODGE DRIVE MODES — IF EQUIPPED............. 174
Performance Control —
If Equipped..................................................... 174
RADIO OPERATION AND MOBILE PHONES...... 179
Regulatory And Safety Information .............. 179
SAFETY
SAFETY FEATURES .............................................. 180 Anti-Lock Brake System (ABS) ..................... 180
Electronic Brake Control (EBC) System ....... 181
AUXILIARY DRIVING SYSTEMS .......................... 185
Blind Spot Monitoring (BSM) —
If Equipped..................................................... 185
Forward Collision Warning (FCW) With
Mitigation Operation ..................................... 188
Tire Pressure Monitoring
System (TPMS) .............................................. 190 OCCUPANT RESTRAINT SYSTEMS ................... 193
Occupant Restraint Systems Features ....... 193
Important Safety Precautions ...................... 193Seat Belt Systems ........................................ 194Supplemental Restraint
Systems (SRS) ............................................... 200
Child Restraints ............................................. 208
SAFETY TIPS ....................................................... 220
Transporting Passengers .............................. 220Transporting Pets ......................................... 220
Safety Checks You Should Make Inside
The Vehicle ................................................... 220
Periodic Safety Checks You Should Make
Outside The Vehicle ...................................... 221
Exhaust Gas................................................... 222
Carbon Monoxide Warnings ......................... 222
IN CASE OF EMERGENCY
HAZARD WARNING FLASHERS ........................ 223
ASSIST AND SOS MIRROR — IF EQUIPPED ..... 223
JACKING AND TIRE CHANGING ......................... 226 Preparations For Jacking .............................. 226Jack Location/Spare Tire Stowage .............. 227Jacking Instructions ...................................... 228 TIRE SERVICE KIT — IF EQUIPPED ..................... 231
Tire Service Kit Storage ................................ 231Tire Service Kit Components And
Operation ....................................................... 231Tire Service Kit Usage Precautions .............. 232
Sealing A Tire With Tire Service Kit .............. 233
JUMP STARTING ................................................. 236
Preparations For Jump Start ........................ 236Jump Starting Procedure .............................. 237
REFUELING IN EMERGENCY .............................. 238
IF YOUR ENGINE OVERHEATS ........................... 239
MANUAL PARK RELEASE —
8-SPEED TRANSMISSION ................................... 240
FREEING A STUCK VEHICLE ............................... 242
TOWING A DISABLED VEHICLE .......................... 243 All Wheel Drive (AWD) Models...................... 244
Rear Wheel Drive (RWD) Models ................ 244
ENHANCED ACCIDENT RESPONSE
SYSTEM (EARS) ................................................... 244
EVENT DATA RECORDER (EDR) ......................... 244
21_LD_OM_EN_USC_t.book Page 5
Page 29 of 320
GETTING TO KNOW YOUR VEHICLE27
BASIC VOICE COMMANDS
The basic Voice Commands below can be given at
any point while using your Uconnect system.
Push the VR button . After the beep, say:
“Cancel ” to stop a current voice session
“Help ” to hear a list of suggested Voice
Commands
“ Repeat ” to listen to the system prompts again
Notice the visual cues that inform you of your VR
system’s status. Cues appear on the touchscreen.
GET STARTED
The Voice Recognition (VR) button is used to
activate/deactivate your Voice Recognition system.
Helpful hints for using Voice Recognition:
Reduce background noise. Wind and passenger
conversations are examples of noise that may
impact recognition.
Speak clearly at a normal pace and volume
while facing straight ahead.
Each time you give a Voice Command, you must first
push the Voice Recognition (VR) button, wait until
after the beep, then say your Voice Command.
You can interrupt the help message or system
prompts by pushing the VR button and saying a
Voice Command from the current category.
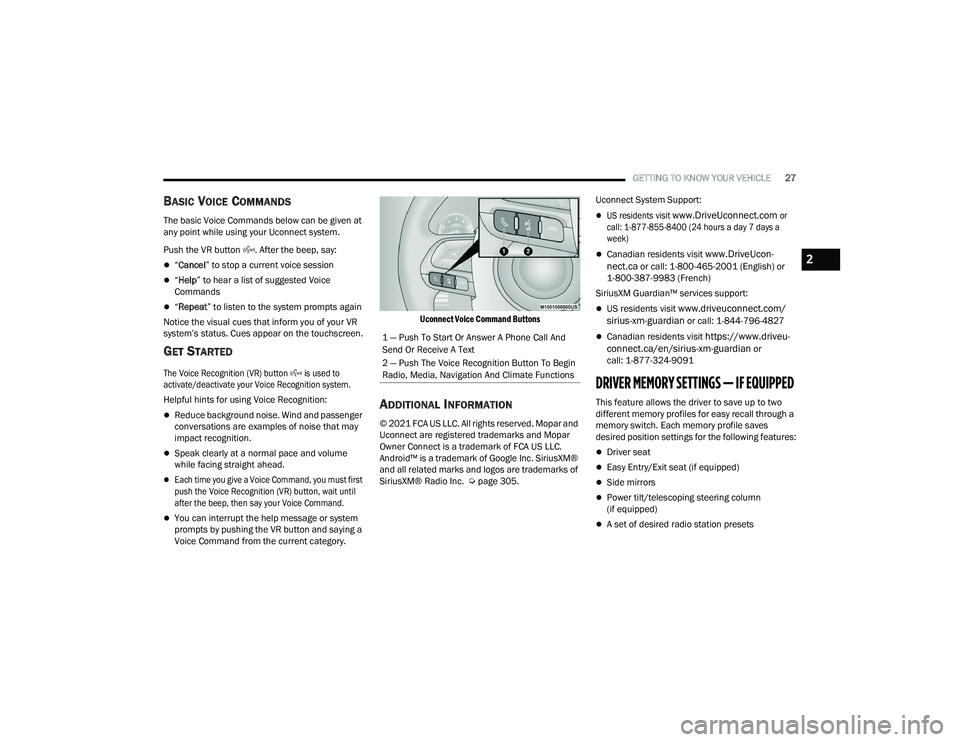
Uconnect Voice Command Buttons
ADDITIONAL INFORMATION
© 2021 FCA US LLC. All rights reserved. Mopar and
Uconnect are registered trademarks and Mopar
Owner Connect is a trademark of FCA US LLC.
Android™ is a trademark of Google Inc. SiriusXM®
and all related marks and logos are trademarks of
SiriusXM® Radio Inc. Ú
page 305. Uconnect System Support:
US residents visit
www.DriveUconnect.com
or
call: 1-877-855-8400 (24 hours a day 7 days a
week)
Canadian residents visit www.DriveUcon -
nect.ca or call: 1-800-465-2001 (English) or
1-800-387-9983 (French)
SiriusXM Guardian™ services support:
US residents visit www.driveuconnect.com/
sirius-xm-guardian or call: 1-844-796-4827
Canadian residents visit https://www.driveu -
connect.ca/en/sirius-xm-guardian or
call: 1-877-324-9091
DRIVER MEMORY SETTINGS — IF EQUIPPED
This feature allows the driver to save up to two
different memory profiles for easy recall through a
memory switch. Each memory profile saves
desired position settings for the following features:
Driver seat
Easy Entry/Exit seat (if equipped)
Side mirrors
Power tilt/telescoping steering column
(if equipped)
A set of desired radio station presets
1 — Push To Start Or Answer A Phone Call And
Send Or Receive A Text
2 — Push The Voice Recognition Button To Begin
Radio, Media, Navigation And Climate Functions
2
21_LD_OM_EN_USC_t.book Page 27
Page 30 of 320
28GETTING TO KNOW YOUR VEHICLE
NOTE:
Your vehicle is equipped with two key fobs, each
can be linked to either memory position 1 or 2.
Be sure to program the radio presets prior to
programming the memory settings.
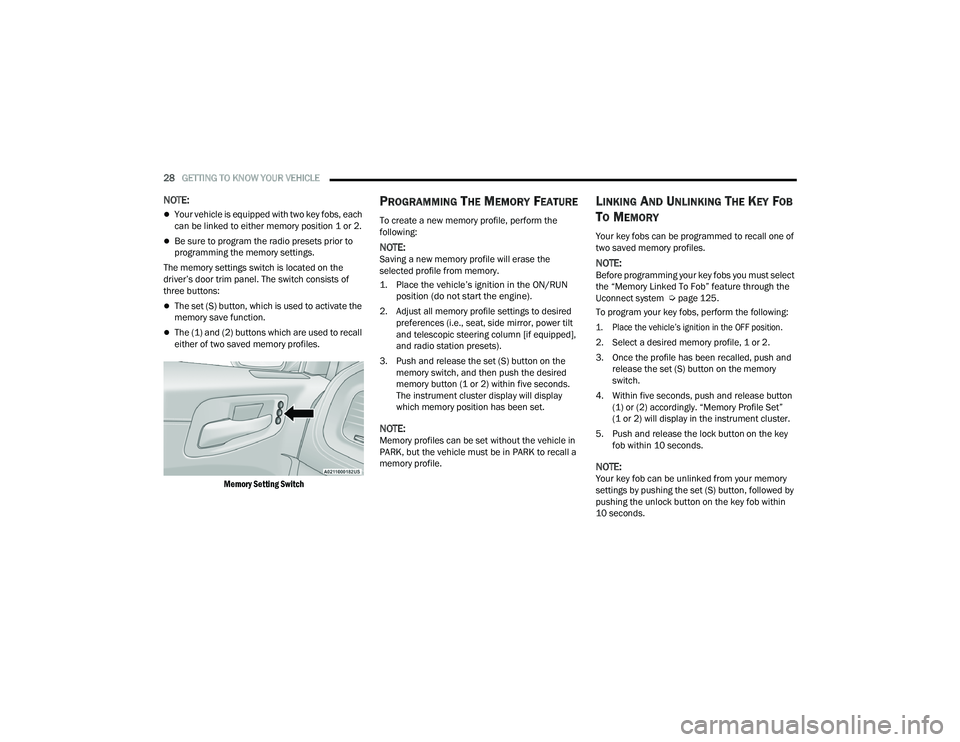
The memory settings switch is located on the
driver’s door trim panel. The switch consists of
three buttons:
The set (S) button, which is used to activate the
memory save function.
The (1) and (2) buttons which are used to recall
either of two saved memory profiles.
Memory Setting Switch
PROGRAMMING THE MEMORY FEATURE
To create a new memory profile, perform the
following:
NOTE:Saving a new memory profile will erase the
selected profile from memory.
1. Place the vehicle’s ignition in the ON/RUN position (do not start the engine).
2. Adjust all memory profile settings to desired preferences (i.e., seat, side mirror, power tilt
and telescopic steering column [if equipped],
and radio station presets).
3. Push and release the set (S) button on the memory switch, and then push the desired
memory button (1 or 2) within five seconds.
The instrument cluster display will display
which memory position has been set.
NOTE:Memory profiles can be set without the vehicle in
PARK, but the vehicle must be in PARK to recall a
memory profile.
LINKING AND UNLINKING THE KEY FOB
T
O MEMORY
Your key fobs can be programmed to recall one of
two saved memory profiles.
NOTE:Before programming your key fobs you must select
the “Memory Linked To Fob” feature through the
Uconnect system Ú page 125.
To program your key fobs, perform the following:
1. Place the vehicle’s ignition in the OFF position.
2. Select a desired memory profile, 1 or 2.
3. Once the profile has been recalled, push and release the set (S) button on the memory
switch.
4. Within five seconds, push and release button (1) or (2) accordingly. “Memory Profile Set”
(1 or 2) will display in the instrument cluster.
5. Push and release the lock button on the key fob within 10 seconds.
NOTE:Your key fob can be unlinked from your memory
settings by pushing the set (S) button, followed by
pushing the unlock button on the key fob within
10 seconds.
21_LD_OM_EN_USC_t.book Page 28
Page 38 of 320
36GETTING TO KNOW YOUR VEHICLE
MIRRORS
INSIDE REARVIEW MIRROR
Manual Mirror— If Equipped
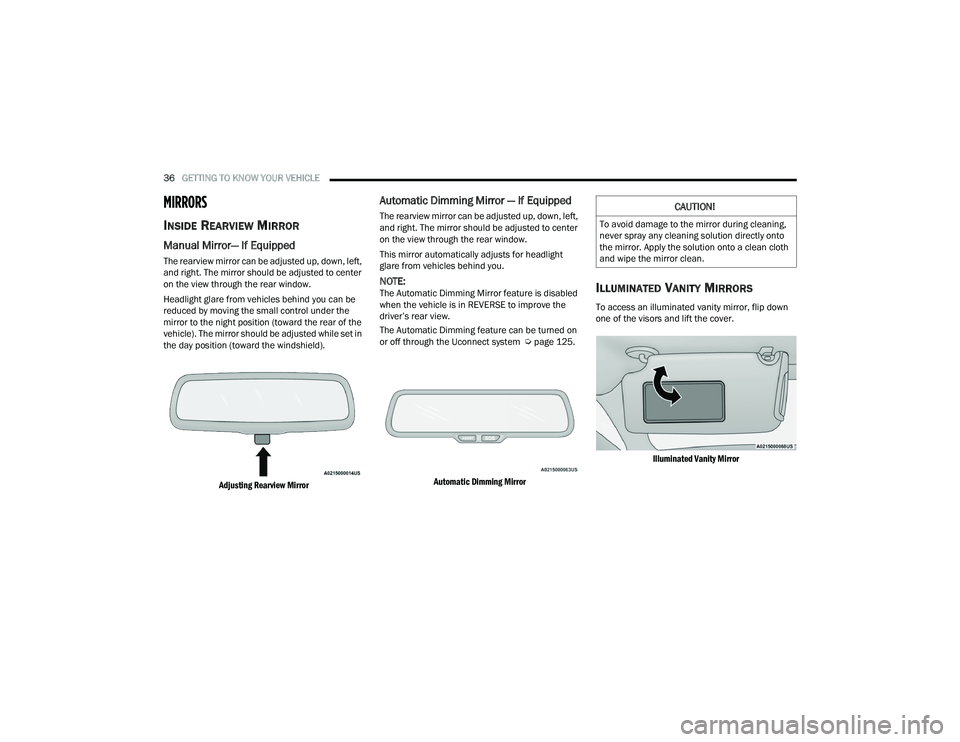
The rearview mirror can be adjusted up, down, left,
and right. The mirror should be adjusted to center
on the view through the rear window.
Headlight glare from vehicles behind you can be
reduced by moving the small control under the
mirror to the night position (toward the rear of the
vehicle). The mirror should be adjusted while set in
the day position (toward the windshield).
Adjusting Rearview Mirror
Automatic Dimming Mirror — If Equipped
The rearview mirror can be adjusted up, down, left,
and right. The mirror should be adjusted to center
on the view through the rear window.
This mirror automatically adjusts for headlight
glare from vehicles behind you.
NOTE:The Automatic Dimming Mirror feature is disabled
when the vehicle is in REVERSE to improve the
driver’s rear view.
The Automatic Dimming feature can be turned on
or off through the Uconnect system Ú page 125.
Automatic Dimming Mirror
ILLUMINATED VANITY MIRRORS
To access an illuminated vanity mirror, flip down
one of the visors and lift the cover.
Illuminated Vanity Mirror
CAUTION!
To avoid damage to the mirror during cleaning,
never spray any cleaning solution directly onto
the mirror. Apply the solution onto a clean cloth
and wipe the mirror clean.
21_LD_OM_EN_USC_t.book Page 36
Page 39 of 320
GETTING TO KNOW YOUR VEHICLE37
Sun Visor “Slide-On-Rod” Feature —
If Equipped
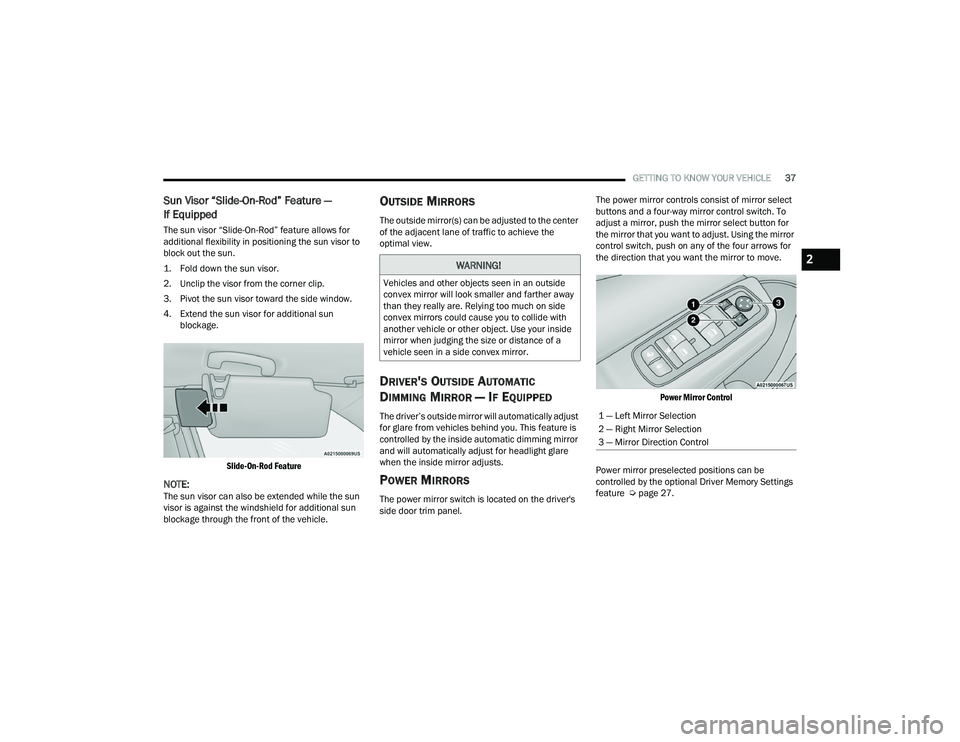
The sun visor “Slide-On-Rod” feature allows for
additional flexibility in positioning the sun visor to
block out the sun.
1. Fold down the sun visor.
2. Unclip the visor from the corner clip.
3. Pivot the sun visor toward the side window.
4. Extend the sun visor for additional sun
blockage.
Slide-On-Rod Feature
NOTE:The sun visor can also be extended while the sun
visor is against the windshield for additional sun
blockage through the front of the vehicle.
OUTSIDE MIRRORS
The outside mirror(s) can be adjusted to the center
of the adjacent lane of traffic to achieve the
optimal view.
DRIVER'S OUTSIDE AUTOMATIC
D
IMMING MIRROR — IF EQUIPPED
The driver’s outside mirror will automatically adjust
for glare from vehicles behind you. This feature is
controlled by the inside automatic dimming mirror
and will automatically adjust for headlight glare
when the inside mirror adjusts.
POWER MIRRORS
The power mirror switch is located on the driver's
side door trim panel. The power mirror controls consist of mirror select
buttons and a four-way mirror control switch. To
adjust a mirror, push the mirror select button for
the mirror that you want to adjust. Using the mirror
control switch, push on any of the four arrows for
the direction that you want the mirror to move.
Power Mirror Control
Power mirror preselected positions can be
controlled by the optional Driver Memory Settings
feature Ú page 27.
WARNING!
Vehicles and other objects seen in an outside
convex mirror will look smaller and farther away
than they really are. Relying too much on side
convex mirrors could cause you to collide with
another vehicle or other object. Use your inside
mirror when judging the size or distance of a
vehicle seen in a side convex mirror.
1 — Left Mirror Selection
2 — Right Mirror Selection
3 — Mirror Direction Control
2
21_LD_OM_EN_USC_t.book Page 37
Page 40 of 320
38GETTING TO KNOW YOUR VEHICLE
HEATED MIRRORS — IF EQUIPPED
These mirrors are heated to melt frost or
ice. This feature will be activated
whenever you turn on the rear window
defroster (if equipped) Úpage 48.
TILT SIDE MIRRORS IN REVERSE —
I
F EQUIPPED
This feature provides automatic outside mirror
positioning which will assist with the driver’s ground
visibility. The outside mirrors will move slightly
downward from the present position when the
vehicle is shifted into REVERSE. The outside mirrors
will then return to the original position when the
vehicle is shifted out of REVERSE. If the vehicle is
equipped with memory settings, this feature will be
linked to the programmable settings.
NOTE:The Tilt Side Mirrors In Reverse feature can be
turned on and off using the Uconnect system
Ú page 125.
UNIVERSAL GARAGE DOOR OPENER
(HOMELINK®)
HomeLink® Buttons And Indicator Light
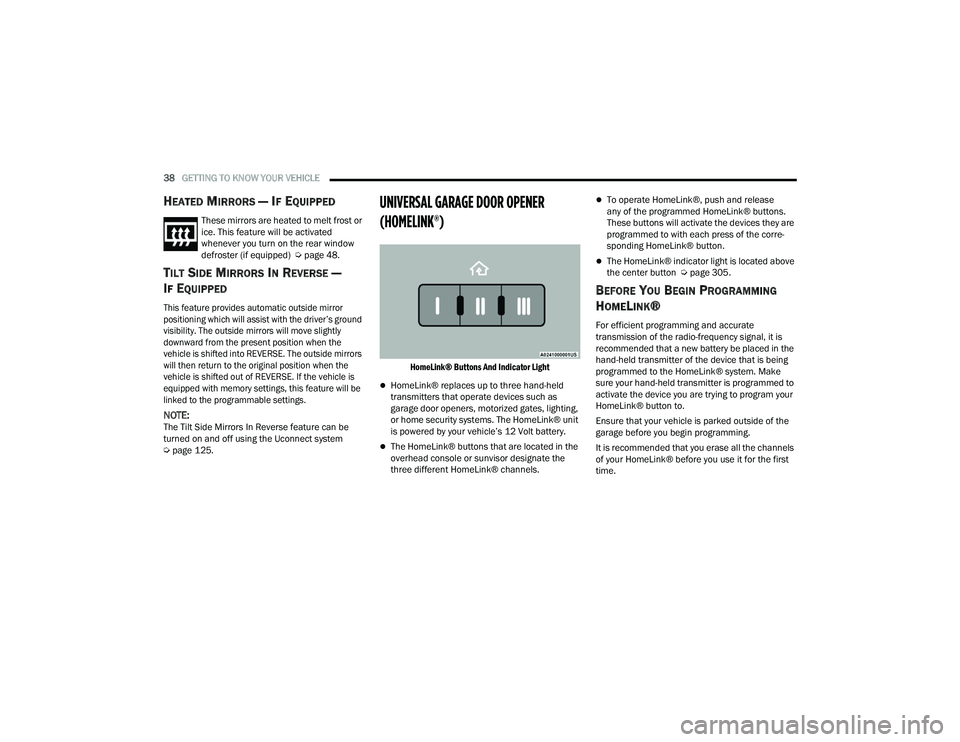
HomeLink® replaces up to three hand-held
transmitters that operate devices such as
garage door openers, motorized gates, lighting,
or home security systems. The HomeLink® unit
is powered by your vehicle’s 12 Volt battery.
The HomeLink® buttons that are located in the
overhead console or sunvisor designate the
three different HomeLink® channels.
To operate HomeLink®, push and release
any of the programmed HomeLink® buttons.
These buttons will activate the devices they are
programmed to with each press of the corre -
sponding HomeLink® button.
The HomeLink® indicator light is located above
the center button Ú page 305.
BEFORE YOU BEGIN PROGRAMMING
H
OMELINK®
For efficient programming and accurate
transmission of the radio-frequency signal, it is
recommended that a new battery be placed in the
hand-held transmitter of the device that is being
programmed to the HomeLink® system. Make
sure your hand-held transmitter is programmed to
activate the device you are trying to program your
HomeLink® button to.
Ensure that your vehicle is parked outside of the
garage before you begin programming.
It is recommended that you erase all the channels
of your HomeLink® before you use it for the first
time.
21_LD_OM_EN_USC_t.book Page 38
Page 45 of 320
GETTING TO KNOW YOUR VEHICLE43
NOTE:
For vehicles sold in Canada, the Daytime
Running Lights will automatically deactivate
when the front fog lights are turned on.
If allowed by law in the country in which the
vehicle was purchased, the Daytime Running
Lights can be turned on and off using the
Uconnect system Úpage 125.
On some vehicles, the Daytime Running Lights
may deactivate, or reduce intensity, on one side
of the vehicle (when a turn signal is activated on
that side), or on both sides of the vehicle (when
the hazard warning lights are activated).
HIGH/LOW BEAM SWITCH
Push the multifunction lever toward the instrument
panel to switch the headlights to high beams.
Pulling the multifunction lever back will turn the
low beams on.
AUTOMATIC HIGH BEAM — IF EQUIPPED
The Automatic High Beam Headlamp Control
system provides increased forward lighting at night
by automating high beam control through the use
of a digital camera mounted on the inside rearview
mirror. This camera detects vehicle specific light
and automatically switches from high beams to low
beams until the approaching vehicle is out of view.
NOTE:
The Automatic High Beam Headlamp Control
can be turned on or off by selecting or dese -
lecting “Auto High Beam” within Uconnect
Settings Ú page 125, as well as turning the
headlight switch to the AUTO position.
Broken, muddy, or obstructed headlights and
taillights of vehicles in the field of view will
cause headlights to remain on longer (closer to
the vehicle). Also, dirt, film, and other obstruc -
tions on the windshield or camera lens will
cause the system to function improperly.
If the windshield or Automatic High Beam Head -
lamp Control mirror is replaced, the mirror must
be re-aimed to ensure proper performance. See
a local authorized dealer.
FLASH-TO-PASS
You can signal another vehicle with your headlights
by lightly pulling the multifunction lever toward you.
This will cause the high beam headlights to turn on,
and remain on, until the lever is released.
AUTOMATIC HEADLIGHTS
This system automatically turns the headlights
on or off according to ambient light levels. To turn
the system on, rotate the headlight switch
counterclockwise to the AUTO position. When the
system is on, the headlight time delay feature is
also on. This means the headlights will stay on for up to 90 seconds after placing the ignition in the
OFF position. The headlight time delay can be
programmed 0/30/60/90 seconds within
Uconnect Settings Ú
page 125.
To turn the automatic system off, move the
headlight switch out of the AUTO position.
NOTE:The engine must be running before the headlights
will come on in the automatic mode.
PARKING LIGHTS
To turn on the parking lights and instrument panel
lights, rotate the headlight switch clockwise.
To turn off the parking lights, rotate the headlight
switch back to the O (off) position.
NOTE:For vehicles sold in Canada, rotate the headlight
switch to the AUTO position to turn off the parking
lights.
AUTOMATIC HEADLIGHTS ON WITH
W
IPERS — IF EQUIPPED
If your vehicle is equipped with Automatic
Headlights, it also has this customer-programmable
feature. When your headlights are in the automatic
mode and the engine is running, they will
automatically turn on when the wiper system is on.
This feature is programmable through the Uconnect
system
Ú
page 125.
2
21_LD_OM_EN_USC_t.book Page 43
Page 51 of 320
GETTING TO KNOW YOUR VEHICLE49
MAX A/C Button
Press and release the MAX A/C button on
the touchscreen to change the current
setting to the coldest output of air. The
MAX A/C indicator illuminates when MAX
A/C is on. Pressing the button again will cause the
MAX A/C operation to exit. In MAX A/C, the blower
level and mode position can be adjusted to the
desired user settings. Pressing other settings will
cancel MAX A/C.
NOTE:The MAX A/C button is only available on the touch -
screen.
A/C Button
Press and release this button on the
touchscreen, or push the button on the
faceplate to change the current setting.
The A/C indicator illuminates when A/C is on.
Recirculation Button
Press and release this button on the
touchscreen, or push the button on the
faceplate, to change the system between
recirculation mode and outside air mode.
The Recirculation indicator illuminates when
Recirculation is on. Recirculation can be used when
outside conditions such as smoke, odors, dust, or high
humidity are present. Recirculation can be used in all
modes. Recirculation may be unavailable (button on
the touchscreen greyed out) if conditions exist that could create fogging on the inside of the windshield.
The A/C can be deselected manually without disturbing
the mode control selection. Continuous use of the
Recirculation mode may make the inside air stuffy and
window fogging may occur. Extended use of this mode
is not recommended.
Auto Button
Set your desired temperature and press
AUTO. AUTO will achieve and maintain your
desired temperature by automatically
adjusting the blower speed and air
distribution. AUTO mode is highly recommended for
efficiency.
You can turn AUTO on in one of two ways:
Press and release this button on the touchscreen.
Push the button on the faceplate.
Toggling this function will cause the system to
switch between manual mode and automatic
mode Ú page 53.
Front Defrost Button
Press and release the Front Defrost button
on the touchscreen, or push and release
the button on the faceplate, to change the
current airflow setting to Defrost mode. The
Front Defrost indicator illuminates when Front Defrost
is on. Air comes from the windshield and side window
demist outlets. When the defrost button is selected, the
blower level may increase. Use Defrost mode with maximum temperature settings for best windshield and
side window defrosting and defogging. When toggling
the front defrost mode button, the climate system will
return to the previous setting.
Rear Defrost Button
Press and release the Rear Defrost
button on the touchscreen, or push and
release the button on the faceplate, to
turn on the rear window defroster and the
heated outside mirrors (if equipped). The Rear
Defrost indicator illuminates when the rear window
defroster is on. The rear window defroster
automatically turns off after 10 minutes.
CAUTION!
Failure to follow these cautions can cause
damage to the heating elements:
Use care when washing the inside of the rear
window. Do not use abrasive window cleaners
on the interior surface of the window. Use a
soft cloth and a mild washing solution, wiping
parallel to the heating elements. Labels can
be peeled off after soaking with warm water.
Do not use scrapers, sharp instruments, or
abrasive window cleaners on the interior
surface of the window.
Keep all objects a safe distance from the
window.
2
21_LD_OM_EN_USC_t.book Page 49
Page 54 of 320
52GETTING TO KNOW YOUR VEHICLE
Rear Defrost Button
Press and release the Rear Defrost
button on the touchscreen, or push and
release the button on the faceplate, to
turn on the rear window defroster and the
heated outside mirrors (if equipped). The Rear
Defrost indicator illuminates when the rear window
defroster is on. The rear window defroster
automatically turns off after 10 minutes.
Driver And Passenger Temperature
Control Buttons
These buttons provide the driver and passenger
with independent temperature control.
Push the red button on the faceplate
or touchscreen or press and slide the
temperature bar towards the red arrow
button on the touchscreen for warmer
temperature settings.
Push the blue button on the faceplate
or touchscreen or press and slide the
temperature bar towards the blue arrow
button on the touchscreen for cooler
temperature settings.
SYNC Button
Press the SYNC button on the
touchscreen to toggle the SYNC feature
on/off. The SYNC indicator illuminates
when SYNC is on. SYNC synchronizes the
passenger temperature setting with the driver
temperature setting. Changing the passenger’s
temperature setting while in SYNC will
automatically exit this feature.
NOTE:The SYNC button is only available on the touch-
screen.
Blower Control
Blower Control regulates the amount of
air forced through the Climate Control
system. There are seven blower speeds
available. Adjusting the blower will cause
automatic mode to switch to manual operation.
The speeds can be selected using either the
blower control knob on the faceplate or the
buttons on the touchscreen.
Faceplate
The blower speed increases as you turn the blower
control knob clockwise from the lowest blower
setting. The blower speed decreases as you turn
the blower control knob counterclockwise.
Touchscreen
Use the small blower icon to reduce the blower
setting and the large blower icon to increase the
blower setting. Blower can also be selected by
pressing the blower bar area between the icons.
Mode Control
Select Mode by pressing one of the Mode
buttons on the touchscreen to change
the airflow distribution mode. The airflow
distribution mode can be adjusted so air
comes from the instrument panel outlets, floor
outlets, defrost outlets, and demist outlets.
CAUTION!
Failure to follow these cautions can cause
damage to the heating elements:
Use care when washing the inside of the rear
window. Do not use abrasive window cleaners
on the interior surface of the window. Use a
soft cloth and a mild washing solution, wiping
parallel to the heating elements. Labels can
be peeled off after soaking with warm water.
Do not use scrapers, sharp instruments, or
abrasive window cleaners on the interior
surface of the window.
Keep all objects a safe distance from the
window.
21_LD_OM_EN_USC_t.book Page 52