power steering DODGE CHARGER 2021 Owners Manual
[x] Cancel search | Manufacturer: DODGE, Model Year: 2021, Model line: CHARGER, Model: DODGE CHARGER 2021Pages: 320, PDF Size: 20.61 MB
Page 4 of 320
2
INTRODUCTION
SYMBOLS KEY ...........................................................9
VEHICLE MODIFICATIONS/ALTERATIONS .............9
SYMBOL GLOSSARY.................................................9
GETTING TO KNOW YOUR VEHICLE
KEYS ....................................................................... 13 Key Fob .............................................................13
SENTRY KEY ........................................................... 15
IGNITION SWITCH .................................................. 16
Keyless Enter ‘n Go™ Ignition .........................16
REMOTE START — IF EQUIPPED .......................... 17
How To Use Remote Start ................................17
To Exit Remote Start Mode .............................18
Remote Start Front Defrost
Activation — If Equipped ..................................19
Remote Start Comfort Systems —
If Equipped........................................................19
Remote Start Windshield Wiper De–Icer
Activation — If Equipped ..................................19
Remote Start Cancel Message —
If Equipped........................................................19
VEHICLE SECURITY SYSTEM — IF EQUIPPED .... 20
To Arm The System ..........................................20
To Disarm The System .....................................20
Rearming Of The System .................................20
Security System Manual Override ...................20
Tamper Alert .....................................................20 DOORS ....................................................................21
Manual Door Locks ..........................................21
Power Door Locks ...........................................21
Keyless Enter ‘n Go™ — Passive Entry ...........22
Automatic Unlock Doors On Exit......................24
Automatic Door Locks —
If Equipped........................................................24
Child-Protection Door Lock System —
Rear Doors .......................................................24
STEERING WHEEL ..................................................25
Manual Tilt/Telescoping Steering
Column — If Equipped .....................................25
Power Tilt/Telescoping Steering
Column — If Equipped .....................................25
Heated Steering Wheel —
If Equipped........................................................25
UCONNECT VOICE RECOGNITION ........................26
Introducing Voice Recognition.........................26
Basic Voice Commands ...................................27
Get Started .......................................................27
Additional Information .....................................27
DRIVER MEMORY SETTINGS — IF EQUIPPED ....27
Programming The Memory Feature ................28
Linking And Unlinking The Key Fob To
Memory .............................................................28
Memory Position Recall ...................................29
SEATS ......................................................................29
Manual Adjustment
(Front Seats) — If Equipped .............................29 Manual Adjustment (Rear Seats).................... 30
Power Adjustment (Front Seats) —
If Equipped .......................................................31
Heated Seats — If Equipped ............................ 32
Front Ventilated Seats —
If Equipped .......................................................34
Head Restraints .............................................. 34
MIRRORS ............................................................... 36
Inside Rearview Mirror..................................... 36
Illuminated Vanity Mirrors ............................... 36
Outside Mirrors.................................................37
Driver's Outside Automatic Dimming
Mirror — If Equipped......................................... 37
Power Mirrors ................................................... 37
Heated Mirrors — If Equipped ......................... 38
Tilt Side Mirrors In Reverse —
If Equipped .......................................................38
UNIVERSAL GARAGE DOOR OPENER
(HOMELINK®) ....................................................... 38
Before You Begin Programming
HomeLink® ...................................................... 38
Erasing All The HomeLink® Channels ............ 39
Identifying Whether You Have A Rolling
Code Or Non-Rolling Code Device ................... 39
Programming HomeLink® To A Garage
Door Opener ..................................................... 39
Programming HomeLink® To A
Miscellaneous Device ...................................... 40
Reprogramming A Single HomeLink®
Button ............................................................... 40
Canadian/Gate Operator Programming ......... 40
21_LD_OM_EN_USC_t.book Page 2
Page 6 of 320
4
STARTING AND OPERATING
STARTING THE ENGINE ........................................ 83
Automatic Transmission .................................83
Normal Starting ...............................................83
AutoPark ...........................................................84
Keyless Enter ‘n Go™ — Ignition......................85
Cold Weather Operation
(Below –22°F Or −30°C) ...............................85
If Engine Fails To Start .....................................85
After Starting.....................................................86
ENGINE BLOCK HEATER — IF EQUIPPED ........... 86
ENGINE BREAK-IN RECOMMENDATIONS —
3.6L & 5.7L ........................................................... 86
PARKING BRAKE ................................................... 87
AUTOMATIC TRANSMISSION................................ 88 Ignition Park Interlock ......................................89
Brake Transmission Shift Interlock (BTSI)
System .............................................................89
8-Speed Automatic Transmission ...................89
SPORT MODE — WITHOUT PERFORMANCE
CONTROL ................................................................ 94
FUEL SAVER TECHNOLOGY 5.7L ONLY—
IF EQUIPPED ........................................................... 94
ELECTRIC POWER STEERING............................... 94
CRUISE CONTROL SYSTEMS — IF EQUIPPED ... 95
Cruise Control ...................................................95
Adaptive Cruise Control (ACC) .........................96 PARKSENSE REAR PARK ASSIST —
IF EQUIPPED ........................................................ 105
ParkSense Sensors ....................................... 105
ParkSense Display ........................................ 105ParkSense Warning Display ......................... 108
Enabling And Disabling ParkSense .............. 108
Service The ParkSense Park Assist System ...108
Cleaning The ParkSense System ................. 108
ParkSense System Usage Precautions........ 108
LANESENSE — IF EQUIPPED ............................. 109
LaneSense Operation ................................... 109Turning LaneSense On Or Off ....................... 110
LaneSense Warning Message ...................... 110Changing LaneSense Status ........................ 112
PARKVIEW REAR BACK UP CAMERA............... 112
REFUELING THE VEHICLE ................................... 113
VEHICLE LOADING ............................................. 114 Vehicle Certification Label ............................ 114
Gross Vehicle Weight Rating (GVWR) .......... 114
Gross Axle Weight Rating (GAWR) ............... 114
Overloading.................................................... 115
Loading ......................................................... 115
TRAILER TOWING ................................................ 115
Common Towing Definitions......................... 115
Trailer Hitch Classification ............................ 117
Trailer Towing Weights (Maximum Trailer
Weight Ratings) ............................................. 117Trailer And Tongue Weight ........................... 118Towing Requirements ................................... 118Towing Tips ................................................... 121 RECREATIONAL TOWING
(BEHIND MOTORHOME) ..................................... 121
DRIVING TIPS ....................................................... 122
Driving On Slippery Surfaces ........................ 122Driving Through Water ................................. 122
MULTIMEDIA
UCONNECT SYSTEMS ......................................... 124
CYBERSECURITY ................................................. 124
UCONNECT SETTINGS ........................................ 125 Customer Programmable Features ............. 125
UCONNECT INTRODUCTION................................ 138
System Overview .......................................... 138Drag & Drop Menu Bar ................................. 140
Safety And General Information................... 140
UCONNECT MODES ............................................. 141
Steering Wheel Audio Controls..................... 141Radio Mode .................................................. 141Media Mode ................................................. 150
Phone Mode ................................................. 152
ANDROID AUTO™ & APPLE CARPLAY® —
IF EQUIPPED ......................................................... 163
Android Auto™ .............................................. 163
Apple CarPlay® ............................................. 165Android Auto™ And Apple CarPlay® Tips And
Tricks.............................................................. 166
21_LD_OM_EN_USC_t.book Page 4
Page 12 of 320
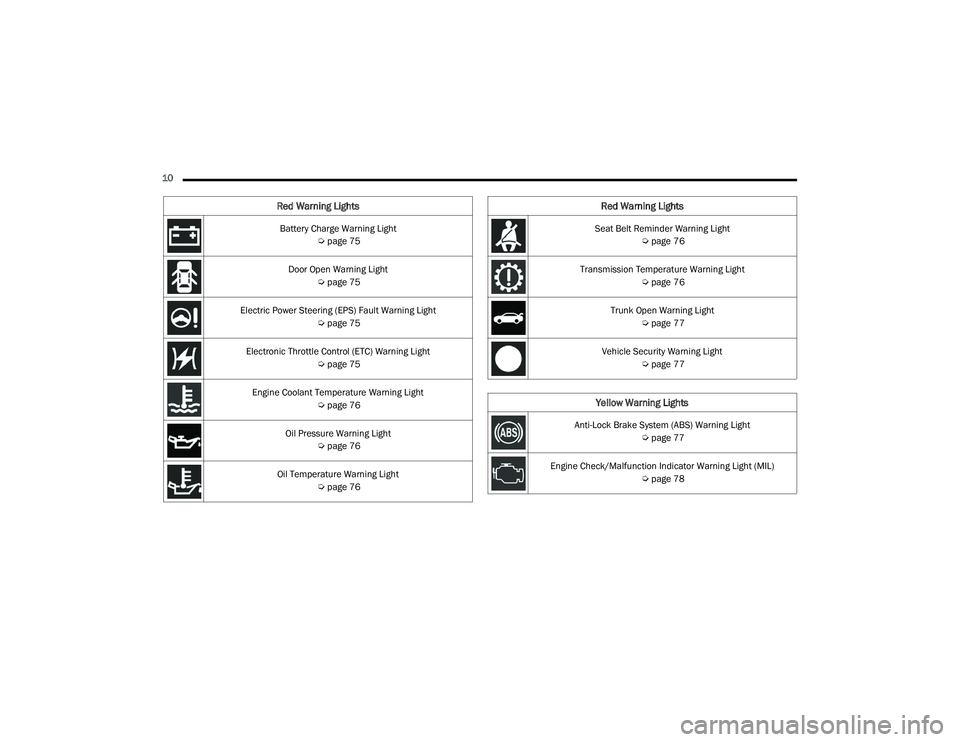
10 Battery Charge Warning Light Úpage 75
Door Open Warning Light Úpage 75
Electric Power Steering (EPS) Fault Warning Light Úpage 75
Electronic Throttle Control (ETC) Warning Light Úpage 75
Engine Coolant Temperature Warning Light Úpage 76
Oil Pressure Warning Light Úpage 76
Oil Temperature Warning Light Úpage 76
Red Warning Lights
Seat Belt Reminder Warning Light
Úpage 76
Transmission Temperature Warning Light Úpage 76
Trunk Open Warning Light Úpage 77
Vehicle Security Warning Light Úpage 77
Yellow Warning Lights
Anti-Lock Brake System (ABS) Warning Light
Úpage 77
Engine Check/Malfunction Indicator Warning Light (MIL) Úpage 78
Red Warning Lights
21_LD_OM_EN_USC_t.book Page 10
Page 27 of 320
GETTING TO KNOW YOUR VEHICLE25
STEERING WHEEL
MANUAL TILT/TELESCOPING STEERING
C
OLUMN — IF EQUIPPED
This feature allows you to tilt the steering column
upward or downward. It also allows you to lengthen
or shorten the steering column. The tilt/telescoping
control is located below the steering wheel at the
end of the steering column.
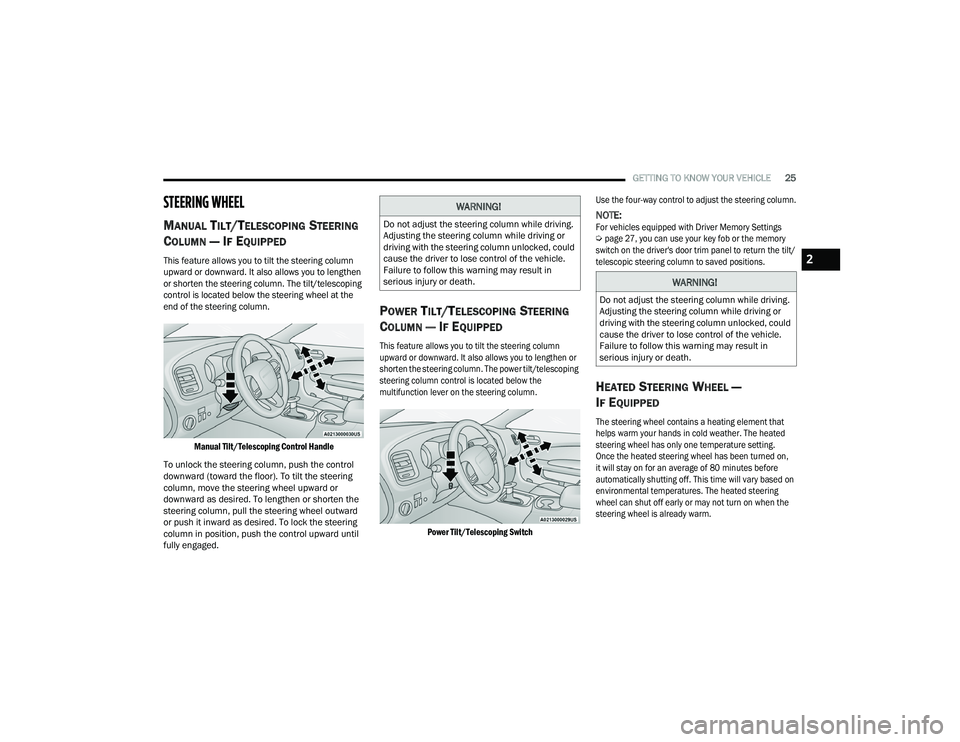
Manual Tilt/Telescoping Control Handle
To unlock the steering column, push the control
downward (toward the floor). To tilt the steering
column, move the steering wheel upward or
downward as desired. To lengthen or shorten the
steering column, pull the steering wheel outward
or push it inward as desired. To lock the steering
column in position, push the control upward until
fully engaged.
POWER TILT/TELESCOPING STEERING
C
OLUMN — IF EQUIPPED
This feature allows you to tilt the steering column
upward or downward. It also allows you to lengthen or
shorten the steering column. The power tilt/telescoping
steering column control is located below the
multifunction lever on the steering column.
Power Tilt/Telescoping Switch
Use the four-way control to adjust the steering column.
NOTE:
For vehicles equipped with Driver Memory Settings
Ú
page 27, you can use your key fob or the memory
switch on the driver's door trim panel to return the tilt/
telescopic steering column to saved positions.
HEATED STEERING WHEEL —
I
F EQUIPPED
The steering wheel contains a heating element that
helps warm your hands in cold weather. The heated
steering wheel has only one temperature setting.
Once the heated steering wheel has been turned on,
it will stay on for an average of 80 minutes before
automatically shutting off. This time will vary based on
environmental temperatures. The heated steering
wheel can shut off early or may not turn on when the
steering wheel is already warm.
WARNING!
Do not adjust the steering column while driving.
Adjusting the steering column while driving or
driving with the steering column unlocked, could
cause the driver to lose control of the vehicle.
Failure to follow this warning may result in
serious injury or death.
WARNING!
Do not adjust the steering column while driving.
Adjusting the steering column while driving or
driving with the steering column unlocked, could
cause the driver to lose control of the vehicle.
Failure to follow this warning may result in
serious injury or death.
2
21_LD_OM_EN_USC_t.book Page 25
Page 29 of 320
GETTING TO KNOW YOUR VEHICLE27
BASIC VOICE COMMANDS
The basic Voice Commands below can be given at
any point while using your Uconnect system.
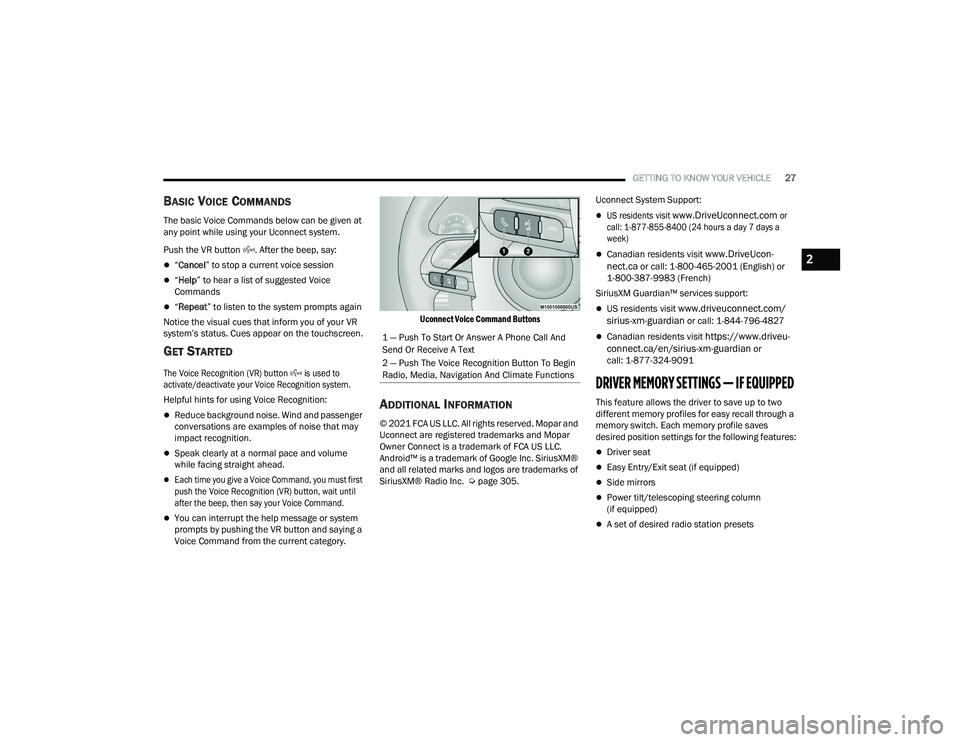
Push the VR button . After the beep, say:
“Cancel ” to stop a current voice session
“Help ” to hear a list of suggested Voice
Commands
“ Repeat ” to listen to the system prompts again
Notice the visual cues that inform you of your VR
system’s status. Cues appear on the touchscreen.
GET STARTED
The Voice Recognition (VR) button is used to
activate/deactivate your Voice Recognition system.
Helpful hints for using Voice Recognition:
Reduce background noise. Wind and passenger
conversations are examples of noise that may
impact recognition.
Speak clearly at a normal pace and volume
while facing straight ahead.
Each time you give a Voice Command, you must first
push the Voice Recognition (VR) button, wait until
after the beep, then say your Voice Command.
You can interrupt the help message or system
prompts by pushing the VR button and saying a
Voice Command from the current category.
Uconnect Voice Command Buttons
ADDITIONAL INFORMATION
© 2021 FCA US LLC. All rights reserved. Mopar and
Uconnect are registered trademarks and Mopar
Owner Connect is a trademark of FCA US LLC.
Android™ is a trademark of Google Inc. SiriusXM®
and all related marks and logos are trademarks of
SiriusXM® Radio Inc. Ú
page 305. Uconnect System Support:
US residents visit
www.DriveUconnect.com
or
call: 1-877-855-8400 (24 hours a day 7 days a
week)
Canadian residents visit www.DriveUcon -
nect.ca or call: 1-800-465-2001 (English) or
1-800-387-9983 (French)
SiriusXM Guardian™ services support:
US residents visit www.driveuconnect.com/
sirius-xm-guardian or call: 1-844-796-4827
Canadian residents visit https://www.driveu -
connect.ca/en/sirius-xm-guardian or
call: 1-877-324-9091
DRIVER MEMORY SETTINGS — IF EQUIPPED
This feature allows the driver to save up to two
different memory profiles for easy recall through a
memory switch. Each memory profile saves
desired position settings for the following features:
Driver seat
Easy Entry/Exit seat (if equipped)
Side mirrors
Power tilt/telescoping steering column
(if equipped)
A set of desired radio station presets
1 — Push To Start Or Answer A Phone Call And
Send Or Receive A Text
2 — Push The Voice Recognition Button To Begin
Radio, Media, Navigation And Climate Functions
2
21_LD_OM_EN_USC_t.book Page 27
Page 30 of 320
28GETTING TO KNOW YOUR VEHICLE
NOTE:
Your vehicle is equipped with two key fobs, each
can be linked to either memory position 1 or 2.
Be sure to program the radio presets prior to
programming the memory settings.
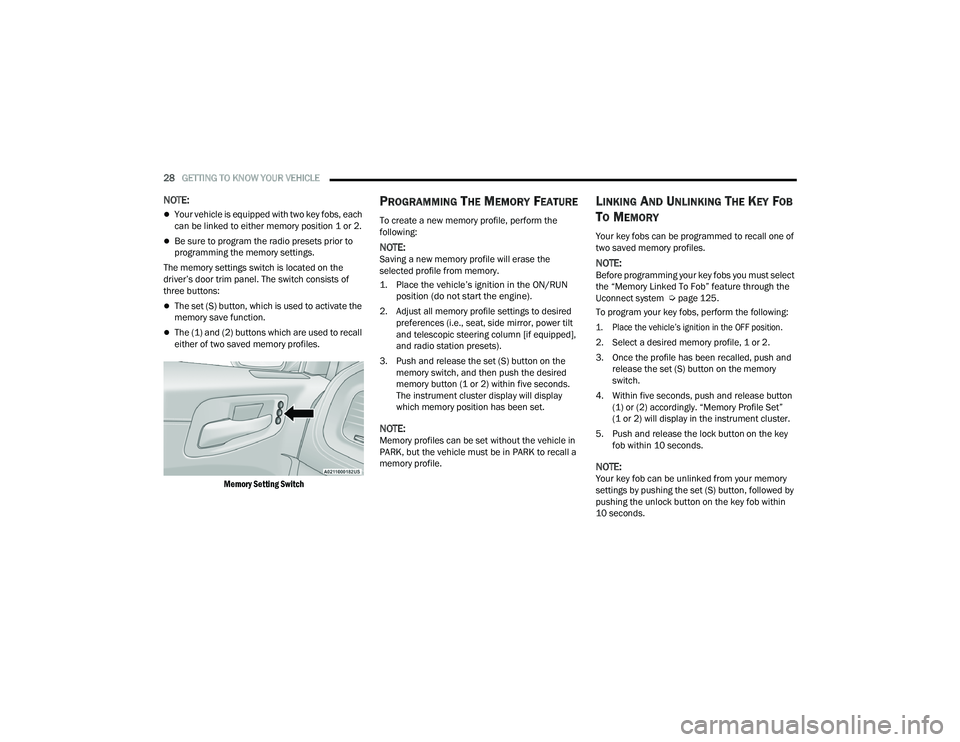
The memory settings switch is located on the
driver’s door trim panel. The switch consists of
three buttons:
The set (S) button, which is used to activate the
memory save function.
The (1) and (2) buttons which are used to recall
either of two saved memory profiles.
Memory Setting Switch
PROGRAMMING THE MEMORY FEATURE
To create a new memory profile, perform the
following:
NOTE:Saving a new memory profile will erase the
selected profile from memory.
1. Place the vehicle’s ignition in the ON/RUN position (do not start the engine).
2. Adjust all memory profile settings to desired preferences (i.e., seat, side mirror, power tilt
and telescopic steering column [if equipped],
and radio station presets).
3. Push and release the set (S) button on the memory switch, and then push the desired
memory button (1 or 2) within five seconds.
The instrument cluster display will display
which memory position has been set.
NOTE:Memory profiles can be set without the vehicle in
PARK, but the vehicle must be in PARK to recall a
memory profile.
LINKING AND UNLINKING THE KEY FOB
T
O MEMORY
Your key fobs can be programmed to recall one of
two saved memory profiles.
NOTE:Before programming your key fobs you must select
the “Memory Linked To Fob” feature through the
Uconnect system Ú page 125.
To program your key fobs, perform the following:
1. Place the vehicle’s ignition in the OFF position.
2. Select a desired memory profile, 1 or 2.
3. Once the profile has been recalled, push and release the set (S) button on the memory
switch.
4. Within five seconds, push and release button (1) or (2) accordingly. “Memory Profile Set”
(1 or 2) will display in the instrument cluster.
5. Push and release the lock button on the key fob within 10 seconds.
NOTE:Your key fob can be unlinked from your memory
settings by pushing the set (S) button, followed by
pushing the unlock button on the key fob within
10 seconds.
21_LD_OM_EN_USC_t.book Page 28
Page 65 of 320
GETTING TO KNOW YOUR VEHICLE63
TRUNK
OPENING THE TRUNK
The trunk may be opened in several ways:
Power trunk release button on the instrument
panel
Trunk button on the key fob
Trunk Passive Entry button Úpage 22
External release switch located on the under -
side of the decklid overhang
NOTE:The release feature will function only when the
vehicle is unlocked.
With the ignition in the ON/RUN position, the trunk
open symbol will display in the instrument cluster
indicating that the trunk is open. The odometer
display will reappear once the trunk is closed.
With the ignition in the OFF position, the trunk
open symbol will display until the trunk is closed.
Power Trunk Release Button
The trunk can be opened from inside the
vehicle using the power trunk release
button located on the instrument panel
to the left of the steering wheel.
NOTE:The gear selector must be in PARK before the
button will operate.
Key Fob Trunk Release ButtonPush the power trunk button on the key
fob twice within five seconds to release
the trunk.
Passive Entry Button
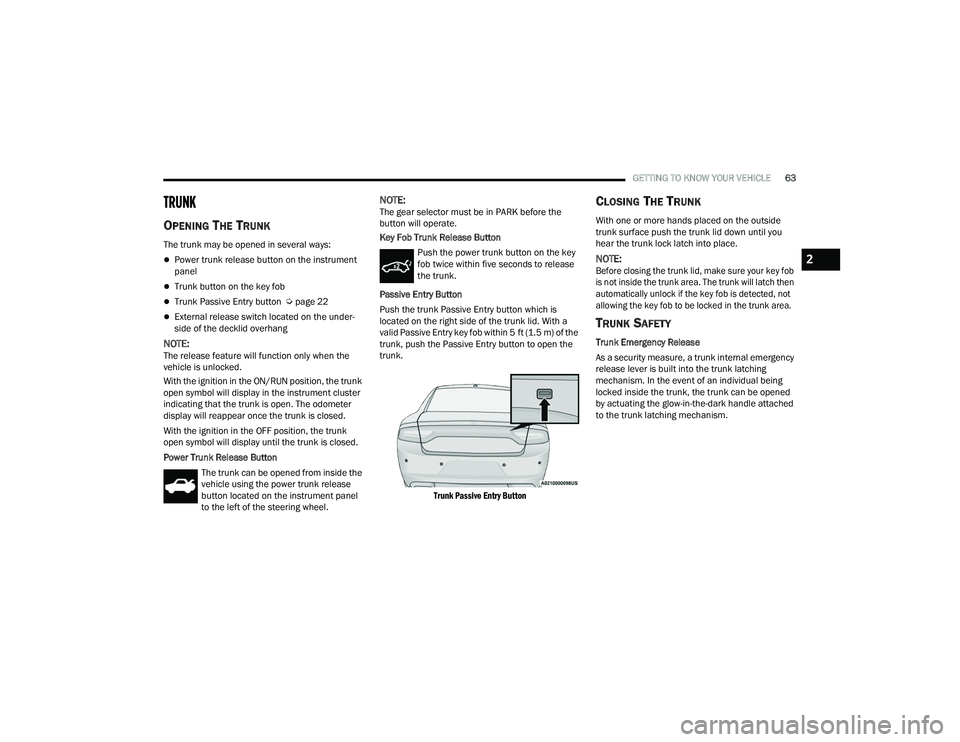
Push the trunk Passive Entry button which is
located on the right side of the trunk lid. With a
valid Passive Entry key fob within 5 ft (1.5 m) of the
trunk, push the Passive Entry button to open the
trunk.
Trunk Passive Entry Button
CLOSING THE TRUNK
With one or more hands placed on the outside
trunk surface push the trunk lid down until you
hear the trunk lock latch into place.
NOTE:
Before closing the trunk lid, make sure your key fob
is not inside the trunk area. The trunk will latch then
automatically unlock if the key fob is detected, not
allowing the key fob to be locked in the trunk area.
TRUNK SAFETY
Trunk Emergency Release
As a security measure, a trunk internal emergency
release lever is built into the trunk latching
mechanism. In the event of an individual being
locked inside the trunk, the trunk can be opened
by actuating the glow-in-the-dark handle attached
to the trunk latching mechanism.
2
21_LD_OM_EN_USC_t.book Page 63
Page 72 of 320
70GETTING TO KNOW YOUR INSTRUMENT PANEL
INSTRUMENT CLUSTER DISPLAY
S
ELECTABLE MENU ITEMS
Push and release the up or down arrow
button until the desired Selectable Menu item is
displayed in the instrument cluster display.
Follow the Menu or submenu prompts as desired.
Speedometer
Push and release the up or down arrow
button until the speedometer menu is displayed in
the instrument cluster display. Push and release
the OK button to toggle units (km/h or mph) of the
speedometer.
Vehicle Info
Push and release the up or down arrow
button until the “Vehicle Info” menu is displayed in
the instrument cluster display. Push and release
the right or left arrow button to scroll
through the submenus items of “Vehicle Info.”
Follow the directional prompts to access or reset
any of the following “Vehicle Info” submenu items:
Tire Pressure Monitor
Coolant Temperature
Trans Temperature
Oil Temperature
Oil Pressure
Oil Life
Battery Voltage
AWD Status — If Equipped
Intake Air Temperature — If Equipped
Engine Torque — If Equipped
Engine Power — If Equipped
Air-Fuel Ratio — If Equipped
Driver Assist — If Equipped
The Driver Assist menu displays the status of the
ACC and LaneSense systems.
Push and release the up or down arrow
button until the Driver Assist menu is displayed in
the instrument cluster display.
Adaptive Cruise Control (ACC) Feature
The instrument cluster displays the current ACC
system settings. The information displayed
depends on ACC system status.
Push the ACC on/off button (located on the
steering wheel) until one of the following displays
in the instrument cluster display:
Adaptive Cruise Control Off
When ACC is deactivated, the display will read
“Adaptive Cruise Control Off.” Adaptive Cruise Control Ready
When ACC is activated but the vehicle speed
setting has not been selected, the display will read
“Adaptive Cruise Control Ready.”
Push the SET + or the SET- button (located on the
steering wheel) and the following will display in the
instrument cluster display:
ACC SET
When ACC is set, the set speed will display in the
instrument cluster.
The ACC screen may display once again if any ACC
activity occurs, which may include any of the
following:
Distance Setting Change
System Cancel
Driver Override
System Off
ACC Proximity Warning
ACC Unavailable Warning
The instrument cluster display will return to the last
display selected after five seconds of no ACC
display activity Ú page 96.
21_LD_OM_EN_USC_t.book Page 70
Page 77 of 320
GETTING TO KNOW YOUR INSTRUMENT PANEL75
NOTE:The light may flash momentarily during sharp
cornering maneuvers, which change fluid level
conditions. The vehicle should have service
performed, and the brake fluid level checked.
If brake failure is indicated, immediate repair is
necessary.
Vehicles equipped with the Anti-Lock Brake System
(ABS) are also equipped with Electronic Brake
Force Distribution (EBD). In the event of an EBD
failure, the Brake Warning Light will turn on along
with the ABS Light. Immediate repair to the ABS
system is required.
Operation of the Brake Warning Light can be
checked by turning the ignition switch from the OFF
position to the ON/RUN position. The light should
illuminate for approximately two seconds. The light
should then turn off unless the parking brake is
applied or a brake fault is detected. If the light does
not illuminate, have the light inspected by an
authorized dealer. The light also will turn on when the parking brake
is applied with the ignition switch in the ON/RUN
position.
NOTE:This light shows only that the parking brake is
applied. It does not show the degree of brake
application.
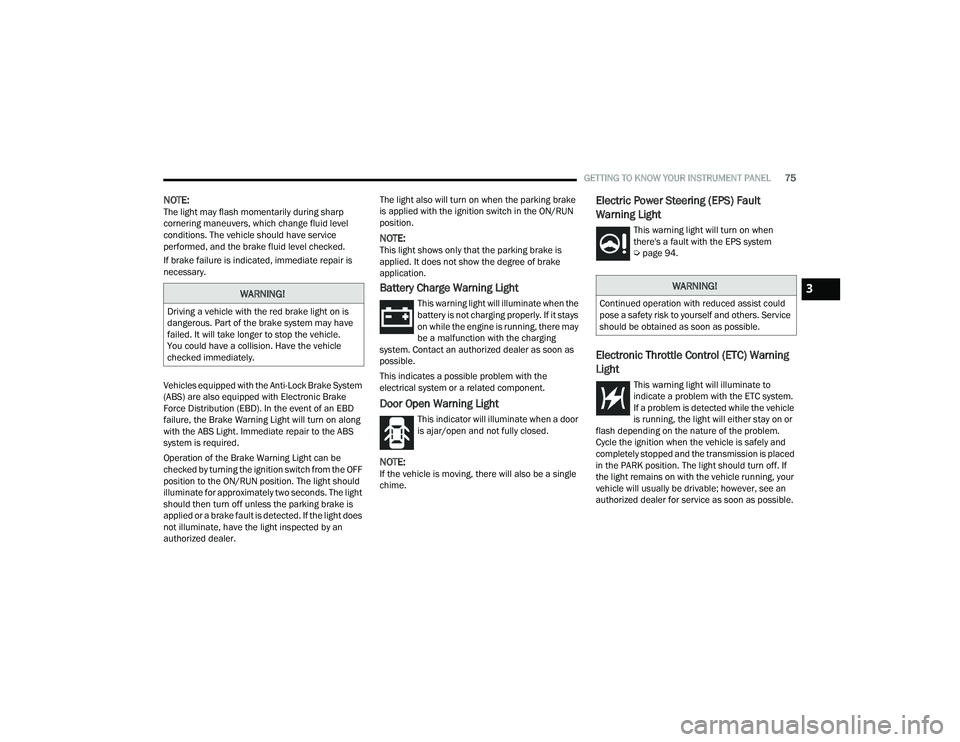
Battery Charge Warning Light
This warning light will illuminate when the
battery is not charging properly. If it stays
on while the engine is running, there may
be a malfunction with the charging
system. Contact an authorized dealer as soon as
possible.
This indicates a possible problem with the
electrical system or a related component.
Door Open Warning Light
This indicator will illuminate when a door
is ajar/open and not fully closed.
NOTE:If the vehicle is moving, there will also be a single
chime.
Electric Power Steering (EPS) Fault
Warning Light
This warning light will turn on when
there's a fault with the EPS system
Ú page 94.
Electronic Throttle Control (ETC) Warning
Light
This warning light will illuminate to
indicate a problem with the ETC system.
If a problem is detected while the vehicle
is running, the light will either stay on or
flash depending on the nature of the problem.
Cycle the ignition when the vehicle is safely and
completely stopped and the transmission is placed
in the PARK position. The light should turn off. If
the light remains on with the vehicle running, your
vehicle will usually be drivable; however, see an
authorized dealer for service as soon as possible.
WARNING!
Driving a vehicle with the red brake light on is
dangerous. Part of the brake system may have
failed. It will take longer to stop the vehicle.
You could have a collision. Have the vehicle
checked immediately.
WARNING!
Continued operation with reduced assist could
pose a safety risk to yourself and others. Service
should be obtained as soon as possible.
3
21_LD_OM_EN_USC_t.book Page 75
Page 96 of 320
94STARTING AND OPERATING
Holding the (-) paddle pressed (if equipped), or
holding the gear selector in the (-) position, will
downshift the transmission to the lowest gear
possible at the current speed.
Transmission shifting will be more noticeable
when AutoStick is enabled.
The system may revert to automatic shift mode
if a fault or overheat condition is detected.
To disengage AutoStick mode, return the gear
selector to the DRIVE position, or press and hold
the (+) shift paddle (if equipped, and the gear
selector is already in DRIVE) until “D” is once again
indicated in the instrument cluster. You can shift in
or out of the AutoStick mode at any time without
taking your foot off the accelerator pedal.
SPORT MODE — WITHOUT PERFORMANCE
CONTROL
Your vehicle is equipped with a SPORT Mode feature.
This mode is a configuration set up for typical
enthusiast driving. The engine, transmission, and
steering systems are all set to their SPORT settings.
SPORT Mode will provide improved throttle response
and modified shifting for an enhanced driving
experience, as well the greatest amount of steering
feel. This mode may be activated and deactivated by
pushing the Sport button on the instrument panel
switch bank.
For vehicles equipped with Drive Modes or a
“SUPER TRACK PAK” button, refer to “Drive Modes
Supplement” for further information.
FUEL SAVER TECHNOLOGY 5.7L ONLY—
IF EQUIPPED
This feature offers improved fuel economy by
shutting off four of the engine's eight cylinders
during light load and cruise conditions. The system
is automatic with no driver inputs or additional
driving skills required.
NOTE:This system may take some time to return to full
functionality after a battery disconnect.
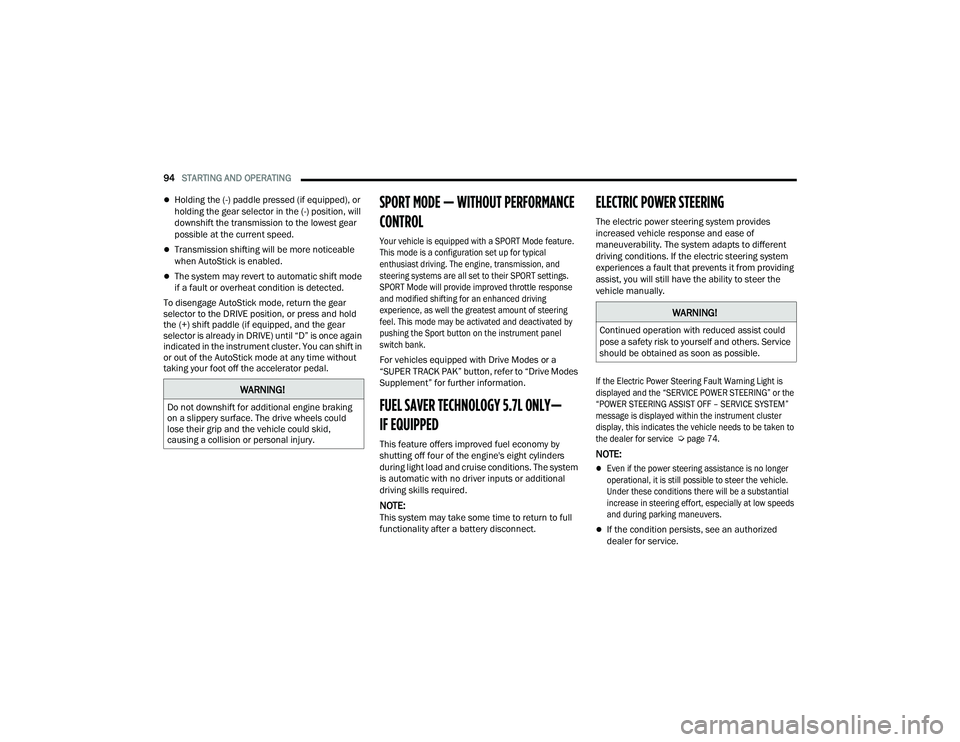
ELECTRIC POWER STEERING
The electric power steering system provides
increased vehicle response and ease of
maneuverability. The system adapts to different
driving conditions. If the electric steering system
experiences a fault that prevents it from providing
assist, you will still have the ability to steer the
vehicle manually.
If the Electric Power Steering Fault Warning Light is
displayed and the “SERVICE POWER STEERING” or the
“POWER STEERING ASSIST OFF – SERVICE SYSTEM”
message is displayed within the instrument cluster
display, this indicates the vehicle needs to be taken to
the dealer for service
Ú
page 74.
NOTE:
Even if the power steering assistance is no longer
operational, it is still possible to steer the vehicle.
Under these conditions there will be a substantial
increase in steering effort, especially at low speeds
and during parking maneuvers.
If the condition persists, see an authorized
dealer for service.
WARNING!
Do not downshift for additional engine braking
on a slippery surface. The drive wheels could
lose their grip and the vehicle could skid,
causing a collision or personal injury.
WARNING!
Continued operation with reduced assist could
pose a safety risk to yourself and others. Service
should be obtained as soon as possible.
21_LD_OM_EN_USC_t.book Page 94