transmission oil DODGE CHARGER 2021 Owners Manual
[x] Cancel search | Manufacturer: DODGE, Model Year: 2021, Model line: CHARGER, Model: DODGE CHARGER 2021Pages: 320, PDF Size: 20.61 MB
Page 8 of 320
6
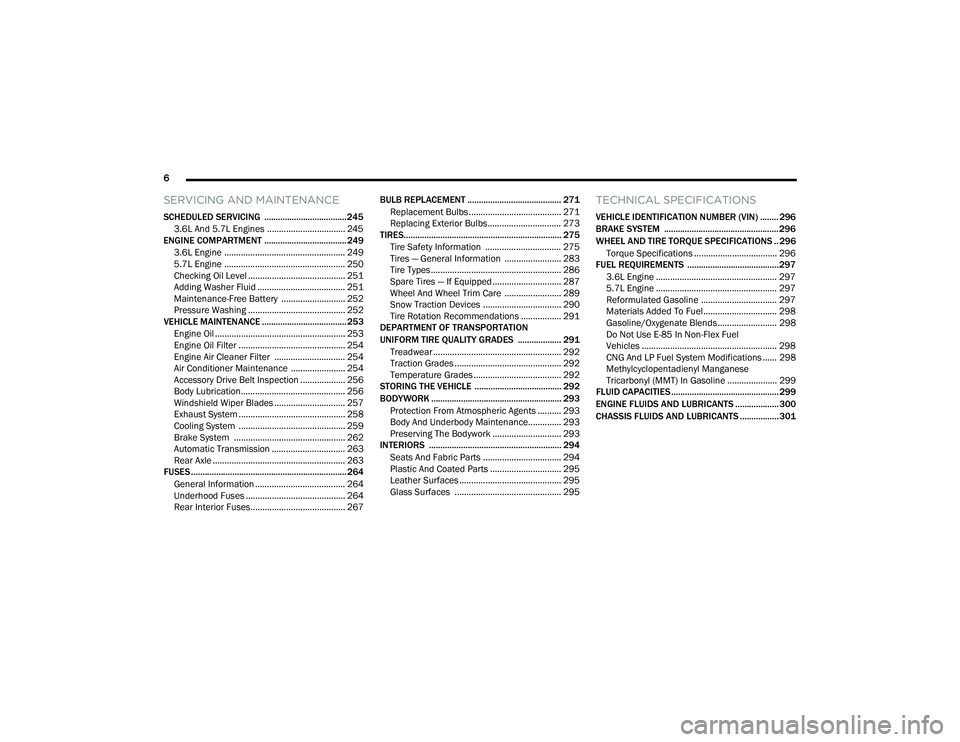
SERVICING AND MAINTENANCE
SCHEDULED SERVICING .................................... 245
3.6L And 5.7L Engines ................................. 245
ENGINE COMPARTMENT .................................... 249
3.6L Engine ................................................... 2495.7L Engine ................................................... 250Checking Oil Level ......................................... 251
Adding Washer Fluid ..................................... 251
Maintenance-Free Battery ........................... 252
Pressure Washing ......................................... 252
VEHICLE MAINTENANCE ..................................... 253
Engine Oil ....................................................... 253
Engine Oil Filter ............................................. 254
Engine Air Cleaner Filter .............................. 254Air Conditioner Maintenance ....................... 254
Accessory Drive Belt Inspection ................... 256
Body Lubrication............................................ 256
Windshield Wiper Blades .............................. 257Exhaust System ............................................. 258
Cooling System ............................................. 259
Brake System ............................................... 262
Automatic Transmission ............................... 263
Rear Axle ........................................................ 263
FUSES .................................................................... 264
General Information ...................................... 264Underhood Fuses .......................................... 264
Rear Interior Fuses........................................ 267 BULB REPLACEMENT ......................................... 271
Replacement Bulbs ....................................... 271
Replacing Exterior Bulbs............................... 273
TIRES..................................................................... 275
Tire Safety Information ................................ 275Tires — General Information ........................ 283
Tire Types....................................................... 286
Spare Tires — If Equipped ............................. 287
Wheel And Wheel Trim Care ........................ 289
Snow Traction Devices ................................. 290
Tire Rotation Recommendations ................. 291
DEPARTMENT OF TRANSPORTATION
UNIFORM TIRE QUALITY GRADES ................... 291
Treadwear ...................................................... 292
Traction Grades ............................................. 292Temperature Grades ..................................... 292
STORING THE VEHICLE ...................................... 292
BODYWORK ......................................................... 293
Protection From Atmospheric Agents .......... 293
Body And Underbody Maintenance.............. 293Preserving The Bodywork ............................. 293
INTERIORS .......................................................... 294
Seats And Fabric Parts ................................. 294
Plastic And Coated Parts .............................. 295Leather Surfaces ........................................... 295Glass Surfaces ............................................. 295
TECHNICAL SPECIFICATIONS
VEHICLE IDENTIFICATION NUMBER (VIN) ........ 296
BRAKE SYSTEM .................................................. 296
WHEEL AND TIRE TORQUE SPECIFICATIONS .. 296
Torque Specifications ................................... 296
FUEL REQUIREMENTS ........................................ 297
3.6L Engine ................................................... 297
5.7L Engine ................................................... 297
Reformulated Gasoline ................................ 297Materials Added To Fuel ............................... 298
Gasoline/Oxygenate Blends ......................... 298
Do Not Use E-85 In Non-Flex Fuel
Vehicles ......................................................... 298
CNG And LP Fuel System Modifications ...... 298Methylcyclopentadienyl Manganese
Tricarbonyl (MMT) In Gasoline ..................... 299
FLUID CAPACITIES ............................................... 299
ENGINE FLUIDS AND LUBRICANTS ................... 300
CHASSIS FLUIDS AND LUBRICANTS ................. 301
21_LD_OM_EN_USC_t.book Page 6
Page 12 of 320
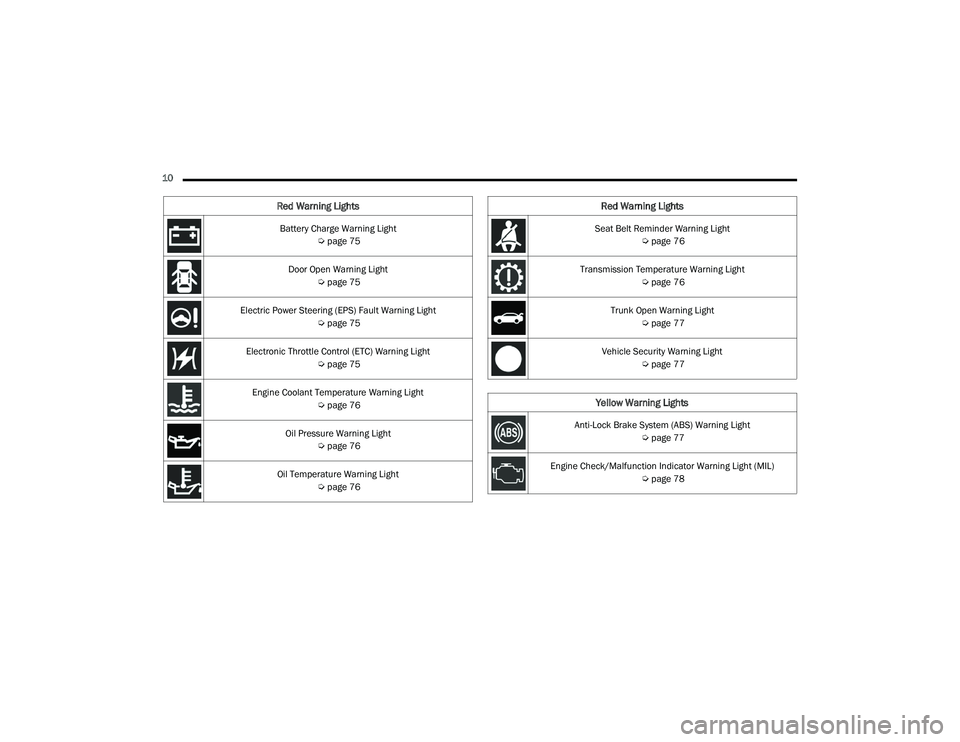
10 Battery Charge Warning Light Úpage 75
Door Open Warning Light Úpage 75
Electric Power Steering (EPS) Fault Warning Light Úpage 75
Electronic Throttle Control (ETC) Warning Light Úpage 75
Engine Coolant Temperature Warning Light Úpage 76
Oil Pressure Warning Light Úpage 76
Oil Temperature Warning Light Úpage 76
Red Warning Lights
Seat Belt Reminder Warning Light
Úpage 76
Transmission Temperature Warning Light Úpage 76
Trunk Open Warning Light Úpage 77
Vehicle Security Warning Light Úpage 77
Yellow Warning Lights
Anti-Lock Brake System (ABS) Warning Light
Úpage 77
Engine Check/Malfunction Indicator Warning Light (MIL) Úpage 78
Red Warning Lights
21_LD_OM_EN_USC_t.book Page 10
Page 71 of 320
GETTING TO KNOW YOUR INSTRUMENT PANEL69
For Screen Setup:
OK button allows user to enter menu and
submenus.
Within each submenu layer, the up and
down arrow buttons will allow the user to
select the item of interest.
Pushing the OK button makes the selection and
a confirmation screen will appear (returning the
user to the first page of the submenu).
Pushing the left arrow button will exit each
submenu layer and return to the main menu.
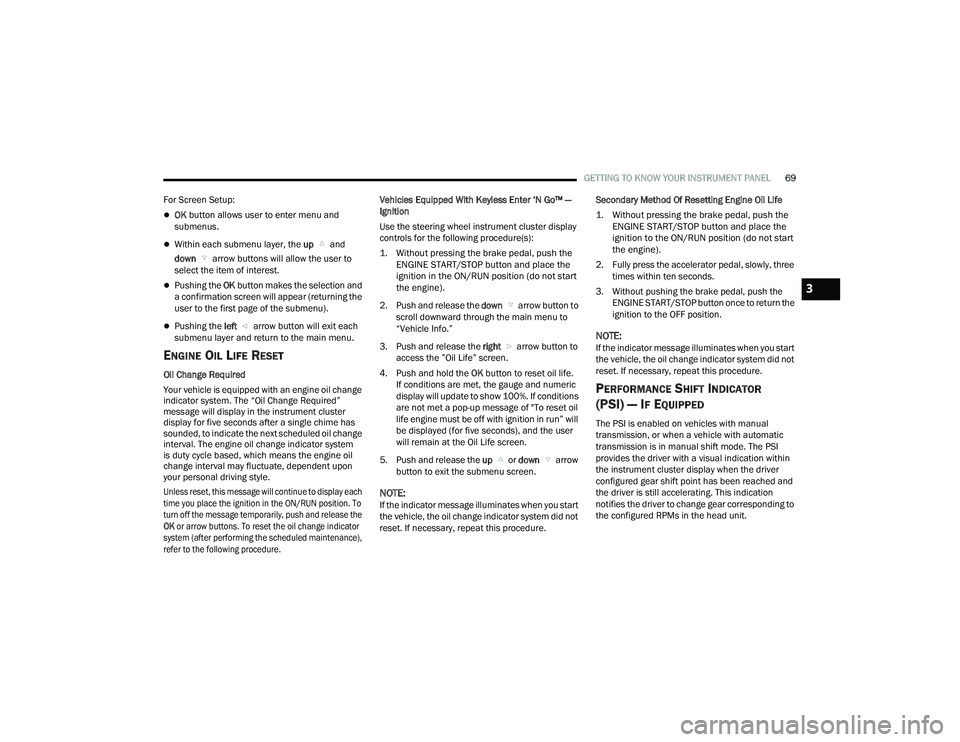
ENGINE OIL LIFE RESET
Oil Change Required
Your vehicle is equipped with an engine oil change
indicator system. The “Oil Change Required”
message will display in the instrument cluster
display for five seconds after a single chime has
sounded, to indicate the next scheduled oil change
interval. The engine oil change indicator system
is duty cycle based, which means the engine oil
change interval may fluctuate, dependent upon
your personal driving style.
Unless reset, this message will continue to display each
time you place the ignition in the ON/RUN position. To
turn off the message temporarily, push and release the
OK or arrow buttons. To reset the oil change indicator
system (after performing the scheduled maintenance),
refer to the following procedure.
Vehicles Equipped With Keyless Enter ‘N Go™ —
Ignition
Use the steering wheel instrument cluster display
controls for the following procedure(s):
1. Without pressing the brake pedal, push the
ENGINE START/STOP button and place the
ignition in the ON/RUN position (do not start
the engine).
2. Push and release the down arrow button to
scroll downward through the main menu to
“Vehicle Info.”
3. Push and release the right arrow button to
access the ”Oil Life” screen.
4. Push and hold the OK button to reset oil life.
If conditions are met, the gauge and numeric
display will update to show 100%. If conditions
are not met a pop-up message of "To reset oil
life engine must be off with ignition in run” will
be displayed (for five seconds), and the user
will remain at the Oil Life screen.
5. Push and release the up or down arrow
button to exit the submenu screen.
NOTE:If the indicator message illuminates when you start
the vehicle, the oil change indicator system did not
reset. If necessary, repeat this procedure. Secondary Method Of Resetting Engine Oil Life
1. Without pressing the brake pedal, push the
ENGINE START/STOP button and place the
ignition to the ON/RUN position (do not start
the engine).
2. Fully press the accelerator pedal, slowly, three times within ten seconds.
3. Without pushing the brake pedal, push the ENGINE START/STOP button once to return the
ignition to the OFF position.
NOTE:If the indicator message illuminates when you start
the vehicle, the oil change indicator system did not
reset. If necessary, repeat this procedure.
PERFORMANCE SHIFT INDICATOR
(PSI) — I
F EQUIPPED
The PSI is enabled on vehicles with manual
transmission, or when a vehicle with automatic
transmission is in manual shift mode. The PSI
provides the driver with a visual indication within
the instrument cluster display when the driver
configured gear shift point has been reached and
the driver is still accelerating. This indication
notifies the driver to change gear corresponding to
the configured RPMs in the head unit.
3
21_LD_OM_EN_USC_t.book Page 69
Page 78 of 320
76GETTING TO KNOW YOUR INSTRUMENT PANEL
NOTE:This light may turn on if the accelerator and brake
pedals are pressed at the same time.
If the light continues to flash when the vehicle is
running, immediate service is required and you may
experience reduced performance, an elevated/rough
idle, or engine stall and your vehicle may require
towing. The light will come on when the ignition is
placed in the ON/RUN or ACC/ON/RUN position and
remain on briefly as a bulb check. If the light does not
come on during starting, have the system checked by
an authorized dealer.
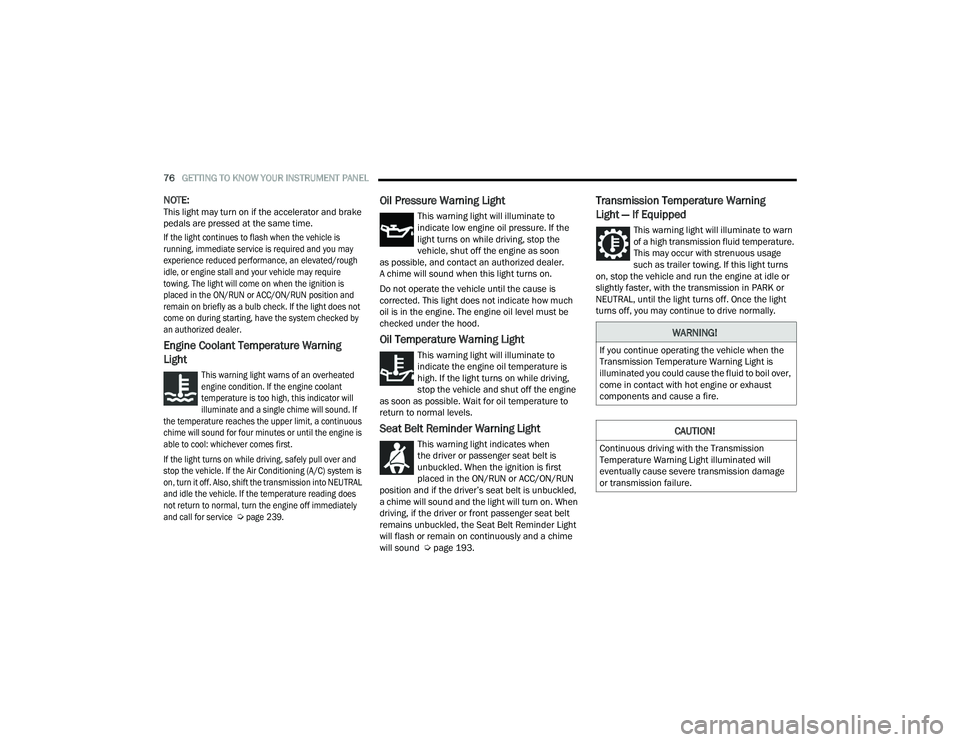
Engine Coolant Temperature Warning
Light
This warning light warns of an overheated
engine condition. If the engine coolant
temperature is too high, this indicator will
illuminate and a single chime will sound. If
the temperature reaches the upper limit, a continuous
chime will sound for four minutes or until the engine is
able to cool: whichever comes first.
If the light turns on while driving, safely pull over and
stop the vehicle. If the Air Conditioning (A/C) system is
on, turn it off. Also, shift the transmission into NEUTRAL
and idle the vehicle. If the temperature reading does
not return to normal, turn the engine off immediately
and call for service
Ú
page 239.
Oil Pressure Warning Light
This warning light will illuminate to
indicate low engine oil pressure. If the
light turns on while driving, stop the
vehicle, shut off the engine as soon
as possible, and contact an authorized dealer.
A chime will sound when this light turns on.
Do not operate the vehicle until the cause is
corrected. This light does not indicate how much
oil is in the engine. The engine oil level must be
checked under the hood.
Oil Temperature Warning Light
This warning light will illuminate to
indicate the engine oil temperature is
high. If the light turns on while driving,
stop the vehicle and shut off the engine
as soon as possible. Wait for oil temperature to
return to normal levels.
Seat Belt Reminder Warning Light
This warning light indicates when
the driver or passenger seat belt is
unbuckled. When the ignition is first
placed in the ON/RUN or ACC/ON/RUN
position and if the driver’s seat belt is unbuckled,
a chime will sound and the light will turn on. When
driving, if the driver or front passenger seat belt
remains unbuckled, the Seat Belt Reminder Light
will flash or remain on continuously and a chime
will sound Ú page 193.
Transmission Temperature Warning
Light — If Equipped
This warning light will illuminate to warn
of a high transmission fluid temperature.
This may occur with strenuous usage
such as trailer towing. If this light turns
on, stop the vehicle and run the engine at idle or
slightly faster, with the transmission in PARK or
NEUTRAL, until the light turns off. Once the light
turns off, you may continue to drive normally.
WARNING!
If you continue operating the vehicle when the
Transmission Temperature Warning Light is
illuminated you could cause the fluid to boil over,
come in contact with hot engine or exhaust
components and cause a fire.
CAUTION!
Continuous driving with the Transmission
Temperature Warning Light illuminated will
eventually cause severe transmission damage
or transmission failure.
21_LD_OM_EN_USC_t.book Page 76
Page 88 of 320
86STARTING AND OPERATING
AFTER STARTING
The idle speed is controlled automatically, and it
will decrease as the engine warms up.
ENGINE BLOCK HEATER — IF EQUIPPED
The engine block heater warms the engine, and
permits quicker starts in cold weather. Connect the
cord to a standard 110-115 Volt AC electrical
outlet with a grounded, three-wire extension cord.
The engine block heater must be plugged in at
least one hour to have an adequate warming effect
on the engine.
The engine block heater cord is routed under the
hood on the driver side of the vehicle. It has a
removable cap that is located near the air box.
ENGINE BREAK-IN RECOMMENDATIONS —
3.6L & 5.7L
A long break-in period is not required for the
drivetrain (engine, transmission, clutch, and rear
axle) in your new vehicle.
Drive moderately during the first 300 miles
(500 km). After the initial 60 miles (100 km),
speeds up to 50 or 55 mph (80 or 90 km/h) are
desirable. While cruising, brief full-throttle acceleration within
the limits of local traffic laws contributes to a good
break-in. However, wide-open throttle acceleration
in low gear can be detrimental and should be
avoided.
The engine oil, transmission fluid, and axle
lubricant installed at the factory is high-quality and
energy-conserving. Oil, fluid, and lubricant changes
should be consistent with anticipated climate and
conditions under which vehicle operations will
occur. For the recommended viscosity and quality
grades Ú
page 300.
NOTE:A new engine may consume some oil during its first
few thousand miles (kilometers) of operation.
This should be considered a normal part of the
break-in and not interpreted as an indication of
difficulty. Please check your oil level with the
engine oil indicator often during the break in
period. Add oil as required.
WARNING!
Never pour fuel or other flammable liquid into
the throttle body air inlet opening in an
attempt to start the vehicle. This could result
in flash fire causing serious personal injury.
Do not attempt to push or tow your vehicle to
get it started. Vehicles equipped with an auto -
matic transmission cannot be started this
way. Unburned fuel could enter the catalytic
converter and once the engine has started,
ignite and damage the converter and vehicle.
If the vehicle has a discharged battery,
booster cables may be used to obtain a start
from a booster battery or the battery in
another vehicle. This type of start can be
dangerous if done improperly Ú page 236.
CAUTION!
To prevent damage to the starter, do not
continuously crank the engine for more than
25 seconds at a time. Wait 60 seconds before
trying again.
WARNING!
Remember to disconnect the engine block
heater cord before driving. Damage to the
110-115 Volt electrical cord could cause
electrocution.
CAUTION!
Never use Non-Detergent Oil or Straight Mineral
Oil in the engine or damage may result.
21_LD_OM_EN_USC_t.book Page 86
Page 125 of 320
STARTING AND OPERATING123
(Continued)
Shallow Standing Water
Although your vehicle is capable of driving through
shallow standing water, consider the following
Warnings and Cautions before doing so.
WARNING!
Driving through standing water limits your
vehicle’s traction capabilities. Do not exceed
5 mph (8 km/h) when driving through
standing water.
Driving through standing water limits your
vehicle’s braking capabilities, which increases
stopping distances. Therefore, after driving
through standing water, drive slowly and
lightly press on the brake pedal several times
to dry the brakes.
Failure to follow these warnings may result in
injuries that are serious or fatal to you, your
passengers, and others around you.
CAUTION!
Always check the depth of the standing water
before driving through it. Never drive through
standing water that is deeper than the bottom
of the tire rims mounted on the vehicle.
Determine the condition of the road or the
path that is under water and if there are any
obstacles in the way before driving through
the standing water.
Do not exceed 5 mph (8 km/h) when driving through standing water. This will minimize
wave effects.
Driving through standing water may cause
damage to your vehicle’s drivetrain compo -
nents. Always inspect your vehicle’s fluids
(i.e., engine oil, transmission, axle, etc.) for
signs of contamination (i.e., fluid that is milky
or foamy in appearance) after driving through
standing water. Do not continue to operate
the vehicle if any fluid appears contaminated,
as this may result in further damage. Such
damage is not covered by the New Vehicle
Limited Warranty.
Getting water inside your vehicle’s engine can
cause it to lock up and stall out, and cause
serious internal damage to the engine. Such
damage is not covered by the New Vehicle
Limited Warranty.
CAUTION!
4
21_LD_OM_EN_USC_t.book Page 123
Page 170 of 320
168MULTIMEDIA
The following describes each feature and its
operation:
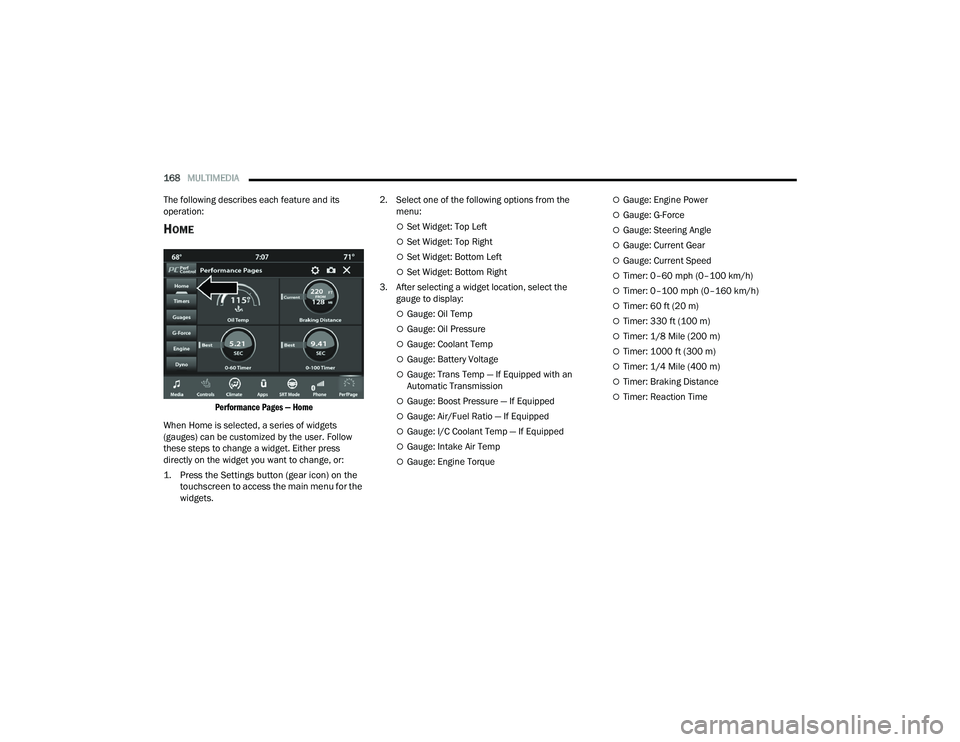
HOME
Performance Pages — Home
When Home is selected, a series of widgets
(gauges) can be customized by the user. Follow
these steps to change a widget. Either press
directly on the widget you want to change, or:
1. Press the Settings button (gear icon) on the touchscreen to access the main menu for the
widgets.
2. Select one of the following options from the
menu:
Set Widget: Top Left
Set Widget: Top Right
Set Widget: Bottom Left
Set Widget: Bottom Right
3. After selecting a widget location, select the gauge to display:
Gauge: Oil Temp
Gauge: Oil Pressure
Gauge: Coolant Temp
Gauge: Battery Voltage
Gauge: Trans Temp — If Equipped with an
Automatic Transmission
Gauge: Boost Pressure — If Equipped
Gauge: Air/Fuel Ratio — If Equipped
Gauge: I/C Coolant Temp — If Equipped
Gauge: Intake Air Temp
Gauge: Engine Torque
Gauge: Engine Power
Gauge: G-Force
Gauge: Steering Angle
Gauge: Current Gear
Gauge: Current Speed
Timer: 0–60 mph (0–100 km/h)
Timer: 0–100 mph (0–160 km/h)
Timer: 60 ft (20 m)
Timer: 330 ft (100 m)
Timer: 1/8 Mile (200 m)
Timer: 1000 ft (300 m)
Timer: 1/4 Mile (400 m)
Timer: Braking Distance
Timer: Reaction Time
21_LD_OM_EN_USC_t.book Page 168
Page 174 of 320
172MULTIMEDIA
GAUGES
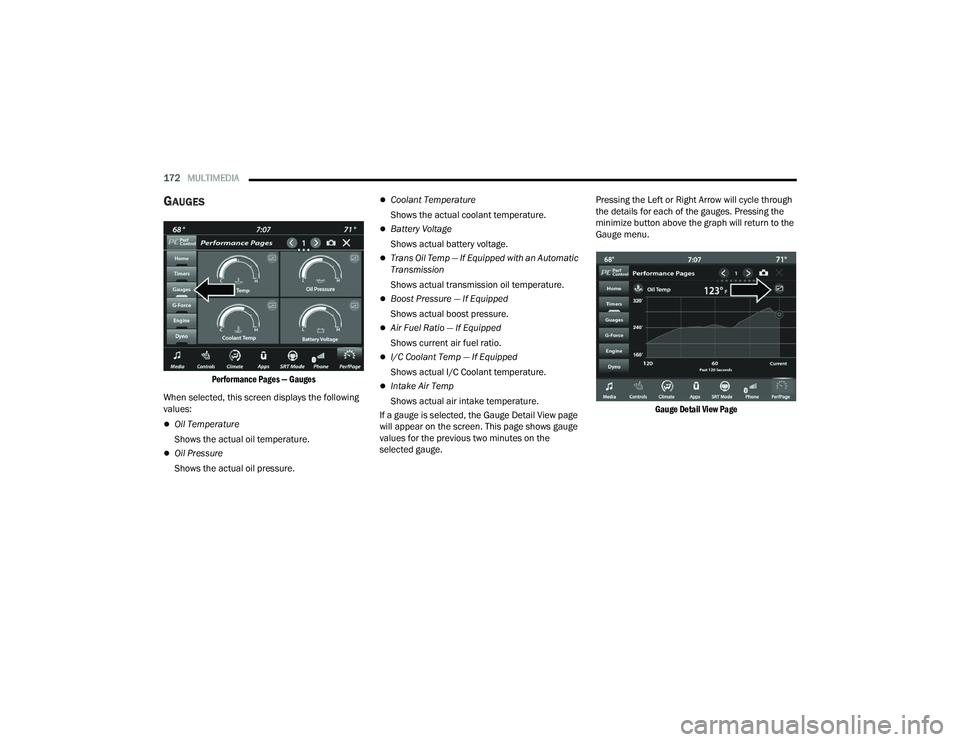
Performance Pages — Gauges
When selected, this screen displays the following
values:
Oil Temperature
Shows the actual oil temperature.
Oil Pressure
Shows the actual oil pressure.
Coolant Temperature
Shows the actual coolant temperature.
Battery Voltage
Shows actual battery voltage.
Trans Oil Temp — If Equipped with an Automatic
Transmission
Shows actual transmission oil temperature.
Boost Pressure — If Equipped
Shows actual boost pressure.
Air Fuel Ratio — If Equipped
Shows current air fuel ratio.
I/C Coolant Temp — If Equipped
Shows actual I/C Coolant temperature.
Intake Air Temp
Shows actual air intake temperature.
If a gauge is selected, the Gauge Detail View page
will appear on the screen. This page shows gauge
values for the previous two minutes on the
selected gauge. Pressing the Left or Right Arrow will cycle through
the details for each of the gauges. Pressing the
minimize button above the graph will return to the
Gauge menu.
Gauge Detail View Page
21_LD_OM_EN_USC_t.book Page 172
Page 235 of 320
IN CASE OF EMERGENCY233
SEALING A TIRE WITH TIRE SERVICE KIT
(A) Whenever You Stop To Use Tire Service Kit:
1. Pull over to a safe location and turn on the
vehicle’s Hazard Warning flashers.
2. Verify that the valve stem (on the wheel with the deflated tire) is in a position that is near to the
ground. This will allow the Tire Service Kit Hoses
(4) and (8) to reach the valve stem and keep the
Tire Service Kit flat on the ground. This will
provide the best positioning of the kit when
injecting the sealant into the deflated tire and
running the air pump. Move the vehicle as
necessary to place the valve stem in this
position before proceeding.
3. Place the transmission in PARK (auto transmission) or in Gear (manual transmission)
and place the ignition in the OFF position.
4. Apply the parking brake.
(B) Setting Up To Use Tire Service Kit:
1. Push in the Mode Select Knob (6) and turn to the Sealant Mode position.
2. Uncoil the Sealant Hose (4) and then remove the cap from the fitting at the end of the hose.
3. Place the Tire Service Kit flat on the ground next to the deflated tire. 4. Remove the cap from the valve stem and then
screw the fitting at the end of the Sealant
Hose (4) onto the valve stem.
5. Uncoil the Power Plug (7) and insert the plug into the vehicle’s 12 Volt power outlet.
NOTE:Do not remove foreign objects (e.g., screws or
nails) from the tire.
(C) Injecting Tire Service Kit Sealant Into
The Deflated Tire:
Always start the engine before turning ON the
Tire Service Kit.
NOTE:Manual transmission vehicles must have the
parking brake engaged and the gear selector in
NEUTRAL.
After pushing the Power Button (3), the sealant
(white fluid) will flow from the Sealant Bottle (1)
through the Sealant Hose (4) and into the tire.
NOTE:Sealant may leak out through the puncture in the
tire.
Keep Tire Service Kit away from open flames
or heat source.
A loose Tire Service Kit thrown forward in a
collision or hard stop could endanger the
occupants of the vehicle. Always stow the Tire
Service Kit in the place provided. Failure to
follow these warnings can result in injuries
that are serious or fatal to you, your passen -
gers, and others around you.
Take care not to allow the contents of Tire
Service Kit to come in contact with hair, eyes,
or clothing. Tire Service Kit sealant is harmful
if inhaled, swallowed, or absorbed through the
skin. It causes skin, eye, and respiratory irrita -
tion. Flush immediately with plenty of water if
there is any contact with eyes or skin. Change
clothing as soon as possible, if there is any
contact with clothing.
Tire Service Kit Sealant solution contains
latex. In case of an allergic reaction or rash,
consult a physician immediately. Keep Tire
Service Kit out of reach of children. If swal -
lowed, rinse mouth immediately with plenty of
water and drink plenty of water. Do not induce
vomiting! Consult a physician immediately.
WARNING!
7
21_LD_OM_EN_USC_t.book Page 233
Page 265 of 320

SERVICING AND MAINTENANCE263
AUTOMATIC TRANSMISSION
Special Additives
The manufacturer strongly recommends against
using any special additives in the transmission.
Automatic Transmission Fluid (ATF) is an engineered
product and its performance may be impaired by
supplemental additives. Therefore, do not add any
fluid additives to the transmission. Avoid using
transmission sealers as they may adversely
affect seals.
Fluid Level Check
The fluid level is preset at the factory and does
not require adjustment under normal operating
conditions. Routine fluid level checks are not
required; therefore the transmission has no dipstick.
An authorized dealer can check your transmission
fluid level using special service tools. If you notice
fluid leakage or transmission malfunction, visit
an authorized dealer immediately to have the
transmission fluid level checked. Operating the
vehicle with an improper fluid level can cause
severe transmission damage.
Fluid And Filter Changes — Eight-Speed
Transmission
Under normal operating conditions, the fluid
installed at the factory will provide satisfactory
lubrication for the life of the vehicle.
Routine fluid and filter changes are not required.
However, change the fluid and filter if the fluid
becomes contaminated (with water, etc.), or if the
transmission is disassembled for any reason.
Selection Of Lubricant
It is important to use the proper transmission fluid
to ensure optimum transmission performance
and life. Use only the manufacturer's specified
transmission fluid Úpage 300. It is important to
maintain the transmission fluid at the correct level
using the recommended fluid.
NOTE:
No chemical flushes should be used in any trans -
mission; only the approved lubricant should be used.
REAR AXLE
For normal service, periodic fluid level checks are
not required. When the vehicle is serviced for other
reasons the exterior surfaces of the axle assembly
should be inspected. If gear oil leakage is
suspected inspect the fluid level Ú page 300.
Overfilling the brake fluid reservoir can result in
spilling brake fluid on hot engine parts, causing
the brake fluid to catch fire. Brake fluid can also
damage painted and vinyl surfaces, care should
be taken to avoid its contact with these surfaces.
Do not allow petroleum based fluid to contaminate
the brake fluid. Brake seal components could be
damaged, causing partial or complete brake
failure. This could result in a collision.
CAUTION!
Do not use chemical flushes in your
transmission as the chemicals can damage your
transmission components. Such damage is not
covered by the New Vehicle Limited Warranty.
WARNING!
CAUTION!
If a transmission fluid leak occurs, visit an
authorized dealer immediately. Severe transmission
damage may occur. An authorized dealer has the
proper tools to adjust the fluid level accurately.
CAUTION!
Using a transmission fluid other than the
manufacturer’s recommended fluid may cause
deterioration in transmission shift quality and/or
torque converter shudder Úpage 300.
8
21_LD_OM_EN_USC_t.book Page 263