Uconnect system DODGE CHARGER 2023 User Guide
[x] Cancel search | Manufacturer: DODGE, Model Year: 2023, Model line: CHARGER, Model: DODGE CHARGER 2023Pages: 292, PDF Size: 13.05 MB
Page 33 of 292
GETTING TO KNOW YOUR VEHICLE31
Adjusting The Seat Up Or Down
The height of the seats can be adjusted up or down by
using the power seat switch. The seat will move in the
direction of the switch. Release the switch when the
desired position has been reached.
Tilting The Seat Up Or Down
The angle of the seat cushion can be adjusted up or down
using the power seat switch. The front of the seat cushion
will move in the direction of the switch. Release the switch
when the desired position has been reached.
Reclining The Seatback
The angle of the seatback can be adjusted forward or
rearward by using the power seat switch. The seat will
move in the direction of the switch. Release the switch
when the desired position is reached.
Power Lumbar — If Equipped
Vehicles equipped with power driver or passenger seats
may also be equipped with power lumbar. The power
lumbar switch is located on the outboard side of the power
seat. Push the switch forward or rearward to increase or
decrease the lumbar support.
Easy Entry/Exit Seat — If Equipped
This feature provides automatic driver seat positioning to
enhance driver mobility when entering and exiting the
vehicle.
The distance the driver seat moves depends on where you
have the driver seat positioned when you place the
vehicle’s ignition in the OFF position.
When you place the vehicle’s ignition in the OFF posi -
tion, the driver seat will move about 2.4 inches
(60 mm) rearward if the driver seat position is greater
than or equal to 2.7 inches (67.7 mm) forward of the rear stop. The seat will return to its previously set posi -
tion when you place the vehicle’s ignition in the ACC or
RUN position.
The Easy Entry/Easy Exit feature is disabled when the
driver seat position is less than 0.9 of an inch
(22.7 mm) forward of the rear stop. At this position,
there is no benefit to the driver by moving the seat for
Easy Exit or Easy Entry.
When enabled in Uconnect Settings, Easy Entry and Easy
Exit positions are stored in each memory setting profile
Úpage 27.
NOTE:The Easy Entry/Exit feature is enabled or disabled through
the programmable features in the Uconnect system
Úpage 112.
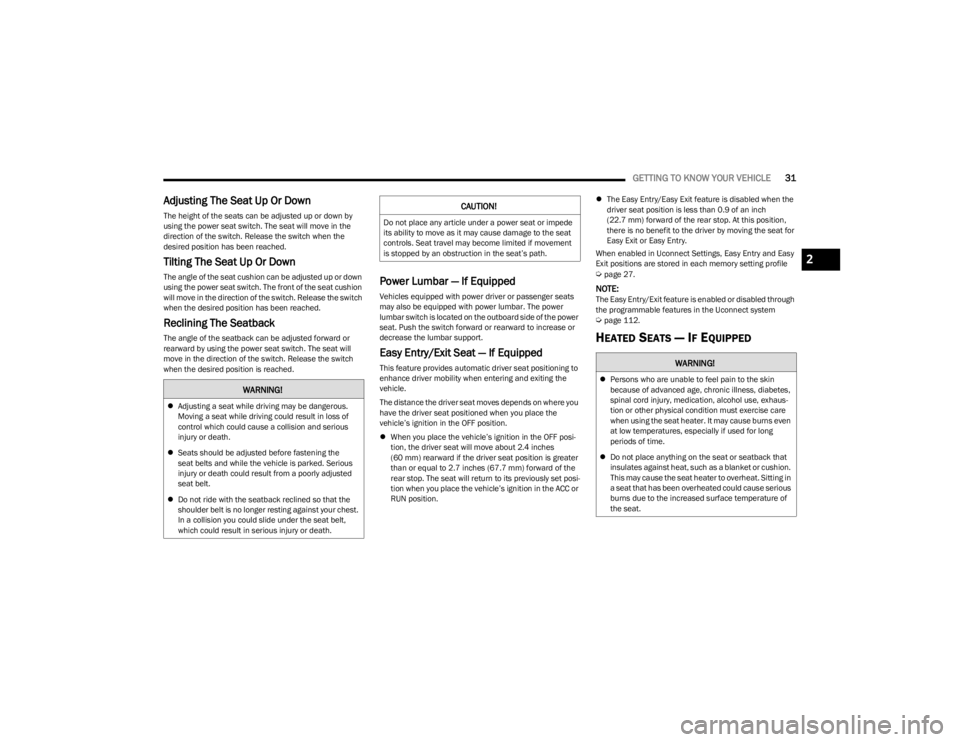
HEATED SEATS — IF EQUIPPED
WARNING!
Adjusting a seat while driving may be dangerous.
Moving a seat while driving could result in loss of
control which could cause a collision and serious
injury or death.
Seats should be adjusted before fastening the
seat belts and while the vehicle is parked. Serious
injury or death could result from a poorly adjusted
seat belt.
Do not ride with the seatback reclined so that the
shoulder belt is no longer resting against your chest.
In a collision you could slide under the seat belt,
which could result in serious injury or death.
CAUTION!
Do not place any article under a power seat or impede
its ability to move as it may cause damage to the seat
controls. Seat travel may become limited if movement
is stopped by an obstruction in the seat’s path.
WARNING!
Persons who are unable to feel pain to the skin
because of advanced age, chronic illness, diabetes,
spinal cord injury, medication, alcohol use, exhaus -
tion or other physical condition must exercise care
when using the seat heater. It may cause burns even
at low temperatures, especially if used for long
periods of time.
Do not place anything on the seat or seatback that
insulates against heat, such as a blanket or cushion.
This may cause the seat heater to overheat. Sitting in
a seat that has been overheated could cause serious
burns due to the increased surface temperature of
the seat.
2
23_LD_OM_EN_USC_t.book Page 31
Page 34 of 292
32GETTING TO KNOW YOUR VEHICLE
Front Heated Seats
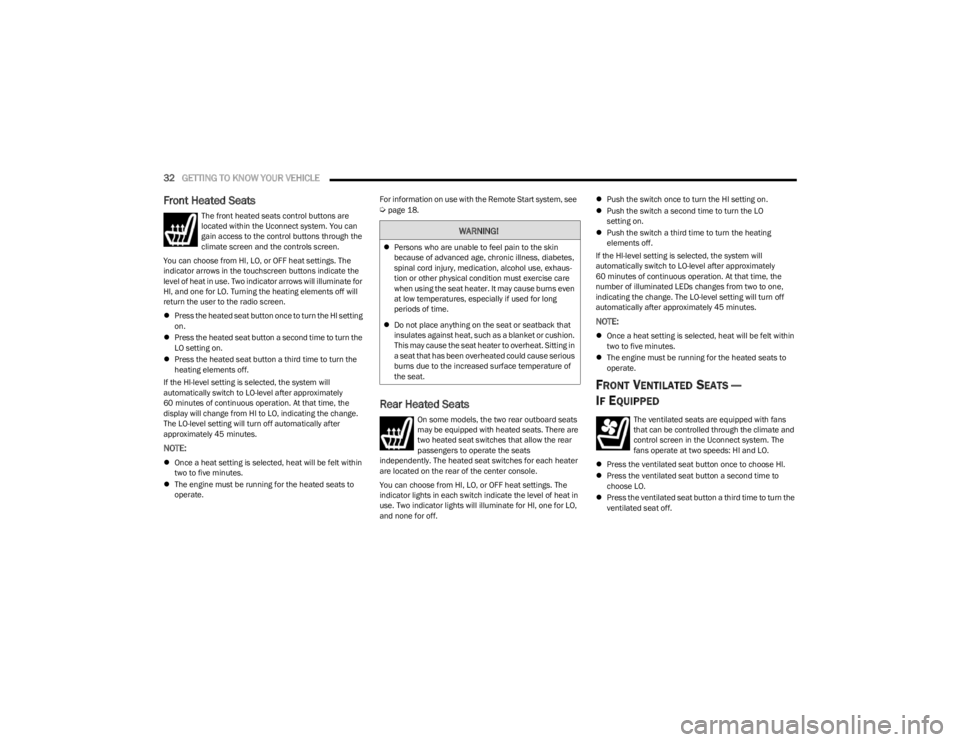
The front heated seats control buttons are
located within the Uconnect system. You can
gain access to the control buttons through the
climate screen and the controls screen.
You can choose from HI, LO, or OFF heat settings. The
indicator arrows in the touchscreen buttons indicate the
level of heat in use. Two indicator arrows will illuminate for
HI, and one for LO. Turning the heating elements off will
return the user to the radio screen.
Press the heated seat button once to turn the HI setting
on.
Press the heated seat button a second time to turn the
LO setting on.
Press the heated seat button a third time to turn the
heating elements off.
If the HI-level setting is selected, the system will
automatically switch to LO-level after approximately
60 minutes of continuous operation. At that time, the
display will change from HI to LO, indicating the change.
The LO-level setting will turn off automatically after
approximately 45 minutes.
NOTE:
Once a heat setting is selected, heat will be felt within
two to five minutes.
The engine must be running for the heated seats to
operate. For information on use with the Remote Start system, see
Úpage 18.
Rear Heated Seats
On some models, the two rear outboard seats
may be equipped with heated seats. There are
two heated seat switches that allow the rear
passengers to operate the seats
independently. The heated seat switches for each heater
are located on the rear of the center console.
You can choose from HI, LO, or OFF heat settings. The
indicator lights in each switch indicate the level of heat in
use. Two indicator lights will illuminate for HI, one for LO,
and none for off.
Push the switch once to turn the HI setting on.
Push the switch a second time to turn the LO
setting on.
Push the switch a third time to turn the heating
elements off.
If the HI-level setting is selected, the system will
automatically switch to LO-level after approximately
60 minutes of continuous operation. At that time, the
number of illuminated LEDs changes from two to one,
indicating the change. The LO-level setting will turn off
automatically after approximately 45 minutes.
NOTE:
Once a heat setting is selected, heat will be felt within
two to five minutes.
The engine must be running for the heated seats to
operate.
FRONT VENTILATED SEATS —
I
F EQUIPPED
The ventilated seats are equipped with fans
that can be controlled through the climate and
control screen in the Uconnect system. The
fans operate at two speeds: HI and LO.
Press the ventilated seat button once to choose HI.
Press the ventilated seat button a second time to
choose LO.
Press the ventilated seat button a third time to turn the
ventilated seat off.
WARNING!
Persons who are unable to feel pain to the skin
because of advanced age, chronic illness, diabetes,
spinal cord injury, medication, alcohol use, exhaus -
tion or other physical condition must exercise care
when using the seat heater. It may cause burns even
at low temperatures, especially if used for long
periods of time.
Do not place anything on the seat or seatback that
insulates against heat, such as a blanket or cushion.
This may cause the seat heater to overheat. Sitting in
a seat that has been overheated could cause serious
burns due to the increased surface temperature of
the seat.
23_LD_OM_EN_USC_t.book Page 32
Page 37 of 292
GETTING TO KNOW YOUR VEHICLE35
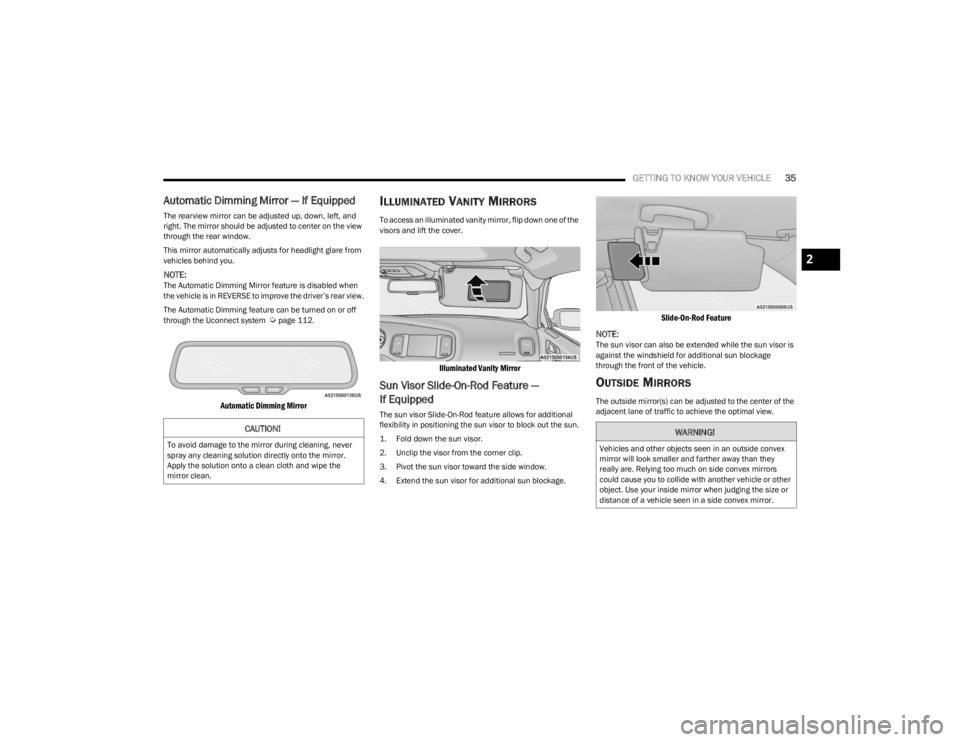
Automatic Dimming Mirror — If Equipped
The rearview mirror can be adjusted up, down, left, and
right. The mirror should be adjusted to center on the view
through the rear window.
This mirror automatically adjusts for headlight glare from
vehicles behind you.
NOTE:The Automatic Dimming Mirror feature is disabled when
the vehicle is in REVERSE to improve the driver’s rear view.
The Automatic Dimming feature can be turned on or off
through the Uconnect system
Úpage 112.
Automatic Dimming Mirror
ILLUMINATED VANITY MIRRORS
To access an illuminated vanity mirror, flip down one of the
visors and lift the cover.
Illuminated Vanity Mirror
Sun Visor Slide-On-Rod Feature —
If Equipped
The sun visor Slide-On-Rod feature allows for additional
flexibility in positioning the sun visor to block out the sun.
1. Fold down the sun visor.
2. Unclip the visor from the corner clip.
3. Pivot the sun visor toward the side window.
4. Extend the sun visor for additional sun blockage.
Slide-On-Rod Feature
NOTE:
The sun visor can also be extended while the sun visor is
against the windshield for additional sun blockage
through the front of the vehicle.
OUTSIDE MIRRORS
The outside mirror(s) can be adjusted to the center of the
adjacent lane of traffic to achieve the optimal view.
CAUTION!
To avoid damage to the mirror during cleaning, never
spray any cleaning solution directly onto the mirror.
Apply the solution onto a clean cloth and wipe the
mirror clean.
WARNING!
Vehicles and other objects seen in an outside convex
mirror will look smaller and farther away than they
really are. Relying too much on side convex mirrors
could cause you to collide with another vehicle or other
object. Use your inside mirror when judging the size or
distance of a vehicle seen in a side convex mirror.
2
23_LD_OM_EN_USC_t.book Page 35
Page 38 of 292
36GETTING TO KNOW YOUR VEHICLE
DRIVER'S OUTSIDE AUTOMATIC
D
IMMING MIRROR — IF EQUIPPED
The driver’s outside mirror will automatically adjust for
glare from vehicles behind you. This feature is controlled
by the inside automatic dimming mirror and will
automatically adjust for headlight glare when the inside
mirror adjusts.
OUTSIDE MIRRORS APPROACH LIGHT —
I
F EQUIPPED
Driver and passenger outside mirrors equipped with
approach lighting contain one LED, which is located in the
upper outboard mirror glass corner. The approach light
supplies illuminated entry lighting, which turns on in both
mirrors when you use the remote keyless entry key fob or
open any door. This LED shines outward to illuminate the
front and rear door handles. It also shines downward to
illuminate the area in front of the doors.
POWER MIRRORS
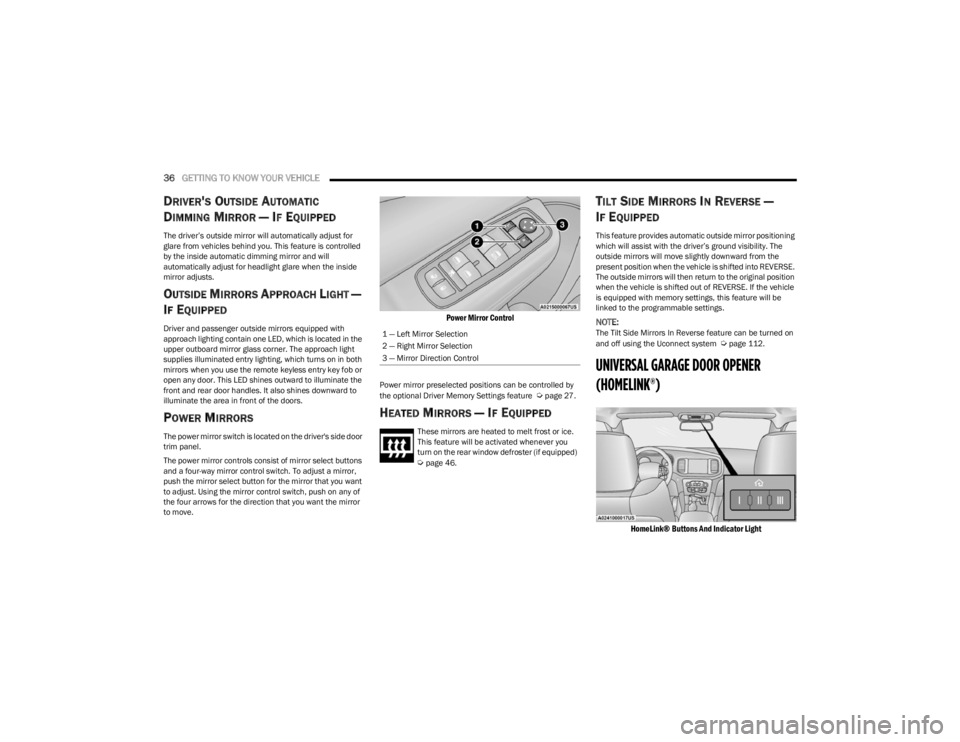
The power mirror switch is located on the driver's side door
trim panel.
The power mirror controls consist of mirror select buttons
and a four-way mirror control switch. To adjust a mirror,
push the mirror select button for the mirror that you want
to adjust. Using the mirror control switch, push on any of
the four arrows for the direction that you want the mirror
to move.
Power Mirror Control
Power mirror preselected positions can be controlled by
the optional Driver Memory Settings feature Úpage 27.
HEATED MIRRORS — IF EQUIPPED
These mirrors are heated to melt frost or ice.
This feature will be activated whenever you
turn on the rear window defroster (if equipped)
Úpage 46.
TILT SIDE MIRRORS IN REVERSE —
I
F EQUIPPED
This feature provides automatic outside mirror positioning
which will assist with the driver’s ground visibility. The
outside mirrors will move slightly downward from the
present position when the vehicle is shifted into REVERSE.
The outside mirrors will then return to the original position
when the vehicle is shifted out of REVERSE. If the vehicle
is equipped with memory settings, this feature will be
linked to the programmable settings.
NOTE:The Tilt Side Mirrors In Reverse feature can be turned on
and off using the Uconnect system Úpage 112.
UNIVERSAL GARAGE DOOR OPENER
(HOMELINK®)
HomeLink® Buttons And Indicator Light
1 — Left Mirror Selection
2 — Right Mirror Selection
3 — Mirror Direction Control
23_LD_OM_EN_USC_t.book Page 36
Page 43 of 292
GETTING TO KNOW YOUR VEHICLE41
To turn on the headlights, rotate the headlight switch
clockwise. When the headlight switch is on, the parking
lights, taillights, license plate light and instrument panel
lights are also turned on. To turn off the headlights, rotate
the headlight switch back to the O (off) position.
For vehicles sold in Canada, rotate the headlight switch
clockwise from the parking lights and instrument panel
lights position to the AUTO position for automatic
headlights. Rotate to the second detent to turn on
headlights, parking lights, and instrument panel lights
operation.
NOTE:
Your vehicle is equipped with plastic headlight and fog
light (if equipped) lenses that are lighter and less
susceptible to stone breakage than glass lights. Plastic
is not as scratch resistant as glass and therefore
different lens cleaning procedures must be followed.
To minimize the possibility of scratching the lenses and
reducing light output, avoid wiping with a dry cloth. To
remove road dirt, wash with a mild soap solution
followed by rinsing.
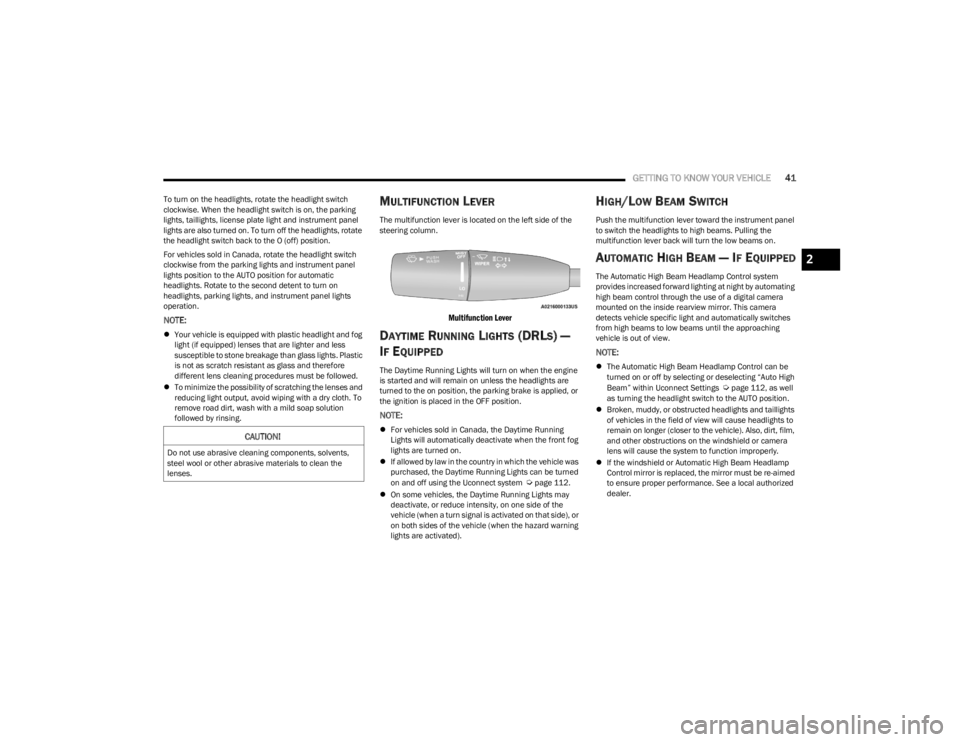
MULTIFUNCTION LEVER
The multifunction lever is located on the left side of the
steering column.
Multifunction Lever
DAYTIME RUNNING LIGHTS (DRLS) —
I
F EQUIPPED
The Daytime Running Lights will turn on when the engine
is started and will remain on unless the headlights are
turned to the on position, the parking brake is applied, or
the ignition is placed in the OFF position.
NOTE:
For vehicles sold in Canada, the Daytime Running
Lights will automatically deactivate when the front fog
lights are turned on.
If allowed by law in the country in which the vehicle was
purchased, the Daytime Running Lights can be turned
on and off using the Uconnect system
Úpage 112.
On some vehicles, the Daytime Running Lights may
deactivate, or reduce intensity, on one side of the
vehicle (when a turn signal is activated on that side), or
on both sides of the vehicle (when the hazard warning
lights are activated).
HIGH/LOW BEAM SWITCH
Push the multifunction lever toward the instrument panel
to switch the headlights to high beams. Pulling the
multifunction lever back will turn the low beams on.
AUTOMATIC HIGH BEAM — IF EQUIPPED
The Automatic High Beam Headlamp Control system
provides increased forward lighting at night by automating
high beam control through the use of a digital camera
mounted on the inside rearview mirror. This camera
detects vehicle specific light and automatically switches
from high beams to low beams until the approaching
vehicle is out of view.
NOTE:
The Automatic High Beam Headlamp Control can be
turned on or off by selecting or deselecting “Auto High
Beam” within Uconnect Settings
Úpage 112, as well
as turning the headlight switch to the AUTO position.
Broken, muddy, or obstructed headlights and taillights
of vehicles in the field of view will cause headlights to
remain on longer (closer to the vehicle). Also, dirt, film,
and other obstructions on the windshield or camera
lens will cause the system to function improperly.
If the windshield or Automatic High Beam Headlamp
Control mirror is replaced, the mirror must be re-aimed
to ensure proper performance. See a local authorized
dealer.
CAUTION!
Do not use abrasive cleaning components, solvents,
steel wool or other abrasive materials to clean the
lenses.
2
23_LD_OM_EN_USC_t.book Page 41
Page 44 of 292
42GETTING TO KNOW YOUR VEHICLE
FLASH-TO-PASS
You can signal another vehicle with your headlights by
lightly pulling the multifunction lever toward you. This will
cause the high beam headlights to turn on, and remain on,
until the lever is released.
AUTOMATIC HEADLIGHTS
This system automatically turns the headlights on or off
according to ambient light levels. To turn the system on,
rotate the headlight switch counterclockwise to the AUTO
position. When the system is on, the headlight time delay
feature is also on. This means the headlights will stay on
for up to 90 seconds after placing the ignition in the OFF
position. The headlight time delay can be programmed
0/30/60/90 seconds within Uconnect Settings
Úpage 112.
To turn the automatic system off, move the headlight
switch out of the AUTO position.
NOTE:The engine must be running before the headlights will
come on in the automatic mode.
PARKING LIGHTS
To turn on the parking lights and instrument panel lights,
rotate the headlight switch clockwise. To turn off the
parking lights, rotate the headlight switch back to the O
(off) position.
NOTE:Vehicles sold in Canada are equipped with a headlight
switch with an AUTO and ON detent but without an OFF
detent. Headlights will be deactivated when the headlight
switch is placed in the parking lights position.
However, the Daytime Running Lights (DRLs) will be
activated along with the front and rear marker lights.
The DRLs may be deactivated when the parking brake is
engaged.
AUTOMATIC HEADLIGHTS ON WITH
W
IPERS — IF EQUIPPED
If your vehicle is equipped with Automatic Headlights, it
also has this customer-programmable feature. When your
headlights are in the automatic mode and the engine is
running, they will automatically turn on when the wiper
system is on. This feature is programmable through the
Uconnect system
Úpage 112.
NOTE:When your headlights come on during the daytime, the
instrument panel lights will automatically dim to the lower
nighttime intensity.
HEADLIGHT DELAY
To aid in your exit, your vehicle is equipped with a
headlight delay that will leave the headlights on for
approximately 90 seconds. This delay is initiated when the
ignition is placed in the OFF position while the headlight
switch is on, and then the headlight switch is cycled off.
Headlight delay can be canceled by either turning the
headlight switch on then off, or by placing the ignition in
the ON position.
NOTE:The headlight delay time is programmable through
Uconnect Settings Úpage 112.
LIGHTS-ON REMINDER
If the headlights or parking lights are on after the ignition
is placed in the OFF position, the vehicle will chime when
the driver’s door is opened.
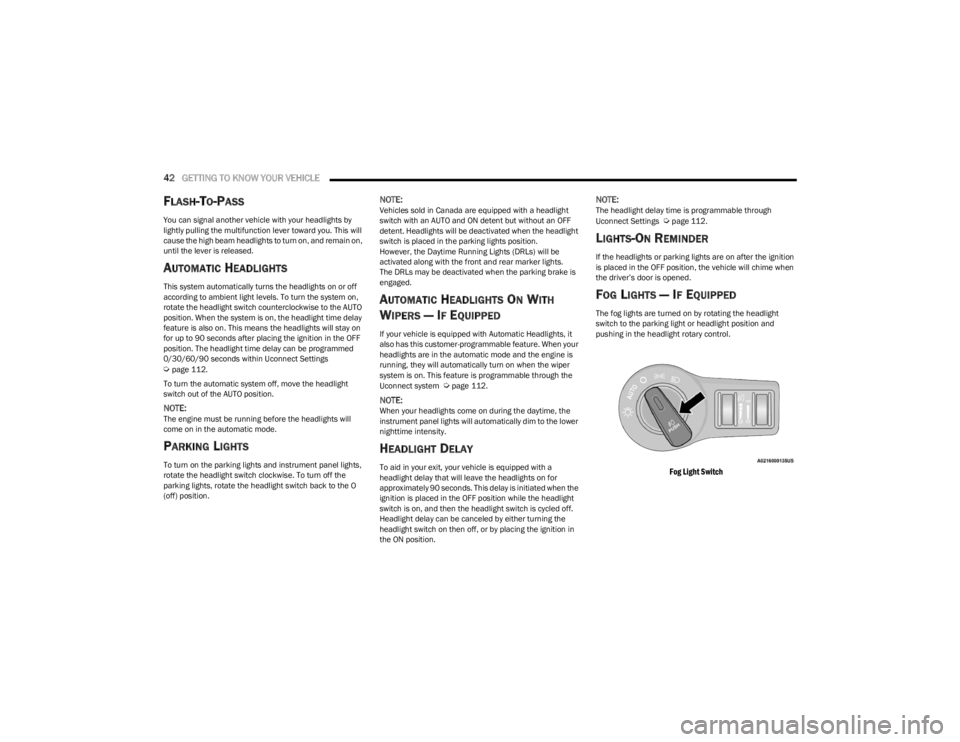
FOG LIGHTS — IF EQUIPPED
The fog lights are turned on by rotating the headlight
switch to the parking light or headlight position and
pushing in the headlight rotary control.
Fog Light Switch
23_LD_OM_EN_USC_t.book Page 42
Page 48 of 292
46GETTING TO KNOW YOUR VEHICLE
Intermittent Wipers
Use one of the four intermittent wiper settings when
weather conditions permit. At driving speeds above
10 mph (16 km/h), the delay can be regulated from a
maximum of approximately 36 seconds between cycles
(first detent), to a cycle every one second (fourth detent).
If the vehicle is moving less than 10 mph (16 km/h), delay
times will be doubled.
Windshield Washers
To use the washer, push on the end of the lever (toward
the steering wheel) and hold. If the lever is pushed while
in the intermittent setting, the wipers will turn on and
operate for several cycles after the end of the lever is
released, and then resume the intermittent interval
previously selected.
If the end of the lever is pushed while the wipers are in the
off position, the wipers will operate for several cycles, then
turn off.
Mist
Rotate the end of the lever downward to the MIST position
and release for a single wiping cycle.NOTE:The Mist feature does not activate the washer pump;
therefore, no washer fluid will be sprayed on the wind -
shield. The washer function must be used in order to spray
the windshield with washer fluid.
For information on wiper care and replacement, see
Úpage 232.
RAIN SENSING WIPERS — IF EQUIPPED
This feature senses rain or snowfall on the windshield and
automatically activates the wipers. Rotate the end of the
multifunction lever to one of four detent positions to
activate this feature.
The sensitivity of the system can be adjusted with the
multifunction lever. Wiper delay position one is the least
sensitive, and wiper delay detent position four is the most
sensitive.
Wiper delay position three should be used for normal rain
conditions.
NOTE:
The Rain Sensing feature will not operate when the
wiper switch is in the low or high-speed position.
The Rain Sensing feature may not function properly
when ice, or dried salt water is present on the wind -
shield.
Use of products containing wax or silicone may reduce
Rain Sensing performance.
The Rain Sensing feature can be turned on and off
using the Uconnect system
Úpage 112. The Rain Sensing system has protection features for the
wiper blades and arms, and will not operate under the
following conditions:
Low Ambient Temperature — When the ignition is first
placed in the ON position, the Rain Sensing system will
not operate until the wiper switch is moved, vehicle
speed is greater than 3 mph (5 km/h), or the outside
temperature is greater than 32°F (0°C).
Transmission In NEUTRAL Position — When the ignition
is ON, and the automatic transmission is in the
NEUTRAL position, the Rain Sensing system will not
operate until the wiper switch is moved, vehicle speed
is greater than 3 mph (5 km/h), or the gear selector is
moved out of the NEUTRAL position.
Remote Start Mode Inhibit — On vehicles equipped with
the Remote Start system, Rain Sensing wipers are not
operational when the vehicle is in the Remote Start
mode.
CLIMATE CONTROLS
The Climate Control system allows you to regulate the
temperature, air flow, and direction of air circulating
throughout the vehicle. The controls are located on the
touchscreen and on the instrument panel below the radio.WARNING!
Sudden loss of visibility through the windshield could
lead to a collision. You might not see other vehicles or
other obstacles. To avoid sudden icing of the windshield
during freezing weather, warm the windshield with the
defroster before and during windshield washer use.
23_LD_OM_EN_USC_t.book Page 46
Page 49 of 292
GETTING TO KNOW YOUR VEHICLE47
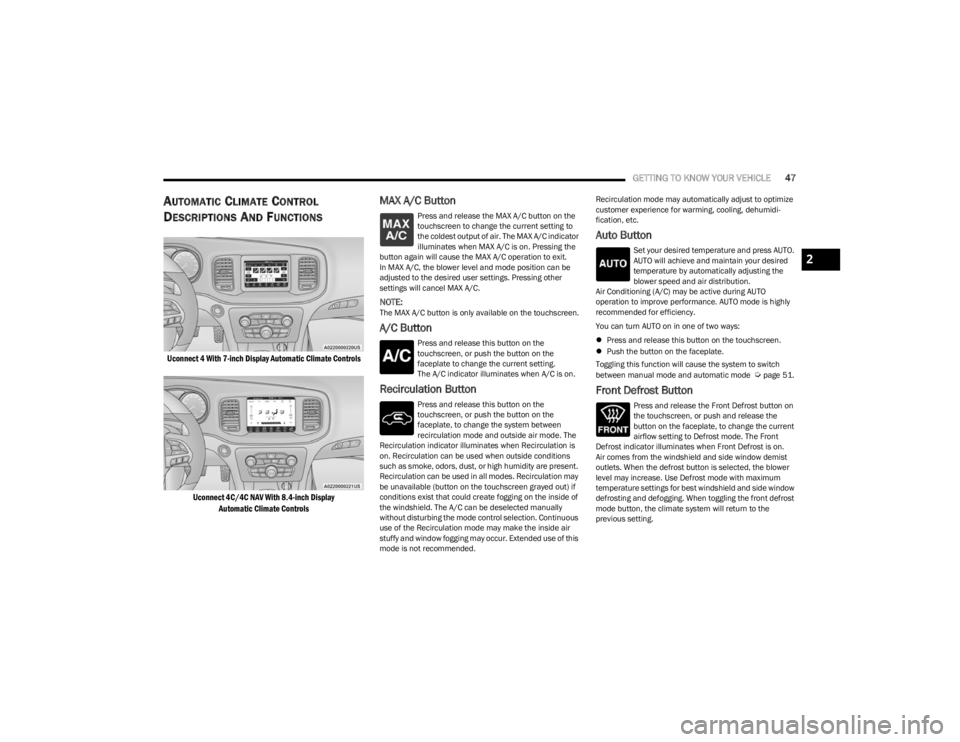
AUTOMATIC CLIMATE CONTROL
D
ESCRIPTIONS AND FUNCTIONS
Uconnect 4 With 7-inch Display Automatic Climate Controls
Uconnect 4C/4C NAV With 8.4-inch DisplayAutomatic Climate Controls
MAX A/C Button
Press and release the MAX A/C button on the
touchscreen to change the current setting to
the coldest output of air. The MAX A/C indicator
illuminates when MAX A/C is on. Pressing the
button again will cause the MAX A/C operation to exit.
In MAX A/C, the blower level and mode position can be
adjusted to the desired user settings. Pressing other
settings will cancel MAX A/C.
NOTE:The MAX A/C button is only available on the touchscreen.
A/C Button
Press and release this button on the
touchscreen, or push the button on the
faceplate to change the current setting.
The A/C indicator illuminates when A/C is on.
Recirculation Button
Press and release this button on the
touchscreen, or push the button on the
faceplate, to change the system between
recirculation mode and outside air mode. The
Recirculation indicator illuminates when Recirculation is
on. Recirculation can be used when outside conditions
such as smoke, odors, dust, or high humidity are present.
Recirculation can be used in all modes. Recirculation may
be unavailable (button on the touchscreen grayed out) if
conditions exist that could create fogging on the inside of
the windshield. The A/C can be deselected manually
without disturbing the mode control selection. Continuous
use of the Recirculation mode may make the inside air
stuffy and window fogging may occur. Extended use of this
mode is not recommended. Recirculation mode may automatically adjust to optimize
customer experience for warming, cooling, dehumidi
-
fication, etc.
Auto Button
Set your desired temperature and press AUTO.
AUTO will achieve and maintain your desired
temperature by automatically adjusting the
blower speed and air distribution.
Air Conditioning (A/C) may be active during AUTO
operation to improve performance. AUTO mode is highly
recommended for efficiency.
You can turn AUTO on in one of two ways:
Press and release this button on the touchscreen.
Push the button on the faceplate.
Toggling this function will cause the system to switch
between manual mode and automatic mode
Úpage 51.
Front Defrost Button
Press and release the Front Defrost button on
the touchscreen, or push and release the
button on the faceplate, to change the current
airflow setting to Defrost mode. The Front
Defrost indicator illuminates when Front Defrost is on.
Air comes from the windshield and side window demist
outlets. When the defrost button is selected, the blower
level may increase. Use Defrost mode with maximum
temperature settings for best windshield and side window
defrosting and defogging. When toggling the front defrost
mode button, the climate system will return to the
previous setting.
2
23_LD_OM_EN_USC_t.book Page 47
Page 51 of 292

GETTING TO KNOW YOUR VEHICLE49
Bi-Level Mode
Air comes from the instrument panel outlets
and floor outlets. A slight amount of air is
directed through the defrost and side window
demister outlets.
NOTE:Bi-Level mode is designed under comfort conditions to
provide cooler air out of the panel outlets and warmer air
from the floor outlets.
Floor Mode
Air comes from the floor outlets. A slight
amount of air is directed through the defrost
and side window demister outlets.
Mix Mode
Air is directed through the floor, defrost, and
side window demister outlets. This setting
works best in cold or snowy conditions that
require extra heat to the windshield. This
setting is good for maintaining comfort while reducing
moisture on the windshield.
Climate Control OFF Button
Press and release the OFF button on the
touchscreen, or push the OFF button on the
faceplate to turn the Climate Control ON/OFF.
MANUAL CLIMATE CONTROL
D
ESCRIPTIONS AND FUNCTIONS
Uconnect 4 With 7-inch Display Manual Climate Controls
Uconnect 4C/4C NAV With 8.4-inch Display Manual Climate Controls
MAX A/C Button
Press and release the MAX A/C button on the
touchscreen to change the current setting to
the coldest output of air. The MAX A/C indicator
illuminates when MAX A/C is on. Pressing the
button again will cause the MAX A/C operation to exit.
NOTE:The MAX A/C button is only available on the touchscreen.
A/C Button
Press and release this button on the
touchscreen, or push the button on the
faceplate to change the current setting.
The A/C indicator illuminates when A/C is on.
Recirculation Button
Press and release this button to change the
system between recirculation mode and
outside air mode. The Recirculation indicator
and the A/C indicator illuminate when the
Recirculation button is pressed. Recirculation can be used
when outside conditions such as smoke, odors, dust, or
high humidity are present. Recirculation can be used in all
modes except for Defrost. Recirculation may be
unavailable (button on the touchscreen grayed out) if
conditions exist that could create fogging on the inside of
the windshield. The A/C can be deselected manually
without disturbing the mode control selection. Continuous
use of the Recirculation mode may make the inside air
stuffy and window fogging may occur. Extended use of this
mode is not recommended. Recirculation mode may
automatically adjust to optimize customer experience for
warming, cooling, dehumidification, etc.
2
23_LD_OM_EN_USC_t.book Page 49
Page 53 of 292

GETTING TO KNOW YOUR VEHICLE51
Panel Mode
Air comes from the outlets in the instrument
panel. Each of these outlets can be individually
adjusted to direct the flow of air. The air vanes
of the center outlets and outboard outlets can
be moved up and down or side to side to regulate airflow
direction. There is a shut-off wheel located below the air
vanes to shut off or adjust the amount of airflow from
these outlets.
Bi-Level Mode
Air comes from the instrument panel outlets
and floor outlets. A slight amount of air is
directed through the defrost and side window
demister outlets.
NOTE:Bi-Level mode is designed under comfort conditions to
provide cooler air out of the panel outlets and warmer air
from the floor outlets.
Floor Mode
Air comes from the floor outlets. A slight
amount of air is directed through the defrost
and side window demister outlets.
Mix Mode
Air is directed through the floor, defrost, and
side window demister outlets. This setting
works best in cold or snowy conditions that
require extra heat to the windshield. This
setting is good for maintaining comfort while reducing
moisture on the windshield.
Climate Control OFF Button
Press and release the OFF button on the
touchscreen, or push the OFF button on the
faceplate to turn the Climate Control ON/OFF.
AUTOMATIC TEMPERATURE CONTROL
(ATC)
Automatic Operation
1. Push the AUTO button on the faceplate, or the AUTO
button on the touchscreen on the Automatic
Temperature Control (ATC) Panel.
2. Next, adjust the temperature that you would like the system to maintain by adjusting the driver and
passenger temperature control buttons. Once the
desired temperature is displayed, the system will
achieve and automatically maintain that comfort
level.
3. When the system is set up for your comfort level, it is not necessary to change the settings. You will
experience the greatest efficiency by simply allowing
the system to function automatically.
NOTE:
It is not necessary to move the temperature settings for
cold or hot vehicles. The system automatically adjusts
the temperature, mode, and blower speed to provide
comfort as quickly as possible.
The temperature can be displayed in U.S. or Metric
units within Uconnect Settings
Úpage 112. To provide you with maximum comfort in the Automatic
mode during cold start-ups, the blower fan will remain on
low until the engine warms up. The blower will increase in
speed and transition into Auto mode.
Manual Operation Override
This system offers a full complement of manual override
features. The AUTO symbol in the front ATC display will be
turned off when the system is being used in the manual
mode.
CLIMATE VOICE COMMANDS
Adjust vehicle temperatures hands-free and keep
everyone comfortable while you keep moving ahead.
Push the VR button. After the beep, say one of the
following commands:
“Set the driver temperature to 70 degrees”
“Set the passenger temperature to 70 degrees”
TIP:Voice Command for Climate may only be used to adjust
the interior temperature of your vehicle. Voice Command
will not work to adjust the heated seats or steering wheel
if equipped.
OPERATING TIPS
Refer to the chart at the end of this section for suggested
control settings for various weather conditions.
2
23_LD_OM_EN_USC_t.book Page 51