center console DODGE CHARGER SRT 2007 6.G Owners Manual
[x] Cancel search | Manufacturer: DODGE, Model Year: 2007, Model line: CHARGER SRT, Model: DODGE CHARGER SRT 2007 6.GPages: 350, PDF Size: 5.51 MB
Page 112 of 350

Settings (Customer Programmable Features),º under
ªElectronic Vehicle Information Center (EVIC)º in Sec-
tion 4 of this manual.
Sunroof Fully Closed
Press the switch forward and release to ensure that the
sunroof is fully closed.
ELECTRICAL POWER OUTLETS
There are two 12-volt electrical outlets on this vehicle.
Both of the outlets are protected by a fuse.
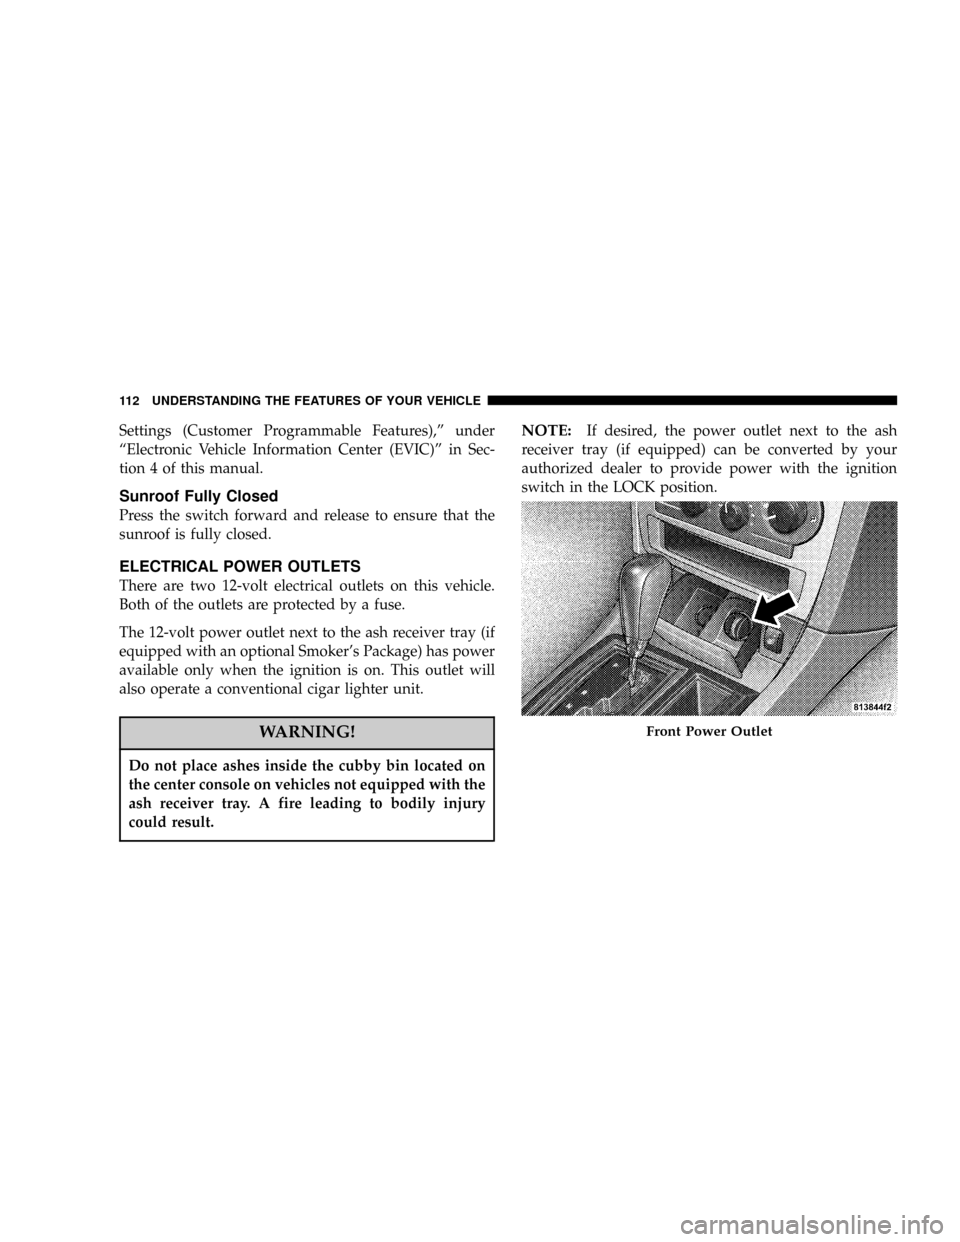
The 12-volt power outlet next to the ash receiver tray (if
equipped with an optional Smoker's Package) has power
available only when the ignition is on. This outlet will
also operate a conventional cigar lighter unit.
WARNING!
Do not place ashes inside the cubby bin located on
the center console on vehicles not equipped with the
ash receiver tray. A fire leading to bodily injury
could result.
NOTE:If desired, the power outlet next to the ash
receiver tray (if equipped) can be converted by your
authorized dealer to provide power with the ignition
switch in the LOCK position.
Front Power Outlet
112 UNDERSTANDING THE FEATURES OF YOUR VEHICLE
Page 113 of 350

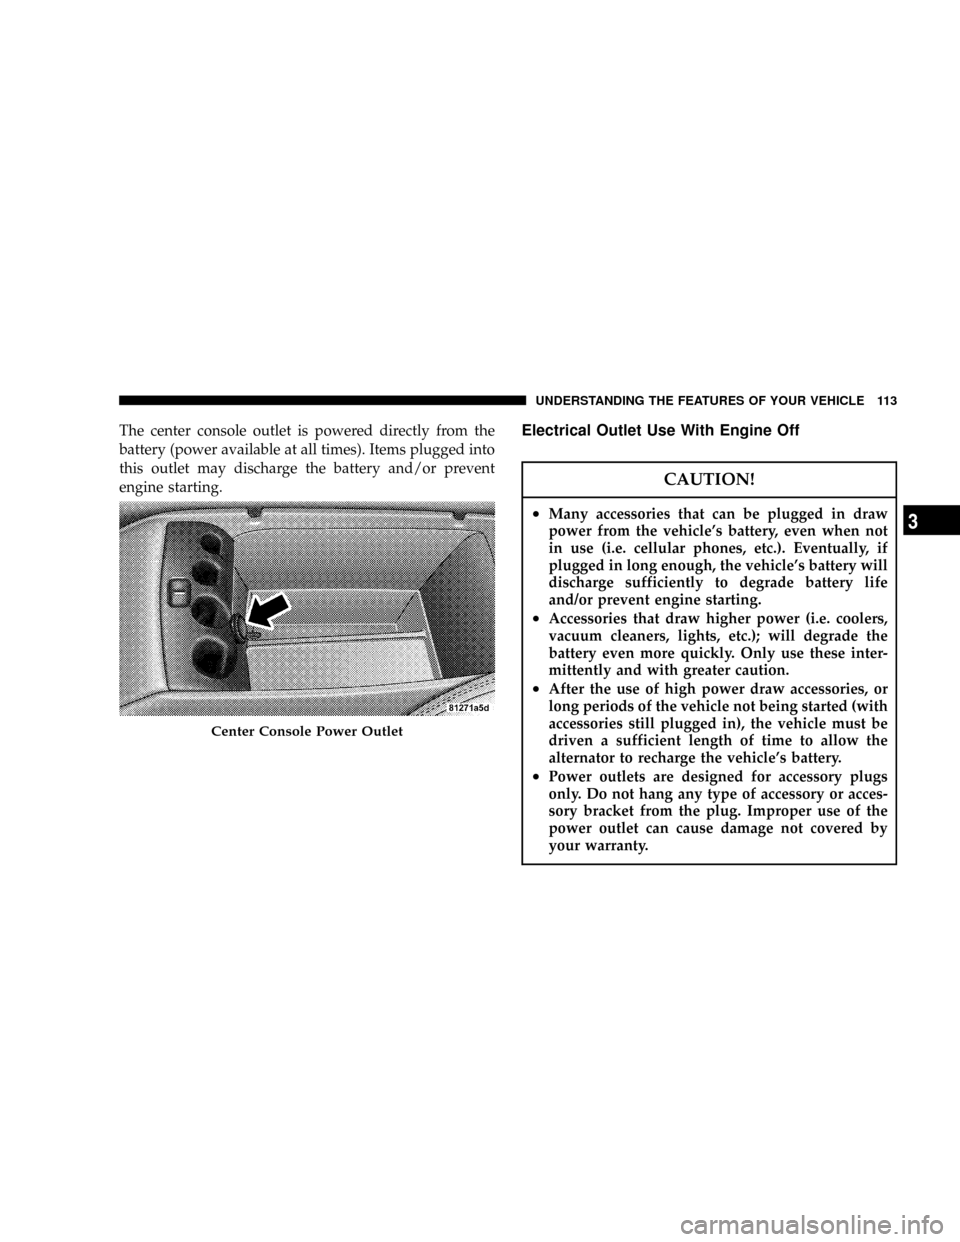
The center console outlet is powered directly from the
battery (power available at all times). Items plugged into
this outlet may discharge the battery and/or prevent
engine starting.Electrical Outlet Use With Engine Off
CAUTION!
²Many accessories that can be plugged in draw
power from the vehicle's battery, even when not
in use (i.e. cellular phones, etc.). Eventually, if
plugged in long enough, the vehicle's battery will
discharge sufficiently to degrade battery life
and/or prevent engine starting.
²Accessories that draw higher power (i.e. coolers,
vacuum cleaners, lights, etc.); will degrade the
battery even more quickly. Only use these inter-
mittently and with greater caution.
²After the use of high power draw accessories, or
long periods of the vehicle not being started (with
accessories still plugged in), the vehicle must be
driven a sufficient length of time to allow the
alternator to recharge the vehicle's battery.
²Power outlets are designed for accessory plugs
only. Do not hang any type of accessory or acces-
sory bracket from the plug. Improper use of the
power outlet can cause damage not covered by
your warranty.
Center Console Power Outlet
UNDERSTANDING THE FEATURES OF YOUR VEHICLE 113
3
Page 114 of 350

CUP HOLDERS
Front Seat Cup Holders Ð Standard
The cup holders are located in the forward edge of the
center console.
Front Seat Cup Holders Ð Premium
The cup holders are located in the forward edge of the
center console.Push down on the cover as shown to expose the cup
holders. Close the cover when the cup holders are no
longer needed.
Front Seat Cup Holders
Front Seat Cup Holders
114 UNDERSTANDING THE FEATURES OF YOUR VEHICLE
Page 115 of 350

Rear Seat Cup Holders
The rear seat cup holders are located in the center armrest
between the rear seats. The cup holders are positioned
forward in the armrest and side-by-side to provide
convenient access to beverage cans or bottles while
maintaining a resting place for the rear occupants' el-
bows.
STORAGE
Console Features
The center console contains a large storage bin. The
storage bin contains a four-slot coin holder (designed to
hold various size coins) and a rubber mat at the bottom of
the bin for noise control. The bin is large enough to hold
a portable AC/DC converter to power laptops, games, or
other electrical equipment. Two slots at the top right side
of the bin provide clearance for power cords to pass
conveniently out of the bin with the lid closed. This
feature is ideal for games, laptops, cell phones, or other
electrical equipment. The console's front-opening lid
allows for easy access to the storage bin for the both the
driver and the front passenger. The inside portion of the
arm rest lid contains a penholder, a tissue holder, and a
tire gauge holder.
In addition to the internal storage, the console contains
two shift bezel cubby bins with rubber mats for holding
small items. For vehicles not equipped with navigation
radio, the console also contains an extra storage bin
located below the climate control, which holds up to four
CD jewel cases.
Rear Seat Cup Holders
UNDERSTANDING THE FEATURES OF YOUR VEHICLE 115
3
Page 166 of 350

VIDEO ENTERTAINMENT SYSTEM (SALES CODE
XRV) Ð IF EQUIPPED
The optional VESŸ (Video Entertainment System) con-
sists of a DVD player and LCD (liquid crystal display)
screen, a battery-powered remote control, and two head-
sets. The system is located in the center console storage
bin under the armrest lid. Refer to your VESŸ User's
Manual for detailed operating instructions.
Accessing The VES
Raising The DVD Screen
166 UNDERSTANDING YOUR INSTRUMENT PANEL
Page 176 of 350

NOTE:To improve fuel economy, leave in defrost only
when necessary.
²Defrost/Floor
Air flows through the front and rear floor
outlets and the outlets at the base of the
windshield. Air is also directed to the front
door windows through the side window demister
grilles.
²
Floor
Air flows through the floor outlets located
under the instrument panel and into the rear
seating area through vents under the front seats.
²
Bi-Level
Air flows through the outlets located in the
instrument panel and through the outlets lo-
cated on the floor. Air flows through the registers in
the back of the center console to the rear seat
passengers. These registers can be closed to par-
tially block airflow.²
Panel
Air flows through the outlets located in the
instrument panel. Air flows through the regis-
ters in the back of the center console to the rear seat
passengers. These registers can be closed to block
airflow.
²
Recirculation Control
The mode control knob also controls the
recirculation feature. You can choose Bi-
Level Recirculation air outlets, Panel Re-
circulation air outlets, or a mix or both
while in this mode. Normally, air enters from out-
side the vehicle. However, when in Recirculation
mode air inside the vehicle is re-used. Use this
mode to cool the inside of the vehicle rapidly. The
Recirculation mode can also be used to temporarily
block out outside odors, smoke, and dust.
Air Conditioning Control
Press this button to turn on and turn off the air
conditioning. When the air conditioning is turned
on, cool dehumidified air will flow through the
outlets selected with the mode control. Press this button
176 UNDERSTANDING YOUR INSTRUMENT PANEL
Page 181 of 350

The operator can override the AUTO mode setting to
change airflow distribution by rotating the Mode Control
knob (on the right) to one of the following positions.
²Defrost
Air is directed to the windshield through the
outlets at the base of the windshield. Air is
also directed to the front door windows through the
side window demister grilles.
²
Defrost/Floor
Air flows through the front and rear floor
outlets and the outlets at the base of the
windshield. Air is also directed to the front
door windows through the side window demister
grilles.
²
Floor
Air flows through the floor outlets located
under the instrument panel and into the rear
seating area through vents under the front seats.²
Bi-Level
Air flows through the outlets located in the
instrument panel and through the outlets lo-
cated on the floor. Air flows through the registers in
the back of the center console to the rear seat
passengers. These registers can be closed to block
airflow.
²
Panel
Air flows through the outlets located in the
instrument panel. Air flows through the regis-
ters in the back of the center console to the rear seat
passengers. These registers can be closed to block
airflow.
²
Air Conditioning Control
Press this button to turn on the air condition-
ing during manual operation only. When the
air conditioning is turned on, cool dehumidi-
fied air will flow through the outlets selected with
the Mode control dial. Press this button a second
time to turn off the air conditioning. An LED in the
button illuminates when manual compressor opera-
tion is selected.
UNDERSTANDING YOUR INSTRUMENT PANEL 181
4
Page 262 of 350

NWindshield Washers...................277
NExhaust System......................278
NCooling System.......................278
NHoses And Vacuum/Vapor Harnesses.......283
NFuel System.........................283
NBrake System........................284
NAutomatic Transmission................286
NFront And Rear Wheel Bearings...........287
NAppearance Care And Protection From
Corrosion...........................287
NCleaning The Center Console Cup Holders . . . 291
mFuses (Power Distribution Centers).........291
NFuses (Front Power Distribution Center).....291
NFuses (Rear Power Distribution Center)......293
mVehicle Storage........................297
mReplacement Light Bulbs................298
mBulb Replacement......................299
NLow Beam Headlight, High Beam
Headlight, Park/Turn Light, And Front Side
Marker Light........................299
NBackup Light, Side Marker Light, Tail/Turn
Light, And Tail/Stop Light...............301
NLicense Light........................304
mFluids And Capacities...................304
mFluids, Lubricants, And Genuine Parts......305
NEngine.............................305
NChassis............................306
262 MAINTAINING YOUR VEHICLE
Page 291 of 350

If the belts need cleaning, use MopartTotal Clean, a mild
soap solution, or lukewarm water. Do not remove the
belts from the vehicle to wash them.
Replace the belts if they appear frayed or worn or if the
buckles do not work properly.
Cleaning The Center Console Cup Holders
Perform the following steps to clean the center console
cup holders:
²Grab the center of the rubber portion of the cup holder
firmly and lift upward to remove.
²Soak the rubber cup holder liner in a mixture of
medium hot tap water and one teaspoon of mild liquid
dish soap. Let soak for approximately one hour.
²After one hour pull the liner from the water and dip it
back into the water about six times. This will loosen
any remaining debris.
²Rinse the liner thoroughly under warm running water.
Shake the excess water from the liner and dry the
outer surfaces with a clean soft cloth.
²Carefully tuck the front, followed by the rear, then side
edges of the cup holder into the center console.
FUSES (POWER DISTRIBUTION CENTERS)
Fuses (Front Power Distribution Center)
A power distribution center is located in the engine
compartment. This center contains fuses and relays.
Front Power Distribution Center
MAINTAINING YOUR VEHICLE 291
7
Page 294 of 350

Cavity Car-
tridge
FuseMini
FuseDescription
1 60 Amp
YellowÐ Ignition Off Draw (IOD)
2 40 Amp
GreenÐ Battery
3ÐÐÐ
4 40 Amp
GreenÐ Battery
Cavity Car-
tridge
FuseMini
FuseDescription
5 40 Amp
GreenÐ Heated Seats - if
equipped
6 Ð 20 Amp
YellowFuel Pump
7 Ð 20 Amp
YellowAmplifier Ð Subwoofer
8 Ð 15 Amp
BlueIgnition Switch/Airbag
Control Module (ACM)
9 Ð 20 Amp
YellowConsole Power Outlet
10ÐÐÐ
11*ÐÐÐ
12*ÐÐÐ
13*ÐÐÐ
14 Ð 10 Amp
RedAC Heater Control/
Cluster/Sentry Key Re-
mote Keyless Entry
15ÐÐÐ
16ÐÐÐ
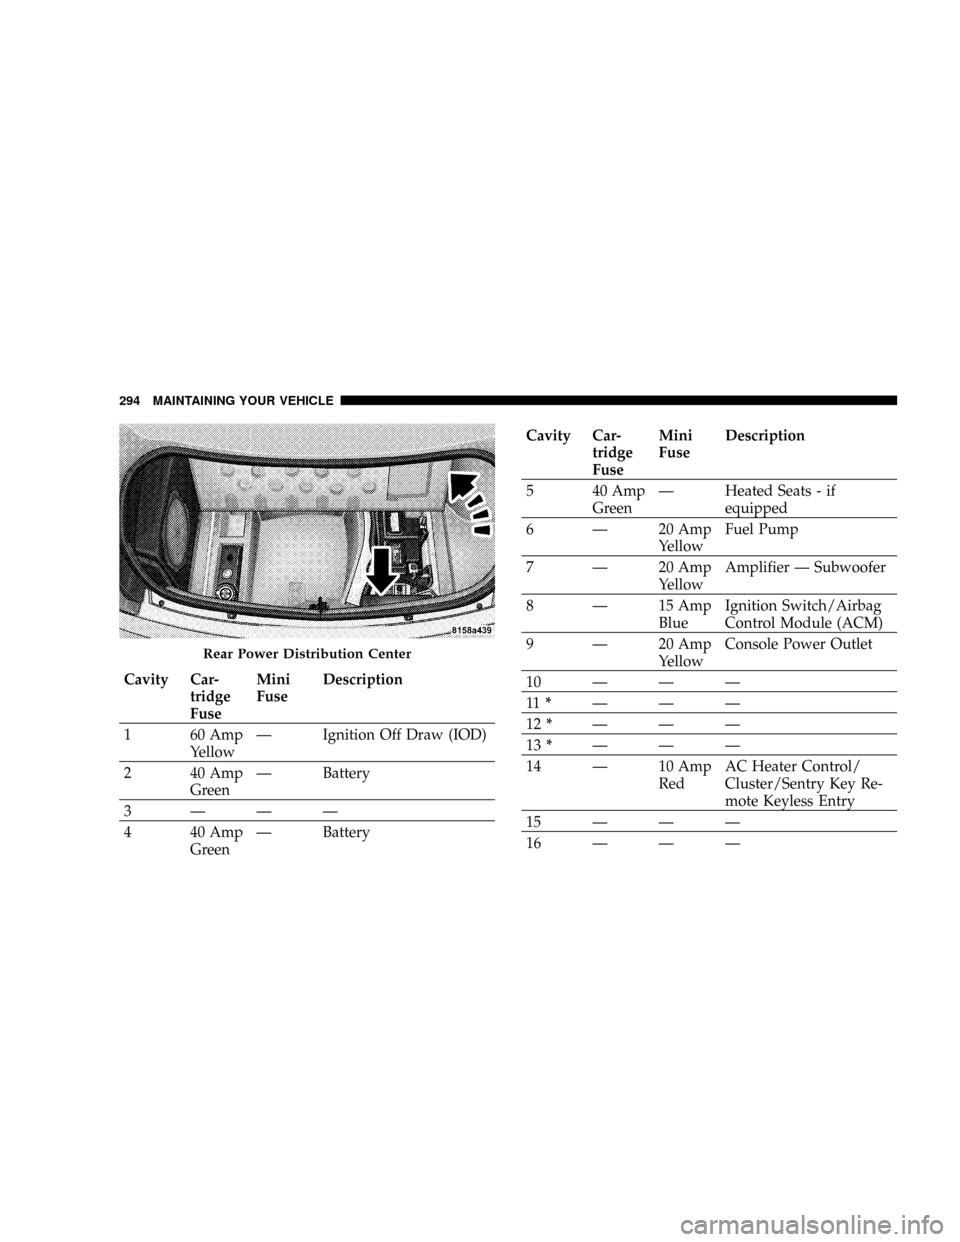
Rear Power Distribution Center
294 MAINTAINING YOUR VEHICLE