seats DODGE CHARGER SRT 2015 7.G User Guide
[x] Cancel search | Manufacturer: DODGE, Model Year: 2015, Model line: CHARGER SRT, Model: DODGE CHARGER SRT 2015 7.GPages: 595, PDF Size: 16.43 MB
Page 82 of 595
Lower Anchors And Tethers For Children (LATCH)
Restraint System
Your vehicle is equipped with the child restraint anchor-
age system called LATCH, which stands for Lower
Anchors and Tethers for CHildren. The LATCH system
has three vehicle anchor points for installing LATCH-
equipped child seats. There are two lower anchorages
located at the back of the seat cushion where it meets the
seatback and one top tether anchorage located behind the
seating position. These anchorages are used to install
LATCH-equipped child seats without using the vehicle’s
seat belts. Some seating positions may have a top tether
anchorage but no lower anchorages. In these seating
positions, the seat belt must be used with the top tether
anchorage to install the child restraint. Please see the
following table for more information.
80 THINGS TO KNOW BEFORE STARTING YOUR VEHICLE
Page 88 of 595
WARNING!
Never use the same lower anchorage to attach more
than one child restraint. Please refer to “Installing
The LATCH-Compatible Child Restraint System” for
typical installation instructions.
Always follow the directions of the child restraint
manufacturer when installing your child restraint. Not
all child restraint systems will be installed as described
here.
To Install A LATCH-Compatible Child Restraint
If the selected seating position has a Switchable Auto-
matic Locking Retractor (ALR) seat belt, stow the seat
belt, following the instructions below. See the section
“Installing Child Restraints Using the Vehicle Seat Belt”
to check what type of seat belt each seating position has.
1. Loosen the adjusters on the lower straps and on the
tether strap of the child seat so that you can more
easily attach the hooks or connectors to the vehicle
anchorages.
2. Place the child seat between the lower anchorages for
that seating position. For some second row seats, you
may need to recline the seat and/or raise the head
restraint to get a better fit. If the rear seat can be moved
forward and rearward in the vehicle, you may wish to
move it to its rear-most position to make room for the
child seat. You may also move the front seat forward
to allow more room for the child seat.
3. Attach the lower hooks or connectors of the child
restraint to the lower anchorages in the selected seat-
ing position.
86 THINGS TO KNOW BEFORE STARTING YOUR VEHICLE
Page 93 of 595
Installing A Child Restraint With A Switchable
Automatic Locking Retractor (ALR)
1. Place the child seat in the center of the seating
position. For some second row seats, you may need to
recline the seat and/or raise the head restraint to get a
better fit. If the rear seat can be moved forward and
rearward in the vehicle, you may wish to move it to its
rear-most position to make room for the child seat.
You may also move the front seat forward to allow
more room for the child seat.
2. Pull enough of the seat belt webbing from the retractor
to pass it through the belt path of the child restraint.
Do not twist the belt webbing in the belt path.
3. Slide the latch plate into the buckle until you hear a
“click.”
4. Pull on the webbing to make the lap portion tight
against the child seat.
5. To lock the seat belt, pull down on the shoulder part of
the belt until you have pulled all the seat belt webbing
out of the retractor. Then, allow the webbing to retract
back into the retractor. As the webbing retracts, you
will hear a clicking sound. This means the seat belt is
now in the Automatic Locking mode.
6. Try to pull the webbing out of the retractor. If it is
locked, you should not be able to pull out any web-
bing. If the retractor is not locked, repeat step 5.
7. Finally, pull up on any excess webbing to tighten the
lap portion around the child restraint while you push
the child restraint rearward and downward into the
vehicle seat.
2
THINGS TO KNOW BEFORE STARTING YOUR VEHICLE 91
Page 98 of 595
For the first 1500 mi (2414 km):
•Do not participate in track events, sport driving
schools, or similar activities during the first 1500 mi
(2414 km).
NOTE:Check engine oil with every refueling and add if
necessary. Oil and fuel consumption may be higher
through the first oil change interval.
SAFETY TIPS
Transporting Passengers
NEVER TRANSPORT PASSENGERS IN THE CARGO
AREA.
WARNING!
•Do not leave children or animals inside parked
vehicles in hot weather. Interior heat build-up may
cause serious injury or death.
•It is extremely dangerous to ride in a cargo area,
inside or outside of a vehicle. In a collision, people
riding in these areas are more likely to be seriously
injured or killed.
•Do not allow people to ride in any area of your
vehicle that is not equipped with seats and seat
belts.
•Be sure everyone in your vehicle is in a seat and
using a seat belt properly.
96 THINGS TO KNOW BEFORE STARTING YOUR VEHICLE
Page 104 of 595
!SEATS . . . . . . . . . . . . . . . . . . . . . . . . . . . . ..128
▫Power Seats — If Equipped..............128
▫Power Lumbar — If Equipped............130
▫Heated Seats — If Equipped.............131
▫Front Ventilated Seats — If Equipped.......134
▫Head Restraints......................134
▫Folding Rear Seat.....................138
!DRIVER MEMORY SEAT — IF EQUIPPED . . . .139
▫Programming The Memory Feature.........140
▫Linking And Unlinking The Remote Keyless
Entry Transmitter To Memory.............141
▫Memory Position Recall.................142
▫Easy Entry/Exit Seat...................142
!TO OPEN AND CLOSE THE HOOD.........144
!LIGHTS.............................145
▫Headlight Switch.....................145
▫Automatic Headlights — If Equipped.......146
▫Headlights On With Wipers (Available With
Automatic Headlights Only).............146
▫Automatic High Beam Headlamp Control —
If Equipped.........................147
▫Headlight Time Delay..................148
▫Daytime Running Lights (DRL) —
If Equipped.........................149
▫Lights-On Reminder...................149
▫Fog Lights — If Equipped...............149
▫Multifunction Lever...................150
102 UNDERSTANDING THE FEATURES OF YOUR VEHICLE
Page 130 of 595
2. The device must accept any interference received,
including interference that may cause undesired op-
eration of the device.
Changes or modifications to any of these systems by
other than an authorized service facility could void
authorization to use this equipment.
SEATS
Seats are a part of the Occupant Restraint System of the
vehicle.
WARNING!
•It is dangerous to ride in a cargo area, inside or
outside of a vehicle. In a collision, people riding in
these areas are more likely to be seriously injured
or killed.
(Continued)
WARNING!(Continued)
•Do not allow people to ride in any area of your
vehicle that is not equipped with seats and seat
belts. In a collision, people riding in these areas are
more likely to be seriously injured or killed.
•Be sure everyone in your vehicle is in a seat and
using a seat belt properly.
Power Seats — If Equipped
On models equipped with power seats, the switch is
located on the outboard side of the seat near the floor.
Use this switch to move the driver’s seat up or down,
forward or rearward or to recline the seatback.
NOTE:The passenger’s seat will move up or down,
forward or rearward.
128 UNDERSTANDING THE FEATURES OF YOUR VEHICLE
Page 131 of 595
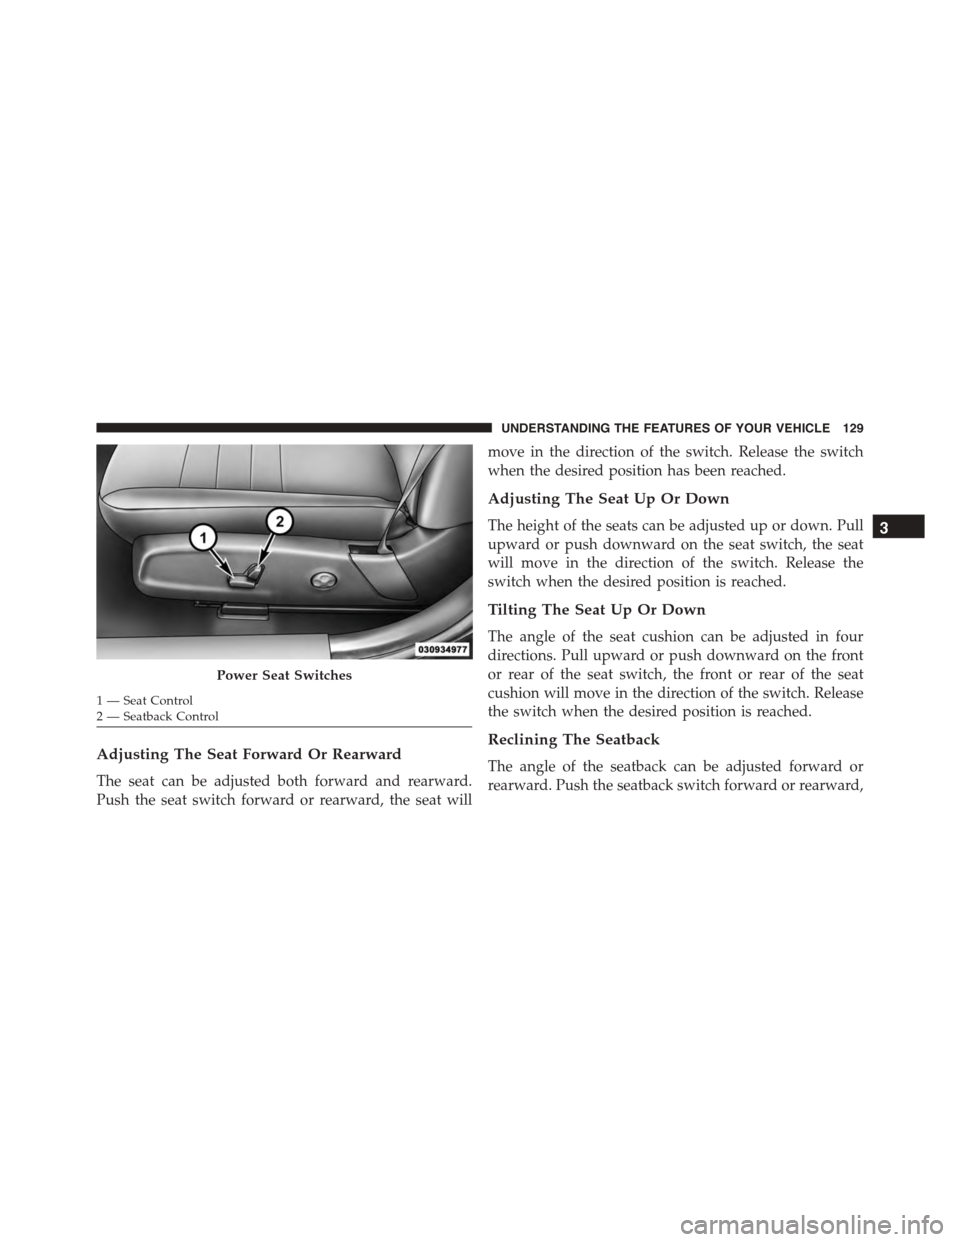
Adjusting The Seat Forward Or Rearward
The seat can be adjusted both forward and rearward.
Push the seat switch forward or rearward, the seat will
move in the direction of the switch. Release the switch
when the desired position has been reached.
Adjusting The Seat Up Or Down
The height of the seats can be adjusted up or down. Pull
upward or push downward on the seat switch, the seat
will move in the direction of the switch. Release the
switch when the desired position is reached.
Tilting The Seat Up Or Down
The angle of the seat cushion can be adjusted in four
directions. Pull upward or push downward on the front
or rear of the seat switch, the front or rear of the seat
cushion will move in the direction of the switch. Release
the switch when the desired position is reached.
Reclining The Seatback
The angle of the seatback can be adjusted forward or
rearward. Push the seatback switch forward or rearward,
Power Seat Switches
1—SeatControl2 — Seatback Control
3
UNDERSTANDING THE FEATURES OF YOUR VEHICLE 129
Page 132 of 595
the seat will move in the direction of the switch. Release
the switch when the desired position is reached.
WARNING!
•Adjusting a seat while driving may be dangerous.
Moving a seat while driving could result in loss of
control which could cause a collision and serious
injury or death.
•Seats should be adjusted before fastening the seat
belts and while the vehicle is parked. Serious
injury or death could result from a poorly adjusted
seat belt.
•Do not ride with the seatback reclined so that the
shoulder belt is no longer resting against your chest.
In a collision you could slide under the seat belt,
which could result in serious injury or death.
CAUTION!
Do not place any article under a power seat or
impede its ability to move as it may cause damage to
the seat controls. Seat travel may become limited if
movement is stopped by an obstruction in the seat’s
path.
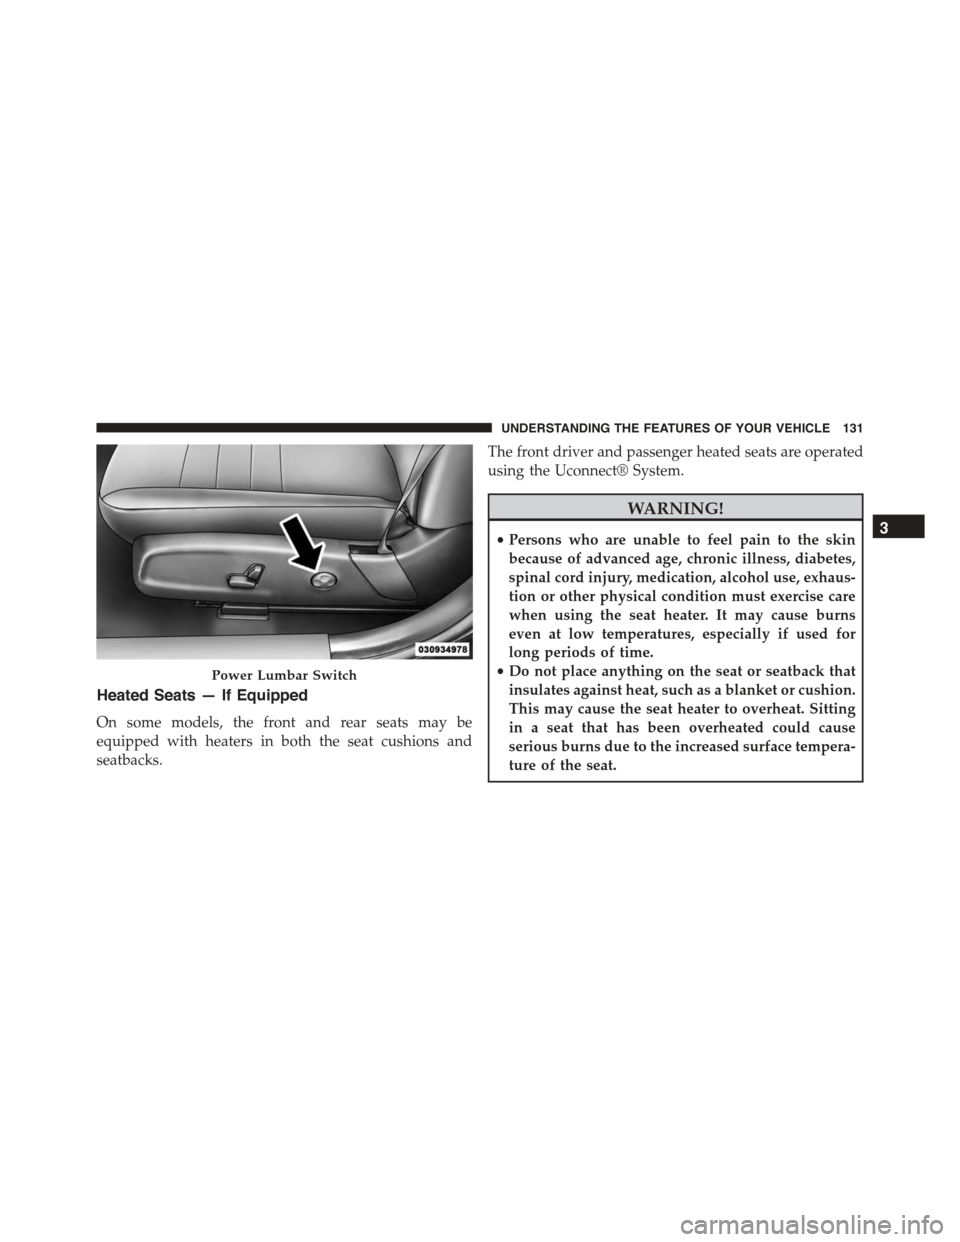
Power Lumbar — If Equipped
Vehicles equipped with power driver or passenger seats
may also be equipped with power lumbar. The power
lumbar switch is located on the outboard side of the
power seat. Push the switch forward or rearward to
increase or decrease the lumbar support. Push the switch
upward or downward to raise or lower the lumbar
support.
130 UNDERSTANDING THE FEATURES OF YOUR VEHICLE
Page 133 of 595
Heated Seats — If Equipped
On some models, the front and rear seats may be
equipped with heaters in both the seat cushions and
seatbacks.
The front driver and passenger heated seats are operated
using the Uconnect® System.
WARNING!
•Persons who are unable to feel pain to the skin
because of advanced age, chronic illness, diabetes,
spinal cord injury, medication, alcohol use, exhaus-
tion or other physical condition must exercise care
when using the seat heater. It may cause burns
even at low temperatures, especially if used for
long periods of time.
•Do not place anything on the seat or seatback that
insulates against heat, such as a blanket or cushion.
This may cause the seat heater to overheat. Sitting
in a seat that has been overheated could cause
serious burns due to the increased surface tempera-
ture of the seat.
Power Lumbar Switch
3
UNDERSTANDING THE FEATURES OF YOUR VEHICLE 131
Page 134 of 595
Front Heated Seats
The front heated seats control buttons are located within
the climate or controls screen of the touchscreen.
You can choose from HI, LO or OFF heat settings. The
indicator lights in each switch indicate the level of heat in
use. Two indicator lights will illuminate for HI, one for
LO and none for OFF.
•Press the heated seat buttononce to turn the HI
setting ON.
•Press the heated seat buttona second time to turn
the LO setting ON.
•Press the heated seat buttona third time to turn
the heating elements OFF.
If the HI-level setting is selected, the system will auto-
matically switch to LO-level after approximately 60 min-
utes of continuous operation. At that time, the display
will change from HI to LO, indicating the change. The
LO-level setting will turn OFF automatically after ap-
proximately 45 minutes.
NOTE:
•Once a heat setting is selected, heat will be felt within
two to five minutes.
•The engine must be running for the heated seats to
operate.
Vehicles Equipped With Remote Start
On models that are equipped with remote start, the
heated seats can be programed to come on during a
remote start.
This feature can be programmed through the Uconnect®
system. Refer to “Uconnect® Settings” in “Understand-
ing Your Instrument Panel” for further information.
132 UNDERSTANDING THE FEATURES OF YOUR VEHICLE