display DODGE CHARGER SRT 2015 7.G Uconnect 5
[x] Cancel search | Manufacturer: DODGE, Model Year: 2015, Model line: CHARGER SRT, Model: DODGE CHARGER SRT 2015 7.GPages: 56, PDF Size: 1.09 MB
Page 5 of 56
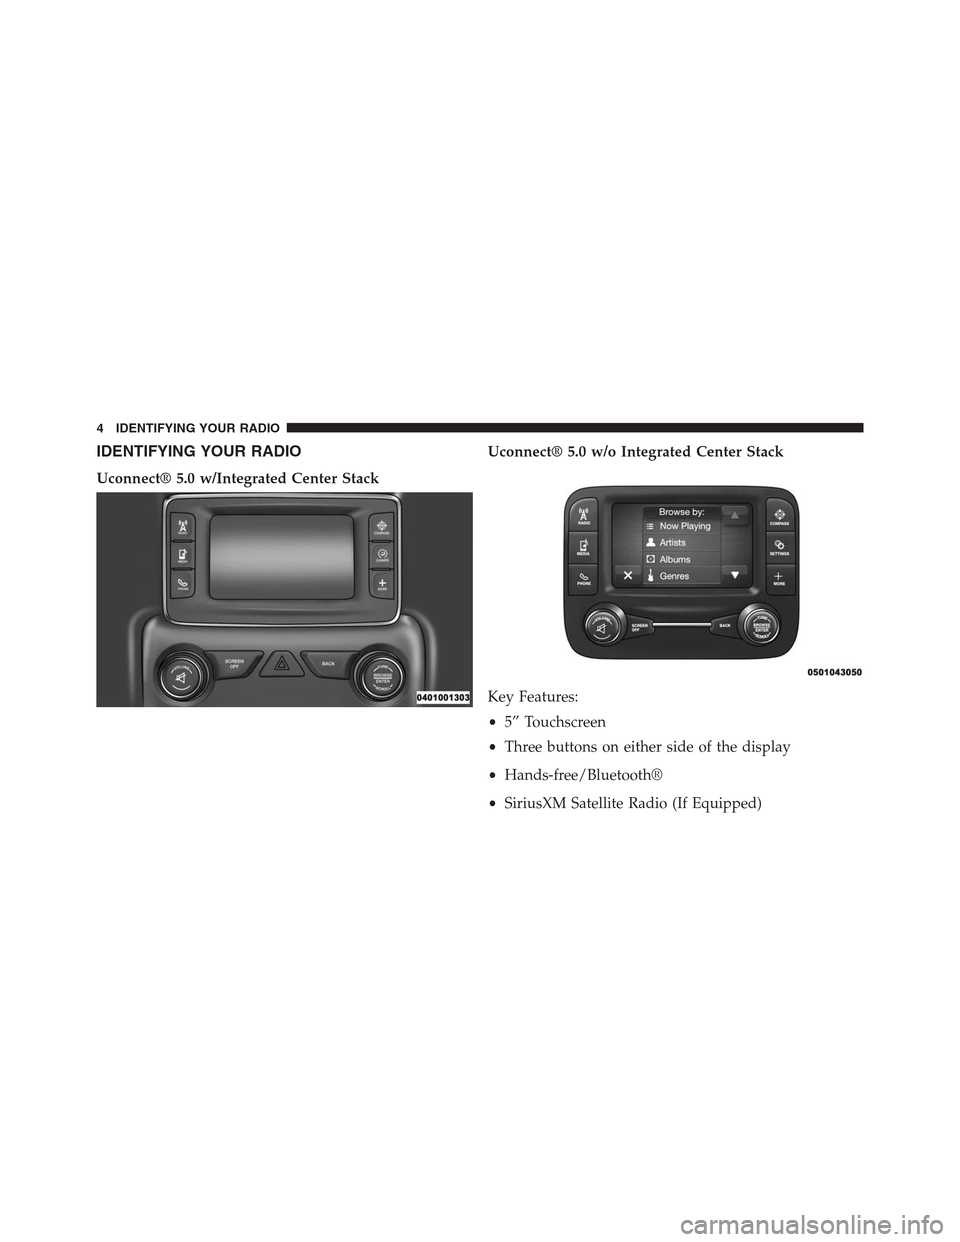
IDENTIFYING YOUR RADIO
Uconnect® 5.0 w/Integrated Center Stack
Uconnect® 5.0 w/o Integrated Center Stack
Key Features:
•5” Touchscreen
•Three buttons on either side of the display
•Hands-free/Bluetooth®
•SiriusXM Satellite Radio (If Equipped)
4 IDENTIFYING YOUR RADIO
Page 6 of 56
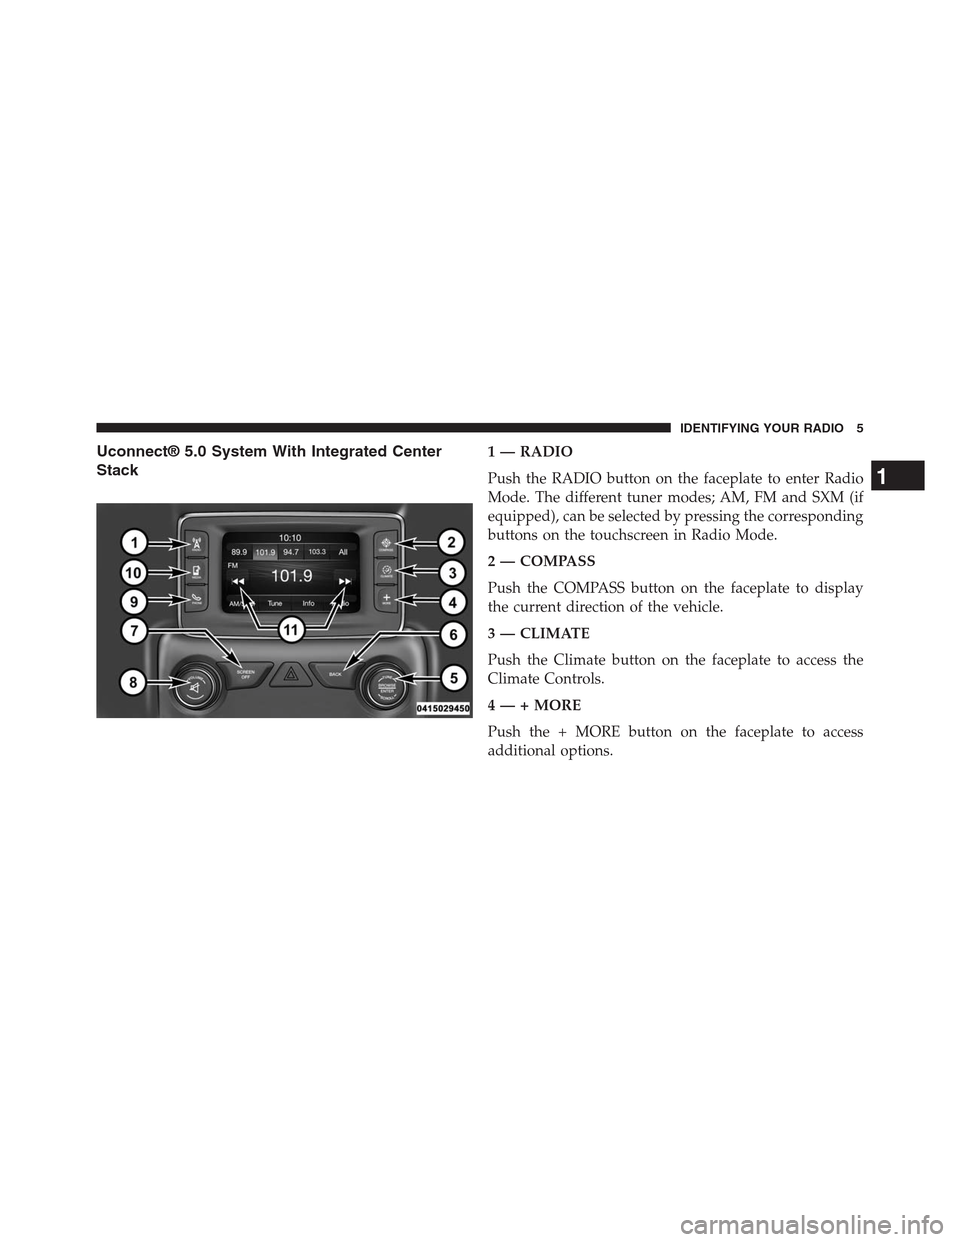
Uconnect® 5.0 System With Integrated Center
Stack
1 — RADIO
Push the RADIO button on the faceplate to enter Radio
Mode. The different tuner modes; AM, FM and SXM (if
equipped), can be selected by pressing the corresponding
buttons on the touchscreen in Radio Mode.
2 — COMPASS
Push the COMPASS button on the faceplate to display
the current direction of the vehicle.
3 — CLIMATE
Push the Climate button on the faceplate to access the
Climate Controls.
4 — + MORE
Push the + MORE button on the faceplate to access
additional options.
1
IDENTIFYING YOUR RADIO 5
Page 8 of 56
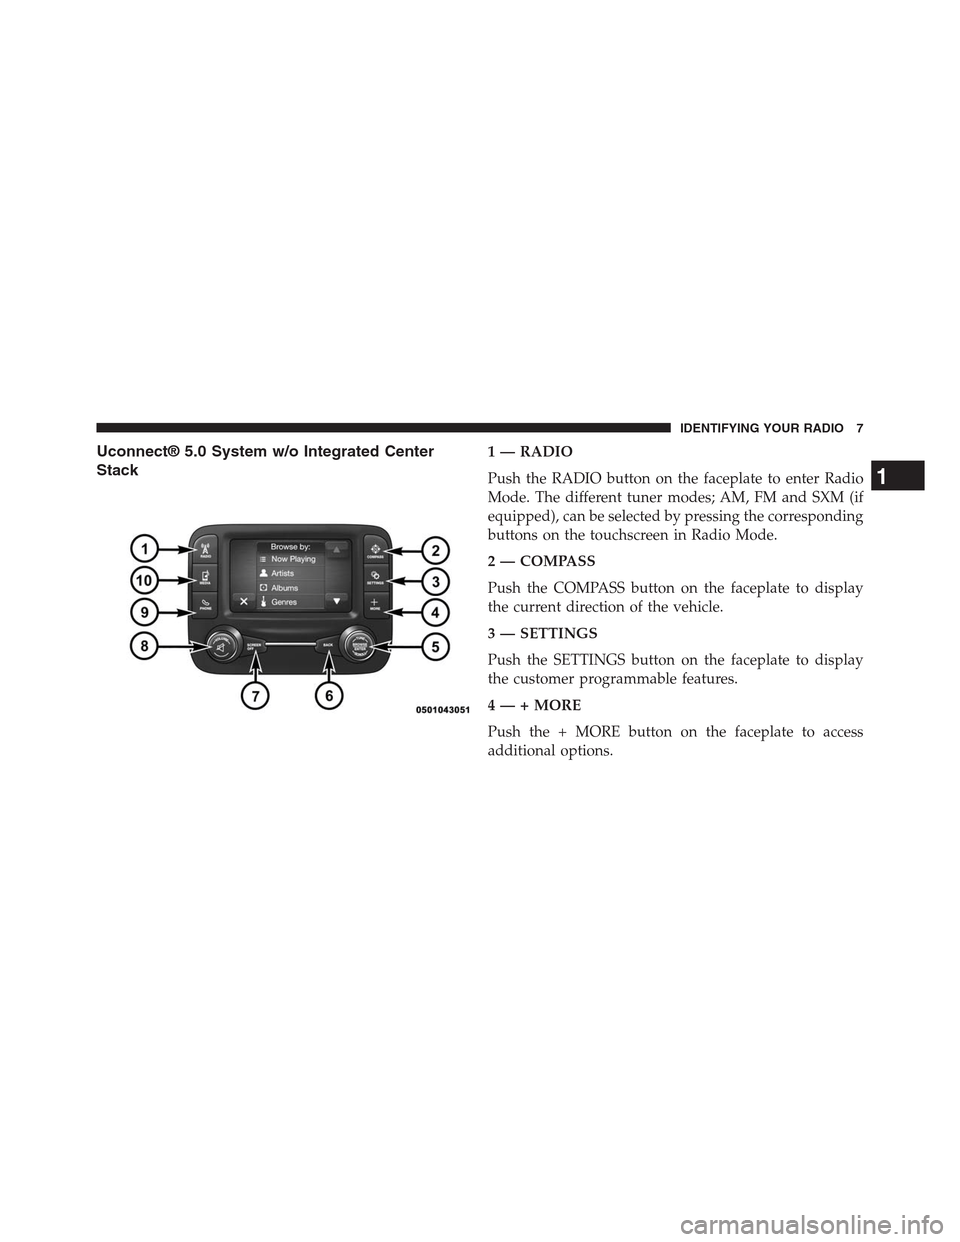
Uconnect® 5.0 System w/o Integrated Center
Stack
1 — RADIO
Push the RADIO button on the faceplate to enter Radio
Mode. The different tuner modes; AM, FM and SXM (if
equipped), can be selected by pressing the corresponding
buttons on the touchscreen in Radio Mode.
2 — COMPASS
Push the COMPASS button on the faceplate to display
the current direction of the vehicle.
3 — SETTINGS
Push the SETTINGS button on the faceplate to display
the customer programmable features.
4 — + MORE
Push the + MORE button on the faceplate to access
additional options.
1
IDENTIFYING YOUR RADIO 7
Page 13 of 56
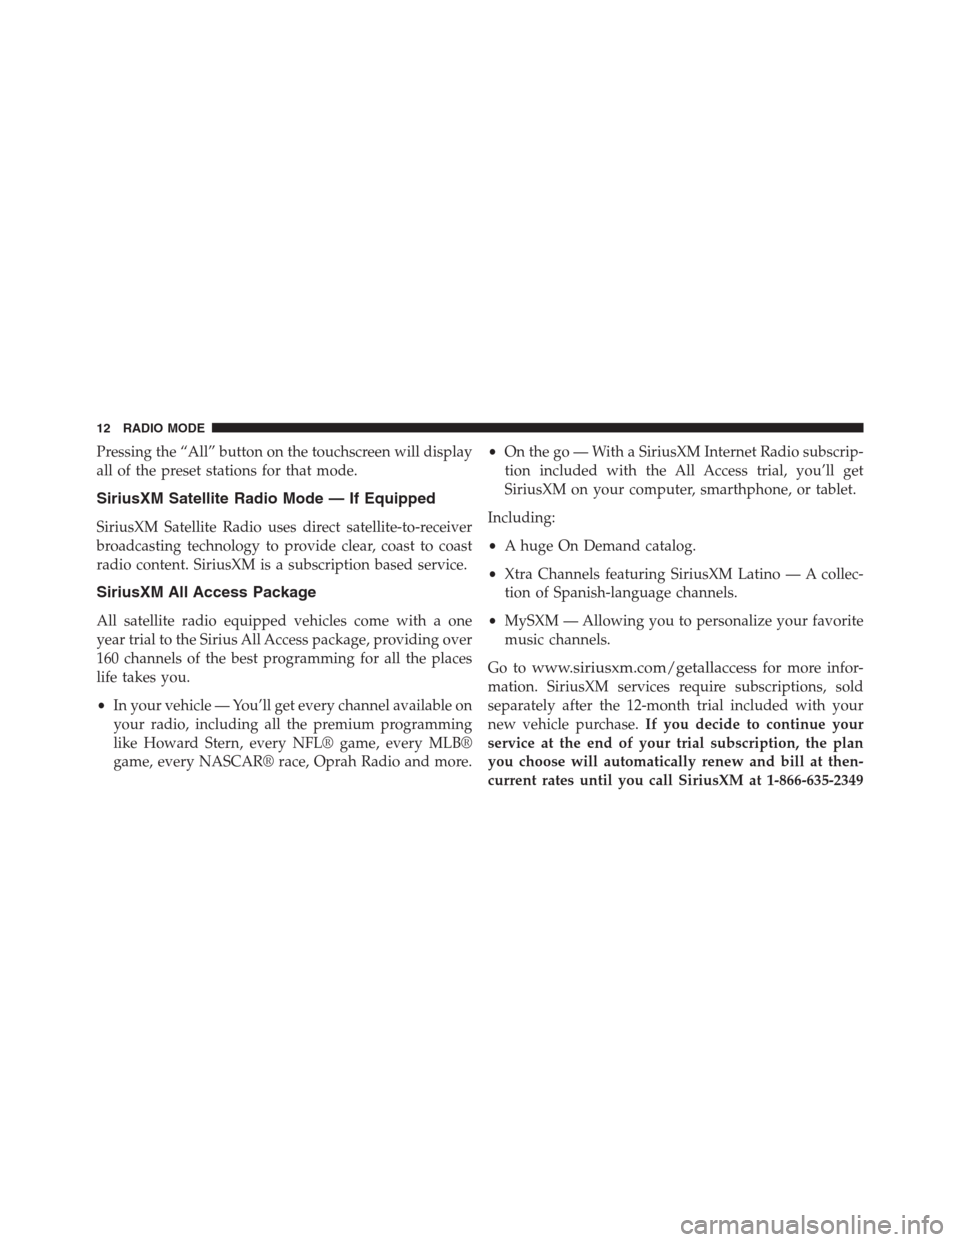
Pressing the “All” button on the touchscreen will display
all of the preset stations for that mode.
SiriusXM Satellite Radio Mode — If Equipped
SiriusXM Satellite Radio uses direct satellite-to-receiver
broadcasting technology to provide clear, coast to coast
radio content. SiriusXM is a subscription based service.
SiriusXM All Access Package
All satellite radio equipped vehicles come with a one
year trial to the Sirius All Access package, providing over
160 channels of the best programming for all the places
life takes you.
•In your vehicle — You’ll get every channel available on
your radio, including all the premium programming
like Howard Stern, every NFL® game, every MLB®
game, every NASCAR® race, Oprah Radio and more.
•On the go — With a SiriusXM Internet Radio subscrip-
tion included with the All Access trial, you’ll get
SiriusXM on your computer, smarthphone, or tablet.
Including:
•A huge On Demand catalog.
•Xtra Channels featuring SiriusXM Latino — A collec-
tion of Spanish-language channels.
•MySXM — Allowing you to personalize your favorite
music channels.
Go towww.siriusxm.com/getallaccessfor more infor-
mation. SiriusXM services require subscriptions, sold
separately after the 12-month trial included with your
new vehicle purchase.If you decide to continue your
service at the end of your trial subscription, the plan
you choose will automatically renew and bill at then-
current rates until you call SiriusXM at 1-866-635-2349
12 RADIO MODE
Page 20 of 56
Fast Seek Up
Press and hold the “Right Arrow”button on the
touchscreen and the desired mode will begin to fast
forward through the current track until the button on
the touchscreen is released.
Fast Seek Down
Press and hold the “Left Arrow”button on the
touchscreen and the desired mode will begin to re-
wind through the current track until the button on the
touchscreen is released.
Source
Press the “Source” button on the touchscreen to select the
desired audio source: Disc (if equipped), USB, SD (if
equipped), AUX and Bluetooth® (if equipped). This
screen will time out after a few seconds and return to the
main radio screen if no selection is made.
Info
Press the “Info” button on the touchscreen to display the
current track information. Press the “X” button on the
touchscreen to cancel this feature.
Shuffle
Press the “Shuffle” button on the touchscreen to play the
selections on the USB/iPod® device in random order to
provide an interesting change of pace. Press the “Shuffle”
button on the touchscreen a second time to turn this
feature off.
Audio
Refer to “Operating Instructions — Radio Mode” for
adjusting the audio settings.
3
MEDIA MODE 19
Page 21 of 56
Repeat
Press the “Repeat” button on the touchscreen to repeat
the song selection. To cancel repeat, press the “Repeat”
button on the touchscreen a second time.
Disc Mode — If Equipped
Your vehicle may have a remote Disc player located in
the center console storage bin.
Disc Mode is entered by either inserting a CD/Disc or by
pushing the MEDIA button on the faceplate. Once in
Media Mode, press the “Source” button on the touch-
screen and select “Disc.”
Inserting Compact Disc
Gently insert one Disc into the Disc player with the Disc
label following the illustration indicated on the player.
The Disc will automatically be pulled into the Disc player
and the Disc icon will illuminate on the radio display. If
a Disc does not go into the slot more than 1.0 in (2.5 cm),
a Disc may already be loaded and must be ejected before
a new Disc can be loaded.
If you insert a Disc with the ignition ON and the radio
ON, the unit will switch to Disc mode and begin to play
when you insert the Disc. The display will show the track
number and index time in minutes and seconds. Play will
begin at the start of track 1.
Browse
Press the “Browse” button on the touchscreen to scroll
through and select a desired track on the Disc. Press the
“Exit” button on the touchscreen if you wish to cancel the
browse function.
20 MEDIA MODE
Page 22 of 56
Eject Button — Ejecting a Disc
Push the EJECT button to eject the Disc. If you have
ejected a Disc and have not removed it within 10 seconds,
it will be reloaded. If the Disc is not removed, the radio
will reinsert the Disc but will not play it.
A Disc can be ejected with the radio and ignition OFF.
USB/iPod® Mode
USB/iPod® Mode is entered by either inserting a USB
Jump Drive or iPod® cable into the USB port, or by
pushing the MEDIA button located on the faceplate.
Once in Media Mode, press the “Source” button on the
touchscreen and select “USB/iPod.”
Inserting USB/iPod® Device
Gently insert the USB/iPod® device into the USB Port. If
you insert a USB/iPod® device with the ignition ON, the
unit will switch to USB/iPod® mode and begin to play
when you insert the device. The display will show the
track number and index time in minutes and seconds.
Play will begin at the start of track 1.
Browse
Press the “Browse” button on the touchscreen to select
Artist, Albums, Genres, Songs, Playlists or Folders from
the USB/iPod® device. Once the desired selection is
made you can chose from the available media by pressing
the button on the touchscreen. Press the “Exit” button on
the touchscreen if you wish to cancel the browse func-
tion.
3
MEDIA MODE 21
Page 28 of 56
2. Press the “Phone” button on the faceplate.
•If there is no phones currently connected with the
system, a pop-up will appear asking if you would
like to pair a mobile phone.
3. Select “Yes” to begin the pairing process.
4. Search for available devices on your Bluetooth® en-
abled mobile phone.
•Press the Settings button on your mobile phone.
•Select Bluetooth® and ensure it is enabled. Once
enabled, the mobile phone will begin to search for
Bluetooth® connections.
5. If No is selected, and you still would like to pair a
mobile phone, press the “Settings” button from the
Uconnect® Phone main screen.
•Select “Paired Phones” then press the “Add Device”
button on the touchscreen,
•Search for available devices on your Bluetooth®
enabled mobile phone (see below). When prompted
on the phone, select “Uconnect” and accept the
connection request.
6. Uconnect® Phone will display an in progress screen
while the system is connecting.
7. When your mobile phone finds the Uconnect® system,
select “Uconnect.”
8. When prompted on the mobile phone, accept the
connection request from Uconnect® Phone.
NOTE:Some mobile phones will require you to enter the
PIN number.
4
Uconnect® PHONE 27
Page 33 of 56
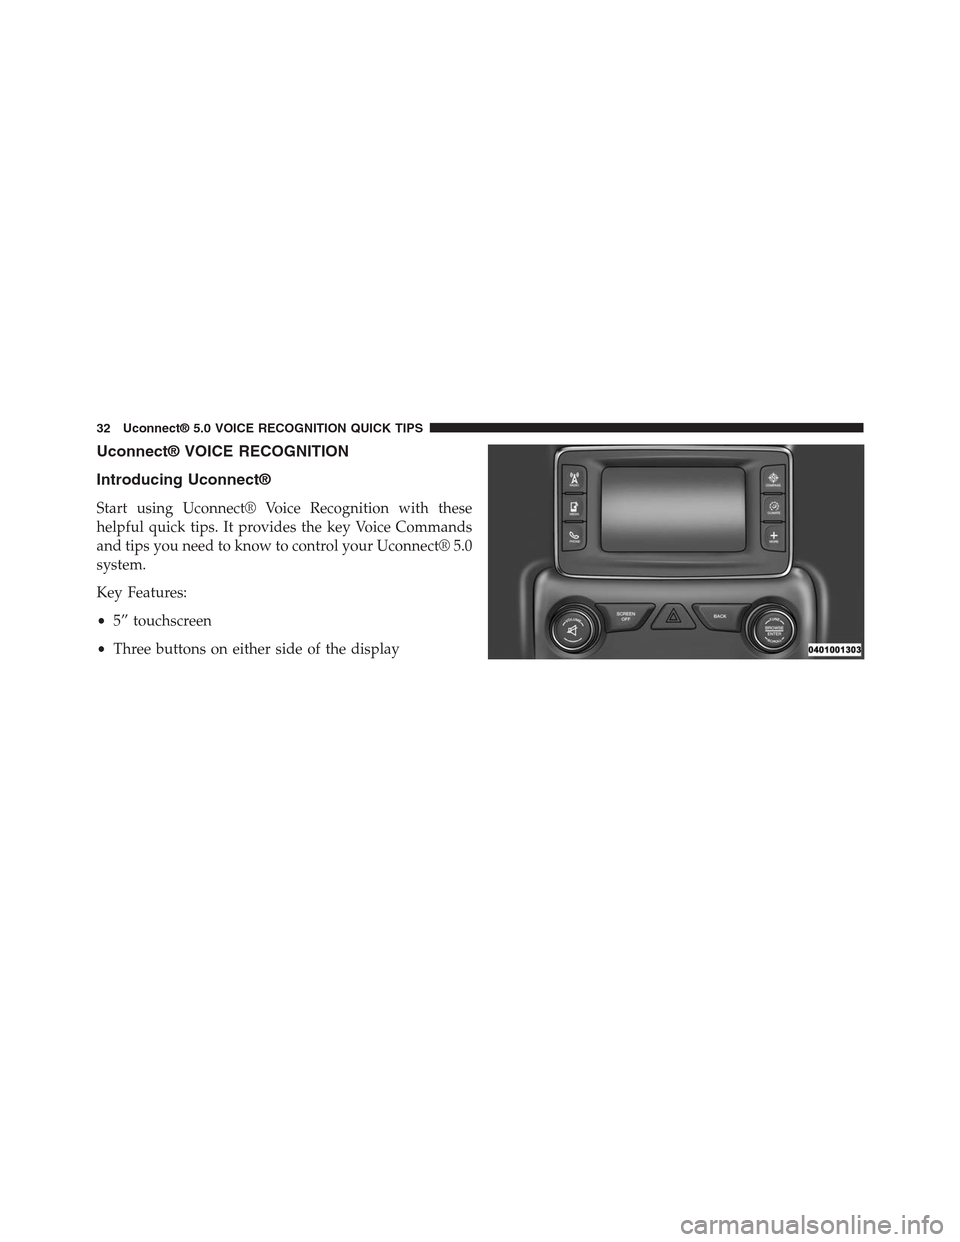
Uconnect® VOICE RECOGNITION
Introducing Uconnect®
Start using Uconnect® Voice Recognition with these
helpful quick tips. It provides the key Voice Commands
and tips you need to know to control your Uconnect® 5.0
system.
Key Features:
•5” touchscreen
•Three buttons on either side of the display
32 Uconnect® 5.0 VOICE RECOGNITION QUICK TIPS
Page 38 of 56
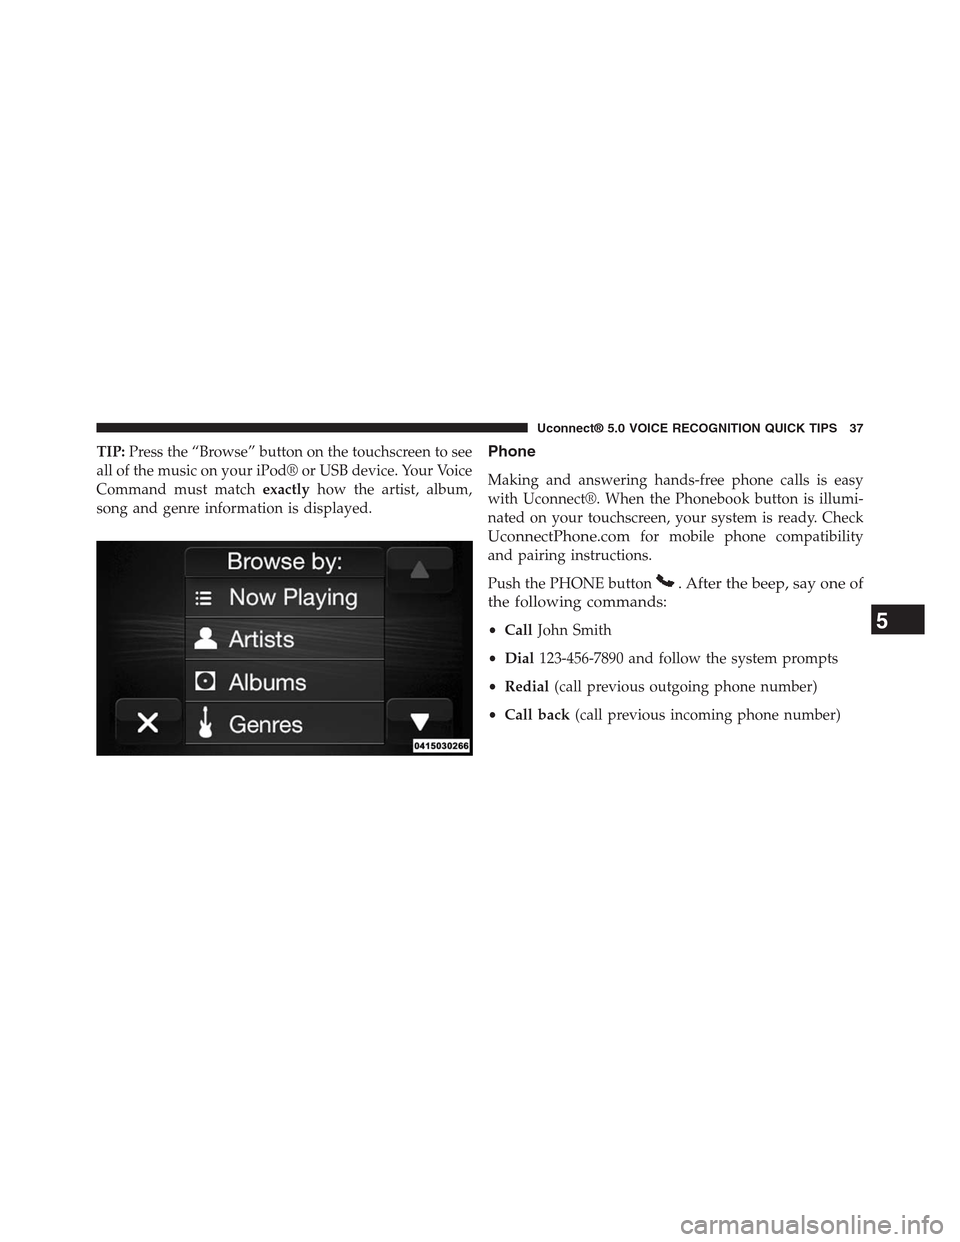
TIP:Press the “Browse” button on the touchscreen to see
all of the music on your iPod® or USB device. Your Voice
Command must matchexactlyhow the artist, album,
song and genre information is displayed.
Phone
Making and answering hands-free phone calls is easy
with Uconnect®. When the Phonebook button is illumi-
nated on your touchscreen, your system is ready. Check
UconnectPhone.comfor mobile phone compatibility
and pairing instructions.
Push the PHONE button. After the beep, say one of
the following commands:
•CallJohn Smith
•Dial123-456-7890 and follow the system prompts
•Redial(call previous outgoing phone number)
•Call back(call previous incoming phone number)
5
Uconnect® 5.0 VOICE RECOGNITION QUICK TIPS 37