phone DODGE DAKOTA 2009 3.G Owner's Manual
[x] Cancel search | Manufacturer: DODGE, Model Year: 2009, Model line: DAKOTA, Model: DODGE DAKOTA 2009 3.GPages: 449, PDF Size: 10.96 MB
Page 102 of 449
²Following the beep, say9Mute off.9
Advanced Phone Connectivity
Transfer Call to and from Cellular Phone
The UConnecttsystem allows ongoing calls to be trans-
ferred from your cellular phone to the UConnecttsystem
without terminating the call. To transfer an ongoing call
from your UConnecttpaired cellular phone to the
UConnecttsystem or vice versa, press the ªVoice Recog-
nitionº button and say9Transfer Call.9
Connect or Disconnect Link Between the
UConnecttSystem and Cellular Phone
Your cellular phone can be paired with many different
electronic devices, but can only be actively9connected9
with one electronic device at a time.
If you would like to connect or disconnect the Bluetootht
connection between a UConnecttpaired cellular phoneand the UConnecttsystem, follow the instructions de-
scribed in your cellular phone User's Manual.
List Paired Cellular Phone Names
²
Press the PHONE button to begin.
²After the ªReadyº prompt and the following beep, say
ªSetup Phone Pairing.º
²When prompted, say9List Phones.9
²The UConnecttsystem will play the phone names of
all paired cellular phones in order from the highest to
the lowest priority. To ªselectº or ªdeleteº a paired
phone being announced, press the ªVoice Recogni-
tionº button and say ªSelectº or ªDelete.º Also, see the
next two sections for an alternate way to ªselectº or
ªdeleteº a paired phone.
100 UNDERSTANDING THE FEATURES OF YOUR VEHICLE
Page 103 of 449
Select Another Cellular Phone
This feature allows you to select and start using another
phone paired with the UConnecttsystem.
²Press the PHONE button to begin.
²After the9Ready9prompt and the following beep, say
9Setup Select Phone9and follow the prompts.
²You can also press the ªVoice Recognitionº button at
any time while the list is being played, and then
choose the phone that you wish to select.
²The selected phone will be used for the next phone
call. If the selected phone is not available, the
UConnecttsystem will return to using the highest
priority phone present in or near (approximately
within 30 ft [9 m]) the vehicle.
Delete UConnecttPaired Cellular Phones
²
Press the PHONE button to begin.
²After the9Ready9prompt and the following beep, say
9Setup Phone Pairing.9
²At the next prompt, say9Delete9and follow the
prompts.
²You can also press the ªVoice Recognitionº button at
any time while the list is being played, and then
choose the phone you wish to delete.
Things You Should Know About Your UConnectT
System
UConnecttTutorial
To hear a brief tutorial of the system features, press the
PHONE button and say ªUConnecttTutorial.º
Voice Training
For users experiencing difficulty with the system recog-
nizing their voice commands or numbers, the UConnectt
UNDERSTANDING THE FEATURES OF YOUR VEHICLE 101
3
Page 105 of 449
²low-to-medium vehicle speed,
²low road noise,
²smooth road surface,
²fully closed windows,
²dry weather condition.
²Even though the system is designed for users speaking
in North American English, French, and Spanish ac-
cents, the system may not always work for some.
²When navigating through an automated system such
as voice mail, or when sending a page, at the end of
speaking the digit string, make sure to say9Send.9
²Storing names in the phonebook when the vehicle is
not in motion is recommended.
²It is not recommended to store similar sounding
names in the UConnecttphonebook.
²Phonebook (Downloaded and UConnect Local) name
recognition rate is optimized when the entries are not
similar.
²You can say9O9(letter9O9) for909(zero).98009must be
spoken9eight-zero-zero.9
²Even though international dialing for most number
combinations is supported, some shortcut dialing
number combinations may not be supported.
²In a convertible vehicle, system performance may be
compromised with the convertible top down.
Far End Audio Performance
²
Audio quality is maximized under:
²low-to-medium blower setting,
²low-to-medium vehicle speed,
²low road noise,
UNDERSTANDING THE FEATURES OF YOUR VEHICLE 103
3
Page 106 of 449
²smooth road surface,
²fully closed windows,
²dry weather conditions, and
²operation from the driver's seat.
²Performance, such as audio clarity, echo, and loudness
to a large degree rely on the phone and network, and
not the UConnecttsystem.
²Echo at the far end can sometimes be reduced by
lowering the in-vehicle audio volume.
²In a convertible vehicle, system performance may be
compromised with the convertible top down.
BluetoothtCommunication Link
Cellular phones have been found to lose connection to
the UConnecttsystem. When this happens, the connec-
tion can generally be re-established by switching the
phone off/on. Your cell phone is recommended to remain
in BluetoothtON mode.
Power-Up
After switching the ignition key from OFF to either ON
or ACC position, or after a language change, you must
wait at least five seconds prior to using the system.
104 UNDERSTANDING THE FEATURES OF YOUR VEHICLE
Page 111 of 449
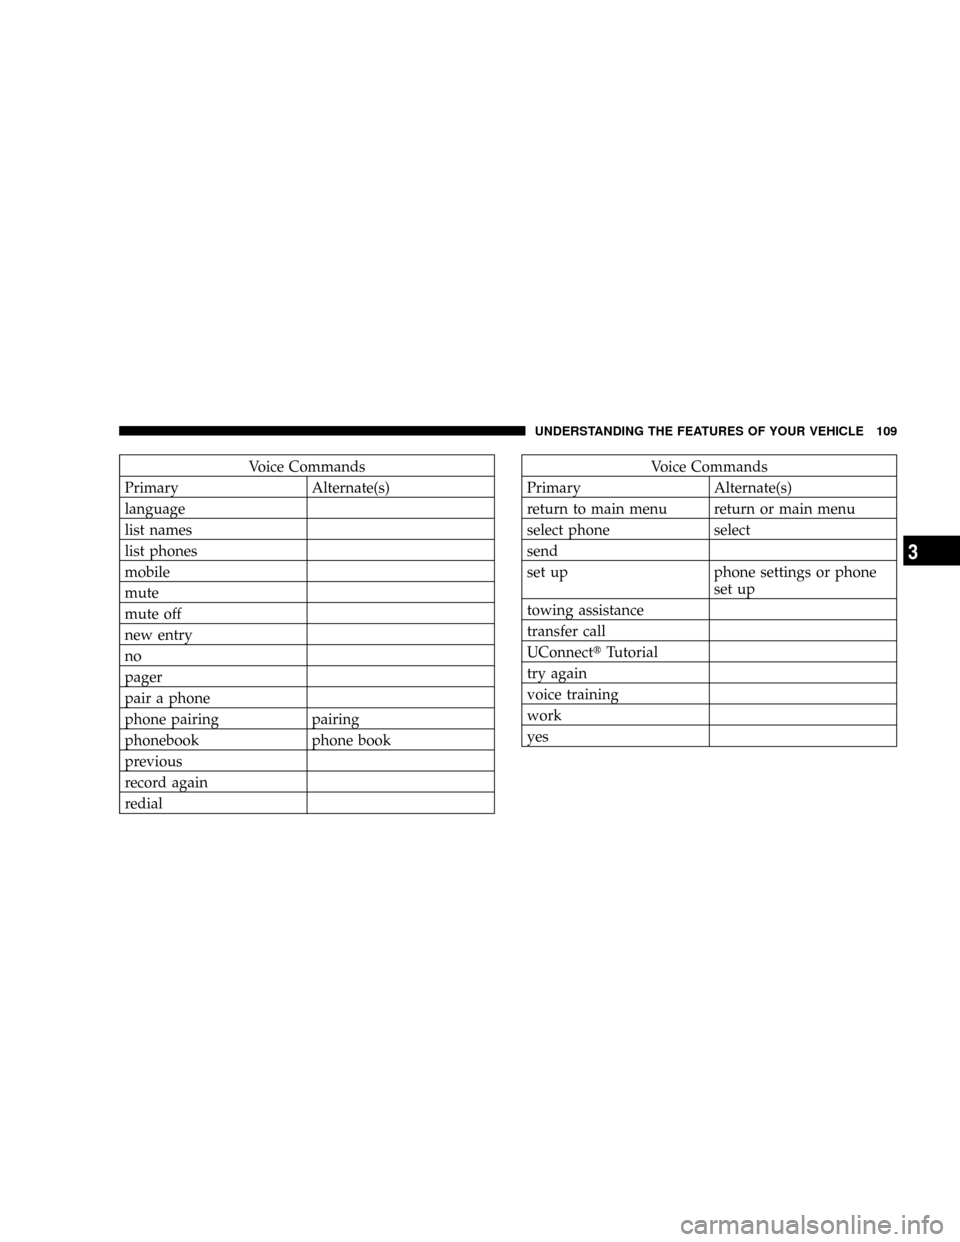
Voice Commands
Primary Alternate(s)
language
list names
list phones
mobile
mute
mute off
new entry
no
pager
pair a phone
phone pairing pairing
phonebook phone book
previous
record again
redialVoice Commands
Primary Alternate(s)
return to main menu return or main menu
select phone select
send
set up phone settings or phone
set up
towing assistance
transfer call
UConnecttTutorial
try again
voice training
work
yes
UNDERSTANDING THE FEATURES OF YOUR VEHICLE 109
3
Page 151 of 449
2. This device must accept any interference that may be
received including interference that may cause undesired
operation
NOTE:The transmitter has been tested and it complies
with FCC and IC rules. Changes or modifications not
expressly approved by the party responsible for compli-
ance could void the user 's authority to operate the
device.
The term ªICº before the certification/registration num-
ber only signifies that Industry Canada technical specifi-
cations were met.
ELECTRICAL POWER OUTLETS
This vehicle has two 12-Volt auxiliary power outlets that
can provide up to 20-Amps of current for accessories
designed for use with standard power outlet adapters.
The outlets are located in the instrument panel (below the
temperature control setting knob) and inside the full -
size center console. When the optional Cigar Lighterheating element is used, it heats when pushed in and
pops out automatically when ready for use.To preserve
the heating element, do not hold the lighter in the
heating position.
The instrument panel outlet can be reconfigured by the
customer to operate only when the ignition is ON (switch
battery fed) or with the ignition switch ON/OFF (battery
fed) to allow for cellular phone charging and/or opera-
tion while the ignition is OFF. This can be done by
moving the power outlet (switchable) fuse (fuse #22)
from the inboard position to the outboard position.
NOTE:All accessories connected to these outlets should
be removed or turned OFF when the vehicle is not in use,
to protect the battery against discharge (unless the cus-
tomer has reconfigured the fuse block to switched battery
feed).
UNDERSTANDING THE FEATURES OF YOUR VEHICLE 149
3
Page 152 of 449
Electrical Outlet Use With Engine OFF (Battery
Fed Configuration)
CAUTION!
²Many accessories that can be plugged in, draw
power from the vehicle's battery, even when not in
use (i.e., cellular phones, etc.). Eventually, if
plugged in long enough, the vehicle's battery will
discharge sufficiently to degrade battery life
and/or prevent engine starting.
²Accessories that draw higher power (i.e., coolers,
vacuum cleaners, lights, etc.), will discharge the
battery even more quickly. Use these only inter-
mittently and with greater caution.
(Continued)
CAUTION! (Continued)
²After the use of high power draw accessories, or
long periods of the vehicle not being started (with
accessories still plugged in), the vehicle must be
driven a sufficient length of time to allow the
generator to recharge the vehicle's battery.
CUPHOLDERS
If your vehicle has bucket seats with a center console,
there are three cupholders located on the console.
150 UNDERSTANDING THE FEATURES OF YOUR VEHICLE
Page 156 of 449
FLOOR CONSOLE Ð IF EQUIPPED
Floor Console Features
The Floor Console between the driver's and front pas-
senger's seat has the following features:
²Miscellaneous storage compartments.
²Three cupholders (two removable).
²iPod/Phone storage bin.
²12-Volt power outlet inside storage compartment.
²Side open armrest lid.
²Tissue holder and two pen holders.
²Coin slots (located under the instrument panel center
stack).
Storage Compartments
Some miscellaneous storage compartments and cuphold-
ers are both removable and dishwasher safe (upper rackof dishwasher only) for cleaning purposes. Various stor-
age compartments provide versatile and useful storage.
A coin holder is also provided inside the driver side
storage bin.
Power Outlet and Portable Phone Storage
The console is equipped with a power outlet and an
iPod/phone storage bin. The phone storage bin can be
used when easy access to the phone is needed. Also, the
power outlet inside the console compartment can be used
to charge the phone while it is being stored in the bin. The
power outlet may be used for any portable item with a
standard 12-Volt power plug.
Side Open Armrest Lid
Pressing the button on the left side of the console opens
the console armrest lid. The armrest lid will remain open
until the armrest lid is closed manually, by pressing the
lid back into place. Two pen holders are provided on the
154 UNDERSTANDING THE FEATURES OF YOUR VEHICLE
Page 167 of 449
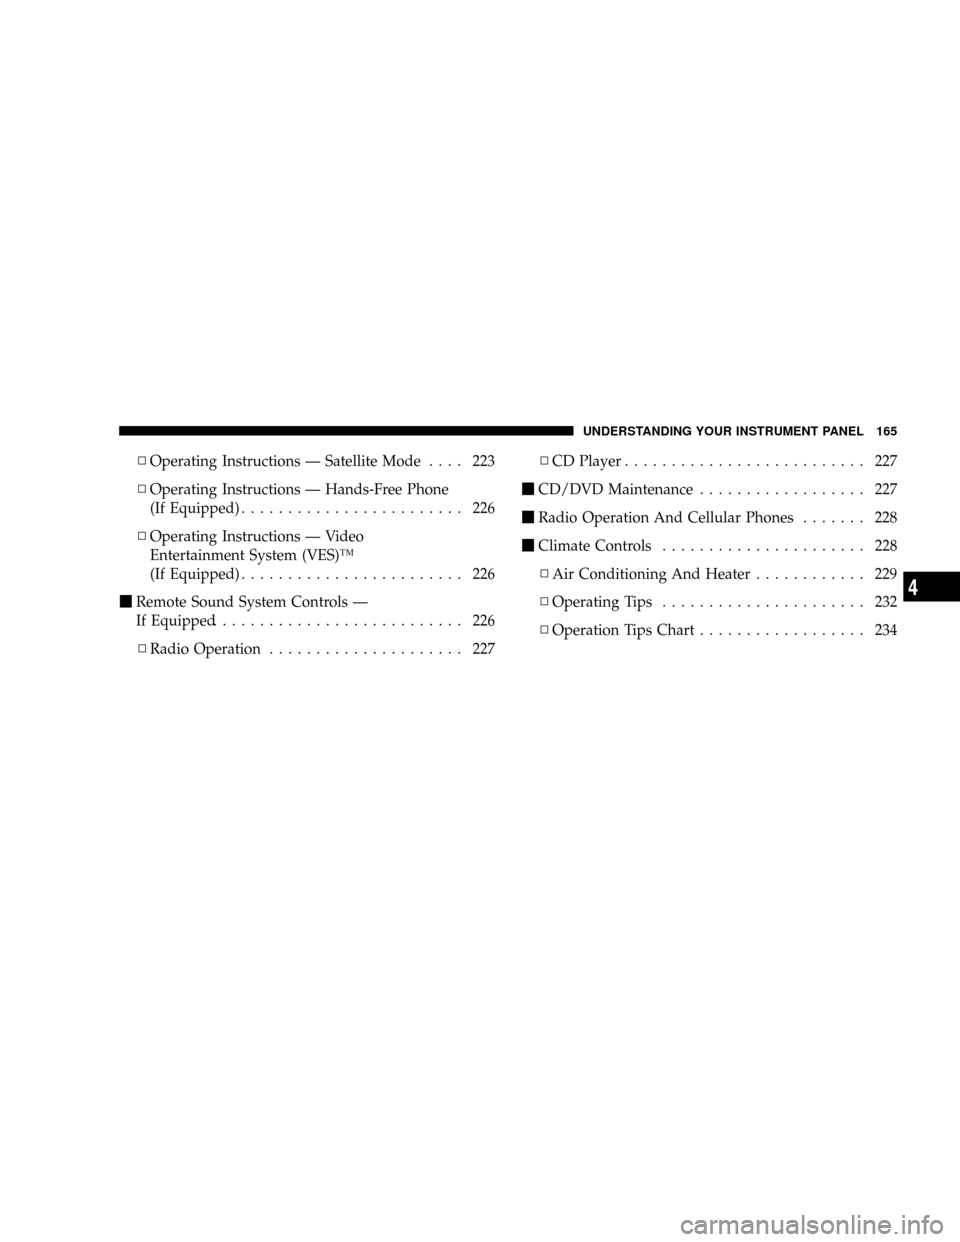
NOperating Instructions Ð Satellite Mode.... 223
NOperating Instructions Ð Hands-Free Phone
(If Equipped)........................ 226
NOperating Instructions Ð Video
Entertainment System (VES)Ÿ
(If Equipped)........................ 226
mRemote Sound System Controls Ð
If Equipped........................... 226
NRadio Operation..................... 227NCD Player.......................... 227
mCD/DVD Maintenance.................. 227
mRadio Operation And Cellular Phones....... 228
mClimate Controls...................... 228
NAir Conditioning And Heater............ 229
NOperating Tips...................... 232
NOperation Tips Chart.................. 234
UNDERSTANDING YOUR INSTRUMENT PANEL 165
4
Page 183 of 449
Power Switch/Volume Control (Rotary)
Push the ON/VOLUME control knob to turn on the
radio. Press the ON/VOLUME control knob a second
time to turn off the radio.
Electronic Volume Control
The electronic volume control turns continuously (360
degrees) in either direction without stopping. Turning the
ON/VOLUME control knob to the right increases the
volume and to the left decreases it.
When the audio system is turned ON, the sound will be
set at the same volume level as last played.
SEEK Buttons
Press and release the SEEK buttons to search for the next
listenable station in AM/FM mode. Press the right switch
to seek up and the left switch to seek down. The radio
will remain tuned to the new station until you make
another selection. Holding either button will bypass
stations without stopping until you release it.
SCAN Button
Pressing the SCAN button causes the tuner to search for
the next listenable station, in AM, FM or Satellite (if
equipped) frequencies, pausing for five seconds at each
listenable station before continuing to the next. To stop
the search, press the SCAN button a second time.
Voice Recognition Button (UConnecttHands-Free
Phone) Ð If Equipped
Press this button to operate the Hands-Free Phone
(UConnectt) feature (if equipped). Refer to ªHands-Free
Communication (UConnectt)º in Section 3.
If your vehicle is not equipped with or this feature is not
available on your vehicle, a ªNot Equipped With
UConnectº message will display on the radio screen.
UNDERSTANDING YOUR INSTRUMENT PANEL 181
4