buttons DODGE DAKOTA 2010 3.G User Guide
[x] Cancel search | Manufacturer: DODGE, Model Year: 2010, Model line: DAKOTA, Model: DODGE DAKOTA 2010 3.GPages: 76, PDF Size: 10.76 MB
Page 17 of 76
CAUTION!
Repeated overheating of the seat could damage the heating element and/or degrade
the material of the seat.
TILT STEERING COLUMN
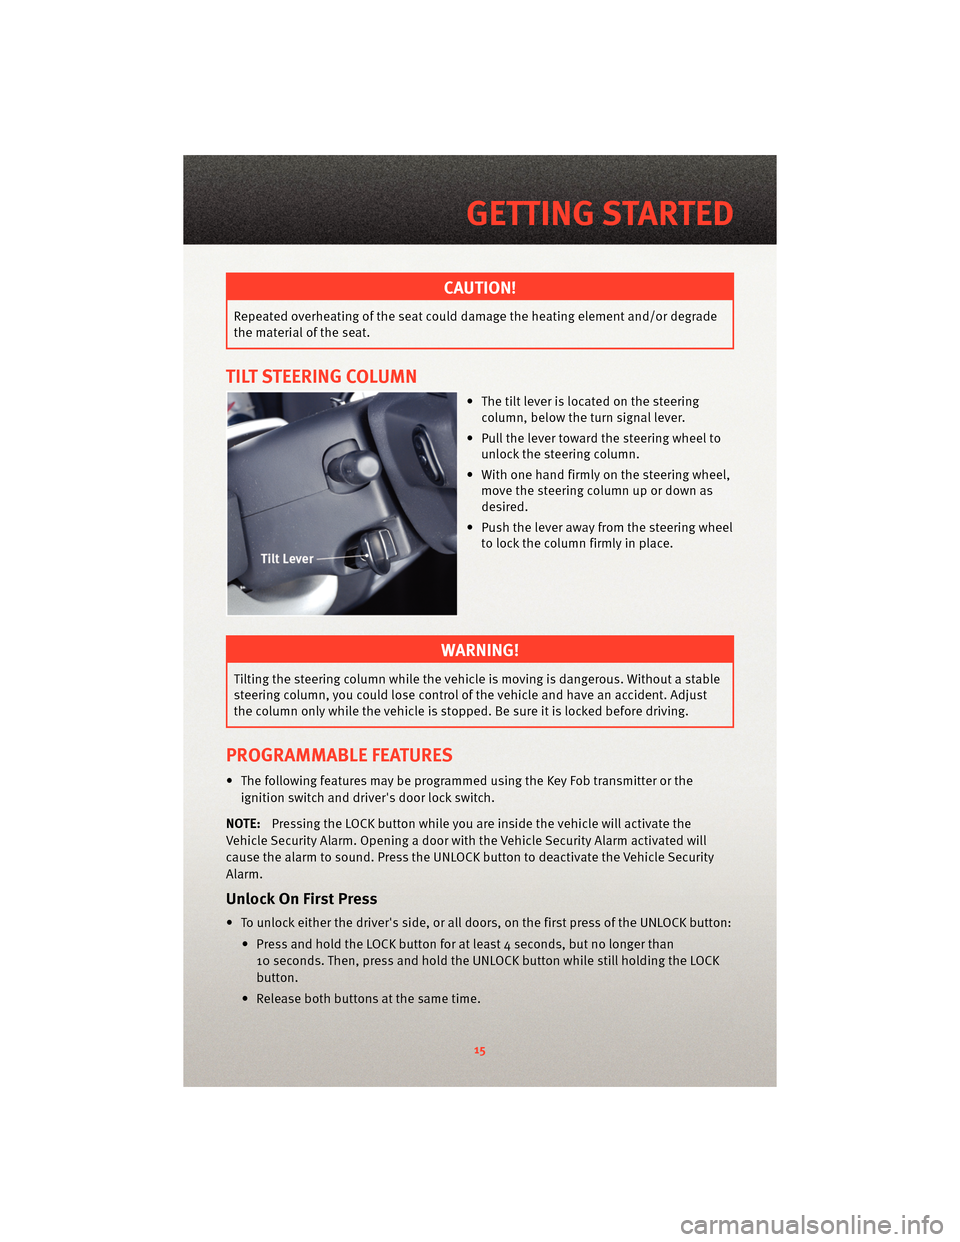
• The tilt lever is located on the steeringcolumn, below the turn signal lever.
• Pull the lever toward the steering wheel to unlock the steering column.
• With one hand firmly on the steering wheel, move the steering column up or down as
desired.
• Push the lever away from the steering wheel to lock the column firmly in place.
WARNING!
Tilting the steering column while the vehicle is moving is dangerous. Without a stable
steering column, you could lose control of the vehicle and have an accident. Adjust
the column only while the vehicle is stopped. Be sure it is locked before driving.
PROGRAMMABLE FEATURES
• The following features may be programmed using the Key Fob transmitter or the
ignition switch and driver's door lock switch.
NOTE: Pressing the LOCK button while you are inside the vehicle will activate the
Vehicle Security Alarm. Opening a door with the Vehicle Security Alarm activated will
cause the alarm to sound. Press the UNLOCK button to deactivate the Vehicle Security
Alarm.
Unlock On First Press
• To unlock either the driver's side, or all doors, on the first press of the UNLOCK button:
• Press and hold the LOCK button for at least 4 seconds, but no longer than10 seconds. Then, press and hold the UNLOCK button while still holding the LOCK
button.
• Release both buttons at the same time.
15
GETTING STARTED
Page 18 of 76
Auto Unlock Doors On Exit
• To have all of the vehicle doors unlock when any door is opened:• Enter your vehicle and close all the doors.
• Fasten your seatbelt.
• Within 15 seconds, cycle the ignition switch between LOCK and ON and then back toLOCK four times, ending up in the LOCK position (do not start the engine).
• Press the power door UNLOCK switch to unlock the doors. A single chime will indicate that programming is complete.
Auto Door Lock
• To have the doors lock automatically when the vehicle’s speed exceeds 15 mph
(24 km/h):
• Enter your vehicle and close all the doors.
• Fasten your seatbelt.
• Within 10 seconds, cycle the ignition switch between LOCK and ON and then back to LOCK four times, ending up in the LOCK position (do not start the engine).
• Press the power door LOCK switch to lock the doors. A single chime will indicate that programming is complete.
Sound Horn With Lock
• To turn the horn chirp on or off when the doors are locked:
• Press the LOCK button for at least 4 seconds, but no longer than 6 seconds. Then,press the PANIC button while still hol ding the LOCK button. A single chime will
sound to indicate that this feature has changed.
• Release both buttons at the same time.
Flashing Lights With Lock
• The turn signal lights flashing, when the doors are locked or unlocked, feature can be turned on or off. To turn this feature on or off:
• Press and hold the UNLOCK button for at least 4 seconds, but no longer than 6 seconds. Then, press and hold the LOCK button while still holding the UNLOCK
button. A single chime will sound to indic ate that this feature has changed.
• Release both buttons at the same time.
GETTING STARTED
16
Page 25 of 76
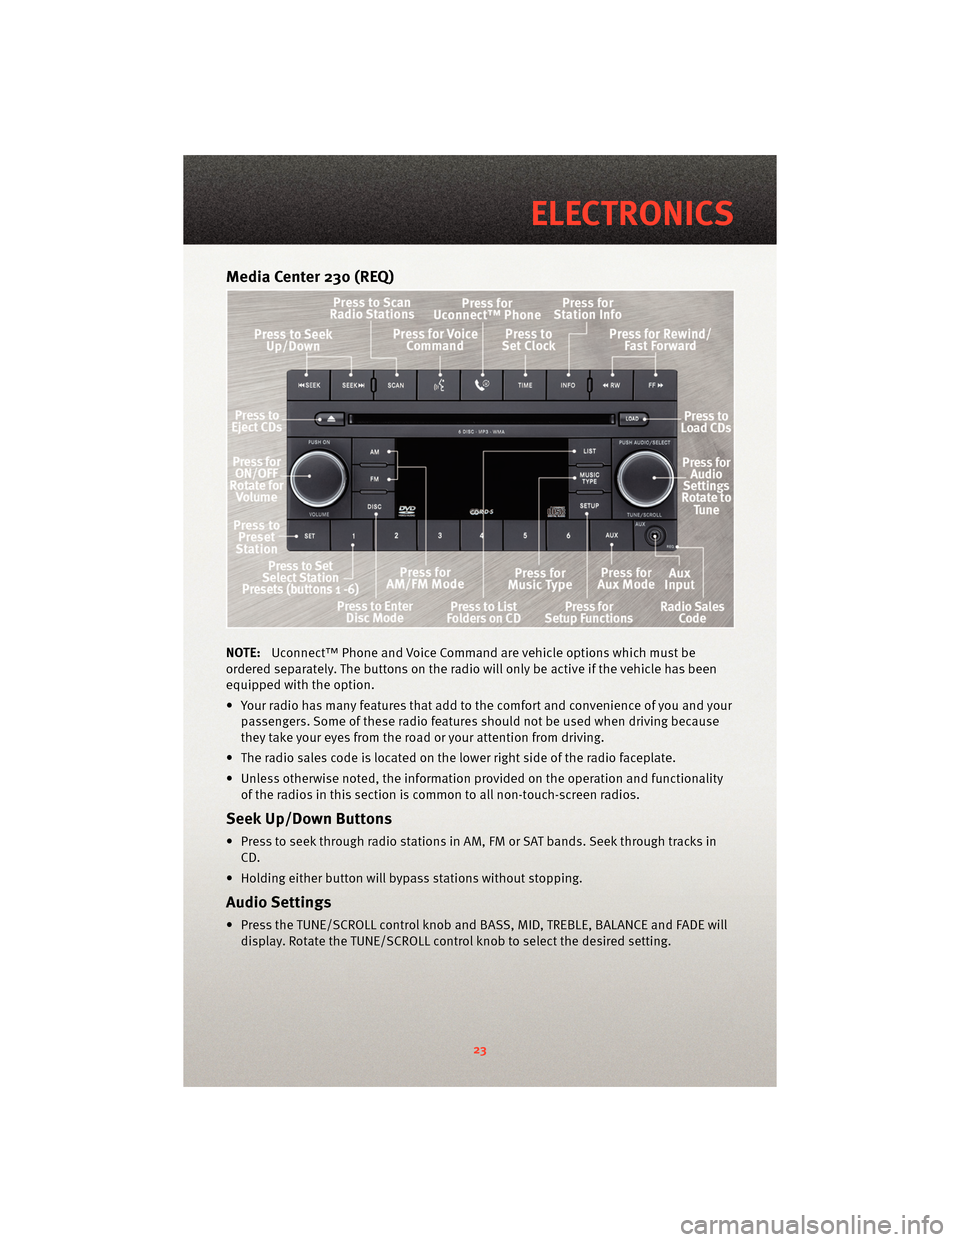
Media Center 230 (REQ)
NOTE:Uconnect™ Phone and Voice Command are vehicle options which must be
ordered separately. The butt ons on the radio will only be active if the vehicle has been
equipped with the option.
• Your radio has many features that add to the comfort and convenience of you and your passengers. Some of these radio featu res should not be used when driving because
they take your eyes from the road or your attention from driving.
• The radio sales code is located on the lower right side of the radio faceplate.
• Unless otherwise noted, the information provided on the operation and functionality of the radios in this section is common to all non-touch-screen radios.
Seek Up/Down Buttons
• Press to seek through radio stations in AM, FM or SAT bands. Seek through tracks inCD.
• Holding either button will bypass stations without stopping.
Audio Settings
• Press the TUNE/SCROLL control knob and BASS, MID, TREBLE, BALANCE and FADE will display. Rotate the TUNE/SCROLL control knob to select the desired setting.
23
ELECTRONICS
Page 30 of 76
Guide Me Home
• Press the NAV hard-key to access the Navigation Main Menu.
• Touch the GUIDE ME HOME soft-key to route you back to your home destination fromyour current location. Touch the GO soft-key to start your trip.
Map
• Press the NAV hard-key to access the Navigation Main Menu.
• Touch the MAP soft-key to display a map of your current position.
STEERING WHEEL AUDIO CONTROLS
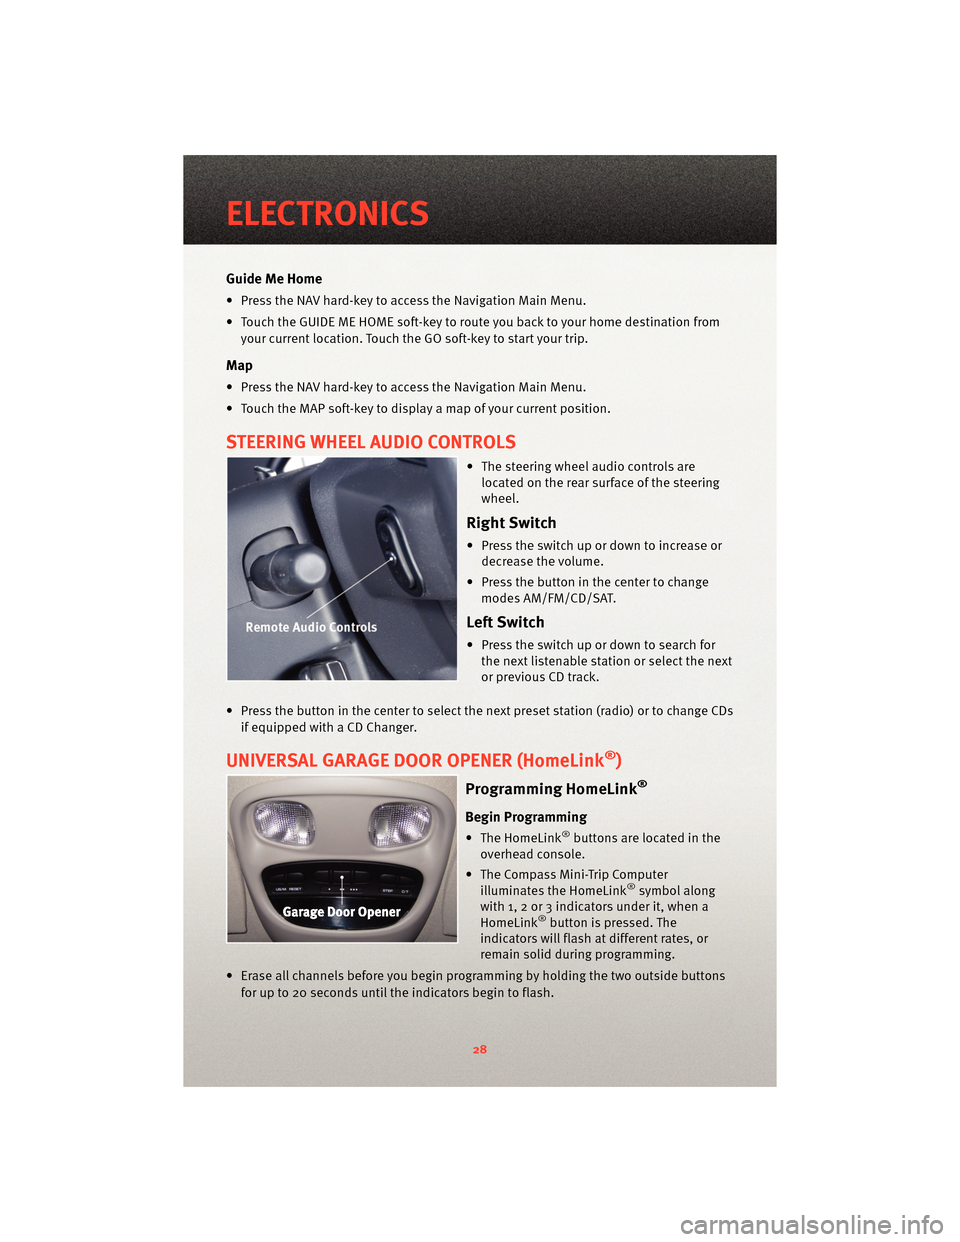
• The steering wheel audio controls arelocated on the rear surface of the steering
wheel.
Right Switch
• Press the switch up or down to increase ordecrease the volume.
• Press the button in the center to change modes AM/FM/CD/SAT.
Left Switch
• Press the switch up or down to search forthe next listenable station or select the next
or previous CD track.
• Press the button in the center to select the next preset station (radio) or to change CDs if equipped with a CD Changer.
UNIVERSAL GARAGE DOOR OPENER (HomeLink®)
Programming HomeLink®
Begin Programming
• The HomeLink®buttons are located in the
overhead console.
• The Compass Mini-Trip Computer illuminates the HomeLink
®symbol along
with 1, 2 or 3 indicators under it, when a
HomeLink
®button is pressed. The
indicators will flash at different rates, or
remain solid during programming.
• Erase all channels before you begin progr amming by holding the two outside buttons
for up to 20 seconds until the indicators begin to flash.
ELECTRONICS
28
Page 31 of 76
• Park your vehicle outside of the garage and turn the ignition switch to the ON/RUNposition.
• Place the hand-held transmitter 1 to 3 in (3 to 8 cm) from the HomeLink
®buttons
while keeping the indicator light in view.
• Simultaneously, press and hold both the chosen HomeLink
®button and the
hand-held transmitter button until the HomeLink®indicator flash rate changes from a
slow to a rapidly blinking light, then release both the HomeLink®and the hand-held
transmitter buttons. This may take up to 30 seconds, or longer in rare cases.
• Press and hold the just-programmed HomeLink
®button; if the indicator light stays on
constantly, programming is complete and the garage door should open.
WARNING!
• Your motorized door or gate will open and close while you are programming the universal transceiver. Do not program the transceiver if people or pets are in the
path of the door or gate. Only use this transceiver with a garage door opener that
has a “stop and reverse” feature as required by Federal safety standards. This
includes most garage door opener models manufactured after 1982. Do not use a
garage door opener without these safety features. Call toll-free 1–800–355–3515 or,
on the Internet, at www.HomeLink.com for s afety informationor assistance.
• Do not run your vehicle in a closed garage or confined area while programming the transceiver. Exhaust gas from your vehicle contains Carbon Monoxide (CO) which is
odorless and colorless. Carbon Monoxide is poisonous and can cause serious
injury or death when inhaled.
NOTE: If you are having difficulty programming your HomeLink
®and your garage door
opener was manufactured after 1995, you may have a rolling code. Follow the steps
below for Programming A Rolling Code System.
Programming A Rolling Code System
• At the garage door opener motor (in the gara ge), locate the “learn” or “programming”
button. This can usually be found where the hanging antenna wire is attached to the
garage door opener motor (it is NOT the button normally used to open and close the
door).
• Firmly press and release the “learn” or “programming” button. The name and color of
the button may vary by manufacturer. Within 30 seconds, return to the vehicle and
press the programmed HomeLink
®button twice (holding the button for two seconds
each time). If the device is plugged in and activates, programming is complete.
• If the device does not activate, press the button a third time (for two seconds) to
complete the programming.
Using HomeLink®
• To operate, simply press and release the programmed HomeLink®button and the
programmed device will operate.
29
ELECTRONICS