buttons DODGE DART 2014 PF / 1.G User Guide
[x] Cancel search | Manufacturer: DODGE, Model Year: 2014, Model line: DART, Model: DODGE DART 2014 PF / 1.GPages: 140, PDF Size: 4.57 MB
Page 12 of 140
KEYLESS ENTER-N-GO™
• The Keyless Enter-N-Go™ system is an enhancement to the vehicle's Key Fob. Thisfeature allows you to lock and unlock the vehicle's door(s) and trunk without having to
press the Key Fob lock or unlock buttons, as well as starting and stopping the vehicle with
the press of a button.
To Unlock From The Driver Or Passenger Side
• With a valid Keyless Enter-N-Go™ Key Fob located outside the vehicle and within 5 ft(1.5m) of the driver or passenger side door handle, grab either front door handle to unlock
the door automatically.
To Lock The Vehicle
• Both front door handles have LOCK but-tons located on the outside of the handle.
With one of the vehicle's Keyless Enter-N-
Go™ Key Fobs located outside the vehicle
and within 5 ft (1.5 m) of the driver's or
passenger front door handle, press the
door handle LOCK button to lock all four
doors and trunk.
• DO NOT grab the door handle when pressing the door handle lock button. This could unlock the door(s).
GETTING STARTED
10
Page 24 of 140
REAR SEAT
Folding Rear Seatback
• Pull on the loops, located near the outertop of the seatbacks, to fold down either
or both seatbacks. These loops can be
tucked away when not in use.
• When the seatback is raised to the upright position, make sure it is latched by
strongly pulling on the top of the seatback
above the seat loop.
WARNING!
• Be certain that the seatback is securely locked into position. If the seatback is not
securely locked into position, the seat will not provide the proper stability for child
seats and/or passengers. An improperly latched seat could cause you and others to
severely injured or killed.
• The cargo area in the rear of the vehicle (with the rear seatbacks in the locked-up or
folded-down position) should not be used as a play area by children when the vehicle
is in motion. They could be severely injured or killed in a collision. Children should be
seated and using the proper restraint system.
HEATED SEATS
Front Heated Seats
The front heated seats control buttons are located within the climate or controls screen of
the touchscreen.
• Press the heated seat button
once to turn the High setting On.
• Press the heated seat button
a second time to turn the Low setting On.
• Press the heated seat button
a third time to turn the heating elements Off.
If the High-level setting is selected, the system will automatically switch to Low-level after
approximately 60 minutes. The Low-level setting will turn Off automatically after approxi-
mately 45 minutes.
GETTING STARTED
22
Page 42 of 140
Uconnect® 200
NOTE:
•
Your radio may not be equipped with the Uconnect® Voice Command and Uconnect® Phone
features. To determine if your radio has these features, locate and press the Uconnect®
Voice Command
and Uconnect® Phonebuttons on the steering wheel.
• Your radio has many features that add to the comfort and convenience of you and your passengers. Some of these radio features should not be used when driving because they
take your eyes from the road or your attention from driving.
Anti-Theft Protection
• This radio will not operate in any vehicle other than the vehicle in which it was delivered.The radio display will prompt you to enter an anti-theft code and the radio will not
function, if this radio is transferred to another vehicle. You must contact your authorized
dealer to get the anti-theft code to unlock the radio.
Clock Setting
• Press and hold the TIME button until the hours are highlighted.
• Adjust the hours by turning the right side TUNE/SCROLL control knob.
• After adjusting the hours, press the right side ENTER/BROWSE control knob to set theminutes. The minutes will highlight.
• Adjust the minutes using the right side TUNE/SCROLL control knob.
• To exit, press the TIME button or press the BACK button to return to the previous menu.
ELECTRONICS
40
Page 43 of 140
NOTE:
Time format has the options of 12HR or 24HR. Selecting one of these options will change
the way the clock is displayed.
Equalizer, Balance And Fade
• To set the Bass, Mid Range, Treble, Balance or Fade settings press the AUDIO button toaccess the Audio sub-menu.
• The Audio sub-menu can also be reached by pressing the MENU button until AUDIO appears in the display. Press the ENTER/BROWSE button to select the AUDIO menu and
use the TUNE/SCROLL knob to highlight select Bass, Mid Range, Treble, Balance or Fade.
Once the desired selection is highlighted, press the ENTER/BROWSE button to select the
item and use the TUNE/SCROLL knob to adjust the setting.
Radio Operation
RADIO Button
• Press the button to select either AM, FM or SiriusXM mode.
Seek Up/Down Buttons
• Press to seek through radio stations in AM, FM, or SXM bands.
• Hold either button to bypass stations without stopping.
Buttons1-5
• These buttons tune the radio to the stations that you commit to pushbutton memory AM(A, B, C), FM (A, B, C) and SXM (A,B,C) — 15 AM, 15 FM and 15 SXM stations.
Store Radio Presets
• When you are receiving a station that you wish to commit to pushbutton memory, pressand hold the button (1–5) you wish to lock onto this station for three seconds.
• You may add a second or third station to each pushbutton by repeating the above procedure with this exception: Press the “A–B–C” button to select the A, B or C mode.
Each button can be set for up to three stations in both AM and FM. This allows a total of
15 AM, 15 FM and 15 SXM stations to be stored into push-button memory.
INFO Button
• Press the INFO button for an RDS station (one with call letters displayed). The radio willreturn a Radio Text message broadcast from an FM station (FM mode only).
Player Button
• Pressing the “Player” button will allow you to switch from AM/FM/SXM modes to Playermode (AUX/CD/Bluetooth® Steaming (BT)/USB).
ELECTRONICS
41
Page 45 of 140
•If you decide to continue your service at the end of your trial subscription, the plan
you choose will automatically renew and bill at then-current rates until you call
SiriusXM at 1-866-635-2349 to cancel. Canadian residents call 1-888-539-7474. See
SiriusXM Customer Agreement for complete terms at www.siriusxm.com. For Canadian
residents www.siriusxm.ca. All fees and programming subject to change. Our satellite
service is available only to those at least 18 and older in the 48 contiguous USA and D.C.
Our Sirius satellite service is also available in PR (with coverage limitations). Our Internet
radio service is available throughout our satellite service area and in AK and HI. © 2014
Sirius XM Radio Inc. Sirius, XM and all related marks and logos are trademarks of Sirius
XM Radio Inc.
CD/DISC Operation — If Equipped
• This radio is capable of playing compact discs (CD), recordable compact discs (CD-R), rewritable compact discs (CD-RW), compact discs with MP3 tracks and multisession
compact discs with CD, MP3 and WMA tracks.
Seek Up/Down Buttons
• Press to seek through CD tracks.
• Hold either button to bypass tracks without stopping.
Audio Jack Operation
• The Audio Jack allows a portable device,such as an MP3 player or an iPod® to be
plugged into the center console and uti-
lize the vehicle’s audio system, using a
3.5 mm audio cable, to amplify the source
and play through the vehicle speakers.
• Pressing the PLAYER button will change the mode to auxiliary device if the Audio
Jack is connected, allowing the music
from your portable device to play through
the vehicle's speakers.
• The functions of the portable device are controlled using the device buttons. The volume may be controlled using the radio or
portable device.
USB Port
• Connect your iPod®/MP3 or compatible device using a USB cable into the USB Port. USBMemory sticks with audio files can also be used. Then, audio from the device can be
played on the vehicles sound system while providing metadata (artist, track title, album,
etc.) information on the radio display.
• Pressing the PLAYER button will change the device mode between connected auxiliary devices.
ELECTRONICS
43
Page 53 of 140
Audio Settings
• Touch the “Audio” soft-key to activate the Audio settings screen to adjust Balance\Fade,Equalizer and Speed Adjusted Volume.
• You can return to the Radio screen by touching the “X” located at the top right.
Balance/Fade
• Touch the “Balance/Fade” soft-key to Balance audio between the front speakers or fade the audio between the rear and front speakers.
• Touching the “Front,” “Rear,” “Left” or “Right” soft-keys or touch and drag the red Speaker Icon to adjust the Balance/Fade.
Equalizer
• Touch the “Equalizer” soft-key to activate the Equalizer screen.
• Touch the “+” or “–” soft-keys, or by touching and dragging over the level bar for each of the equalizer bands. The level value, which spans between ±9, is displayed at the bottom
of each of the Bands.
Speed Adjusted Volume
• Touch the “Speed Adjusted Volume” soft-key to activate the Speed Adjusted Volume screen. The Speed Adjusted Volume is adjusted by touching the “+” and “–” buttons or by
touching and dragging over the level bar. This alters the automatic adjustment of the
audio volume with variation to vehicle speed.
Remote CD/Disc Player
• The CD/Disc Player is located inside thecenter console.
• With the printed side facing the rear of the car, insert the disc into the disc slot inside
the center console. The radio pulls the
disc in automatically. The radio selects
the appropriate mode after the disc is
recognized, and starts playing the first
track.
ELECTRONICS
51
Page 76 of 140
ELECTRONIC VEHICLE INFORMATION CENTER (EVIC) —
PREMIUM (4 BUTTON)
• The EVIC features a driver interactive dis-play that is located in the instrument
cluster. Pressing the controls on the left
side of the steering wheel allows the
driver to select vehicle information and
Personal Settings. For additional infor-
mation, refer to “Programmable Fea-
tures” in this guide.
• Press and release the UP
button to
scroll upward through the main menus
(Fuel Economy, Vehicle Info, Tire PSI,
Cruise, Messages, Trip Info, Vehicle Speed
and Turn Menu Off) and sub menus.
• Press and release the DOWN
button
to scroll downward through the main
menus and sub menus.
• Press and release the RIGHT
button
for access to main menus, sub menus or
to select a personal setting in the setup
menu. Press and hold the RIGHT
button for two seconds to reset features
• Press the LEFT
button to scroll back to a previous menu or sub menu.
Compass Calibration
This compass is self-calibrating, which eliminates the need to set the compass manually.
When the vehicle is new, the compass may appear erratic and the EVIC will display “CAL”
until the compass is calibrated.
You may also calibrate the compass by completing one or more 360 degree turns (in an area
free from large metal or metallic objects) until the “CAL” message displayed in the EVIC
turns off. The compass will now function normally.
Programmable Features
•The EVIC can be used to view or change the following settings. Press the UPor DOWN
button until System Setup displays, then press the RIGHTbutton. Scroll through
the settings using the UP or DOWN buttons. Press the RIGHT
button to change the
setting. Press the LEFT
button to scroll back to a previous menu or sub menu.
• Radio Info • Trip Info
• Fuel Economy Info • Tire Pressure
• Cruise Control Info • Vehicle Info
• Digital Vehicle Speed • Stored Warning Messages
• Analog Vehicle Speed • Turn Menu OFF
Four Button EVIC Controls
ELECTRONICS
74
Page 78 of 140
Trip Info
• Press and release the UPorDOWN button until the Trip Info icon is highlighted
in the EVIC. Press and release the RIGHT
button to display the following three trip
features in the next screen:
• Trip A
• Trip B
• Elapsed Time
Stored Message
• Press and release the UPorDOWN button until the Messages display icon is
highlighted in the EVIC. This feature shows the number of stored warning messages.
Pressing the RIGHT
button will allow you to see what the stored messages are. Press
the LEFT
button to return to the Main Menu. The inner ring of the display will
illuminate grey under normal conditions, yellow for non critical warnings, red for critical
warnings and white for on demand information.
Screen Setup
•Screen Setup Display Analog Icon
•
Screen Setup Display Digital Icon
• Press and release the UP
or DOWNbutton until the Screen Setup display icon
is highlighted in the EVIC. Press and release the RIGHT
button to enter the Screen
Setup sub-menu. The Screen Setup feature allows you to change what information is
displayed in the instrument cluster as well as the location that information is displayed.
• Press and release the UP
or DOWNbutton until the Screen Setup display icon
is highlighted in the EVIC. Press and release the RIGHT
button to enter the Screen
Setup sub-menu. The Screen Setup feature allows you to change the location that
information is displayed within the instrument cluster. Use the UP and DOWN buttons to
highlight a screen setup location (i.e., Upper Left, Upper Right, etc.) then press the RIGHT
arrow button to select the location and make changes. Press the UP and DOWN buttons
to select the information you would like to display in that location (i.e., Date, Time,
Outside Temp, etc.) and press the RIGHT arrow button to save the display setting. You can
press the LEFT arrow button at any time to back out of a sub-menu selection.
ELECTRONICS
76
Page 80 of 140
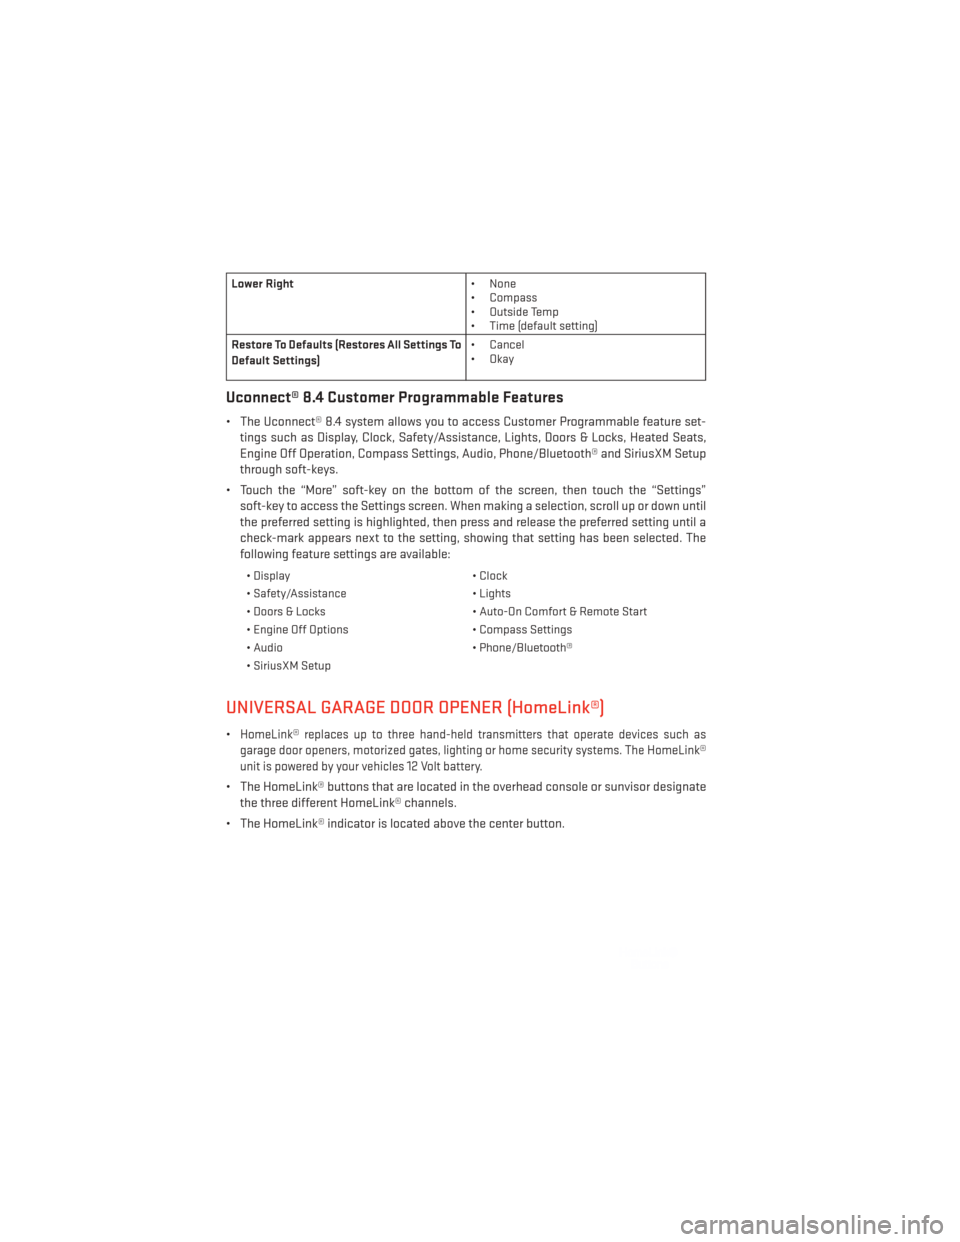
Lower Right• None
• Compass
• Outside Temp
• Time (default setting)
Restore To Defaults (Restores All Settings To
Default Settings) • Cancel
•Okay
Uconnect® 8.4 Customer Programmable Features
• The Uconnect® 8.4 system allows you to access Customer Programmable feature set-
tings such as Display, Clock, Safety/Assistance, Lights, Doors & Locks, Heated Seats,
Engine Off Operation, Compass Settings, Audio, Phone/Bluetooth® and SiriusXM Setup
through soft-keys.
• Touch the “More” soft-key on the bottom of the screen, then touch the “Settings” soft-key to access the Settings screen. When making a selection, scroll up or down until
the preferred setting is highlighted, then press and release the preferred setting until a
check-mark appears next to the setting, showing that setting has been selected. The
following feature settings are available:
• Display • Clock
• Safety/Assistance • Lights
• Doors & Locks • Auto-On Comfort & Remote Start
• Engine Off Options • Compass Settings
• Audio • Phone/Bluetooth®
• SiriusXM Setup
UNIVERSAL GARAGE DOOR OPENER (HomeLink®)
•HomeLink® replaces up to three hand-held transmitters that operate devices such as
garage door openers, motorized gates, lighting or home security systems. The HomeLink®
unit is powered by your vehicles 12 Volt battery.
• The HomeLink® buttons that are located in the overhead console or sunvisor designate the three different HomeLink® channels.
• The HomeLink® indicator is located above the center button.
ELECTRONICS
78
Page 81 of 140
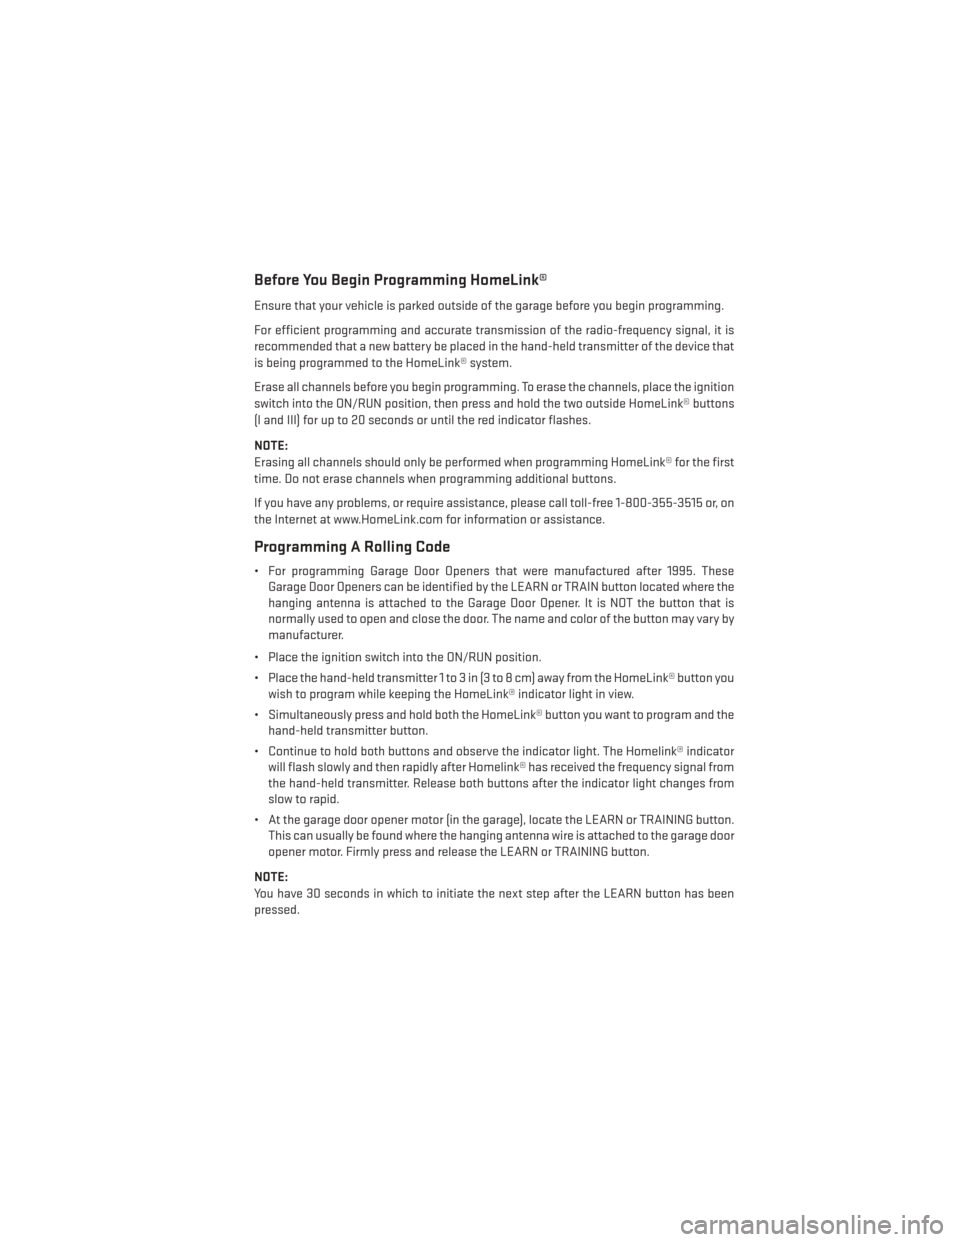
Before You Begin Programming HomeLink®
Ensure that your vehicle is parked outside of the garage before you begin programming.
For efficient programming and accurate transmission of the radio-frequency signal, it is
recommended that a new battery be placed in the hand-held transmitter of the device that
is being programmed to the HomeLink® system.
Erase all channels before you begin programming. To erase the channels, place the ignition
switch into the ON/RUN position, then press and hold the two outside HomeLink® buttons
(I and III) for up to 20 seconds or until the red indicator flashes.
NOTE:
Erasing all channels should only be performed when programming HomeLink® for the first
time. Do not erase channels when programming additional buttons.
If you have any problems, or require assistance, please call toll-free 1-800-355-3515 or, on
the Internet at www.HomeLink.com for information or assistance.
Programming A Rolling Code
• For programming Garage Door Openers that were manufactured after 1995. TheseGarage Door Openers can be identified by the LEARN or TRAIN button located where the
hanging antenna is attached to the Garage Door Opener. It is NOT the button that is
normally used to open and close the door. The name and color of the button may vary by
manufacturer.
• Place the ignition switch into the ON/RUN position.
• Place the hand-held transmitter 1 to 3 in (3 to 8 cm) away from the HomeLink® button you wish to program while keeping the HomeLink® indicator light in view.
• Simultaneously press and hold both the HomeLink® button you want to program and the hand-held transmitter button.
• Continue to hold both buttons and observe the indicator light. The Homelink® indicator will flash slowly and then rapidly after Homelink® has received the frequency signal from
the hand-held transmitter. Release both buttons after the indicator light changes from
slow to rapid.
• At the garage door opener motor (in the garage), locate the LEARN or TRAINING button. This can usually be found where the hanging antenna wire is attached to the garage door
opener motor. Firmly press and release the LEARN or TRAINING button.
NOTE:
You have 30 seconds in which to initiate the next step after the LEARN button has been
pressed.
ELECTRONICS
79