instrument panel DODGE DART 2015 PF / 1.G Owner's Guide
[x] Cancel search | Manufacturer: DODGE, Model Year: 2015, Model line: DART, Model: DODGE DART 2015 PF / 1.GPages: 664, PDF Size: 16.96 MB
Page 251 of 664
Headlights On With Wipers (Available With
Automatic Headlights Only)
When this feature is active, the headlights will turn on
approximately 10 seconds after the wipers are turned on
if the headlight switch is placed in the AUTO position. In
addition, the headlights will turn off when the wipers are
turned off if they were turned on by this feature.
The Headlights On with Wipers feature can be turned on
and off using the Uconnect® System, refer to “Uconnect®
Settings” in “Understanding Your Instrument Panel” for
further information.
Rain Sensing Wipers — If Equipped
This feature senses moisture on the windshield and
automatically activates the wipers for the driver. The
feature is especially useful for road splash or over spray
from the windshield washers of the vehicle ahead. Rotate
the end of the multifunction lever to one of four settings
to activate this feature.
The sensitivity of the system can be adjusted with the
multifunction lever. Wiper delay position 1 is the least
sensitive, and wiper delay position 4 is the most sensi-
tive. Setting 3 should be used for normal rain conditions.
Settings 1 and 2 can be used if the driver desires less
wiper sensitivity. Setting 4 can be used if the driver
desires more sensitivity. The rain sense wipers will
automatically change between an intermittent wipe, slow
wipe and a fast wipe depending on the amount of
moisture that is sensed on the windshield. Place the
wiper switch in the OFF position when not using the
system.
The Rain Sensing feature can be turned on and off using
the Uconnect® System, refer to “Uconnect® Settings” in
“Understanding Your Instrument Panel” for further in-
formation.
3
UNDERSTANDING THE FEATURES OF YOUR VEHICLE 249
Page 254 of 664
HEATED STEERING WHEEL — IF EQUIPPED
The steering wheel contains a heating element that helps
warm your hands in cold weather. The heated steering
wheel has only one temperature setting. Once the heated
steering wheel has been turned on it will operate for up
to 80 minutes before automatically shutting off. The
heated steering wheel can shut off early or may not turn
on when the steering wheel is already warm.
The heated steering wheel control button is located
within the Uconnect® system. You can gain access to the
control button through the climate screen or the controls
screen.
•Press the heated steering wheel buttononce to
turn the heating element ON.
•Press the heated steering wheel buttona second
time to turn the heating element OFF.
NOTE:The engine must be running for the heated
steering wheel to operate.
Vehicles Equipped With Remote Start
On models that are equipped with remote start, the
heated steering wheel can be programmed to come on
during a remote start through the Uconnect® system.
Refer to “Uconnect® Settings” in “Understanding Your
Instrument Panel” for further information.
252 UNDERSTANDING THE FEATURES OF YOUR VEHICLE
Page 258 of 664
The drivers preferred units can be selected through the
instrument panel settings if equipped. Refer to “ Under-
standing Your Instrument Panel” for more information.
The speed increment shown is dependant on the chosen
speed unit of U.S. (mph) or Metric (km/h):
U.S. Speed (mph)
•Pressing the RES (+) button once will result ina1mph
increase in set speed. Each subsequent tap of the
button results in an increase of 1 mph.
•If the button is continually pressed, the set speed will
continue to increase until the button is released, then
the new set speed will be established.
Metric Speed (km/h)
•Pressing the RES (+) button once will result in a
1 km/h increase in set speed. Each subsequent tap of
the button results in an increase of 1 km/h.
•If the button is continually pressed, the set speed will
continue to increase until the button is released, then
the new set speed will be established.
To Decrease Speed
When the Electronic Speed Control is set, you can de-
crease speed by pushing the SET (-) button.
The drivers preferred units can be selected through the
instrument panel settings if equipped. Refer to “ Under-
standing Your Instrument Panel” for more information.
The speed decrement shown is dependant on the chosen
speed unit of U.S. (mph) or Metric (km/h):
U.S. Speed (mph)
•Pressing the SET (-) button once will result ina1mph
decrease in set speed. Each subsequent tap of the
button results in a decrease of 1 mph.
256 UNDERSTANDING THE FEATURES OF YOUR VEHICLE
Page 260 of 664
PARKSENSE® REAR PARK ASSIST — IF
EQUIPPED
The ParkSense® Rear Park Assist system provides visual
and audible indications of the distance between the rear
fascia and a detected obstacle when backing up, e.g.
during a parking maneuver. Refer to “ParkSense® Sys-
tem Usage Precautions” in this section for limitations of
this system and recommendations.
ParkSense® will retain the last system state (enabled or
disabled) from the last ignition cycle when the ignition is
changed to the ON/RUN position.
ParkSense® can be active only when the shift lever is in
REVERSE. If ParkSense® is enabled at this shift lever
position, the system will remain active until the vehicle
speed is increased to approximately 7 mph (11 km/h) or
above. The system will become active again if the vehicle
speed is decreased to speeds less than approximately
6 mph (9 km/h).
ParkSense® Sensors
The four ParkSense® sensors, located in the rear fascia/
bumper, monitor the area behind the vehicle that is
within the sensors’ field of view. The sensors can detect
obstacles from approximately 12 in (30 cm) up to 79 in
(200 cm) from the rear fascia/bumper in the horizontal
direction, depending on the location, type and orienta-
tion of the obstacle.
ParkSense® Warning Display
The ParkSense® Warning screen will only be displayed if
Sound and Display is selected from the Uconnect®
System. Refer to “Uconnect® Settings” in “Understand-
ing Your Instrument Panel” for further information.
The ParkSense® Warning screen is located within the
Driver Information Display (DID). It provides visual
warnings to indicate the distance between the rear
fascia/bumper and the detected obstacle. Refer to
“Driver Information Display (DID) Settings” in “Under-
standing Your Instrument Panel” for further information.
258 UNDERSTANDING THE FEATURES OF YOUR VEHICLE
Page 268 of 664
Enabling And Disabling ParkSense®
ParkSense® can be enabled and disabled using the
Uconnect® System. The available choices are: Off, Sound
Only, or Sound and Display. Refer to “Uconnect® Set-
tings” in “Understanding Your Instrument Panel” for
further information.
When the ParkSense® button is pushed to disable the
system, the Driver Information Display (DID) will dis-
play the “PARKSENSE OFF” message for approximately
five seconds. Refer to “Driver Information Display (DID)
” in “Understanding Your Instrument Panel” for further
information. When the shift lever is moved to REVERSE
and the system is disabled, the DID will display the
“PARKSENSE OFF” message for as long as the vehicle is
in REVERSE.
Service The ParkSense® Rear Park Assist
System
During vehicle start up, when the ParkSense® Rear Park
Assist System has detected a faulted condition, the
instrument cluster will actuate a single chime, once per
ignition cycle, and it will display the “PARKSENSE
UNAVAILABLE WIPE OFF REAR SENSORS” or the
“PARKSENSE UNAVAILABLE SERVICE REQUIRED”
message. Refer to “Driver Information Display (DID)” for
further information. When the shift lever/gear selector is
moved to REVERSE and the system has detected a
faulted condition, the DID will display the#PARKSENSE
UNAVAILABLE WIPE OFF REAR SENSORS#or
#PARKSENSE UNAVAILABLE SERVICE REQUIRED#
message for as long as the vehicle is in REVERSE. Under
this condition, ParkSense® will not operate.
If “PARKSENSE UNAVAILABLE WIPE OFF REAR SEN-
SORS” appears in the Driver Information Display (DID)
make sure the outer surface and the underside of the rear
266 UNDERSTANDING THE FEATURES OF YOUR VEHICLE
Page 273 of 664
PARKVIEW® REAR BACK UP CAMERA — IF
EQUIPPED
Your vehicle may be equipped with the ParkView® Rear
Back Up Camera that allows you to see an on-screen
image of the rear surroundings of your vehicle whenever
the shift lever is put into REVERSE. The image will be
displayed in the touchscreen display along with a caution
note to “check entire surroundings” across the top of the
screen. After five seconds this note will disappear. The
ParkView® camera is located on the rear of the vehicle
above the rear License plate.
When the vehicle is shifted out of REVERSE, the rear
camera mode is exited and the last selected touchscreen
appears again.
If your vehicle is equipped with the Camera Delay
feature and it is turned On, the rear camera image will be
displayed for up to 10 seconds when the vehicle is shifted
out of REVERSE unless the forward vehicle speed ex-
ceeds 8 mph (13 km/h), the transmission is shifted into
#PARK#or the vehicle’s ignition is cycled to the OFF
position.
Fixed guide lines are overlaid on the image to illustrate
the width of the vehicle.
NOTE:The ParkView® Rear Back Up Camera has pro-
grammable modes of operation that may be selected
through the Uconnect® System. Refer to “Uconnect®
Settings” in “Understanding Your Instrument Panel” for
further information.
Different colored zones indicate the distance to the rear of
the vehicle.
3
UNDERSTANDING THE FEATURES OF YOUR VEHICLE 271
Page 289 of 664
open or partially open positions. This is a normal occur-
rence and can be minimized. If the buffeting occurs with
the rear windows open, open the front and rear windows
together to minimize the buffeting. If the buffeting occurs
with the sunroof open, adjust the sunroof opening to
minimize the buffeting or open any window.
Sunroof Maintenance
Use only a nonabrasive cleaner and a soft cloth to clean
the glass panel.
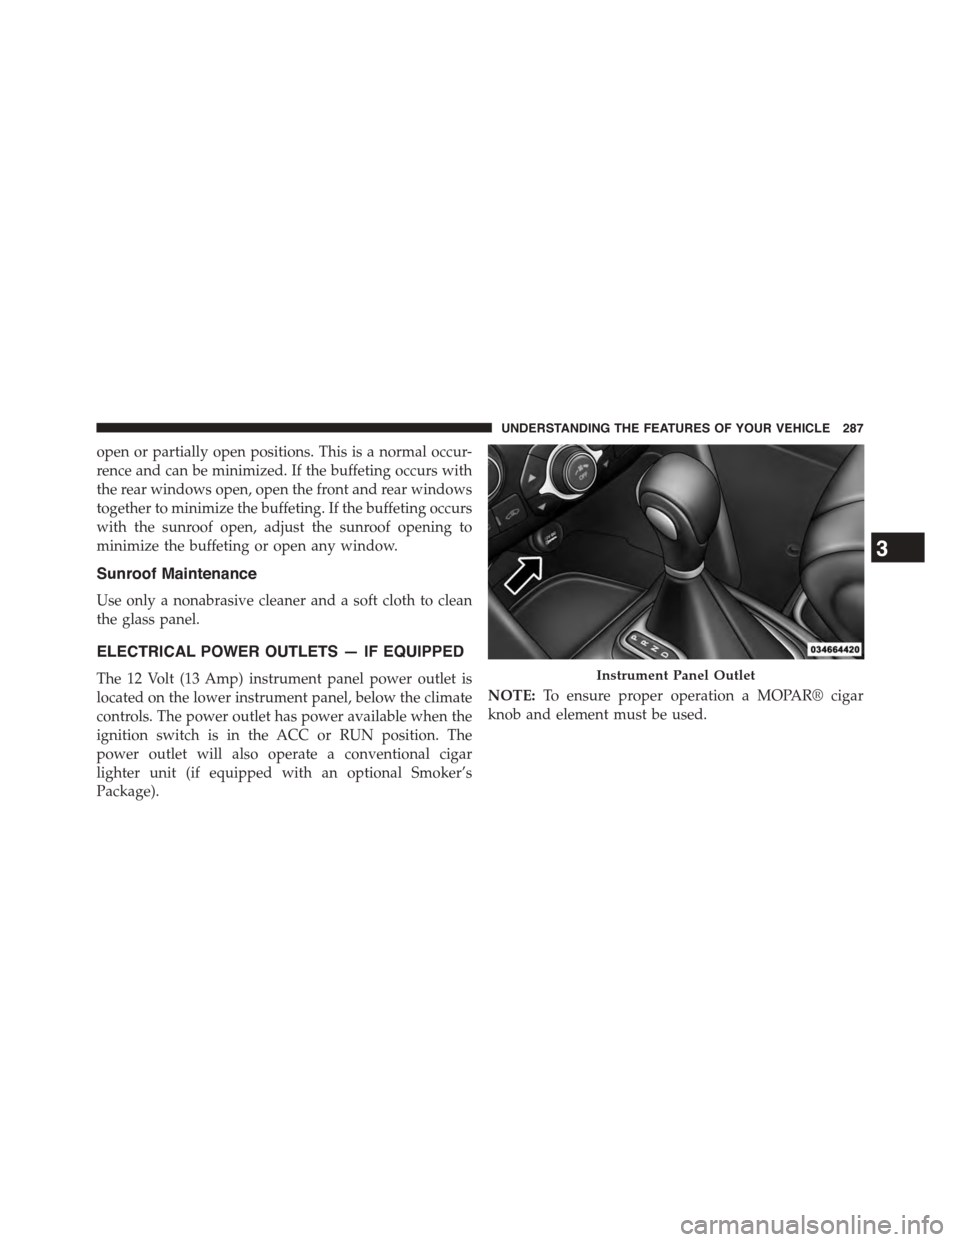
ELECTRICAL POWER OUTLETS — IF EQUIPPED
The 12 Volt (13 Amp) instrument panel power outlet is
located on the lower instrument panel, below the climate
controls. The power outlet has power available when the
ignition switch is in the ACC or RUN position. The
power outlet will also operate a conventional cigar
lighter unit (if equipped with an optional Smoker’s
Package).
NOTE:To ensure proper operation a MOPAR® cigar
knob and element must be used.
Instrument Panel Outlet
3
UNDERSTANDING THE FEATURES OF YOUR VEHICLE 287
Page 294 of 664
STORAGE
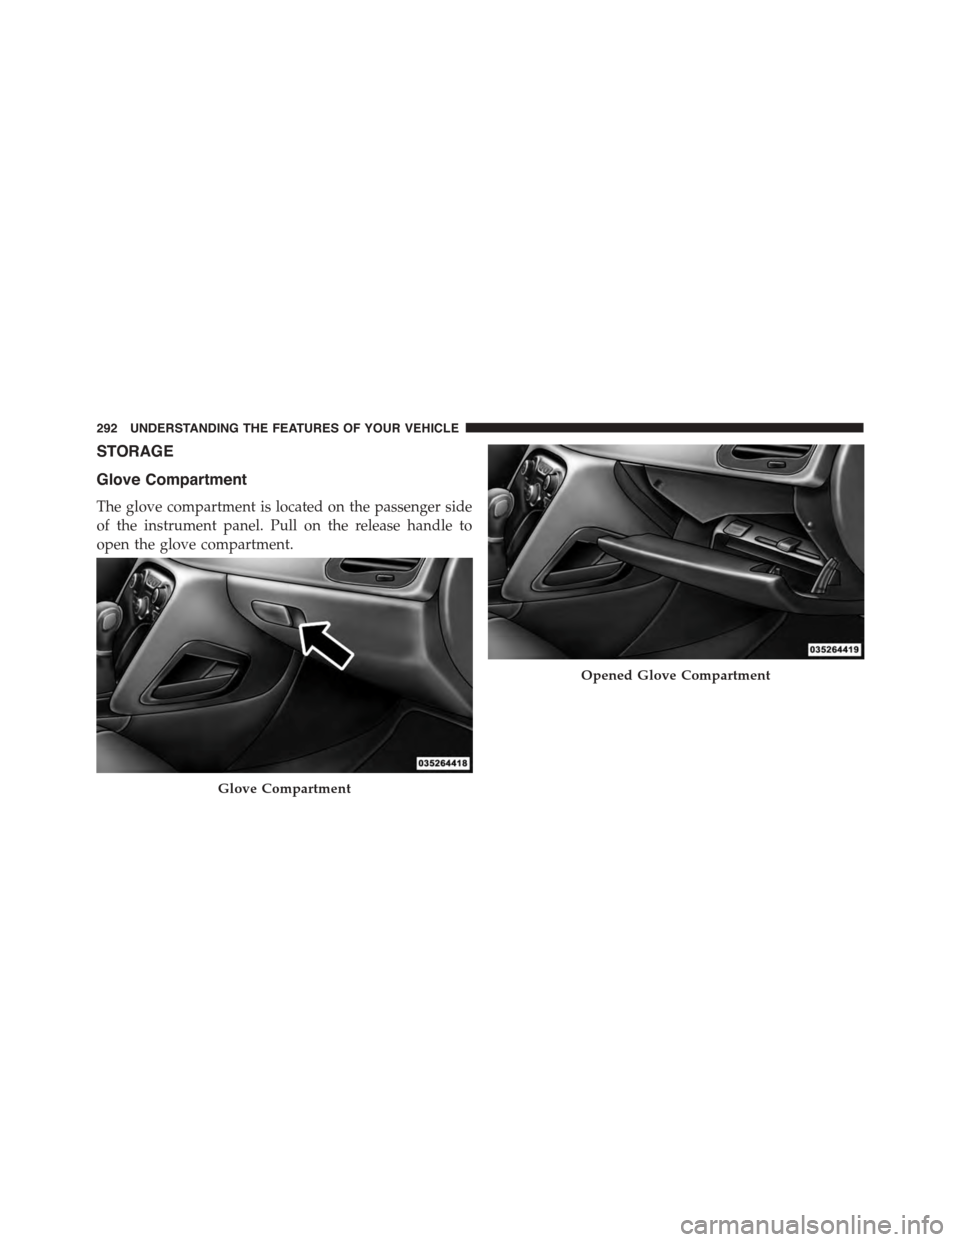
Glove Compartment
The glove compartment is located on the passenger side
of the instrument panel. Pull on the release handle to
open the glove compartment.
Glove Compartment
Opened Glove Compartment
292 UNDERSTANDING THE FEATURES OF YOUR VEHICLE
Page 303 of 664
UNDERSTANDING YOUR INSTRUMENT PANEL
CONTENTS
!INSTRUMENT PANEL FEATURES..........304
!INSTRUMENT CLUSTER — BASE (EVIC).....305
!INSTRUMENT CLUSTER — PREMIUM
ANALOG (DID)........................306
!INSTRUMENT CLUSTER — PREMIUM
DIGITAL (DID)........................307
!INSTRUMENT CLUSTER DESCRIPTIONS.....308
!ELECTRONIC VEHICLE INFORMATION
CENTER (EVIC).......................321
▫Two Button EVIC — If Equipped..........322
▫Oil Change Indicator...................330
!DRIVER INFORMATION DISPLAY DID.......332
▫Four Button DID — If Equipped...........333
▫Oil Change Indicator...................349
!Uconnect® SETTINGS...................351
▫Buttons On The Faceplate................351
▫Buttons On The Touchscreen..............352
▫Customer Programmable Features — Uconnect®
System 8.4 Settings....................352
!Uconnect® 200 — AM/FM STEREO RADIO WITH
CD PLAYER (MP3 AUX JACK) AND SiriusXM
RADIO..............................366
4
Page 304 of 664
▫Operating Instructions — Radio Mode.......367
▫Operation Instructions — CD MODE For CD
And MP3 Audio Play...................372
▫Notes On Playing MP3 Files.............374
▫Enter/Browse Button (CD Mode For MP3/WMA
Play)..............................377
▫INFO Button (CD Mode For MP3/WMA
Play)..............................377
▫Operation Instructions — Auxiliary Mode . . . .377
▫Operation Instructions — Universal Serial Bus
(USB) — If Equipped...................378
▫Security............................378
!CD PLAYER — IF EQUIPPED.............379
▫CD Player Operating Instructions..........380
!iPod®/USB/MP3 CONTROL WITH Uconnect®
VOICE COMMAND — IF EQUIPPED........380
▫Connecting The iPod® Or External USB
Device.............................381
▫Using This Feature.....................382
▫Controlling The iPod® Or External USB Device
Using Radio Buttons...................383
▫Play Mode..........................383
▫List Or Browse Mode...................384
▫Bluetooth® Streaming Audio (BTSA).......386
!STEERING WHEEL AUDIO CONTROLS......387
▫Radio Operation......................388
▫CD Player...........................388
!CD/DVD DISC MAINTENANCE...........389
302 UNDERSTANDING YOUR INSTRUMENT PANEL