oil pressure DODGE DURANGO 2008 2.G Owners Manual
[x] Cancel search | Manufacturer: DODGE, Model Year: 2008, Model line: DURANGO, Model: DODGE DURANGO 2008 2.GPages: 481, PDF Size: 7.75 MB
Page 77 of 481

Safety Checks You Should Make Outside The
Vehicle
Tires
Examine tires for tread wear or uneven wear patterns.
Check for stones, nails, glass or other objects lodged in
the tread.
Inspect for tread cuts or sidewall cracks. Check wheel
nuts for tightness and tires for proper pressure.
Lights
Check the operation of all exterior lights. Check turn
signal and high beam indicator lights on the instrument
panel.
Door Latches
Check for positive closing, latching and locking.
Fluid Leaks
Check area under vehicle after overnight parking for fuel,
water, oil, or other fluid leaks. Also, if fuel fumes are
detected the cause should be located and corrected.
THINGS TO KNOW BEFORE STARTING YOUR VEHICLE 77
2
Page 195 of 481
WARNING!
A hot engine cooling system is dangerous. You or
others could be badly burned by steam or boiling
coolant. You may want to call a service center if your
vehicle overheats. If you decide to look under the
hood yourself, see Section 7 of this manual. Follow
the warnings under the Cooling System Pressure Cap
paragraph.
8. Speedometer
Shows the vehicles speed.
9. Voltage Light
This light monitors the electrical system voltage.
The light should turn on momentarily as the
engine is started. If the light stays on or turns on while
driving, it indicates a problem with the charging system.
Immediate service should be obtained.10. Security Light
This light will flash rapidly for approximately 15 seconds
when the vehicle theft alarm is arming. The light will
flash at a slower speed continuously after the alarm is set.
The security light will also come on for about three
seconds when the ignition is first turned on.
11. ABS Warning Light
This light monitors the Anti-Lock Brake System
which is described elsewhere in this manual.
This light will come on when the ignition key is
turned to the ON position and may stay on for
approximately 3 seconds. If this light remains on or
comes on during driving, it indicates that the Anti-Lock
portion of the brake system is not functioning and that
service is required. See your authorized dealer immedi-
ately. With the ABS malfunctioning, the BAS and ESP are
also switched off. Both malfunction indicator lights illu-
minate with the engine running. If the charging voltage
falls below 10 volts, the malfunction indicator light
INSTRUMENT PANEL AND CONTROLS 195
4
Page 196 of 481

illuminates and the ABS is switched off. When the
voltage is above this value again, the malfunction indi-
cator light should go out and the ABS is operational. If
the malfunction indicator light stays illuminated, have
the system checked at your authorized dealer as soon as
possible.
12. Engine Oil Pressure Indicator Light
This light indicates that the engine oil pressure has
become too low. For a bulb check, this light will
come on momentarily when the ignition is turned On. If
the light turns on while driving, stop the vehicle and shut
off the engine as soon as possible. Immediate service
should be obtained.
13. Tachometer
This gauge measures engine revolutions-per-minute
(rpm x 1000).14. Gear Selector
The electronic gear selector display is self-contained
within the instrument cluster. It displays the position of
the automatic transmission shift lever, and the relation of
each position to all other positions. For a good signal the
display will place a box around the selected transmission
range (PRND21). If the PRNDL displays only the char-
acters PRND21 (no boxes) have the system checked by an
authorized dealer.
15. Odometer/Trip Odometer
The odometer shows the total distance the vehicle has
been driven. U.S. federal regulations require that upon
transfer of vehicle ownership, the seller certify to the
purchaser the correct mileage that the vehicle has been
driven. Therefore, if the odometer reading is changed
during repair or replacement, be sure to keep a record of
the reading before and after the service so that the correct
mileage can be determined.
196 INSTRUMENT PANEL AND CONTROLS
Page 271 of 481

mSupplemental Tire Pressure Information Ð If
Equipped............................322
mTire Chains...........................322
mSnow Tires...........................323
mTire Rotation Recommendations............324
mTire Pressure Monitor System (TPMS) Ð If
Equipped............................325
NBase System ± If Equipped...............327
NPremium System ± If Equipped...........329
NGeneral Information...................332
mFuel Requirements......................332
NReformulated Gasoline.................333
NGasoline/Oxygenate Blends..............333
NMMT In Gasoline.....................334NMaterials Added To Fuel................335
NFuel System Cautions..................335
NCarbon Monoxide Warnings..............336
mAdding Fuel..........................336
NFuel Filler Cap (Gas Cap)...............336
NLoose Fuel Filler Cap (Gas Cap) Message....338
mFlexible Fuel Ð If Equipped...............339
NE-85 General Information................339
NEthanol Fuel (E-85)....................340
NFuel Requirements....................340
NSelection Of Engine Oil For Flexible Fuel
Vehicles (E-85) And Gasoline Vehicles.......341
NStarting............................341
STARTING AND OPERATING 271
5
Page 320 of 481
WARNING!
Tires and spare tire should be replaced after six years,
regardless of the remaining tread. Failure to follow
this warning can result in sudden tire failure. You
could lose control and have an accident resulting in
serious injury or death.
Keep dismounted tires in a cool, dry place with as little
exposure to light as possible. Protect tires from contact
with oil, grease, and gasoline.
Replacement Tires
The tires on your new vehicle provide a balance of many
characteristics. They should be inspected regularly for
wear and correct cold tire inflation pressure. The manu-
facturer strongly recommends that you use tires equiva-
lent to the originals in size, quality and performance
when replacement is needed (refer to the paragraph on
ªTread Wear Indicatorsº). Refer to the ªTire and Loading
Informationº placard for the size designation of your tire.
The service description and load identification will be
found on the original equipment tire. Failure to use
equivalent replacement tires may adversely affect the
safety, handling, and ride of your vehicle. We recommend
that you contact your original equipment or an autho-
rized tire dealer with any questions you may have on tire
specifications or capability.
320 STARTING AND OPERATING
Page 373 of 481
WARNING!
Raising the vehicle higher than necessary can make
the vehicle unstable and cause an accident. It could
slip off the jack and hurt someone near it. Raise the
vehicle only enough to remove the tire.
5. Remove the wheel nuts and pull the wheel off. Install
the spare wheel and wheel nuts with the cone shaped end
of the nuts toward the wheel. Lightly tighten the nuts. To
avoid risk of forcing the vehicle off the jack, do not fully
tighten the nuts until the vehicle has been lowered.
NOTE:Do not oil wheel studs. For chrome wheels, do
not substitute with chrome plated wheel nuts.
6. Using the wheel wrench, finish tightening the nuts in
a crisscross pattern. Correct nut tightness is 135 10 ft.
lbs. (183 14 N´m) dynamic torque. If in doubt about the
correct tightness, have them checked with a torque
wrench by your dealer or at a service station.
WARNING!
A loose tire or jack thrown forward in a collision or
hard stop could injure someone in the vehicle. Al-
ways stow the jack, tools and the extra tire and wheel
in the places provided.
7. Remove wheel blocks. Do not install chrome or alu-
minum wheel center caps on the spare wheel. This may
result in cap damage.
8. Lower the jack to its fully closed position. Stow the
replaced tire, jack, and tools as previously described.
9. Adjust the tire pressure when possible.
NOTE:Do not oil wheel studs. For chrome wheels, do
not substitute with chrome plated wheel nuts.
WHAT TO DO IN EMERGENCIES 373
6
Page 392 of 481
CAUTION!
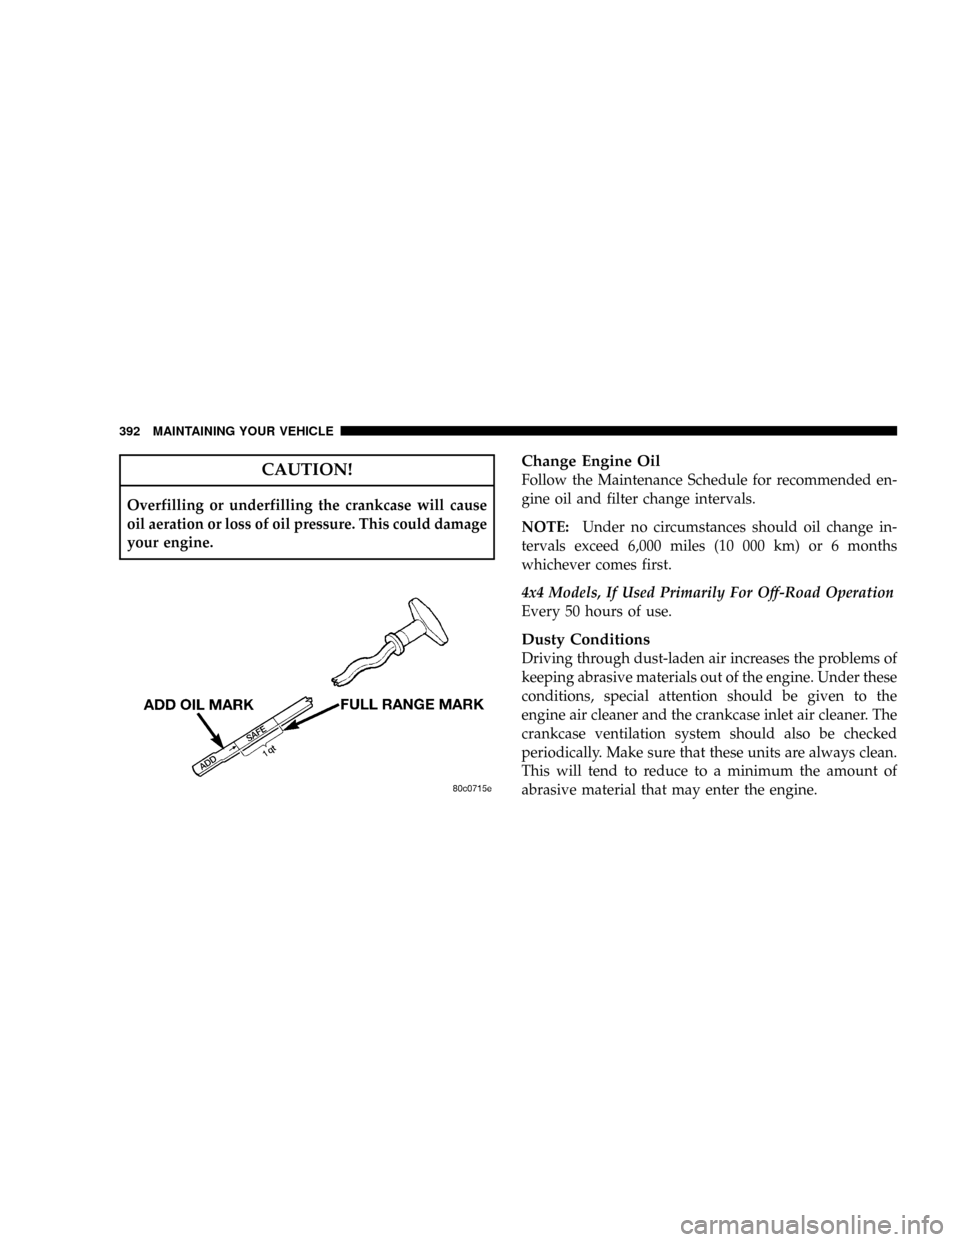
Overfilling or underfilling the crankcase will cause
oil aeration or loss of oil pressure. This could damage
your engine.
Change Engine Oil
Follow the Maintenance Schedule for recommended en-
gine oil and filter change intervals.
NOTE:Under no circumstances should oil change in-
tervals exceed 6,000 miles (10 000 km) or 6 months
whichever comes first.
4x4 Models, If Used Primarily For Off-Road Operation
Every 50 hours of use.
Dusty Conditions
Driving through dust-laden air increases the problems of
keeping abrasive materials out of the engine. Under these
conditions, special attention should be given to the
engine air cleaner and the crankcase inlet air cleaner. The
crankcase ventilation system should also be checked
periodically. Make sure that these units are always clean.
This will tend to reduce to a minimum the amount of
abrasive material that may enter the engine.
392 MAINTAINING YOUR VEHICLE
Page 400 of 481
WARNING!
²Use only refrigerants and compressor lubricants
approved by the manufacturer for your air condi-
tioning system. Some unapproved refrigerants are
flammable and can explode, injuring you. Other
unapproved refrigerants or lubricants can cause
the system to fail, requiring costly repairs. Refer to
Section 3 of the Warranty Information book for
further warranty information.
²The air conditioning system contains refrigerant
under high pressure. To avoid risk of personal
injury or damage to the system, adding refrigerant
or any repair requiring lines to be disconnected
should be done by an experienced repairman.NOTE:Use only manufacturer approved A/C System
Sealers, Stop Leak Products, Seal Conditioners, Compres-
sor Oils and Refrigerants.
Refrigerant Recovery and Recycling
R-134a Air Conditioning Refrigerant is a hydrofluorocar-
bon (HFC) that is endorsed by the Environmental Pro-
tection Agency and is an ozone-saving product. How-
ever, the manufacturer recommends that air conditioning
service be performed by dealers or other service facilities
using recovery and recycling equipment.
Front Suspension Ball Joints
The ball joints and seals should be inspected whenever
the vehicle is serviced for other reasons. Damaged seals
should be replaced to prevent leakage or contamination
of the grease.
400 MAINTAINING YOUR VEHICLE
Page 403 of 481
damaged, have a competent mechanic inspect the com-
plete exhaust system and adjacent body areas for broken,
damaged, deteriorated, or mispositioned parts. Open
seams or loose connections could permit exhaust fumes
to seep into the passenger compartment. In addition,
inspect the exhaust system each time the vehicle is raised
for lubrication or oil change. Replace as required.
WARNING!
Exhaust gases can injure or kill. They contain carbon
monoxide (CO) which is colorless and odorless.
Breathing it can make you unconscious and can
eventually poison you. To avoid breathing CO, fol-
low the preceding safety tips.
Cooling System
WARNING!
You or others can be badly burned by hot coolant or
steam from your radiator. If you see or hear steam
coming from under the hood, don't open the hood
until the radiator has had time to cool. Never try to
open a cooling system pressure cap when the radiator
is hot.
Engine Coolant Checks
Check the engine coolant (antifreeze) protection every 12
months (before the onset of freezing weather, where
applicable). If coolant is dirty or rusty in appearance, the
system should be drained, flushed and refilled with fresh
coolant. Check the front of the A/C condenser and
radiator for any accumulation of bugs, leaves, etc. If dirty,
MAINTAINING YOUR VEHICLE 403
7
Page 409 of 481

Emission Related Components
Fuel System Hoses And Vapor/Vacuum Harnesses
When the vehicle is serviced for scheduled maintenance,
inspect surface of hoses and nylon tubing for evidence of
heat and mechanical damage. Hard and brittle rubber,
cracking, checking, tears, cuts, abrasions, and excessive
swelling suggest deterioration of the rubber. Particular
attention should be given to examining hose surfaces
nearest to high heat sources, such as the exhaust mani-
fold.
Insure nylon tubing in these areas has not melted or
collapsed.
Inspect all hose clamps and couplings to make sure they
are secure and no leaks are present.
NOTE:Fluids such as oil, power steering fluid, and
brake fluid are used during assembly plant operations to
ease the assembly of hoses to couplings. Therefore, oil
wetness at the hose-coupling area is not necessarily anindication of leakage. Actual dripping of hot fluid when
systems are under pressure (during vehicle operation),
should be noted before hose is replaced based on leakage.
You are urged to use only the manufacturer's specified
hoses and clamps, or their equivalent in material and
specification, in any fuel system servicing. It is manda-
tory to replace all clamps that have been loosened or
removed during service. Care should be taken in install-
ing new clamps to insure they are properly torqued.
Positive Crankcase Ventilation (PCV) Valve
Proper operation of the crankcase ventilation system
requires that the PCV valve be free of sticking or plug-
ging because of deposits. Deposits can accumulate in the
PCV valve and passage with increasing mileage. Have
the PCV valve, hoses, and passages checked for proper
operation at the intervals specified. If the valve is
plugged or sticking, replace with a new valve ±Do not
MAINTAINING YOUR VEHICLE 409
7