heater DODGE DURANGO 2011 3.G User Guide
[x] Cancel search | Manufacturer: DODGE, Model Year: 2011, Model line: DURANGO, Model: DODGE DURANGO 2011 3.GPages: 108, PDF Size: 5.96 MB
Page 24 of 108

WARNING!
• Persons who are unable to feel pain to the skin because of advanced age,
chronic illness, diabetes, spinal cord injury, medication, alcohol use,
exhaustion or other physical conditions must exercise care when using the
seat heater. It may cause burns even at low temperatures, especially if used
for long periods of time.
• Do not place anything on the seat that insulates against heat, such as a
blanket or cushion. This may cause the seat heater to overheat. Sitting in a
seat that has been overheated could cause serious burns due to the increased
surface temperature of the seat.
HEATED STEERING WHEEL
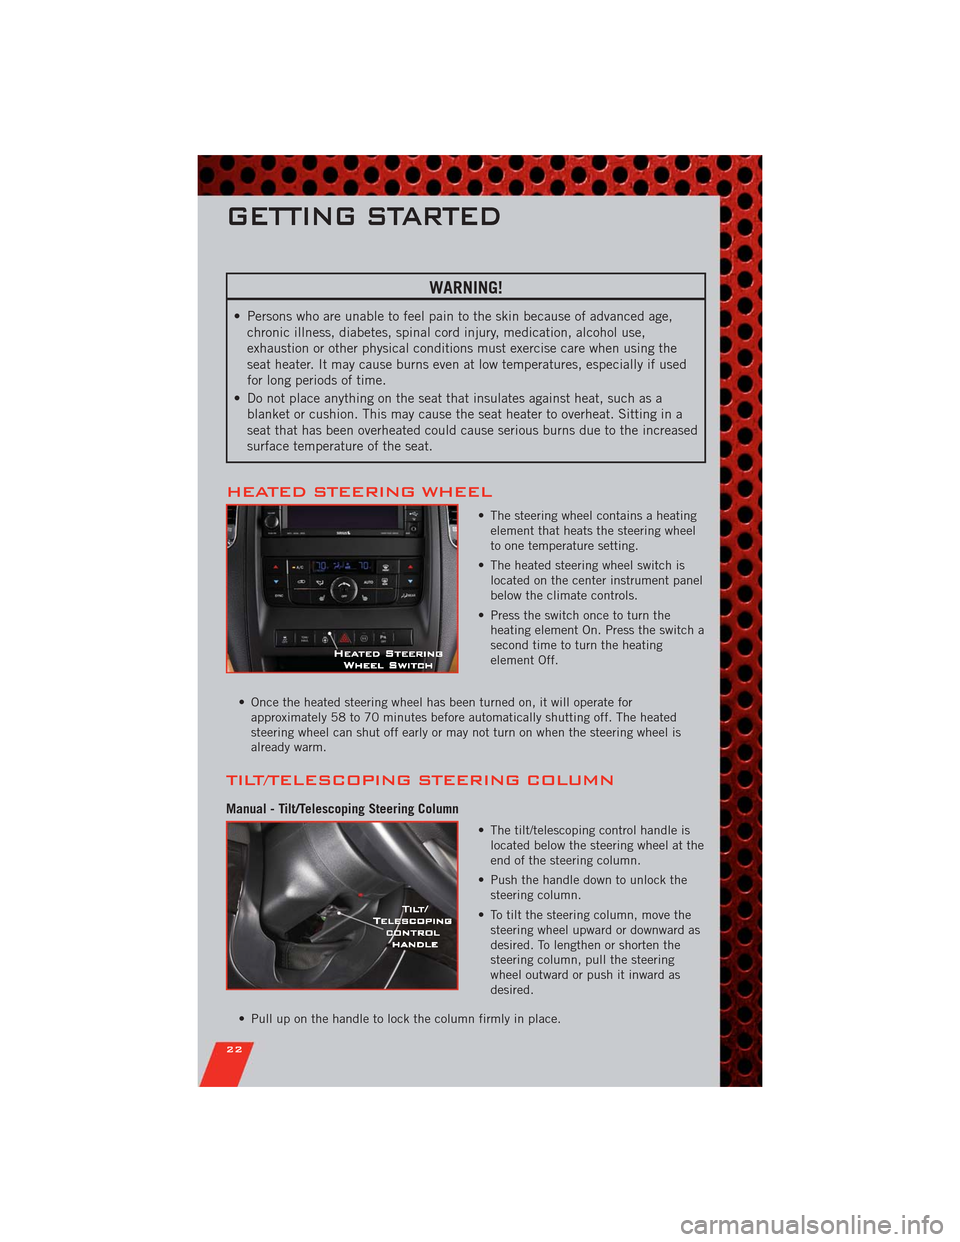
• The steering wheel contains a heating
element that heats the steering wheel
to one temperature setting.
• The heated steering wheel switch is
located on the center instrument panel
below the climate controls.
• Press the switch once to turn the
heating element On. Press the switch a
second time to turn the heating
element Off.
• Once the heated steering wheel has been turned on, it will operate for
approximately 58 to 70 minutes before automatically shutting off. The heated
steering wheel can shut off early or may not turn on when the steering wheel is
already warm.
TILT/TELESCOPING STEERING COLUMN
Manual - Tilt/Telescoping Steering Column
• The tilt/telescoping control handle is
located below the steering wheel at the
end of the steering column.
• Push the handle down to unlock the
steering column.
• To tilt the steering column, move the
steering wheel upward or downward as
desired. To lengthen or shorten the
steering column, pull the steering
wheel outward or push it inward as
desired.
• Pull up on the handle to lock the column firmly in place.
GETTING STARTED
22
Page 48 of 108

SIRIUS Travel Link
• To access SIRIUS Travel Link, press the MENU hard-key, then touch the Travel
Link soft-key.
NOTE:SIRIUS Travel Link requires a subscription, sold separately after trial
subscription included with vehicle purchase.
• SIRIUS Travel Link brings a wealth of useful information into your vehicle and right
to your fingertips:
•Weather
• View detailed weather conditions at your current location.
•Ski Info
• View ski and snowboarding conditions at ski resorts.
•Fuel Prices
• Check detailed price information for fuel stations near your current location.
•Movie Listings
• Check which movies (includes start times, ratings, run lengths and summaries)
are playing at theaters near your current location.
•Sports Scores
• View scores and upcoming events for all major sports.
• Your favorite location, theater and sports teams can be stored for quick access.
• Refer to your Media Center 730N (RHR) User's Manual or Media Center 430/430N
(RBZ/RHB) User's Manual for more details.
STEERING WHEEL AUDIO CONTROLS
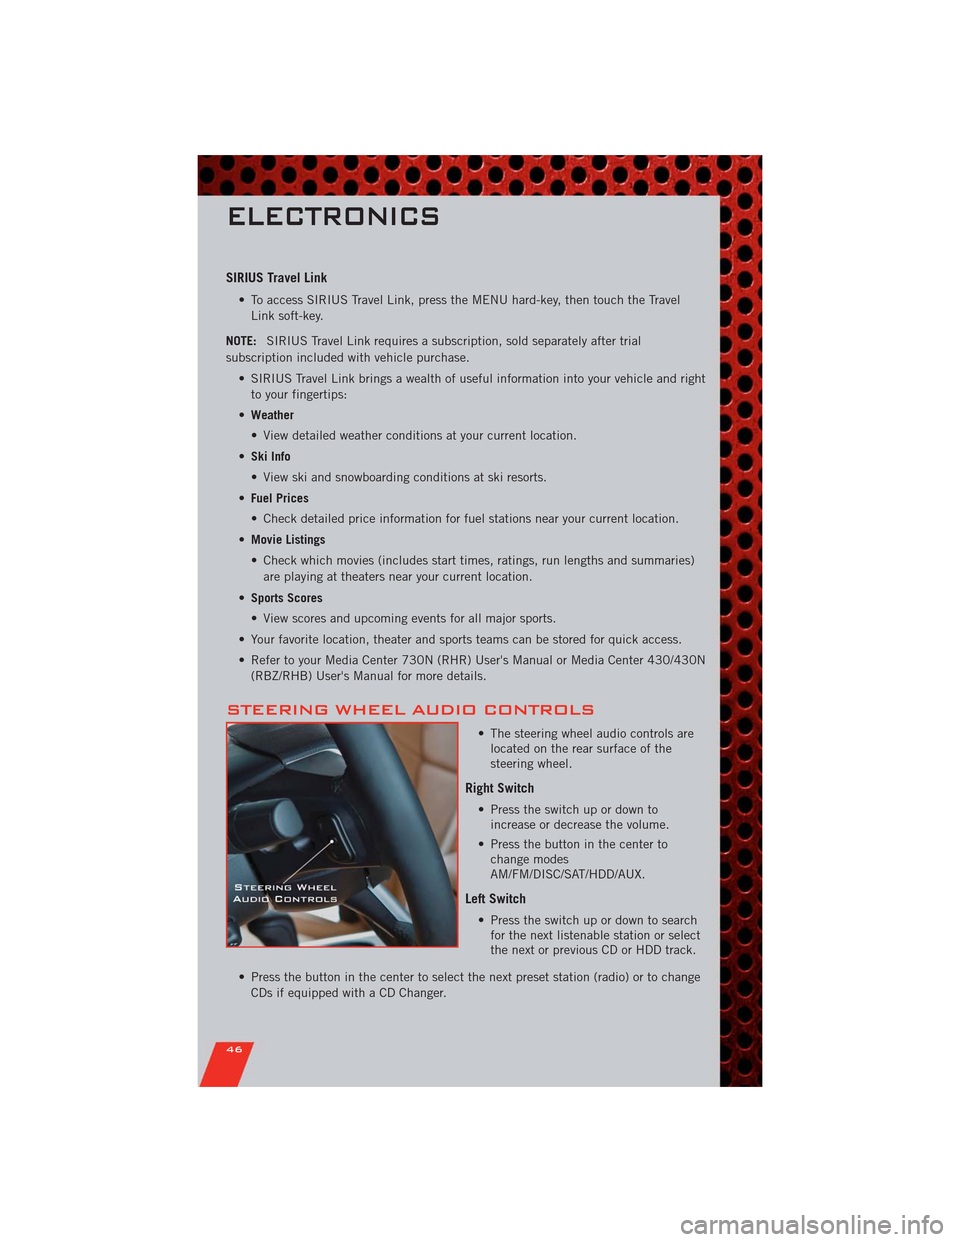
• The steering wheel audio controls are
located on the rear surface of the
steering wheel.
Right Switch
• Press the switch up or down to
increase or decrease the volume.
• Press the button in the center to
change modes
AM/FM/DISC/SAT/HDD/AUX.
Left Switch
• Press the switch up or down to search
for the next listenable station or select
the next or previous CD or HDD track.
• Press the button in the center to select the next preset station (radio) or to change
CDs if equipped with a CD Changer.
ELECTRONICS
46
Page 69 of 108

- Airbag Warning Light
• If the light is not on during starting, stays on, or turns on while driving, have the
vehicle serviced by an authorized service center immediately.
Fuel Cap/Loose Gas Cap Message
• If a “gas cap” message (shown as Check Gascap) appears, tighten the gas cap
until a “clicking” sound is heard.
• If the message continues to appear for more than three days after tightening the
gas cap, have the vehicle serviced by an authorized service center immediately.
Oil Change Indicator
Message
• If an “oil change” message (shown as Oil Change Required) appears and a single
chime sounds, it is time for your next required oil change.
Vehicles Equipped With Keyless Enter-N-Go
• Without pressing the brake pedal, push the ENGINE START/STOP button and cycle
the ignition to the ON/RUN position (Do not start the engine.)
• Fully depress the accelerator pedal, slowly, three times within 10 seconds.
• Without pressing the brake pedal, push the ENGINE START/STOP button once to
return the ignition to the OFF/LOCK position.
Vehicles Not Equipped With Keyless Enter-N-Go
• Turn the ignition switch to the ON/RUN position (Do not start the engine.)
• Fully depress the accelerator pedal, slowly, three times within 10 seconds.
• Turn the ignition switch to the OFF/LOCK position.
IF YOUR ENGINE OVERHEATS
• In any of the following situations, you can reduce the potential for overheating by
taking the appropriate action.
• On the highways — slow down.
• In city traffic — while stopped, shift transmission into NEUTRAL, but do not
increase engine idle speed.
NOTE:There are steps that you can take to slow down an impending overheat
condition:
• If your air conditioner (A/C) is on, turn it off. The A/C system adds heat to the engine
cooling system and turning the A/C off can help remove this heat.
• You can also turn the Temperature Control to maximum heat, the Mode Control to
floor and the Fan Control to high. This allows the heater core to act as a supplement
to the radiator and aids in removing heat from the engine cooling system.
• If the temperature reading does not return to normal, turn the engine off
immediately.
• We recommend that you do not operate the vehicle or engine damage will occur.
Have the vehicle serviced immediately.
WHAT TO DO IN EMERGENCIES
67
Page 75 of 108

Preparations for Jump-Start
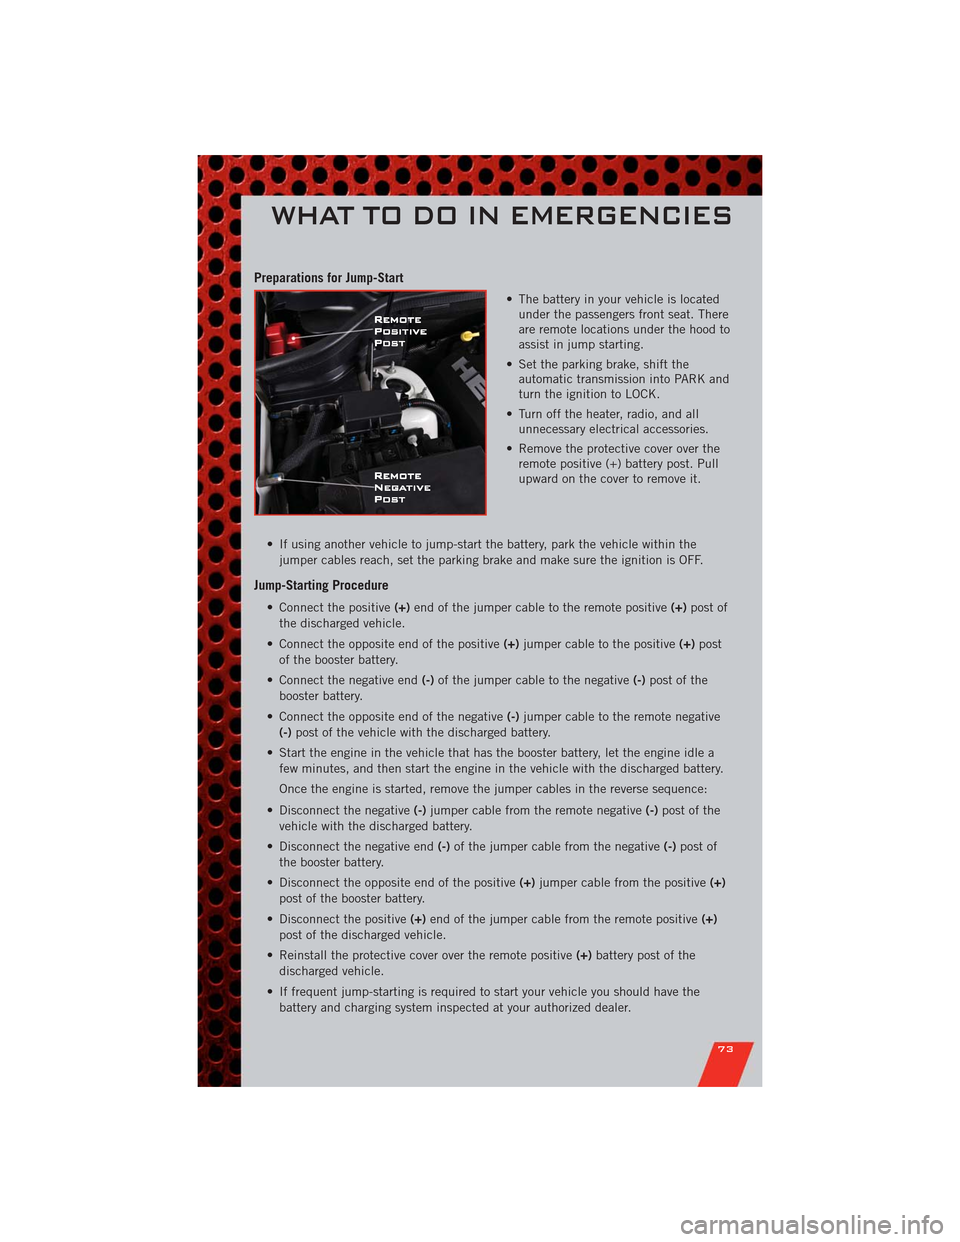
• The battery in your vehicle is located
under the passengers front seat. There
are remote locations under the hood to
assist in jump starting.
• Set the parking brake, shift the
automatic transmission into PARK and
turn the ignition to LOCK.
• Turn off the heater, radio, and all
unnecessary electrical accessories.
• Remove the protective cover over the
remote positive (+) battery post. Pull
upward on the cover to remove it.
• If using another vehicle to jump-start the battery, park the vehicle within the
jumper cables reach, set the parking brake and make sure the ignition is OFF.
Jump-Starting Procedure
• Connect the positive(+)end of the jumper cable to the remote positive(+)post of
the discharged vehicle.
• Connect the opposite end of the positive(+)jumper cable to the positive(+)post
of the booster battery.
• Connect the negative end(-)of the jumper cable to the negative(-)post of the
booster battery.
• Connect the opposite end of the negative(-)jumper cable to the remote negative
(-)post of the vehicle with the discharged battery.
• Start the engine in the vehicle that has the booster battery, let the engine idle a
few minutes, and then start the engine in the vehicle with the discharged battery.
Once the engine is started, remove the jumper cables in the reverse sequence:
• Disconnect the negative(-)jumper cable from the remote negative(-)post of the
vehicle with the discharged battery.
• Disconnect the negative end(-)of the jumper cable from the negative(-)post of
the booster battery.
• Disconnect the opposite end of the positive(+)jumper cable from the positive(+)
post of the booster battery.
• Disconnect the positive(+)end of the jumper cable from the remote positive(+)
post of the discharged vehicle.
• Reinstall the protective cover over the remote positive(+)battery post of the
discharged vehicle.
• If frequent jump-starting is required to start your vehicle you should have the
battery and charging system inspected at your authorized dealer.
WHAT TO DO IN EMERGENCIES
73