ignition DODGE DURANGO 2012 3.G Owner's Manual
[x] Cancel search | Manufacturer: DODGE, Model Year: 2012, Model line: DURANGO, Model: DODGE DURANGO 2012 3.GPages: 140, PDF Size: 4.3 MB
Page 81 of 140
• Return to the vehicle and press the programmed HomeLink®button twice (holding
the button for two seconds each time). If the device is plugged in and activates,
programming is complete.
NOTE: If the device does not activate, press the button a third time (for two seconds)
to complete the training.
• To program the remaining two HomeLink
®buttons, repeat each step for each
remaining button. DO NOT erase the channels.
Programming A Non-Rolling Code
• For programming Garage Door Openers manufactured before 1995.
• Turn the ignition switch to the ON/RUN position.
• Place the hand-held transmitter 1 to 3 in (3 to 8 cm) away from the HomeLink
®
button you wish to program while keeping the HomeLink®indicator light in view.
• Simultaneously press and hold both the HomeLink
®button you want to program
and the hand-held transmitter button.
• Continue to hold both buttons and observe the indicator light. The Homelink
®
indicator will flash slowly and then rapidly after Homelink®has received the
frequency signal from the hand-held transmitter. Release both buttons after the
indicator light changes from slow to rapid.
• Press and hold the programmed HomeLink
®button and observe the indicator light.
NOTE:
• If the indicator light stays on constantly, programming is complete and the garage door (or device) should activate when the HomeLink
®button is pressed.
• To program the two remaining HomeLink®buttons, repeat each step for each
remaining button. DO NOT erase the channels.
Using HomeLink®
• To operate, press and release the programmed HomeLink®button. Activation will
now occur for the programmed device (i.e., garage door opener, gate operator,
security system, entry door lock, home/office lighting, etc.,). The hand-held
transmitter of the device may also be used at any time.
WARNING!
• Your motorized door or gate will open and close while you are programming the universal transceiver. Do not program the transceiver if people or pets are
in the path of the door or gate.
• Do not run your vehicle in a closed garage or confined area while programming the transceiver. Exhaust gas from your vehicle contains Carbon
Monoxide (CO) which is odorless and colorless. Carbon Monoxide is
poisonous when inhaled and can cause you and others to be severely injured
or killed.
ELECTRONICS
79
Page 83 of 140
POWER OUTLET
• The front power outlet is located in thefront center storage bin of the
instrument panel.
• A second front power outlet is located inside the center console.
• The rear power outlet is located in the right rear cargo area.
• The power outlets are labeled with either a “key” or a “battery” symbol to indicate how the outlet is powered. Power outlets labeled with a “key” are powered when
the ignition switch is in the ON/RUN or ACC position, while the outlets labeled
with a “battery” are connected directly to the battery and powered at all times.
NOTE:
• Do not exceed the maximum power of 160 Watts (13 Amps) at 12 Volts. If the 160 Watt (13 Amp) power rating is exceeded, the fuse protecting the system will need to
be replaced. See below image for fuse locations.
• Power outlets are designed for accessory plugs only. Do not insert any other object in the power outlet as this will damage the outlet and blow the fuse. Improper use of
the power outlet can cause damage not covered by your new vehicle warranty.
ELECTRONICS
81
Page 86 of 140
Shifting Procedures
AWD AUTO To LOW RANGE
NOTE: When shifting into or out of LOW RANGE some gear noise may be heard. This
noise is normal and is not detrimental to the vehicle or occupants.
• Shifting can be performed with the vehicle rolling 2 to 3 mph (3 to 5 km/h) orcompletely stopped. Use either of the following procedures:
Preferred Procedure • With the engine running, slow the vehicle to 2 to 3 mph (3 to 5 km/h).
• Shift the transmission into NEUTRAL.
• While still rolling, rotate the transfer case control switch to the desired position.
• After the desired position indicator light is ON (not flashing), shift the transmissionback into gear.
Alternate Procedure • Bring the vehicle to complete stop.
• With the ignition switch in the ON position and the engine either OFF or running,shift the transmission into NEUTRAL.
• Rotate the transfer case control switch to the desired position.
• After the desired position indicator light is ON (not flashing), shift the transmission back into gear.
NOTE:
• If Steps 1 or 2 of either the Preferred or Alternate Procedure are not satisfied prior to attempting the shift or if they no longer are being met while the shift attempt is in
process, the desired position indicator light will flash continuously while the original
position indicator light is ON, until all requirements have been met.
• The ignition switch must be in the ON position for a shift to take place and for the position indicator lights to be operable. If the ignition switch is not in the ON
position, then the shift will not take place and no position indicator lights will be on
or flashing.
WARNING!
• Always engage the parking brake when powering down the vehicle if the“SERV AWD Warning Light” is illuminated. Not engaging the parking brake
may allow the vehicle to roll which may cause personal injury.
• You or others could be injured if you leave the vehicle unattended with the transfer case in the NEUTRAL position without first fully engaging the
parking brake. The transfer case NEUTRAL position disengages both the front
and rear driveshafts from the powertrain and will allow the vehicle to move
regardless of the transmission position. The parking brake should always be
applied when the driver is not in the vehicle.
OFF-ROAD CAPABILITIES
84
Page 89 of 140
TOW/HAUL MODE
• When driving in hilly areas, towing a trailer, carrying a heavy load, etc., andfrequent transmission shifting occurs, press the TOW/HAUL switch to select
TOW/HAUL mode. This will improve performance and reduce the potential for
transmission overheating or failure due to excessive shifting. When operating in
TOW/HAUL mode, transmission upshifts are delayed, and the transmission will
automatically downshift (for engine braking) during steady braking maneuvers.
• The “TOW/HAUL Indicator Light” will illuminate in the instrument cluster to
indicate that TOW/HAUL mode has
been activated. Pressing the switch a
second time restores normal operation.
If the TOW/HAUL mode is desired, the
switch must be pressed each time the
engine is started.
RECREATIONAL TOWING (BEHIND MOTORHOME,
ETC.)
Rear-Wheel Drive Models
•Recreational towing is not allowed.
All-Wheel Drive Models (Single-Speed Transfer Case)
•Recreational towing is not allowed. This model does not have a NEUTRAL position
in the transfer case.
All-Wheel Drive Models (Two-Speed Transfer Case)
NOTE: The transfer case must be in the NEUTRAL position, and the transmission must
be in the PARK position for recreational towing.
Shifting Into NEUTRAL• Use the following procedure to prepare your vehicle for recreational towing.
• Bring the vehicle to a complete stop and shift the transmission to PARK. Turn the engine off.
• For vehicles with Keyless Enter-N-Go, remove the Keyless Enter-N-Go button and use the Key Fob to complete this procedure.
• Turn the ignition switch to the ON/RUN position, but do not start the engine.
TOW/HAUL Switch
UTILITY
87
Page 93 of 140
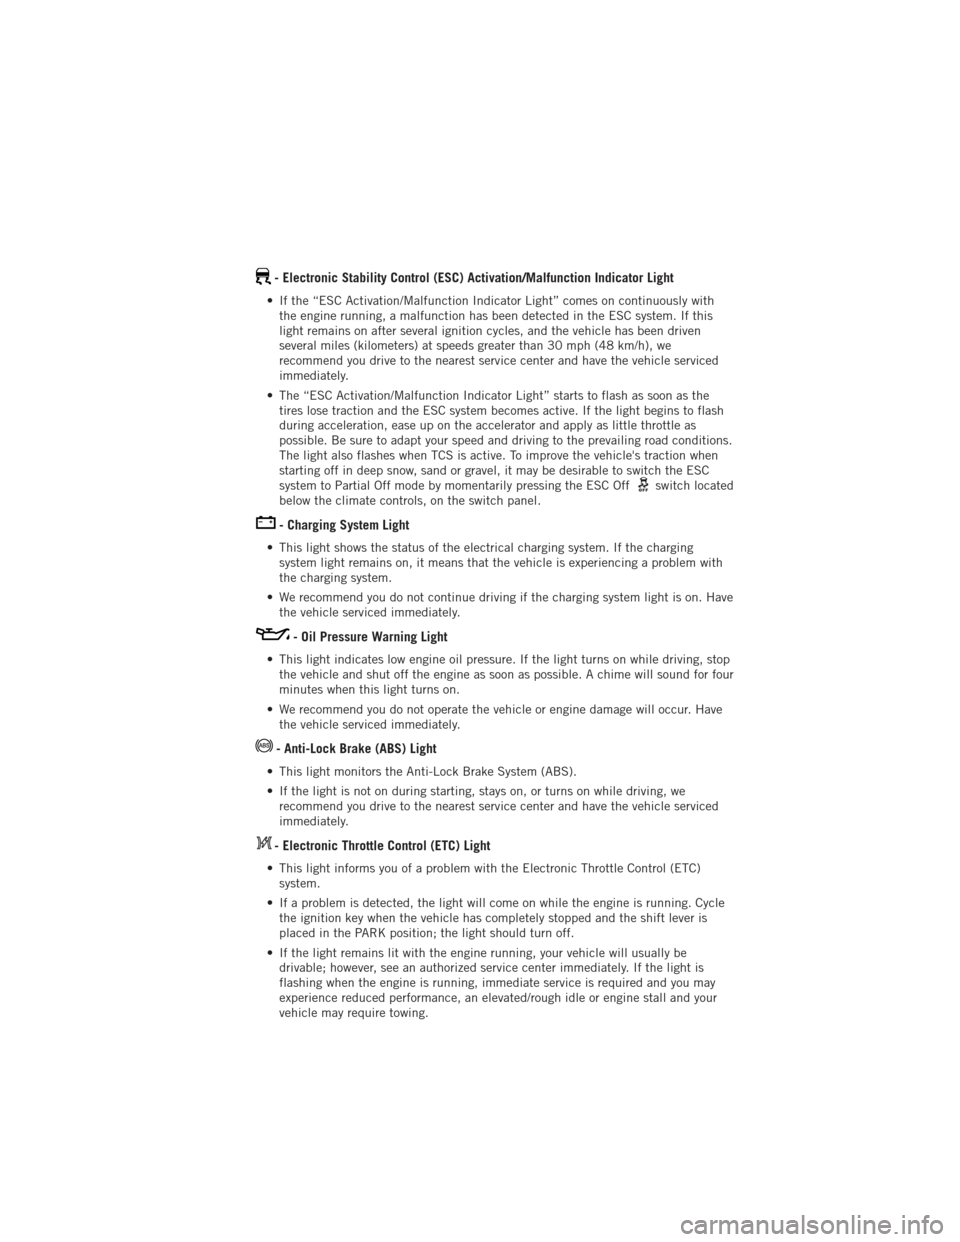
- Electronic Stability Control (ESC) Activation/Malfunction Indicator Light
• If the “ESC Activation/Malfunction Indicator Light” comes on continuously withthe engine running, a malfunction has been detected in the ESC system. If this
light remains on after several ignition cycles, and the vehicle has been driven
several miles (kilometers) at speeds greater than 30 mph (48 km/h), we
recommend you drive to the nearest service center and have the vehicle serviced
immediately.
• The “ESC Activation/Malfunction Indicator Light” starts to flash as soon as the tires lose traction and the ESC system becomes active. If the light begins to flash
during acceleration, ease up on the accelerator and apply as little throttle as
possible. Be sure to adapt your speed and driving to the prevailing road conditions.
The light also flashes when TCS is active. To improve the vehicle's traction when
starting off in deep snow, sand or gravel, it may be desirable to switch the ESC
system to Partial Off mode by momentarily pressing the ESC Off
switch located
below the climate controls, on the switch panel.
- Charging System Light
• This light shows the status of the electrical charging system. If the charging system light remains on, it means that the vehicle is experiencing a problem with
the charging system.
• We recommend you do not continue driving if the charging system light is on. Have the vehicle serviced immediately.
- Oil Pressure Warning Light
• This light indicates low engine oil pressure. If the light turns on while driving, stopthe vehicle and shut off the engine as soon as possible. A chime will sound for four
minutes when this light turns on.
• We recommend you do not operate the vehicle or engine damage will occur. Have the vehicle serviced immediately.
- Anti-Lock Brake (ABS) Light
• This light monitors the Anti-Lock Brake System (ABS).
• If the light is not on during starting, stays on, or turns on while driving, werecommend you drive to the nearest service center and have the vehicle serviced
immediately.
- Electronic Throttle Control (ETC) Light
• This light informs you of a problem with the Electronic Throttle Control (ETC)system.
• If a problem is detected, the light will come on while the engine is running. Cycle the ignition key when the vehicle has completely stopped and the shift lever is
placed in the PARK position; the light should turn off.
• If the light remains lit with the engine running, your vehicle will usually be drivable; however, see an authorized service center immediately. If the light is
flashing when the engine is running, immediate service is required and you may
experience reduced performance, an elevated/rough idle or engine stall and your
vehicle may require towing.
WHAT TO DO IN EMERGENCIES
91
Page 94 of 140
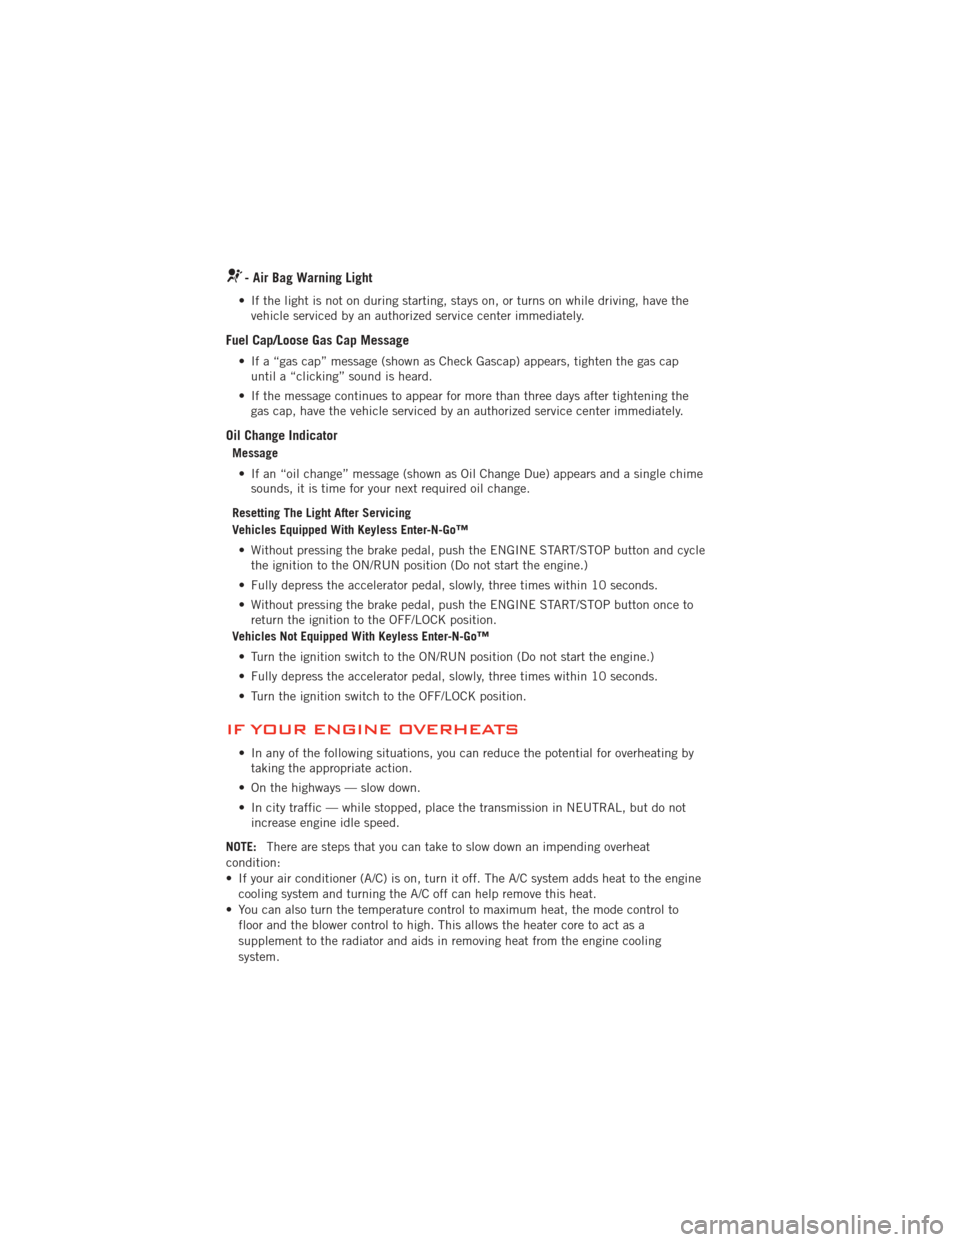
- Air Bag Warning Light
• If the light is not on during starting, stays on, or turns on while driving, have thevehicle serviced by an authorized service center immediately.
Fuel Cap/Loose Gas Cap Message
• If a “gas cap” message (shown as Check Gascap) appears, tighten the gas capuntil a “clicking” sound is heard.
• If the message continues to appear for more than three days after tightening the gas cap, have the vehicle serviced by an authorized service center immediately.
Oil Change Indicator
Message
• If an “oil change” message (shown as Oil Change Due) appears and a single chime sounds, it is time for your next required oil change.
Resetting The Light After Servicing
Vehicles Equipped With Keyless Enter-N-Go™ • Without pressing the brake pedal, push the ENGINE START/STOP button and cycle the ignition to the ON/RUN position (Do not start the engine.)
• Fully depress the accelerator pedal, slowly, three times within 10 seconds.
• Without pressing the brake pedal, push the ENGINE START/STOP button once to return the ignition to the OFF/LOCK position.
Vehicles Not Equipped With Keyless Enter-N-Go™
• Turn the ignition switch to the ON/RUN position (Do not start the engine.)
• Fully depress the accelerator pedal, slowly, three times within 10 seconds.
• Turn the ignition switch to the OFF/LOCK position.
IF YOUR ENGINE OVERHEATS
• In any of the following situations, you can reduce the potential for overheating by taking the appropriate action.
• On the highways — slow down.
• In city traffic — while stopped, place the transmission in NEUTRAL, but do not increase engine idle speed.
NOTE: There are steps that you can take to slow down an impending overheat
condition:
• If your air conditioner (A/C) is on, turn it off. The A/C system adds heat to the engine cooling system and turning the A/C off can help remove this heat.
• You can also turn the temperature control to maximum heat, the mode control to floor and the blower control to high. This allows the heater core to act as a
supplement to the radiator and aids in removing heat from the engine cooling
system.
WHAT TO DO IN EMERGENCIES
92
Page 105 of 140
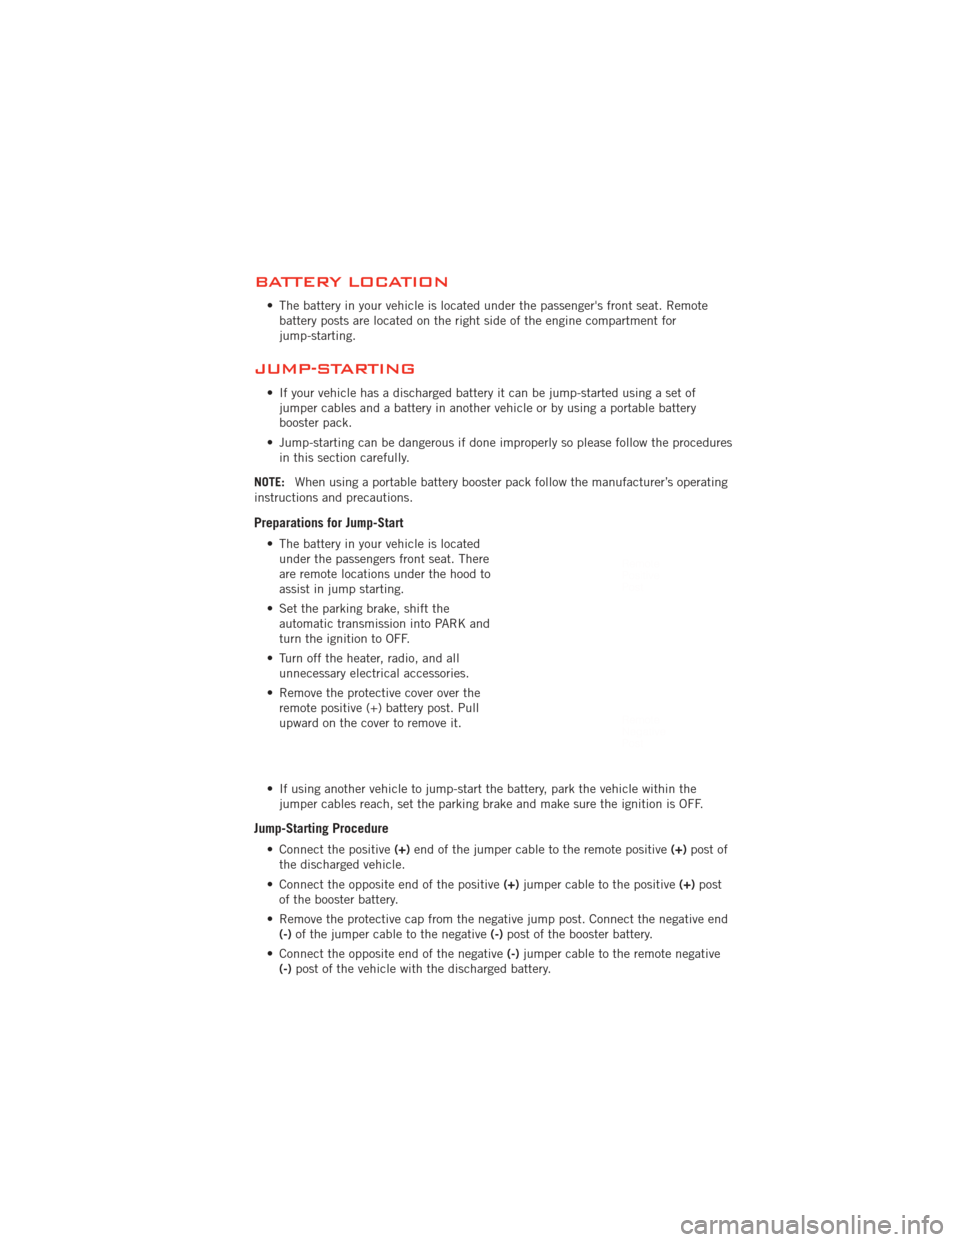
BATTERY LOCATION
• The battery in your vehicle is located under the passenger's front seat. Remotebattery posts are located on the right side of the engine compartment for
jump-starting.
JUMP-STARTING
• If your vehicle has a discharged battery it can be jump-started using a set ofjumper cables and a battery in another vehicle or by using a portable battery
booster pack.
• Jump-starting can be dangerous if done improperly so please follow the procedures in this section carefully.
NOTE: When using a portable battery booster pack follow the manufacturer’s operating
instructions and precautions.
Preparations for Jump-Start
• The battery in your vehicle is located under the passengers front seat. There
are remote locations under the hood to
assist in jump starting.
• Set the parking brake, shift the automatic transmission into PARK and
turn the ignition to OFF.
• Turn off the heater, radio, and all unnecessary electrical accessories.
• Remove the protective cover over the remote positive (+) battery post. Pull
upward on the cover to remove it.
• If using another vehicle to jump-start the battery, park the vehicle within the jumper cables reach, set the parking brake and make sure the ignition is OFF.
Jump-Starting Procedure
• Connect the positive (+)end of the jumper cable to the remote positive (+)post of
the discharged vehicle.
• Connect the opposite end of the positive (+)jumper cable to the positive (+)post
of the booster battery.
• Remove the protective cap from the negative jump post. Connect the negative end (-) of the jumper cable to the negative (-)post of the booster battery.
• Connect the opposite end of the negative (-)jumper cable to the remote negative
(-) post of the vehicle with the discharged battery.
WHAT TO DO IN EMERGENCIES
103
Page 106 of 140
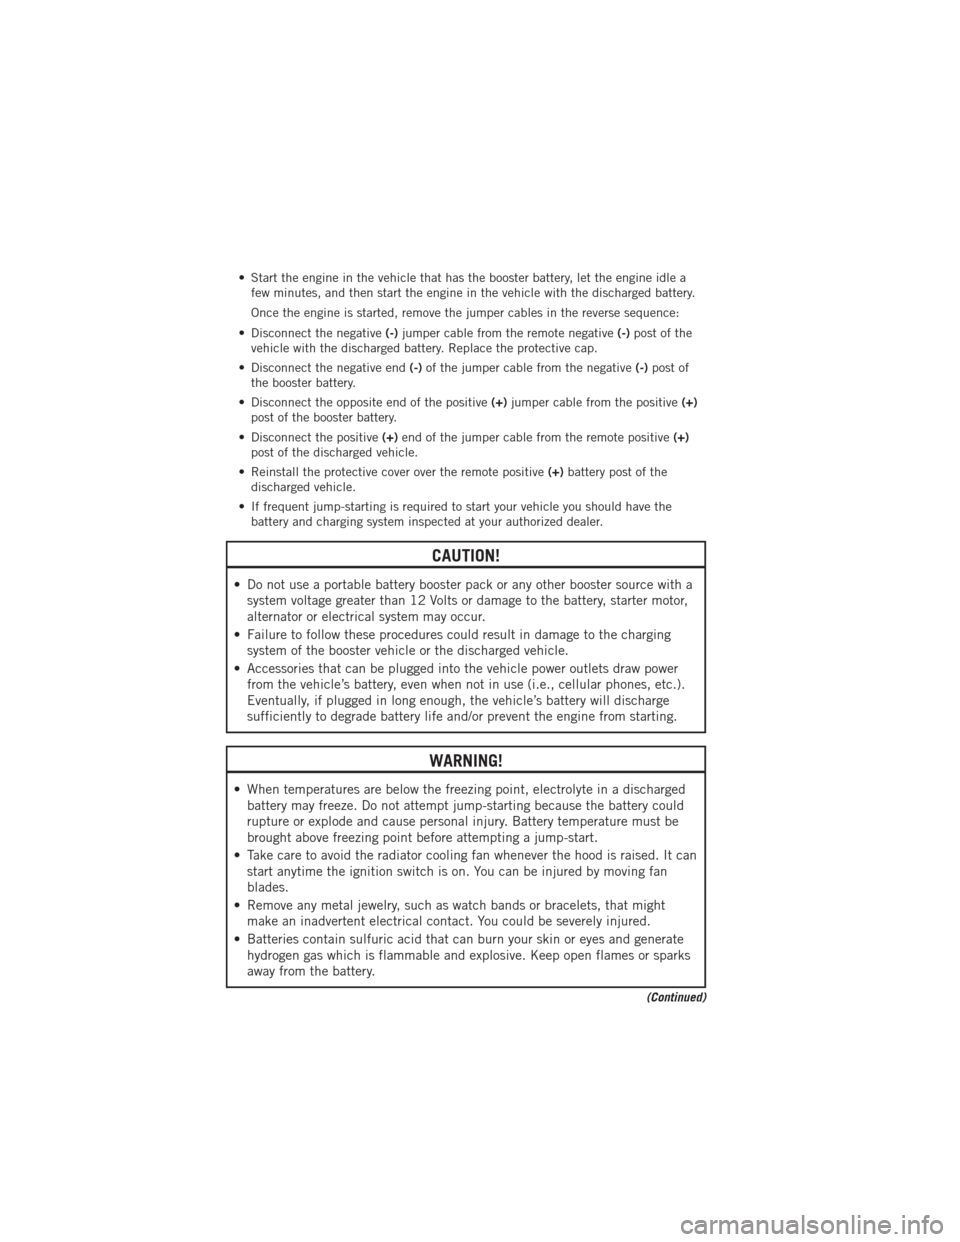
• Start the engine in the vehicle that has the booster battery, let the engine idle afew minutes, and then start the engine in the vehicle with the discharged battery.
Once the engine is started, remove the jumper cables in the reverse sequence:
• Disconnect the negative (-)jumper cable from the remote negative (-)post of the
vehicle with the discharged battery. Replace the protective cap.
• Disconnect the negative end (-)of the jumper cable from the negative (-)post of
the booster battery.
• Disconnect the opposite end of the positive (+)jumper cable from the positive (+)
post of the booster battery.
• Disconnect the positive (+)end of the jumper cable from the remote positive (+)
post of the discharged vehicle.
• Reinstall the protective cover over the remote positive (+)battery post of the
discharged vehicle.
• If frequent jump-starting is required to start your vehicle you should have the battery and charging system inspected at your authorized dealer.
CAUTION!
• Do not use a portable battery booster pack or any other booster source with asystem voltage greater than 12 Volts or damage to the battery, starter motor,
alternator or electrical system may occur.
• Failure to follow these procedures could result in damage to the charging system of the booster vehicle or the discharged vehicle.
• Accessories that can be plugged into the vehicle power outlets draw power from the vehicle’s battery, even when not in use (i.e., cellular phones, etc.).
Eventually, if plugged in long enough, the vehicle’s battery will discharge
sufficiently to degrade battery life and/or prevent the engine from starting.
WARNING!
• When temperatures are below the freezing point, electrolyte in a dischargedbattery may freeze. Do not attempt jump-starting because the battery could
rupture or explode and cause personal injury. Battery temperature must be
brought above freezing point before attempting a jump-start.
• Take care to avoid the radiator cooling fan whenever the hood is raised. It can start anytime the ignition switch is on. You can be injured by moving fan
blades.
• Remove any metal jewelry, such as watch bands or bracelets, that might make an inadvertent electrical contact. You could be severely injured.
• Batteries contain sulfuric acid that can burn your skin or eyes and generate hydrogen gas which is flammable and explosive. Keep open flames or sparks
away from the battery.
(Continued)
WHAT TO DO IN EMERGENCIES
104
Page 108 of 140
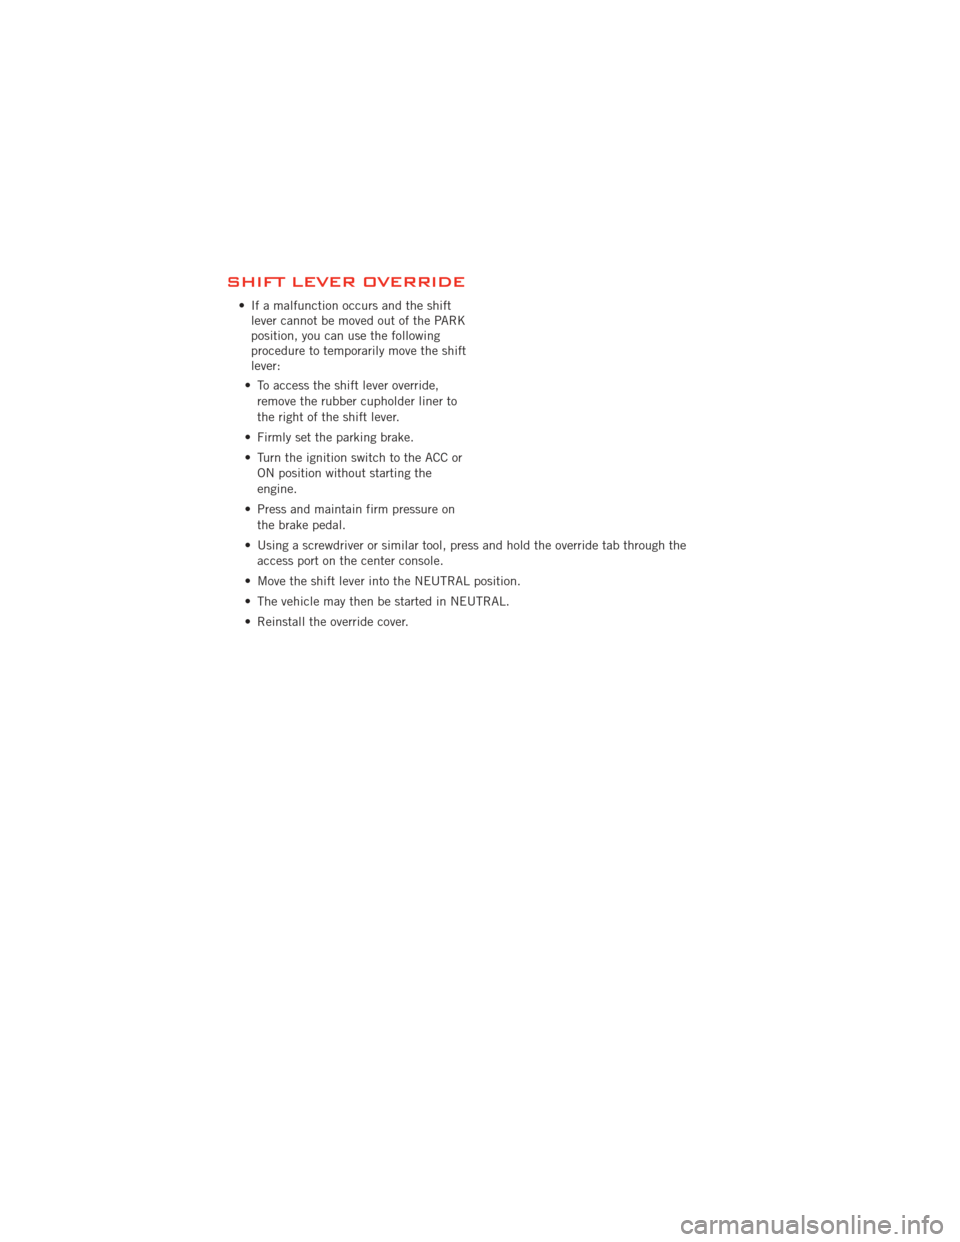
SHIFT LEVER OVERRIDE
• If a malfunction occurs and the shiftlever cannot be moved out of the PARK
position, you can use the following
procedure to temporarily move the shift
lever:
• To access the shift lever override, remove the rubber cupholder liner to
the right of the shift lever.
• Firmly set the parking brake.
• Turn the ignition switch to the ACC or ON position without starting the
engine.
• Press and maintain firm pressure on the brake pedal.
• Using a screwdriver or similar tool, press and hold the override tab through the access port on the center console.
• Move the shift lever into the NEUTRAL position.
• The vehicle may then be started in NEUTRAL.
• Reinstall the override cover.
WHAT TO DO IN EMERGENCIES
106
Page 121 of 140
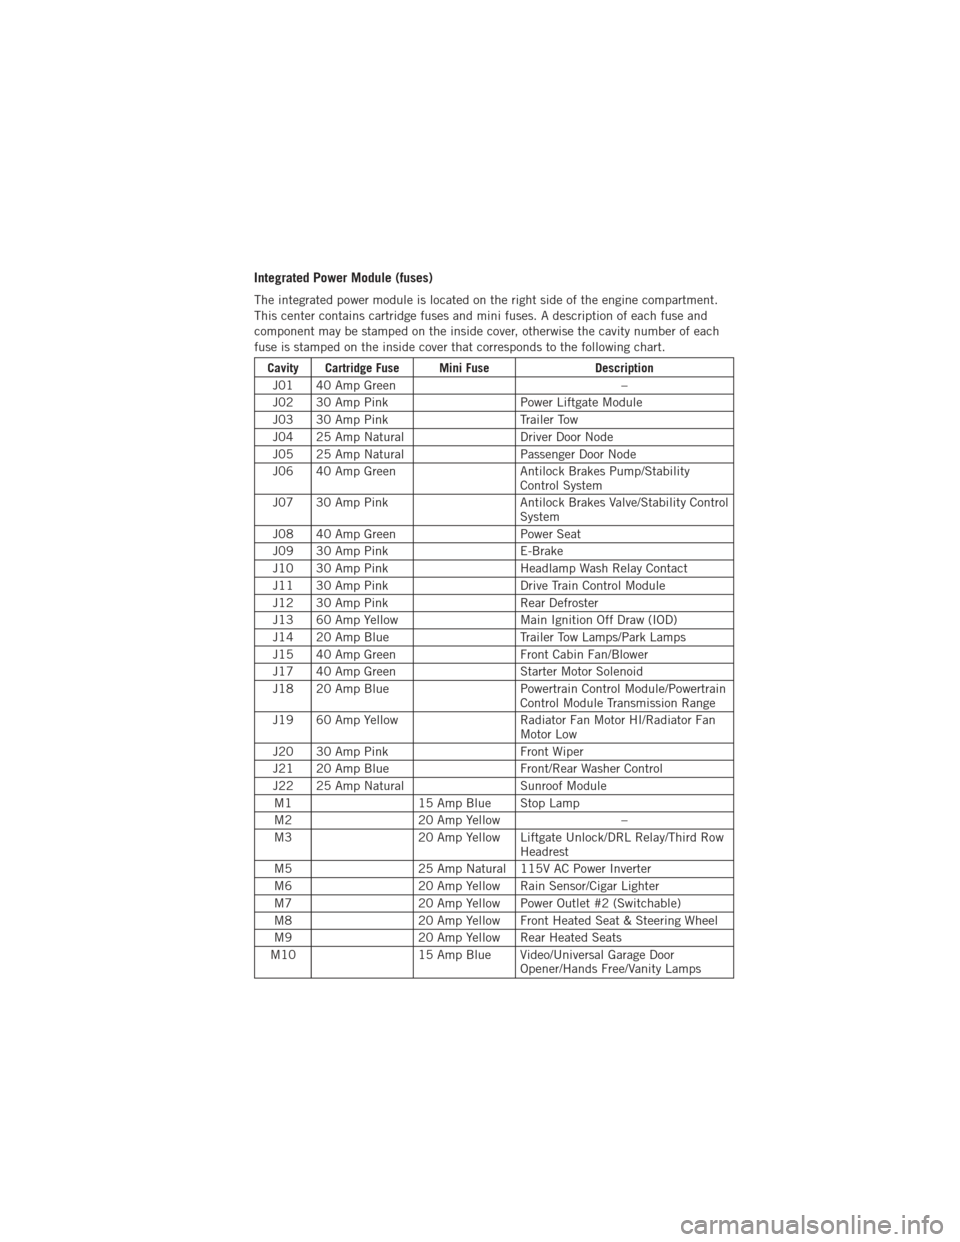
Integrated Power Module (fuses)
The integrated power module is located on the right side of the engine compartment.
This center contains cartridge fuses and mini fuses. A description of each fuse and
component may be stamped on the inside cover, otherwise the cavity number of each
fuse is stamped on the inside cover that corresponds to the following chart.
Cavity Cartridge Fuse Mini FuseDescription
J01 40 Amp Green –
J02 30 Amp Pink Power Liftgate Module
J03 30 Amp Pink Trailer Tow
J04 25 Amp Natural Driver Door Node
J05 25 Amp Natural Passenger Door Node
J06 40 Amp Green Antilock Brakes Pump/Stability
Control System
J07 30 Amp Pink Antilock Brakes Valve/Stability Control
System
J08 40 Amp Green Power Seat
J09 30 Amp Pink E-Brake
J10 30 Amp Pink Headlamp Wash Relay Contact
J11 30 Amp Pink Drive Train Control Module
J12 30 Amp Pink Rear Defroster
J13 60 Amp Yellow Main Ignition Off Draw (IOD)
J14 20 Amp Blue Trailer Tow Lamps/Park Lamps
J15 40 Amp Green Front Cabin Fan/Blower
J17 40 Amp Green Starter Motor Solenoid
J18 20 Amp Blue Powertrain Control Module/Powertrain
Control Module Transmission Range
J19 60 Amp Yellow Radiator Fan Motor HI/Radiator Fan
Motor Low
J20 30 Amp Pink Front Wiper
J21 20 Amp Blue Front/Rear Washer Control
J22 25 Amp Natural Sunroof Module
M1 15 Amp Blue Stop Lamp
M2 20 Amp Yellow –
M3 20 Amp Yellow Liftgate Unlock/DRL Relay/Third Row
Headrest
M5 25 Amp Natural 115V AC Power Inverter
M6 20 Amp Yellow Rain Sensor/Cigar Lighter
M7 20 Amp Yellow Power Outlet #2 (Switchable)
M8 20 Amp Yellow Front Heated Seat & Steering Wheel
M9 20 Amp Yellow Rear Heated Seats
M10 15 Amp Blue Video/Universal Garage Door
Opener/Hands Free/Vanity Lamps
MAINTAINING YOUR VEHICLE
119