AUX DODGE DURANGO 2012 3.G User Guide
[x] Cancel search | Manufacturer: DODGE, Model Year: 2012, Model line: DURANGO, Model: DODGE DURANGO 2012 3.GPages: 140, PDF Size: 4.3 MB
Page 45 of 140
Store Radio Presets• Press the “SET/RND” button once and SET 1 will show in the display. Then select button (1–6).
• A second station may be added to each push button. Press the “SET/RND” button twice and SET 2 will show in the display. Then select button (1–6).
CD/DISC Operation
Seek Up/Down Buttons
• Press to seek through CD tracks.
• Hold either button to bypass tracks without stopping.
SET/RND Button (Random Play) • Press this button while the CD is playing to activate Random Play.
• This feature plays the selections on the CD in random order to provide an interesting change of pace.
Audio Jack Operation
• The Audio Jack allows a portable device, such as an MP3 player or a cassetteplayer, to be plugged into the radio and utilize the vehicle’s audio system, using a
3.5 mm audio cable, to amplify the source and play through the vehicle speakers.
• Pressing the “AUX” button will change the mode to auxiliary device if the Audio Jack is connected, allowing the music from your portable device to play through
the vehicle's speakers.
• The functions of the portable device are controlled using the device buttons. The volume may be controlled using the radio or portable device.
ELECTRONICS
43
Page 48 of 140
• To select a folder from the list, press the “TUNE/SCROLL” control knob and theradio will begin playing the files contained in that folder.
Audio Jack Operation
• The Audio Jack allows a portable device, such as an MP3 player or a cassetteplayer, to be plugged into the radio and utilize the vehicle’s audio system, using a
3.5 mm audio cable, to amplify the source and play through the vehicle speakers.
• Pressing the “AUX” button will change the mode to auxiliary device if the Audio Jack is connected, allowing the music from your portable device to play through
the vehicle's speakers.
• The functions of the portable device are controlled using the device buttons. The volume may be controlled using the radio or portable device.
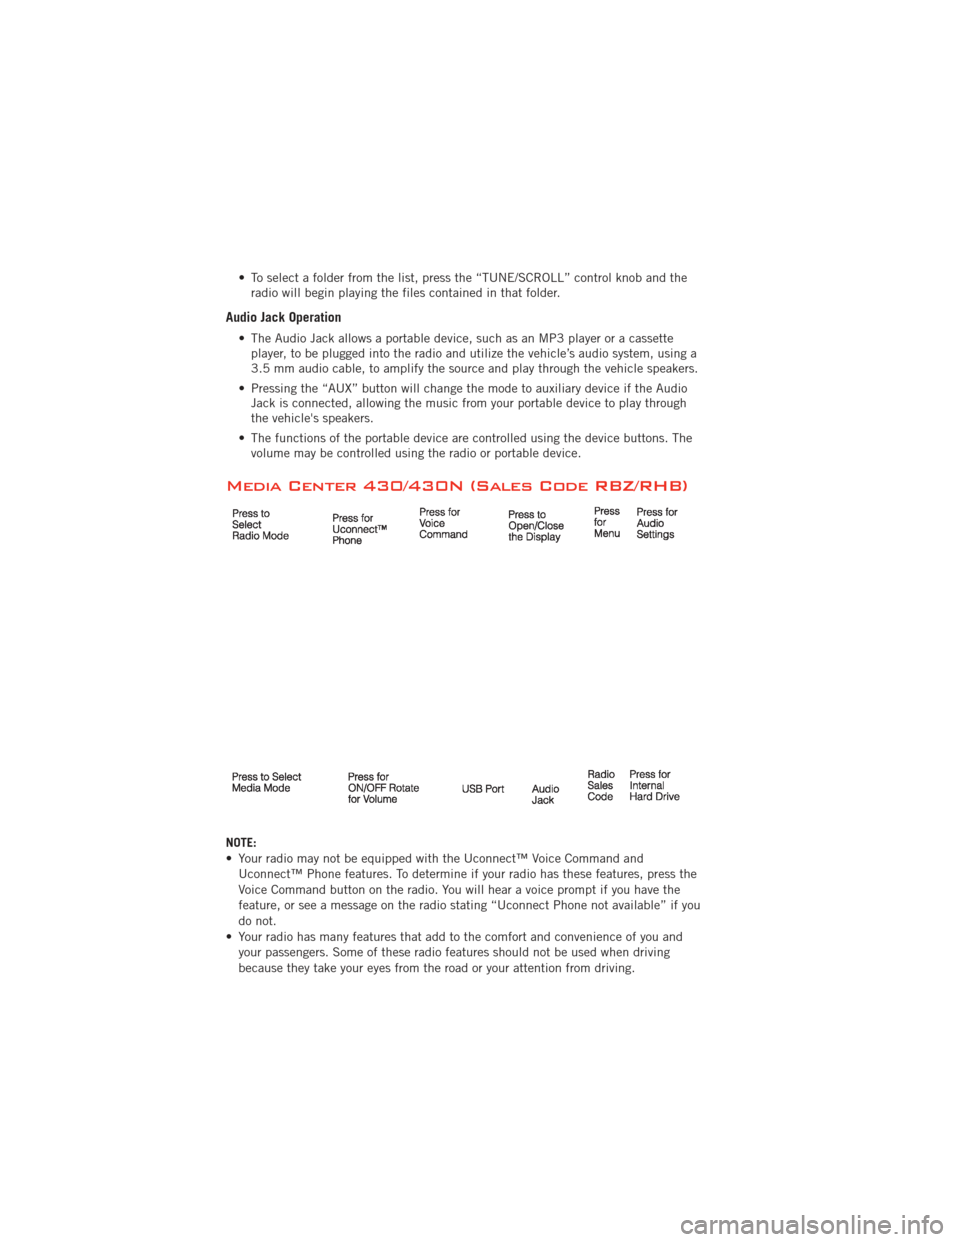
Media Center 430/430N (Sales Code RBZ/RHB)
NOTE:
• Your radio may not be equipped with the Uconnect™ Voice Command and
Uconnect™ Phone features. To determine if your radio has these features, press the
Voice Command button on the radio. You will hear a voice prompt if you have the
feature, or see a message on the radio stating “Uconnect Phone not available” if you
do not.
• Your radio has many features that add to the comfort and convenience of you and your passengers. Some of these radio features should not be used when driving
because they take your eyes from the road or your attention from driving.
ELECTRONICS
46
Page 49 of 140
Clock Setting
• Turn the radio on, then touch the screen where the time is displayed.
• Touch the “USER CLOCK” soft-key (Navigation radio only).
• To adjust the hours, touch either the “HOUR FORWARD” or “HOUR BACKWARD”soft-key.
• To adjust the minutes, touch either the “MINUTE FORWARD” or “MINUTE BACKWARD” soft-key.
• To save the new time setting, touch the screen where the word “Save” is displayed.
Menu
• Press the “MENU” hard-key to access the System Setup menu and the My Files menu.
• Press the “MENU” hard-key in an active mode (SAT, CD, AUX, etc.) in order to change mode specific settings.
Equalizer, Balance And Fade
Audio Control Menu
• Press the “AUDIO” hard-key on the right side of the radio.
• Use either the arrow soft-keys or the cross-hair on the screen to change
Balance and Fade. The “CENTER”
soft-key resets the settings.
• Touch the “Equalizer” soft-key and use either the arrow soft-keys or the sliders on the screen to adjust BASS, MID, and/or TREBLE.
Display Settings
• Press the “MENU” hard-key and touchthe “Display Settings” soft-key to
access the Display Settings menu.
• Select the “Daytime Colors” soft-key to switch to manual daytime mode and to
adjust the brightness of the display
using daytime colors.
• Select the “Nighttime Colors” soft-key to switch to manual nighttime mode and to adjust the brightness of the display using nighttime colors.
•
Select the “Auto Color Mode” soft-key to switch to automatic daytime/nighttime mode
and to control the brightness of the display using the dimmer switch of the vehicle.
• Touch the “EXIT” soft-key to save your settings.
ELECTRONICS
47
Page 51 of 140
CD/DVD Disc Operation
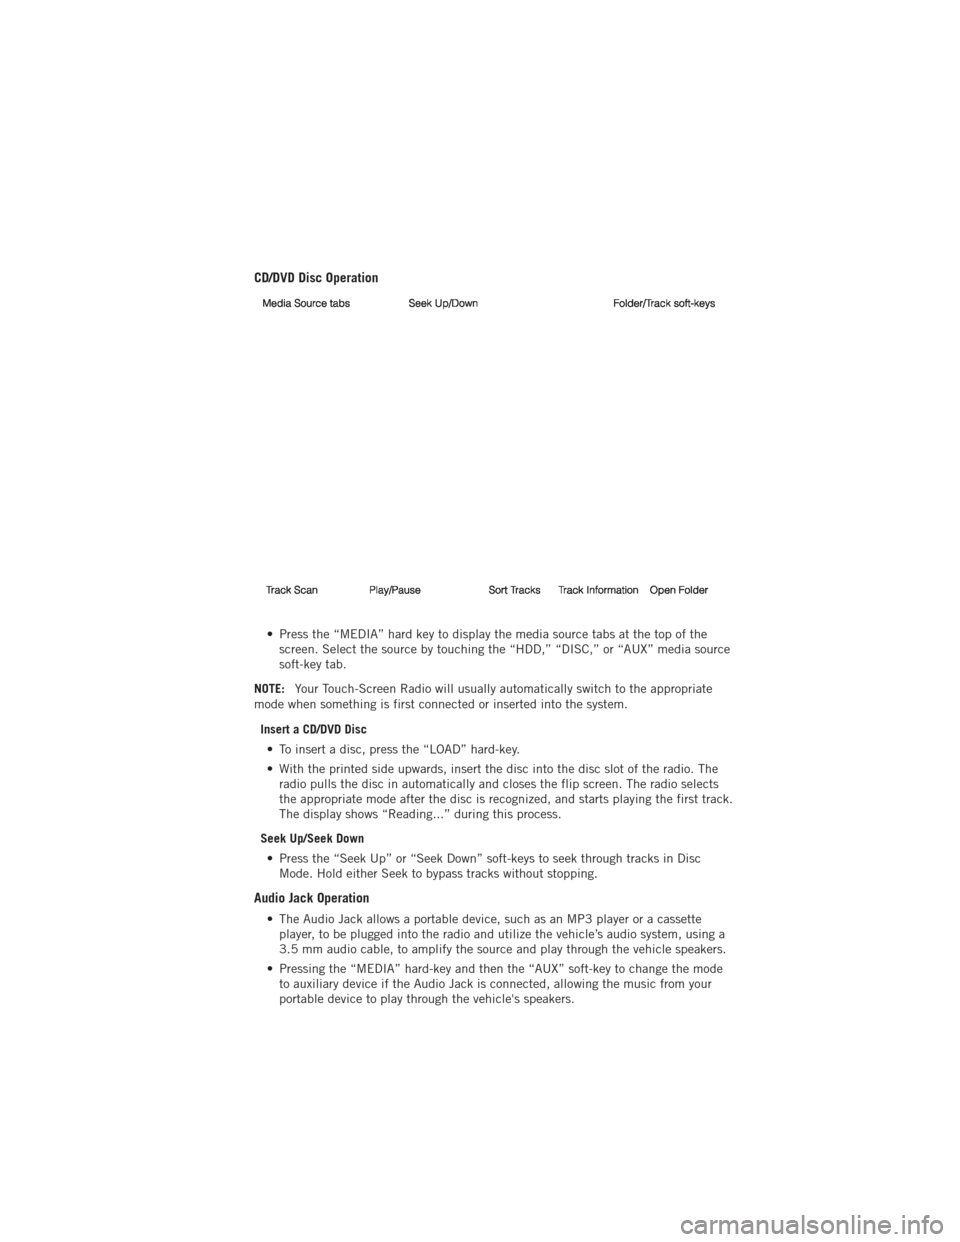
• Press the “MEDIA” hard key to display the media source tabs at the top of thescreen. Select the source by touching the “HDD,” “DISC,” or “AUX” media source
soft-key tab.
NOTE: Your Touch-Screen Radio will usually automatically switch to the appropriate
mode when something is first connected or inserted into the system.
Insert a CD/DVD Disc• To insert a disc, press the “LOAD” hard-key.
• With the printed side upwards, insert the disc into the disc slot of the radio. The radio pulls the disc in automatically and closes the flip screen. The radio selects
the appropriate mode after the disc is recognized, and starts playing the first track.
The display shows “Reading...” during this process.
Seek Up/Seek Down • Press the “Seek Up” or “Seek Down” soft-keys to seek through tracks in Disc Mode. Hold either Seek to bypass tracks without stopping.
Audio Jack Operation
• The Audio Jack allows a portable device, such as an MP3 player or a cassetteplayer, to be plugged into the radio and utilize the vehicle’s audio system, using a
3.5 mm audio cable, to amplify the source and play through the vehicle speakers.
• Pressing the “MEDIA” hard-key and then the “AUX” soft-key to change the mode to auxiliary device if the Audio Jack is connected, allowing the music from your
portable device to play through the vehicle's speakers.
ELECTRONICS
49
Page 58 of 140
Menu
• Press the “MENU” hard-key to access the System Setup menu and the My Filesmenu.
• Press the “MENU” hard-key in an active mode (SAT, CD, AUX, etc.) in order to change mode specific settings.
Equalizer, Balance And Fade
Audio Control Menu
• Press the “MENU” hard-key on the right side of the radio. Then press the
“Audio Control” soft-key to get to the
audio control menu.
• Use either the arrow soft-keys or the cross-hair on the screen to change
Balance and Fade. The “CENTER”
soft-key resets the settings.
• Touch the “Equalizer” soft-key and use either the arrow soft-keys or the sliders on the screen to adjust BASS, MID, and/or TREBLE.
Display Settings
• Press the “MENU” hard-key and touchthe Display Settings soft-key to access
the Display Settings menu.
• Select the “Daytime Colors” soft-key to switch to manual daytime mode and to
adjust the brightness of the display
using daytime colors.
• Select the “Nighttime Colors” soft-key to switch to manual nighttime mode and to adjust the brightness of the display using nighttime colors.
• Select the “Auto Color Mode” soft-key to switch to automatic daytime/nighttime mode and to control the brightness of the display using the dimmer switch of the
vehicle.
• Touch the “EXIT” soft-key to save your settings.
ELECTRONICS
56
Page 60 of 140
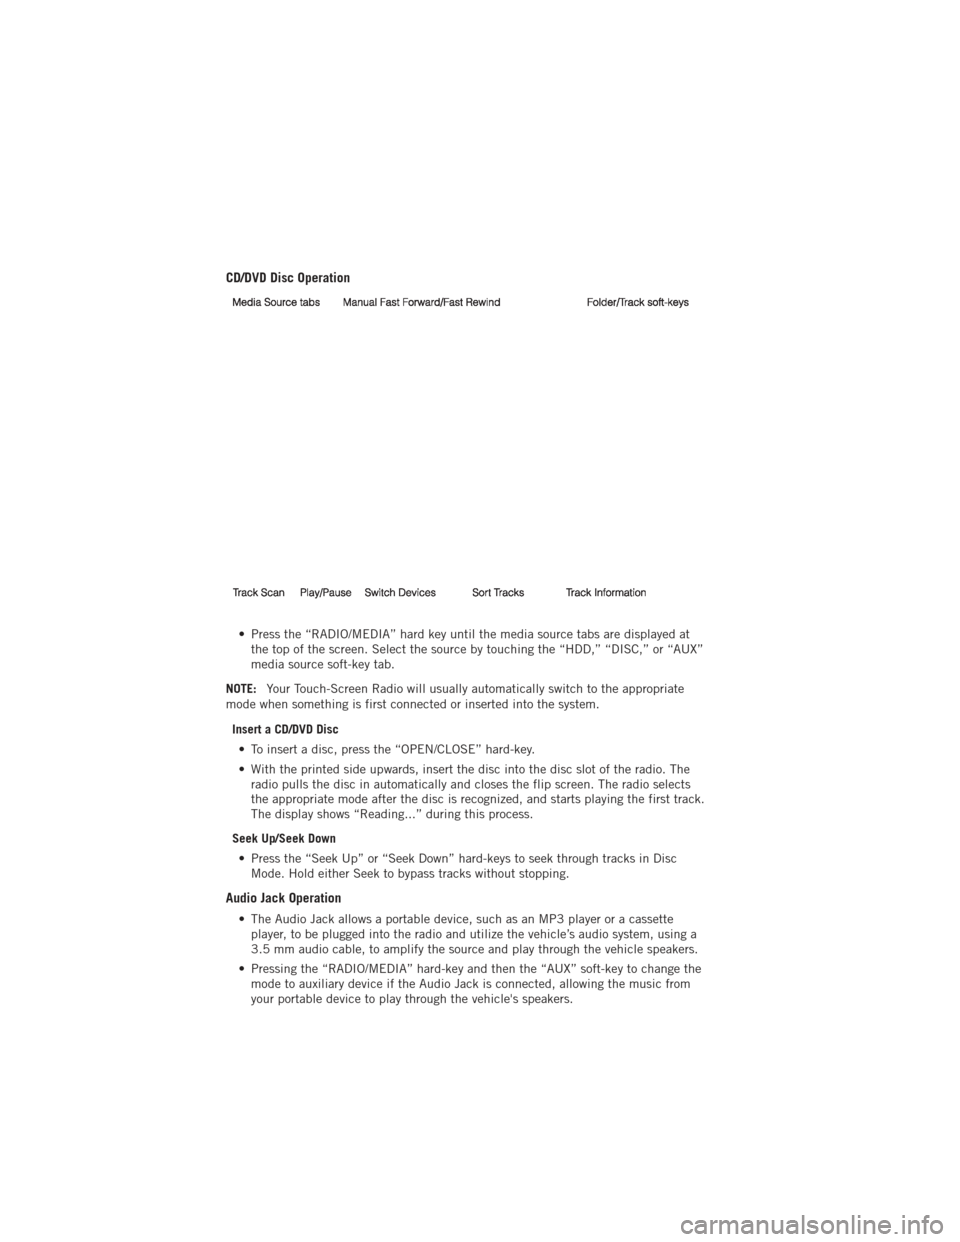
CD/DVD Disc Operation
• Press the “RADIO/MEDIA” hard key until the media source tabs are displayed atthe top of the screen. Select the source by touching the “HDD,” “DISC,” or “AUX”
media source soft-key tab.
NOTE: Your Touch-Screen Radio will usually automatically switch to the appropriate
mode when something is first connected or inserted into the system.
Insert a CD/DVD Disc• To insert a disc, press the “OPEN/CLOSE” hard-key.
• With the printed side upwards, insert the disc into the disc slot of the radio. The radio pulls the disc in automatically and closes the flip screen. The radio selects
the appropriate mode after the disc is recognized, and starts playing the first track.
The display shows “Reading...” during this process.
Seek Up/Seek Down • Press the “Seek Up” or “Seek Down” hard-keys to seek through tracks in Disc Mode. Hold either Seek to bypass tracks without stopping.
Audio Jack Operation
• The Audio Jack allows a portable device, such as an MP3 player or a cassetteplayer, to be plugged into the radio and utilize the vehicle’s audio system, using a
3.5 mm audio cable, to amplify the source and play through the vehicle speakers.
• Pressing the “RADIO/MEDIA” hard-key and then the “AUX” soft-key to change the mode to auxiliary device if the Audio Jack is connected, allowing the music from
your portable device to play through the vehicle's speakers.
ELECTRONICS
58
Page 70 of 140
STEERING WHEEL AUDIO CONTROLS
• The steering wheel audio controls arelocated on the rear surface of the
steering wheel.
Right Switch
• Press the switch up or down toincrease or decrease the volume.
• Press the button in the center to change modes
AM/FM/DISC/SAT/HDD/AUX.
Left Switch
• Press the switch up or down to search for the next listenable station or select thenext or previous CD or HDD track.
• Press the button in the center to select the next preset station (radio) or to change CDs if equipped with a CD Changer.
iPod®/USB/MP3 CONTROL
• There are many ways to play music from iPod®/MP3 players or USB devices
through your vehicle's sound system.
• The remote USB port, located within the center console, allows you to plug an iPod
®into the vehicle's sound system.
NOTE: If equipped with the Media Center
730N (RHR), the USB port on the
faceplate allows the same functions as the
remote USB port.
• Non-Touch-Screen Radios: To hearaudio from devices connected to the
USB port, press the “AUX” button on
the radio faceplate
• Touch-Screen Radios: To hear audio from devices connected to the USB
port, press the “MEDIA” hard-key, then
touch the “AUX” or “iPod
®” soft-key.
ELECTRONICS
68
Page 76 of 140
• Press the “Voice Command” buttonand after the BEEP, say “SMS” to get
started.
NOTE: To access the tutorial, press the “Voice Command” button
. After the
BEEP, say “tutorial”. Press any hard-key/button or touch the display (Touch-Screen
radio) to cancel the tutorial.
WARNING!
Any voice commanded system should be used only in safe driving conditions
following local laws and phone use. All attention should be kept on the roadway
ahead. Failure to do so may result in a collision causing you and others to be
severely injured or killed.
Bluetooth®STREAMING AUDIO
• If equipped with Uconnect™ Voice Command, your Bluetooth-equipped
iPod
®devices, cell phones or other
media players, may also be able to
stream music to your vehicle's
speakers. Your connected device must
be Bluetooth-compatible, and paired
with your Media Center radio (see
Uconnect™ Phone for pairing
instructions). Non-Touch-Screen
Radios: Press the “AUX” button on the radio faceplate until "BT" or “Audio
Streaming” is displayed on the radio screen. Touch-Screen-Radios: Press the
“RADIO/MEDIA” or “MEDIA” hard-key and then touch the “AUX” soft-key tab.
VIDEO ENTERTAINMENT SYSTEM (VES)™
System Operation
• The screen is located on the headliner behind the front seat. To lower the
screen, press the release button
located in the rear of the overhead
console.
• The system may be controlled by the front seat occupants using the
touch-screen radio, or by the rear seat
occupants using the remote control.
ELECTRONICS
74
Page 77 of 140
• The video screen displays information in a split-screen format. The left side of thescreen is referred to as Channel 1 and the right side of the screen is referred to as
Channel 2. All modes except video modes are displayed in a split-screen format.
• To use the headphones, press the power button located on the right ear cup. Select the channel on the headphones (1 or 2) that corresponds to the channel selected
on the VES™ screen.
Operation Of The Touch-Screen Radio
• To view a DVD video, press the OPEN/CLOSE or LOAD hard-key and insert the disc.Playback will begin automatically after the DVD is recognized by the disc drive. If
playback does not begin automatically, follow these steps:
• Press the MENU hard-key, then touch the Rear VES™ soft-key. If a chapter list appears on the right side of the screen touch the HIDE LIST soft-key to display
the Rear VES™ Control screen.
• Touch the 1 soft-key to select an audio channel, then touch the DISC soft-key in the MEDIA column.
Operation Of The Remote
• The remote control operates similarly to any DVD remote you have used before andallows the rear seat passengers to change stations, tracks, discs and audio/video
modes.
• The remote control is designed to control either channel by using the selector switch located on the right side of the remote.
• Pressing the power button will turn the VES™ system ON/OFF.
• Pressing the MODE button causes the Mode Selection menu to appear on the VES™ screen. Use the remote control arrow buttons to scroll through the available
modes, then press ENTER to select the desired mode.
Auxiliary Audio/Video Input Jacks
• The Aux jacks are located on the rear of the center console.
• Connect the video game or other external media devices to the AUX jacks followingthe color coding for VES™ jacks.
• Using either the touch-screen radio or remote control, select AUX from the Rear VES™ Control or Mode Selection screen.
• Refer to your vehicle's Owners Manual on the DVD for further details.
ELECTRONICS
75
Page 128 of 140
Adaptive Cruise Control (ACC) (Cruise
Control)................. 30
Air Conditioning ............ 35
Airbag .................. 15
AirbagLight ............... 92
Alarm, Panic ............... 8
All Wheel Drive (AWD) ......... 83
Anti-Lock Brake System (ABS) .... 91
Arming Theft System
(Security Alarm) ............ 14
Audio Settings . . . 42,43,44,46,49,58
Automatic Dimming Mirror ...... 29
Automatic Headlights ......... 27
Automatic Temperature
Control (ATC) .............. 35
Air Recirculation ........... 35
Automatic Operation ........ 35
Rear Temperature Control ...... 35
SYNC Temperature Button ..... 36
Automatic Transmission FluidType .............. 113
Auxiliary Audio/Video Input Jacks . . 75
AxleFluid ............ 113,114
Back-UpCamera ............ 37
Battery Charging System Light ....... 91
Belts, Seat ............... 14
Blind Spot Monitoring ......... 37
BrakeFluid ........... 113,114
Brake System WarningLight ............ 90
Break-In Recommendations,
New Vehicle ............... 27
Bulb Replacement .......... 122
Button, Start/Stop Removal ..... 8,12
Calibration, Compass ......... 76
Cargo Compartment Luggage Carrier ........... 85
Change Oil Indicator .......... 92
Changing A Flat Tire .......... 94
Charging System Light ......... 91
Check Engine Light (Malfunction
Indicator Light) ............. 90
Child Restraint ............. 16
Child Restraint Tether Anchors .... 16
ClimateControl ............. 35 Clock Setting
........ 42,44,47,55
Compass Calibration .......... 76
Cooling System Coolant Capacity .......... 113
Cruise Control (Speed Control) .... 30
CruiseLight ............... 30
Customer Assistance ......... 123
Defects, Reporting .......... 124
Dimmer Control ............. 28
Dimmer Switch, Headlight ...... 28
Disarming, Theft System ....... 14
E-85Fuel ............... 114
ECO ................... 76
Electronic Range Select (ERS) .... 34
Electronic Speed Control
(CruiseControl) ............. 30
Electronic Stability Control (ESC) . . 91
Electronic Throttle Control
WarningLight .............. 91
Electronic Vehicle Information Center
(EVIC) ................ 76,77
Electronically Shifted Transfer
Case ................... 83
Electronics Your Vehicle's Sound System .... 40
Emergency Key .............. 8
Emergency, In Case of Jacking ................ 94
Overheating ............. 92
Engine Break-In Recommendations .... 27
Compartment ............
111
Coolant (Antifreeze) ........ 113
Malfunction Indicator
(CheckEngine) ............ 90
Oil .................. 113
Oil Filter .............. 113
Oil Selection ............ 113
Overheating ............. 92
Starting ................ 13
Stopping ............... 13
EventDataRecorder ......... 108
Exterior Lights ............ 122
Flexible Fuel Vehicles ........ 114
INDEX
126