service DODGE DURANGO 2014 3.G User Guide
[x] Cancel search | Manufacturer: DODGE, Model Year: 2014, Model line: DURANGO, Model: DODGE DURANGO 2014 3.GPages: 188, PDF Size: 3.8 MB
Page 10 of 188
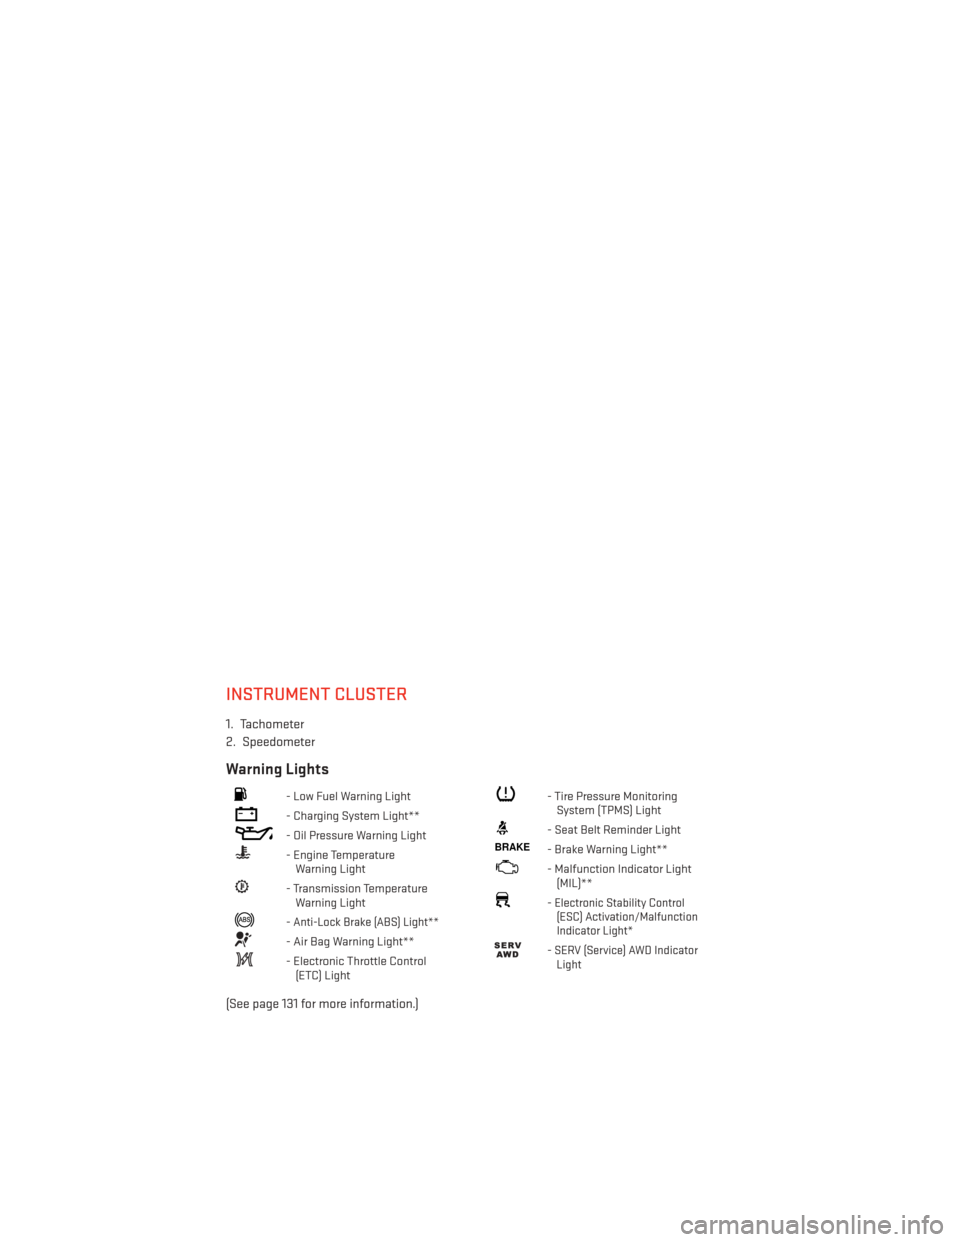
INSTRUMENT CLUSTER
1. Tachometer
2. Speedometer
Warning Lights
- Low Fuel Warning Light
- Charging System Light**
- Oil Pressure Warning Light
- Engine TemperatureWarning Light
- Transmission TemperatureWarning Light
-Anti-Lock Brake (ABS) Light**
- Air Bag Warning Light**
- Electronic Throttle Control(ETC) Light
- Tire Pressure MonitoringSystem (TPMS) Light
- Seat Belt Reminder Light
BRAKE- Brake Warning Light**
- Malfunction Indicator Light(MIL)**
-Electronic Stability Control(ESC) Activation/Malfunction
Indicator Light*
-SERV (Service) AWD Indicator Light
(See page 131 for more information.)
CONTROLS AT A GLANCE
8
Page 18 of 188
SUPPLEMENTAL RESTRAINT SYSTEM (SRS) — AIR BAGS
This vehicle has Advanced Front Air Bags for both the driver and front passenger as a
supplement to the seat belt restraint systems. The driver's Advanced Front Air Bag is
mounted in the center of the steering wheel. The passenger's Advanced Front Air Bag is
mounted in the instrument panel, above the glove compartment. The words SRS AIR BAG
are embossed on the air bag covers.
Advanced Front Air Bags are designed to provide additional protection by supplementing
the seat belts in certain frontal collisions depending on several factors, including the
severity and type of collision. Advanced Front Air Bags are not expected to reduce the risk
of injury in rear, side, or rollover collisions.
This vehicle is equipped with Supplemental Side Air Bag Inflatable Curtains to protect the
driver, front and rear passengers sitting next to a window.
This vehicle is equipped with Supplemental Seat-Mounted Side Air Bags to provide en-
hanced protection to help protect an occupant during a side impact.
This vehicle is equipped with Supplemental Driver’s Side Knee Air Bag mounted in the
instrument panel below the steering column and a Knee Bolster mounted below the glove
compartment. The Supplemental Driver’s Side Knee Air Bag provides enhanced protection
and works together with the Driver Advanced Front Air Bag during a frontal impact.
If the Air Bag Warning Light
is not on during starting, stays on, or turns on while driving,
have the vehicle serviced by an authorized service center immediately.
Refer to the Owner's Manual on the DVD for further details regarding the Supplemental
Restraint System (SRS).
WARNING!
• Relying on the air bags alone could lead to more severe injuries in a collision. The air bags work with your seat belt to restrain you properly. In some collisions, the air bags
won't deploy at all. Always wear your seat belts even though you have air bags.
• Being too close to the steering wheel or instrument panel during Advanced Front Air
Bag deployment could cause serious injury, including death. Air bags need room to
inflate. Sit back, comfortably extending your arms to reach the steering wheel or
instrument panel.
• Supplemental Side Air Bag Inflatable Curtains and Supplemental Seat-Mounted Side
Air Bags need room to inflate. Do not lean against the door or window. Sit upright in
the center of the seat.
•
Being too close to the Supplemental Side Air Bag Inflatable Curtain and/or Seat-
Mounted Side Air Bag during deployment could cause you to be severely injured or killed.
• Do not drive your vehicle after the air bags have deployed. If you are involved in
another collision, the air bags will not be in place to protect you.
• After any collision, the vehicle should be taken to an authorized dealer immediately.
GETTING STARTED
16
Page 54 of 188
• Search for places to eat, shop, relax and play with Yelp®, using your voice or on-screenmenu. Then navigate to them (navigation standard on Uconnect® 8.4AN, optional on
Uconnect® 8.4A).
• Get operator assistance using the Assist button on your mirror.
Before you drive, familiarize yourself with the easy-to-use Uconnect® System.
1. The ASSIST and 9-1-1 buttons are located on your rearview mirror. The ASSIST Button is used for contacting Roadside Assistance, Vehicle Care and Uconnect® Care. The 9-1-1
Button connects you to emergency services.
NOTE:
Vehicles sold in Canada and Mexico DO NOT have 9-1-1 Call system capabilities. 9-1-1 or
other emergency line operators in Canada and Mexico may not answer or respond to 9-1-1
system calls.
2. The Uconnect® “Apps” button on the menu bar at the bottom right corner of the radio touchscreen. This is where you can begin your registration process, manage your Apps
and purchase WiFi on demand.
3. The Uconnect® Voice Command and Uconnect® Phone buttons are located on the left side of your steering wheel. These buttons let you use your voice to give commands,
make phone calls, send and receive text messages hands-free, enter navigation desti-
nations, and control your radio and media devices.
Included Trial Period For New Vehicles
Your new vehicle may come with an included trial period for use of the Uconnect® Access
Services starting at the date of vehicle purchase (date based on vehicle sales notification
from your dealer). To activate the trial, you must first register with Uconnect® Access .
After the trial period, if you wish to continue your Uconnect® Access Services you can
choose to purchase a subscription.
Features And Packages
•
After the trial period, you can subscribe to continue your service by visiting the Uconnect®
Store located within the Mopar Owner Connect website (moparownerconnect.com). If you
need assistance, U.S. residents can call Uconnect® Care at 855-792-4241.
• For the latest information on packages and pricing information: U.S. residents visit DriveUconnect.com.
ELECTRONICS
52
Page 58 of 188
Using Uconnect® Access
Getting Started With Apps
Applications (Apps) and features in your Uconnect® Access system deliver services that are
customized for the driver and are certified by Chrysler Group, LLC. Two different types are:
1.Built-In Features — use the built-in 3G Cellular Network on your Uconnect® 8.4A or 8.4AN
radio.
2. Uconnect® Access via Mobile (if equipped) — uses the Uconnect Access app and your
smartphone's data plan to access your personal Pandora®, iHeartRadio, Aha™ and
Slacker accounts from the vehicle and control them using the vehicle touchscreen.
Customer's data plan charges will apply.
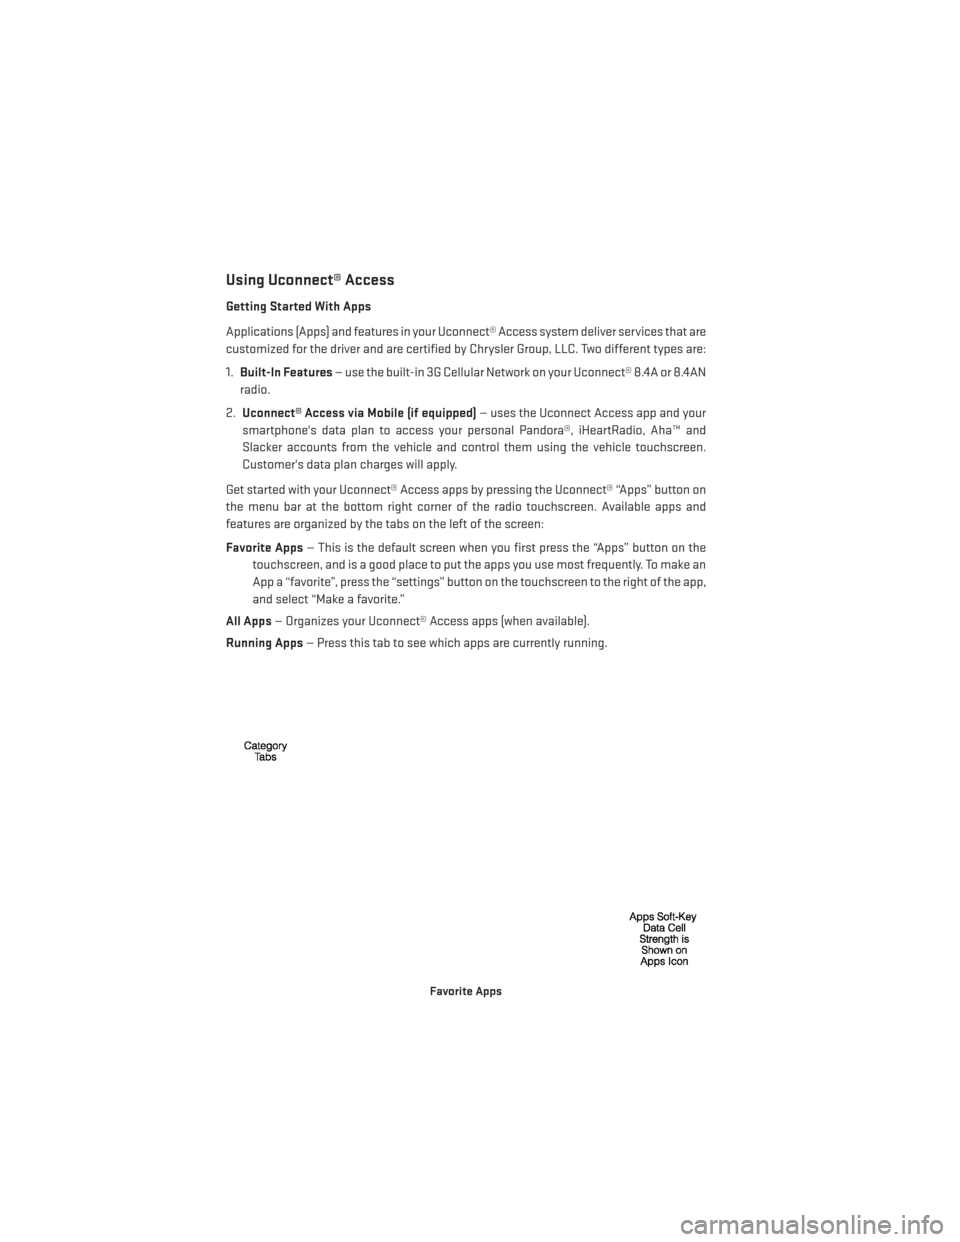
Get started with your Uconnect® Access apps by pressing the Uconnect® “Apps” button on
the menu bar at the bottom right corner of the radio touchscreen. Available apps and
features are organized by the tabs on the left of the screen:
Favorite Apps — This is the default screen when you first press the “Apps” button on the
touchscreen, and is a good place to put the apps you use most frequently. To make an
App a “favorite”, press the “settings” button on the touchscreen to the right of the app,
and select “Make a favorite.”
All Apps — Organizes your Uconnect® Access apps (when available).
Running Apps — Press this tab to see which apps are currently running.
Favorite Apps
ELECTRONICS
56
Page 60 of 188
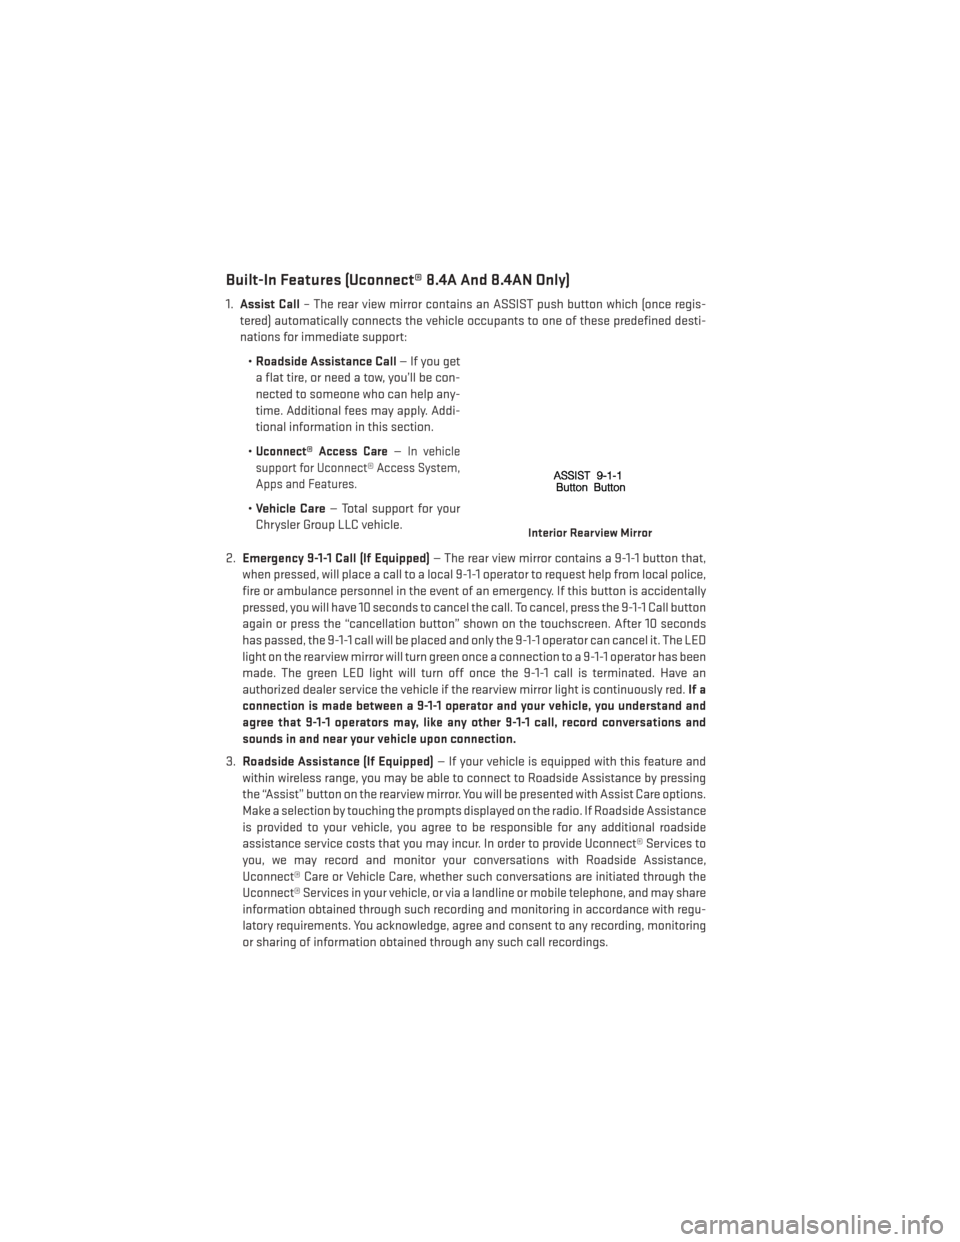
Built-In Features (Uconnect® 8.4A And 8.4AN Only)
1.Assist Call – The rear view mirror contains an ASSIST push button which (once regis-
tered) automatically connects the vehicle occupants to one of these predefined desti-
nations for immediate support:
•Roadside Assistance Call — If you get
a flat tire, or need a tow, you’ll be con-
nected to someone who can help any-
time. Additional fees may apply. Addi-
tional information in this section.
•
Uconnect® Access Care—In vehicle
support for Uconnect® Access System,
Apps and Features.
• Vehicle Care — Total support for your
Chrysler Group LLC vehicle.
2. Emergency 9-1-1 Call (If Equipped) — The rear view mirror contains a 9-1-1 button that,
when pressed, will place a call to a local 9-1-1 operator to request help from local police,
fire or ambulance personnel in the event of an emergency. If this button is accidentally
pressed, you will have 10 seconds to cancel the call. To cancel, press the 9-1-1 Call button
again or press the “cancellation button” shown on the touchscreen. After 10 seconds
has passed, the 9-1-1 call will be placed and only the 9-1-1 operator can cancel it. The LED
light on the rearview mirror will turn green once a connection to a 9-1-1 operator has been
made. The green LED light will turn off once the 9-1-1 call is terminated. Have an
authorized dealer service the vehicle if the rearview mirror light is continuously red. If a
connection is made between a 9-1-1 operator and your vehicle, you understand and
agree that 9-1-1 operators may, like any other 9-1-1 call, record conversations and
sounds in and near your vehicle upon connection.
3. Roadside Assistance (If Equipped) — If your vehicle is equipped with this feature and
within wireless range, you may be able to connect to Roadside Assistance by pressing
the “Assist” button on the rearview mirror. You will be presented with Assist Care options.
Make a selection by touching the prompts displayed on the radio. If Roadside Assistance
is provided to your vehicle, you agree to be responsible for any additional roadside
assistance service costs that you may incur. In order to provide Uconnect® Services to
you, we may record and monitor your conversations with Roadside Assistance,
Uconnect® Care or Vehicle Care, whether such conversations are initiated through the
Uconnect® Services in your vehicle, or via a landline or mobile telephone, and may share
information obtained through such recording and monitoring in accordance with regu-
latory requirements. You acknowledge, agree and consent to any recording, monitoring
or sharing of information obtained through any such call recordings.
Interior Rearview Mirror
ELECTRONICS
58
Page 61 of 188
4.Yelp® — Customers have the ability to search for nearby destinations or a point of
interest (POI) either by category or custom search by using keywords (for example,
“Italian restaurant”). Searching can be done by voice or using the touchscreen keypad.
Using the touchscreen, launch Yelp® by selecting the “Apps” icon, touch the “All Apps”
tab, and then touch “Yelp.” Using voice recognition press the Voice Command (VR)
button on the steering wheel and say “Launch Yelp®.”
5. Security Alarm Notification — The Security Alarm Notification feature notifies you via
email or text (SMS) message when the vehicle’s factory-installed security alarm system
has been set-off. There are a number of reasons why your alarm may have been
triggered, one of which could be that your vehicle was stolen. If so, please see the details
of the Stolen Vehicle Assistance service below. When you register, Security Alarm
Notification is automatically set to send you an email at the mail address you provide
should the alarm go off. You may also opt to have a text message sent to your mobile
device.
6. Stolen Vehicle Assistance — If your vehicle is stolen, contact local law enforcement
immediately to file a stolen vehicle report. Once this report has been filed, Uconnect®
care can help locate your vehicle. The Uconnect® Care agent will ask for the stolen
vehicle report number issued by local law enforcement. Then, using GPS technology and
the built-in wireless connection within your vehicle, the Uconnect® Care agent will be
able to locate the stolen vehicle and work with law enforcement to help recover it.
(Vehicle must be within the United States, have network coverage and must be regis-
tered with Uconnect® Access with an active subscription that includes the applicable
feature).
7. WiFi Hotspot — WiFi Hotspot is on-demand WiFi 3G connectivity that's built-in and ready
to go whenever you are. Once your vehicle is registered for Uconnect® Access, you can
purchase a Wifi Hotspot subscription at the Uconnect® Store. After you've made your
purchase, turn on your signal and connect your devices. It's never been easier to bring
your home or office with you.
Your vehicle must have a working electrical system for any of the in vehicle Uconnect®
features to operate.
Uconnect® Access Remote Features
If you own a compatible iPhone® or Android® powered device, the Uconnect® Access App
allows you to remotely lock or unlock your doors, start your engine or activate your horn
and lights from virtually anywhere (Vehicle must be within the United States and have
network coverage). You can download the App from Mopar Owner Connect or from the
App Store (iPhone) or Google Play store. Visit UconnectPhone.com to determine if your
device is compatible. For Uconnect® Phone customer support and to determine if your
device is compatible.
U.S. residents - visit UconnectPhone.com or call 1–877–855–8400
ELECTRONICS
59
Page 63 of 188
Voice Texting (U.S. Residents Only)— Want to dictate a personal message? Register with
Uconnect® Access to take advantage of a new, cloudbased Voice Texting service, an
enhancement to Voice Text Reply.
Voice Texting allows you to compose a new text or reply to an incoming text message.
Before you attempt to use the Voice Texting feature, check to ensure you have the following:
1.
A paired, Bluetooth® enabled phone with the Message Access Profile (MAP). Not all Bluetooth®
enabled phones support MAP, including all iPhones® (Apple iOS). Visit UconnectPhone.com for
system and device compatibility information.
2.An active Uconnect® Access trial or paid subscription. Press the “U” button on the lower
right hand corner of the touchscreen to begin the registration process.
3.Accept the Allow MAP profile request on your smart phone. (Please refer to device manu-
facturer instructions for details).
To Send A Text Message:
1. Press the “Uconnect® Phone” button.
2. Wait for the beep.
3. Say “Text.”
4. Uconnect® will prompt you “Say the phone number, or full name and phone type of the contact you want to send a message to.”
5. Wait for the beep and say a contact that is in your phonebook, or a mobile phone number that you would like to send the message to.
6. Uconnect® will prompt you “Please say the message that you would like to send.” (If you do not hear this prompt, you may not have an active subscription with Uconnect®
Access).
7. Wait for the beep, and then dictate any message up to 140 characters. If you exceed 140 characters, you will hear the following prompt: “Message was too long; your message will
be truncated.”
8. Uconnect® will then repeat the message back to you.
9.
Uconnect® will prompt you: “To add to your message, say “Continue”; To delete the current
message and start over, say “Start Over”; to send the current message, say “Send”; to hear
the message again, say “Repeat”.
10.If you are happy with your message and would like to send it, wait for the beep and say
“Send”.
11. Uconnect® will then say “Sending your message.”
ELECTRONICS
61
Page 66 of 188
If equipped, the Via Mobile apps can be found by selecting the “Apps” soft-key in the lower
right corner of the radio touchscreen. Via Mobile apps are listed under the “All Apps” tab.
The words “Via Mobile” will appear after the app name indicating it is a Via Mobile app.
Via Mobile apps can also be launched through Voice Recognition by pressing the VR button
on the steering wheel and stating “launch” and then the name of the app. For example, you
can say “launch Aha via Mobile.”
NOTE:
For detailed information on how to use Via Mobile apps visit the Mopar Owner Connect
website (www.moparownerconnect.com) and login using the username and password you
set up when registering for Uconnect® Access.
A message will be displayed to remind you that Via Mobile apps utilize the data plan on your
connected smartphone to provide content. Many smartphones have a limit to how much
data they can utilize before incurring additional charges. The amount of data being used
varies by smartphone device, cellular service provider and specific app. Check your mobile
phone service plan for more details.* Touch “OK” to continue or the “X” to exit.
(*Additional smartphone data usage charges may apply.)
Favorite Apps
ELECTRONICS
64
Page 70 of 188
SiriusXM Premier Over 160 Channels
•Get every channel available on your satellite radio, and enjoy all you want, all in one place.
Hear commercial-free music plus sports, news, talk and entertainment. Get all the premium
programming, including Howard Stern, every NFL game, Oprah Radio®, every MLB® and
NHL® game, every NASCAR® race, Martha Stewart and more. And get 20+ extra channels,
including SiriusXM Latino, offering 20 channels of commercial free music, news, talk,
comedy, sports and more dedicated to Spanish language programming.
• To access SiriusXM Satellite Radio, press the RADIO hard-key and then the “SXM” soft-key.
• SiriusXM services require subscriptions, sold separately after the 12-month trial in- cluded with the new vehicle purchase. If you decide to continue your service at the end
of your trial subscription, the plan you choose will automatically renew and bill at
then-current rates until you call SiriusXM at 1-866-635-2349 for U.S. residents and
1-888-539-7474 for Canadian residents to cancel. See SiriusXM Customer Agreement
for complete terms at www.siriusxm.com for U.S. residents and www.siriusxm.ca for
Canadian residents. All fees and programming subject to change. Our satellite service is
available only to those at least 18 and older in the 48 contiguous USA and D.C. Our Sirius
satellite service is also available in PR (with coverage limitations). Our Internet radio
service is available throughout our satellite service area and in AK and HI. ©2014 Sirius
XM Radio Inc. Sirius, XM and all related marks and logos are trademarks of Sirius XM
Radio Inc.
Disc Operation
• Your vehicle may have a remote CD player located in the lower center console storage bin.
• CD/Disc Mode is entered by either inserting a CD/Disc or by touching the “Media” button located on the side of the display. Once in Media Mode, select “Disc”.
• Gently insert one CD into the CD player with the CD label facing as indicated on the illustration located on the Disc player.
Seek Up/Down Buttons
• Press to seek through Disc tracks.
• Hold either button to bypass tracks without stopping.
Browse
• Touch the “Browse” soft-key to scroll through and select a desired track on the Disc. Touch the “Exit” soft-key if you wish to cancel the browse function.
ELECTRONICS
68
Page 72 of 188
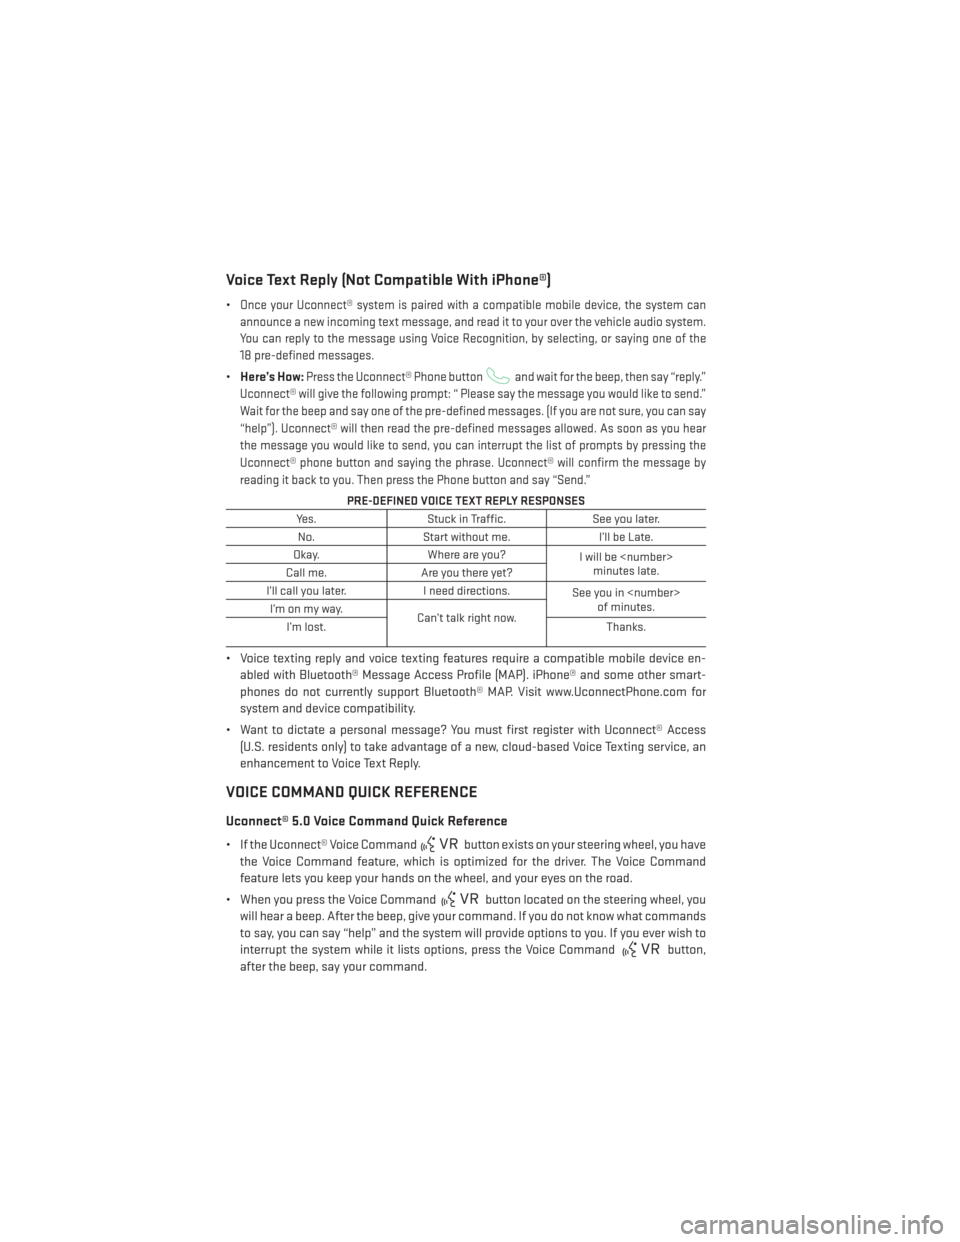
Voice Text Reply (Not Compatible With iPhone®)
•Once your Uconnect® system is paired with a compatible mobile device, the system can
announce a new incoming text message, and read it to your over the vehicle audio system.
You can reply to the message using Voice Recognition, by selecting, or saying one of the
18 pre-defined messages.
• Here’s How:Press the Uconnect® Phone buttonand wait for the beep, then say “reply.”
Uconnect® will give the following prompt: “ Please say the message you would like to send.”
Wait for the beep and say one of the pre-defined messages. (If you are not sure, you can say
“help”). Uconnect® will then read the pre-defined messages allowed. As soon as you hear
the message you would like to send, you can interrupt the list of prompts by pressing the
Uconnect® phone button and saying the phrase. Uconnect® will confirm the message by
reading it back to you. Then press the Phone button and say “Send.”
PRE-DEFINED VOICE TEXT REPLY RESPONSES
Yes. Stuck in Traffic. See you later.
No. Start without me. I’ll be Late.
Okay. Where are you?
I will be
minutes late.
Call me. Are you there yet?
I’ll call you later. I need directions.
See you in
of minutes.
I’monmyway.
Can’t talk right now.
I’m lost. Thanks.
• Voice texting reply and voice texting features require a compatible mobile device en-
abled with Bluetooth® Message Access Profile (MAP). iPhone® and some other smart-
phones do not currently support Bluetooth® MAP. Visit www.UconnectPhone.com for
system and device compatibility.
• Want to dictate a personal message? You must first register with Uconnect® Access (U.S. residents only) to take advantage of a new, cloud-based Voice Texting service, an
enhancement to Voice Text Reply.
VOICE COMMAND QUICK REFERENCE
Uconnect® 5.0 Voice Command Quick Reference
• If the Uconnect® Voice Commandbutton exists on your steering wheel, you have
the Voice Command feature, which is optimized for the driver. The Voice Command
feature lets you keep your hands on the wheel, and your eyes on the road.
• When you press the Voice Command
button located on the steering wheel, you
will hear a beep. After the beep, give your command. If you do not know what commands
to say, you can say “help” and the system will provide options to you. If you ever wish to
interrupt the system while it lists options, press the Voice Command
button,
after the beep, say your command.
ELECTRONICS
70