removal DODGE DURANGO 2015 3.G User Guide
[x] Cancel search | Manufacturer: DODGE, Model Year: 2015, Model line: DURANGO, Model: DODGE DURANGO 2015 3.GPages: 236, PDF Size: 35.01 MB
Page 28 of 236
Active Head Restraints — Front Seats
Active Head Restraints are passive, deployable components, and vehicles with this
equipment cannot be readily identified by any markings, only through visual inspection of
the head restraint. The Active Head Restraints (AHR) will be split in two halves, with the
front half being soft foam and trim, the back half being decorative plastic.
When AHRs deploy during a rear impact, the front half of the head restraint extends
forward to minimize the gap between the back of the occupant’s head and the AHR. This
system is designed to help prevent or reduce the extent of injuries to the driver and front
passenger in certain types of rear impacts. Refer to “Occupant Restraints” in “Things To
Know Before Starting” in your Owner’s Manual on the DVD for further information.
To r a i s e t h e h e a d r e s t r a i n t , p u l l u p w a r d o n t h e h e a d r e s t r a i n t . To l o w e r t h e h e a d r e s t r a i n t ,
push the adjustment button, located at the base of the head restraint, and push downward
on the head restraint.
For comfort the Active Head Restraints can be tilted forward and rearward. To tilt the head
restraint closer to the back of your head, pull forward on the bottom of the head restraint.
Push rearward on the bottom of the head restraint to move the head restraint away from
your head.
NOTE:
•Theheadrestraintsshouldonlyberemovedbyqualifiedtechnicians,forservice
purposes only. If either of the head restraints require removal, see your authorized
dealer.
•IntheeventofdeploymentofanActiveHeadRestraint,referto“OccupantRestraints”
in “Things To Know Before Starting” in your Owner’s Manual on the DVD for further
information.
WARNING!
•Do not place items over the top of the Active Head Restraint, such as coats, seat covers
or portable DVD players. These items may interfere with the operation of the Active Head
Restraint in the event of a collision and could result in serious injury or death.
•ActiveHeadRestraintsmaybedeployediftheyarestruckbyanobjectsuchasa
hand, foot or loose cargo. To avoid accidental deployment of the Active Head
Restraint ensure that all cargo is secured, as loose cargo could contact the Active
Head Restraint during sudden stops. Failure to follow this warning could cause
personal injury if the Active Head Restraint is deployed.
GETTING STARTED
26
Page 164 of 236
Trailer Hitch Receiver Cover Removal — If Equipped
Yo u r v e h i c l e m a y b e e q u i p p e d w i t h a t r a i l e r h i t c h r e c e i v e r c o v e r, t h i s m u s t b e r e m o v e d t o
access the trailer hitch receiver (if equipped). This cover is located at the bottom center
of the rear fascia.
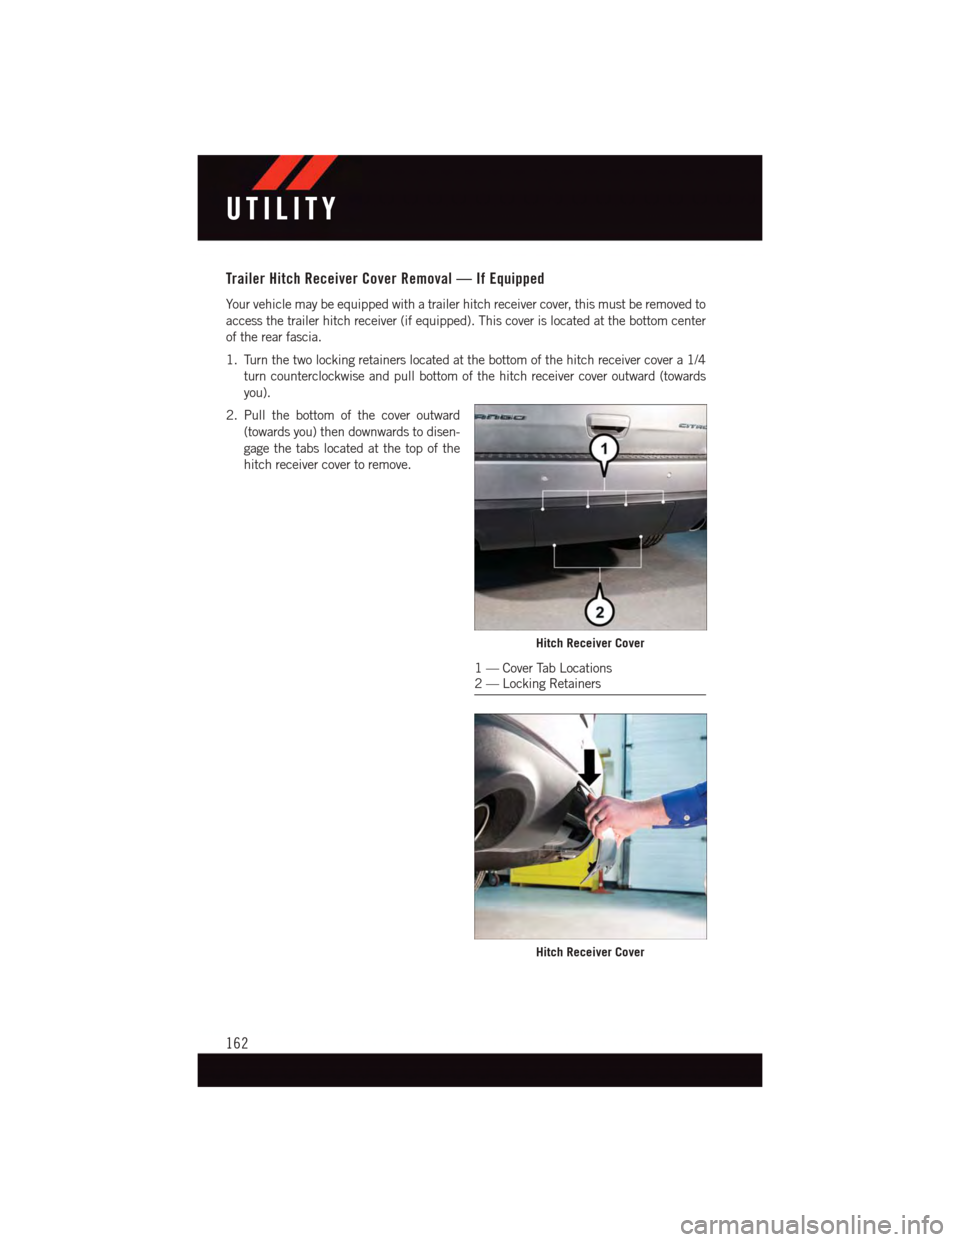
1. Turn the two locking retainers located at the bottom of the hitch receiver cover a 1/4
turn counterclockwise and pull bottom of the hitch receiver cover outward (towards
you).
2. Pull the bottom of the cover outward
(towards you) then downwards to disen-
gage the tabs located at the top of the
hitch receiver cover to remove.
Hitch Receiver Cover
1—CoverTabLocations2—LockingRetainers
Hitch Receiver Cover
UTILITY
162
Page 178 of 236
JACKING AND TIRE CHANGING
Jack Location
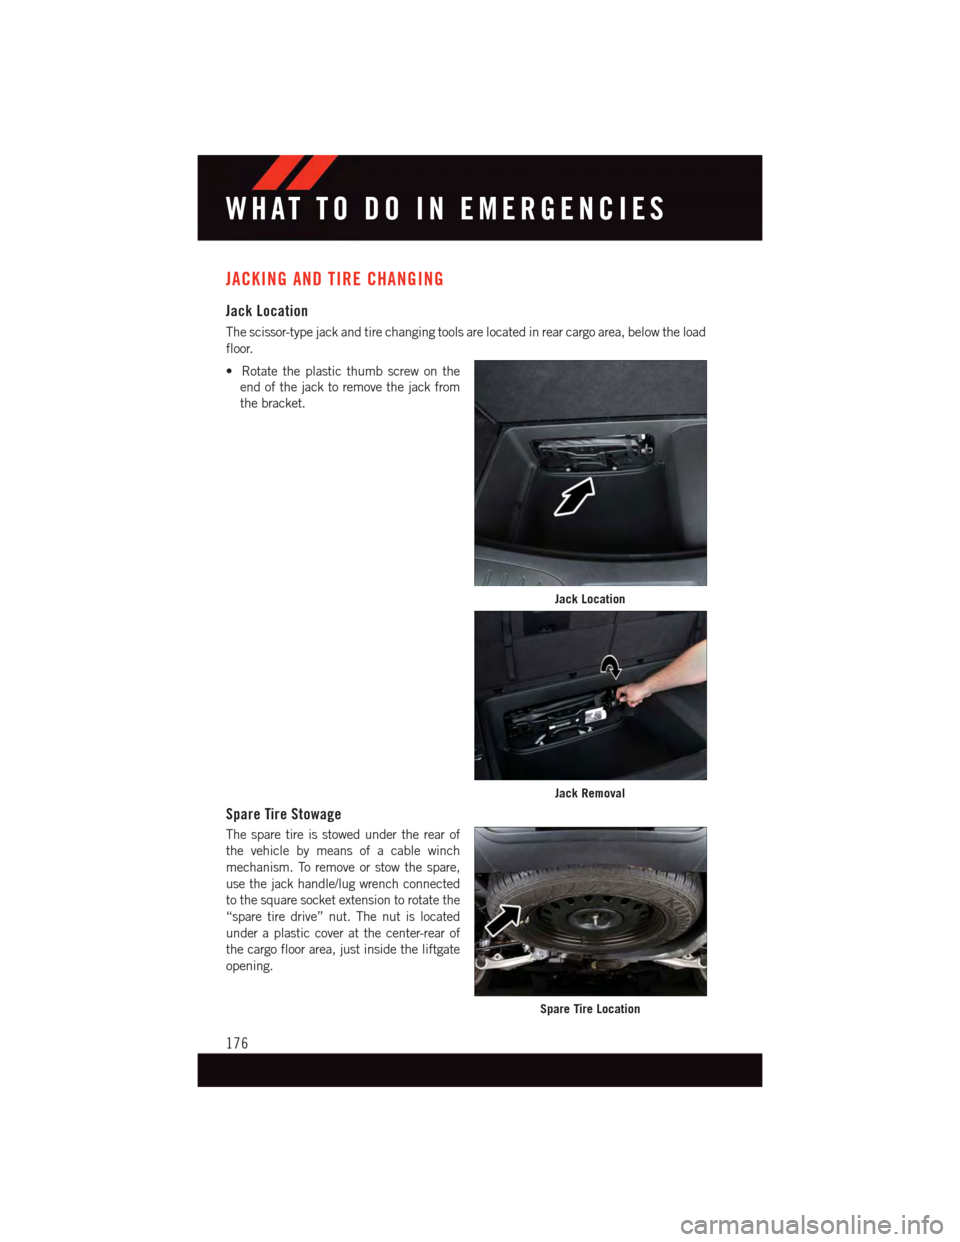
The scissor-type jack and tire changing tools are located in rear cargo area, below the load
floor.
•Rotatetheplasticthumbscrewonthe
end of the jack to remove the jack from
the bracket.
Spare Tire Stowage
The spare tire is stowed under the rear of
the vehicle by means of a cable winch
mechanism. To remove or stow the spare,
use the jack handle/lug wrench connected
to the square socket extension to rotate the
“spare tire drive” nut. The nut is located
under a plastic cover at the center-rear of
the cargo floor area, just inside the liftgate
opening.
Jack Location
Jack Removal
Spare Tire Location
WHAT TO DO IN EMERGENCIES
176
Page 179 of 236
Spare Tire Removal
1. Remove the jack tools from the bag.
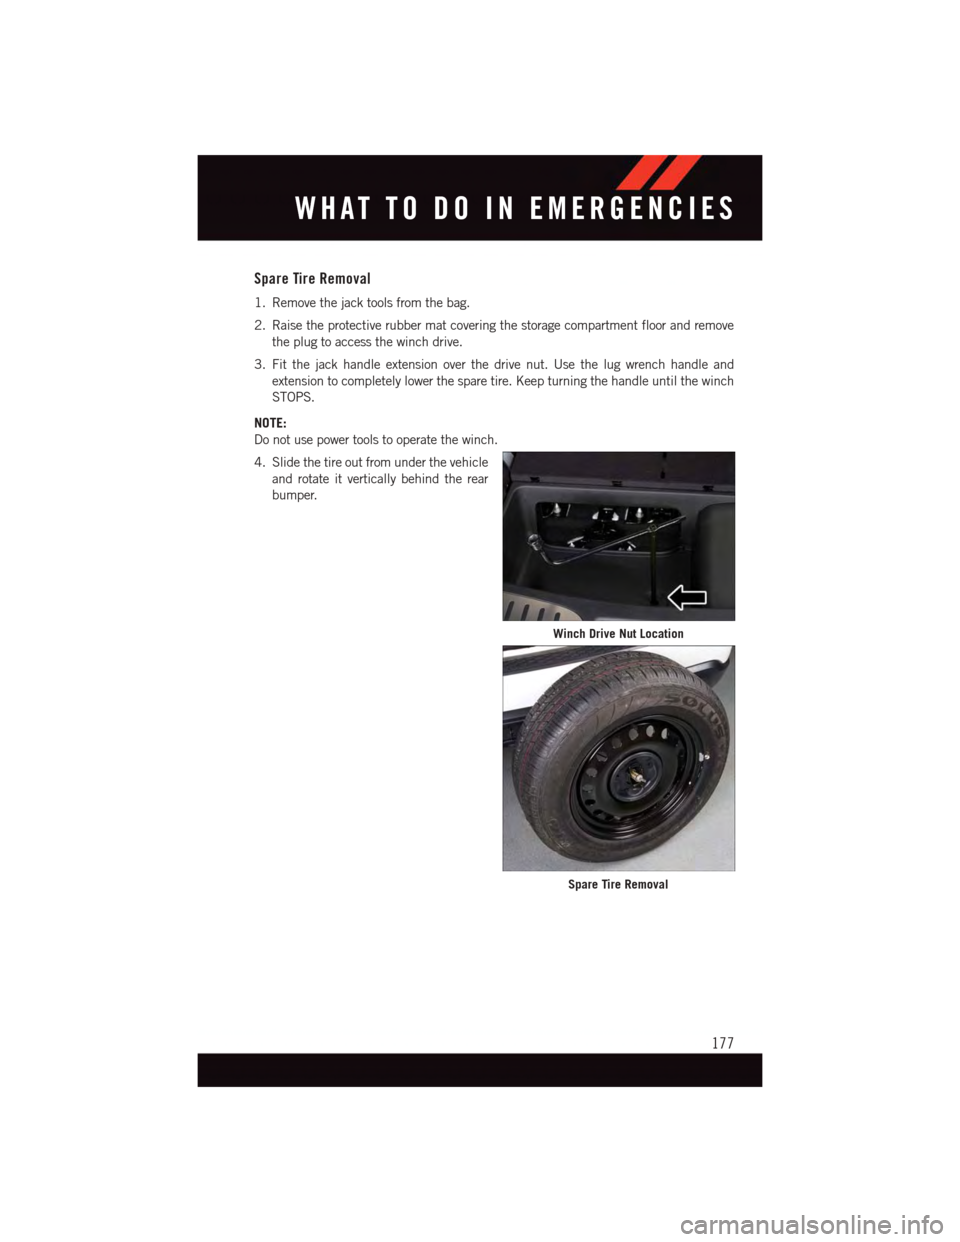
2. Raise the protective rubber mat covering the storage compartment floor and remove
the plug to access the winch drive.
3. Fit the jack handle extension over the drive nut. Use the lug wrench handle and
extension to completely lower the spare tire. Keep turning the handle until the winch
STOPS.
NOTE:
Do not use power tools to operate the winch.
4. Slide the tire out from under the vehicle
and rotate it vertically behind the rear
bumper.
Winch Drive Nut Location
Spare Tire Removal
WHAT TO DO IN EMERGENCIES
177
Page 180 of 236
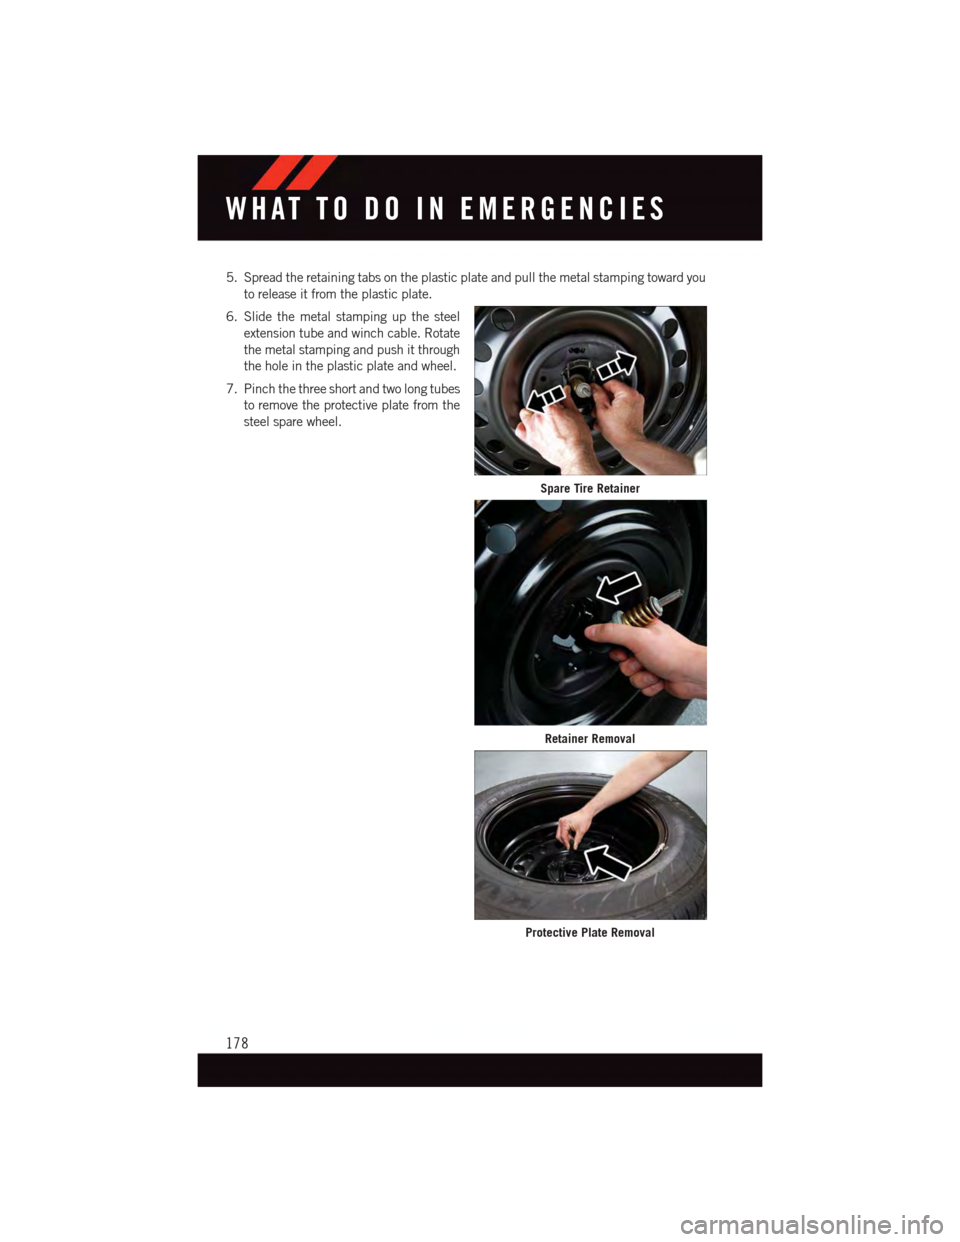
5. Spread the retaining tabs on the plastic plate and pull the metal stamping toward you
to release it from the plastic plate.
6. Slide the metal stamping up the steel
extension tube and winch cable. Rotate
the metal stamping and push it through
the hole in the plastic plate and wheel.
7. Pinch the three short and two long tubes
to remove the protective plate from the
steel spare wheel.
Spare Tire Retainer
Retainer Removal
Protective Plate Removal
WHAT TO DO IN EMERGENCIES
178