DODGE DURANGO 2018 Owners Manual
DURANGO 2018
DODGE
DODGE
https://www.carmanualsonline.info/img/12/40520/w960_40520-0.png
DODGE DURANGO 2018 Owners Manual
Trending: tire type, sunroof, fuel filter, ESP, ignition, Air Filters, bolt pattern
Page 131 of 592
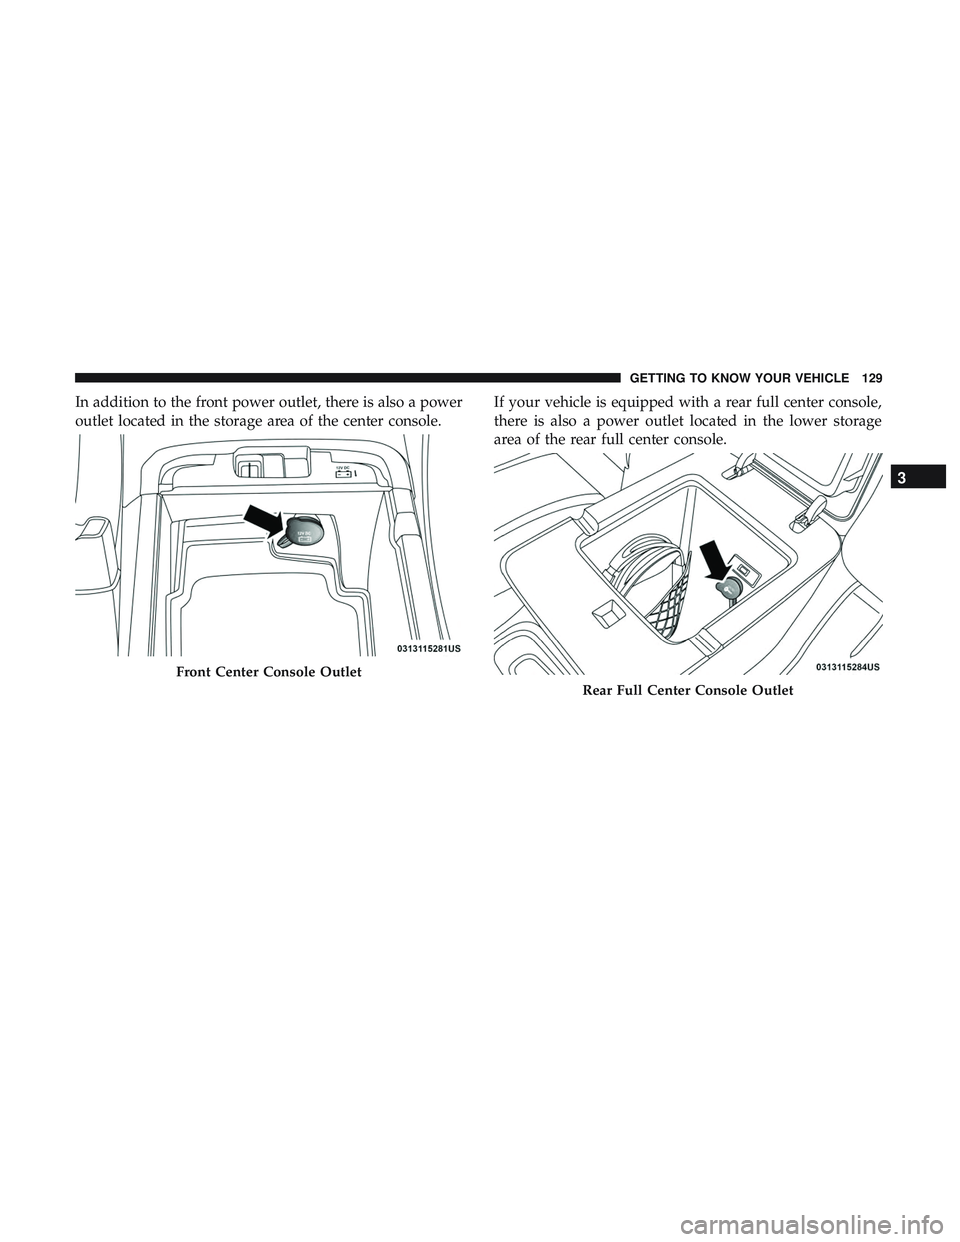
In addition to the front power outlet, there is also a power
outlet located in the storage area of the center console.If your vehicle is equipped with a rear full center console,
there is also a power outlet located in the lower storage
area of the rear full center console.
Front Center Console Outlet
Rear Full Center Console Outlet
3
GETTING TO KNOW YOUR VEHICLE 129
Page 132 of 592
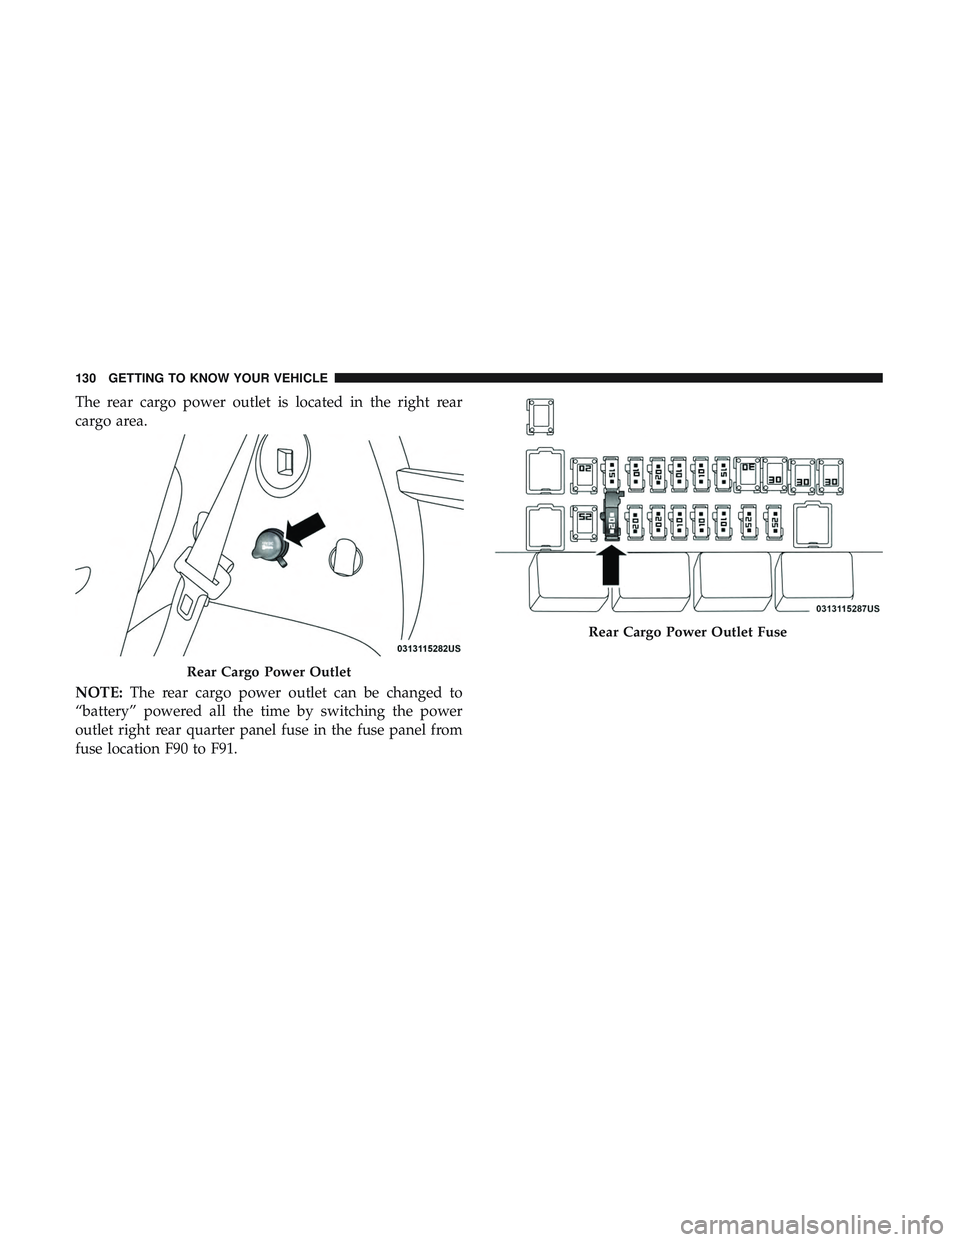
The rear cargo power outlet is located in the right rear
cargo area.
NOTE:The rear cargo power outlet can be changed to
“battery” powered all the time by switching the power
outlet right rear quarter panel fuse in the fuse panel from
fuse location F90 to F91.
Rear Cargo Power Outlet
Rear Cargo Power Outlet Fuse
130 GETTING TO KNOW YOUR VEHICLE
Page 133 of 592
WARNING!
To avoid serious injury or death:
•Only devices designed for use in this type of outlet
should be inserted into any 12 Volt outlet.
• Do not touch with wet hands.
(Continued)
WARNING! (Continued)
•Close the lid when not in use and while driving the
vehicle.
• If this outlet is mishandled, it may cause an electric
shock and failure.
CAUTION!
•Many accessories that can be plugged in draw power
from the vehicle’s battery, even when not in use (i.e.,
cellular phones, etc.). Eventually, if plugged in long
enough, the vehicle’s battery will discharge suffi-
ciently to degrade battery life and/or prevent the
engine from starting.
• Accessories that draw higher power (i.e., coolers,
vacuum cleaners, lights, etc.) will degrade the battery
even more quickly. Only use these intermittently and
with greater caution.
• After the use of high power draw accessories, or long
periods of the vehicle not being started (with acces-
sories still plugged in), the vehicle must be driven a
sufficient length of time to allow the generator to
recharge the vehicle’s battery.
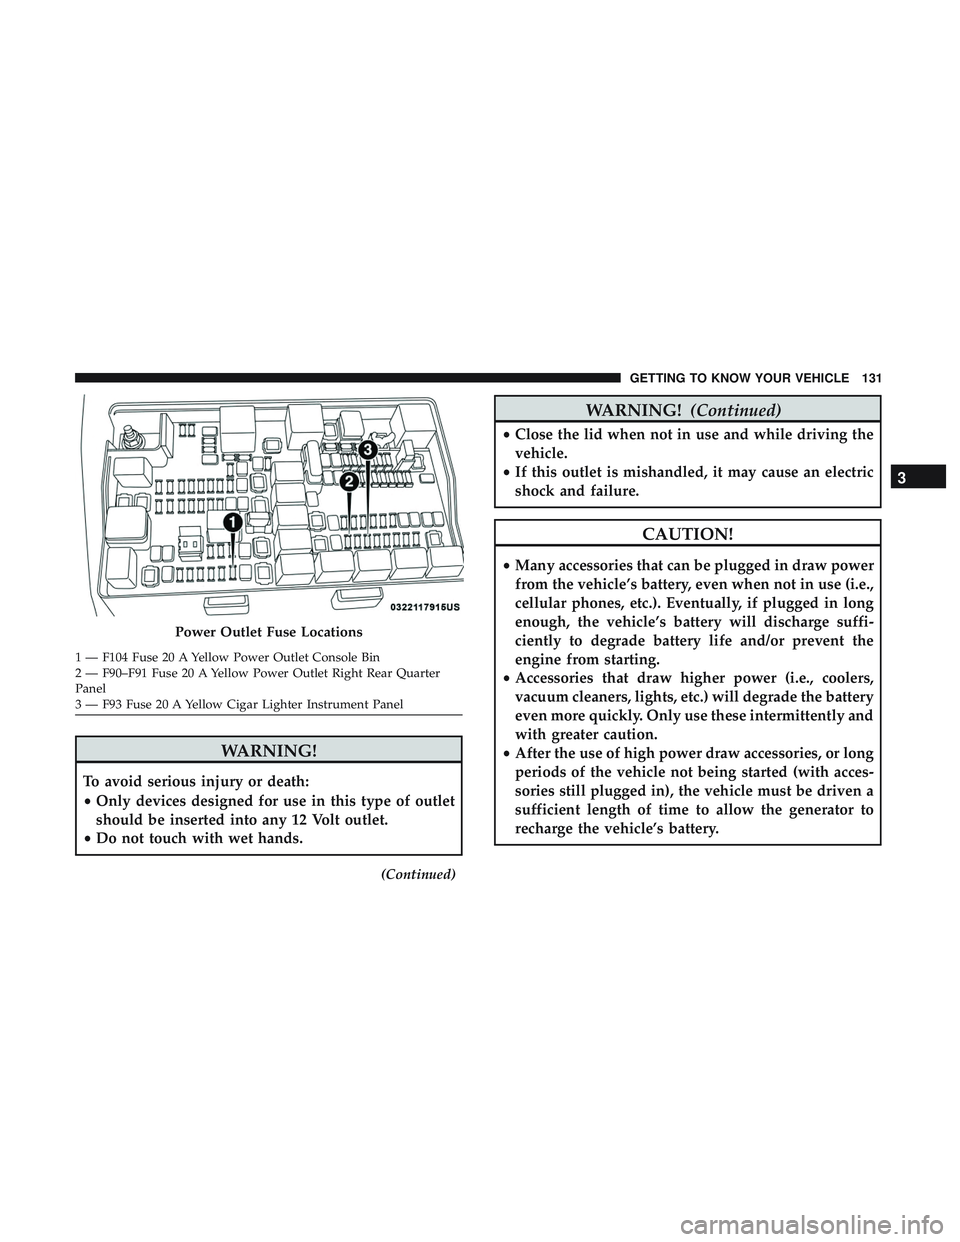
Power Outlet Fuse Locations
1 — F104 Fuse 20 A Yellow Power Outlet Console Bin
2 — F90–F91 Fuse 20 A Yellow Power Outlet Right Rear Quarter
Panel
3 — F93 Fuse 20 A Yellow Cigar Lighter Instrument Panel
3
GETTING TO KNOW YOUR VEHICLE 131
Page 134 of 592
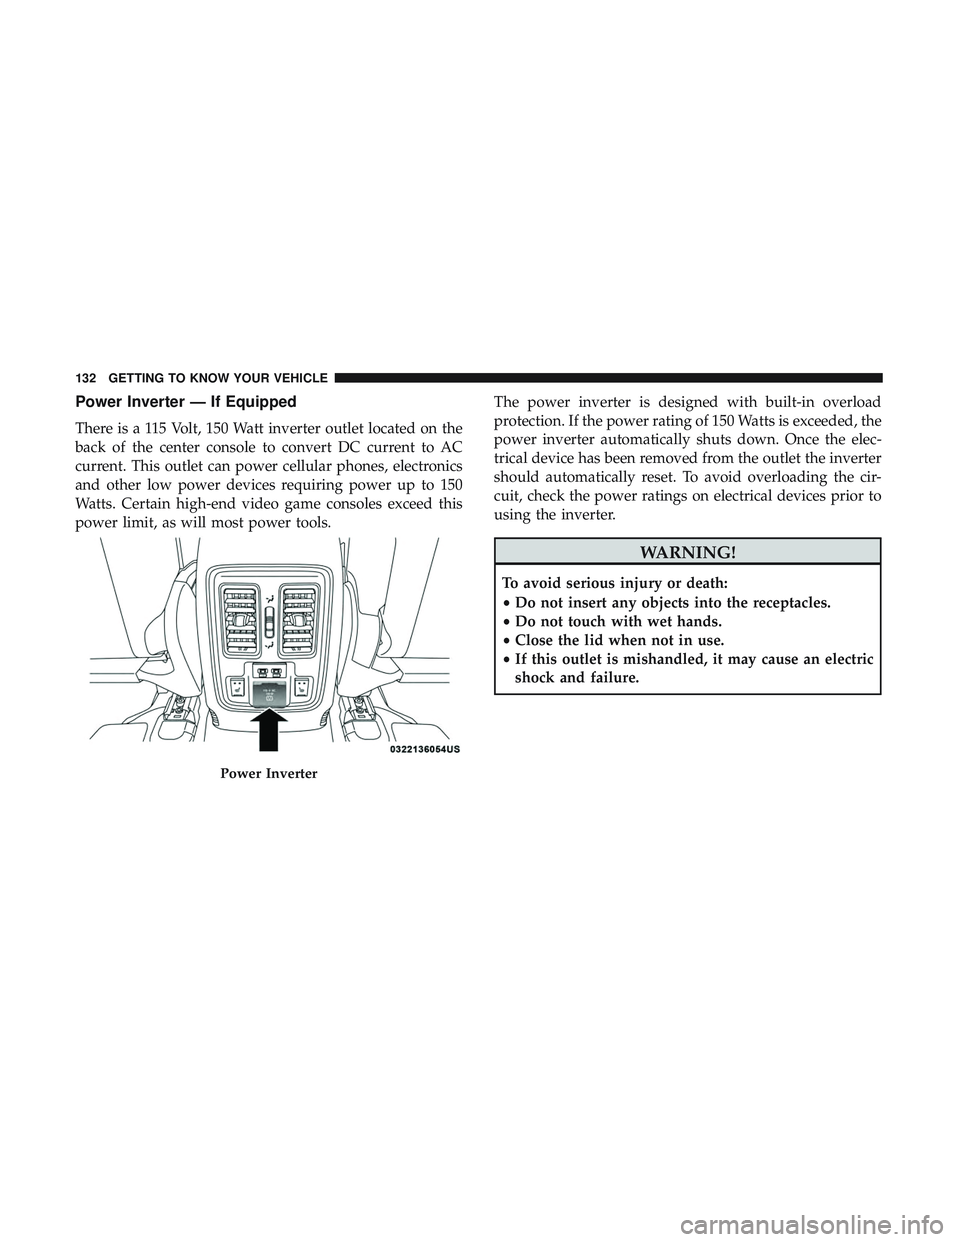
Power Inverter — If Equipped
There is a 115 Volt, 150 Watt inverter outlet located on the
back of the center console to convert DC current to AC
current. This outlet can power cellular phones, electronics
and other low power devices requiring power up to 150
Watts. Certain high-end video game consoles exceed this
power limit, as will most power tools.The power inverter is designed with built-in overload
protection. If the power rating of 150 Watts is exceeded, the
power inverter automatically shuts down. Once the elec-
trical device has been removed from the outlet the inverter
should automatically reset. To avoid overloading the cir-
cuit, check the power ratings on electrical devices prior to
using the inverter.
WARNING!
To avoid serious injury or death:
•
Do not insert any objects into the receptacles.
• Do not touch with wet hands.
• Close the lid when not in use.
• If this outlet is mishandled, it may cause an electric
shock and failure.
Power Inverter
132 GETTING TO KNOW YOUR VEHICLE
Page 135 of 592
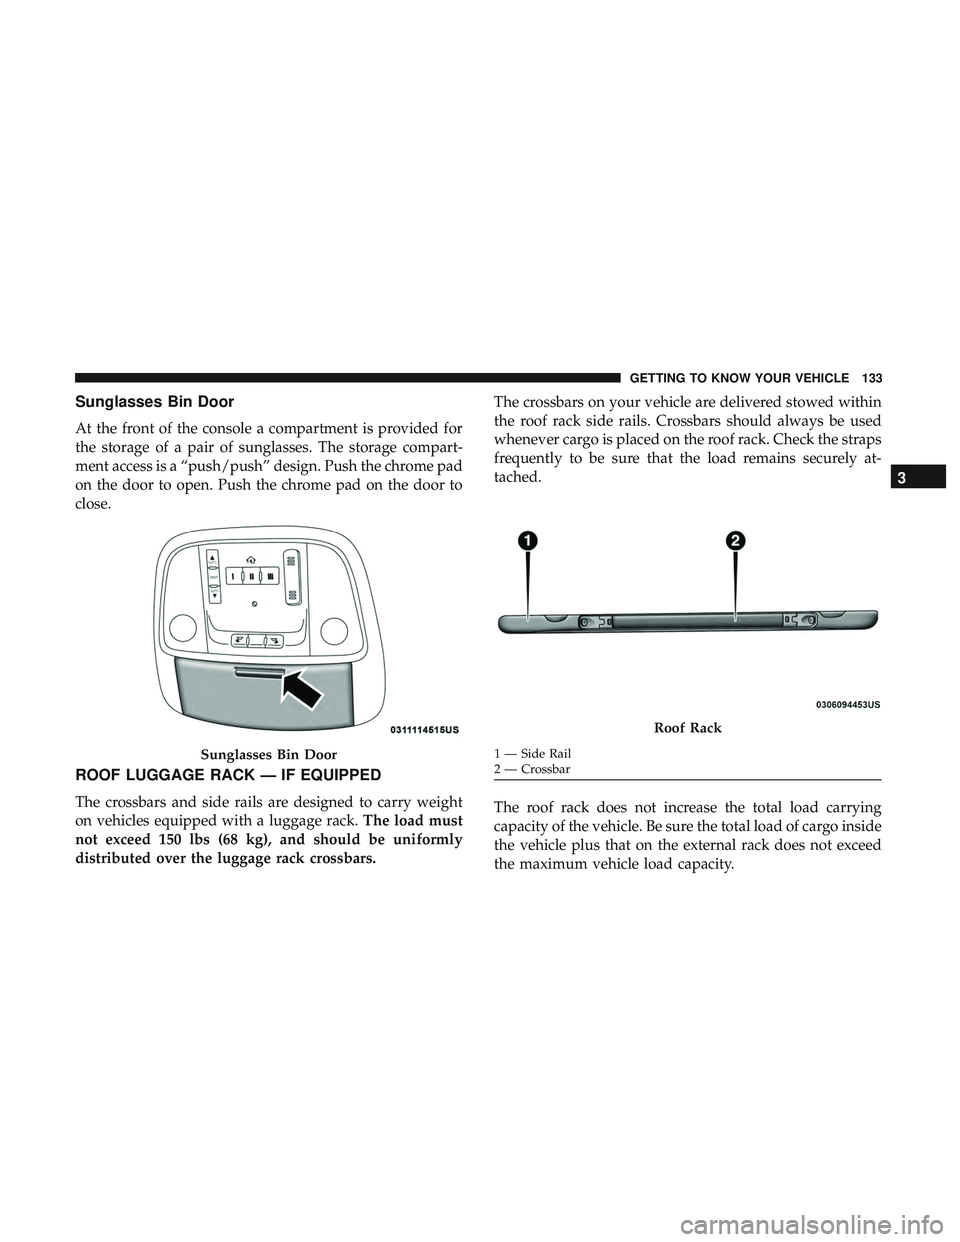
Sunglasses Bin Door
At the front of the console a compartment is provided for
the storage of a pair of sunglasses. The storage compart-
ment access is a “push/push” design. Push the chrome pad
on the door to open. Push the chrome pad on the door to
close.
ROOF LUGGAGE RACK — IF EQUIPPED
The crossbars and side rails are designed to carry weight
on vehicles equipped with a luggage rack.The load must
not exceed 150 lbs (68 kg), and should be uniformly
distributed over the luggage rack crossbars. The crossbars on your vehicle are delivered stowed within
the roof rack side rails. Crossbars should always be used
whenever cargo is placed on the roof rack. Check the straps
frequently to be sure that the load remains securely at-
tached.
The roof rack does not increase the total load carrying
capacity of the vehicle. Be sure the total load of cargo inside
the vehicle plus that on the external rack does not exceed
the maximum vehicle load capacity.
Sunglasses Bin Door
Roof Rack
1 — Side Rail
2 — Crossbar
3
GETTING TO KNOW YOUR VEHICLE 133
Page 136 of 592
Deploying The Crossbars
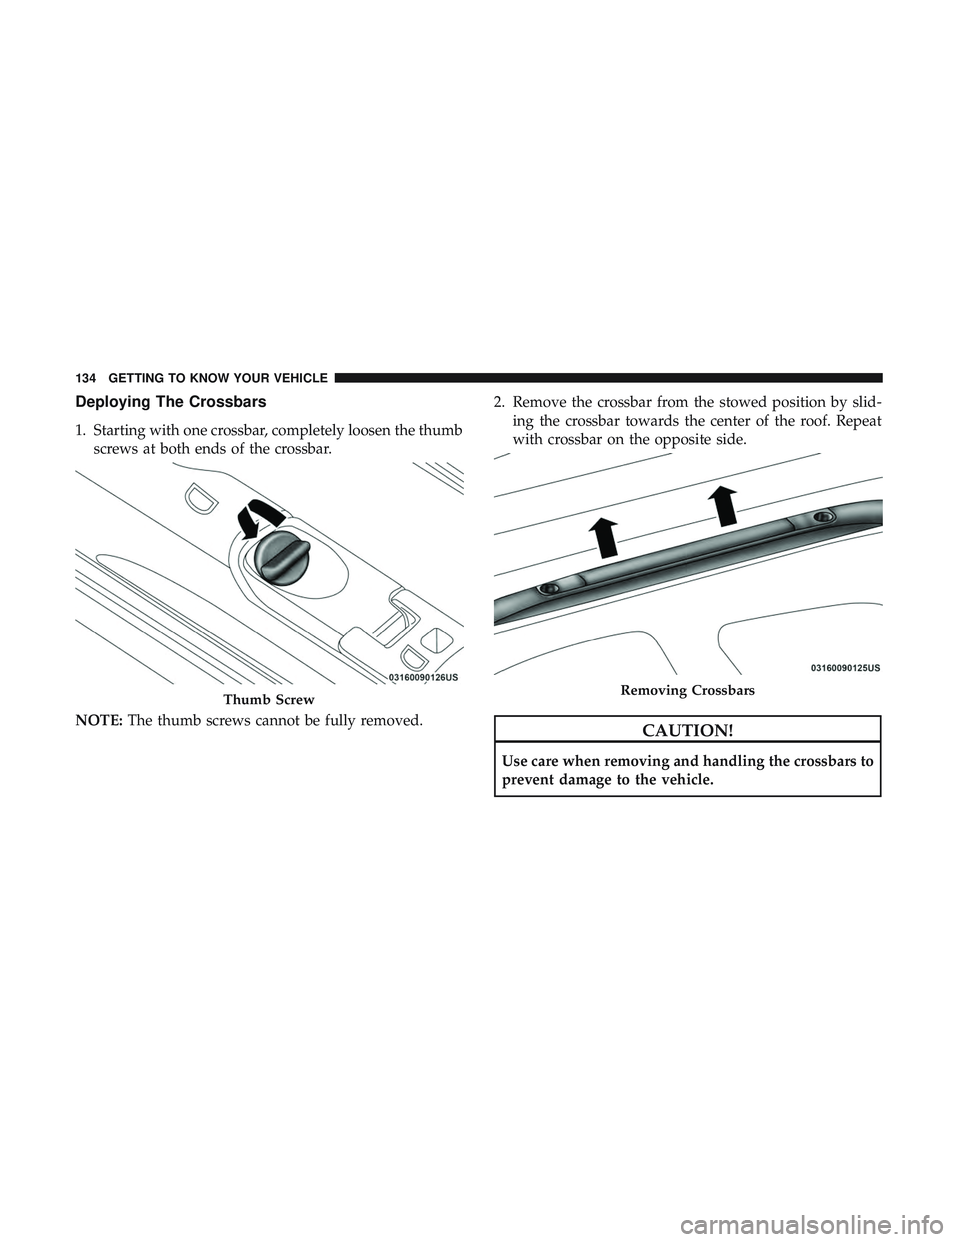
1. Starting with one crossbar, completely loosen the thumbscrews at both ends of the crossbar.
NOTE: The thumb screws cannot be fully removed. 2. Remove the crossbar from the stowed position by slid-
ing the crossbar towards the center of the roof. Repeat
with crossbar on the opposite side.
CAUTION!
Use care when removing and handling the crossbars to
prevent damage to the vehicle.
Thumb ScrewRemoving Crossbars
134 GETTING TO KNOW YOUR VEHICLE
Page 137 of 592
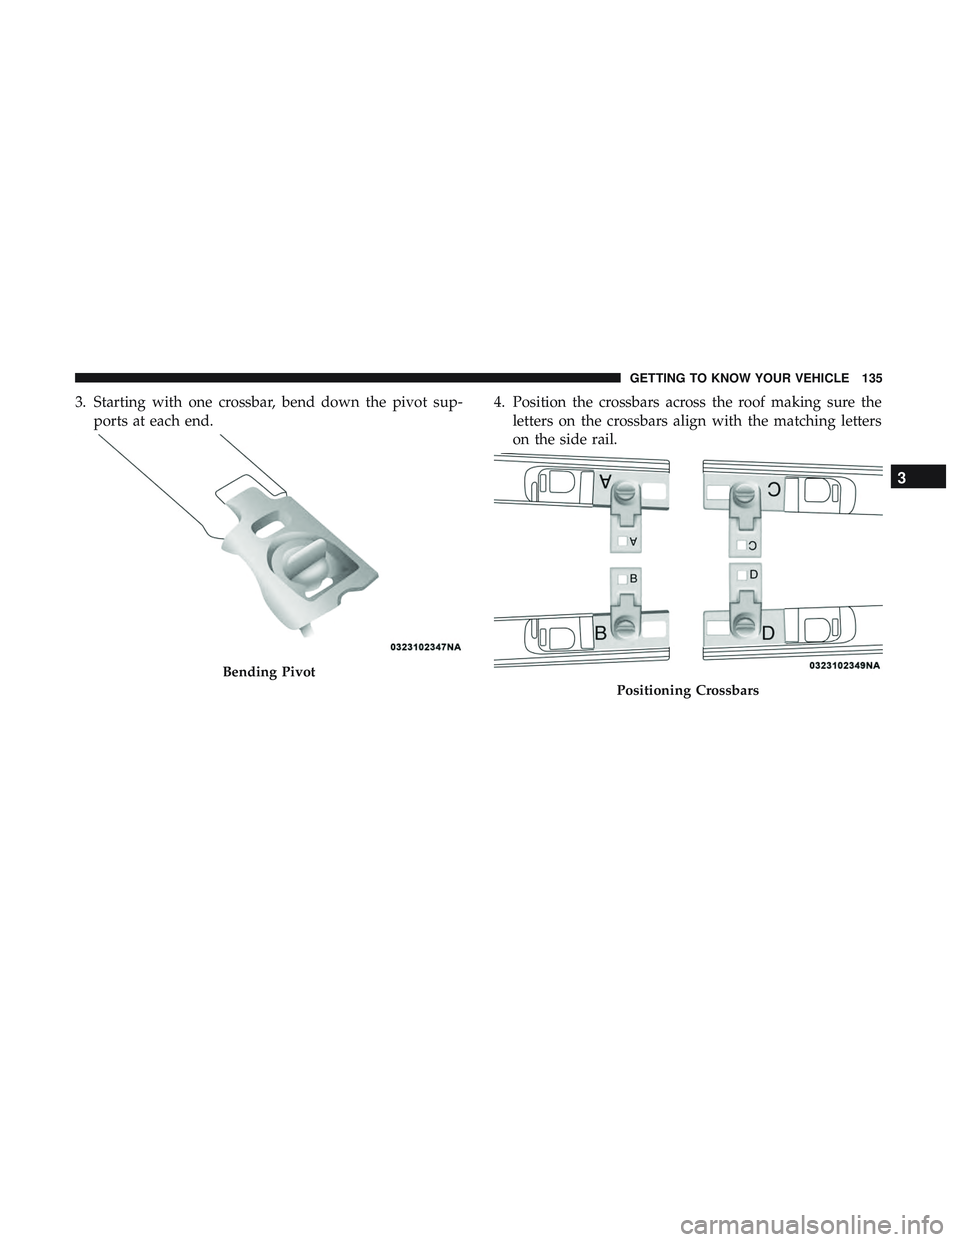
3. Starting with one crossbar, bend down the pivot sup-ports at each end. 4. Position the crossbars across the roof making sure the
letters on the crossbars align with the matching letters
on the side rail.
Bending Pivot
Positioning Crossbars
3
GETTING TO KNOW YOUR VEHICLE 135
Page 138 of 592
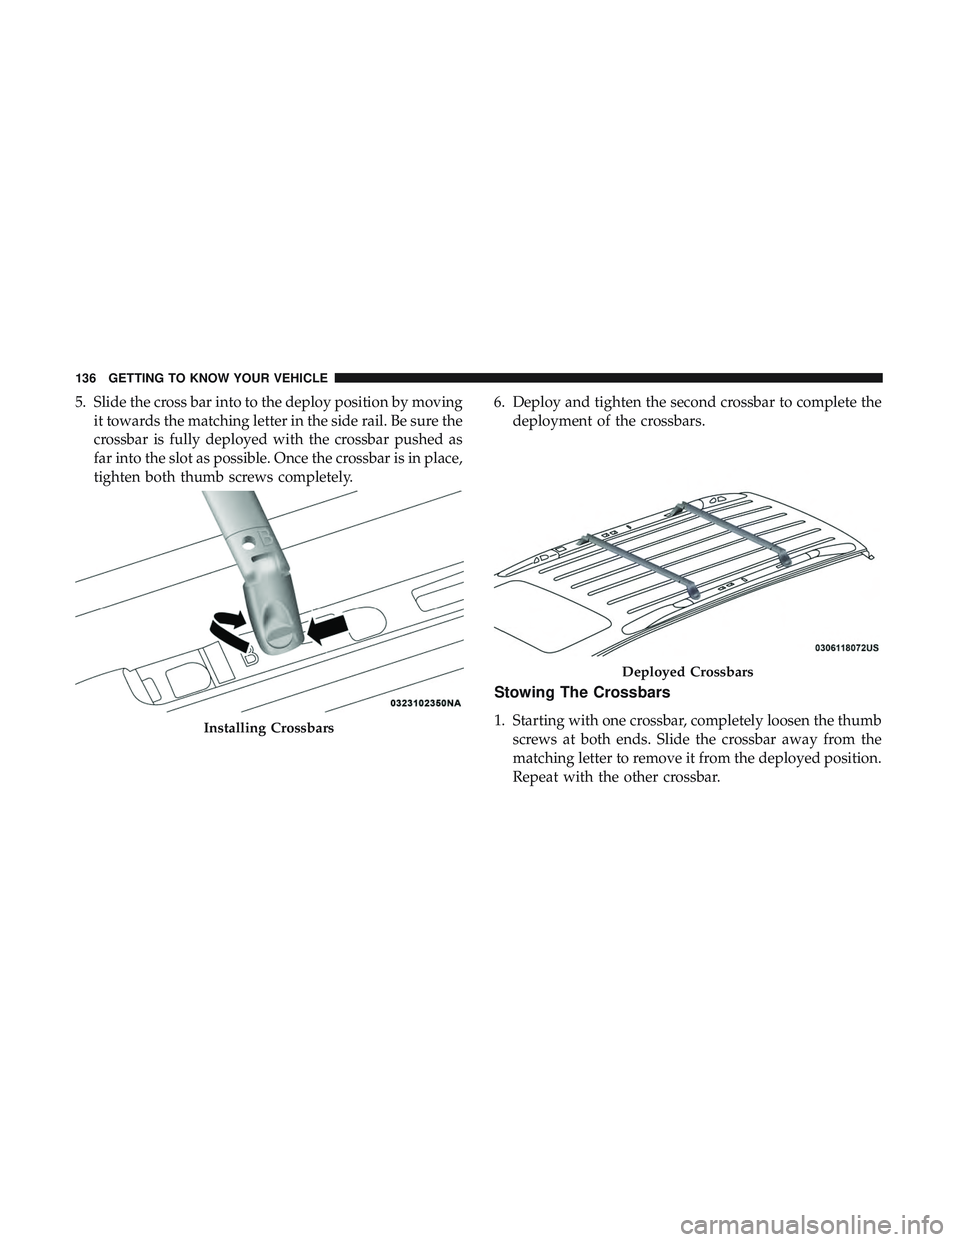
5. Slide the cross bar into to the deploy position by movingit towards the matching letter in the side rail. Be sure the
crossbar is fully deployed with the crossbar pushed as
far into the slot as possible. Once the crossbar is in place,
tighten both thumb screws completely. 6. Deploy and tighten the second crossbar to complete the
deployment of the crossbars.
Stowing The Crossbars
1. Starting with one crossbar, completely loosen the thumbscrews at both ends. Slide the crossbar away from the
matching letter to remove it from the deployed position.
Repeat with the other crossbar.Installing Crossbars
Deployed Crossbars
136 GETTING TO KNOW YOUR VEHICLE
Page 139 of 592
CAUTION!
Use care when removing and handling the crossbars to
prevent damage to the vehicle.
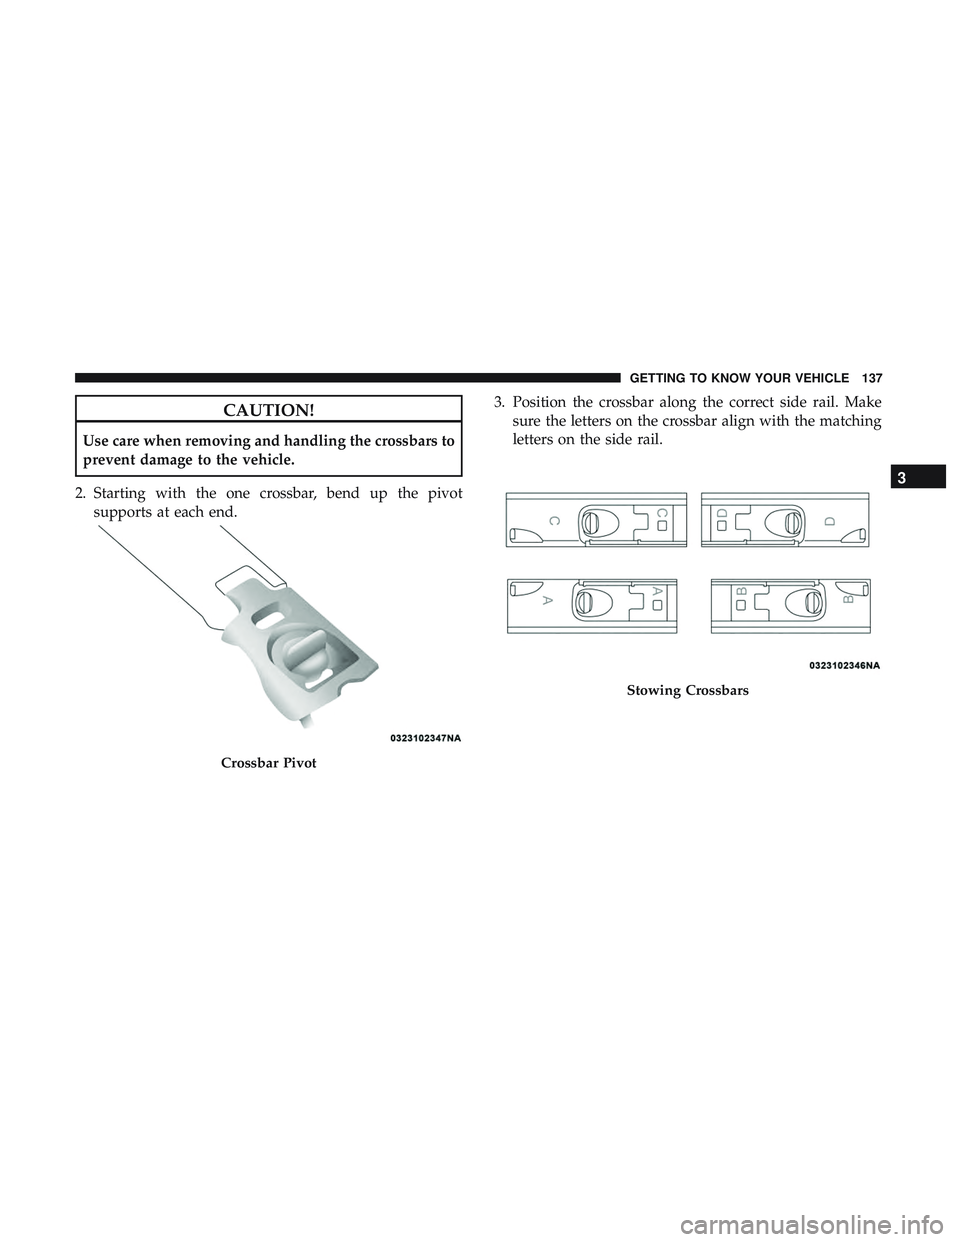
2. Starting with the one crossbar, bend up the pivot supports at each end. 3. Position the crossbar along the correct side rail. Make
sure the letters on the crossbar align with the matching
letters on the side rail.
Crossbar Pivot
Stowing Crossbars
3
GETTING TO KNOW YOUR VEHICLE 137
Page 140 of 592
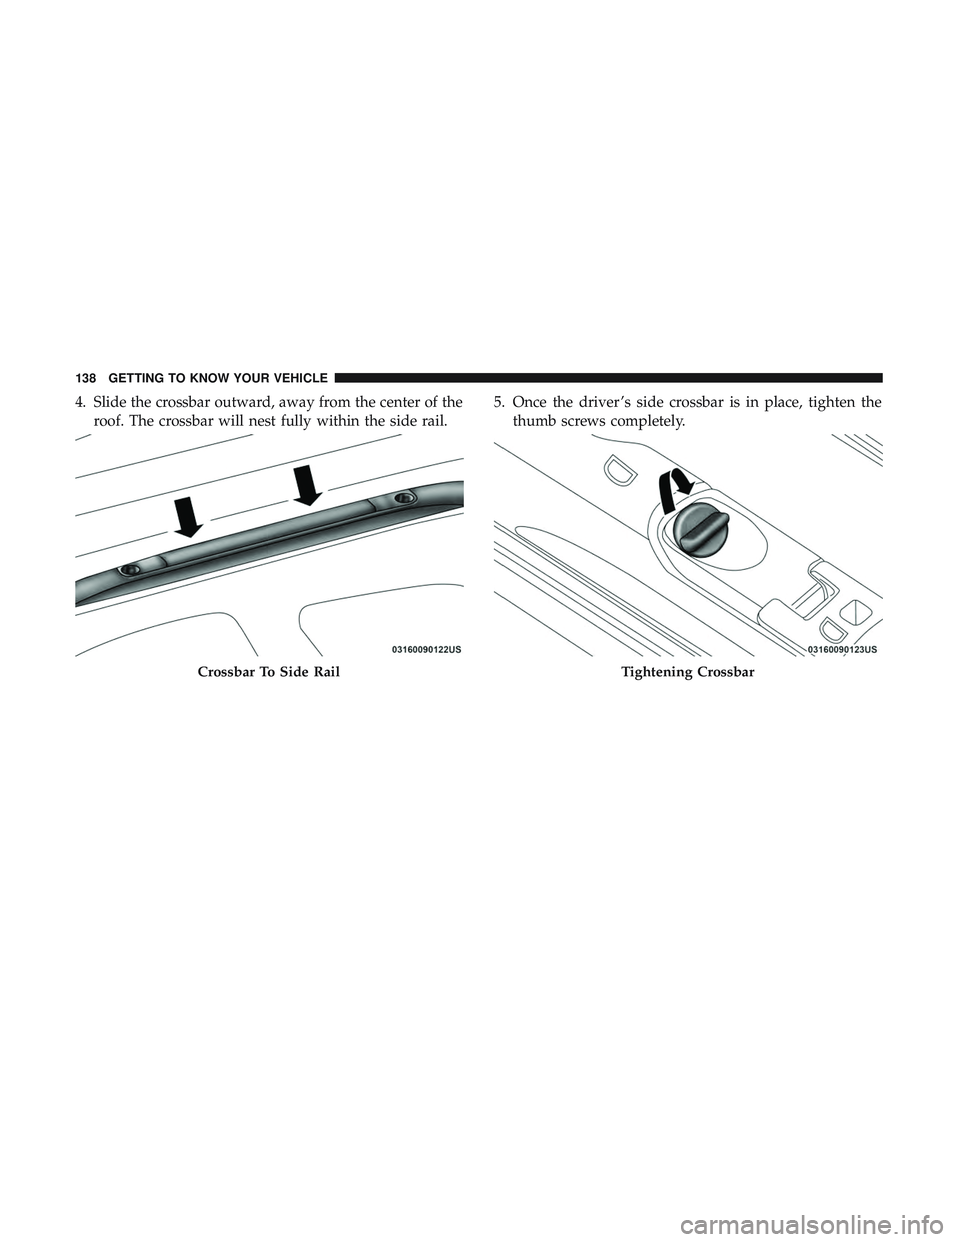
4. Slide the crossbar outward, away from the center of theroof. The crossbar will nest fully within the side rail. 5. Once the driver ’s side crossbar is in place, tighten the
thumb screws completely.
Crossbar To Side RailTightening Crossbar
138 GETTING TO KNOW YOUR VEHICLE
Trending: load capacity, service schedule, reset, reset sun roof, gas mileage, Radio, air condition
