driver memory DODGE DURANGO 2020 Owners Manual
[x] Cancel search | Manufacturer: DODGE, Model Year: 2020, Model line: DURANGO, Model: DODGE DURANGO 2020Pages: 464, PDF Size: 22.14 MB
Page 4 of 464

2
INTRODUCTION
HOW TO USE THIS MANUAL ...............................10
Essential Information .................................. 10
Symbols ........................................................ 10
ROLLOVER WARNING ..........................................10
WARNINGS AND CAUTIONS ...............................11
VEHICLE MODIFICATIONS/ALTERATIONS .........11
GETTING TO KNOW YOUR VEHICLE
VEHICLE USER GUIDE — IF EQUIPPED ...............12
KEYS ......................................................................13
Key Fob......................................................... 13
IGNITION SWITCH ................................................17
Keyless Push Button Ignition ...................... 17
Ignition Or Accessory On Message ............. 18
Depleted Key Fob Battery ........................... 18
REMOTE START — IF EQUIPPED .........................19
How To Use Remote Start .......................... 19
Remote Start Abort Message —
If Equipped ................................................... 20 To Enter Remote Start Mode ...................... 20
To Exit Remote Start Mode Without
Driving The Vehicle ..................................... 20 To Exit Remote Start Mode And Drive
The Vehicle ................................................... 20 Remote Start Comfort Systems —
If Equipped ................................................... 21 General Information .................................... 21 SENTRY KEY ......................................................... 21
Key Programming ....................................... 22
Replacement Keys ...................................... 22
General Information .................................... 22
VEHICLE SECURITY ALARM — IF EQUIPPED ..... 23
To Arm The System ...................................... 23
To Disarm The System ................................ 24
Rearming Of The System............................. 24
Tamper Alert................................................. 24
DOORS .................................................................. 24
Manual Door Locks...................................... 24
Power Door Locks ........................................ 25
Keyless Enter-N-Go — Passive Entry .......... 26
Automatic Unlock On Exit Feature — If
Equipped ...................................................... 29 Automatic Door Locks — If Equipped ......... 29
Child-Protection Door Lock System —
Rear Doors .................................................. 29
DRIVER MEMORY SETTINGS —
IF EQUIPPED ........................................................ 30
Programming The Memory Feature............ 31
Linking And Unlinking The Remote
Keyless Entry Key Fob To Memory ............. 31 Memory Position Recall............................... 31
SEATS ................................................................... 32
Manual Adjustment (Front Seats) — If
Equipped ...................................................... 32 Manual Adjustment (Rear Seats) ............... 34
Power Adjustment (Front Seats) —
If Equipped .................................................. 37 Power Passenger Seat Adjustment — If
Equipped ...................................................... 39 Heated Seats — If Equipped ...................... 40
Front Ventilated Seats — If Equipped ........ 42
HEAD RESTRAINTS ..............................................42
Supplemental Active Head Restraints —
Front Seats................................................... 42 Head Restraints — Rear Seats.................... 44
Head Restraint Removal — Rear Seats...... 44
Power Folding Third Row Head
Restraints ..................................................... 45
STEERING WHEEL.................................................46
Manual Tilt/Telescoping Steering
Column — If Equipped ................................ 46 Power Tilt/Telescoping Steering
Column — If Equipped ............................... 46 Heated Steering Wheel — If Equipped ...... 47
MIRRORS ..............................................................47
Inside Day/Night Mirror — If Equipped ...... 47
Automatic Dimming Mirror —
If Equipped .................................................. 48 Outside Mirrors ........................................... 48
Outside Automatic Dimming Mirrors —
If Equipped ................................................... 49 Power Mirrors .............................................. 49
Heated Mirrors — If Equipped .................... 49
Tilt Side Mirrors In Reverse (Available
With Memory Settings Only) —
If Equipped ................................................... 49 Illuminated Vanity Mirrors .......................... 50
20_WD_OM_EN_USC_t.book Page 2
Page 32 of 464

30GETTING TO KNOW YOUR VEHICLE
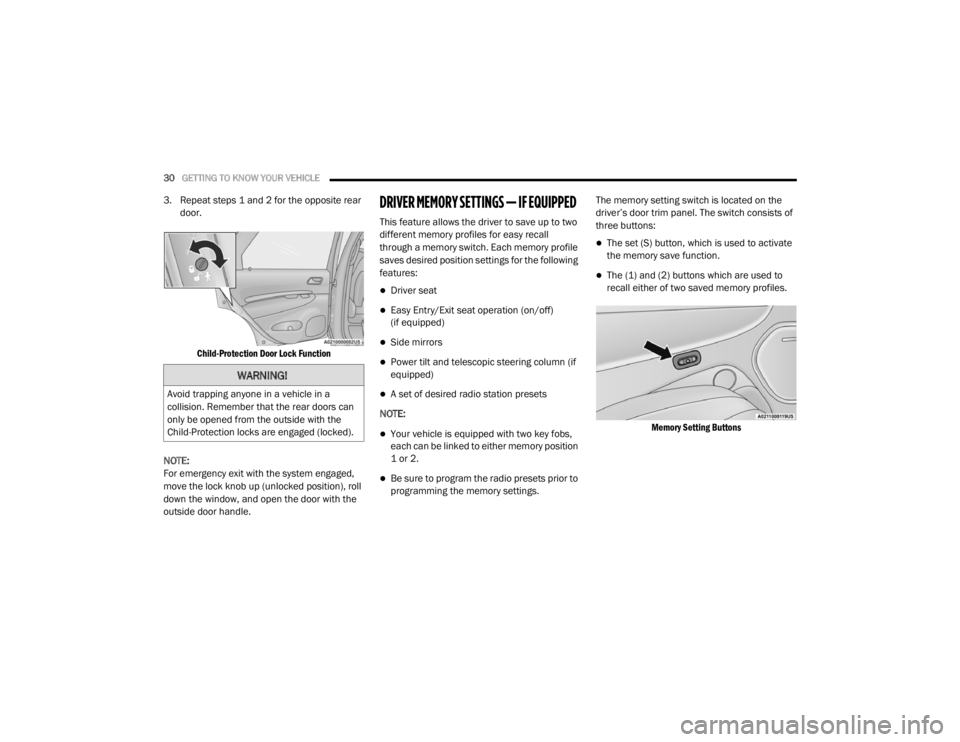
3. Repeat steps 1 and 2 for the opposite rear
door.
Child-Protection Door Lock Function
NOTE:
For emergency exit with the system engaged,
move the lock knob up (unlocked position), roll
down the window, and open the door with the
outside door handle.DRIVER MEMORY SETTINGS — IF EQUIPPED
This feature allows the driver to save up to two
different memory profiles for easy recall
through a memory switch. Each memory profile
saves desired position settings for the following
features:
Driver seat
Easy Entry/Exit seat operation (on/off)
(if equipped)
Side mirrors
Power tilt and telescopic steering column (if
equipped)
A set of desired radio station presets
NOTE:
Your vehicle is equipped with two key fobs,
each can be linked to either memory position
1 or 2.
Be sure to program the radio presets prior to
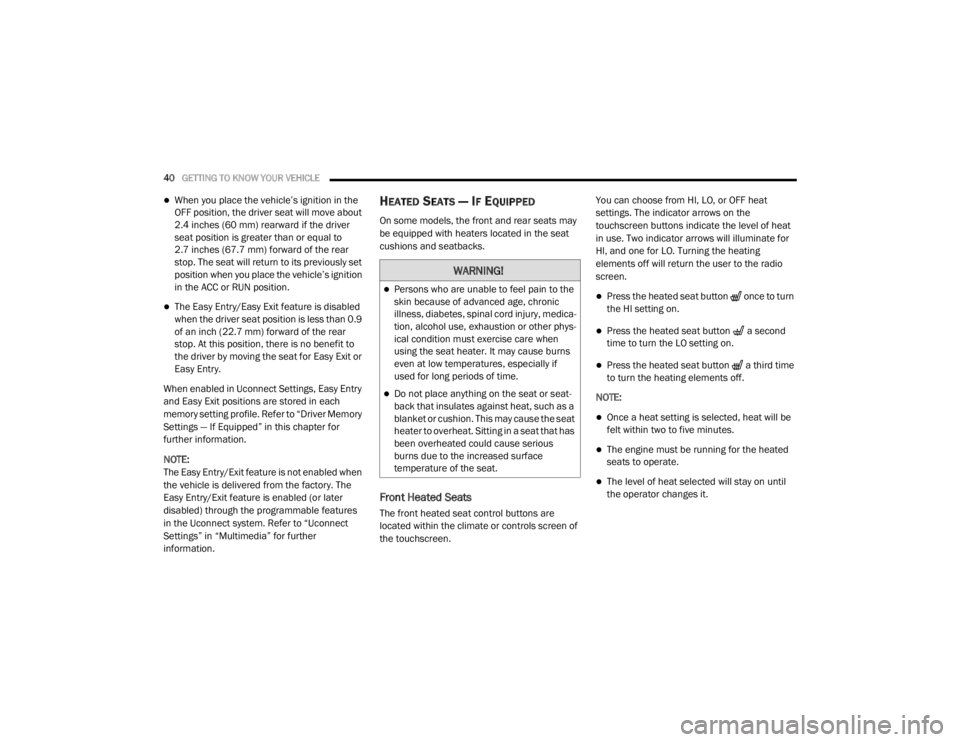
programming the memory settings. The memory setting switch is located on the
driver’s door trim panel. The switch consists of
three buttons:
The set (S) button, which is used to activate
the memory save function.
The (1) and (2) buttons which are used to
recall either of two saved memory profiles.
Memory Setting Buttons
WARNING!
Avoid trapping anyone in a vehicle in a
collision. Remember that the rear doors can
only be opened from the outside with the
Child-Protection locks are engaged (locked).
20_WD_OM_EN_USC_t.book Page 30
Page 33 of 464

GETTING TO KNOW YOUR VEHICLE31
PROGRAMMING THE MEMORY FEATURE
To create a new memory profile, perform the
following:
1. Place the vehicle’s ignition in the ON/RUN
position (do not start the engine).
2. Adjust all memory profile settings to desired preferences (i.e., seat, side mirror, power tilt
and telescopic steering column [if
equipped], and radio station presets).
3. Push the set (S) button on the memory switch, and then push the desired memory
button (1 or 2) within five seconds. The
instrument cluster display will display which
memory position has been set.
NOTE:
Memory profiles can be set without the vehicle
in PARK, but the vehicle must be in PARK to
recall a memory profile.
LINKING AND UNLINKING THE REMOTE
K
EYLESS ENTRY KEY FOB TO MEMORY
Your key fobs can be programmed to recall one
of two saved memory profiles by pushing the
unlock button on the key fob.
NOTE:
Before programming your key fobs you must
select the “Memory Linked To Fob” feature
through the Uconnect system settings. Refer to
“Uconnect Settings” in “Multimedia” for further
information.
To program your key fobs, perform the following:
1. Place the vehicle’s ignition in the OFF
position.
2. Select a desired memory profile, 1 or 2.
3. Once the profile has been recalled, push and release the set (S) button on the
memory switch. Then, within five seconds,
push and release button (1) or (2)
accordingly. “Memory Profile Set” (1 or 2)
will display in the instrument cluster display.
4. Push and release the lock button on the key fob within 10 seconds. NOTE:
Your key fobs can be unlinked from your
memory settings by pushing the set (S) button,
and within 10 seconds, followed by pushing the
unlock button on the key fob.
MEMORY POSITION RECALL
NOTE:
If a recall is attempted when the vehicle is not in
PARK, a message will be displayed in the instru
-
ment cluster display.
To recall the memory settings for driver one or
two, push the desired memory button (1 or 2) or
the unlock button on the key fob linked to the
desired memory position.
A recall can be canceled by pushing any of the
memory buttons during a recall (S, 1, or 2), or by
pushing any of the seat adjustment switches.
When a recall is canceled, the driver's seat and
telescopic steering column (if equipped) will
stop moving. A delay of one second will occur
before another recall can be selected.
2
20_WD_OM_EN_USC_t.book Page 31
Page 42 of 464

40GETTING TO KNOW YOUR VEHICLE
When you place the vehicle’s ignition in the
OFF position, the driver seat will move about
2.4 inches (60 mm) rearward if the driver
seat position is greater than or equal to
2.7 inches (67.7 mm) forward of the rear stop. The seat will return to its previously set
position when you place the vehicle’s ignition
in the ACC or RUN position.
The Easy Entry/Easy Exit feature is disabled
when the driver seat position is less than 0.9
of an inch (22.7 mm) forward of the rear
stop. At this position, there is no benefit to
the driver by moving the seat for Easy Exit or
Easy Entry.
When enabled in Uconnect Settings, Easy Entry
and Easy Exit positions are stored in each
memory setting profile. Refer to “Driver Memory
Settings — If Equipped” in this chapter for
further information.
NOTE:
The Easy Entry/Exit feature is not enabled when
the vehicle is delivered from the factory. The
Easy Entry/Exit feature is enabled (or later
disabled) through the programmable features
in the Uconnect system. Refer to “Uconnect
Settings” in “Multimedia” for further
information.
HEATED SEATS — IF EQUIPPED
On some models, the front and rear seats may
be equipped with heaters located in the seat
cushions and seatbacks.
Front Heated Seats
The front heated seat control buttons are
located within the climate or controls screen of
the touchscreen. You can choose from HI, LO, or OFF heat
settings. The indicator arrows on the
touchscreen buttons indicate the level of heat
in use. Two indicator arrows will illuminate for
HI, and one for LO. Turning the heating
elements off will return the user to the radio
screen.
Press the heated seat button once to turn
the HI setting on.
Press the heated seat button a second
time to turn the LO setting on.
Press the heated seat button a third time
to turn the heating elements off.
NOTE:
Once a heat setting is selected, heat will be
felt within two to five minutes.
The engine must be running for the heated
seats to operate.
The level of heat selected will stay on until
the operator changes it.
WARNING!
Persons who are unable to feel pain to the
skin because of advanced age, chronic
illness, diabetes, spinal cord injury, medica -
tion, alcohol use, exhaustion or other phys -
ical condition must exercise care when
using the seat heater. It may cause burns
even at low temperatures, especially if
used for long periods of time.
Do not place anything on the seat or seat -
back that insulates against heat, such as a
blanket or cushion. This may cause the seat
heater to overheat. Sitting in a seat that has
been overheated could cause serious
burns due to the increased surface
temperature of the seat.
20_WD_OM_EN_USC_t.book Page 40
Page 48 of 464

46GETTING TO KNOW YOUR VEHICLE
STEERING WHEEL
MANUAL TILT/TELESCOPING STEERING
C
OLUMN — IF EQUIPPED
This feature allows you to tilt the steering
column upward or downward. It also allows you
to lengthen or shorten the steering column. The
tilt/telescoping lever is located below the
steering wheel at the end of the steering
column.
Manual Tilt/Telescoping Steering Column Handle
To unlock the steering column, push the lever
downward (toward the floor). To tilt the steering
column, move the steering wheel upward or
downward as desired. To lengthen or shorten the steering column, pull
the steering wheel outward or push it inward as
desired. To lock the steering column in position,
push the lever upward until fully engaged.
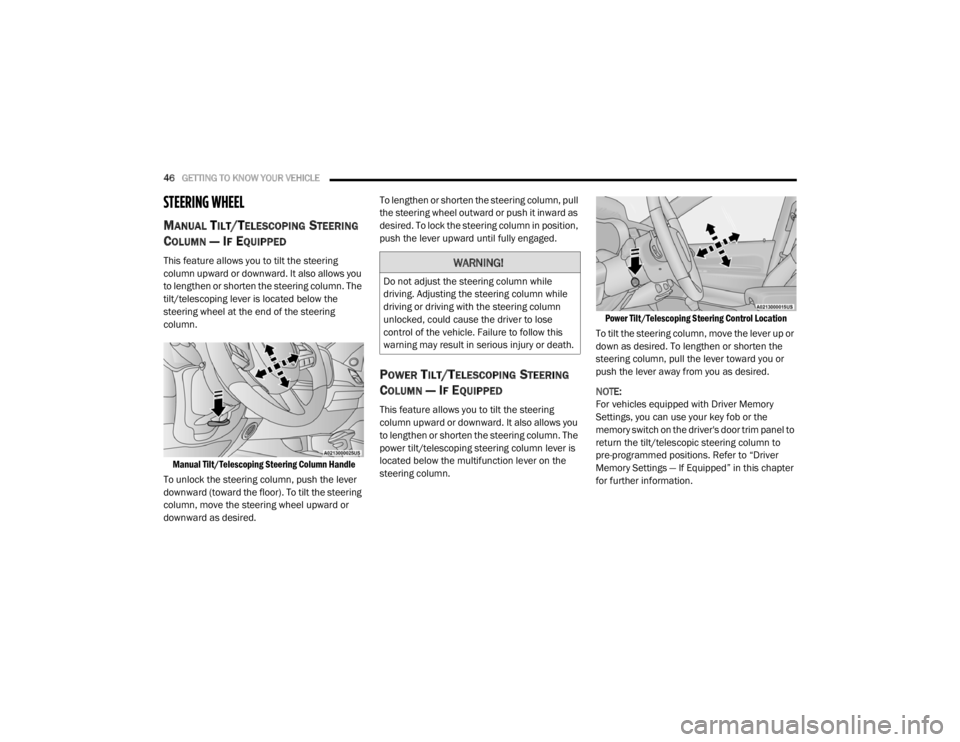
POWER TILT/TELESCOPING STEERING
C
OLUMN — IF EQUIPPED
This feature allows you to tilt the steering
column upward or downward. It also allows you
to lengthen or shorten the steering column. The
power tilt/telescoping steering column lever is
located below the multifunction lever on the
steering column.
Power Tilt/Telescoping Steering Control Location
To tilt the steering column, move the lever up or
down as desired. To lengthen or shorten the
steering column, pull the lever toward you or
push the lever away from you as desired.
NOTE:
For vehicles equipped with Driver Memory
Settings, you can use your key fob or the
memory switch on the driver's door trim panel to
return the tilt/telescopic steering column to
pre-programmed positions. Refer to “Driver
Memory Settings — If Equipped” in this chapter
for further information.
WARNING!
Do not adjust the steering column while
driving. Adjusting the steering column while
driving or driving with the steering column
unlocked, could cause the driver to lose
control of the vehicle. Failure to follow this
warning may result in serious injury or death.
20_WD_OM_EN_USC_t.book Page 46
Page 51 of 464

GETTING TO KNOW YOUR VEHICLE49
OUTSIDE AUTOMATIC DIMMING
M
IRRORS — IF EQUIPPED
The outside mirrors will automatically adjust for
glare from vehicles behind you. This feature is
controlled by the inside Automatic Dimming
Mirror. The mirrors will automatically adjust for
headlight glare when the inside mirror adjusts.
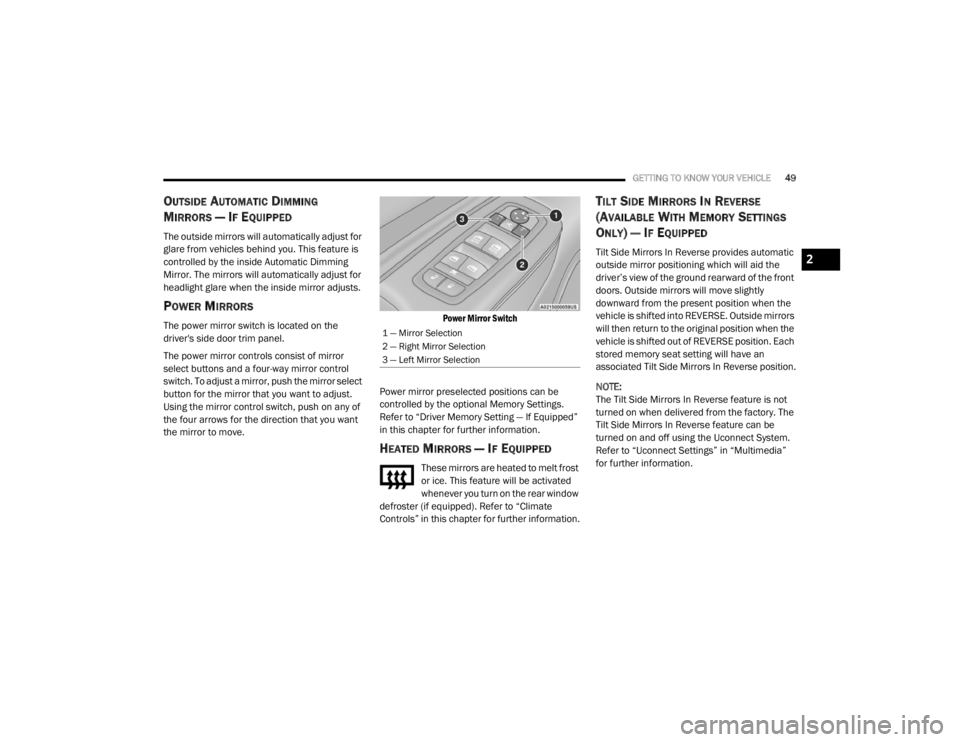
POWER MIRRORS
The power mirror switch is located on the
driver's side door trim panel.
The power mirror controls consist of mirror
select buttons and a four-way mirror control
switch. To adjust a mirror, push the mirror select
button for the mirror that you want to adjust.
Using the mirror control switch, push on any of
the four arrows for the direction that you want
the mirror to move.
Power Mirror Switch
Power mirror preselected positions can be
controlled by the optional Memory Settings.
Refer to “Driver Memory Setting — If Equipped”
in this chapter for further information.
HEATED MIRRORS — IF EQUIPPED
These mirrors are heated to melt frost
or ice. This feature will be activated
whenever you turn on the rear window
defroster (if equipped). Refer to “Climate
Controls” in this chapter for further information.
TILT SIDE MIRRORS IN REVERSE
(A
VAILABLE WITH MEMORY SETTINGS
O
NLY) — IF EQUIPPED
Tilt Side Mirrors In Reverse provides automatic
outside mirror positioning which will aid the
driver’s view of the ground rearward of the front
doors. Outside mirrors will move slightly
downward from the present position when the
vehicle is shifted into REVERSE. Outside mirrors
will then return to the original position when the
vehicle is shifted out of REVERSE position. Each
stored memory seat setting will have an
associated Tilt Side Mirrors In Reverse position.
NOTE:
The Tilt Side Mirrors In Reverse feature is not
turned on when delivered from the factory. The
Tilt Side Mirrors In Reverse feature can be
turned on and off using the Uconnect System.
Refer to “Uconnect Settings” in “Multimedia”
for further information.
1 — Mirror Selection
2 — Right Mirror Selection
3 — Left Mirror Selection
2
20_WD_OM_EN_USC_t.book Page 49
Page 209 of 464

STARTING AND OPERATING207
Metric Speed (km/h)
Pushing the SET (+) button once will result in
a 1 km/h increase in set speed. Each subse -
quent tap of the button results in an increase
of 1 km/h.
If the button is continually pushed, the set
speed will continue to increase until the
button is released, then the new set speed
will be established.
To Decrease Speed
When the Speed Control is set, you can
decrease speed by pushing the SET (-) button.
The driver's preferred units can be selected
through the instrument cluster display. Refer to
“Getting To Know Your Instrument Panel” for
more information. The speed decrement shown
is dependent on the chosen speed unit of U.S.
(mph) or Metric (km/h):
U.S. Speed (mph)
Pushing the SET (-) button once will result in
a 1 mph decrease in set speed. Each subse -
quent tap of the button results in a decrease
of 1 mph.
If the button is continually pushed, the set
speed will continue to decrease until the
button is released, then the new set speed
will be established.
Metric Speed (km/h)
Pushing the SET (-) button once will result in
a 1 km/h decrease in set speed. Each subse -
quent tap of the button results in a decrease
of 1 km/h.
If the button is continually pushed, the set
speed will continue to decrease until the
button is released, then the new set speed
will be established.
TO ACCELERATE FOR PASSING
Press the accelerator as you would normally.
When the pedal is released, the vehicle will
return to the set speed.
Using Speed Control On Hills
The transmission may downshift on hills to
maintain the vehicle set speed.
NOTE:
The Speed Control system maintains speed up
and down hills. A slight speed change on
moderate hills is normal. On steep hills, a greater speed loss or gain may
occur so it may be preferable to drive without
Speed Control.
TO RESUME SPEED
To resume a previously set speed, push the RES
button and release. Resume can be used at any
speed above 20 mph (32 km/h).
TO DEACTIVATE
A soft tap on the brake pedal, pushing the CANC
button, or normal brake pressure while slowing
the vehicle will deactivate the Speed Control
without erasing the set speed from memory.
Pushing the on/off button or placing the ignition
in the OFF position, erases the set speed from
memory.
WARNING!
Speed Control can be dangerous where the
system cannot maintain a constant speed.
Your vehicle could go too fast for the
conditions, and you could lose control and
have an accident. Do not use Speed Control
in heavy traffic or on roads that are winding,
icy, snow-covered or slippery.
5
20_WD_OM_EN_USC_t.book Page 207
Page 210 of 464

208STARTING AND OPERATING
(Continued)
The following conditions will also deactivate the
Speed Control without erasing the set speed
from memory:
Vehicle parking brake is applied
Stability event occurs
Gear selector is moved out of DRIVE
Engine overspeed occurs
ADAPTIVE CRUISE CONTROL (ACC) — IF
EQUIPPED
Adaptive Cruise Control (ACC) increases the
driving convenience provided by cruise control
while traveling on highways and major
roadways. However, it is not a safety system
and not designed to prevent collisions. Speed
Control function performs differently. Please
refer to the proper section within this chapter.
ACC will allow you to keep cruise control
engaged in light to moderate traffic conditions
without the constant need to reset your cruise
control. ACC utilizes a radar sensor and a
forward facing camera designed to detect a
vehicle directly ahead of you. NOTE:
If the sensor does not detect a vehicle ahead
of you, ACC will maintain a fixed set speed.
If the ACC sensor detects a vehicle ahead,
ACC will apply limited braking or accelerate
(not to exceed the original set speed) auto
-
matically to maintain a preset following
distance, while matching the speed of the
vehicle ahead.
The Cruise Control system has two control
modes:
Adaptive Cruise Control mode for main -
taining an appropriate distance between
vehicles.
Normal (Fixed Speed) Cruise Control mode
for cruising at a constant preset speed. For
additional information, refer to “Normal
(Fixed Speed) Cruise Control Mode” in this
section.
NOTE:
Normal (Fixed Speed) Cruise Control will not
react to preceding vehicles. Always be aware of
the mode selected. You can change the mode by using the Cruise
Control buttons. The two control modes
function differently. Always confirm which mode
is selected.
WARNING!
Adaptive Cruise Control (ACC) is a conve
-
nience system. It is not a substitute for
active driver involvement. It is always the
driver’s responsibility to be attentive of
road, traffic, and weather conditions,
vehicle speed, distance to the vehicle
ahead; and, most importantly, brake opera -
tion to ensure safe operation of the vehicle
under all road conditions. Your complete
attention is always required while driving to
maintain safe control of your vehicle.
Failure to follow these warnings can result
in a collision and death or serious personal
injury.
20_WD_OM_EN_USC_t.book Page 208
Page 213 of 464

STARTING AND OPERATING211
If the system is set when the vehicle speed is
below 20 mph (32 km/h), the set speed shall
be defaulted to 20 mph (32 km/h). If the
system is set when the vehicle speed is above
20 mph (32 km/h), the set speed shall be the
current speed of the vehicle.
NOTE:
ACC cannot be set if there is a stationary vehicle
in front of your vehicle in close proximity.
Remove your foot from the accelerator pedal. If
you do not, the vehicle may continue to
accelerate beyond the set speed. If this occurs:
The message “DRIVER OVERRIDE” will
display in the instrument cluster display.
The system will not be controlling the
distance between your vehicle and the
vehicle ahead. The vehicle speed will only be
determined by the position of the accelerator
pedal.
TO CANCEL
The following conditions cancel the system:
The brake pedal is applied.
The CANC button is pushed.
An Anti-Lock Brake System (ABS) event
occurs.
The gear selector is removed from the DRIVE
position.
The Electronic Stability Control/Traction
Control System (ESC/TCS) activates.
The vehicle parking brake is applied.
Driver seat belt is unbuckled at low speeds.
Driver door is opened at low speeds.
The driver switches ESC to Full Off mode.
The braking temperature exceeds normal
range (overheated).
TO TURN OFF
The system will turn off and clear the set speed
in memory if:
The Adaptive Cruise Control (ACC) on/off
button is pushed.
The Normal (Fixed Speed) Cruise Control
on/off button is pushed.
The ignition is placed in the OFF position.
TO RESUME
If there is a set speed in memory push the RES
(resume) button and then remove your foot
from the accelerator pedal. The instrument
cluster display will display the last set speed.
NOTE:
ACC cannot be resumed if there is a stationary
vehicle in-front of your vehicle in close prox -
imity.
WARNING!
The Resume function should only be used if
traffic and road conditions permit. Resuming
a set speed that is too high or too low for
prevailing traffic and road conditions could
cause the vehicle to accelerate or decelerate
too sharply for safe operation. Failure to
follow these warnings can result in a collision
and death or serious personal injury.
5
20_WD_OM_EN_USC_t.book Page 211
Page 223 of 464

STARTING AND OPERATING221
To Cancel
The following conditions will cancel the Normal
(Fixed Speed) Cruise Control without clearing
the memory:
The brake pedal is applied.
The CANC button is pushed.
The Electronic Stability Control/Traction
Control System (ESC/TCS) activates.
The vehicle parking brake is applied.
The braking temperature exceeds normal
range (overheated).
The gear selector is removed from the DRIVE
position.
The driver switches ESC to Full Off mode.
To Resume Speed
To resume a previously set speed, push the RES
button and release. Resume can be used at any
speed above 20 mph (32 km/h).
To Turn Off
The system will turn off and erase the set speed
in memory if:
The Normal (Fixed Speed) Cruise Control on/
off button is pushed.
The ignition is placed in the OFF position.
The Adaptive Cruise Control (ACC) on/off
button is pushed.
PARKSENSE REAR PARK ASSIST — IF
EQUIPPED
The ParkSense Rear Park Assist system
provides visual and audible indications of the
distance between the rear fascia and a
detected obstacle when backing up (e.g. during
a parking maneuver). If your vehicle is equipped
with an automatic transmission, the vehicle
brakes may be automatically applied and
released when performing a reverse parking
maneuver if the system detects a possible
collision with an obstacle.
NOTE:
The driver can disable the automatic braking
function by turning ParkSense off via the
ParkSense switch. The driver can also over -
ride automatic braking by changing the gear
or by pressing the gas pedal over 90% of its
capacity during the braking event.
Automatic brakes are not available if the
vehicle is in 4WD Low.
Automatic brakes will not be available if there
is a faulted condition detected with the Park -
Sense Park Assist system or the Braking
System Module.
The automatic braking function may only be
applied if the vehicle deceleration is not
enough to avoid colliding with a detected
obstacle.
The automatic braking function may not be
applied fast enough for obstacles that move
toward the rear of the vehicle from the left
and/or right sides.
The automatic braking function can be
enabled/disabled from the
Customer-Programmable Features section of
the Uconnect System.
ParkSense will retain its last known configu -
ration state for the automatic braking func -
tion through ignition cycles.
The automatic braking function is intended to
assist the driver in avoiding possible collisions
with detected obstacles when backing up in
REVERSE gear.
5
20_WD_OM_EN_USC_t.book Page 221