ESP DODGE DURANGO 2020 User Guide
[x] Cancel search | Manufacturer: DODGE, Model Year: 2020, Model line: DURANGO, Model: DODGE DURANGO 2020Pages: 464, PDF Size: 22.14 MB
Page 59 of 464
GETTING TO KNOW YOUR VEHICLE57
RAIN SENSING WIPERS — IF EQUIPPED
This feature senses rain or snowfall on the
windshield and automatically activates the
wipers for the driver. The feature is especially
useful for road splash or overspray from the
windshield washers of the vehicle ahead.
Rotate the end of the multifunction lever to one
of four settings to activate this feature.
The sensitivity of the system can be adjusted
with the multifunction lever. Wiper delay
position one is the least sensitive, and wiper
delay position four is the most sensitive.
NOTE:
Wiper delay position three should be used for
normal rain conditions.
Settings one and two can be used if the driver
desires less wiper sensitivity. Setting four can
be used if the driver desires more sensitivity.
Place the wiper switch in the OFF position when
not using the system. NOTE:The Rain Sensing feature will not operate
when the wiper switch is in the low or
high-speed position.
The Rain Sensing feature may not function
properly when ice, or dried salt water is
present on the windshield.
Use of Rain-X or products containing wax or
silicone may reduce Rain Sensing perfor
-
mance.
The Rain Sensing feature can be turned on
and off using the Uconnect System, refer to
“Uconnect Settings” in “Multimedia” for
further information. The Rain Sensing system has protection
features for the wiper blades and arms, and will
not operate under the following conditions:
Low Ambient Temperature
— When the igni-
tion is first placed in the ON position, the Rain
Sensing system will not operate until the
wiper switch is moved, vehicle speed is
greater than 3 mph (5 km/h), or the outside
temperature is greater than 32°F (0°C).
Transmission In NEUTRAL Position — When
the ignition is in the ON position, and the gear
selector is in NEUTRAL, the Rain Sensing
system will not operate until the wiper switch
is moved, vehicle speed is greater than
3 mph (5 km/h), or the gear selector is
moved out of NEUTRAL.
2
20_WD_OM_EN_USC_t.book Page 57
Page 85 of 464
GETTING TO KNOW YOUR VEHICLE83
GENERAL INFORMATION
The following regulatory statement applies to all
Radio Frequency (RF) devices equipped in this
vehicle:
This device complies with Part 15 of the FCC
Rules and with Innovation, Science and
Economic Development Canada license-exempt
RSS standard(s). Operation is subject to the
following two conditions:
1. This device may not cause harmful
interference, and
2. This device must accept any interference received, including interference that may
cause undesired operation.
Le présent appareil est conforme aux CNR
d`Innovation, Science and Economic
Development applicables aux appareils radio
exempts de licence. L'exploitation est autorisée aux deux conditions
suivantes:
1. l'appareil ne doit pas produire de
brouillage, et
2. l'utilisateur de l'appareil doit accepter tout brouillage radioélectrique subi, même si le
brouillage est susceptible d'en compro -
mettre le fonctionnement.
La operación de este equipo está sujeta a las
siguientes dos condiciones:
1. es posible que este equipo o dispositivo no cause interferencia perjudicial y
2. este equipo o dispositivo debe aceptar cualquier interferencia, incluyendo la que
pueda causar su operación no deseada.
NOTE:
Changes or modifications not expressly
approved by the party responsible for compli -
ance could void the user’s authority to operate
the equipment.
INTERNAL EQUIPMENT
STORAGE
Glove Compartment
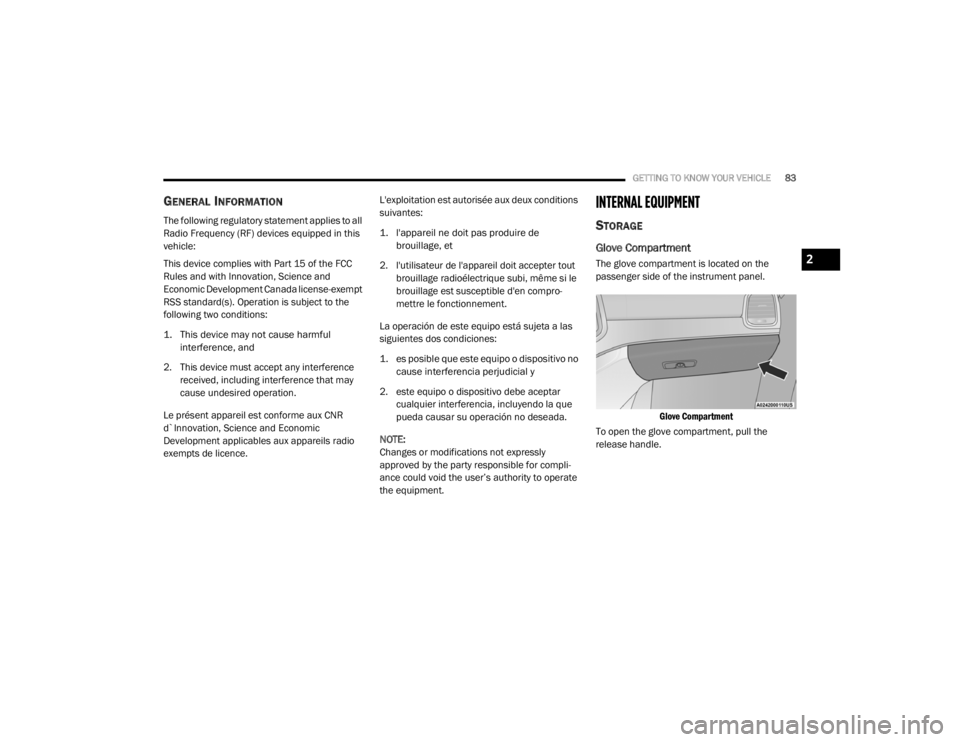
The glove compartment is located on the
passenger side of the instrument panel.
Glove Compartment
To open the glove compartment, pull the
release handle.2
20_WD_OM_EN_USC_t.book Page 83
Page 96 of 464
94GETTING TO KNOW YOUR VEHICLE
(Continued)
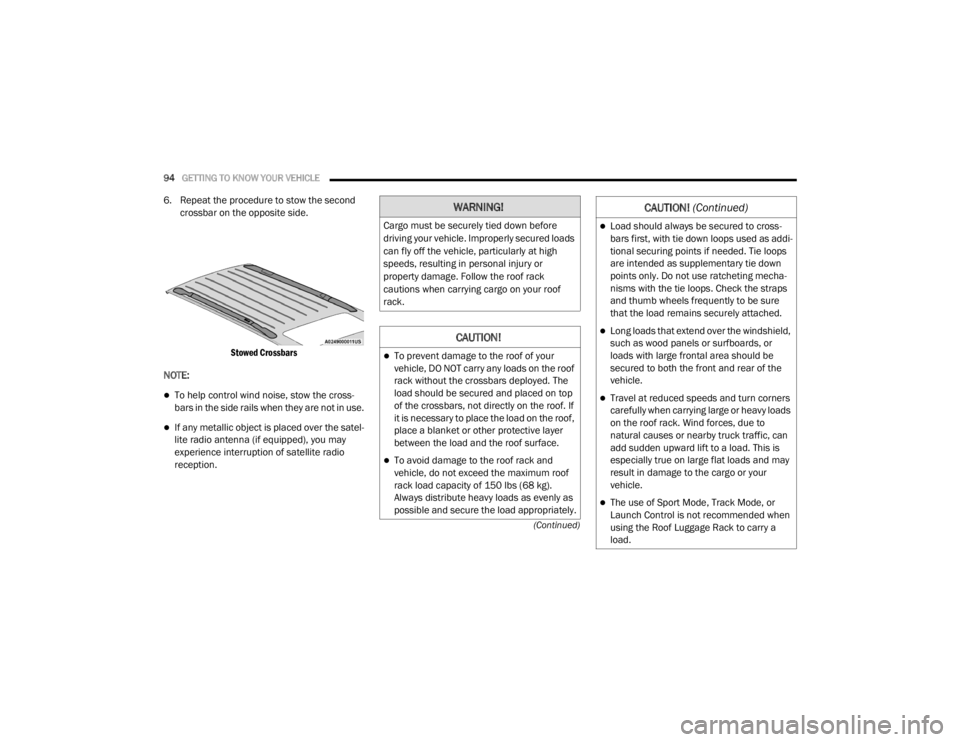
6. Repeat the procedure to stow the second crossbar on the opposite side.
Stowed Crossbars
NOTE:
To help control wind noise, stow the cross -
bars in the side rails when they are not in use.
If any metallic object is placed over the satel -
lite radio antenna (if equipped), you may
experience interruption of satellite radio
reception.
WARNING!
Cargo must be securely tied down before
driving your vehicle. Improperly secured loads
can fly off the vehicle, particularly at high
speeds, resulting in personal injury or
property damage. Follow the roof rack
cautions when carrying cargo on your roof
rack.
CAUTION!
To prevent damage to the roof of your
vehicle, DO NOT carry any loads on the roof
rack without the crossbars deployed. The
load should be secured and placed on top
of the crossbars, not directly on the roof. If
it is necessary to place the load on the roof,
place a blanket or other protective layer
between the load and the roof surface.
To avoid damage to the roof rack and
vehicle, do not exceed the maximum roof
rack load capacity of 150 lbs (68 kg).
Always distribute heavy loads as evenly as
possible and secure the load appropriately.
Load should always be secured to cross -
bars first, with tie down loops used as addi -
tional securing points if needed. Tie loops
are intended as supplementary tie down
points only. Do not use ratcheting mecha -
nisms with the tie loops. Check the straps
and thumb wheels frequently to be sure
that the load remains securely attached.
Long loads that extend over the windshield,
such as wood panels or surfboards, or
loads with large frontal area should be
secured to both the front and rear of the
vehicle.
Travel at reduced speeds and turn corners
carefully when carrying large or heavy loads
on the roof rack. Wind forces, due to
natural causes or nearby truck traffic, can
add sudden upward lift to a load. This is
especially true on large flat loads and may
result in damage to the cargo or your
vehicle.
The use of Sport Mode, Track Mode, or
Launch Control is not recommended when
using the Roof Luggage Rack to carry a
load.
CAUTION! (Continued)
20_WD_OM_EN_USC_t.book Page 94
Page 116 of 464
114GETTING TO KNOW YOUR INSTRUMENT PANEL
Electronic Stability Control (ESC) Active
Warning Light
This warning light will indicate when
the Electronic Stability Control (ESC)
system is Active. The “ESC Indicator
Light” in the instrument cluster will
come on when the ignition is placed in the
ON/RUN or ACC/ON/RUN position, and when
ESC is activated. It should go out with the
engine running. If the “ESC Indicator Light”
comes on continuously with the engine running,
a malfunction has been detected in the ESC
system. If this warning light remains on after
several ignition cycles, and the vehicle has been
driven several miles (kilometers) at speeds
greater than 30 mph (48 km/h), see an
authorized dealer as soon as possible to have
the problem diagnosed and corrected.
The “ESC OFF Indicator Light” and the “ESC
Indicator Light” come on momentarily each
time the ignition is placed in the ON/RUN or
ACC/ON/RUN position.
The ESC system will make buzzing or clicking
sounds when it is active. This is normal; the
sounds will stop when ESC becomes inactive.
This light will come on when the vehicle is in
an ESC event.
Electronic Stability Control (ESC) OFF
Warning Light
This warning light indicates the
Electronic Stability Control (ESC) is
off.
Each time the ignition is turned to ON/RUN or
ACC/ON/RUN, the ESC system will be on, even
if it was turned off previously.
The ESC OFF indicator will be lit any time the
Traction Mode is set to Sport, Track or Full OFF
in Drive Modes.
Low Washer Fluid Warning Light — If
Equipped
This warning light will illuminate when
the windshield washer fluid is low.
Refer to “Adding Washer Fluid” in
“Servicing And Maintenance” for
further information.
Tire Pressure Monitoring System (TPMS)
Warning Light
The warning light switches on and a
message is displayed to indicate that
the tire pressure is lower than the
recommended value and/or that slow
pressure loss is occurring. In these cases,
optimal tire duration and fuel consumption may
not be guaranteed.
Should one or more tires be in the condition
mentioned above, the display will show the
indications corresponding to each tire.
CAUTION!
Prolonged driving with the Malfunction
Indicator Light (MIL) on could cause damage
to the vehicle control system. It also could
affect fuel economy and driveability. If the
MIL is flashing, severe catalytic converter
damage and power loss will soon occur.
Immediate service is required.
20_WD_OM_EN_USC_t.book Page 114
Page 117 of 464
GETTING TO KNOW YOUR INSTRUMENT PANEL115
Each tire, including the spare (if provided),
should be checked monthly when cold and
inflated to the inflation pressure recommended
by the vehicle manufacturer on the vehicle
placard or tire inflation pressure label. If your
vehicle has tires of a different size than the size
indicated on the vehicle placard or tire inflation
pressure label, you should determine the
proper tire inflation pressure for those tires.
As an added safety feature, your vehicle has
been equipped with a Tire Pressure Monitoring
System (TPMS) that illuminates a low tire
pressure telltale when one or more of your tires
is significantly under-inflated. Accordingly, when
the low tire pressure telltale illuminates, you
should stop and check your tires as soon as
possible, and inflate them to the proper
pressure. Driving on a significantly under-inflated tire
causes the tire to overheat and can lead to tire
failure. Under-inflation also reduces fuel
efficiency and tire tread life, and may affect the
vehicle’s handling and stopping ability.
Please note that the TPMS is not a substitute for
proper tire maintenance, and it is the driver’s
responsibility to maintain correct tire pressure,
even if under-inflation has not reached the level
to trigger illumination of the TPMS low tire
pressure telltale.
Your vehicle has also been equipped with a
TPMS malfunction indicator to indicate when
the system is not operating properly. The TPMS
malfunction indicator is combined with the low
tire pressure telltale. When the system detects
a malfunction, the telltale will flash for
approximately one minute and then remain
continuously illuminated. This sequence will
continue upon subsequent vehicle start-ups as
long as the malfunction exists. When the
malfunction indicator is illuminated, the system
may not be able to detect or signal low tire
pressure as intended.
TPMS malfunctions may occur for a variety of
reasons, including the installation of
replacement or alternate tires or wheels on the
vehicle that prevent the TPMS from functioning
properly. Always check the TPMS malfunction
telltale after replacing one or more tires or
wheels on your vehicle to ensure that the
replacement or alternate tires and wheels allow
the TPMS to continue to function properly.
CAUTION!
Do not continue driving with one or more flat
tires as handling may be compromised. Stop
the vehicle, avoiding sharp braking and
steering. If a tire puncture occurs, repair
immediately using the dedicated tire repair
kit and contact an authorized dealer as soon
as possible.
CAUTION!
The TPMS has been optimized for the original
equipment tires and wheels. TPMS pressures
and warning have been established for the
tire size equipped on your vehicle.
Undesirable system operation or sensor
damage may result when using replacement
equipment that is not of the same size, type,
and/or style. Aftermarket wheels can cause
sensor damage. Using aftermarket tire
sealants may cause the Tire Pressure
Monitoring System (TPMS) sensor to become
inoperable. After using an aftermarket tire
sealant it is recommended that you take your
vehicle to an authorized dealer to have your
sensor function checked.
3
20_WD_OM_EN_USC_t.book Page 115
Page 120 of 464
118GETTING TO KNOW YOUR INSTRUMENT PANEL
LaneSense Indicator Light — If Equipped
The LaneSense indicator light
illuminates solid green when both
lane markings have been detected
and the system is “armed” and ready
to provide visual and torque warnings if an
unintentional lane departure occurs. Refer to
“LaneSense — If Equipped” in “Starting And
Operating” for further information.
Park/Headlight On Indicator Light
This indicator light will illuminate
when the park lights or headlights are
turned on. Refer to “Exterior Lights” in
“Getting To Know Your Vehicle” for
further information.
Snow Mode SRT Indicator Light
This light will turn on when Snow
Mode is active. Refer to the Drive
Modes Supplement for further
information.
Stop/Start Active Indicator Light — If
Equipped
This indicator light will illuminate
when the Stop/Start function is in
“Autostop” mode. Refer to “Stop /
Start System — If Equipped” in
“Starting And Operating” for further
information.
Sport Mode Indicator Light
This light will turn on when Sport
Mode is active. Refer to “Sport Mode
— If Equipped” in “Starting And
Operating” for further information.
Sport Mode SRT Indicator Light
This light will turn on when Sport
Mode is active. Refer to the Drive
Modes Supplement for further
information.
Tow Mode SRT Indicator Light
This light will turn on when Tow Mode
is active. Refer to the Drive Modes
Supplement for further information.
Track Mode SRT Indicator Light
This light will turn on when Track
Mode is active. Refer to the Drive
Modes Supplement for further
information.
Turn Signal Indicator Lights
When the left or right turn signal is
activated, the turn signal indicator will
flash independently and the
corresponding exterior turn signal
lamps will flash. Turn signals can be activated
when the multifunction lever is moved down
(left) or up (right).
NOTE:
A continuous chime will sound if the vehicle is
driven more than 1 mile (1.6 km) with either
turn signal on.
Check for an inoperative outside light bulb if
either indicator flashes at a rapid rate.
20_WD_OM_EN_USC_t.book Page 118
Page 126 of 464

124SAFETY
Brake System Warning Light
The red “Brake System Warning Light” will turn
on when the ignition is placed in the ON/RUN
mode and may stay on for as long as four
seconds.
If the “Brake System Warning Light” remains on
or comes on while driving, it indicates that the
brake system is not functioning properly and
that immediate service is required. If the “Brake
System Warning Light” does not come on when
the ignition is placed in the ON/RUN mode,
have the light repaired as soon as possible.
Dynamic Steering Torque (DST)
Dynamic Steering Torque (DST) is a feature of
the ESC and Electric Power Steering (EPS)
modules that provides torque at the steering
wheel for certain driving conditions in which the
ESC module is detecting vehicle instability. The
torque that the steering wheel receives is only
meant to help the driver realize optimal steering
behavior in order to reach/maintain vehicle
stability. The only notification the driver receives
that the feature is active is the torque applied to
the steering wheel. NOTE:
The DST feature is only meant to help the driver
realize the correct course of action through
small torques on the steering wheel, which
means the effectiveness of the DST feature is
highly dependent on the driver’s sensitivity and
overall reaction to the applied torque. It is very
important to realize that this feature will not
steer the vehicle, meaning the driver is still
responsible for steering the vehicle.
Electronic Brake Force Distribution (EBD)
The Electronic Brake Force Distribution (EBD)
function manages the distribution of the
braking torque between the front and rear axles
by limiting braking pressure to the rear axle.
This is done to prevent overslip of the rear
wheels to avoid vehicle instability, and to
prevent the rear axle from entering ABS before
the front axle.
Electronic Roll Mitigation (ERM)
This system anticipates the potential for wheel
lift by monitoring the driver’s steering wheel
input and the speed of the vehicle. When
Electronic Roll Mitigation (ERM) determines
that the rate of change of the steering wheel
angle and vehicle’s speed are sufficient to
potentially cause wheel lift, it then applies the
appropriate brake and may also reduce engine
power to lessen the chance that wheel lift will
occur. ERM can only reduce the chance of
wheel lift occurring during severe or evasive
driving maneuvers; it cannot prevent wheel lift
due to other factors, such as road conditions,
leaving the roadway, or striking objects or other
vehicles.
20_WD_OM_EN_USC_t.book Page 124
Page 127 of 464
SAFETY125
(Continued)
Electronic Stability Control (ESC)
This system enhances directional control and
stability of the vehicle under various driving
conditions. Electronic Stability Control (ESC)
corrects for oversteering or understeering of the
vehicle by applying the brake of the appropriate
wheel(s) to assist in counteracting the oversteer
or understeer condition. Engine power may also
be reduced to help the vehicle maintain the
desired path. ESC uses sensors in the vehicle to determine
the vehicle path intended by the driver and
compares it to the actual path of the vehicle.
When the actual path does not match the
intended path, ESC applies the brake of the
appropriate wheel to assist in counteracting the
oversteer or understeer condition.
Oversteer — when the vehicle is turning more
than appropriate for the steering wheel posi
-
tion.
Understeer — when the vehicle is turning less
than appropriate for the steering wheel posi -
tion.
The “ESC Activation/Malfunction Indicator
Light” located in the instrument cluster will start
to flash as soon as the ESC system becomes
active. The “ESC Activation/Malfunction
Indicator Light” also flashes when the Traction
Control System (TCS) is active. If the “ESC
Activation/Malfunction Indicator Light” begins
to flash during acceleration, ease up on the
accelerator and apply as little throttle as
possible. Be sure to adapt your speed and
driving to the prevailing road conditions.
WARNING!
Many factors, such as vehicle loading, road
conditions and driving conditions, influence
the chance that wheel lift or rollover may
occur. ERM cannot prevent all wheel lift or roll
overs, especially those that involve leaving
the roadway or striking objects or other
vehicles. The capabilities of an
ERM-equipped vehicle must never be
exploited in a reckless or dangerous manner
which could jeopardize the user's safety or
the safety of others.
WARNING!
Electronic Stability Control (ESC) cannot
prevent the natural laws of physics from
acting on the vehicle, nor can it increase
the traction afforded by prevailing road
conditions. ESC cannot prevent accidents,
including those resulting from excessive
speed in turns, driving on very slippery
surfaces, or hydroplaning. ESC also cannot
prevent accidents resulting from loss of
vehicle control due to inappropriate driver
input for the conditions. Only a safe, atten -
tive, and skillful driver can prevent acci -
dents. The capabilities of an ESC equipped
vehicle must never be exploited in a reck -
less or dangerous manner which could
jeopardize the user’s safety or the safety of
others.
4
20_WD_OM_EN_USC_t.book Page 125
Page 130 of 464
128SAFETY
NOTE:
The “ESC Activation/Malfunction Indicator
Light” and the “ESC OFF Indicator Light”
come on momentarily each time the ignition
is turned to the ON/RUN mode.
Each time the ignition is turned to ON/RUN
mode, the ESC system will be on even if it was
turned off previously.
The ESC system will make buzzing or clicking
sounds when it is active. This is normal; the
sounds will stop when ESC becomes inactive
following the maneuver that caused the ESC
activation.
The “ESC OFF Indicator Light”
indicates the customer has elected to
have the Electronic Stability Control
(ESC) in a reduced mode.
Hill Start Assist (HSA)
The Hill Start Assist (HSA) system is designed to
mitigate roll back from a complete stop while on
an incline. If the driver releases the brake while
stopped on an incline, HSA will continue to hold
the brake pressure for a short period. If the driver does not apply the throttle before
this time expires, the system will release brake
pressure and the vehicle will roll down the hill as
normal.
The following conditions must be met in order
for HSA to activate:
The feature must be enabled
The vehicle must be stopped
The parking brake must be off
The driver door must be closed
The vehicle must be on a sufficient grade
The gear selection must match vehicle uphill
direction (i.e., vehicle facing uphill is in
forward gear; vehicle backing uphill is in
REVERSE (R) gear)
HSA will work in REVERSE gear and all
forward gears. The system will not activate if
the transmission is in PARK (P) or NEUTRAL
(N). For vehicles equipped with a manual
transmission, if the clutch is pressed, HSA
will remain active.
WARNING!
There may be situations where the Hill Start
Assist (HSA) will not activate and slight rolling
may occur, such as on minor hills or with a
loaded vehicle, or while pulling a trailer. HSA
is not a substitute for active driving
involvement. It is always the driver’s
responsibility to be attentive to distance to
other vehicles, people, and objects, and most
importantly brake operation to ensure safe
operation of the vehicle under all road
conditions. Your complete attention is always
required while driving to maintain safe control
of your vehicle. Failure to follow these
warnings can result in a collision or serious
personal injury.
20_WD_OM_EN_USC_t.book Page 128
Page 134 of 464
132SAFETY
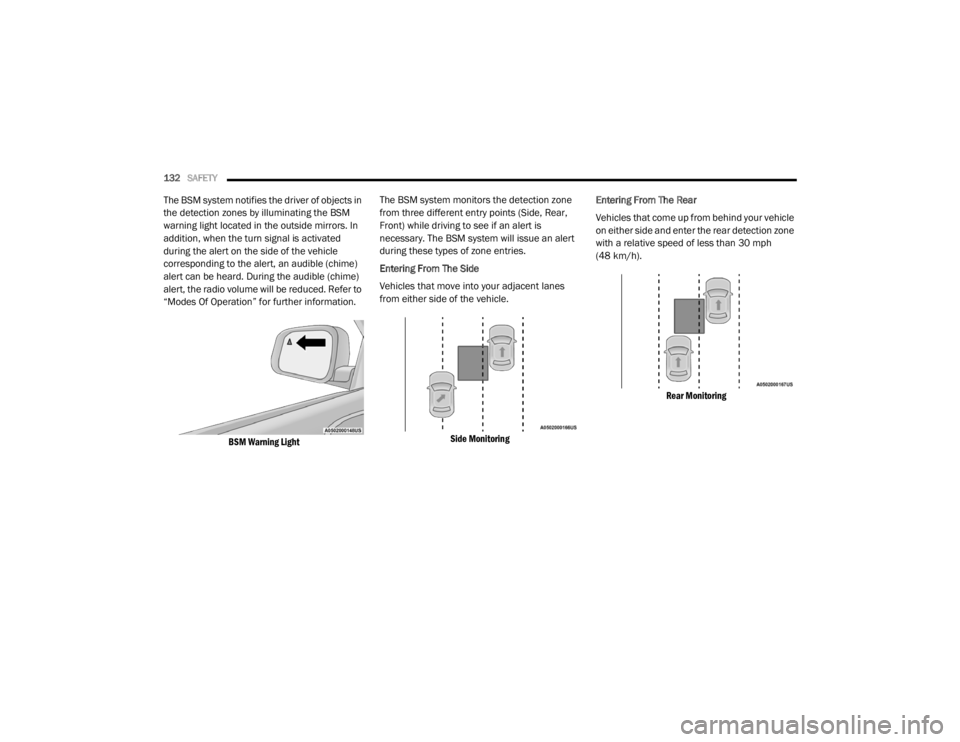
The BSM system notifies the driver of objects in
the detection zones by illuminating the BSM
warning light located in the outside mirrors. In
addition, when the turn signal is activated
during the alert on the side of the vehicle
corresponding to the alert, an audible (chime)
alert can be heard. During the audible (chime)
alert, the radio volume will be reduced. Refer to
“Modes Of Operation” for further information.
BSM Warning Light
The BSM system monitors the detection zone
from three different entry points (Side, Rear,
Front) while driving to see if an alert is
necessary. The BSM system will issue an alert
during these types of zone entries.
Entering From The Side
Vehicles that move into your adjacent lanes
from either side of the vehicle.
Side Monitoring
Entering From The Rear
Vehicles that come up from behind your vehicle
on either side and enter the rear detection zone
with a relative speed of less than 30 mph
(48 km/h).
Rear Monitoring
20_WD_OM_EN_USC_t.book Page 132