reverse DODGE DURANGO 2021 Owners Manual
[x] Cancel search | Manufacturer: DODGE, Model Year: 2021, Model line: DURANGO, Model: DODGE DURANGO 2021Pages: 340, PDF Size: 20.38 MB
Page 4 of 340
2
INTRODUCTION
SYMBOLS KEY ...........................................................9
ROLLOVER WARNING ............................................. 9
VEHICLE MODIFICATIONS/ALTERATIONS .......... 10
SYMBOL GLOSSARY.............................................. 10
GETTING TO KNOW YOUR VEHICLE
KEYS ........................................................................ 14 Key Fob .............................................................14
SENTRY KEY .......................................................... 16
IGNITION SWITCH .................................................. 17
Keyless Enter ‘n Go™ Ignition .........................17
REMOTE START — IF EQUIPPED .......................... 18
How To Use Remote Start ................................19
To Exit Remote Start Mode ..............................19
Remote Start Front Defrost Activation —
If Equipped........................................................20
Remote Start Comfort Systems —
If Equipped........................................................20
Remote Start Windshield Wiper De–Icer
Activation — If Equipped ..................................21
Remote Start Cancel Message —
If Equipped........................................................21
VEHICLE SECURITY SYSTEM — IF EQUIPPED ..... 21
To Arm The System ..........................................21
To Disarm The System .....................................21
Rearming Of The System .................................22
Security System Manual Override ...................22
Tamper Alert .....................................................22 DOORS ....................................................................22
Manual Door Locks ..........................................22
Power Door Locks ............................................23
Keyless Enter ‘n Go™ — Passive Entry ...........23
Automatic Unlock On Exit Feature —
If Equipped........................................................26
Automatic Door Locks — If Equipped ..............26
Child-Protection Door Lock System —
Rear Doors .......................................................26
STEERING WHEEL ..................................................27
Manual Tilt/Telescoping Steering
Column — If Equipped .....................................27
Power Tilt/Telescoping Steering
Column — If Equipped ......................................27
Heated Steering Wheel — If Equipped ...........27
DRIVER MEMORY SETTINGS — IF EQUIPPED .....28
Programming The Memory Feature ................28
Linking And Unlinking The Remote
Keyless Entry Key Fob To Memory ..................29
Memory Position Recall ...................................29
SEATS ..................................................................29
Manual Adjustment (Front Seats) —
If Equipped........................................................30
Manual Adjustment (Rear Seats) ....................31
Power Adjustment (Front Seats) —
If Equipped .......................................................35
Power Passenger Seat Adjustment —
If Equipped........................................................36
Heated Seats — If Equipped ...........................37
Front Ventilated Seats — If Equipped .............38
Head Restraints .............................................39 UCONNECT VOICE RECOGNITION ....................... 41
Introducing Voice Recognition ........................ 41
Basic Voice Commands ................................... 41
Get Started .......................................................41
Additional Information ..................................... 42
MIRRORS ............................................................... 42
Inside Rearview Mirror..................................... 42
Illuminated Vanity Mirrors .............................. 43
Outside Mirrors ................................................ 43
Outside Automatic Dimming Mirrors —
If Equipped .......................................................44
Power Mirrors .................................................. 44
Heated Mirrors — If Equipped ......................... 44
Tilt Side Mirrors In Reverse — If Equipped ..... 44
UNIVERSAL GARAGE DOOR OPENER
(HOMELINK®) ....................................................... 45
Before You Begin Programming
HomeLink® ...................................................... 45
Erasing All The HomeLink® Channels ............ 45
Identifying Whether You Have A Rolling
Code Or Non-Rolling Code Device ................... 45
Programming HomeLink® To A Garage
Door Opener ..................................................... 46
Programming HomeLink® To A
Miscellaneous Device ...................................... 47
Reprogramming A Single HomeLink®
Button ............................................................... 47
Canadian/Gate Operator Programming ......... 47
21_WD_OM_EN_USC_t.book Page 2
Page 43 of 340
GETTING TO KNOW YOUR VEHICLE41
Power Folding Third Row Head Restraints
For improved visibility when in REVERSE, the third
row head restraints can be folded using the
Uconnect system.
Press the “Controls” button located on the bottom
of the Uconnect display.
Press the Headrest Fold button to power
fold the third row head restraints.
NOTE:
The head restraints can only be folded down -
ward using the Headrest Fold button. The head
restraints must be raised manually when occu -
pying the third row.
Do not fold if there are passengers seated in the
third row seats.
UCONNECT VOICE RECOGNITION
INTRODUCING VOICE RECOGNITION
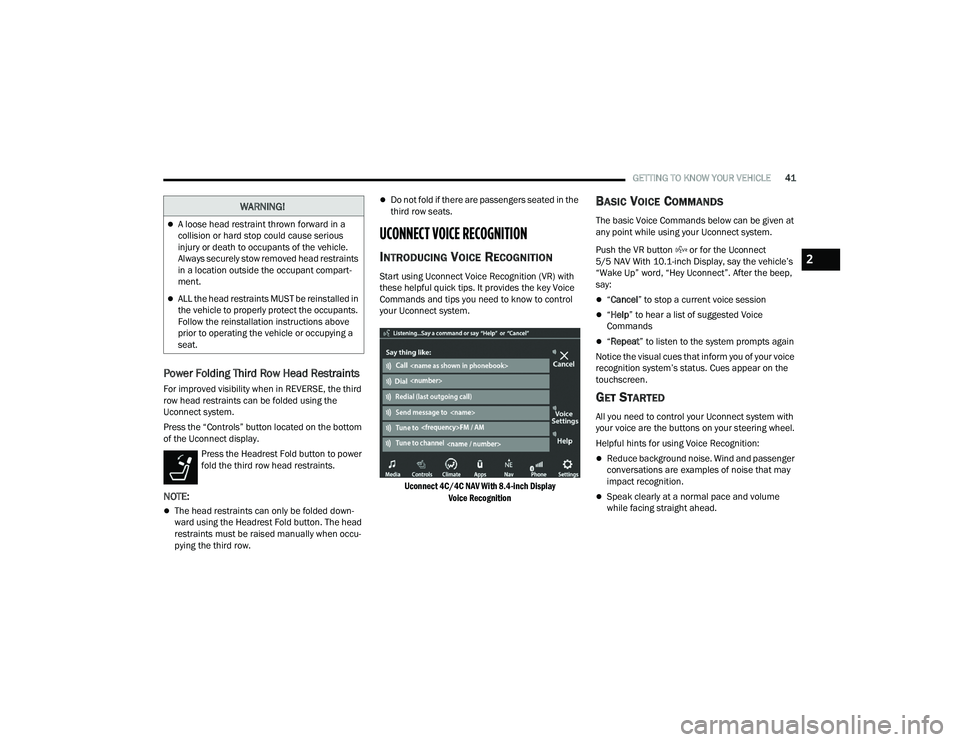
Start using Uconnect Voice Recognition (VR) with
these helpful quick tips. It provides the key Voice
Commands and tips you need to know to control
your Uconnect system.
Uconnect 4C/4C NAV With 8.4-inch Display Voice Recognition
BASIC VOICE COMMANDS
The basic Voice Commands below can be given at
any point while using your Uconnect system.
Push the VR button or for the Uconnect
5/5 NAV With 10.1-inch Display, say the vehicle’s
“Wake Up” word, “Hey Uconnect”. After the beep,
say:
“Cancel ” to stop a current voice session
“Help ” to hear a list of suggested Voice
Commands
“ Repeat ” to listen to the system prompts again
Notice the visual cues that inform you of your voice
recognition system’s status. Cues appear on the
touchscreen.
GET STARTED
All you need to control your Uconnect system with
your voice are the buttons on your steering wheel.
Helpful hints for using Voice Recognition:
Reduce background noise. Wind and passenger
conversations are examples of noise that may
impact recognition.
Speak clearly at a normal pace and volume
while facing straight ahead.
WARNING!
A loose head restraint thrown forward in a
collision or hard stop could cause serious
injury or death to occupants of the vehicle.
Always securely stow removed head restraints
in a location outside the occupant compart -
ment.
ALL the head restraints MUST be reinstalled in
the vehicle to properly protect the occupants.
Follow the reinstallation instructions above
prior to operating the vehicle or occupying a
seat.
2
21_WD_OM_EN_USC_t.book Page 41
Page 45 of 340
GETTING TO KNOW YOUR VEHICLE43
Automatic Dimming Mirror — If Equipped
The rearview mirror can be adjusted up, down, left,
and right. The mirror should be adjusted to center
on the view through the rear window.
This mirror automatically adjusts for headlight
glare from vehicles behind you.
NOTE:The Automatic Dimming Mirror feature is disabled
when the vehicle is in REVERSE to improve rear
view viewing.
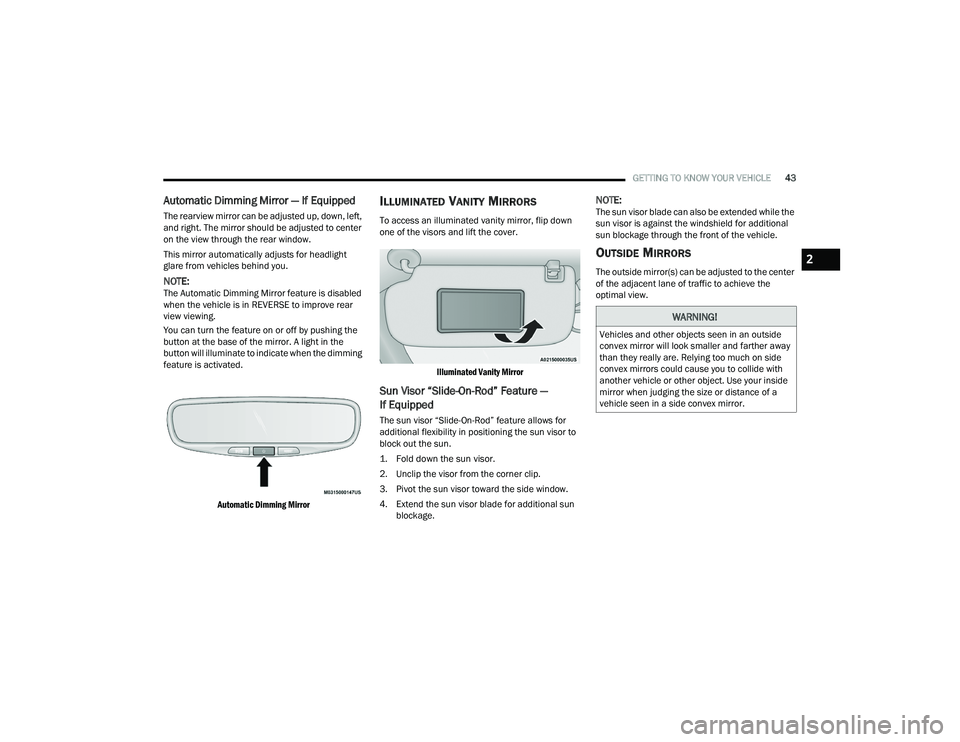
You can turn the feature on or off by pushing the
button at the base of the mirror. A light in the
button will illuminate to indicate when the dimming
feature is activated.
Automatic Dimming Mirror
ILLUMINATED VANITY MIRRORS
To access an illuminated vanity mirror, flip down
one of the visors and lift the cover.
Illuminated Vanity Mirror
Sun Visor “Slide-On-Rod” Feature —
If Equipped
The sun visor “Slide-On-Rod” feature allows for
additional flexibility in positioning the sun visor to
block out the sun.
1. Fold down the sun visor.
2. Unclip the visor from the corner clip.
3. Pivot the sun visor toward the side window.
4. Extend the sun visor blade for additional sun blockage.
NOTE:The sun visor blade can also be extended while the
sun visor is against the windshield for additional
sun blockage through the front of the vehicle.
OUTSIDE MIRRORS
The outside mirror(s) can be adjusted to the center
of the adjacent lane of traffic to achieve the
optimal view.
WARNING!
Vehicles and other objects seen in an outside
convex mirror will look smaller and farther away
than they really are. Relying too much on side
convex mirrors could cause you to collide with
another vehicle or other object. Use your inside
mirror when judging the size or distance of a
vehicle seen in a side convex mirror.
2
21_WD_OM_EN_USC_t.book Page 43
Page 46 of 340
44GETTING TO KNOW YOUR VEHICLE
Outside Mirrors Folding Feature
All outside mirrors are hinged and may be moved
either forward or rearward to resist damage. The
hinges have three detent positions:
Full forward position
Full rearward position
Normal position
OUTSIDE AUTOMATIC DIMMING
M
IRRORS — IF EQUIPPED
The outside mirrors will automatically adjust for
glare from vehicles behind you. This feature is
controlled by the inside automatic dimming mirror.
The mirrors will automatically adjust for headlight
glare when the inside mirror adjusts.
POWER MIRRORS
The power mirror switch is located on the driver's
side door trim panel.
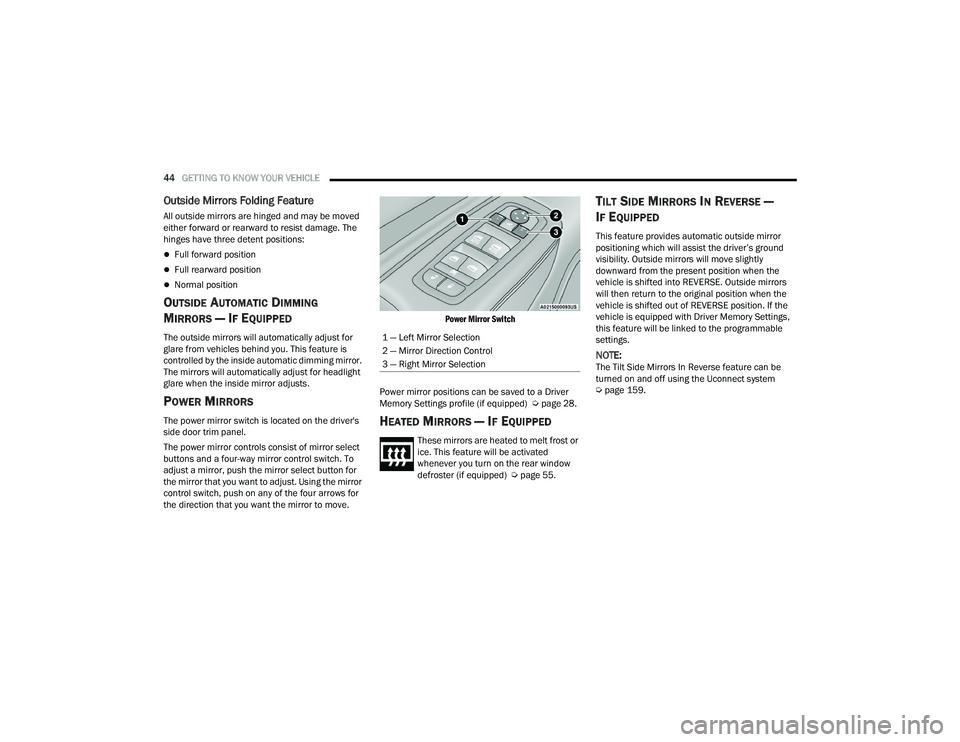
The power mirror controls consist of mirror select
buttons and a four-way mirror control switch. To
adjust a mirror, push the mirror select button for
the mirror that you want to adjust. Using the mirror
control switch, push on any of the four arrows for
the direction that you want the mirror to move.
Power Mirror Switch
Power mirror positions can be saved to a Driver
Memory Settings profile (if equipped) Ú page 28.HEATED MIRRORS — IF EQUIPPED
These mirrors are heated to melt frost or
ice. This feature will be activated
whenever you turn on the rear window
defroster (if equipped) Úpage 55.
TILT SIDE MIRRORS IN REVERSE —
I
F EQUIPPED
This feature provides automatic outside mirror
positioning which will assist the driver’s ground
visibility. Outside mirrors will move slightly
downward from the present position when the
vehicle is shifted into REVERSE. Outside mirrors
will then return to the original position when the
vehicle is shifted out of REVERSE position. If the
vehicle is equipped with Driver Memory Settings,
this feature will be linked to the programmable
settings.
NOTE:The Tilt Side Mirrors In Reverse feature can be
turned on and off using the Uconnect system
Ú page 159.
1 — Left Mirror Selection
2 — Mirror Direction Control
3 — Right Mirror Selection
21_WD_OM_EN_USC_t.book Page 44
Page 74 of 340
72GETTING TO KNOW YOUR VEHICLE
Automatic Window Features
Auto-Down Feature
Both the driver and front passenger window
switches have an Auto-Down feature. Push the
window switch past the first detent, release, and
the window will go down automatically.
To cancel the Auto-Down movement, operate the
switch in either the up or down direction and
release the switch.
Auto-Up Feature With Anti-Pinch Protection —
Driver And Front Passenger Door Only
Lift the window switch fully upward to the second
detent, release, and the window will go up
automatically. To stop the window from going all the way up
during the Auto-Up operation, push down on the
switch briefly.
If the window runs into any obstacle during
Auto-Up, it will reverse direction and then go back
down. Remove the obstacle and use the window
switch again to close the window.
NOTE:Any impact due to rough road conditions may
trigger the auto reverse function unexpectedly
during Auto-Up. If this happens, pull the switch
lightly to the first detent and hold it to close the
window manually.
Reset Auto-Up
Should the Auto-Up feature stop working, the
window may need to be reset. To reset Auto-Up:
1. Make sure the door is fully closed.
2. Pull the window switch up to close the window
completely and continue to hold the switch up
for an additional two seconds after the window
is closed. 3. Push the window switch down firmly to the
second detent to open the window completely
and continue to hold the switch down for an
additional two seconds after the window is
fully open.
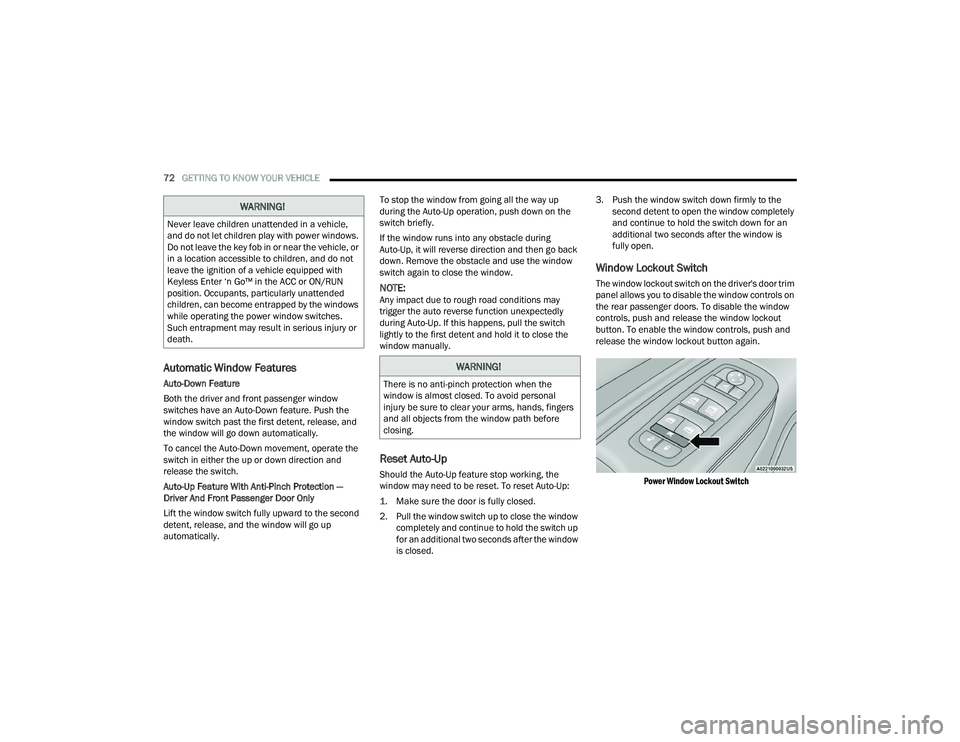
Window Lockout Switch
The window lockout switch on the driver's door trim
panel allows you to disable the window controls on
the rear passenger doors. To disable the window
controls, push and release the window lockout
button. To enable the window controls, push and
release the window lockout button again.
Power Window Lockout Switch
WARNING!
Never leave children unattended in a vehicle,
and do not let children play with power windows.
Do not leave the key fob in or near the vehicle, or
in a location accessible to children, and do not
leave the ignition of a vehicle equipped with
Keyless Enter ‘n Go™ in the ACC or ON/RUN
position. Occupants, particularly unattended
children, can become entrapped by the windows
while operating the power window switches.
Such entrapment may result in serious injury or
death.
WARNING!
There is no anti-pinch protection when the
window is almost closed. To avoid personal
injury be sure to clear your arms, hands, fingers
and all objects from the window path before
closing.
21_WD_OM_EN_USC_t.book Page 72
Page 77 of 340
GETTING TO KNOW YOUR VEHICLE75
CLOSING THE HOOD
LIFTGATE
POWER LIFTGATE — IF EQUIPPED
The power liftgate may be opened by
pushing the liftgate release handle
Úpage 23 or by pushing the liftgate
button on the key fob. Push the liftgate
button on the key fob twice within five seconds to
open or close the power liftgate.
NOTE:
When using the liftgate button on the key fob to
open the liftgate while the vehicle is locked, only
the liftgate will unlock leaving the other doors to
remain locked. Closing the liftgate will not relock
the liftgate. The lock button on the key fob, or
the Passive Entry lock button must be pushed to
relock.
If the Passive Entry button is used to open the
liftgate and all the doors unlock, the liftgate and
vehicle doors must be locked again. Use the key
fob, Passive Entry lock button, or the power door
lock switches on the front door panels.
The power liftgate may also be opened or closed by
pushing the liftgate button located on the front
overhead console. If the liftgate is fully open, it can
be closed by pushing the liftgate button located on
the left rear trim panel. If the liftgate is in motion,
pushing the button again will reverse the liftgate.
When the liftgate button on the key fob is pushed
two times, the turn signals will flash to signal that
the liftgate is opening or closing (if Flash Lamps
with Lock is enabled in the Uconnect settings), and
the liftgate chime will be audible. The chime can be
turned on or off through the Uconnect Settings
Ú page 159.
NOTE:
In the event of a power malfunction to the lift -
gate, an emergency liftgate latch release can be
used to open the liftgate. The emergency liftgate
latch release can be accessed through a snap-in
cover located on the liftgate trim panel.
If liftgate is left open for an extended period of
time, the liftgate may need to be closed manu -
ally to reset power liftgate functionality.
NOTE:
The power liftgate buttons will not operate if the
vehicle is in gear or the vehicle speed is above
0 mph (0 km/h).
The power liftgate will not operate in tempera -
tures below −22°F (−30°C) or temperatures
above 150°F (65°C). Be sure to remove any
buildup of snow or ice from the liftgate before
pushing any of the power liftgate switches.
WARNING!
Be sure the hood is fully latched before driving
your vehicle. If the hood is not fully latched, it
could open when the vehicle is in motion and
block your vision. Failure to follow this warning
could result in serious injury or death.
CAUTION!
To prevent possible damage, do not slam the
hood to close it. Lower hood to approximately
12 inches (30 cm) and drop the hood to close.
Make sure hood is fully closed for both latches.
Never drive vehicle unless hood is fully closed,
with both latches engaged.
WARNING!
During power operation, personal injury or cargo
damage may occur. Ensure the liftgate travel
path is clear. Make sure the liftgate is closed
and latched before driving away.
2
21_WD_OM_EN_USC_t.book Page 75
Page 78 of 340
76GETTING TO KNOW YOUR VEHICLE
If anything obstructs the power liftgate while it is
closing or opening, the liftgate will automatically
reverse to the closed or open position. After
multiple obstructions in the same cycle, the lift -
gate will automatically stop and must be opened
or closed manually.
There are also pinch sensors attached to the
side of the liftgate. Light pressure anywhere
along these strips will cause the liftgate to
return to the open position.
If the liftgate is only partially open, push the lift -
gate button on the key fob twice to operate the
liftgate.
If the liftgate release handle is pushed while the
power liftgate is opening, the liftgate motor will
disengage to allow manual operation.
CARGO AREA FEATURES
Cargo Storage
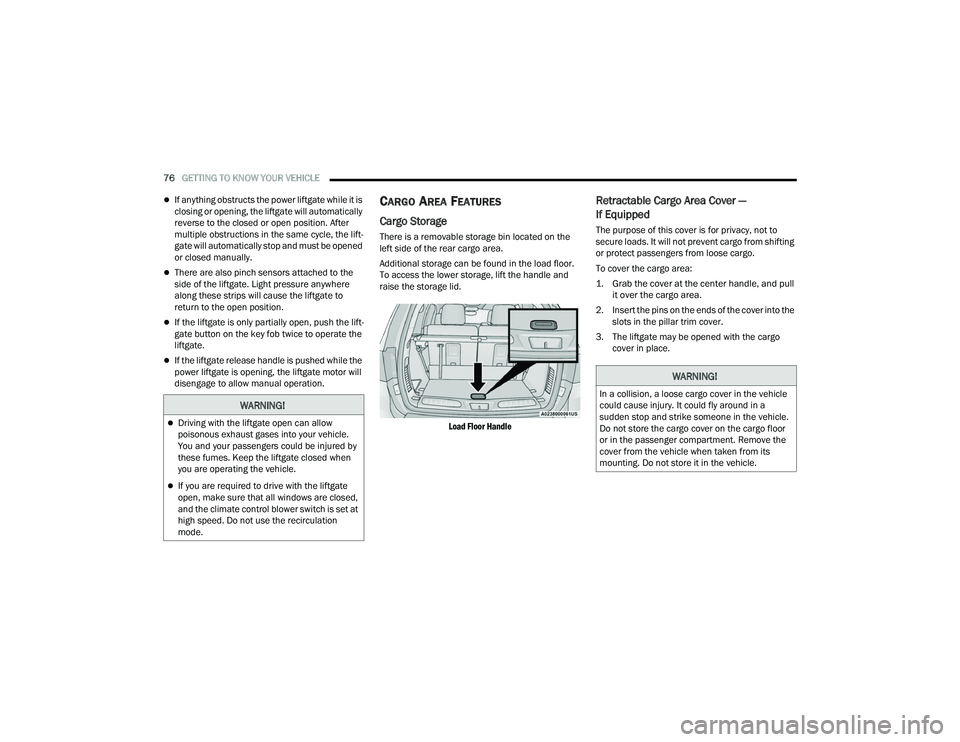
There is a removable storage bin located on the
left side of the rear cargo area.
Additional storage can be found in the load floor.
To access the lower storage, lift the handle and
raise the storage lid.
Load Floor Handle
Retractable Cargo Area Cover —
If Equipped
The purpose of this cover is for privacy, not to
secure loads. It will not prevent cargo from shifting
or protect passengers from loose cargo.
To cover the cargo area:
1. Grab the cover at the center handle, and pull it over the cargo area.
2. Insert the pins on the ends of the cover into the slots in the pillar trim cover.
3. The liftgate may be opened with the cargo cover in place.
WARNING!
Driving with the liftgate open can allow
poisonous exhaust gases into your vehicle.
You and your passengers could be injured by
these fumes. Keep the liftgate closed when
you are operating the vehicle.
If you are required to drive with the liftgate
open, make sure that all windows are closed,
and the climate control blower switch is set at
high speed. Do not use the recirculation
mode.
WARNING!
In a collision, a loose cargo cover in the vehicle
could cause injury. It could fly around in a
sudden stop and strike someone in the vehicle.
Do not store the cargo cover on the cargo floor
or in the passenger compartment. Remove the
cover from the vehicle when taken from its
mounting. Do not store it in the vehicle.
21_WD_OM_EN_USC_t.book Page 76
Page 103 of 340
101
(Continued)
(Continued)
STARTING AND OPERATING
STARTING THE ENGINE
Before starting your vehicle, adjust your seat,
adjust the inside and outside mirrors, fasten your
seat belt, and if present, instruct all other
occupants to buckle their seat belts.
AUTOMATIC TRANSMISSION
The gear selector must be in the NEUTRAL (N) or
PARK (P) position before you can start the engine.
Apply the brakes before shifting into any driving
gear.
NORMAL STARTING
To Turn On The Engine Using The ENGINE START/
STOP Button
1. The transmission must be in PARK (P).
2. Press and hold the brake pedal while pushing
the ENGINE START/STOP button once.
3. The system starts the vehicle. If the vehicle fails to start, the starter will disengage
automatically after 10 seconds.
4. If you wish to stop the cranking of the engine prior to the engine starting, push the ENGINE
START/STOP button again.
WARNING!
Before exiting a vehicle, always come to a
complete stop, then shift the automatic trans -
mission into PARK and apply the parking
brake.
Always make sure the keyless ignition node is
in the OFF mode, key fob is removed from the
vehicle and vehicle is locked.
Never leave children alone in a vehicle, or with
access to an unlocked vehicle. Leaving chil -
dren in a vehicle unattended is dangerous for
a number of reasons. A child or others could
be seriously or fatally injured. Children should
be warned not to touch the parking brake,
brake pedal or the gear selector.
Do not leave the key fob in or near the vehicle,
or in a location accessible to children, and do
not leave the ignition of a vehicle equipped
with Keyless Enter ‘n Go™ in the ACC or
ON/RUN mode. A child could operate power
windows, other controls, or move the vehicle.
Do not leave children or animals inside parked
vehicles in hot weather. Interior heat build-up
may cause serious injury or death.
CAUTION!
Damage to the transmission may occur if the
following precautions are not observed:
Do not shift from REVERSE (R), PARK, or
NEUTRAL into any forward gear when the
engine is above idle speed.
WARNING!
Shift into or out of PARK or REVERSE only after
the vehicle has come to a complete stop and
the engine is at idle speed.
Before shifting into any gear, make sure your
foot is firmly on the brake pedal.
CAUTION!
4
21_WD_OM_EN_USC_t.book Page 101
Page 108 of 340
106STARTING AND OPERATING
(Continued)
(Continued)
AUTOMATIC TRANSMISSION
You must press and hold the brake pedal while
shifting out of PARK.Do not leave the key fob in or near the vehicle
or in a location accessible to children, and do
not leave the ignition of a vehicle equipped
with Keyless Enter ‘n Go™ in the ACC or
ON/RUN mode. A child could operate power
windows, other controls, or move the vehicle.
Be sure the parking brake is fully disengaged
before driving; failure to do so can lead to
brake failure and a collision.
Always fully apply the parking brake when
leaving your vehicle, or it may roll and cause
damage or injury. Also be certain to leave the
transmission in PARK. Failure to do so may
allow the vehicle to roll and cause damage or
injury.
CAUTION!
If the Brake Warning Light remains on with the
parking brake released, a brake system
malfunction is indicated. Have the brake system
serviced by an authorized dealer immediately.
WARNING!
WARNING!
Never use the PARK (P) position as a substi -
tute for the parking brake. Always apply the
parking brake fully when exiting the vehicle to
guard against vehicle movement and possible
injury or damage.
Your vehicle could move and injure you and
others if it is not in PARK. Check by trying to
move the transmission gear selector out of
PARK with the brake pedal released. Make
sure the transmission is in PARK before
exiting the vehicle.
The transmission may not engage PARK if the
vehicle is moving. Always bring the vehicle to a
complete stop before shifting to PARK, and
verify that the transmission gear position indi -
cator solidly indicates PARK without blinking.
Ensure that the vehicle is completely stopped,
and the PARK position is properly indicated,
before exiting the vehicle.
It is dangerous to shift out of PARK or
NEUTRAL (N) if the engine speed is higher
than idle speed. If your foot is not firmly
pressing the brake pedal, the vehicle could
accelerate quickly forward or in reverse. You
could lose control of the vehicle and hit
someone or something. Only shift into gear
when the engine is idling normally and your
foot is firmly pressing the brake pedal.
Unintended movement of a vehicle could
injure those in or near the vehicle. As with all
vehicles, you should never exit a vehicle while
the engine is running. Before exiting a vehicle,
always come to a complete stop, then apply
the parking brake, shift the transmission into
PARK, and turn the ignition OFF. When the
ignition is in the OFF mode, the transmission
is locked in PARK, securing the vehicle against
unwanted movement.
When exiting the vehicle, always make sure
the ignition is in the OFF mode, remove the
key fob from the vehicle, and lock the vehicle.
WARNING!
21_WD_OM_EN_USC_t.book Page 106
Page 109 of 340
STARTING AND OPERATING107
IGNITION PARK INTERLOCK
This vehicle is equipped with an Ignition Park
Interlock which requires the transmission to be in
PARK (P) before the ignition can be turned to the
OFF mode. This helps the driver avoid inadvertently
leaving the vehicle without placing the
transmission in PARK. This system also locks the
transmission in PARK whenever the ignition is in
the OFF mode.
NOTE:The transmission is NOT locked in PARK when the
ignition is in the ACC mode (even though the
engine will be off). Ensure that the transmission is
in PARK, and the ignition is OFF (not in ACC mode)
before exiting the vehicle.
BRAKE TRANSMISSION SHIFT
I
NTERLOCK (BTSI) SYSTEM
This vehicle is equipped with a BTSI system that
holds the transmission gear selector in PARK
unless the brakes are applied. To shift the
transmission out of PARK, the engine must be
running and the brake pedal must be pressed. The
brake pedal must also be pressed to shift from
NEUTRAL into DRIVE or REVERSE when the vehicle
is stopped or moving at low speeds.
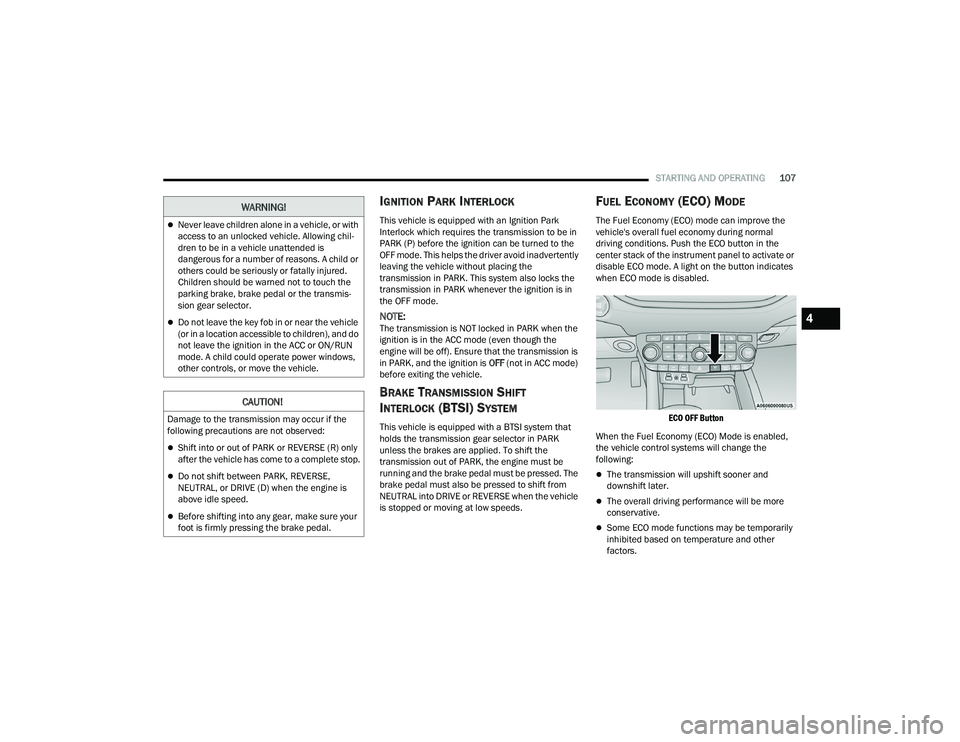
FUEL ECONOMY (ECO) MODE
The Fuel Economy (ECO) mode can improve the
vehicle's overall fuel economy during normal
driving conditions. Push the ECO button in the
center stack of the instrument panel to activate or
disable ECO mode. A light on the button indicates
when ECO mode is disabled.
ECO OFF Button
When the Fuel Economy (ECO) Mode is enabled,
the vehicle control systems will change the
following:
The transmission will upshift sooner and
downshift later.
The overall driving performance will be more
conservative.
Some ECO mode functions may be temporarily
inhibited based on temperature and other
factors.
Never leave children alone in a vehicle, or with
access to an unlocked vehicle. Allowing chil -
dren to be in a vehicle unattended is
dangerous for a number of reasons. A child or
others could be seriously or fatally injured.
Children should be warned not to touch the
parking brake, brake pedal or the transmis -
sion gear selector.
Do not leave the key fob in or near the vehicle
(or in a location accessible to children), and do
not leave the ignition in the ACC or ON/RUN
mode. A child could operate power windows,
other controls, or move the vehicle.
CAUTION!
Damage to the transmission may occur if the
following precautions are not observed:
Shift into or out of PARK or REVERSE (R) only
after the vehicle has come to a complete stop.
Do not shift between PARK, REVERSE,
NEUTRAL, or DRIVE (D) when the engine is
above idle speed.
Before shifting into any gear, make sure your
foot is firmly pressing the brake pedal.
WARNING!
4
21_WD_OM_EN_USC_t.book Page 107