tire type DODGE DURANGO 2021 Owners Manual
[x] Cancel search | Manufacturer: DODGE, Model Year: 2021, Model line: DURANGO, Model: DODGE DURANGO 2021Pages: 340, PDF Size: 20.38 MB
Page 8 of 340
6
IN CASE OF EMERGENCY
HAZARD WARNING FLASHERS ........................ 243
ASSIST AND SOS MIRROR — IF EQUIPPED...... 243
JACKING AND TIRE CHANGING ........................ 247 Preparations For Jacking ............................ 247
Jack Location ................................................. 248
Spare Tire Stowage ....................................... 249
Spare Tire Removal ....................................... 249
Jacking Instructions ..................................... 251
JUMP STARTING .................................................. 255
Preparations For Jump Start......................... 255Jump Starting Procedure .............................. 256
REFUELING IN EMERGENCY –
IF EQUIPPED ........................................................ 257
IF YOUR ENGINE OVERHEATS ............................ 258
MANUAL PARK RELEASE ................................... 258
FREEING A STUCK VEHICLE .............................. 260
TOWING A DISABLED VEHICLE .........................261
Rear Wheel Drive Models ............................. 262
All Wheel Drive Models ................................. 263
ENHANCED ACCIDENT RESPONSE SYSTEM
(EARS) .................................................................. 263
EVENT DATA RECORDER (EDR) ......................... 263
SERVICING AND MAINTENANCE
SCHEDULED SERVICING ................................... 264
Maintenance Plan ......................................... 265
ENGINE COMPARTMENT .................................... 268
3.6L Engine ................................................... 268
5.7L Engine ................................................... 269
Checking Oil Level ......................................... 270
Adding Washer Fluid .................................... 270
Maintenance-Free Battery ........................... 270Pressure Washing ......................................... 271
VEHICLE MAINTENANCE..................................... 271
Engine Oil ...................................................... 271
Engine Oil Filter ............................................ 272
Engine Air Cleaner Filter ............................ 272
Air Conditioner Maintenance ..................... 273
Accessory Drive Belt Inspection ................... 275Body Lubrication .......................................... 276
Windshield Wiper Blades ............................. 276
Exhaust System ............................................ 279
Cooling System .............................................. 280
Brake System ............................................... 283
Automatic Transmission ............................... 284
Front/Rear Axle Fluid ................................... 285Transfer Case ............................................... 285
Fuses.............................................................. 286
Bulb Replacement......................................... 293 TIRES ..................................................................... 295
Tire Safety Information ................................. 295
Tires — General Information ........................ 303Tire Types....................................................... 306Spare Tires — If Equipped ............................ 307
Wheel And Wheel Trim Care ........................ 309Snow Traction Devices ................................. 310
Tire Rotation Recommendations ................ 312
DEPARTMENT OF TRANSPORTATION
UNIFORM TIRE QUALITY GRADES .................... 312
Treadwear...................................................... 312
Traction Grades ............................................. 313Temperature Grades..................................... 313
STORING THE VEHICLE .................................... 313
BODYWORK .......................................................... 313 Protection From Atmospheric Agents .......... 313
Body And Underbody Maintenance ............. 314
Preserving The Bodywork ............................. 314
INTERIORS ........................................................... 315
Seats And Fabric Parts ................................. 315
Plastic And Coated Parts .............................. 315
Leather Surfaces........................................... 316
Glass Surfaces ............................................. 316
21_WD_OM_EN_USC_t.book Page 6
Page 11 of 340
9
SYMBOLS KEY
If you do not read this entire Owner’s Manual, you may miss important
information. Observe all Cautions and Warnings.
ROLLOVER WARNING
Utility vehicles have a significantly higher rollover rate than other types of
vehicles. This vehicle has a higher ground clearance and a higher center of
gravity than many passenger vehicles. It is capable of performing better in a
wide variety of off-road applications. Driven in an unsafe manner, all vehicles
can go out of control. Because of the higher center of gravity, if this vehicle is
out of control, it may roll over while some other vehicles may not.
Do not attempt sharp turns, abrupt maneuvers, or other unsafe driving actions
that can cause loss of vehicle control. Failure to operate this vehicle safely may
result in a collision, rollover of the vehicle, and severe or fatal injury. Drive
carefully.
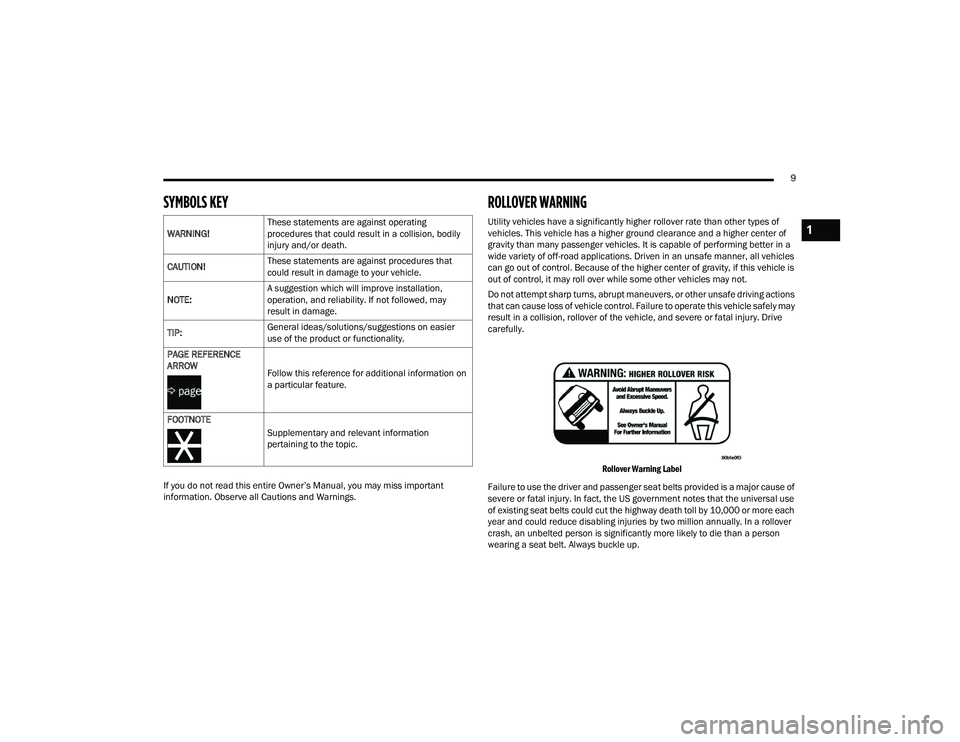
Rollover Warning Label
Failure to use the driver and passenger seat belts provided is a major cause of
severe or fatal injury. In fact, the US government notes that the universal use
of existing seat belts could cut the highway death toll by 10,000 or more each
year and could reduce disabling injuries by two million annually. In a rollover
crash, an unbelted person is significantly more likely to die than a person
wearing a seat belt. Always buckle up.
WARNING!
These statements are against operating
procedures that could result in a collision, bodily
injury and/or death.
CAUTION! These statements are against procedures that
could result in damage to your vehicle.
NOTE: A suggestion which will improve installation,
operation, and reliability. If not followed, may
result in damage.
TIP: General ideas/solutions/suggestions on easier
use of the product or functionality.
PAGE REFERENCE
ARROW
Follow this reference for additional information on
a particular feature.
FOOTNOTE Supplementary and relevant information
pertaining to the topic. 1
21_WD_OM_EN_USC_t.book Page 9
Page 87 of 340
GETTING TO KNOW YOUR INSTRUMENT PANEL85
The instrument cluster display is located in the
center portion of the cluster and consist of multiple
sections:
Main Screen — The inner ring of the display will
illuminate in gray under normal conditions,
yellow for non critical warnings, red for critical
warnings, and white for on demand information.
Submenu Dots — Whenever there are
submenus available, the position within the
submenus is shown here.
Reconfigurable Telltales/Information
Gear Selector Status (PRND)
Driver Interactive Display (Compass, Temp,
Range to Empty, Trip A, Trip B, Average Fuel
Economy, Current Fuel Economy, Time, Trailer
Trip and Gain)
All Wheel Drive (AWD) Status — If Equipped
The instrument cluster display will normally display
the main menu or the screens of a selected feature
of the main menu. The main display area also
displays “pop-up” messages that consist of
approximately 60 possible warning or information
messages. These pop-up messages fall into
several categories:
Five Second Stored Messages
When the appropriate conditions occur, this
type of message takes control of the main
display area for five seconds and then returns to
the previous screen. Most of the messages of
this type are then stored (as long as the condi-
tion that activated it remains active) and can be
reviewed from the “Messages” main menu item.
Examples of this message type are “Right Front
Turn Signal Lamp Out” and “Low Tire Pressure.”
Unstored Messages
This message type is displayed indefinitely or
until the condition that activated the message is
cleared. Examples of this message type are
“Turn Signal On” (if a turn signal is left on) and
“Lights On” (if driver leaves the vehicle with the
lights on).
Unstored Messages Until RUN
These messages deal primarily with the Remote
Start feature. This message type is displayed
until the ignition is in the RUN state. Examples of
this message type are “Remote Start Canceled -
Door Ajar” and “Press Brake Pedal and Push
Button to Start.”
Five Second Unstored Messages
When the appropriate conditions occur, this
type of message takes control of the main
display area for five seconds and then returns to
the previous screen. An example of this
message type is “Automatic High Beams On.”
ENGINE OIL LIFE RESET
Oil Change Required
Your vehicle is equipped with an engine oil change
indicator system. The “Oil Change Required”
message will display in the instrument cluster
display for five seconds after a single chime has
sounded, to indicate the next scheduled oil change
interval. The engine oil change indicator system is
duty cycle based, which means the engine oil
change interval may fluctuate, dependent upon
your personal driving style.
Unless reset, this message will continue to display
each time the ignition is placed in the ON/RUN
position. To turn off the message temporarily, push
and release the OK or arrow buttons. To reset the
oil change indicator system (after performing the
scheduled maintenance), refer to the following
procedure.3
21_WD_OM_EN_USC_t.book Page 85
Page 89 of 340
GETTING TO KNOW YOUR INSTRUMENT PANEL87
Remote Start Canceled Liftgate Open
Remote Start Canceled Time Expired
Remote Start Disabled Start To Reset
Service Air Bag System
Service Air Bag Warning Light
Door Open
Doors Open
Liftgate Open
Hood Open
Shift Not Allowed
Vehicle Speed Too High To Shift to D
Vehicle Speed is Too High to Shift to R
Vehicle Speed is Too High to Shift to P
Service Transmission
Service Shifter
The Reconfigurable Telltales section is divided into
the white or yellow telltales area on the left, and
the green or red telltales area on the right.
INSTRUMENT CLUSTER DISPLAY MENU
I
TEMS
The instrument cluster display can be used to view
the main menu items for several features. Use the
up and down arrow buttons to scroll through
the driver interactive display menu options until
the desired menu is reached.
NOTE:Depending on the vehicle’s options, feature
settings may vary.
Speedometer
Non - SRT
Push and release the up or down arrow
button until the main gauge menu icon is displayed
in the instrument cluster display. Push and release
the left or right arrow button to select the
analog or digital type speedometer display. Push
and release the OK button to toggle units (mph or
km/h) of the speedometer.
Vehicle Info
Push and release the up or down arrow
button until the Vehicle Info icon/title is highlighted
in the instrument cluster display. Push the
left or right arrow button to scroll through
the information submenus. Tire Pressure Monitor System
If tire pressure is
OK for all tires a vehicle icon is
displayed with tire pressure values in each
corner of the icon.
If one or more tires have low pressure, “Inflate
Tire To XX” is displayed with the vehicle icon and
the tire pressure values in each corner of the
icon with the pressure value of the low tire are
displayed in a different color than the other tire
pressure value.
If the Tire Pressure system requires service,
“Service Tire Pressure System” is displayed.
Tire Pressure is an information only function, and
cannot be reset Ú page 201.
Transmission Temperature
Displays the actual transmission temperature.
Oil Temperature
Displays the actual oil temperature.
Oil Pressure
Displays the actual oil pressure.
Oil Life
Displays the current oil life of the vehicle.
3
21_WD_OM_EN_USC_t.book Page 87
Page 98 of 340
96GETTING TO KNOW YOUR INSTRUMENT PANEL
When the malfunction indicator is illuminated, the
system may not be able to detect or signal low tire
pressure as intended. TPMS malfunctions may
occur for a variety of reasons, including the
installation of replacement or alternate tires or
wheels on the vehicle that prevent the TPMS from
functioning properly. Always check the TPMS
malfunction telltale after replacing one or more
tires or wheels on your vehicle to ensure that the
replacement or alternate tires and wheels allow
the TPMS to continue to function properly.
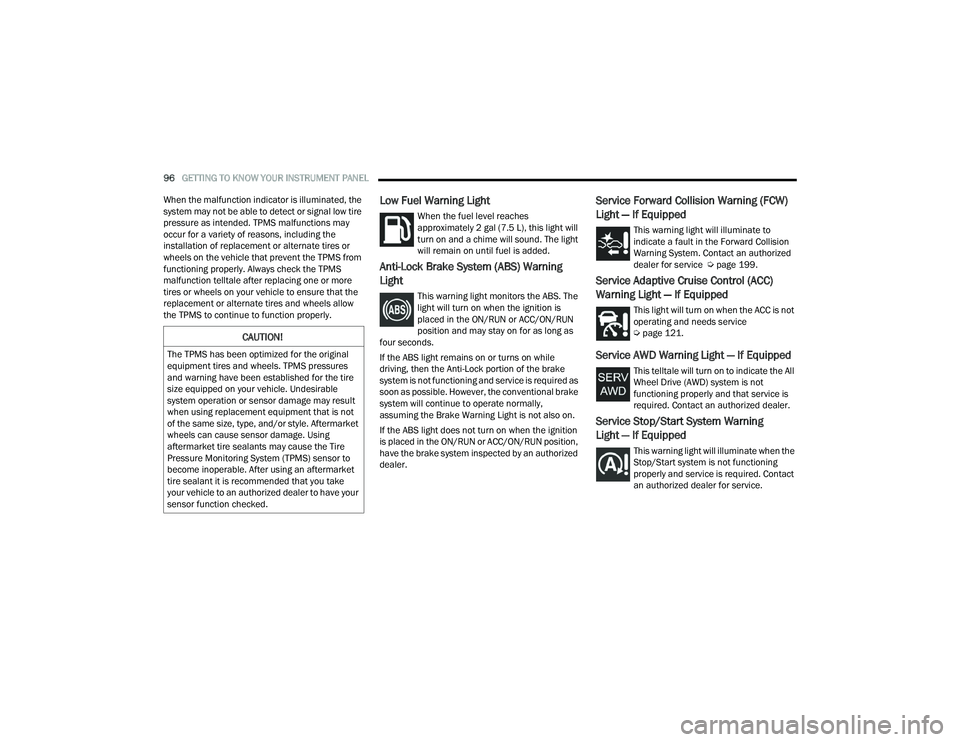
Low Fuel Warning Light
When the fuel level reaches
approximately 2 gal (7.5 L), this light will
turn on and a chime will sound. The light
will remain on until fuel is added.
Anti-Lock Brake System (ABS) Warning
Light
This warning light monitors the ABS. The
light will turn on when the ignition is
placed in the ON/RUN or ACC/ON/RUN
position and may stay on for as long as
four seconds.
If the ABS light remains on or turns on while
driving, then the Anti-Lock portion of the brake
system is not functioning and service is required as
soon as possible. However, the conventional brake
system will continue to operate normally,
assuming the Brake Warning Light is not also on.
If the ABS light does not turn on when the ignition
is placed in the ON/RUN or ACC/ON/RUN position,
have the brake system inspected by an authorized
dealer.
Service Forward Collision Warning (FCW)
Light — If Equipped
This warning light will illuminate to
indicate a fault in the Forward Collision
Warning System. Contact an authorized
dealer for service Ú page 199.
Service Adaptive Cruise Control (ACC)
Warning Light — If Equipped
This light will turn on when the ACC is not
operating and needs service
Úpage 121.
Service AWD Warning Light — If Equipped
This telltale will turn on to indicate the All
Wheel Drive (AWD) system is not
functioning properly and that service is
required. Contact an authorized dealer.
Service Stop/Start System Warning
Light — If Equipped
This warning light will illuminate when the
Stop/Start system is not functioning
properly and service is required. Contact
an authorized dealer for service.
CAUTION!
The TPMS has been optimized for the original
equipment tires and wheels. TPMS pressures
and warning have been established for the tire
size equipped on your vehicle. Undesirable
system operation or sensor damage may result
when using replacement equipment that is not
of the same size, type, and/or style. Aftermarket
wheels can cause sensor damage. Using
aftermarket tire sealants may cause the Tire
Pressure Monitoring System (TPMS) sensor to
become inoperable. After using an aftermarket
tire sealant it is recommended that you take
your vehicle to an authorized dealer to have your
sensor function checked.
21_WD_OM_EN_USC_t.book Page 96
Page 115 of 340
STARTING AND OPERATING113
When additional traction is required, the transfer
case AWD LOW position can be used to lock the
front and rear driveshafts together forcing the front
and rear wheels to rotate at the same speed. This
is accomplished by pushing the AWD LOW switch
Ú page 114. The AWD LOW position is designed for
loose, slippery road surfaces only. Driving in the
AWD LOW position on dry, hard surfaced roads
may cause increased tire wear and damage to the
driveline components.
Transfer Case Position Indicator Messages
The Transfer Case Position Indicator message
(AWD LOW) is located in the instrument cluster and
indicate the current and desired transfer case
selection Ú page 83. When you select a different
transfer case position, the position indicator lights
will do the following:
If All Shift Conditions Are Met:
1. The current position indicator light will turn off.
2. The selected position indicator light will flash until the transfer case completes the shift.
3. When the shift is complete, the indicator light for the selected position will stop flashing and
remain on. If shift conditions are not met, one or more of the
following events may occur:
1. The indicator light for the current position will
remain on.
2. The newly selected position indicator light will continue to flash.
3. The transfer case will not shift.
NOTE:Before retrying a selection, make certain that all
the necessary requirements for selecting a new
transfer case position have been met Úpage 114.
The “SERV AWD” Warning Light monitors the
electronic shift all-wheel drive system. If this light
remains on after engine start up or illuminates
during driving, it means that the all-wheel drive
system is not functioning properly and that service
is required.
NOTE:Do not attempt to make a shift while only the front
or rear wheels are spinning. This could cause
damage to driveline components.
When operating your vehicle in AWD LOW, the
engine speed is approximately three times that of
the AWD AUTO position at a given road speed. Take
care not to overspeed the engine and do not
exceed 25 mph (40 km/h).
Proper operation of all-wheel drive vehicles
depends on tires of equal size, type and
circumference on each wheel. Any difference in
tire size can cause damage to the transfer case.
Because all-wheel drive provides improved
traction, there is a tendency to exceed safe turning
and stopping speeds. Do not go faster than road
conditions permit.
For additional information on the appropriate use
of each transfer case mode position, see the
information below:
AWD LOW
All-Wheel Drive Low Range – This range provides
low speed all-wheel drive. Locks the front and rear
driveshafts together forcing the front and rear
wheels to rotate at the same speed. Additional
traction and maximum pulling power for loose,
slippery road surfaces only. Do not exceed 25 mph
(40 km/h).
WARNING!
Always engage the parking brake when powering
down the vehicle if the “SERV AWD Warning
Light” is illuminated. Not engaging the parking
brake may allow the vehicle to roll which may
cause personal injury.
4
21_WD_OM_EN_USC_t.book Page 113
Page 144 of 340
142STARTING AND OPERATING
Curb Weight
The curb weight of a vehicle is defined as the total
weight of the vehicle with all fluids, including
vehicle fuel, at full capacity conditions, and with no
occupants or cargo loaded into the vehicle. The
front and rear curb weight values are determined
by weighing your vehicle on a commercial scale
before any occupants or cargo are added.
Loading
The actual total weight and the weight of the front
and rear of your vehicle at the ground can best be
determined by weighing it when it is loaded and
ready for operation.
The entire vehicle should first be weighed on a
commercial scale to ensure that the GVWR has not
been exceeded. The weight on the front and rear of
the vehicle should then be determined separately
to be sure that the load is properly distributed over
the front and rear axle. Weighing the vehicle may
show that the GAWR of either the front or rear axles
has been exceeded but the total load is within the
specified GVWR. If so, weight must be shifted from
front to rear or rear to front as appropriate until the
specified weight limitations are met. Store the
heavier items down low and be sure that the
weight is distributed equally. Stow all loose items
securely before driving. Improper weight distributions can have an adverse
effect on the way your vehicle steers and handles
and the way the brakes operate.
TRAILER TOWING
In this section you will find safety tips and
information on limits to the type of towing you can
reasonably do with your vehicle. Before towing a
trailer, carefully review this information to tow your
load as efficiently and safely as possible.
To maintain the New Vehicle Limited Warranty
coverage, follow the requirements and
recommendations in this manual concerning
vehicles used for trailer towing.
COMMON TOWING DEFINITIONS
The following trailer towing related definitions will
assist you in understanding the following
information:
Gross Vehicle Weight Rating (GVWR)
The GVWR is the total allowable weight of your
vehicle. This includes driver, passengers, cargo
and tongue weight. The total load must be limited
so that you do not exceed the GVWR Ú
page 141.
Gross Trailer Weight (GTW)
The GTW is the weight of the trailer plus the weight
of all cargo, consumables and equipment
(permanent or temporary) loaded in or on the
trailer in its "loaded and ready for operation"
condition.
The recommended way to measure GTW is to put
your fully loaded trailer on a vehicle scale. The
entire weight of the trailer must be supported by
the scale.
CAUTION!
Do not load your vehicle any heavier than the
GVWR or the maximum front and rear GAWR. If
you do, parts on your vehicle can break, or it can
change the way your vehicle handles. This could
cause you to lose control. Overloading can
shorten the life of your vehicle.
WARNING!
If the gross trailer weight is 5,000 lb (2,267 kg)
or more, it is recommended to use a
weight-distributing hitch to ensure stable
handling of your vehicle. If you use a standard
weight-carrying hitch, you could lose control of
your vehicle and cause a collision.
21_WD_OM_EN_USC_t.book Page 142
Page 149 of 340
STARTING AND OPERATING147
(Continued)
(Continued)
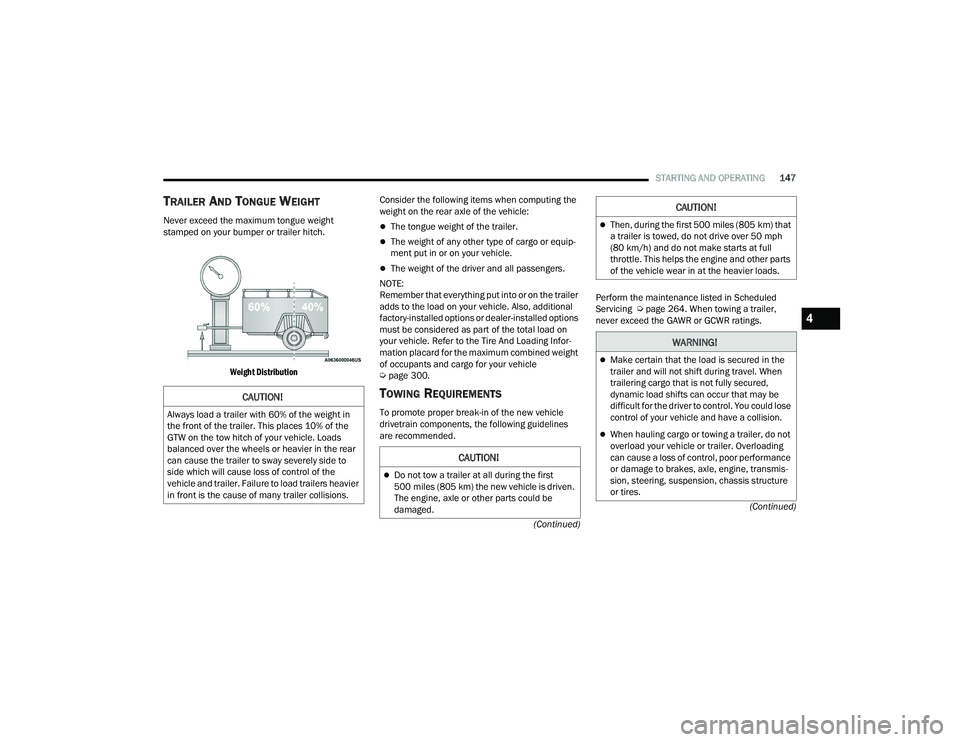
TRAILER AND TONGUE WEIGHT
Never exceed the maximum tongue weight
stamped on your bumper or trailer hitch.
Weight Distribution
Consider the following items when computing the
weight on the rear axle of the vehicle:The tongue weight of the trailer.
The weight of any other type of cargo or equip
-
ment put in or on your vehicle.
The weight of the driver and all passengers.
NOTE:
Remember that everything put into or on the trailer
adds to the load on your vehicle. Also, additional
factory-installed options or dealer-installed options
must be considered as part of the total load on
your vehicle. Refer to the Tire And Loading Infor -
mation placard for the maximum combined weight
of occupants and cargo for your vehicle
Ú page 300.
TOWING REQUIREMENTS
To promote proper break-in of the new vehicle
drivetrain components, the following guidelines
are recommended. Perform the maintenance listed in Scheduled
Servicing Ú
page 264. When towing a trailer,
never exceed the GAWR or GCWR ratings.
CAUTION!
Always load a trailer with 60% of the weight in
the front of the trailer. This places 10% of the
GTW on the tow hitch of your vehicle. Loads
balanced over the wheels or heavier in the rear
can cause the trailer to sway severely side to
side which will cause loss of control of the
vehicle and trailer. Failure to load trailers heavier
in front is the cause of many trailer collisions.
CAUTION!
Do not tow a trailer at all during the first
500 miles (805 km) the new vehicle is driven.
The engine, axle or other parts could be
damaged.
Then, during the first 500 miles (805 km) that
a trailer is towed, do not drive over 50 mph
(80 km/h) and do not make starts at full
throttle. This helps the engine and other parts
of the vehicle wear in at the heavier loads.
WARNING!
Make certain that the load is secured in the
trailer and will not shift during travel. When
trailering cargo that is not fully secured,
dynamic load shifts can occur that may be
difficult for the driver to control. You could lose
control of your vehicle and have a collision.
When hauling cargo or towing a trailer, do not
overload your vehicle or trailer. Overloading
can cause a loss of control, poor performance
or damage to brakes, axle, engine, transmis -
sion, steering, suspension, chassis structure
or tires.
CAUTION!
4
21_WD_OM_EN_USC_t.book Page 147
Page 152 of 340
150STARTING AND OPERATING
3. When a trailer with electric/EOH brakes is plugged in, the trailer connected message
should appear in the instrument cluster
display (if the connection is not recognized by
the ITBM, braking functions will not be
available), the GAIN setting will illuminate and
the correct type of trailer must be selected
from the instrument cluster display options.
4. Push the UP or DOWN button on the steering wheel until “TRAILER TOW” appears on the
screen.
5. Push the RIGHT arrow on the steering wheel to enter “TRAILER TOW”.
6. Push the UP or DOWN buttons until the Trailer Brake Type appears on the screen.
7. Push the RIGHT arrow and then push the UP or DOWN buttons until the proper Trailer Brake
Type appears on the screen.
8. In a traffic-free environment, tow the trailer on a dry, level surface at a speed of 20–25 mph
(30–40 km/h) and squeeze the manual brake
control lever completely. 9. If the trailer wheels lockup (indicated by
squealing tires), reduce the GAIN setting; if the
trailer wheels turn freely, increase the GAIN
setting.
Repeat steps 8 and 9 until the GAIN setting is at a
point just below trailer wheel lockup. If towing a
heavier trailer, trailer wheel lockup may not be
attainable even with the maximum GAIN setting
of 10.
Display Messages
The trailer brake control interacts with the
instrument cluster display. Display messages,
along with a single chime, will be displayed when a
malfunction is determined in the trailer
connection, trailer brake control, or on the trailer
Ú page 83.
NOTE:
An aftermarket controller may be available for
use with trailers with air or EOH trailer brake
systems. To determine the type of brakes on
your trailer and the availability of controllers,
check with your trailer manufacturer or dealer.
Removal of the ITBM will cause errors and it
may cause damage to the electrical system and
electronic modules of the vehicle. See an autho -
rized dealer if an aftermarket module is to be
installed.
WARNING!
Connecting a trailer that is not compatible with
the ITBM system may result in reduced or
complete loss of trailer braking. There may be an
increase in stopping distance or trailer instability
which could result in personal injury.
CAUTION!
Connecting a trailer that is not compatible with
the ITBM system may result in reduced or
complete loss of trailer braking. There may be an
increase in stopping distance or trailer instability
which could result in damage to your vehicle,
trailer, or other property.
21_WD_OM_EN_USC_t.book Page 150
Page 188 of 340
186MULTIMEDIA
Disc Features control the remote Blu-ray™ Disc
player's settings of DVD being watched in the
remote player.
Listening To Audio With The Screen Closed
To listen to only the audio portion of the channel
with the screen closed:
Set the audio to the desired source and
channel.
Close the video screen.
To change the current audio mode, push the
remote control’s SOURCE button. This will auto -
matically select the next available audio mode
without using the Mode/Source Select menu.
When the screen is reopened, the video screen
will automatically turn back on and show the
appropriate display menu or media.
If the screen is closed and there is no audio heard,
verify that the headphones are turned on (the ON
indicator is illuminated) and the headphone
selector switch is on the desired channel. If the
headphones are turned on, push the remote
control’s power button to turn audio on. If audio is
still not heard, check that fully charged batteries
are installed in the headphones.
Disc Formats
The Blu-ray™ Disc player is capable of playing the
following types of 4.7-inch (12 centimeter)
diameter discs:
BD: BDMV (Profile 1.1), BDAV (Profile 1.1)
DVD: DVD-Video, DVD-Audio, AVCREC, AVCHD,
DVD-VR
CD: CD-DA, VCD, CD-TEXT
DVD/CD: MP3, WMA, AAC, DivX (versions 3 – 6)
profile 3.0
DVD Region Codes
The Blu-ray™ Disc player and many DVD discs are
coded by geographic region. These region codes
must match in order for the disc to play. If the
region code for the DVD disc does not match the
region code for the player, the disc will not play.
DVD Audio Support
When a DVD-Audio disc is inserted in the Blu-ray™
Disc player, the DVD-Audio title on the disc is
played by default (most DVD-Audio discs also have
a Video title, but the Video title is ignored). All
multichannel program material is automatically
mixed down to two channels, which may result in a
lowered apparent volume level. If you increase the
volume level to account for this change in level,
remember to lower the volume before changing
the disc or to another mode. Recorded Discs
The Blu-ray™ Disc player will play CD-R and CD-RW
discs recorded in CD-Audio or Video-CD format, or
as a CD-ROM containing MP3 or WMA files. The
player will also play DVD-Video content recorded to
a DVD-R or DVD-RW disc. DVD-ROM discs (either
pressed or recorded) are not supported.
If you record a disc using a personal computer,
there may be cases where the Blu-ray™ Disc player
may not be able to play some or the entire disc,
even if it is recorded in a compatible format and is
playable on other players. To help avoid playback
problems, use the following guidelines when
recording discs:
Open sessions are ignored. Only sessions that
are closed are playable.
For multi-session CDs that contain only multiple
CD-Audio sessions, the player will renumber the
tracks so each track number is unique.
For CD Data (or CD-ROM) discs, always use the
ISO-9660 (Level 1 or Level 2), Joliet, or Romeo
format. Other formats (such as UDF, HFS, or
others) are not supported.
The player recognizes a maximum of 512 files
and 99 folders per CD-R and CD-RW disc.
Mixed media recordable DVD formats will only
play the Video_TS portion of the disc.
21_WD_OM_EN_USC_t.book Page 186