windshield wipers DODGE DURANGO 2021 Owners Manual
[x] Cancel search | Manufacturer: DODGE, Model Year: 2021, Model line: DURANGO, Model: DODGE DURANGO 2021Pages: 340, PDF Size: 20.38 MB
Page 5 of 340
3
EXTERIOR LIGHTS.................................................. 48 Multifunction Lever ..........................................48
Headlight Switch ..............................................48
Daytime Running Lights (DRLs) ......................49
High/Low Beam Switch....................................49
Automatic High Beam — If Equipped ..............50
Flash-To-Pass ..................................................50
Automatic Headlights ......................................50
Parking Lights And Panel Lights ......................50
Automatic Headlights With Wipers..................50
Headlight Delay ................................................51
Lights-On Reminder..........................................51
Fog Lights — If Equipped ..................................51
Turn Signals ......................................................51
Lane Change Assist — If Equipped ..................51
Automatic Headlight Leveling —
If Equipped........................................................52
Battery Saver ....................................................52
INTERIOR LIGHTS ................................................. 52
Courtesy Lights .................................................52
WINDSHIELD WIPERS AND WASHERS .............. 53
Windshield Wiper Operation ...........................53
Rain Sensing Wipers — If Equipped ...............54
Rear Window Wiper/Washer ..........................55
CLIMATE CONTROLS ............................................. 55
Automatic Climate Control Descriptions And
Functions ..........................................................55
Automatic Temperature Control (ATC) ..........62
Climate Voice Recognition ...............................62
Operating Tips .................................................62 INTERIOR STORAGE AND EQUIPMENT ............... 64
Storage..............................................................64
USB/AUX Control .............................................67
Electrical Power Outlets .................................68
Power Inverter — If Equipped ..........................70
Wireless Charging Pad —
If Equipped .......................................................71
WINDOWS ..............................................................71
Power Windows ................................................71
Wind Buffeting .................................................73
POWER SUNROOF — IF EQUIPPED ...................... 73
Opening And Closing The Sunroof...................73
Sunshade Operation ........................................73
Pinch Protect Feature ......................................74
Venting Sunroof................................................74
Sunroof Maintenance ......................................74
Ignition Off Operation.......................................74
HOOD .......................................................................74
Opening The Hood............................................74
Closing The Hood .............................................75
LIFTGATE ................................................................. 75
Power Liftgate — If Equipped ...........................75
Cargo Area Features .......................................76
ROOF LUGGAGE RACK — IF EQUIPPED ............... 77
Deploying The Crossbars .................................78
Stowing The Crossbars ....................................80
GETTING TO KNOW YOUR
INSTRUMENT PANEL
INSTRUMENT CLUSTER ........................................ 82Instrument Cluster Descriptions ..................... 83
INSTRUMENT CLUSTER DISPLAY ........................ 83
Location And Controls...................................... 83
Engine Oil Life Reset ....................................... 85
Display And Messages ..................................... 86
Instrument Cluster Display Menu Items ........ 87
Battery Saver On/Battery Saver Mode
Message — Electrical Load Reduction
Actions — If Equipped ...................................... 89
WARNING LIGHTS AND MESSAGES ................... 91
Red Warning Lights ..........................................91
Yellow Warning Lights ...................................... 94
Yellow Indicator Lights ..................................... 97
Green Indicator Lights ..................................... 97
White Indicator Lights ...................................... 98
Blue Indicator Lights ........................................ 98
ONBOARD DIAGNOSTIC SYSTEM — OBD II ........ 99
Onboard Diagnostic System
(OBD II) Cybersecurity ...................................... 99
EMISSIONS INSPECTION AND MAINTENANCE
PROGRAMS .......................................................... 100
21_WD_OM_EN_USC_t.book Page 3
Page 52 of 340
50GETTING TO KNOW YOUR VEHICLE
AUTOMATIC HIGH BEAM — IF EQUIPPED
The Automatic High Beam Headlamp Control
system provides increased forward lighting at night
by automatically controlling the high beams
through the use of a camera mounted on the
inside rearview mirror. This camera detects vehicle
specific light and automatically switches from high
beams to low beams until the approaching vehicle
is out of view.
NOTE:
The Automatic High Beam Headlamp Control
can be turned on or off by selecting or dese -
lecting “Auto Dim High Beams” within your
Uconnect Settings Ú page 159, as well as
turning the headlight switch to the AUTO posi -
tion.
Broken, muddy, or obstructed headlights and
taillights of vehicles in the field of view will
cause headlights to remain on longer (closer to
the vehicle). Also, dirt, film, and other obstruc -
tions on the windshield or camera lens will
cause the system to function improperly.
If the windshield or Automatic High Beam Head -
lamp Control mirror is replaced, the mirror must
be re-aimed to ensure proper performance. See
a local authorized dealer.
FLASH-TO-PASS
You can signal another vehicle with your headlights
by lightly pulling the multifunction lever toward you.
This will cause the high beam headlights to turn on,
and remain on, until the lever is released.
AUTOMATIC HEADLIGHTS
This system automatically turns the headlights on
or off according to ambient light levels. To turn the
system on, rotate the headlight switch
counterclockwise to the AUTO position. When the
system is on, the headlight time delay feature is
also on. This means the headlights will stay on for
up to 90 seconds after you place the ignition into
the OFF position. The headlight time delay can be
programmed 0/30/60/90 seconds within
Uconnect Settings Ú page 159.
To turn the automatic system off, move the
headlight switch out of the AUTO position.
NOTE:The engine must be running before the headlights
will come on in the automatic mode.
PARKING LIGHTS AND PANEL LIGHTS
To turn on the parking lights and instrument panel
lights, rotate the headlight switch clockwise. To
turn off the parking lights, rotate the headlight
switch back to the O (off) position.
AUTOMATIC HEADLIGHTS WITH WIPERS
If your vehicle is equipped with Automatic
Headlights, it also has this customer-
programmable feature. When your headlights are
in the automatic mode and the engine is running,
they will automatically turn on when the wiper
system is on. This feature is programmable
through the Uconnect system Ú page 159.
NOTE:When your headlights come on during the daytime,
the vehicle will monitor outside brightness and
decide if the instrument panel needs to be dimmed
or not.
21_WD_OM_EN_USC_t.book Page 50
Page 55 of 340
GETTING TO KNOW YOUR VEHICLE53
Ambient Light — If Equipped
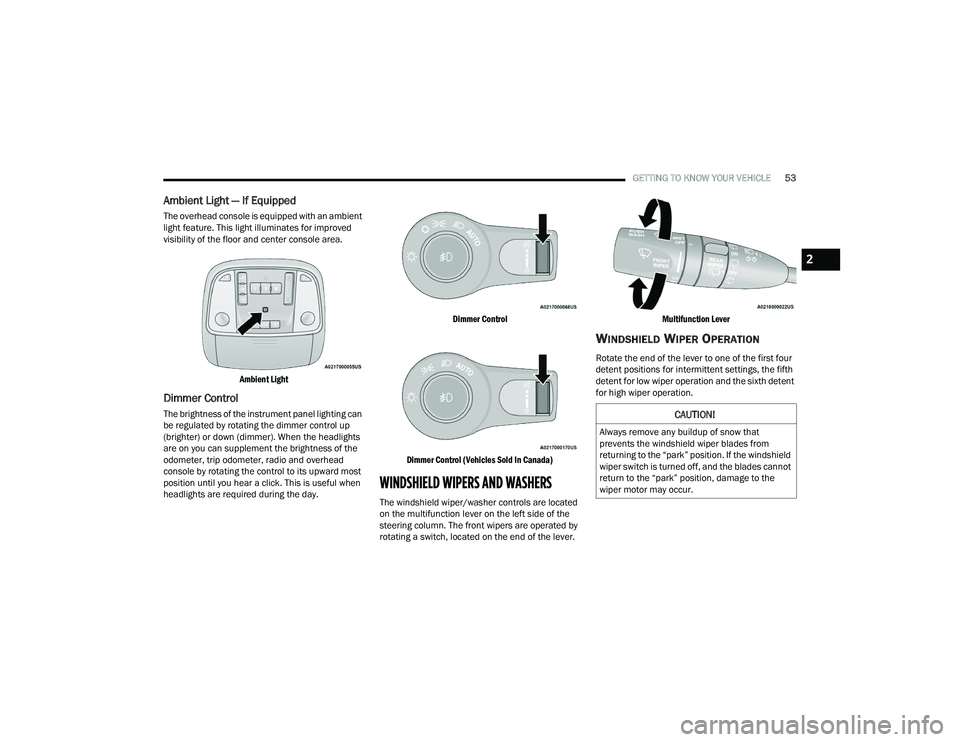
The overhead console is equipped with an ambient
light feature. This light illuminates for improved
visibility of the floor and center console area.
Ambient Light
Dimmer Control
The brightness of the instrument panel lighting can
be regulated by rotating the dimmer control up
(brighter) or down (dimmer). When the headlights
are on you can supplement the brightness of the
odometer, trip odometer, radio and overhead
console by rotating the control to its upward most
position until you hear a click. This is useful when
headlights are required during the day.
Dimmer Control
Dimmer Control (Vehicles Sold In Canada)
WINDSHIELD WIPERS AND WASHERS
The windshield wiper/washer controls are located
on the multifunction lever on the left side of the
steering column. The front wipers are operated by
rotating a switch, located on the end of the lever.
Multifunction Lever
WINDSHIELD WIPER OPERATION
Rotate the end of the lever to one of the first four
detent positions for intermittent settings, the fifth
detent for low wiper operation and the sixth detent
for high wiper operation.
CAUTION!
Always remove any buildup of snow that
prevents the windshield wiper blades from
returning to the “park” position. If the windshield
wiper switch is turned off, and the blades cannot
return to the “park” position, damage to the
wiper motor may occur.
2
21_WD_OM_EN_USC_t.book Page 53
Page 56 of 340
54GETTING TO KNOW YOUR VEHICLE
Intermittent Wipers
Use one of the four intermittent wiper settings
when weather conditions make a single wiping
cycle, with a variable delay between cycles,
desirable. At driving speeds above 10 mph
(16 km/h), the delay can be regulated from a
maximum of approximately 18 seconds between
cycles (first detent), to a cycle every one second
(fourth detent). If the vehicle is moving less than
10 mph (16 km/h), delay times will be doubled.
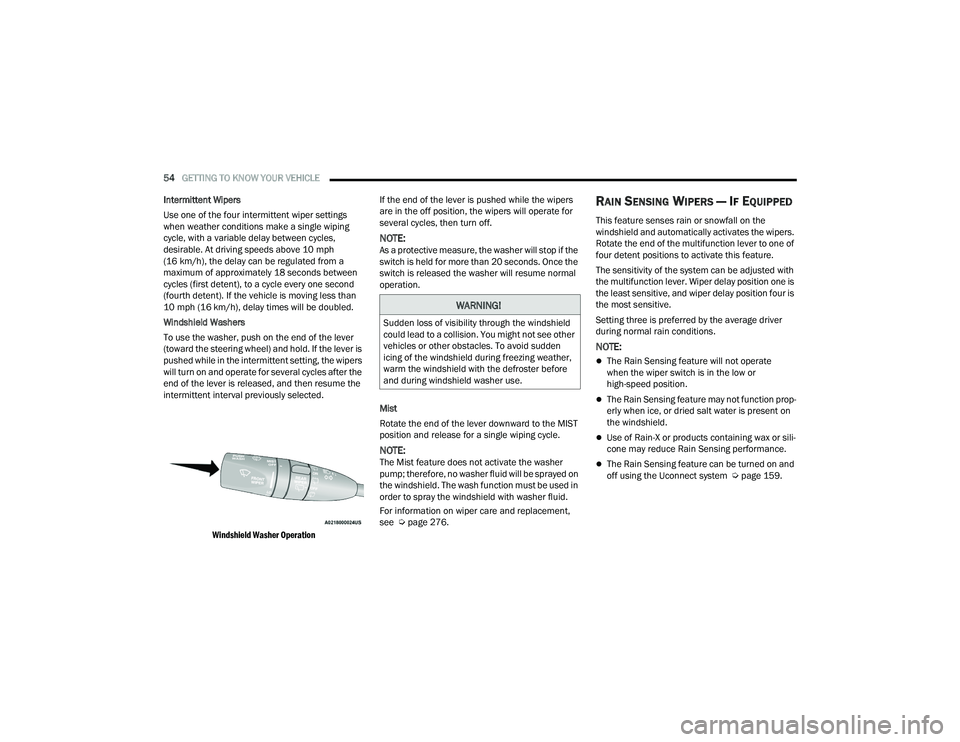
Windshield Washers
To use the washer, push on the end of the lever
(toward the steering wheel) and hold. If the lever is
pushed while in the intermittent setting, the wipers
will turn on and operate for several cycles after the
end of the lever is released, and then resume the
intermittent interval previously selected.
Windshield Washer Operation
If the end of the lever is pushed while the wipers
are in the off position, the wipers will operate for
several cycles, then turn off.
NOTE:As a protective measure, the washer will stop if the
switch is held for more than 20 seconds. Once the
switch is released the washer will resume normal
operation.
Mist
Rotate the end of the lever downward to the MIST
position and release for a single wiping cycle.
NOTE:The Mist feature does not activate the washer
pump; therefore, no washer fluid will be sprayed on
the windshield. The wash function must be used in
order to spray the windshield with washer fluid.
For information on wiper care and replacement,
see Ú
page 276.
RAIN SENSING WIPERS — IF EQUIPPED
This feature senses rain or snowfall on the
windshield and automatically activates the wipers.
Rotate the end of the multifunction lever to one of
four detent positions to activate this feature.
The sensitivity of the system can be adjusted with
the multifunction lever. Wiper delay position one is
the least sensitive, and wiper delay position four is
the most sensitive.
Setting three is preferred by the average driver
during normal rain conditions.
NOTE:
The Rain Sensing feature will not operate
when the wiper switch is in the low or
high-speed position.
The Rain Sensing feature may not function prop -
erly when ice, or dried salt water is present on
the windshield.
Use of Rain-X or products containing wax or sili-
cone may reduce Rain Sensing performance.
The Rain Sensing feature can be turned on and
off using the Uconnect system Ú page 159.
WARNING!
Sudden loss of visibility through the windshield
could lead to a collision. You might not see other
vehicles or other obstacles. To avoid sudden
icing of the windshield during freezing weather,
warm the windshield with the defroster before
and during windshield washer use.
21_WD_OM_EN_USC_t.book Page 54
Page 196 of 340
194SAFETY
Disabling And Enabling HSA
This feature can be turned on or turned off.
To change the current setting see Ú page 159.
Towing With HSA
HSA will also provide assistance to mitigate roll
back while towing a trailer.
Rain Brake Support (RBS)
RBS may improve braking performance in wet
conditions. It will periodically apply a small amount
of brake pressure to remove any water buildup on
the front brake rotors. It functions when the
windshield wipers are in LO or HI speed. When Rain
Brake Support is active, there is no notification to
the driver and no driver interaction is required.
Ready Alert Braking (RAB)
RAB may reduce the time required to reach full
braking during emergency braking situations. It
anticipates when an emergency braking situation
may occur by monitoring how fast the throttle is
released by the driver. The Electronic Brake
Controller (EBC) will prepare the brake system for
a panic stop.
Traction Control System (TCS)
The TCS monitors the amount of wheel spin of
each of the driven wheels. If wheel spin is
detected, the TCS may apply brake pressure to the
spinning wheel(s) and/or reduce engine power to
provide enhanced acceleration and stability. A
feature of the TCS, Brake Limited Differential (BLD)
functions similarly to a limited slip differential and
controls the wheel spin across a driven axle. If one
wheel on a driven axle is spinning faster than the
other, the system will apply the brake of the
spinning wheel. This will allow more engine power
to be applied to the wheel that is not spinning.
BLD may remain enabled even if TCS and ESC are
in reduced modes.
WARNING!
There may be situations where the Hill Start
Assist (HSA) will not activate and slight rolling
may occur, such as on minor hills or with a
loaded vehicle, or while pulling a trailer. HSA is
not a substitute for active driving involvement. It
is always the driver’s responsibility to be
attentive to distance to other vehicles, people,
and objects, and most importantly brake
operation to ensure safe operation of the vehicle
under all road conditions. Your complete
attention is always required while driving to
maintain safe control of your vehicle. Failure to
follow these warnings can result in a collision or
serious personal injury.
WARNING!
If you use a trailer brake controller with your
trailer, the trailer brakes may be activated and
deactivated with the brake switch. If so, there
may not be enough brake pressure to hold
both the vehicle and the trailer on a hill when
the brake pedal is released. In order to avoid
rolling down an incline while resuming accel -
eration, manually activate the trailer brake or
apply more vehicle brake pressure prior to
releasing the brake pedal.
HSA is not a parking brake. Always apply the
parking brake fully when exiting your vehicle.
Also, be certain to place the transmission
in PARK.
Failure to follow these warnings can result in a
collision or serious personal injury.
21_WD_OM_EN_USC_t.book Page 194
Page 278 of 340
276SERVICING AND MAINTENANCE
When inspecting accessory drive belts, small
cracks that run across the ribbed surface of the
belt from rib to rib, are considered normal. This is
not a reason to replace belt. However, cracks
running along a rib (not across) are not normal.
Any belt with cracks running along a rib must be
replaced. Also have the belt replaced if it has
excessive wear, frayed cords or severe glazing.
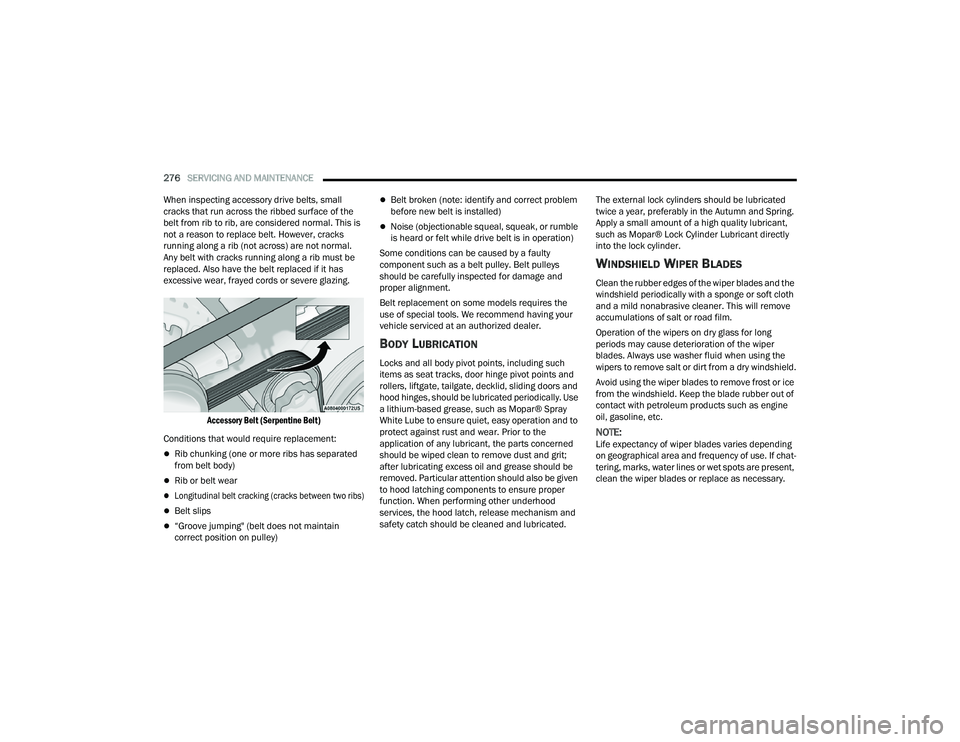
Accessory Belt (Serpentine Belt)
Conditions that would require replacement:
Rib chunking (one or more ribs has separated
from belt body)
Rib or belt wear
Longitudinal belt cracking (cracks between two ribs)
Belt slips
“Groove jumping" (belt does not maintain
correct position on pulley)
Belt broken (note: identify and correct problem
before new belt is installed)
Noise (objectionable squeal, squeak, or rumble
is heard or felt while drive belt is in operation)
Some conditions can be caused by a faulty
component such as a belt pulley. Belt pulleys
should be carefully inspected for damage and
proper alignment.
Belt replacement on some models requires the
use of special tools. We recommend having your
vehicle serviced at an authorized dealer.
BODY LUBRICATION
Locks and all body pivot points, including such
items as seat tracks, door hinge pivot points and
rollers, liftgate, tailgate, decklid, sliding doors and
hood hinges, should be lubricated periodically. Use
a lithium-based grease, such as Mopar® Spray
White Lube to ensure quiet, easy operation and to
protect against rust and wear. Prior to the
application of any lubricant, the parts concerned
should be wiped clean to remove dust and grit;
after lubricating excess oil and grease should be
removed. Particular attention should also be given
to hood latching components to ensure proper
function. When performing other underhood
services, the hood latch, release mechanism and
safety catch should be cleaned and lubricated. The external lock cylinders should be lubricated
twice a year, preferably in the Autumn and Spring.
Apply a small amount of a high quality lubricant,
such as Mopar® Lock Cylinder Lubricant directly
into the lock cylinder.
WINDSHIELD WIPER BLADES
Clean the rubber edges of the wiper blades and the
windshield periodically with a sponge or soft cloth
and a mild nonabrasive cleaner. This will remove
accumulations of salt or road film.
Operation of the wipers on dry glass for long
periods may cause deterioration of the wiper
blades. Always use washer fluid when using the
wipers to remove salt or dirt from a dry windshield.
Avoid using the wiper blades to remove frost or ice
from the windshield. Keep the blade rubber out of
contact with petroleum products such as engine
oil, gasoline, etc.
NOTE:Life expectancy of wiper blades varies depending
on geographical area and frequency of use. If chat
-
tering, marks, water lines or wet spots are present,
clean the wiper blades or replace as necessary.
21_WD_OM_EN_USC_t.book Page 276
Page 280 of 340
278SERVICING AND MAINTENANCE
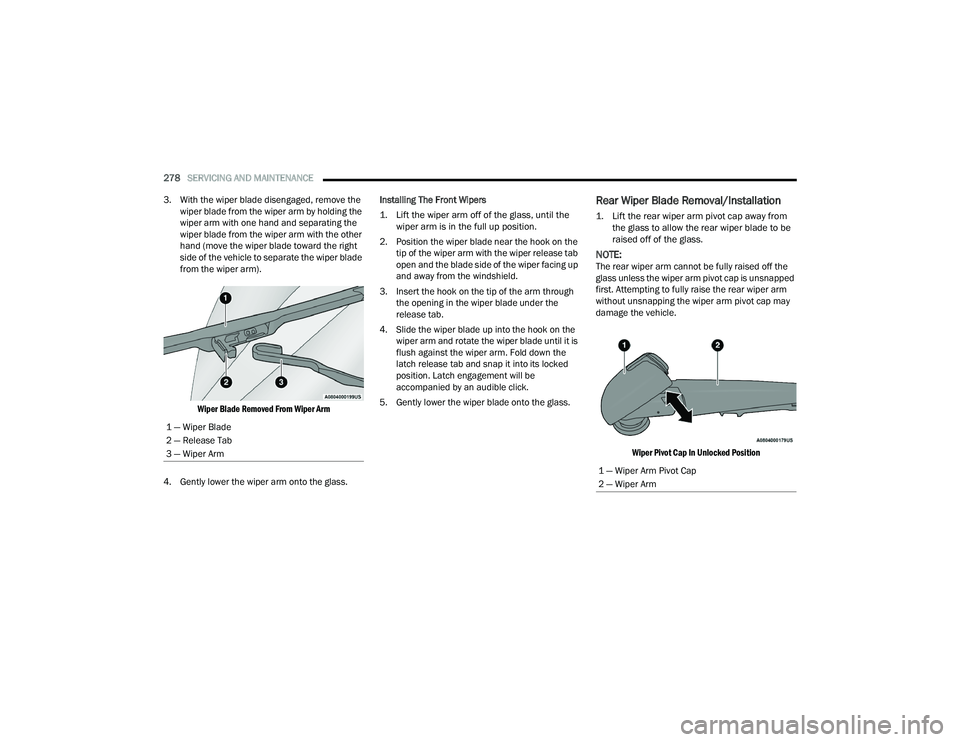
3. With the wiper blade disengaged, remove the wiper blade from the wiper arm by holding the
wiper arm with one hand and separating the
wiper blade from the wiper arm with the other
hand (move the wiper blade toward the right
side of the vehicle to separate the wiper blade
from the wiper arm).
Wiper Blade Removed From Wiper Arm
4. Gently lower the wiper arm onto the glass. Installing The Front Wipers
1. Lift the wiper arm off of the glass, until the
wiper arm is in the full up position.
2. Position the wiper blade near the hook on the tip of the wiper arm with the wiper release tab
open and the blade side of the wiper facing up
and away from the windshield.
3. Insert the hook on the tip of the arm through the opening in the wiper blade under the
release tab.
4. Slide the wiper blade up into the hook on the wiper arm and rotate the wiper blade until it is
flush against the wiper arm. Fold down the
latch release tab and snap it into its locked
position. Latch engagement will be
accompanied by an audible click.
5. Gently lower the wiper blade onto the glass.
Rear Wiper Blade Removal/Installation
1. Lift the rear wiper arm pivot cap away from the glass to allow the rear wiper blade to be
raised off of the glass.
NOTE:The rear wiper arm cannot be fully raised off the
glass unless the wiper arm pivot cap is unsnapped
first. Attempting to fully raise the rear wiper arm
without unsnapping the wiper arm pivot cap may
damage the vehicle.
Wiper Pivot Cap In Unlocked Position
1 — Wiper Blade
2 — Release Tab
3 — Wiper Arm
1 — Wiper Arm Pivot Cap
2 — Wiper Arm
21_WD_OM_EN_USC_t.book Page 278
Page 338 of 340
336 Rotation
.................................................... 312Safety.............................................. 295, 303Sizes.......................................................... 296Snow Tires................................................. 307Spare Tires............................. 249, 307, 308Spinning.................................................... 305Trailer Towing............................................ 148Tread Wear Indicators............................... 305Wheel Nut Torque..................................... 317To Open Hood.................................................. 74Tongue Weight/Trailer Weight....................... 147Tow N Go....................................................... 115Towing................................................. 142, 261Disabled Vehicle........................................ 261Guide......................................................... 145Recreational.............................................. 153Weight....................................................... 145Towing Behind A Motorhome......................... 153Traction Control............................................. 194Trailer Sway Control (TSC)............................. 195Trailer Towing................................................ 142Hitches...................................................... 145Minimum Requirements............................ 147Tips........................................................... 152Trailer And Tongue Weight........................ 147Wiring........................................................ 151Trailer Towing Guide...................................... 145Trailer Weight................................................ 145Transfer Case................................................ 285Electronically Shifted................................. 112
Fluid......................................................... 323Maintenance............................................ 285Transmission................................................ 108Automatic........................................ 108, 284Fluid......................................................... 323Maintenance............................................ 284Shifting..................................................... 106Transporting Pets.......................................... 239Tread Wear Indicators.................................. 305Turn Signals............................................98, 294
U
Uconnect SettingsCustomer Programmable Features
...... 23, 26Passive Entry Programming.................. 23, 26Uniform Tire Quality Grades.......................... 312Unleaded Gasoline....................................... 318Untwisting Procedure, Seat Belt................... 208
V
Vanity Mirrors.................................................. 43Vehicle Identification Number (VIN).............. 317Vehicle Loading................................... 141, 301Vehicle Maintenance.................................... 271Vehicle Modifications/Alterations.................... 10Vehicle Security System................................... 21Vehicle Storage.......................................63, 313Voice Command............................................... 41Voice Recognition System (VR)........................ 41
W
Warning Flashers, Hazard............................. 243Warning lightRed..............................................................91Yellow..........................................................94Warning Lights
(Instrument Cluster Descriptions)....................95Warning Lights and Messages.........................91Warnings, Roll Over............................................ 9Warranty Information.................................... 326Washers, Windshield............................. 53, 270Washing Vehicle............................................ 314Wheel And Wheel Tire Care........................... 309Wheel And Wheel Tire Trim........................... 309Wind Buffeting.................................................73Window Fogging...............................................63Windows..........................................................71Power...........................................................71Reset Auto-Up..............................................72Windshield Defroster.................................... 240Windshield Washers.............................. 53, 270Fluid.......................................................... 270Windshield Wiper Blades.............................. 276Windshield Wipers...........................................53Wipers Blade Replacement........................... 276Wipers, Intermittent.........................................53Wipers, Rain Sensitive.....................................54Wireless Charging Pad.....................................71
21_WD_OM_EN_USC_t.book Page 336