key DODGE DURANGO 2023 Owner's Manual
[x] Cancel search | Manufacturer: DODGE, Model Year: 2023, Model line: DURANGO, Model: DODGE DURANGO 2023Pages: 328, PDF Size: 13.82 MB
Page 46 of 328

44GETTING TO KNOW YOUR VEHICLE
REPROGRAMMING A SINGLE
H
OMELINK® BUTTON
To reprogram a single HomeLink® button that has
been previously trained, without erasing all the
channels, proceed as follows. Be sure to
determine whether the new device you want to
program the HomeLink® button to has a rolling
code, or non-rolling code.
1. Place the ignition in the ON/RUN position,
without starting the engine.
2. Push and hold the desired HomeLink® button until the HomeLink® indicator light begins to
flash after 20 seconds. Do not release the
button.
3. Without releasing the button , proceed with
Step 2 in “Programming HomeLink® To A
Garage Door Opener” and follow all remaining
steps.
CANADIAN/GATE OPERATOR
P
ROGRAMMING
For programming transmitters in Canada/United
States that require the transmitter signals to
“time-out” after several seconds of transmission:
Canadian Radio Frequency (RF) laws require
transmitter signals to time-out (or quit) after
several seconds of transmission, which may not be
long enough for HomeLink® to pick up the signal during programming. Similar to this Canadian law,
some U.S. gate operators are designed to time-out
in the same manner.
It may be helpful to unplug the device during the
cycling process to prevent possible overheating of
the garage door or gate motor.
1. Place the ignition in the ON/RUN position.
NOTE:For vehicles equipped with Keyless Enter ‘n Go™,
place the ignition in the RUN position. Make sure
while programming HomeLink® with the engine on
that your vehicle is outside of your garage, or that
the garage door remains open at all times.
2. Place the hand-held transmitter 1 to 3 inches
(3 to 8 cm) away from the HomeLink® button
you wish to program while keeping the
HomeLink® indicator light in view.
3. Continue to push and hold the HomeLink® button while you push and release (cycle) your
hand-held transmitter every two seconds until
HomeLink® has successfully accepted the
frequency signal. The indicator light will flash
slowly and then rapidly when fully trained.
4. Watch for the HomeLink® indicator to change flash rates. When it changes, it is
programmed. It may take up to 30 seconds or
longer in rare cases. The garage door may
open and close while you are programming. 5. Push and hold the programmed HomeLink®
button and observe the indicator light.
NOTE:
If the indicator light stays on constantly,
programming is complete and the garage
door/device should activate when the
HomeLink® button is pushed.
To program the two remaining HomeLink®
buttons, repeat each step for each
remaining button. DO NOT erase the chan -
nels.
If you unplugged the garage door opener/device
for programming, plug it back in at this time.
Reprogramming A Single HomeLink® Button
(Canadian/Gate Operator)
To reprogram a channel that has been previously
trained, follow these steps:
1. Place the ignition in the ON/RUN position.
2. Press and hold the desired HomeLink® button until the indicator light begins to flash after 20
seconds. Do not release the button.
3. Without releasing the button, proceed with “Canadian/Gate Operator Programming” Step
2 and follow all remaining steps.
23_WD_OM_EN_USC_t.book Page 44
Page 51 of 328
GETTING TO KNOW YOUR VEHICLE49
AUTOMATIC HEADLIGHT LEVELING —
I
F EQUIPPED
This feature prevents the headlights from
interfering with the vision of oncoming drivers.
Headlight leveling automatically adjusts the height
of the headlight beam in reaction to changes in
vehicle pitch.
BATTERY SAVER
Timers are set to both the interior and exterior
lights to protect the life of your vehicle’s battery.
After 10 minutes, if the ignition is OFF and any door
is left open or the dimmer control is rotated all the
way up to the dome light on position, the interior
lights will automatically turn off.
NOTE:Battery saver mode is canceled if the ignition is ON.
If the headlights remain on while the ignition is
placed in the OFF position, the exterior lights will
automatically turn off after eight minutes. If the
headlights are turned on and left on for eight
minutes while the ignition is OFF, the exterior lights
will automatically turn off.
INTERIOR LIGHTS
Courtesy and dome lights are turned on when the
front doors are opened or when the dimmer control
is rotated to its upward most position. If your
vehicle is equipped with a key fob and the unlock
button is pushed, the courtesy and dome lights will
turn on. When a door is open and the interior lights
are on, rotating the dimmer control all the way
down, to the O (off) position, will cause all the
interior lights to go out. This allows the doors to
stay open for extended periods of time without
discharging the vehicle’s battery.
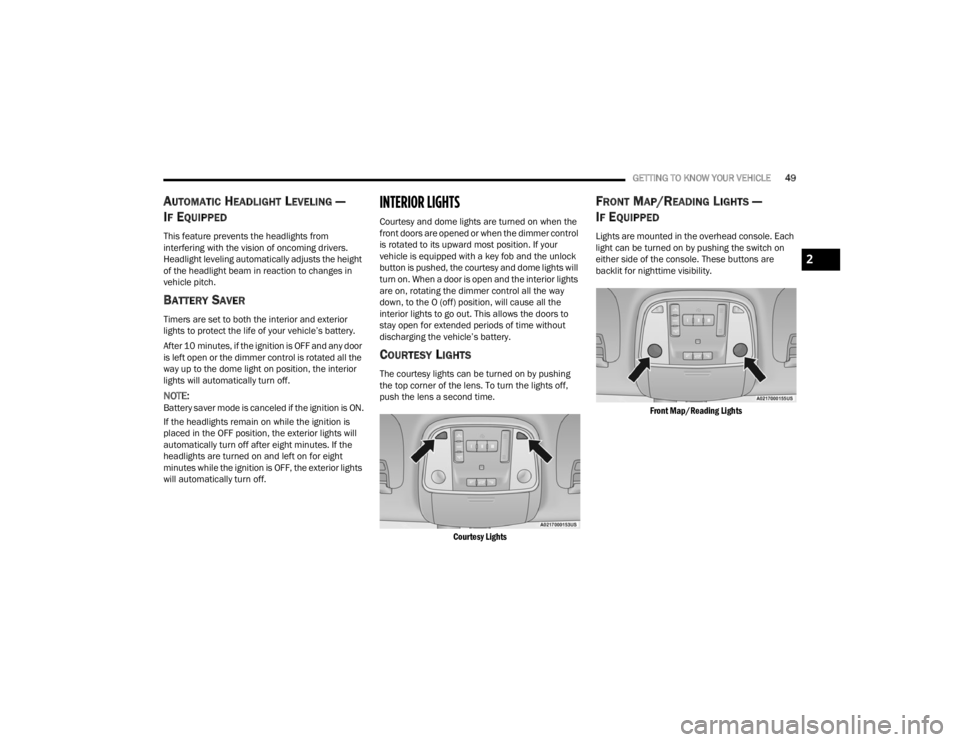
COURTESY LIGHTS
The courtesy lights can be turned on by pushing
the top corner of the lens. To turn the lights off,
push the lens a second time.
Courtesy Lights
FRONT MAP/READING LIGHTS —
I
F EQUIPPED
Lights are mounted in the overhead console. Each
light can be turned on by pushing the switch on
either side of the console. These buttons are
backlit for nighttime visibility.
Front Map/Reading Lights
2
23_WD_OM_EN_USC_t.book Page 49
Page 52 of 328
50GETTING TO KNOW YOUR VEHICLE
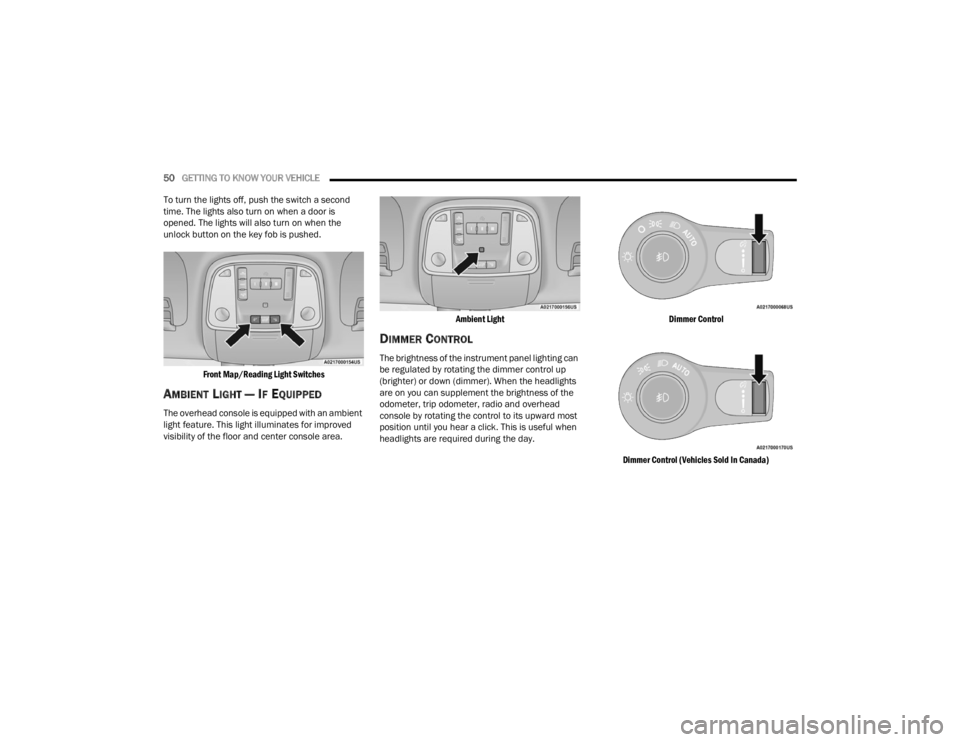
To turn the lights off, push the switch a second
time. The lights also turn on when a door is
opened. The lights will also turn on when the
unlock button on the key fob is pushed.
Front Map/Reading Light Switches
AMBIENT LIGHT — IF EQUIPPED
The overhead console is equipped with an ambient
light feature. This light illuminates for improved
visibility of the floor and center console area.
Ambient Light
DIMMER CONTROL
The brightness of the instrument panel lighting can
be regulated by rotating the dimmer control up
(brighter) or down (dimmer). When the headlights
are on you can supplement the brightness of the
odometer, trip odometer, radio and overhead
console by rotating the control to its upward most
position until you hear a click. This is useful when
headlights are required during the day.
Dimmer Control
Dimmer Control (Vehicles Sold In Canada)
23_WD_OM_EN_USC_t.book Page 50
Page 53 of 328
GETTING TO KNOW YOUR VEHICLE51
ILLUMINATED ENTRY
When programmed with the Uconnect system, the
headlights and courtesy lights will turn on when
you use the key fob to unlock the doors or open any
door Úpage 153.
The time the lights stay on is programmable up to
90 seconds. The lights will fade to off after the
programmed time, or they will immediately fade to
off once the ignition switch is placed in the ON/
RUN position from the OFF position.
The front courtesy overhead console and door
courtesy lights will not turn off if the instrument
panel dimmer switch is rotated to the upward most
position, past the detent. The overhead and door
courtesy lights will turn off after 10 minutes when
the ignition is placed in the OFF position to protect
the battery.
The illuminated entry system will not operate if the
instrument panel dimmer switch is rotated all the
way downward to the O (off) position.
WINDSHIELD WIPERS AND WASHERS
The windshield wiper/washer controls are located
on the multifunction lever on the left side of the
steering column. The front wipers are operated by
rotating a switch, located on the end of the lever.
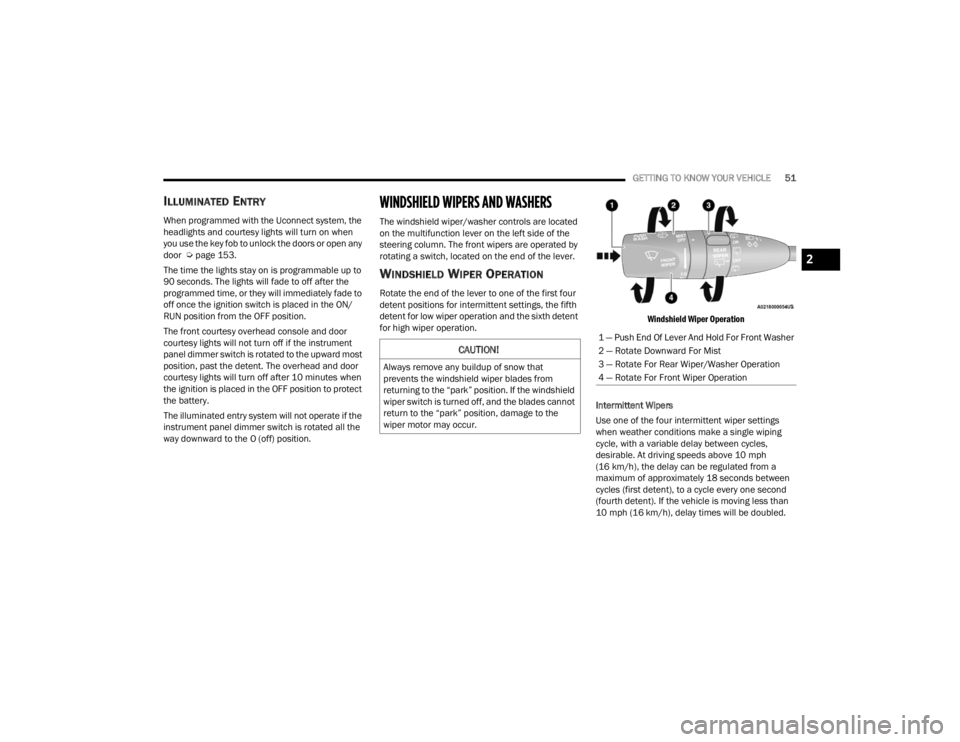
WINDSHIELD WIPER OPERATION
Rotate the end of the lever to one of the first four
detent positions for intermittent settings, the fifth
detent for low wiper operation and the sixth detent
for high wiper operation.
Windshield Wiper Operation
Intermittent Wipers
Use one of the four intermittent wiper settings
when weather conditions make a single wiping
cycle, with a variable delay between cycles,
desirable. At driving speeds above 10 mph
(16 km/h), the delay can be regulated from a
maximum of approximately 18 seconds between
cycles (first detent), to a cycle every one second
(fourth detent). If the vehicle is moving less than
10 mph (16 km/h), delay times will be doubled.
CAUTION!
Always remove any buildup of snow that
prevents the windshield wiper blades from
returning to the “park” position. If the windshield
wiper switch is turned off, and the blades cannot
return to the “park” position, damage to the
wiper motor may occur.
1 — Push End Of Lever And Hold For Front Washer
2 — Rotate Downward For Mist
3 — Rotate For Rear Wiper/Washer Operation
4 — Rotate For Front Wiper Operation
2
23_WD_OM_EN_USC_t.book Page 51
Page 67 of 328
GETTING TO KNOW YOUR VEHICLE65
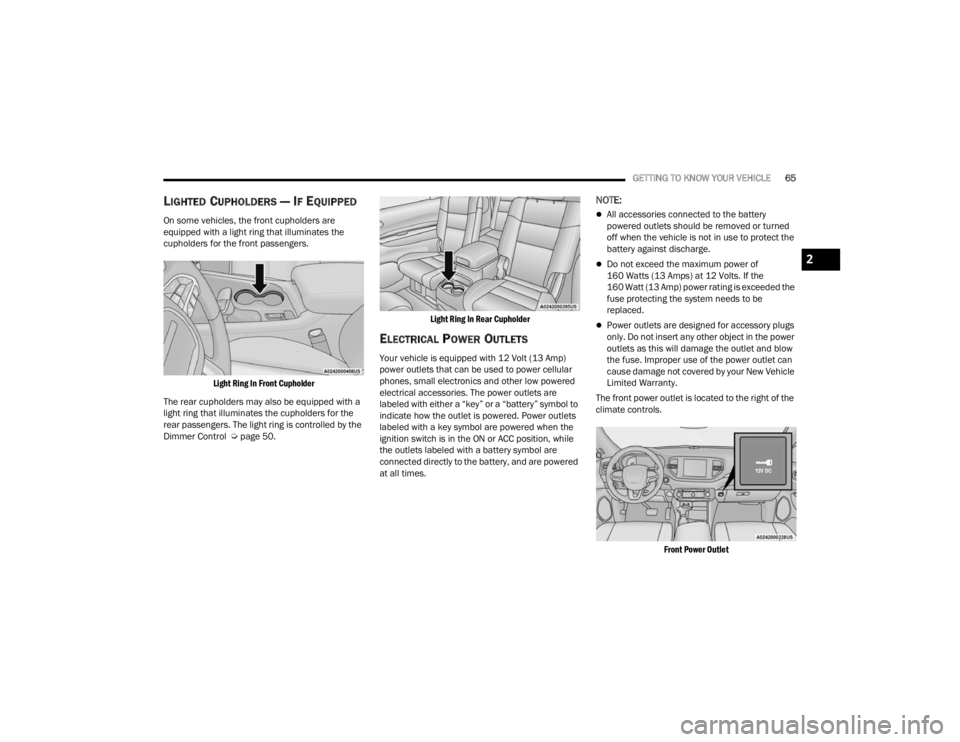
LIGHTED CUPHOLDERS — IF EQUIPPED
On some vehicles, the front cupholders are
equipped with a light ring that illuminates the
cupholders for the front passengers.
Light Ring In Front Cupholder
The rear cupholders may also be equipped with a
light ring that illuminates the cupholders for the
rear passengers. The light ring is controlled by the
Dimmer Control Ú page 50.
Light Ring In Rear Cupholder
ELECTRICAL POWER OUTLETS
Your vehicle is equipped with 12 Volt (13 Amp)
power outlets that can be used to power cellular
phones, small electronics and other low powered
electrical accessories. The power outlets are
labeled with either a “key” or a “battery” symbol to
indicate how the outlet is powered. Power outlets
labeled with a key symbol are powered when the
ignition switch is in the ON or ACC position, while
the outlets labeled with a battery symbol are
connected directly to the battery, and are powered
at all times.
NOTE:
All accessories connected to the battery
powered outlets should be removed or turned
off when the vehicle is not in use to protect the
battery against discharge.
Do not exceed the maximum power of
160 Watts (13 Amps) at 12 Volts. If the
160 Watt (13 Amp) power rating is exceeded the
fuse protecting the system needs to be
replaced.
Power outlets are designed for accessory plugs
only. Do not insert any other object in the power
outlets as this will damage the outlet and blow
the fuse. Improper use of the power outlet can
cause damage not covered by your New Vehicle
Limited Warranty.
The front power outlet is located to the right of the
climate controls.
Front Power Outlet
2
23_WD_OM_EN_USC_t.book Page 65
Page 70 of 328
68GETTING TO KNOW YOUR VEHICLE
WIRELESS CHARGING PAD —
I
F EQUIPPED
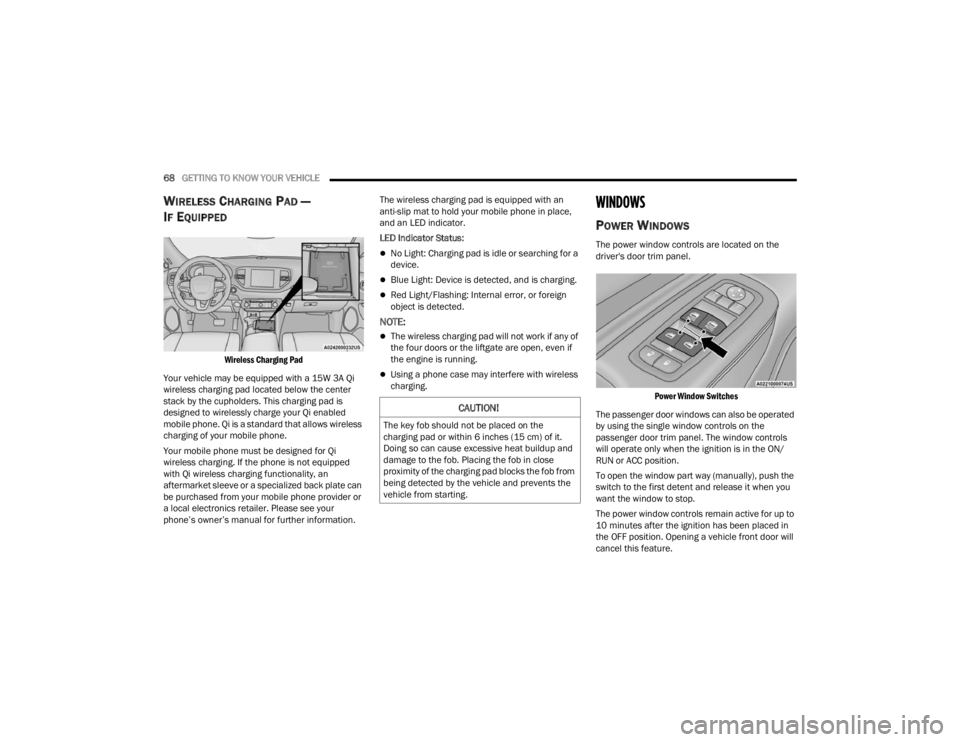
Wireless Charging Pad
Your vehicle may be equipped with a 15W 3A Qi
wireless charging pad located below the center
stack by the cupholders. This charging pad is
designed to wirelessly charge your Qi enabled
mobile phone. Qi is a standard that allows wireless
charging of your mobile phone.
Your mobile phone must be designed for Qi
wireless charging. If the phone is not equipped
with Qi wireless charging functionality, an
aftermarket sleeve or a specialized back plate can
be purchased from your mobile phone provider or
a local electronics retailer. Please see your
phone’s owner’s manual for further information. The wireless charging pad is equipped with an
anti-slip mat to hold your mobile phone in place,
and an LED indicator.
LED Indicator Status:
No Light: Charging pad is idle or searching for a
device.
Blue Light: Device is detected, and is charging.
Red Light/Flashing: Internal error, or foreign
object is detected.
NOTE:
The wireless charging pad will not work if any of
the four doors or the liftgate are open, even if
the engine is running.
Using a phone case may interfere with wireless
charging.
WINDOWS
POWER WINDOWS
The power window controls are located on the
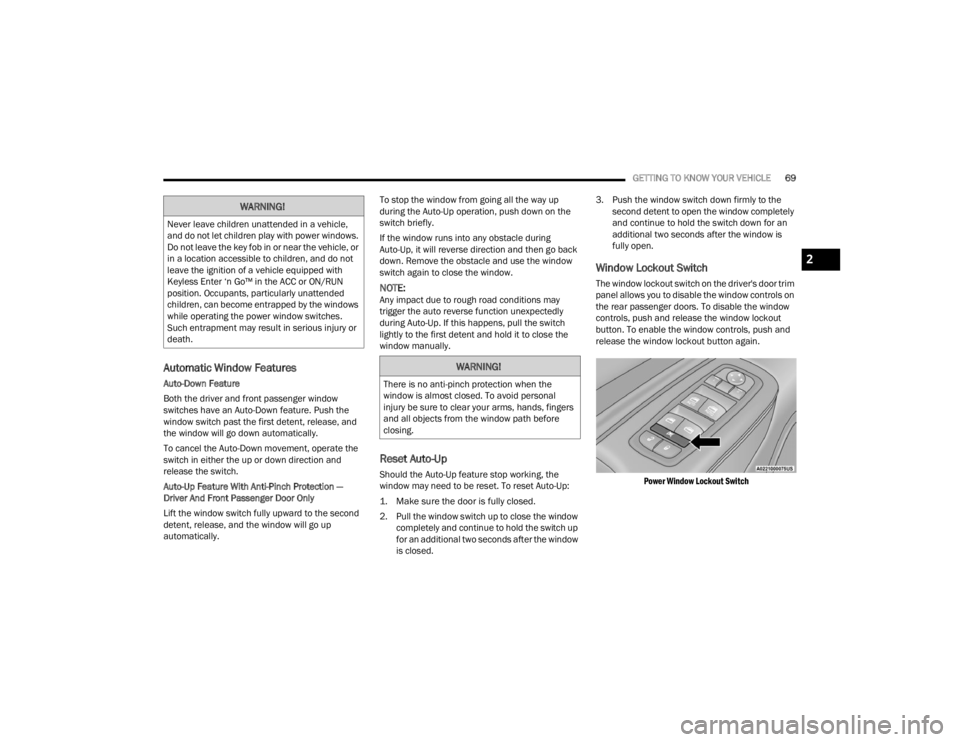
driver's door trim panel.
Power Window Switches
The passenger door windows can also be operated
by using the single window controls on the
passenger door trim panel. The window controls
will operate only when the ignition is in the ON/
RUN or ACC position.
To open the window part way (manually), push the
switch to the first detent and release it when you
want the window to stop.
The power window controls remain active for up to
10 minutes after the ignition has been placed in
the OFF position. Opening a vehicle front door will
cancel this feature.
CAUTION!
The key fob should not be placed on the
charging pad or within 6 inches (15 cm) of it.
Doing so can cause excessive heat buildup and
damage to the fob. Placing the fob in close
proximity of the charging pad blocks the fob from
being detected by the vehicle and prevents the
vehicle from starting.
23_WD_OM_EN_USC_t.book Page 68
Page 71 of 328
GETTING TO KNOW YOUR VEHICLE69
Automatic Window Features
Auto-Down Feature
Both the driver and front passenger window
switches have an Auto-Down feature. Push the
window switch past the first detent, release, and
the window will go down automatically.
To cancel the Auto-Down movement, operate the
switch in either the up or down direction and
release the switch.
Auto-Up Feature With Anti-Pinch Protection —
Driver And Front Passenger Door Only
Lift the window switch fully upward to the second
detent, release, and the window will go up
automatically. To stop the window from going all the way up
during the Auto-Up operation, push down on the
switch briefly.
If the window runs into any obstacle during
Auto-Up, it will reverse direction and then go back
down. Remove the obstacle and use the window
switch again to close the window.
NOTE:Any impact due to rough road conditions may
trigger the auto reverse function unexpectedly
during Auto-Up. If this happens, pull the switch
lightly to the first detent and hold it to close the
window manually.
Reset Auto-Up
Should the Auto-Up feature stop working, the
window may need to be reset. To reset Auto-Up:
1. Make sure the door is fully closed.
2. Pull the window switch up to close the window
completely and continue to hold the switch up
for an additional two seconds after the window
is closed. 3. Push the window switch down firmly to the
second detent to open the window completely
and continue to hold the switch down for an
additional two seconds after the window is
fully open.
Window Lockout Switch
The window lockout switch on the driver's door trim
panel allows you to disable the window controls on
the rear passenger doors. To disable the window
controls, push and release the window lockout
button. To enable the window controls, push and
release the window lockout button again.
Power Window Lockout Switch
WARNING!
Never leave children unattended in a vehicle,
and do not let children play with power windows.
Do not leave the key fob in or near the vehicle, or
in a location accessible to children, and do not
leave the ignition of a vehicle equipped with
Keyless Enter ‘n Go™ in the ACC or ON/RUN
position. Occupants, particularly unattended
children, can become entrapped by the windows
while operating the power window switches.
Such entrapment may result in serious injury or
death.
WARNING!
There is no anti-pinch protection when the
window is almost closed. To avoid personal
injury be sure to clear your arms, hands, fingers
and all objects from the window path before
closing.
2
23_WD_OM_EN_USC_t.book Page 69
Page 72 of 328
70GETTING TO KNOW YOUR VEHICLE
WIND BUFFETING
Wind buffeting can be described as the perception
of pressure on the ears or a helicopter-type sound
in the ears. Your vehicle may exhibit wind buffeting
with the windows down, or the sunroof (if
equipped) in certain open or partially open
positions. This is a normal occurrence and can be
minimized. If the buffeting occurs with the rear
windows open, open the front and rear windows
together to minimize the buffeting. If the buffeting
occurs with the sunroof open, adjust the sunroof
opening to minimize the buffeting or open any
window.
POWER SUNROOF — IF EQUIPPED
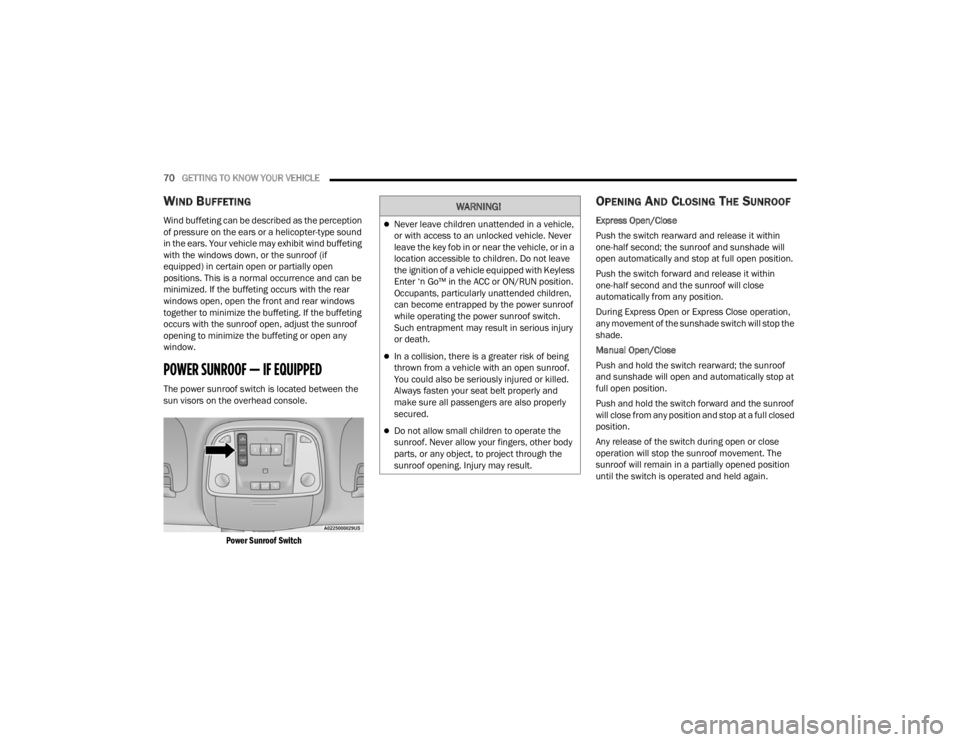
The power sunroof switch is located between the
sun visors on the overhead console.
Power Sunroof Switch
OPENING AND CLOSING THE SUNROOF
Express Open/Close
Push the switch rearward and release it within
one-half second; the sunroof and sunshade will
open automatically and stop at full open position.
Push the switch forward and release it within
one-half second and the sunroof will close
automatically from any position.
During Express Open or Express Close operation,
any movement of the sunshade switch will stop the
shade.
Manual Open/Close
Push and hold the switch rearward; the sunroof
and sunshade will open and automatically stop at
full open position.
Push and hold the switch forward and the sunroof
will close from any position and stop at a full closed
position.
Any release of the switch during open or close
operation will stop the sunroof movement. The
sunroof will remain in a partially opened position
until the switch is operated and held again.
WARNING!
Never leave children unattended in a vehicle,
or with access to an unlocked vehicle. Never
leave the key fob in or near the vehicle, or in a
location accessible to children. Do not leave
the ignition of a vehicle equipped with Keyless
Enter ‘n Go™ in the ACC or ON/RUN position.
Occupants, particularly unattended children,
can become entrapped by the power sunroof
while operating the power sunroof switch.
Such entrapment may result in serious injury
or death.
In a collision, there is a greater risk of being
thrown from a vehicle with an open sunroof.
You could also be seriously injured or killed.
Always fasten your seat belt properly and
make sure all passengers are also properly
secured.
Do not allow small children to operate the
sunroof. Never allow your fingers, other body
parts, or any object, to project through the
sunroof opening. Injury may result.
23_WD_OM_EN_USC_t.book Page 70
Page 74 of 328
72GETTING TO KNOW YOUR VEHICLE
NOTE:
Vehicle must be at a stop and the gear selector
must be in PARK.
While lifting the hood, use both hands.
Before lifting the hood, check that the wiper
arms are not in motion and not in the lifted posi -
tion.
CLOSING THE HOOD
In one continuous motion, pull down on the front
edge of the hood with moderate force until the
angle is below the crossover point (where the gas
props are no longer resisting) and let the hood
continue to fall closed from its own inertia.
LIFTGATE
POWER LIFTGATE — IF EQUIPPED
The power liftgate may be opened by
pushing the liftgate release handle
Ú page 22 or by pushing the liftgate
button on the key fob. Push the liftgate
button on the key fob twice within five seconds to
open or close the power liftgate.
NOTE:
When using the liftgate button on the key fob to
open the liftgate while the vehicle is locked, only
the liftgate will unlock leaving the other doors to
remain locked. Closing the liftgate will not relock
the liftgate. The lock button on the key fob, or
the Passive Entry lock button must be pushed to
relock.
If the electronic liftgate handle is used to open
the liftgate and all the doors unlock, the liftgate
and vehicle doors must be locked again. Use the
key fob, Passive Entry lock button, or the power
door lock switches on the front door panels.
The power liftgate may also be opened or closed by
pushing the liftgate button located on the front
overhead console. If the liftgate is fully open, it can
be closed by pushing the liftgate button located on
the left rear trim panel. If the liftgate is in motion,
pushing the button again will reverse the liftgate. When the liftgate button on the key fob is pushed
two times, the turn signals will flash to signal that
the liftgate is opening or closing (if Flash Lamps
with Lock is enabled in the Uconnect settings), and
the liftgate chime will be audible. The chime can be
turned on or off through the Uconnect Settings
Ú
page 153.
NOTE:
In the event of a power malfunction to the lift -
gate, an emergency liftgate latch release can be
used to open the liftgate. The emergency liftgate
latch release can be accessed through a snap-in
cover located on the liftgate trim panel.
If liftgate is left open for an extended period of
time, the liftgate may need to be closed manu -
ally to reset power liftgate functionality.
NOTE:
The power liftgate buttons will not operate if the
vehicle is in gear or the vehicle speed is above
0 mph (0 km/h).
WARNING!
Be sure the hood is fully latched before driving
your vehicle. If the hood is not fully latched, it
could open when the vehicle is in motion and
block your vision. Failure to follow this warning
could result in serious injury or death.WARNING!
During power operation, personal injury or cargo
damage may occur. Ensure the liftgate travel
path is clear. Make sure the liftgate is closed
and latched before driving away.
23_WD_OM_EN_USC_t.book Page 72
Page 75 of 328
GETTING TO KNOW YOUR VEHICLE73
(Continued)
The power liftgate will not operate in tempera -
tures below −22°F (−30°C) or temperatures
above 150°F (65°C). Be sure to remove any
buildup of snow or ice from the liftgate before
pushing any of the power liftgate switches.
If anything obstructs the power liftgate while it is
closing or opening, the liftgate will automatically
reverse to the closed or open position. After
multiple obstructions in the same cycle, the lift -
gate will automatically stop and must be opened
or closed manually.
There are also pinch sensors attached to the
side of the liftgate. Light pressure anywhere
along these strips will cause the liftgate to
return to the open position.
If the liftgate is only partially open, push the lift -
gate button on the key fob twice to operate the
liftgate.
If the liftgate release handle is pushed while the
power liftgate is opening, the liftgate motor will
disengage to allow manual operation.
CARGO AREA FEATURES
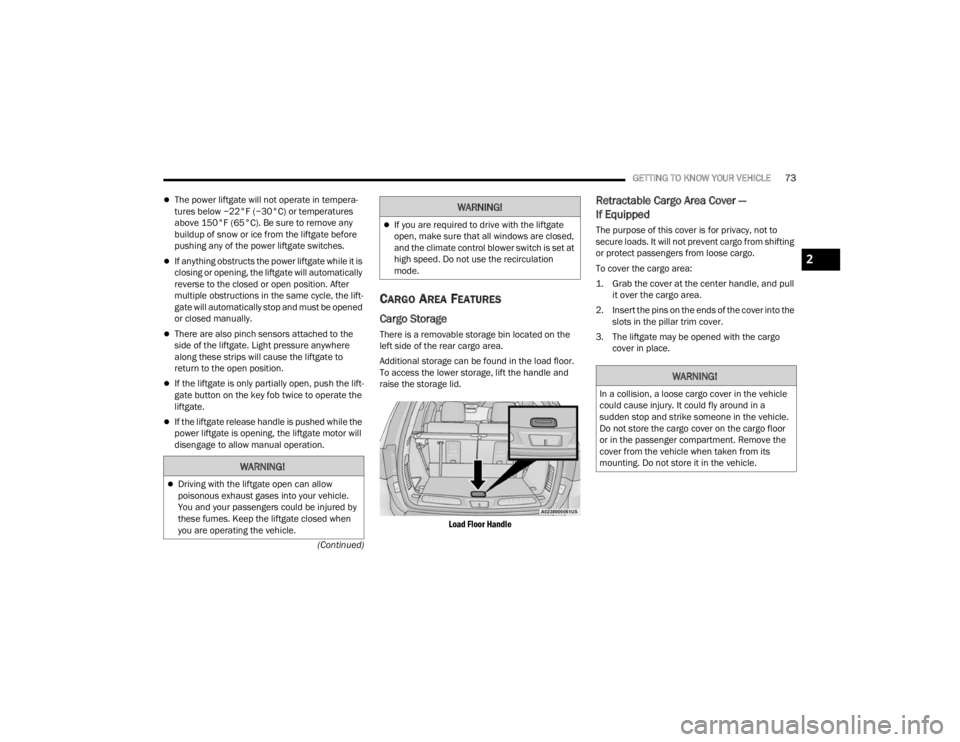
Cargo Storage
There is a removable storage bin located on the
left side of the rear cargo area.
Additional storage can be found in the load floor.
To access the lower storage, lift the handle and
raise the storage lid.
Load Floor Handle
Retractable Cargo Area Cover —
If Equipped
The purpose of this cover is for privacy, not to
secure loads. It will not prevent cargo from shifting
or protect passengers from loose cargo.
To cover the cargo area:
1. Grab the cover at the center handle, and pull it over the cargo area.
2. Insert the pins on the ends of the cover into the slots in the pillar trim cover.
3. The liftgate may be opened with the cargo cover in place.
WARNING!
Driving with the liftgate open can allow
poisonous exhaust gases into your vehicle.
You and your passengers could be injured by
these fumes. Keep the liftgate closed when
you are operating the vehicle.
If you are required to drive with the liftgate
open, make sure that all windows are closed,
and the climate control blower switch is set at
high speed. Do not use the recirculation
mode.
WARNING!
WARNING!
In a collision, a loose cargo cover in the vehicle
could cause injury. It could fly around in a
sudden stop and strike someone in the vehicle.
Do not store the cargo cover on the cargo floor
or in the passenger compartment. Remove the
cover from the vehicle when taken from its
mounting. Do not store it in the vehicle.
2
23_WD_OM_EN_USC_t.book Page 73