rear view mirror DODGE GRAND CARAVAN 2009 5.G Owners Manual
[x] Cancel search | Manufacturer: DODGE, Model Year: 2009, Model line: GRAND CARAVAN, Model: DODGE GRAND CARAVAN 2009 5.GPages: 535, PDF Size: 18.61 MB
Page 102 of 535
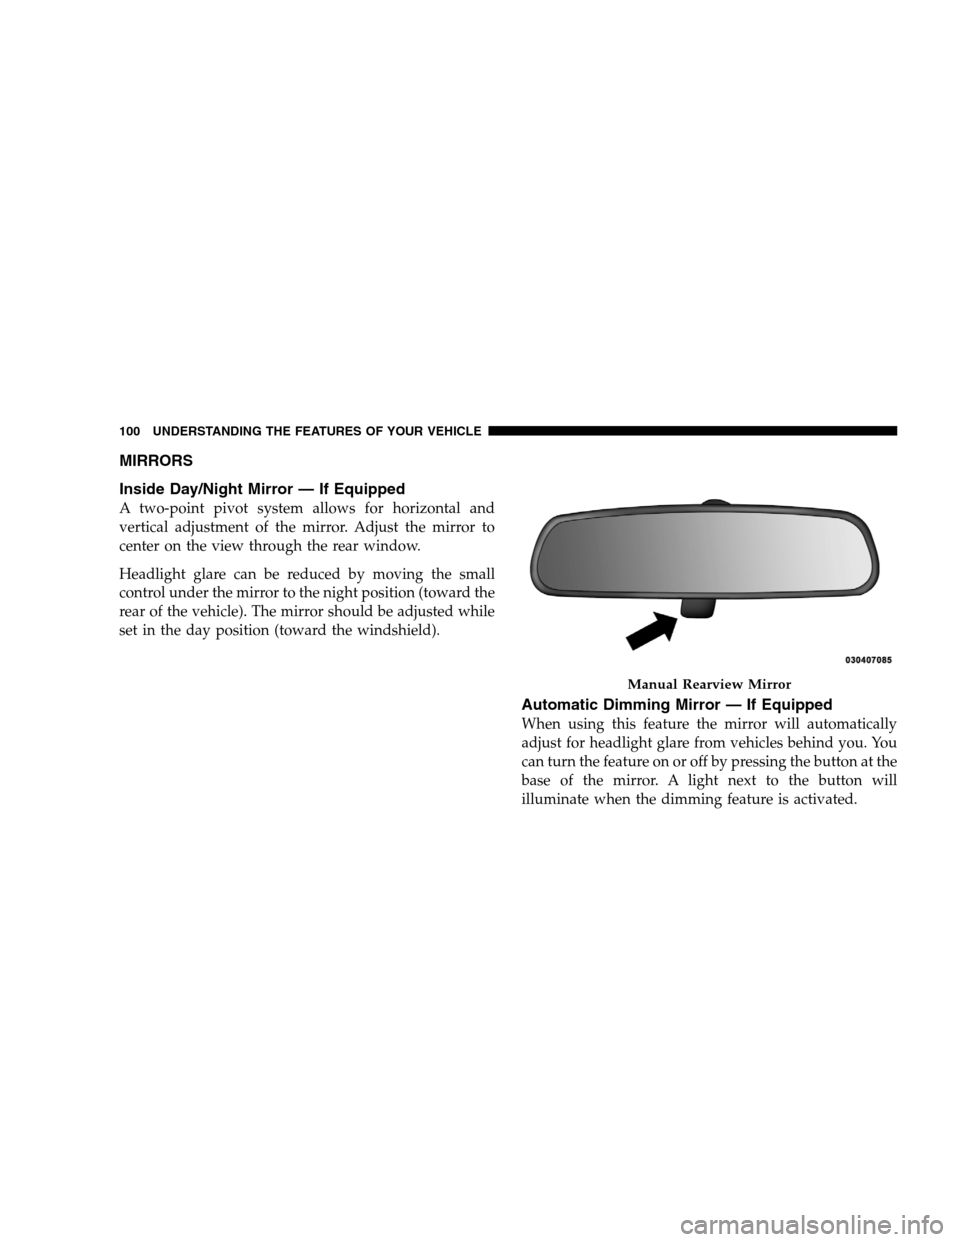
MIRRORS
Inside Day/Night
Mirror — If Equipped
A two-point pivot system allows for horizontal and
vertical adjustment of the mirror. Adjust the mirror to
center on the view through the rear window.
Headlight glare can be reduced by moving the small
control under the mirror to the night position (toward the
rear of the vehicle). The mirror should be adjusted while
set in the day position (toward the windshield).
Automatic Dimming Mirror — If Equipped
When using this feature the mirror will automatically
adjust for headlight glare from vehicles behind you. You
can turn the feature on or off by pressing the button at the
base of the mirror. A light next to the button will
illuminate when the dimming feature is activated. Manual Rearview Mirror
100 UNDERST
ANDING THE FEATURES OF YOUR VEHICLE
Page 104 of 535
Driver’s Outside Automatic Dimming Mirror — If
EquippedThe outside mirror will automatically adjust for glare
from vehicles behind you. This feature is controlled by
the inside automatic dimming mirror and can be turned
on or off by pressing the button at the base of the inside
mirror. The outside mirror will automatically adjust for
headlight glare when the inside mirror adjusts.
Outside Mirror Folding Feature
All outside mirrors are hinged and may be moved either
forward or rearward to resist damage. The hinges have
three detent positions: full forward, full rearward and
normal.
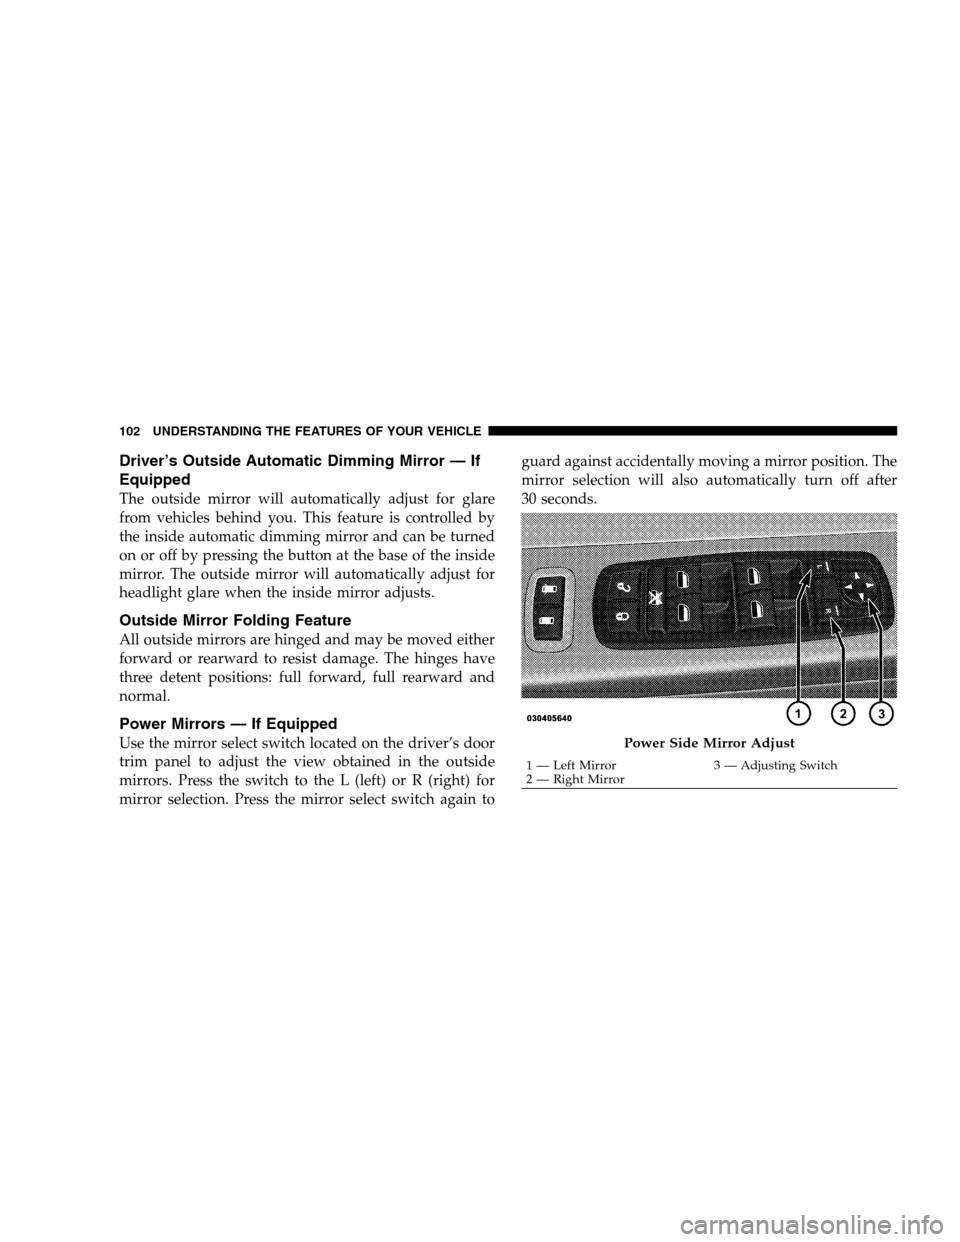
Power Mirrors — If Equipped
Use the mirror select switch located on the driver’s door
trim panel to adjust the view obtained in the outside
mirrors. Press the switch to the L (left) or R (right) for
mirror selection. Press the mirror select switch again to
guard against accidentally moving a mirror position. The
mirror selection will also automatically turn off after
30 seconds. Power Side Mirror Adjust
1 — Left Mirror
3 — Adjusting Switch
2 —
Right Mirror
102 UNDERSTANDING THE FEATURES OF YOUR VEHICLE
Page 105 of 535
Select a mirror and press one of the four arrows for the
direction you want the mirror to move.
Driver’s power mirror preselected positions can be con-
trolled by the optional Driver Memory Seat Feature.
Refer to “Driver Memory Seat” in Section 3.
Heated Mirrors — If Equipped
These mirrors are heated to melt frost or ice. This
feature is activated whenever you turn on the rear
window defroster. Refer to “Rear Window Features” in
this section, for further information.
Tilt Mirrors in Reverse (Available with Memory
Seat Only) — If Equipped
Tilt Mirrors in Reverse provides automatic outside mirror
positioning which will aid the driver’s view of the ground rearward of the front doors. The outside mirrors
will move slightly downward from the present position
when the vehicle is shifted into REVERSE. The outside
mirrors will then return to the original position when the
vehicle is shifted out of REVERSE position. Each stored
memory setting will have an associated Tilt Mirrors in
Reverse position.
NOTE:
The Tilt Mirrors in Reverse feature is not en-
abled when delivered from the factory. The Tilt Mirrors in
Reverse feature can be enabled or disabled in the Elec-
tronic Vehicle Information Center (EVIC). Refer to “Tilt
Mirrors in Reverse” under “Customer-Programmable
Features” under “Electronic Vehicle Information Center
(EVIC) in Section 4. UNDERSTANDING THE FEATURES OF YOUR VEHICLE 103
3
Page 107 of 535
When the vehicle is started, the BSM warning light will
be momentarily illuminated in both outside rear view
mirrors to let the driver know that the system is opera-
tional. The BSM system sensors operate when the vehicle
is in any forward gear or REVERSE and enters stand by
mode when the vehicle is in PARK.
The BSM detection zone covers approximately one lane
on both sides of the vehicle (11 ft or 3.35 m). The zone
starts at the outside rear view mirror and extends ap-
proximately 20 ft (6 m) to the rear of the vehicle. The BSM
system monitors the detection zones on both sides of the
vehicle when the vehicle speed has reached approxi-
mately 6 mph (10 km/h) or higher and will alert the
driver of vehicles in these areas.NOTE:
The BSM system does NOT alert the driver about
rapidly approaching vehicles that are outside the
detection zones.
The BSM system detection zone DOES NOT change if
your vehicle is towing a trailer. Therefore, visually
verify the adjacent lane is clear for both your vehicle
and trailer before making a lane change. If the trailer
or other object (i.e., bicycle, sports equipment) extends
beyond the side of your vehicle, this may result in the
BSM warning light remaining illuminated the entire
time the vehicle is in a forward gear.
UNDERSTANDING THE FEATURES OF YOUR VEHICLE 105 3
Page 112 of 535
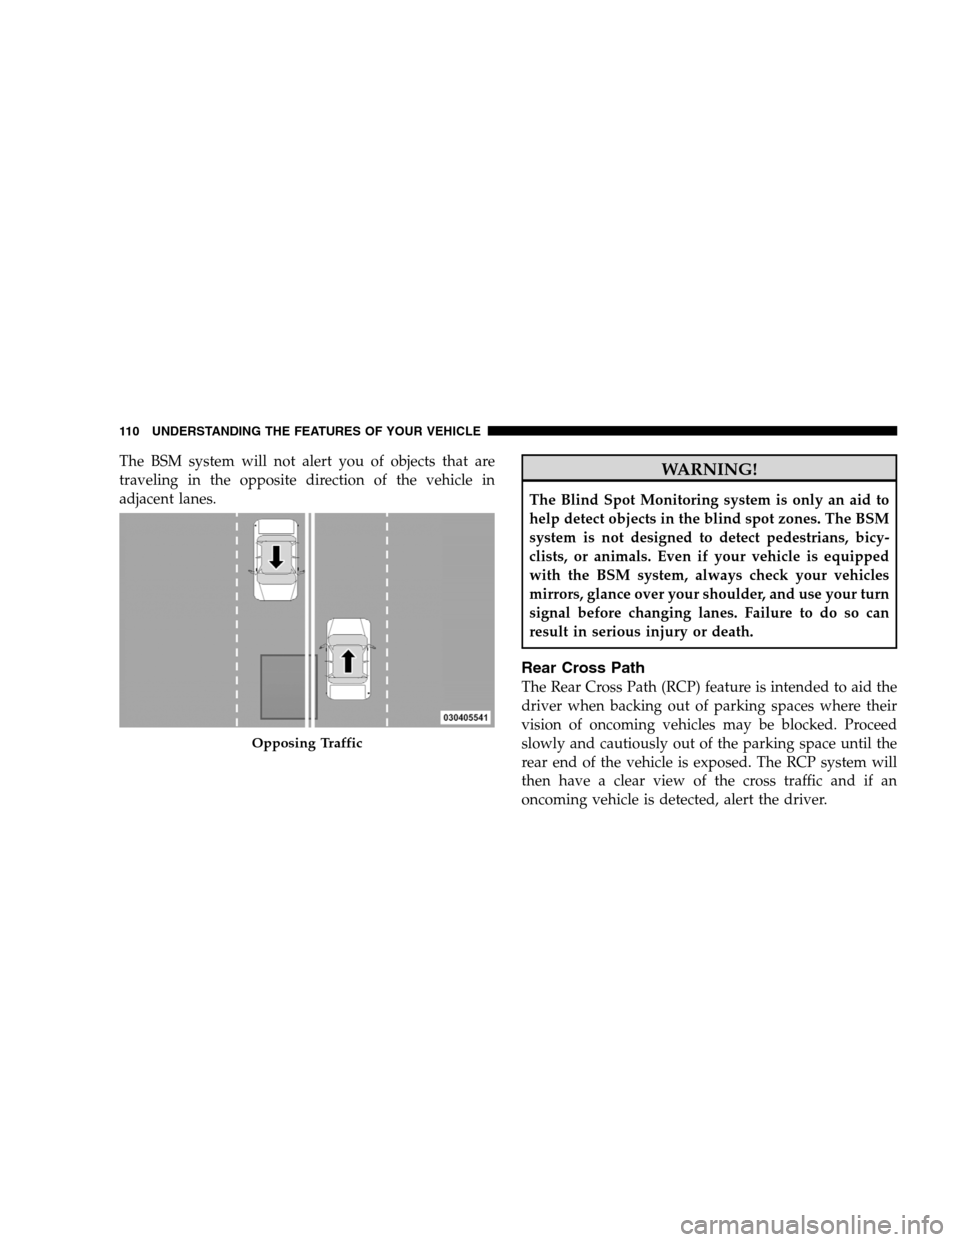
The BSM system will not alert you of objects that are
traveling in the opposite direction of the vehicle in
adjacent lanes.WARNING!
The Blind Spot Monitoring system is only an aid to
help detect objects in the blind spot zones. The BSM
system is not designed to detect pedestrians, bicy-
clists, or animals. Even if your vehicle is equipped
with the BSM system, always check your vehicles
mirrors, glance over your shoulder, and use your turn
signal before changing lanes. Failure to do so can
result in serious injury or death.
Rear Cross Path
The Rear Cross Path (RCP) feature is intended to aid the
driver when backing out of parking spaces where their
vision of oncoming vehicles may be blocked. Proceed
slowly and cautiously out of the parking space until the
rear end of the vehicle is exposed. The RCP system will
then have a clear view of the cross traffic and if an
oncoming vehicle is detected, alert the driver.
Opposing Traffic
110
UNDERSTANDING THE FEATURES OF YOUR VEHICLE
Page 116 of 535
uconnecttallows you to transfer calls between the sys-
tem and your cellular phone as you enter or exit your
vehicle and enables you to mute the system’s microphone
for private conversation.
The uconnectt phone is driven through your Bluetootht
“Hands-Free Profile” cellular phone. uconnectt features
Bluetootht technology - the global standard that enables
different electronic devices to connect to each other
without wires or a docking station, so uconnectt phone
works no matter where you stow your cellular phone (be
it your purse, pocket, or briefcase), as long as your phone
is turned on and has been paired to the vehicle’s
uconnectt phone. The uconnectt phone allows up to
seven cellular phones to be linked to the system. Only
one linked (or paired) cellular phone can be used with the
system at a time. The system is available in English,
Spanish, or French languages. Phone Button
The rearview mirror contains the microphone
for the system (depending on the type of
mirror and radio equipped), and either the
radio or the mirror has the two control buttons
(PHONE Button and VOICE RECOGNITION button)
that will enable you to access the system.
Voice Recognition Button
Actual button location may vary with the ra-
dio. The individual buttons are described in the
“Operation” section.
The uconnectt phone can be used with any Hands-Free
Profile certified Bluetootht cellular phone. See the
uconnectt website for supported phones. If your cellular
phone supports a different profile (e.g., Headset Profile)
you may not be able to use any uconnectt phone
features. Refer to your cellular service provider or the
phone manufacturer for details. 114 UNDERSTANDING THE FEATURES OF YOUR VEHICLE
Page 135 of 535
Press the VOICE RECOGNITION button and say the
9Setup, Voice Training9
command.
Repeat the words and phrases when prompted by the
uconnectt phone. For best results, the Voice Training
session should be completed when the vehicle is parked
with the engine running, all windows closed, and the
blower fan switched off.
This procedure may be repeated with a new user. The
system will adapt to the last trained voice only.
To restore the Voice Recognition system to factory default
settings, enter the Voice Training session via the above
procedure and follow the prompts.
Voice Recognition (VR)
For best performance, adjust the rearview mirror to
provide at least1�2in (1 cm) gap between the overhead
console (if equipped) and the mirror.
Always wait for the beep before speaking.
Speak normally, without pausing, just as you would
speak to a person sitting a few feet/meters away from
you.
Make sure that no one other than you is speaking
during a voice recognition period.
Performance is maximized under:
low-to-medium blower setting,
low-to-medium vehicle speed,
low road noise,
smooth road surface,
fully closed windows,
dry weather condition.
UNDERSTANDING THE FEATURES OF YOUR VEHICLE 133 3
Page 193 of 535
REAR PARK ASSIST — IF EQUIPPEDThe Rear Park Assist provides visible and audible indi-
cations of the distance between the rear fascia and the
detected obstacle, when backing up. When backing up,
you should also use the inside rearview and outside
mirrors.
The Rear Park Assist will remember the last system state
(enabled or disabled) from the last ignition cycle, when
the ignition is changed to the RUN/ON position.
The Rear Park Assist can be active only when the shift
lever is in REVERSE. When in REVERSE, the system
scans for objects behind the vehicle, using four sensors
located in the rear bumper.
NOTE:
The system will be active until the vehicle speed
is increased to approximately 11 mph (18 km/h) or
above. The system will be active again if the vehicle
speed is decreased to speeds less than approximately
10 mph (16 km/h).
Rear Park Assist Sensors
The four Rear Park Assist sensors, located in the rear
fascia, monitor the area behind the vehicle that is within
the sensors’ field of view. The monitored area seems oval
in shape. The sensors can detect obstacles from approxi-
mately 11.8 in (30 cm) up to 78.7 in (200 cm) from the rear
fascia in the horizontal direction, depending on the
location and orientation of the obstacle and the type of
obstacle.
UNDERSTANDING THE FEATURES OF YOUR VEHICLE 191 3
Page 194 of 535
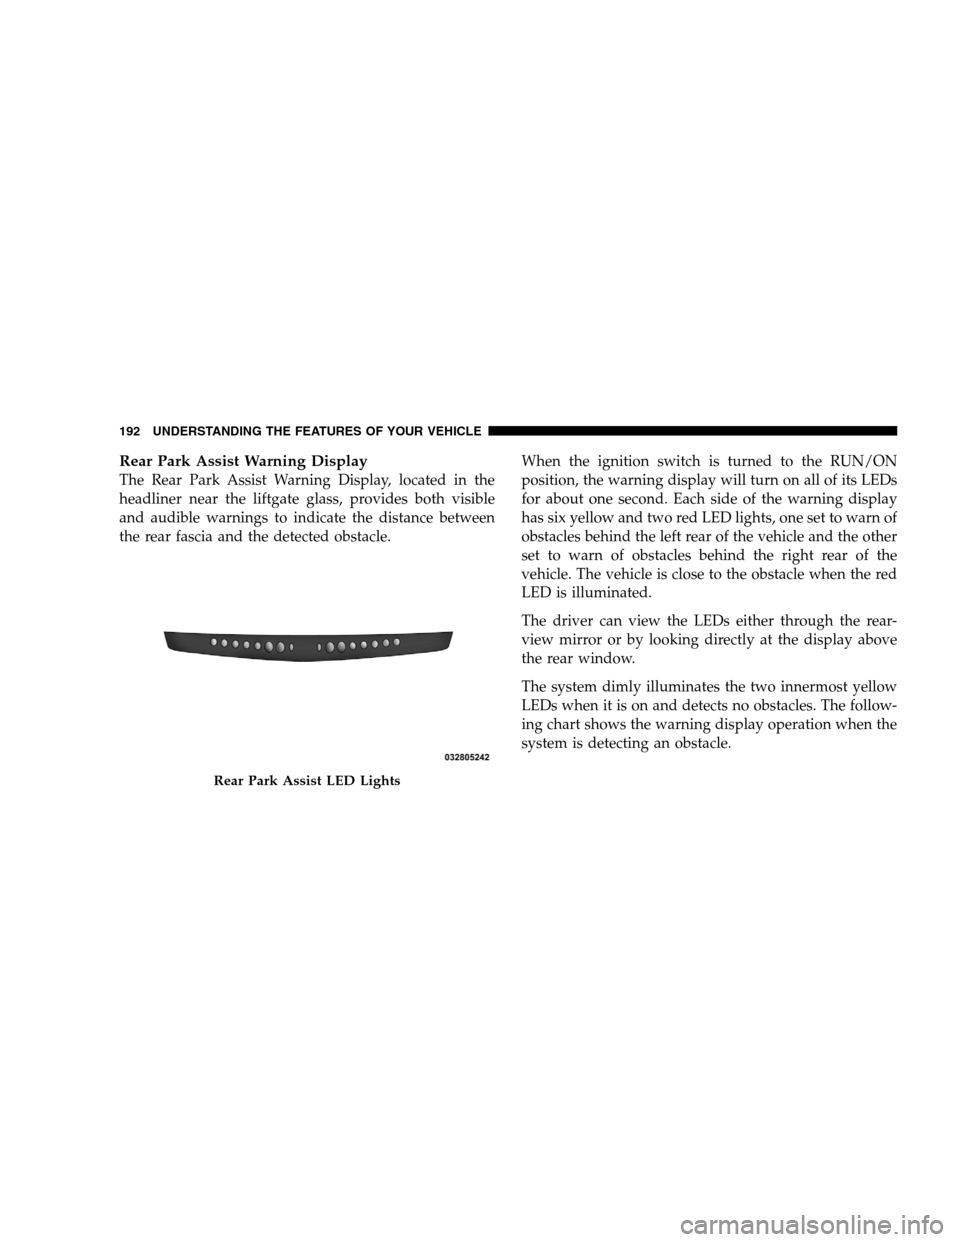
Rear Park Assist Warning DisplayThe Rear Park Assist Warning Display, located in the
headliner near the liftgate glass, provides both visible
and audible warnings to indicate the distance between
the rear fascia and the detected obstacle.
When the ignition switch is turned to the RUN/ON
position, the warning display will turn on all of its LEDs
for about one second. Each side of the warning display
has six yellow and two red LED lights, one set to warn of
obstacles behind the left rear of the vehicle and the other
set to warn of obstacles behind the right rear of the
vehicle. The vehicle is close to the obstacle when the red
LED is illuminated.
The driver can view the LEDs either through the rear-
view mirror or by looking directly at the display above
the rear window.
The system dimly illuminates the two innermost yellow
LEDs when it is on and detects no obstacles. The follow-
ing chart shows the warning display operation when the
system is detecting an obstacle.Rear Park Assist LED Lights
192 UNDERST
ANDING THE FEATURES OF YOUR VEHICLE
Page 261 of 535
rear view icons will be illuminated. If electronic inter-
ference is present, the BSM system will illuminate the
icon only on the side of interference as long as
interference is present.
Service Blind Spot System — This message is dis-
played to indicate the Blind Spot Monitor (BSM)
system is permanently unavailable. The driver will
receive an EVIC message and the BSM display warn-
ing in both mirrors will be permanently illuminated. If
this message is present see an authorized dealer.
Oil Change Required
Your vehicle is equipped with an engine oil change
indicator system. TheOil Change Required message will
flash in the EVIC display for approximately 10 seconds,
after a single chime has sounded, to indicate the next
scheduled oil change interval. The engine oil change indicator system is duty-cycle based, which means the
engine oil change interval may fluctuate dependent upon
your personal driving style.
Unless reset, this message will continue to display each
time you turn the ignition switch to the ON/RUN
position. To turn off the message temporarily, press and
release the Menu button. To reset the oil change indicator
system (after performing the scheduled maintenance)
perform the following steps.
1. Turn the ignition switch to the ON position (do not
start the engine).
2. Fully depress the accelerator pedal, slowly, three times
within 10 seconds.
3. Turn the ignition switch to the OFF/LOCK position.
NOTE:
If the indicator message illuminates when you
start the engine, the oil change indicator system did not
reset. If necessary, repeat these steps.
UNDERSTANDING YOUR INSTRUMENT PANEL 259 4