ECO mode DODGE GRAND CARAVAN 2013 5.G Owner's Manual
[x] Cancel search | Manufacturer: DODGE, Model Year: 2013, Model line: GRAND CARAVAN, Model: DODGE GRAND CARAVAN 2013 5.GPages: 132, PDF Size: 4.51 MB
Page 55 of 132
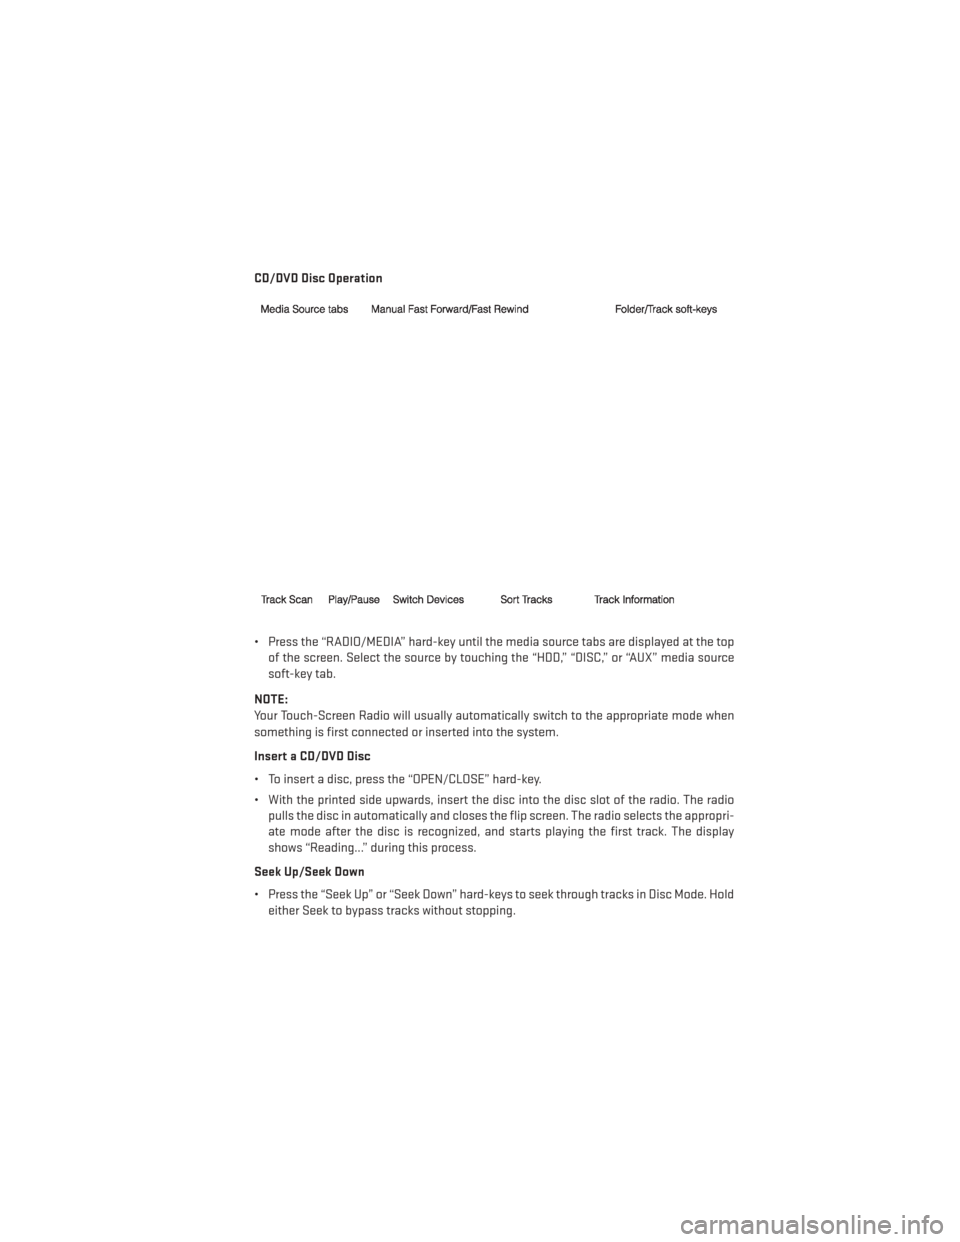
CD/DVD Disc Operation
• Press the “RADIO/MEDIA” hard-key until the media source tabs are displayed at the topof the screen. Select the source by touching the “HDD,” “DISC,” or “AUX” media source
soft-key tab.
NOTE:
Your Touch-Screen Radio will usually automatically switch to the appropriate mode when
something is first connected or inserted into the system.
Insert a CD/DVD Disc
• To insert a disc, press the “OPEN/CLOSE” hard-key.
• With the printed side upwards, insert the disc into the disc slot of the radio. The radio pulls the disc in automatically and closes the flip screen. The radio selects the appropri-
ate mode after the disc is recognized, and starts playing the first track. The display
shows “Reading...” during this process.
Seek Up/Seek Down
• Press the “Seek Up” or “Seek Down” hard-keys to seek through tracks in Disc Mode. Hold either Seek to bypass tracks without stopping.
ELECTRONICS
53
Page 63 of 132
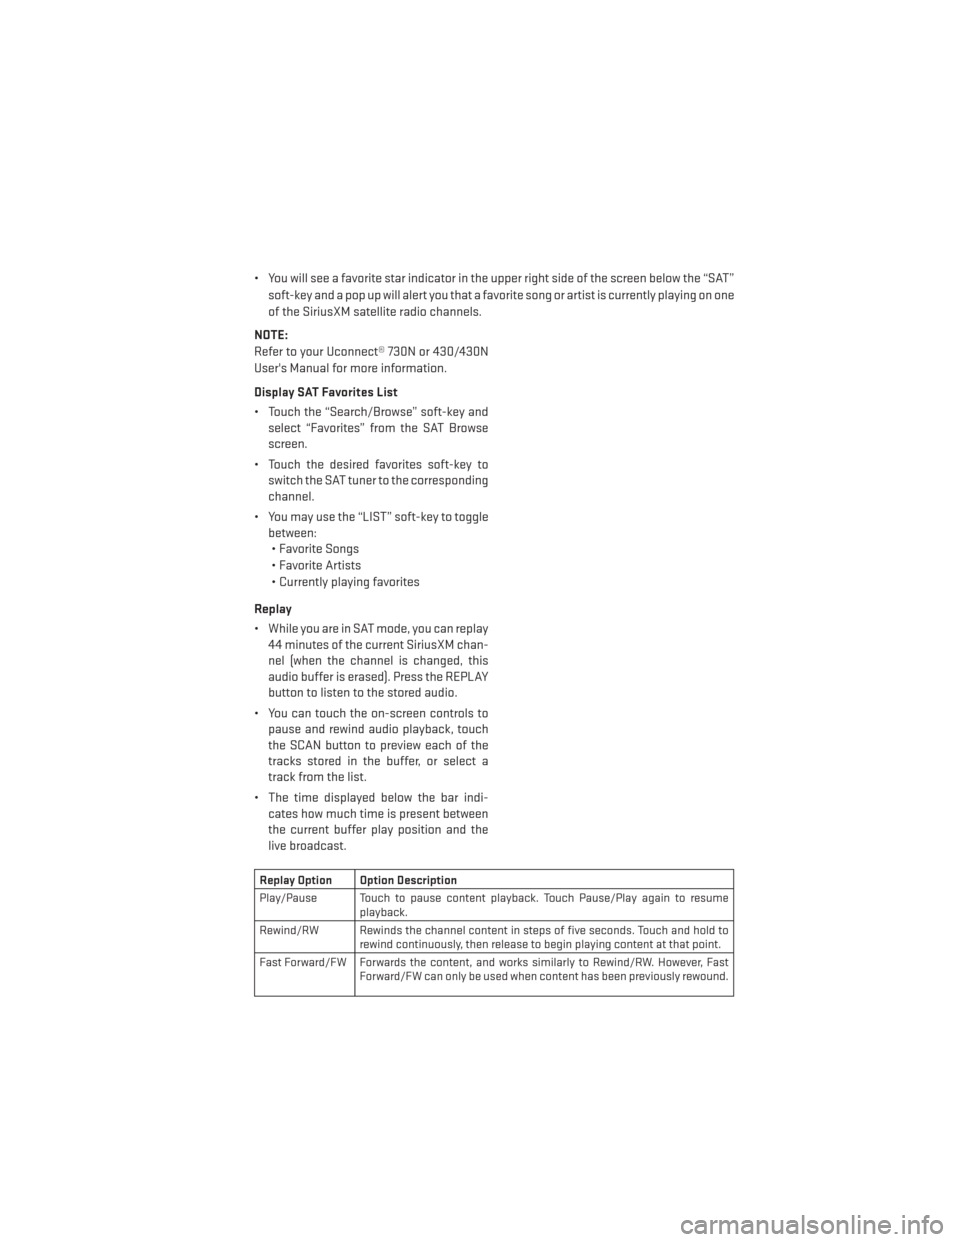
• You will see a favorite star indicator in the upper right side of the screen below the “SAT”soft-key and a pop up will alert you that a favorite song or artist is currently playing on one
of the SiriusXM satellite radio channels.
NOTE:
Refer to your Uconnect® 730N or 430/430N
User's Manual for more information.
Display SAT Favorites List
• Touch the “Search/Browse” soft-key and select “Favorites” from the SAT Browse
screen.
• Touch the desired favorites soft-key to switch the SAT tuner to the corresponding
channel.
• You may use the “LIST” soft-key to toggle between:• Favorite Songs
• Favorite Artists
• Currently playing favorites
Replay
• While you are in SAT mode, you can replay 44 minutes of the current SiriusXM chan-
nel (when the channel is changed, this
audio buffer is erased). Press the REPLAY
button to listen to the stored audio.
• You can touch the on-screen controls to pause and rewind audio playback, touch
the SCAN button to preview each of the
tracks stored in the buffer, or select a
track from the list.
• The time displayed below the bar indi- cates how much time is present between
the current buffer play position and the
live broadcast.
Replay Option Option Description
Play/Pause Touch to pause content playback. Touch Pause/Play again to resume playback.
Rewind/RW Rewinds the channel content in steps of five seconds. Touch and hold to rewind continuously, then release to begin playing content at that point.
Fast Forward/FW Forwards the content, and works similarly to Rewind/RW. However, Fast Forward/FW can only be used when content has been previously rewound.
ELECTRONICS
61
Page 69 of 132
Uconnect® VOICE COMMAND
Voice Command Operation
• The Uconnect® Voice Command system allows you to control your AM, FM radio, satelliteradio, disc player, HDD, Uconnect® Phone, a memo recorder, and supported portable
media devices.
• When you press the “Voice Command” button
located on the radio faceplate or
steering wheel, you will hear a beep. The beep is your signal to give a command. If you do
not say a command within a few seconds, the system will present you with a list of
options. If you ever wish to interrupt the system while it lists options, press the “Voice
Command” button
, listen for the BEEP, and say your command.
NOTE:
Visit http://www.driveuconnect.com/features/voiceCommand/ for more info on which
voice command features apply to your vehicle.
• Start a dialogue by pressing the “Voice Command” button
, you will hear a beep.
The beep is your signal to give a command. Below are a list of voice commands for each
of the different modes.
Common Voice Commands (Examples)
While In: Voice Command Example:
Main Menu “Radio AM” (to switch to the AM radio mode)
“Radio FM” (to switch to the FM radio mode)
“Satellite Radio” (to switch to the Satellite radio mode) “Disc” (to switch to the disc mode)“USB” (to switch to the USB mode)
“Bluetooth Streaming” (to switch to the Bluetooth Streaming mode) “Memo” (to switch to the memo recorder)
“System Setup” (to switch to system setup)
Radio Mode “Frequency” (to change the frequency)
“Next Station” (to select the next station)
“Previous Station” (to select the previous station) “Radio Menu” (to switch to the radio menu)“Main Menu” (to switch to the main menu)
ELECTRONICS
67
Page 70 of 132
SiriusXM SatelliteRadio Mode “Channel Number” (to change the channel by its spoken number)
“Next Channel” (to select the next channel)
“Previous Channel” (to select the previous channel) “List Channel” (to hear a list of available channels)
"Channel Name" (to change the channel by its spoken name) “Select Name” (to say the name of a channel)“Radio Menu” (to switch to the radio menu)“Main Menu” (to switch to the main menu)
Disc Mode “Track” (#) (to change the track)
“Next Track” (to play the next track)
“Previous Track” (to play the previous track) “Main Menu” (to switch to the main menu)
Memo Mode
To switch to the voice recorder mode, say “Memo”. The following are
common voice commands for this mode: “New Memo” (to record a new memo) — During the recording, you may press the Voice Command
button
to stop recording. You proceed by saying one of the following commands:
— “Save” (to save the memo)
— “Continue” (to continue recording) — “Delete” (to delete the recording)
— “Play Memos” (to play previously recorded memos) — During the play-
back you may press the Voice Command buttonto stop playing
memos. You proceed by saying one of the following commands:
— “Repeat” (to repeat a memo)
— “Next” (to play the next memo)
— “Previous” (to play the previous memo) — “Delete” (to delete a memo)
— “Delete All” (to delete all memos)
Voice Text Reply
• If equipped with Uconnect® Voice Command, your Uconnect® 430N, 730N & 731N radios may be able to play incoming Short Message Service (SMS) messages (text messages)
through the vehicle's sound system.
• It also allows you to respond by selecting from various pre - defined phrases.
• Not all phones are compatible with this feature. Refer to the phone compatibility list at www.UconnectPhone.com. Connected mobile phones must be bluetooth-compatible
and paired with your radio.
• Press the “Voice Command” button
and after the BEEP, say “SMS” to get started.
NOTE:
To access the tutorial, press the “Voice Command” button
. After the BEEP, say
“tutorial”. Press any hard-key/button or touch the display (Touch-Screen radio) to cancel
the tutorial.
ELECTRONICS
68
Page 72 of 132
Operation Of The Touch-Screen Radio/DVD Player/Blu-Ray Player
• To view a DVD press the OPEN/CLOSE or LOAD hard-key on the touch-screen radio andinsert the disc or insert the disc into the optional DVD player. Playback will begin
automatically after the DVD is recognized by the disc drive. If playback does not begin
automatically when the disc is inserted into the DVD player press the PLAY button. If
playback does not begin automatically after the disc is inserted into the touch-screen
radio follow these steps:• Press the MENU hard-key, then touch the Rear VES™ soft-key. If a chapter list appears
on the right side of the screen, touch the HIDE LIST soft-key to display the Rear VES™
control screen.
• Touch the 1 soft key to select an audio channel, then touch the DISC soft-key in the MEDIA column.
Operation Of The Remote Control
• The remote control operates similarly to any DVD remote you may have used before and allows the rear seat passengers to change stations, tracks, discs and audio/video
modes.
• The remote control is designed to control either channel by using the selector switch located on the right side of the remote.
• Connect the video game or other external media devices to the AUX jacks following the color coding for the VES™ jacks.
• Pressing the power button will turn the VES™ system ON/OFF.
• Pressing the mode button causes the MODE SELECTION menu to appear on the VES™ screen. Use the remote control arrow buttons to scroll through the available modes, and
then press ENTER to select the desired mode.
Auxiliary Audio/Video Input Jacks
• The AUX jacks are located on the drivers side rear trim panel behind the sliding door.
• Connect the video game or other external media devices to the AUX jacks following the color coding for the VES™ jacks.
• Using either the touch-screen radio or remote control, select AUX from the REAR VES™ CONTROL or the MODE SELECTION screen.
• Refer to the Uconnect® Multimedia – Video Entertainment System (VES™) section in the vehicle Owner's Manual on the DVD for further details.
ELECTRONICS
70
Page 100 of 132
FREEING A STUCK VEHICLE
• If your vehicle becomes stuck in mud, sand or snow, it can often be moved using arocking motion. Turn your steering wheel right and left to clear the area around the front
wheels. Then shift back and forth between DRIVE and REVERSE while gently pressing the
accelerator. Use the least amount of accelerator pedal pressure that will maintain the
rocking motion, without spinning the wheels or racing the engine.
NOTE:
Press the "ESC Off" switch, to place the Electronic Stability Control (ESC) system in "Partial
Off" mode before rocking the vehicle. Once the vehicle has been freed, press the "ESC Off"
switch again to restore "ESC On" mode.
CAUTION!
• When “rocking” a stuck vehicle by moving between REVERSE and DRIVE, do not spin the wheels faster than 15 mph (24 km/h), or drivetrain damage may result.
• Revving the engine or spinning the wheels too fast may lead to transmission over-
heating and failure. It can also damage the tires. Do not spin the wheels above
30 mph (48 km/h) while in gear (no transmission shifting occurring).
WARNING!
Fast spinning tires can be dangerous. Forces generated by excessive wheel speeds may
cause tire damage or failure. A tire could explode and injure someone. Do not spin your
vehicle's wheels faster than 30 mph (48 km/h) when you are stuck. Do not let anyone
near a spinning wheel, no matter what the speed.
WHAT TO DO IN EMERGENCIES
98
Page 116 of 132
CHRYSLER GROUP LLC CUSTOMER CENTER
P.O. Box 21–8004 Auburn Hills, MI 48321–8004 Phone: 1–800–423–6343
CHRYSLER CANADA INC. CUSTOMER CENTER
P.O. Box 1621 Windsor, Ontario N9A 4H6 Phone: 1–800–465–2001 (English)
Phone: 1–800–387–9983 (French)
PUBLICATIONS ORDERING
• Replacement English User Guide kits or DVDs may be purchased by visiting www.tech-authority.com or by calling 1–800–890–4038 (U.S.) or 1–800–387–1143 (Canada). Visa,
Master Card, American Express and Discover orders are accepted. If you prefer mailing
your order, please call the above numbers for an order form.
• For a copy of this User Guide/DVD kit in Spanish, please contact your authorized dealer.
NOTE:
• A street address is required when ordering manuals (no P.O. Boxes).
• The Owner's Manual and User Guide electronic files are also available on the Chrysler, Jeep, Ram Truck and Dodge websites.
• Click on the “For Owners” tab, select "Owner/Service Manuals”, then select your desired model year and vehicle from the drop down lists.
ASSISTANCE FOR THE HEARING IMPAIRED
•To assist customers who have hearing difficulties, the manufacturer has installed special
TDD (Telecommunication Devices for the Deaf) equipment at its customer center. Any
hearing or speech impaired customer, who has access to a TDD or a conventional teletype-
writer (TTY) in the United States, can communicate with the manufacturer by dialing
1–800–380–CHRY. Canadian residents with hearing difficulties that require assistance can
use the special needs relay service offered by Bell Canada. For TTY teletypewriter users,
dial 711 and for Voice callers, dial 1–800–855–0511 to connect with a Bell Relay Service
operator.
WARNING!
Engine exhaust, some of its constituents, and certain vehicle components contain, or
emit, chemicals known to the State of California to cause cancer and birth defects, or
other reproductive harm. In addition, certain fluids contained in vehicles and certain
products of component wear contain, or emit, chemicals known to the State of California
to cause cancer and birth defects, or other reproductive harm.
CONSUMER ASSISTANCE
114
Page 119 of 132
Adjustable Pedals.............21
Airbag...................10
Arming Theft System (Security Alarm)...9
Automatic Headlights ..........24
Automatic Temperature Control (ATC)...29
Automatic Transmission Fluid Type ..............103
Auxiliary Audio/Video Input Jacks ....70
AxleFluid ................103
Back-UpCamera.............30
Belts, Seat .................10
Blind Spot Monitoring ...........31
BrakeFluid................103
Break-In Recommendations, New Vehicle ..............22
BulbReplacement............113
Calibration, Compass ...........71
Cargo Compartment Luggage Carrier ...........78
Change Oil Indicator ...........83
Changing A Flat Tire ...........85
Child Restraint ...............11
Child Restraint Tether Anchors ......12
Compass Calibration ...........71
Cooling System Coolant Capacity ..........103
Cruise Control (Speed Control) ......25
Cruise Light ................25
Customer Assistance ..........114
Defects, Reporting ............115
Dimmer Control ..............24
Dimmer Switch, Headlight ........24
Disarming, Theft System ..........9
Economy(Fuel)Mode...........26
Electronics Your Vehicle's Sound System ....34
Electronic Speed Control (Cruise Control) ............25
Electronic Vehicle Information Center (EVIC) ............71,72 Emergency, In Case of
Brake Warning Light .........82
Freeing Vehicle When Stuck .....98
Jacking ..............85,89
Overheating .............84
Engine Break-In Recommendations .....22
Compartment ........... .102
Oil Selection .............103
Overheating .............84
EventDataRecorder...........99
Exterior Lights ..............113
Flash-To-Pass ...............23
Fluid Capacities .............103
Fluids ..................103
FogLights.................24
Fold in Floor (Stow `n Go) Seating ....15
Freeing A Stuck Vehicle .........98
Front Heated Seats ............19
Fuel Economy Mode ............26
Filler Cap (Gas Cap) .........83
Specification s............
103
Garage Door Opener (HomeLink®) ....73
Gas Cap (Fuel Filler Cap) .........83
Headlights Automatic ..............24
Dimmer Switch ............24
HighBeam ..............23
HeatedMirrors ..........27,28,29
Heated Seats ...............19
Heated Steering Wheel ..........20
High Beam/Low Beam Select (Dimmer) Switch ............23
HomeLink® (Garage Door Opener) ....73
Hood Release ..............100
Instrument Cluster Indicators ...............7
Instrument Cluster Warning Lights ....6
Intermittent Wipers (Delay Wipers) ....23
INDEX
117