seat adjustment DODGE GRAND CARAVAN 2020 Owners Manual
[x] Cancel search | Manufacturer: DODGE, Model Year: 2020, Model line: GRAND CARAVAN, Model: DODGE GRAND CARAVAN 2020Pages: 380, PDF Size: 14.92 MB
Page 4 of 380

2
INTRODUCTION
HOW TO USE THIS MANUAL .................................. 8
Essential Information .................................... 8
Symbols .......................................................... 8
WARNINGS AND CAUTIONS ................................. 8
VEHICLE MODIFICATIONS/ALTERATIONS ........... 8
GETTING TO KNOW YOUR VEHICLE
KEYS ........................................................................ 9
Key Fobs ......................................................... 9
IGNITION SWITCH .................................................11
Wireless Ignition Node (WIN) ...................... 11
REMOTE START — IF EQUIPPED .........................12
How To Use Remote Start ........................... 12
Remote Start Abort Messages .................... 12
To Enter Remote Start Mode ...................... 12
To Exit Remote Start Mode Without
Driving The Vehicle ..................................... 13 To Exit Remote Start Mode And Drive The
Vehicle .......................................................... 13 General Information .................................... 13
SENTRY KEY ..........................................................13
Key Programming ....................................... 14
Replacement Keys....................................... 14
General Information .................................... 14
VEHICLE SECURITY ALARM — IF EQUIPPED .....15
Rearming Of The System............................. 15
To Arm The System ..................................... 15
To Disarm The System ................................ 15
Tamper Alert................................................. 16 DOORS .................................................................. 16
Manual Door Locks...................................... 16
Power Door Locks — If Equipped ............... 17
Power Sliding Side Door — If Equipped ...... 18
Child Locks ................................................... 19
SEATS .................................................................... 20
Manual Adjustment (Front Seats) — If
Equipped ...................................................... 20 Manual Adjustment (Rear Seats) ............... 21
Power Seats — If Equipped ......................... 27
Heated Seats — If Equipped ....................... 28
Plastic Grocery Bag Retainer Hooks........... 30
HEAD RESTRAINTS .............................................. 30
Supplemental Active Head Restraints
— Front Seats ............................................... 30 Head Restraints — Second Row Quad
Seats............................................................. 31 Head Restraints — Second Row Bench ...... 32
Head Restraints — Third Row...................... 32
STEERING WHEEL ............................................... 33
Tilt/Telescoping Steering Column .............. 33
Heated Steering Wheel — If Equipped ....... 34
MIRRORS .............................................................. 34
Automatic Dimming Mirror
— If Equipped .............................................. 34 Automatic Dimming Mirror With Rear
View Camera Display — If Equipped ........... 35 Outside Mirrors ........................................... 35
Interior Observation Mirror.......................... 36
Power Mirrors — If Equipped ...................... 36
Outside Mirrors Folding Feature ................. 36 Heated Mirrors — If Equipped ..................... 37
Illuminated Vanity Mirrors
— If Equipped .............................................. 37
EXTERIOR LIGHTS ...............................................37
Headlight Switch.......................................... 37
Multifunction Lever .................................... 37
Daytime Running Lights (DRLs)
— If Equipped ............................................... 38 High/Low Beam Switch .............................. 38
Flash-To-Pass ............................................... 38
Automatic Headlights ................................. 38
Headlights On With Wipers
— If Equipped ............................................... 38 Headlight Delay — If Equipped.................... 38
Lights-On Reminder ..................................... 39
Front Fog Lights — If Equipped .................. 39
Turn Signals ................................................. 39
Lane Change Assist ..................................... 39
Battery Protection ....................................... 39
INTERIOR LIGHTS ................................................39
Courtesy/Interior Lighting ........................... 39
WINDSHIELD WIPER AND WASHERS ...............41
Windshield Wiper Operation ....................... 41
Rear Wiper And Washer .............................. 42
CLIMATE CONTROLS ...........................................42
Manual Climate Control Overview .............. 42
Automatic Climate Control Overview .......... 48
Climate Control Functions........................... 56
Automatic Temperature Control (ATC)
— If Equipped ............................................... 56 Operating Tips ............................................. 57
20_RT_OM_EN_USC_t.book Page 2
Page 22 of 380
20GETTING TO KNOW YOUR VEHICLE
(Continued)
SEATS
Seats are a part of the Occupant Restraint
System of the vehicle.
Manual Adjustment (Front Seats) — If
Equipped
Manual Front/Second Row Seat Adjuster
Both front seats are adjustable forward or
rearward. The manual seat adjustment handle
is located under the seat cushion at the front
edge of each seat.
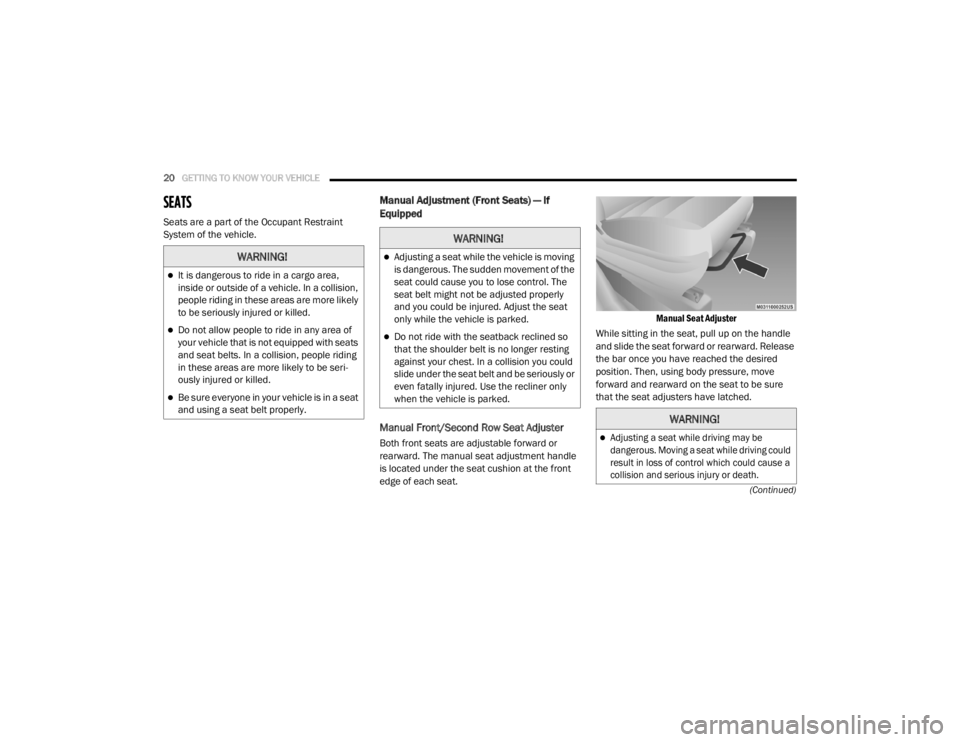
Manual Seat Adjuster
While sitting in the seat, pull up on the handle
and slide the seat forward or rearward. Release
the bar once you have reached the desired
position. Then, using body pressure, move
forward and rearward on the seat to be sure
that the seat adjusters have latched.
WARNING!
It is dangerous to ride in a cargo area,
inside or outside of a vehicle. In a collision,
people riding in these areas are more likely
to be seriously injured or killed.
Do not allow people to ride in any area of
your vehicle that is not equipped with seats
and seat belts. In a collision, people riding
in these areas are more likely to be seri -
ously injured or killed.
Be sure everyone in your vehicle is in a seat
and using a seat belt properly.
WARNING!
Adjusting a seat while the vehicle is moving
is dangerous. The sudden movement of the
seat could cause you to lose control. The
seat belt might not be adjusted properly
and you could be injured. Adjust the seat
only while the vehicle is parked.
Do not ride with the seatback reclined so
that the shoulder belt is no longer resting
against your chest. In a collision you could
slide under the seat belt and be seriously or
even fatally injured. Use the recliner only
when the vehicle is parked.
WARNING!
Adjusting a seat while driving may be
dangerous. Moving a seat while driving could
result in loss of control which could cause a
collision and serious injury or death.
20_RT_OM_EN_USC_t.book Page 20
Page 23 of 380
GETTING TO KNOW YOUR VEHICLE21
Manual Reclining Seats — If Equipped
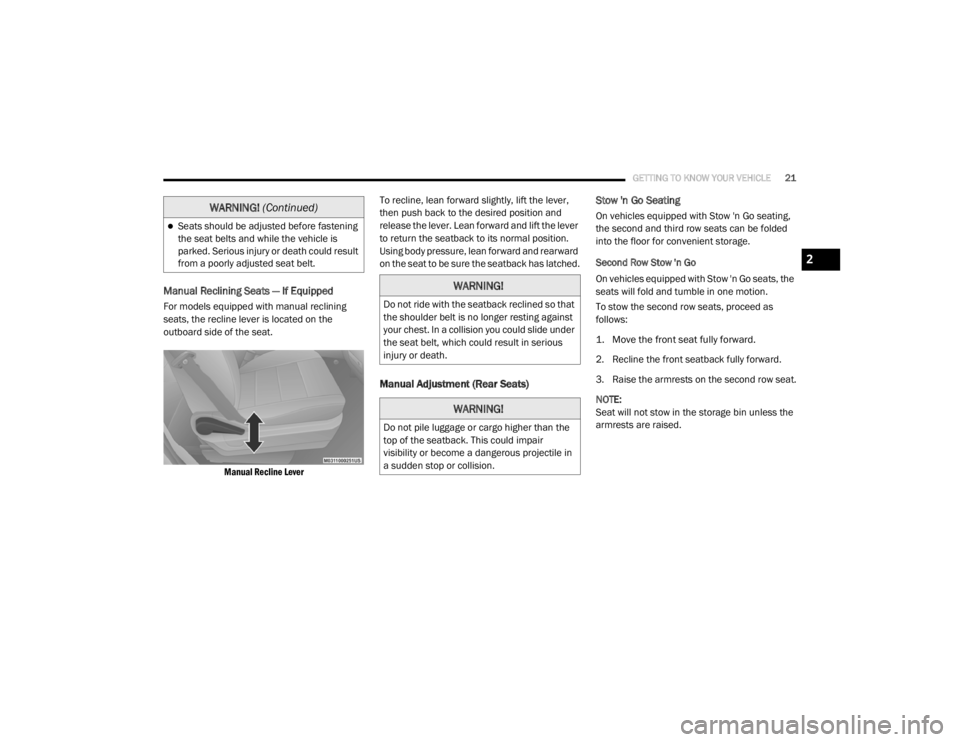
For models equipped with manual reclining
seats, the recline lever is located on the
outboard side of the seat.
Manual Recline Lever
To recline, lean forward slightly, lift the lever,
then push back to the desired position and
release the lever. Lean forward and lift the lever
to return the seatback to its normal position.
Using body pressure, lean forward and rearward
on the seat to be sure the seatback has latched.
Manual Adjustment (Rear Seats)
Stow 'n Go Seating
On vehicles equipped with Stow 'n Go seating,
the second and third row seats can be folded
into the floor for convenient storage.
Second Row Stow 'n Go
On vehicles equipped with Stow 'n Go seats, the
seats will fold and tumble in one motion.
To stow the second row seats, proceed as
follows:
1. Move the front seat fully forward.
2. Recline the front seatback fully forward.
3. Raise the armrests on the second row seat.
NOTE:
Seat will not stow in the storage bin unless the
armrests are raised.Seats should be adjusted before fastening
the seat belts and while the vehicle is
parked. Serious injury or death could result
from a poorly adjusted seat belt.
WARNING!
(Continued)
WARNING!
Do not ride with the seatback reclined so that
the shoulder belt is no longer resting against
your chest. In a collision you could slide under
the seat belt, which could result in serious
injury or death.
WARNING!
Do not pile luggage or cargo higher than the
top of the seatback. This could impair
visibility or become a dangerous projectile in
a sudden stop or collision.
2
20_RT_OM_EN_USC_t.book Page 21
Page 32 of 380

30GETTING TO KNOW YOUR VEHICLE
Plastic Grocery Bag Retainer Hooks
Retainer hooks which will hold plastic grocery
bag handles are built into the seatbacks of all
rear seats and some front seats. The floor
supports the partial weight of the bagged
goods.
HEAD RESTRAINTS
Head restraints are designed to reduce the risk
of injury by restricting head movement in the
event of a rear impact. Head restraints should
be adjusted so that the top of the head restraint
is located above the top of your ear.
Supplemental Active Head Restraints —
Front Seats
Active Head Restraints are passive, deployable
components, and vehicles with this equipment
cannot be readily identified by any markings,
only through visual inspection of the head
restraint. The Active Head Restraints (AHR) will
be split in two halves, with the front half being
soft foam and trim, the back half being
decorative plastic.
When AHRs deploy during a rear impact, the
front half of the head restraint extends forward
to reduce the gap between the back of the
occupant’s head and the AHR. This system is
design to reduce the risk of injury to the driver
or front passenger in certain types of rear
impacts. Refer to “Occupant Restraints” in
“Safety” for further information.
To raise the head restraint, pull upward on the
head restraint. To lower the head restraint,
push the adjustment button, located at the
base of the head restraint, and push downward
on the head restraint.
Adjustment Button
For comfort, the Active Head Restraints can be
tilted forward and rearward. To tilt the head
restraint closer to the back of your head, pull
forward on the bottom of the head restraint.
Push rearward on the bottom of the head
restraint to move the head restraint away from
your head.
Active Head Restraint (Normal Position)
WARNING!
All occupants, including the driver, should
not operate a vehicle or sit in a vehicle’s
seat until the head restraints are placed in
their proper positions in order to minimize
the risk of neck injury in the event of a
crash.
Head restraints should never be adjusted
while the vehicle is in motion. Driving a
vehicle with the head restraints improperly
adjusted or removed could cause serious
injury or death in the event of a collision.
20_RT_OM_EN_USC_t.book Page 30
Page 34 of 380
32GETTING TO KNOW YOUR VEHICLE
Head Restraints — Second Row Bench
The second row bench seat is equipped with
adjustable head restraints.
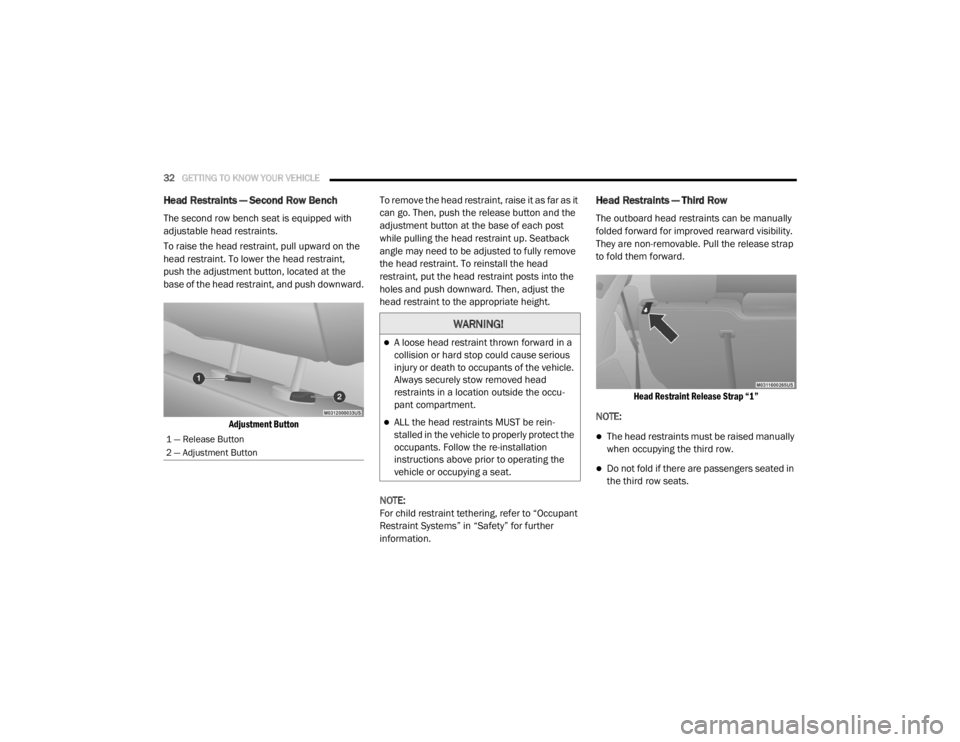
To raise the head restraint, pull upward on the
head restraint. To lower the head restraint,
push the adjustment button, located at the
base of the head restraint, and push downward.
Adjustment Button
To remove the head restraint, raise it as far as it
can go. Then, push the release button and the
adjustment button at the base of each post
while pulling the head restraint up. Seatback
angle may need to be adjusted to fully remove
the head restraint. To reinstall the head
restraint, put the head restraint posts into the
holes and push downward. Then, adjust the
head restraint to the appropriate height.
NOTE:
For child restraint tethering, refer to “Occupant
Restraint Systems” in “Safety” for further
information.
Head Restraints — Third Row
The outboard head restraints can be manually
folded forward for improved rearward visibility.
They are non-removable. Pull the release strap
to fold them forward.
Head Restraint Release Strap “1”
NOTE:
The head restraints must be raised manually
when occupying the third row.
Do not fold if there are passengers seated in
the third row seats.
1 — Release Button
2 — Adjustment Button
WARNING!
A loose head restraint thrown forward in a
collision or hard stop could cause serious
injury or death to occupants of the vehicle.
Always securely stow removed head
restraints in a location outside the occu -
pant compartment.
ALL the head restraints MUST be rein -
stalled in the vehicle to properly protect the
occupants. Follow the re-installation
instructions above prior to operating the
vehicle or occupying a seat.
20_RT_OM_EN_USC_t.book Page 32
Page 49 of 380

GETTING TO KNOW YOUR VEHICLE47
Icon Description
Panel Mode
Rear Panel Mode
To change Rear Mode to Panel Mode, turn the Rear Mode Knob to Rear Panel Mode position. Air comes from the outlets in
the headliner. Each of these outlets can be individually adjusted to direct the flow of air. Moving the air vanes of the outlets
to one side will shut off the airflow.
Bi-Level Mode Rear Bi-Level Mode
Air comes from both the headliner outlets and the floor outlets.
NOTE:
To change Rear Mode to Bi-Level Mode, turn the Rear Mode Knob to Rear Bi-Level Mode position. In many temperature
positions, the Bi-Level mode is designed to provide cooler air out of the headliner outlets and warmer air from the floor outlets.
Floor Mode
Rear Floor Mode
To change Rear Mode to Floor Mode, turn the Rear Mode Knob to Rear Floor Mode position. Air comes from the floor outlets.
Rear Temperature Control Knob
To change the temperature in the rear of the vehicle, turn the Temperature Control Knob. Turn it to the right to raise the
temperature, or turn it to the left to lower the temperature. The rear temperature settings are displayed in control head.
When rear controls are locked by the front system, the Rear Temperature Lock symbol on the control head is illuminated and
any rear overhead adjustments are ignored.
Rear Blower Control Knob
The rear blower control can be manually set to off, or any fixed blower speed by rotating the Blower Control Knob in the rear
of the vehicle. This allows the rear seat occupants to control the volume of air circulated in the rear of the vehicle.
2
20_RT_OM_EN_USC_t.book Page 47
Page 57 of 380

GETTING TO KNOW YOUR VEHICLE55
Rear Temperature Control Knob
To change the temperature in the rear of the vehicle, turn the Temperature Control Knob. Turn it to the right to raise the
temperature, or turn it to the left to lower the temperature. The rear temperature settings are displayed in control head.
When rear controls are locked by the front system, the Rear Temperature Lock symbol on the control head is illuminated and
any rear overhead adjustments are ignored.
Push the Rear Temperature Lock button on the front ATC panel. This turns off the Rear Temperature Lock icon in the rear
temperature knob.
Rear Blower Control Knob
The rear blower control can be manually set to off, or any fixed blower speed by rotating the Blower Control Knob in the rear
of the vehicle. This allows the rear seat occupants to control the volume of air circulated in the rear of the vehicle.
Rear AUTO Mode
Rear AUTO is selected by adjusting the rear blower knob counterclockwise to AUTO. The ATC system will automatically achieve
and maintain that comfort level. When the system is set up for your comfort level, it is not necessary to change the settings.
You will experience the greatest efficiency by simply allowing the system to function automatically.
Icon Description
2
20_RT_OM_EN_USC_t.book Page 55
Page 74 of 380
72GETTING TO KNOW YOUR VEHICLE
(Continued)
Umbrella Holder
An umbrella holder has been conveniently
molded into the left front door entry scuff
molding.
Umbrella Holder
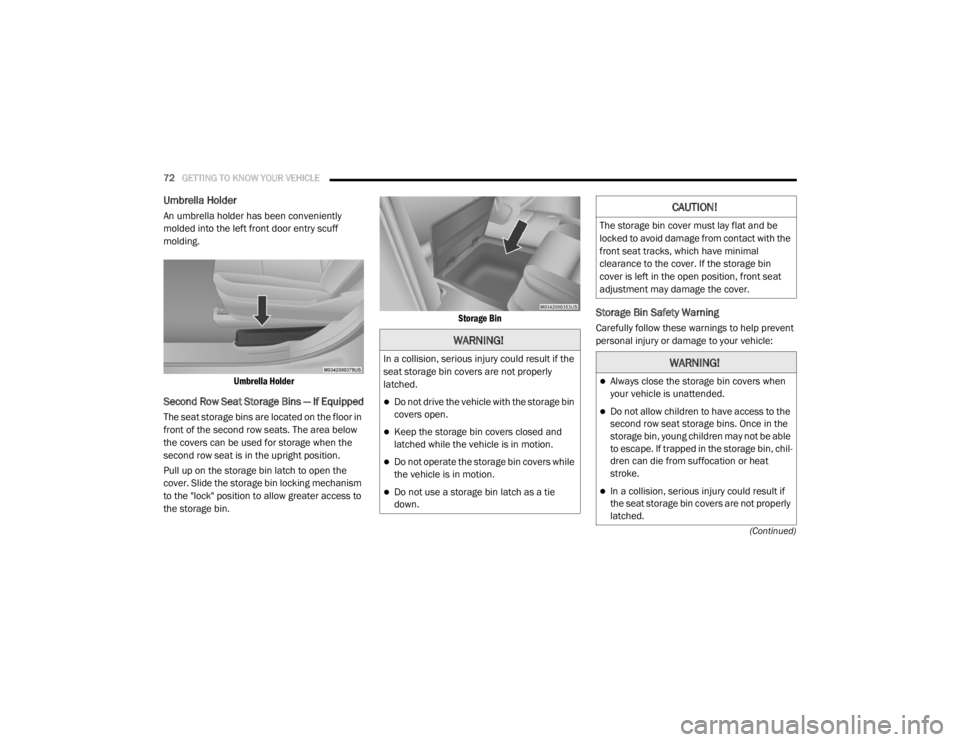
Second Row Seat Storage Bins — If Equipped
The seat storage bins are located on the floor in
front of the second row seats. The area below
the covers can be used for storage when the
second row seat is in the upright position.
Pull up on the storage bin latch to open the
cover. Slide the storage bin locking mechanism
to the "lock" position to allow greater access to
the storage bin.
Storage Bin
Storage Bin Safety Warning
Carefully follow these warnings to help prevent
personal injury or damage to your vehicle:
WARNING!
In a collision, serious injury could result if the
seat storage bin covers are not properly
latched.
Do not drive the vehicle with the storage bin
covers open.
Keep the storage bin covers closed and
latched while the vehicle is in motion.
Do not operate the storage bin covers while
the vehicle is in motion.
Do not use a storage bin latch as a tie
down.
CAUTION!
The storage bin cover must lay flat and be
locked to avoid damage from contact with the
front seat tracks, which have minimal
clearance to the cover. If the storage bin
cover is left in the open position, front seat
adjustment may damage the cover.
WARNING!
Always close the storage bin covers when
your vehicle is unattended.
Do not allow children to have access to the
second row seat storage bins. Once in the
storage bin, young children may not be able
to escape. If trapped in the storage bin, chil
-
dren can die from suffocation or heat
stroke.
In a collision, serious injury could result if
the seat storage bin covers are not properly
latched.
20_RT_OM_EN_USC_t.book Page 72
Page 75 of 380
GETTING TO KNOW YOUR VEHICLE73
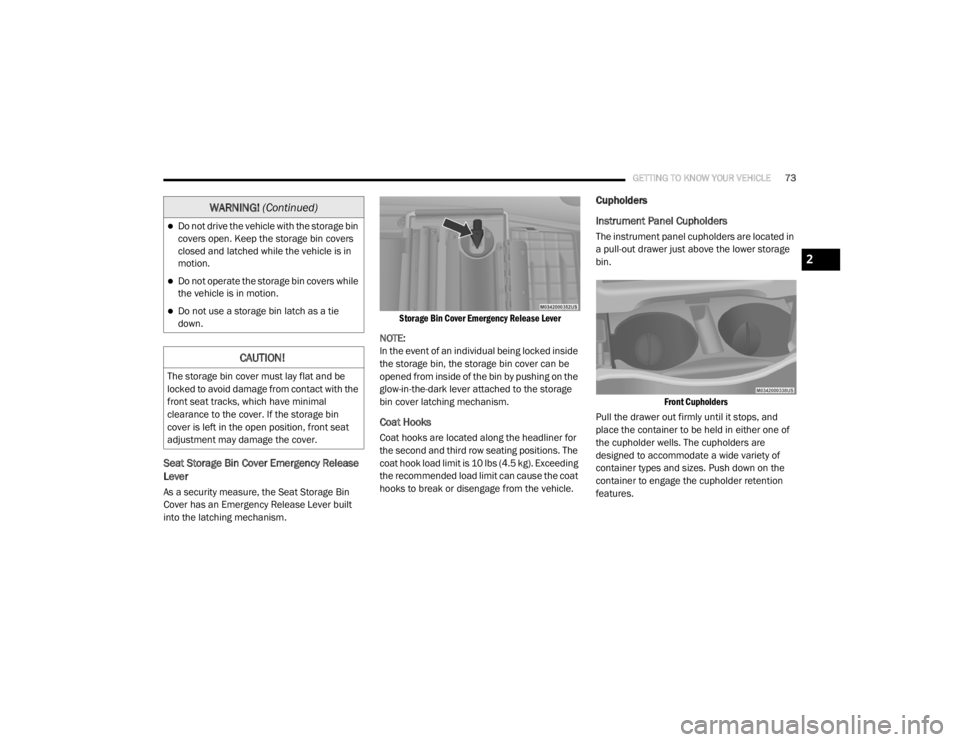
Seat Storage Bin Cover Emergency Release
Lever
As a security measure, the Seat Storage Bin
Cover has an Emergency Release Lever built
into the latching mechanism.
Storage Bin Cover Emergency Release Lever
NOTE:
In the event of an individual being locked inside
the storage bin, the storage bin cover can be
opened from inside of the bin by pushing on the
glow-in-the-dark lever attached to the storage
bin cover latching mechanism.
Coat Hooks
Coat hooks are located along the headliner for
the second and third row seating positions. The
coat hook load limit is 10 lbs (4.5 kg). Exceeding
the recommended load limit can cause the coat
hooks to break or disengage from the vehicle.
Cupholders
Instrument Panel Cupholders
The instrument panel cupholders are located in
a pull-out drawer just above the lower storage
bin.
Front Cupholders
Pull the drawer out firmly until it stops, and
place the container to be held in either one of
the cupholder wells. The cupholders are
designed to accommodate a wide variety of
container types and sizes. Push down on the
container to engage the cupholder retention
features.Do not drive the vehicle with the storage bin
covers open. Keep the storage bin covers
closed and latched while the vehicle is in
motion.
Do not operate the storage bin covers while
the vehicle is in motion.
Do not use a storage bin latch as a tie
down.
CAUTION!
The storage bin cover must lay flat and be
locked to avoid damage from contact with the
front seat tracks, which have minimal
clearance to the cover. If the storage bin
cover is left in the open position, front seat
adjustment may damage the cover.
WARNING! (Continued)
2
20_RT_OM_EN_USC_t.book Page 73
Page 126 of 380
124SAFETY
(Continued)
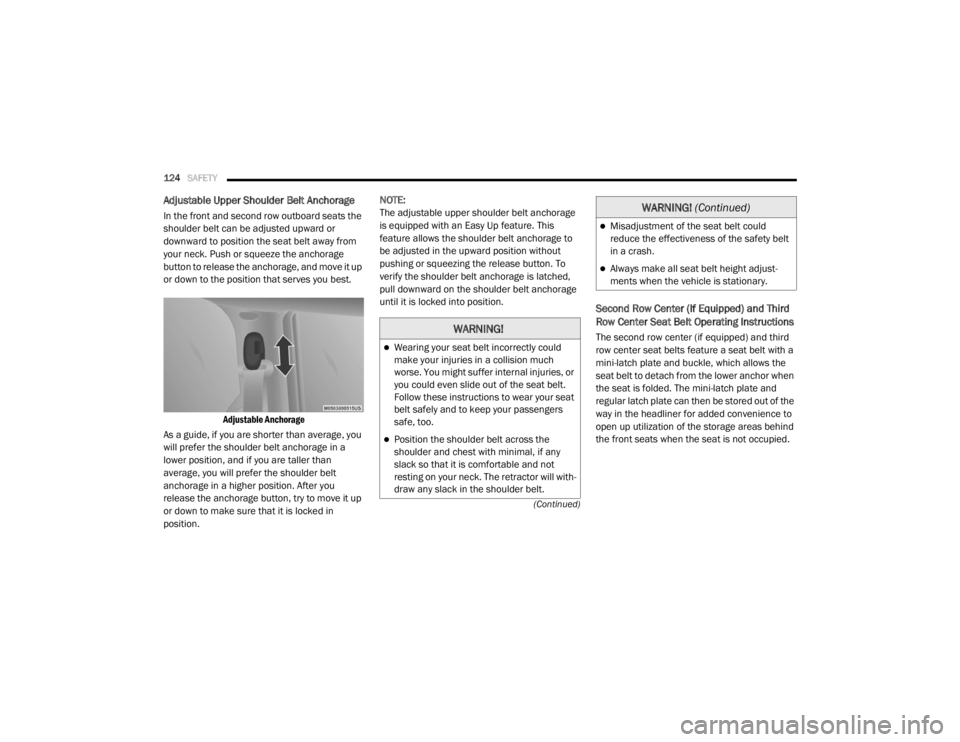
Adjustable Upper Shoulder Belt Anchorage
In the front and second row outboard seats the
shoulder belt can be adjusted upward or
downward to position the seat belt away from
your neck. Push or squeeze the anchorage
button to release the anchorage, and move it up
or down to the position that serves you best.
Adjustable Anchorage
As a guide, if you are shorter than average, you
will prefer the shoulder belt anchorage in a
lower position, and if you are taller than
average, you will prefer the shoulder belt
anchorage in a higher position. After you
release the anchorage button, try to move it up
or down to make sure that it is locked in
position. NOTE:
The adjustable upper shoulder belt anchorage
is equipped with an Easy Up feature. This
feature allows the shoulder belt anchorage to
be adjusted in the upward position without
pushing or squeezing the release button. To
verify the shoulder belt anchorage is latched,
pull downward on the shoulder belt anchorage
until it is locked into position.
Second Row Center (If Equipped) and Third
Row Center Seat Belt Operating Instructions
The second row center (if equipped) and third
row center seat belts feature a seat belt with a
mini-latch plate and buckle, which allows the
seat belt to detach from the lower anchor when
the seat is folded. The mini-latch plate and
regular latch plate can then be stored out of the
way in the headliner for added convenience to
open up utilization of the storage areas behind
the front seats when the seat is not occupied.WARNING!
Wearing your seat belt incorrectly could
make your injuries in a collision much
worse. You might suffer internal injuries, or
you could even slide out of the seat belt.
Follow these instructions to wear your seat
belt safely and to keep your passengers
safe, too.
Position the shoulder belt across the
shoulder and chest with minimal, if any
slack so that it is comfortable and not
resting on your neck. The retractor will with
-
draw any slack in the shoulder belt.
Misadjustment of the seat belt could
reduce the effectiveness of the safety belt
in a crash.
Always make all seat belt height adjust -
ments when the vehicle is stationary.
WARNING! (Continued)
20_RT_OM_EN_USC_t.book Page 124