technical specifications DODGE GRAND CARAVAN 2020 Owners Manual
[x] Cancel search | Manufacturer: DODGE, Model Year: 2020, Model line: GRAND CARAVAN, Model: DODGE GRAND CARAVAN 2020Pages: 380, PDF Size: 14.92 MB
Page 3 of 380
TABLE OF CONTENTS
1
2
3
4
5
6
7
8
9
10
11
1 INTRODUCTION .............................................................................................................................. 7
2 GETTING TO KNOW YOUR VEHICLE ................................................................................... 9
3 GETTING TO KNOW YOUR INSTRUMENT PANEL ........................................................82
4 SAFETY .........................................................................................................................................103 5 STARTING AND OPERATING ............................................................................................... 162
6 IN CASE OF EMERGENCY .....................................................................................................194 7 SERVICING AND MAINTENANCE ...................................................................................... 226
8 TECHNICAL SPECIFICATIONS ............................................................................................ 266
9 MULTIMEDIA .............................................................................................................................. 275
10 CUSTOMER ASSISTANCE .....................................................................................................364
11 INDEX ............................................................................................................................................. 368
20_RT_OM_EN_USC_t.book Page 1
Page 7 of 380

5
SERVICING AND MAINTENANCE
SCHEDULED SERVICING .................................. 226Maintenance Plan......................................227
ENGINE COMPARTMENT .................................. 231
Engine Compartment — 3.6L ....................231
Checking Oil Level......................................232
Adding Washer Fluid .................................232
Maintenance-Free Battery .......................232
Pressure Washing ......................................233
DEALER SERVICE .............................................. 233
Engine Oil .................................................. 233Engine Oil Filter ..........................................234Engine Air Cleaner Filter ...........................235
Air Conditioner Maintenance ...................235Accessory Drive Belt Inspection................236Body Lubrication ........................................237
Windshield Wiper Blades ..........................238
Exhaust System ........................................238
Cooling System ..........................................239Brake System ............................................242
Automatic Transmission ............................243
RAISING THE VEHICLE ...................................... 244
TIRES ................................................................... 245
Tire Safety Information .............................245Tires — General Information .....................252Tire Types ...................................................256
Spare Tires — If Equipped .........................257
Wheel And Wheel Trim Care ....................259
Tire Chains and Traction Devices ............260
Tire Rotation Recommendations .............261 DEPARTMENT OF TRANSPORTATION
UNIFORM TIRE QUALITY GRADES .................. 261
Treadwear .................................................. 261
Traction Grades ......................................... 261
Temperature Grades ................................. 262
VEHICLE STORAGE .............................................262
BODYWORK ........................................................ 262
Protection From Atmospheric Agents....... 262
Body And Underbody Maintenance .......... 263Preserving The Bodywork .......................... 263
INTERIORS ......................................................... 264
Seats And Fabric Parts .............................. 264
Plastic And Coated Parts ........................... 264
Glass Surfaces .......................................... 265Cleaning The Instrument Panel
Cupholders ................................................. 265
TECHNICAL SPECIFICATIONS
IDENTIFICATION DATA .......................................266
Vehicle Identification Number .................. 266
BRAKE SYSTEM .................................................. 266
WHEEL AND TIRE TORQUE
SPECIFICATIONS ................................................ 266
Torque Specifications ................................ 266
FUEL REQUIREMENTS ......................................267
3.6L Engine ................................................ 267
Reformulated Gasoline ............................ 268
Materials Added To Fuel ........................... 268
Gasoline/Oxygenate Blends ..................... 268 Do Not Use E-85 In Non-Flex Fuel
Vehicles ...................................................... 269 CNG And LP Fuel System
Modifications ............................................. 269 MMT In Gasoline........................................ 269
Fuel System Cautions................................ 270
Carbon Monoxide Warnings...................... 270
FLUID CAPACITIES ............................................ 271
FLUIDS AND LUBRICANTS ................................ 272
Engine ........................................................ 272
Chassis ....................................................... 274
MULTIMEDIA
CYBERSECURITY ............................................... 275
SAFETY AND GENERAL INFORMATION .......... 276Safety Guidelines....................................... 276
RADIO 430/430 NAV........................................ 277
General Handling....................................... 277
Getting Started .......................................... 279
Radio Mode ................................................ 281
Media Mode ............................................... 286
Remote Devices......................................... 299Uconnect Phone— If Equipped ................. 304
Navigation — If Equipped .......................... 317
STEERING WHEEL AUDIO CONTROLS — IF
EQUIPPED .......................................................... 340
Radio Operation......................................... 340CD Player.................................................... 340
20_RT_OM_EN_USC_t.book Page 5
Page 59 of 380
GETTING TO KNOW YOUR VEHICLE57
3. When the system is set up for your comfort
level, it is not necessary to change the
settings. You will experience the greatest
efficiency by simply allowing the system to
function automatically.
NOTE:
It is not necessary to move the temperature
settings for cold or hot vehicles. The system
automatically adjusts the temperature,
mode, and blower speed to provide comfort
as quickly as possible.
The temperature can be displayed in U.S. or
Metric units by selecting the U.S./Metric
customer programmable feature. To provide
you with maximum comfort in the Automatic
mode during cold start-ups, the blower fan
will remain on low until the engine warms up.
The blower will increase in speed and transi -
tion into AUTO mode.
Manual Operation Override
This system offers a full complement of manual
override features. The AUTO symbol in the front
ATC display will be turned off when the system
is being used in the manual mode.
Operating Tips
NOTE:
Refer to the chart at the end of this section for
suggested control settings for various weather
conditions.
Summer Operation
The engine cooling system must be protected
with a high-quality antifreeze coolant to provide
proper corrosion protection and to protect
against engine overheating. OAT coolant
(conforming to MS.90032) is recommended.
Refer to “Fluids And Lubricants” in “Technical
Specifications” for proper coolant selection.
Winter Operation
To ensure the best possible heater and
defroster performance, make sure the engine
cooling system is functioning properly and the
proper amount, type, and concentration of
coolant is used. Refer to “Fluids And
Lubricants” in “Technical Specifications” for
proper coolant selection. Use of the air Recircu -
lation mode during Winter months is not
recommended, because it may cause window
fogging.
Vacation/Storage
Before you store your vehicle, or keep it out of
service (i.e., vacation) for two weeks or more,
run the air conditioning system at idle for about
five minutes, in fresh air with the blower setting
on high. This will ensure adequate system
lubrication to minimize the possibility of
compressor damage when the system is started
again.
2
20_RT_OM_EN_USC_t.book Page 57
Page 175 of 380
STARTING AND OPERATING173
Power Steering Fluid Check
Checking the power steering fluid level at a
defined service interval is not required. The fluid
should only be checked if a leak is suspected,
abnormal noises are apparent, and/or the
system is not functioning as anticipated.
Coordinate inspection efforts through an
authorized dealer. If necessary, add fluid to restore to the proper
indicated level. With a clean cloth, wipe any
spilled fluid from all surfaces. Refer to “Fluids
And Lubricants” in “Technical Specifications”
for the correct fluid type.
SPEED CONTROL — IF EQUIPPED
When engaged, the Speed Control takes over
accelerator operations at speeds greater than
25 mph (40 km/h).
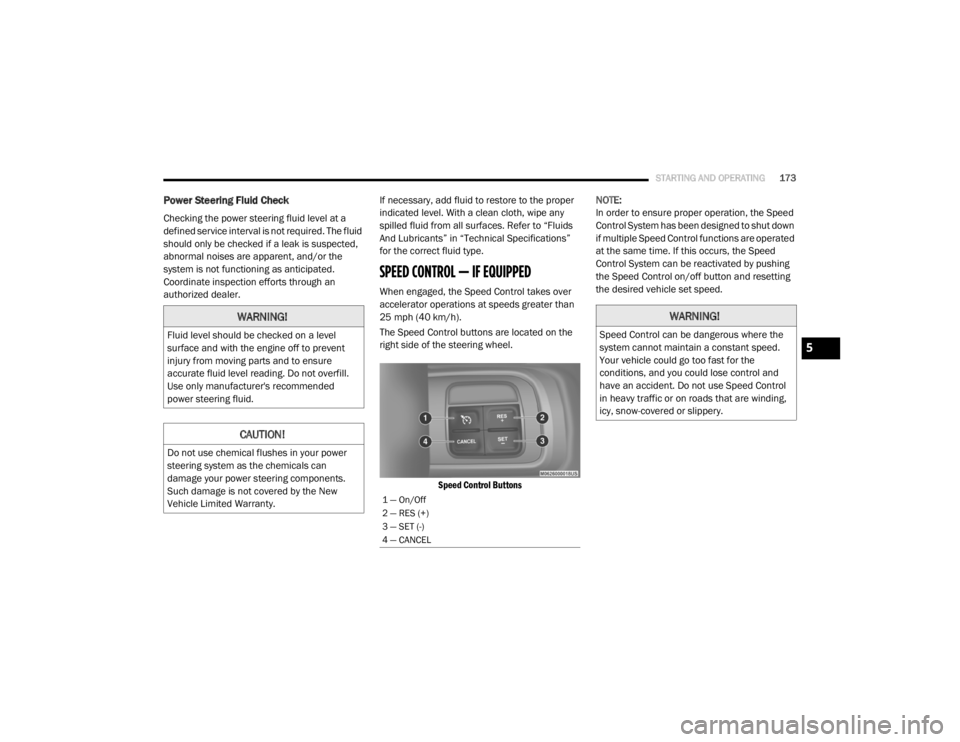
The Speed Control buttons are located on the
right side of the steering wheel.
Speed Control Buttons
NOTE:
In order to ensure proper operation, the Speed
Control System has been designed to shut down
if multiple Speed Control functions are operated
at the same time. If this occurs, the Speed
Control System can be reactivated by pushing
the Speed Control on/off button and resetting
the desired vehicle set speed.
WARNING!
Fluid level should be checked on a level
surface and with the engine off to prevent
injury from moving parts and to ensure
accurate fluid level reading. Do not overfill.
Use only manufacturer's recommended
power steering fluid.
CAUTION!
Do not use chemical flushes in your power
steering system as the chemicals can
damage your power steering components.
Such damage is not covered by the New
Vehicle Limited Warranty.
1 — On/Off
2 — RES (+)
3 — SET (-)
4 — CANCEL
WARNING!
Speed Control can be dangerous where the
system cannot maintain a constant speed.
Your vehicle could go too fast for the
conditions, and you could lose control and
have an accident. Do not use Speed Control
in heavy traffic or on roads that are winding,
icy, snow-covered or slippery.
5
20_RT_OM_EN_USC_t.book Page 173
Page 211 of 380
IN CASE OF EMERGENCY209
5. Remove the wheel lug nuts. For vehicles
with wheel covers, remove the cover from
the wheel by hand by holding down the
wheel and pulling on convenient features
on the cover. Do not pry the wheel cover off.
Then pull the wheel off the hub.
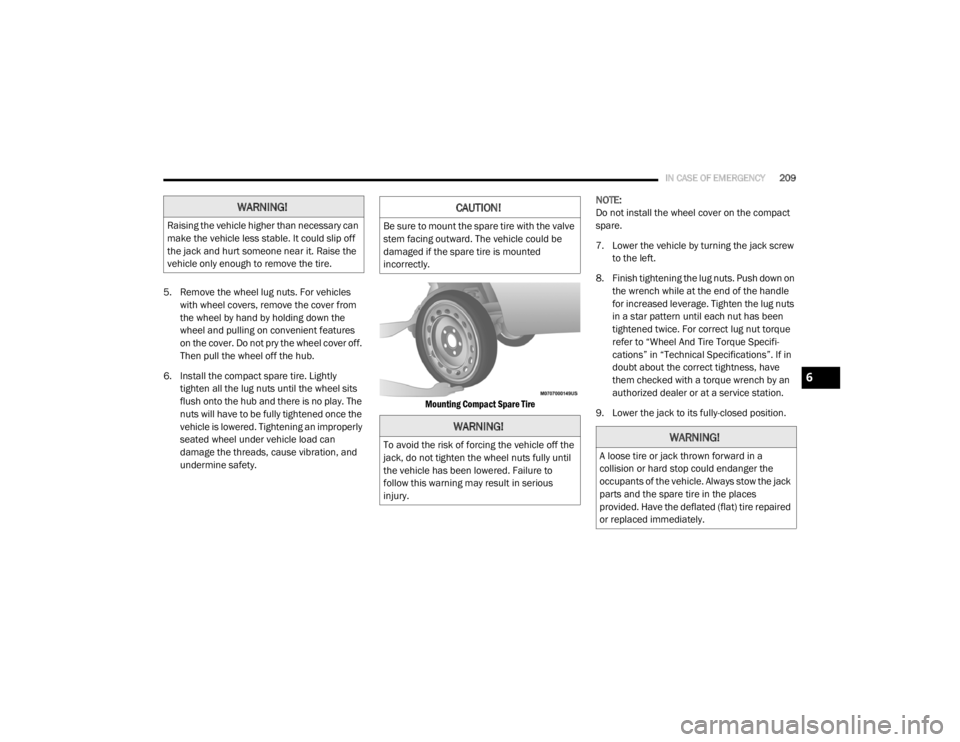
6. Install the compact spare tire. Lightly tighten all the lug nuts until the wheel sits
flush onto the hub and there is no play. The
nuts will have to be fully tightened once the
vehicle is lowered. Tightening an improperly
seated wheel under vehicle load can
damage the threads, cause vibration, and
undermine safety.
Mounting Compact Spare Tire
NOTE:
Do not install the wheel cover on the compact
spare.
7. Lower the vehicle by turning the jack screw
to the left.
8. Finish tightening the lug nuts. Push down on the wrench while at the end of the handle
for increased leverage. Tighten the lug nuts
in a star pattern until each nut has been
tightened twice. For correct lug nut torque
refer to “Wheel And Tire Torque Specifi -
cations” in “Technical Specifications”. If in
doubt about the correct tightness, have
them checked with a torque wrench by an
authorized dealer or at a service station.
9. Lower the jack to its fully-closed position.
WARNING!
Raising the vehicle higher than necessary can
make the vehicle less stable. It could slip off
the jack and hurt someone near it. Raise the
vehicle only enough to remove the tire.
CAUTION!
Be sure to mount the spare tire with the valve
stem facing outward. The vehicle could be
damaged if the spare tire is mounted
incorrectly.
WARNING!
To avoid the risk of forcing the vehicle off the
jack, do not tighten the wheel nuts fully until
the vehicle has been lowered. Failure to
follow this warning may result in serious
injury.WARNING!
A loose tire or jack thrown forward in a
collision or hard stop could endanger the
occupants of the vehicle. Always stow the jack
parts and the spare tire in the places
provided. Have the deflated (flat) tire repaired
or replaced immediately.
6
20_RT_OM_EN_USC_t.book Page 209
Page 214 of 380
212IN CASE OF EMERGENCY
6. Finish tightening the lug nuts. Push down on
the wrench while at the end of the handle
for increased leverage. Tighten the lug nuts
in a star pattern until each nut has been
tightened twice. Refer to “Wheel And Tire
Torque Specifications” in “Technical
Specifications” for proper wheel lug nut
torque. If in doubt about the correct
tightness, have them checked with a torque
wrench by an authorized dealer or at a
service station.
7. After 25 miles (40 km) check the lug nut torque with a torque wrench to ensure that
all lug nuts are properly seated against the
wheel.
Vehicles Without Wheel Covers
1. Mount the road tire on the axle.
2. Install the remaining lug nuts with the cone shaped end of the nut toward the wheel.
Lightly tighten all the lug nuts until the
wheel sits flush onto the hub and there is no
play. The nuts will have to be fully tightened
once the vehicle is lowered. Tightening an
improperly seated wheel under vehicle load
can damage the threads, cause vibration,
and undermine safety. 3. Lower the vehicle to the ground by turning
the jack handle counterclockwise.
4. Finish tightening the lug nuts. Push down on the wrench while at the end of the handle
for increased leverage. Tighten the lug nuts
in a star pattern until each nut has been
tightened twice. Refer to “Wheel And Tire
Torque Specifications” in the “Technical
Specifications” section for proper wheel lug
nut torque. If in doubt about the correct
tightness, have them checked with a torque
wrench by an authorized dealer or at a
service station.
5. After 25 miles (40 km) check the lug nut torque with a torque wrench to ensure that
all lug nuts are properly seated against the
wheel.
TIRE SERVICE KIT — IF EQUIPPED
Your vehicle may be equipped with a Tire
Service Kit. Small punctures up to 1/4 inch
(6 mm) in the tire tread can be sealed with Tire
Service Kit. Foreign objects (e.g., screws or
nails) should not be removed from the tire. Tire
Service Kit can be used in outside temperatures
down to approximately -4°F (-20°C). This kit will
provide a temporary tire seal, allowing you to
drive your vehicle up to 100 miles (160 km)
with a maximum speed of 50 mph (80 km/h).
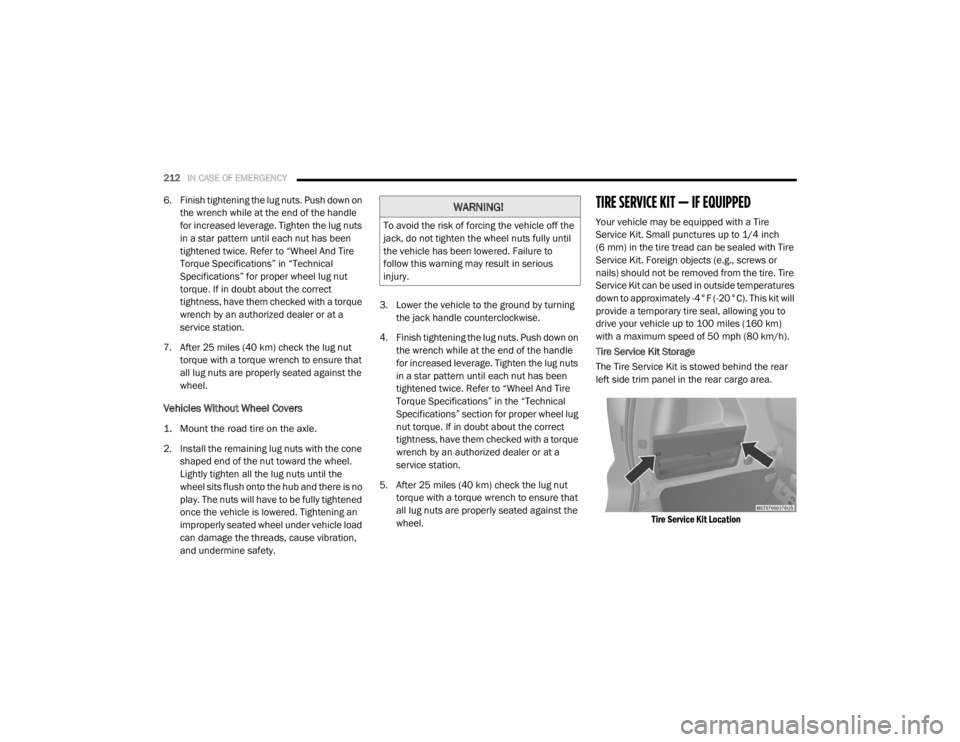
Tire Service Kit Storage
The Tire Service Kit is stowed behind the rear
left side trim panel in the rear cargo area.
Tire Service Kit Location
WARNING!
To avoid the risk of forcing the vehicle off the
jack, do not tighten the wheel nuts fully until
the vehicle has been lowered. Failure to
follow this warning may result in serious
injury.
20_RT_OM_EN_USC_t.book Page 212
Page 242 of 380
240SERVICING AND MAINTENANCE
Engine Coolant Checks
Check the engine coolant (antifreeze)
protection every 12 months (before the onset of
freezing weather, where applicable). If the
engine coolant (antifreeze) is dirty, the system
should be drained, flushed, and refilled with
fresh OAT coolant (conforming to MS.90032) by
an authorized dealer. Check the front of the
A/C condenser for any accumulation of bugs,
leaves, etc. If dirty, clean by gently spraying
water from a garden hose vertically down the
face of the condenser.
Check the engine cooling system hoses for
brittle rubber, cracking, tears, cuts, and
tightness of the connection at the coolant
recovery bottle and radiator. Inspect the entire
system for leaks. DO NOT REMOVE THE
COOLANT PRESSURE CAP WHEN THE COOLING
SYSTEM IS HOT.
Cooling System — Drain, Flush And Refill
NOTE:
Some vehicles require special tools to add
coolant properly. Failure to fill these systems
properly could lead to severe internal engine
damage. If any coolant is needed to be added to
the system please contact an authorized
dealer. If the engine coolant (antifreeze) is dirty or
contains visible sediment, have an authorized
dealer clean and flush with OAT coolant
(antifreeze) (conforming to MS.90032).
Refer to the “Maintenance Plan” in this section
for the proper maintenance intervals.
Selection Of Coolant
Refer to “Fluids And Lubricants” in “Technical
Specifications” for further information.
NOTE:
Mixing of engine coolant (antifreeze) other
than specified Organic Additive Technology
(OAT) engine coolant (antifreeze), may result
in engine damage and may decrease corro
-
sion protection. Organic Additive Technology
(OAT) engine coolant is different and should
not be mixed with Hybrid Organic Additive
Technology (HOAT) engine coolant (anti -
freeze) or any “globally compatible” coolant
(antifreeze). If a non-OAT engine coolant
(antifreeze) is introduced into the cooling
system in an emergency, the cooling system
will need to be drained, flushed, and refilled
with fresh OAT coolant (conforming to
MS.90032), by an authorized dealer as soon
as possible.
Do not use water alone or alcohol-based
engine coolant (antifreeze) products. Do not
use additional rust inhibitors or antirust prod -
ucts, as they may not be compatible with the
radiator engine coolant and may plug the
radiator.
This vehicle has not been designed for use
with propylene glycol-based engine coolant
(antifreeze). Use of propylene glycolbased
engine coolant (antifreeze) is not
recommended.
Some vehicles require special tools to add
coolant properly. Failure to fill these systems
properly could lead to severe internal engine
damage. If any coolant is needed to be added
to the system please contact an authorized
dealer.
Adding Coolant
Your vehicle has been built with an improved
engine coolant (OAT coolant conforming to
MS.90032) that allows extended maintenance
intervals. This engine coolant (antifreeze) can
be used up to ten years or 150,000 miles
(240,000 km) before replacement.
20_RT_OM_EN_USC_t.book Page 240
Page 245 of 380
SERVICING AND MAINTENANCE243
(Continued)
Master Cylinder — Brake Fluid Level Check
The fluid level in the master cylinder should be
checked when performing underhood services,
or immediately if the “Brake System Warning
Light” indicates system failure.
Clean the top of the master cylinder area before
removing the cap. Add fluid to bring the level up
to the top of the “FULL” mark on the side of the
master cylinder reservoir.
Overfilling of fluid is not recommended because
it may cause leaking in the system.
Add enough fluid to bring the level up to the
requirements described on the brake fluid
reservoir. With disc brakes, fluid level can be
expected to fall as the brake pads wear.
However, low fluid level may be caused by a
leak and a checkup may be needed.
Use only manufacturer's recommended brake
fluid. Refer to “Fluids And Lubricants” in
“Technical Specifications” for further
information.
Automatic Transmission
Selection Of Lubricant
It is important to use the proper transmission
fluid to ensure optimum transmission
performance and life. Use only the
manufacturer's specified transmission fluid.
Refer to “Fluids And Lubricants” in “Technical
Specifications” for fluid specifications. It is
important to maintain the transmission fluid at
the correct level using the recommended fluid.
No chemical flushes should be used in any
transmission; only the approved lubricant
should be used.
WARNING!
Use only manufacturer's recommended
brake fluid. Refer to “Fluids And Lubri -
cants” in “Technical Specifications” for
further information. Using the wrong type of
brake fluid can severely damage your brake
system and/or impair its performance. The
proper type of brake fluid for your vehicle is
also identified on the original factory
installed hydraulic master cylinder
reservoir.
To avoid contamination from foreign matter
or moisture, use only new brake fluid or
fluid that has been in a tightly closed
container. Keep the master cylinder reser -
voir cap secured at all times. Brake fluid in
a open container absorbs moisture from
the air resulting in a lower boiling point. This
may cause it to boil unexpectedly during
hard or prolonged braking, resulting in
sudden brake failure. This could result in a
collision.
Overfilling the brake fluid reservoir can
result in spilling brake fluid on hot engine
parts, causing the brake fluid to catch fire.
Brake fluid can also damage painted and
vinyl surfaces, care should be taken to
avoid its contact with these surfaces.
Do not allow petroleum based fluid to
contaminate the brake fluid. Brake seal
components could be damaged, causing
partial or complete brake failure. This could
result in a collision.
WARNING! (Continued)
7
20_RT_OM_EN_USC_t.book Page 243
Page 246 of 380
244SERVICING AND MAINTENANCE
Special Additives
The manufacturer strongly recommends
against using any special additives in the
transmission. Automatic Transmission Fluid
(ATF) is an engineered product and its
performance may be impaired by supplemental
additives. Therefore, do not add any fluid
additives to the transmission. The only
exception to this policy is the use of special dyes
for diagnosing fluid leaks. Avoid using
transmission sealers as they may adversely
affect seals.
Fluid Level Check
The fluid level is preset at the factory and does
not require adjustment under normal operating
conditions. Routine fluid level checks are not
required, therefore the transmission fill tube is
capped and no dipstick is provided. An
authorized dealer can check your transmission
fluid level using a special service dipstick. If you
notice fluid leakage or transmission
malfunction, visit an authorized dealer
immediately to have the transmission fluid level
checked. Operating the vehicle with an
improper fluid level can cause severe
transmission damage.
Fluid And Filter Changes
Refer to the “Maintenance Plan” in this section
for the proper maintenance intervals.
In addition, change the fluid and filter if the fluid
becomes contaminated (with water, etc.), or if
the transmission is disassembled for any
reason.
RAISING THE VEHICLE
In the case where it is necessary to raise the
vehicle, go to an authorized dealer or service
station.
CAUTION!
Using a transmission fluid other than the
manufacturer’s recommended fluid may
cause deterioration in transmission shift
quality and/or torque converter shudder, and
will require more frequent fluid and filter
changes. Refer to “Fluids And Lubricants” in
“Technical Specifications” for fluid
specifications.
CAUTION!
Do not use chemical flushes in your
transmission as the chemicals can damage
your transmission components. Such damage
is not covered by the New Vehicle Limited
Warranty.
CAUTION!
If a transmission fluid leak occurs, visit an
authorized dealer immediately. Severe
transmission damage may occur. An
authorized dealer has the proper tools to
adjust the fluid level accurately.
20_RT_OM_EN_USC_t.book Page 244
Page 268 of 380
266
TECHNICAL SPECIFICATIONS
IDENTIFICATION DATA
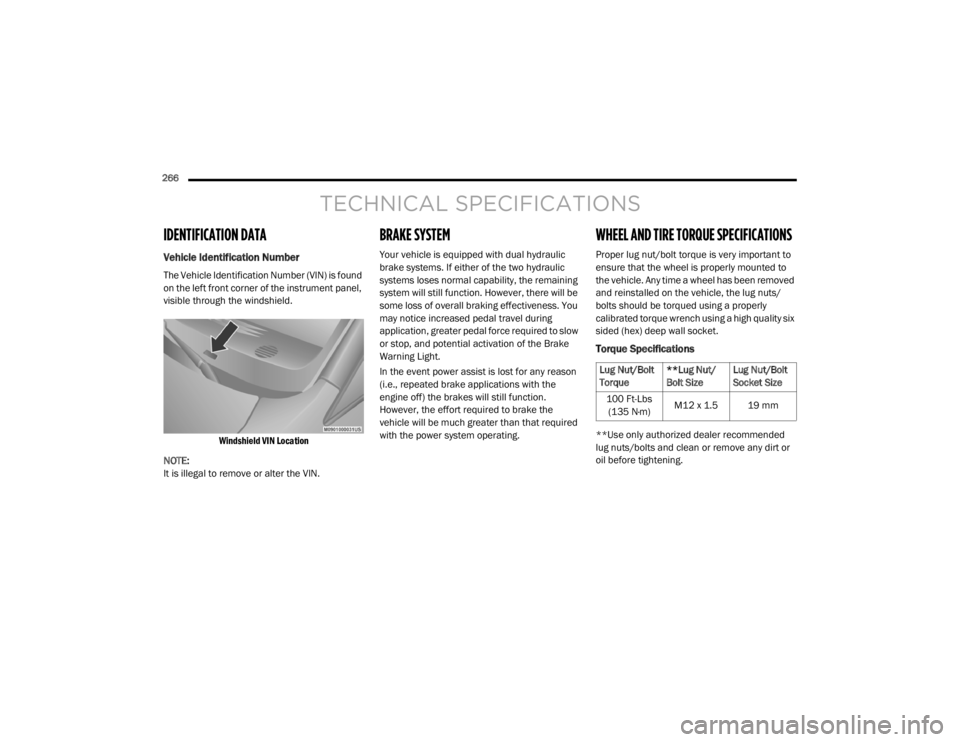
Vehicle Identification Number
The Vehicle Identification Number (VIN) is found
on the left front corner of the instrument panel,
visible through the windshield.
Windshield VIN Location
NOTE:
It is illegal to remove or alter the VIN.
BRAKE SYSTEM
Your vehicle is equipped with dual hydraulic
brake systems. If either of the two hydraulic
systems loses normal capability, the remaining
system will still function. However, there will be
some loss of overall braking effectiveness. You
may notice increased pedal travel during
application, greater pedal force required to slow
or stop, and potential activation of the Brake
Warning Light.
In the event power assist is lost for any reason
(i.e., repeated brake applications with the
engine off) the brakes will still function.
However, the effort required to brake the
vehicle will be much greater than that required
with the power system operating.
WHEEL AND TIRE TORQUE SPECIFICATIONS
Proper lug nut/bolt torque is very important to
ensure that the wheel is properly mounted to
the vehicle. Any time a wheel has been removed
and reinstalled on the vehicle, the lug nuts/
bolts should be torqued using a properly
calibrated torque wrench using a high quality six
sided (hex) deep wall socket.
Torque Specifications
**Use only authorized dealer recommended
lug nuts/bolts and clean or remove any dirt or
oil before tightening.
Lug Nut/Bolt
Torque **Lug Nut/
Bolt SizeLug Nut/Bolt
Socket Size
100 Ft-Lbs (135 N·m) M12 x 1.5 19 mm
20_RT_OM_EN_USC_t.book Page 266