fuel DODGE HORNET 2023 Owners Manual
[x] Cancel search | Manufacturer: DODGE, Model Year: 2023, Model line: HORNET, Model: DODGE HORNET 2023Pages: 288, PDF Size: 14.2 MB
Page 2 of 288

The driver’s primary responsibility is the safe operation of the vehicle. Driving w\
hile distracted can result in loss of vehicle control, resulting in an accident and personal
injury. FCA US LLC strongly recommends that the driver use extreme caution whe\
n using any device or feature that may take their attention off the road. Use of any electrical
devices, such as cellular telephones, computers, portable radios, vehicl\
e navigation or other devices, by the driver while the vehicle is moving is dangerous and could lead
to a serious accident. Texting while driving is also dangerous and should never be done while th\
e vehicle is moving. If you find yourself unable to devote your full attention
to vehicle operation, pull off the road to a safe location and stop your\
vehicle. Some states or provinces prohibit the use of cellular telephones or texting while driving. It is
always the driver’s responsibility to comply with all local laws.
This Owner’s Manual has been prepared to help you get acquainted with your new Dodge brand vehicle and to provide a convenient reference source for common questions.
Not all features shown in this manual may apply to your vehicle. For add\
itional information, visit mopar.com/om (U.S.), owners.mopar.ca (Canada) or your local Dodge brand
dealer.
DRIVING AND ALCOHOL
Drunk driving is one of the most frequent causes of accidents. Your driving ability can be seriously impaired with blood alcohol levels far
below the legal minimum. If you are drinking, don’t drive. Ride with \
a designated non-drinking driver, call a cab, a rideshare, a friend, or use public
transportation.
WARNING
Driving after drinking can lead to an accident. Your perceptions are less sharp, your reflexes are slower and your judg\
ment is impaired when you have
been drinking. Never drink and then drive.
WARNING: Operating, servicing and maintaining a passenger vehicle or off-highway \
motor vehicle can expose you to
chemicals including engine exhaust, carbon monoxide, phthalates, and lea\
d, which are known to the State of California to
cause cancer and birth defects or other reproductive harm. To minimize exposure, avoid breathing exhaust, do not idle the
engine except as necessary, service your vehicle in a well-ventilated area and wear gloves or wash\
your hands frequently
when servicing your vehicle. For more information go to www.P65Warnings.ca.gov/passenger-vehicle.
This Owner’s Manual illustrates and describes the operation of features and equipme\
nt that are either standard or optional on this vehicle. This manual may\
also include a description of features and equipment that are no longer available or were not ordered \
on this vehicle. Please disregard any features and equipment described i\
n this manual that are not on this vehicle. FCA US LLC reserves the right to make changes in design and specifications\
, and/or make additions to or improvements to its products without impos\
ing any obligation upon itself to install them on products previously manufactured.
With respect to any vehicles sold in Canada, the name FCA US LLC shall b\
e deemed to be deleted and the name FCA Canada Inc. used in substitution\
therefore.
This Owner’s Manual is intended to familiarize you with the important features of y\
our vehicle. Your most up-to-date Owner’s Manual, Owner Handbook, Radio Instruction Manual and Warranty Booklet can be found by visiting the website on the back cover.
U.S. Residents: If you are the first registered retail owner of your v\
ehicle, you may obtain a complimentary printed copy of the Warranty Booklet by calling 1-800-423-6343 or by contacting your dealer. Replacement kits can be purchased by visiting www.techauthority.com.
Canadian Residents: If you are the first registered retail owner of yo\
ur vehicle, you may obtain a complimentary printed copy of the W arranty Booklet or purchase a replacement kit by calling 1-800-387-1143 or by contacting your dealer.
FCA US LLC reserves the right to modify the terms or discontinue the Roa\
dside Assistance Program at any time. The Roadside Assistance Program i\
s subject to restrictions and conditions of use, that are determined solely by FCA US LLC.
ROADSIDE ASSISTANCE 24 HOURS, 7 DAYS A WEEK AT YOUR SERVICE. CALL 1-800-521-2779 OR VISIT CHRYSLER.RSAHELP.COM (USA) CALL 1-800-363-4869 OR VISIT FCA.ROADSIDEAID.COM (CANADA) SERVICES: Flat Tire Service, Out Of Gas/Fuel Delivery, Battery Jump Assistance, Lockout Service and Towing Service
Please see the Customer Assistance chapter in this Owner’s Manual for further information.
Page 6 of 288
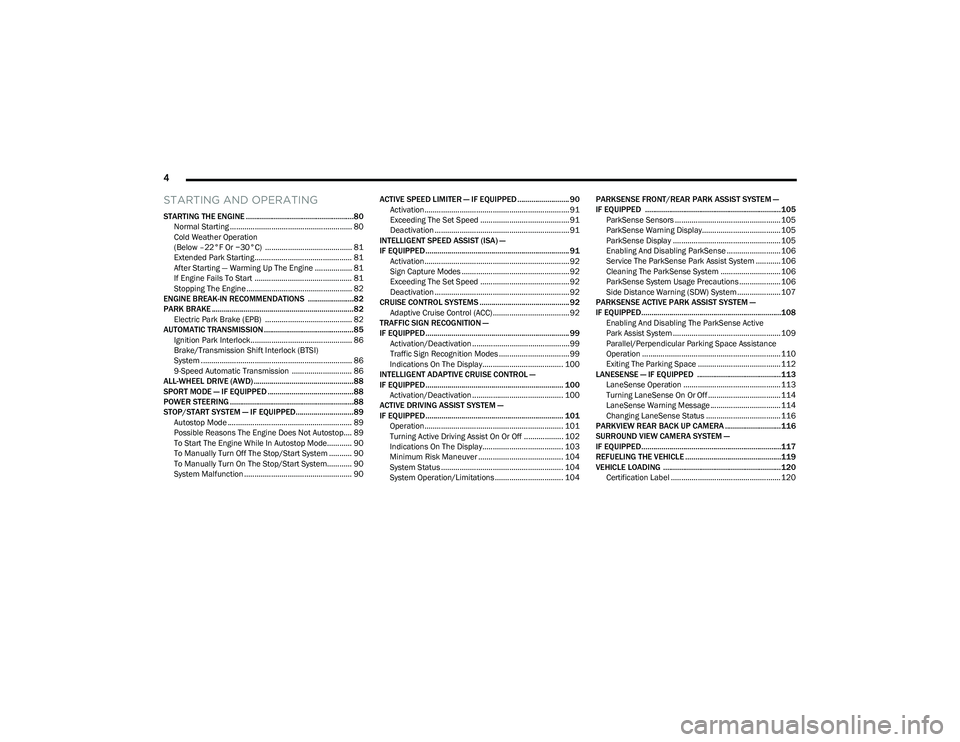
4
STARTING AND OPERATING
STARTING THE ENGINE ......................................................80
Normal Starting ........................................................... 80
Cold Weather Operation
(Below –22°F Or −30°C) .......................................... 81
Extended Park Starting............................................... 81
After Starting — Warming Up The Engine .................. 81
If Engine Fails To Start ............................................... 81
Stopping The Engine ................................................... 82
ENGINE BREAK-IN RECOMMENDATIONS .......................82
PARK BRAKE ....................................................................... 82 Electric Park Brake (EPB) .......................................... 82
AUTOMATIC TRANSMISSION .............................................85 Ignition Park Interlock................................................. 86
Brake/Transmission Shift Interlock (BTSI)
System ......................................................................... 86
9-Speed Automatic Transmission ............................. 86
ALL-WHEEL DRIVE (AWD) ..................................................88
SPORT MODE — IF EQUIPPED ...........................................88
POWER STEERING ..............................................................88
STOP/START SYSTEM — IF EQUIPPED.............................89 Autostop Mode ............................................................ 89
Possible Reasons The Engine Does Not Autostop.... 89
To Start The Engine While In Autostop Mode............ 90
To Manually Turn Off The Stop/Start System ........... 90
To Manually Turn On The Stop/Start System............ 90
System Malfunction .................................................... 90 ACTIVE SPEED LIMITER — IF EQUIPPED .......................... 90
Activation...................................................................... 91
Exceeding The Set Speed ........................................... 91
Deactivation ................................................................. 91
INTELLIGENT SPEED ASSIST (ISA) —
IF EQUIPPED ........................................................................ 91 Activation...................................................................... 92
Sign Capture Modes .................................................... 92
Exceeding The Set Speed ........................................... 92
Deactivation ................................................................. 92
CRUISE CONTROL SYSTEMS ............................................. 92 Adaptive Cruise Control (ACC)..................................... 92
TRAFFIC SIGN RECOGNITION —
IF EQUIPPED ........................................................................ 99 Activation/Deactivation ............................................... 99
Traffic Sign Recognition Modes .................................. 99
Indications On The Display....................................... 100
INTELLIGENT ADAPTIVE CRUISE CONTROL —
IF EQUIPPED ..................................................................... 100 Activation/Deactivation ............................................ 100
ACTIVE DRIVING ASSIST SYSTEM —
IF EQUIPPED ..................................................................... 101 Operation................................................................... 101
Turning Active Driving Assist On Or Off ................... 102
Indications On The Display....................................... 103
Minimum Risk Maneuver ......................................... 104
System Status ........................................................... 104
System Operation/Limitations................................. 104 PARKSENSE FRONT/REAR PARK ASSIST SYSTEM —
IF EQUIPPED ....................................................................105
ParkSense Sensors ................................................... 105
ParkSense Warning Display...................................... 105ParkSense Display .................................................... 105
Enabling And Disabling ParkSense .......................... 106
Service The ParkSense Park Assist System ............ 106
Cleaning The ParkSense System ............................. 106
ParkSense System Usage Precautions .................... 106
Side Distance Warning (SDW) System..................... 107
PARKSENSE ACTIVE PARK ASSIST SYSTEM —
IF EQUIPPED......................................................................108 Enabling And Disabling The ParkSense Active
Park Assist System .................................................... 109
Parallel/Perpendicular Parking Space Assistance
Operation ................................................................... 110Exiting The Parking Space ........................................ 112
LANESENSE — IF EQUIPPED .......................................... 113 LaneSense Operation ............................................... 113Turning LaneSense On Or Off ................................... 114
LaneSense Warning Message .................................. 114
Changing LaneSense Status .................................... 116
PARKVIEW REAR BACK UP CAMERA ............................ 116
SURROUND VIEW CAMERA SYSTEM —
IF EQUIPPED......................................................................117
REFUELING THE VEHICLE ................................................119
VEHICLE LOADING ...........................................................120 Certification Label ..................................................... 120
23_GG_OM_EN_USC_t.book Page 4
Page 7 of 288
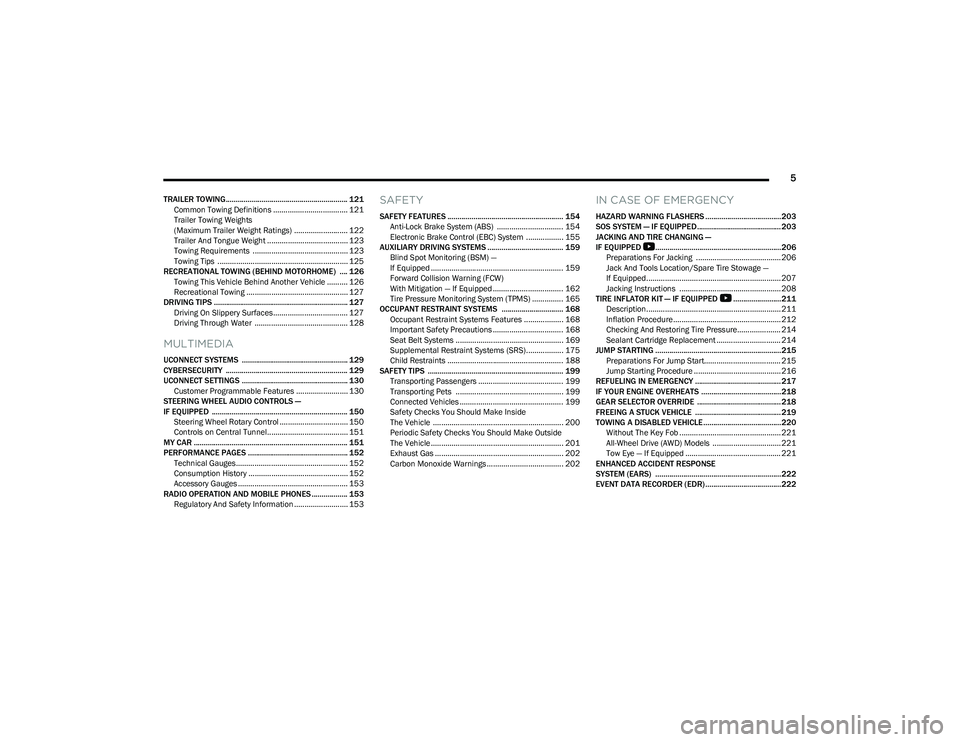
5
TRAILER TOWING............................................................. 121Common Towing Definitions .................................... 121
Trailer Towing Weights
(Maximum Trailer Weight Ratings) .......................... 122Trailer And Tongue Weight ....................................... 123
Towing Requirements .............................................. 123
Towing Tips ............................................................... 125
RECREATIONAL TOWING (BEHIND MOTORHOME) .... 126 Towing This Vehicle Behind Another Vehicle .......... 126
Recreational Towing ................................................. 127
DRIVING TIPS ................................................................... 127 Driving On Slippery Surfaces.................................... 127
Driving Through Water ............................................. 128
MULTIMEDIA
UCONNECT SYSTEMS ..................................................... 129
CYBERSECURITY ............................................................. 129
UCONNECT SETTINGS ..................................................... 130Customer Programmable Features ......................... 130
STEERING WHEEL AUDIO CONTROLS —
IF EQUIPPED .................................................................... 150 Steering Wheel Rotary Control ................................. 150Controls on Central Tunnel....................................... 151
MY CAR ............................................................................. 151
PERFORMANCE PAGES .................................................. 152 Technical Gauges...................................................... 152Consumption History ................................................ 152Accessory Gauges ..................................................... 153
RADIO OPERATION AND MOBILE PHONES .................. 153 Regulatory And Safety Information .......................... 153
SAFETY
SAFETY FEATURES .......................................................... 154Anti-Lock Brake System (ABS) ................................ 154
Electronic Brake Control (EBC) System .................. 155
AUXILIARY DRIVING SYSTEMS ...................................... 159 Blind Spot Monitoring (BSM) —
If Equipped ................................................................ 159Forward Collision Warning (FCW)
With Mitigation — If Equipped .................................. 162
Tire Pressure Monitoring System (TPMS) ............... 165
OCCUPANT RESTRAINT SYSTEMS ............................... 168 Occupant Restraint Systems Features ................... 168
Important Safety Precautions .................................. 168
Seat Belt Systems .................................................... 169
Supplemental Restraint Systems (SRS).................. 175
Child Restraints ........................................................ 188
SAFETY TIPS .................................................................... 199 Transporting Passengers ......................................... 199
Transporting Pets .................................................... 199
Connected Vehicles .................................................. 199Safety Checks You Should Make Inside
The Vehicle ............................................................... 200Periodic Safety Checks You Should Make Outside
The Vehicle ................................................................ 201Exhaust Gas .............................................................. 202
Carbon Monoxide Warnings ..................................... 202
IN CASE OF EMERGENCY
HAZARD WARNING FLASHERS ......................................203
SOS SYSTEM — IF EQUIPPED.......................................... 203
JACKING AND TIRE CHANGING —
IF EQUIPPED
b
...............................................................206
Preparations For Jacking ......................................... 206
Jack And Tools Location/Spare Tire Stowage —
If Equipped................................................................. 207
Jacking Instructions ................................................. 208
TIRE INFLATOR KIT — IF EQUIPPED
b
........................211
Description................................................................. 211
Inflation Procedure.................................................... 212
Checking And Restoring Tire Pressure..................... 214
Sealant Cartridge Replacement ............................... 214
JUMP STARTING ...............................................................215 Preparations For Jump Start..................................... 215
Jump Starting Procedure .......................................... 216
REFUELING IN EMERGENCY ........................................... 217
IF YOUR ENGINE OVERHEATS ........................................218
GEAR SELECTOR OVERRIDE .......................................... 218
FREEING A STUCK VEHICLE ........................................... 219
TOWING A DISABLED VEHICLE.......................................220 Without The Key Fob ................................................. 221
All-Wheel Drive (AWD) Models ................................. 221
Tow Eye — If Equipped .............................................. 221
ENHANCED ACCIDENT RESPONSE
SYSTEM (EARS) ...............................................................222
EVENT DATA RECORDER (EDR)......................................222
23_GG_OM_EN_USC_t.book Page 5
Page 8 of 288
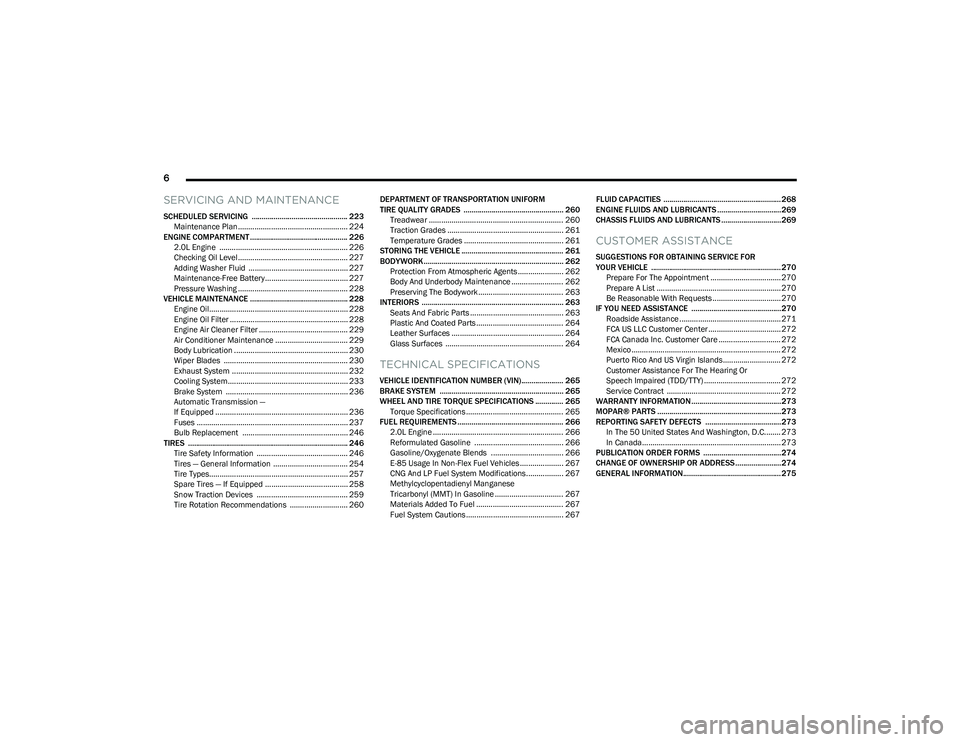
6
SERVICING AND MAINTENANCE
SCHEDULED SERVICING ................................................ 223
Maintenance Plan ..................................................... 224
ENGINE COMPARTMENT................................................. 226 2.0L Engine .............................................................. 226Checking Oil Level ..................................................... 227
Adding Washer Fluid ................................................ 227Maintenance-Free Battery........................................ 227Pressure Washing ..................................................... 228
VEHICLE MAINTENANCE ................................................. 228 Engine Oil................................................................... 228
Engine Oil Filter ......................................................... 228
Engine Air Cleaner Filter ........................................... 229
Air Conditioner Maintenance ................................... 229
Body Lubrication ....................................................... 230Wiper Blades ............................................................ 230
Exhaust System ........................................................ 232
Cooling System.......................................................... 233
Brake System ........................................................... 236
Automatic Transmission —
If Equipped ................................................................ 236
Fuses ......................................................................... 237
Bulb Replacement ................................................... 246
TIRES ................................................................................ 246 Tire Safety Information ............................................ 246
Tires — General Information .................................... 254
Tire Types................................................................... 257
Spare Tires — If Equipped ........................................ 258Snow Traction Devices ............................................ 259
Tire Rotation Recommendations ............................ 260 DEPARTMENT OF TRANSPORTATION UNIFORM
TIRE QUALITY GRADES .................................................. 260
Treadwear ................................................................. 260Traction Grades ........................................................ 261Temperature Grades ................................................ 261
STORING THE VEHICLE ................................................... 261
BODYWORK ...................................................................... 262 Protection From Atmospheric Agents ...................... 262Body And Underbody Maintenance ......................... 262
Preserving The Bodywork ......................................... 263
INTERIORS ....................................................................... 263 Seats And Fabric Parts ............................................. 263
Plastic And Coated Parts .......................................... 264Leather Surfaces ...................................................... 264
Glass Surfaces ......................................................... 264
TECHNICAL SPECIFICATIONS
VEHICLE IDENTIFICATION NUMBER (VIN)..................... 265
BRAKE SYSTEM .............................................................. 265
WHEEL AND TIRE TORQUE SPECIFICATIONS .............. 265 Torque Specifications ............................................... 265
FUEL REQUIREMENTS ..................................................... 266 2.0L Engine ............................................................... 266Reformulated Gasoline ........................................... 266Gasoline/Oxygenate Blends ................................... 266E-85 Usage In Non-Flex Fuel Vehicles ..................... 267CNG And LP Fuel System Modifications.................. 267
Methylcyclopentadienyl Manganese
Tricarbonyl (MMT) In Gasoline ................................. 267
Materials Added To Fuel .......................................... 267Fuel System Cautions ............................................... 267 FLUID CAPACITIES ...........................................................268
ENGINE FLUIDS AND LUBRICANTS ................................269
CHASSIS FLUIDS AND LUBRICANTS ..............................269
CUSTOMER ASSISTANCE
SUGGESTIONS FOR OBTAINING SERVICE FOR
YOUR VEHICLE ................................................................. 270 Prepare For The Appointment .................................. 270
Prepare A List ............................................................ 270Be Reasonable With Requests ................................. 270
IF YOU NEED ASSISTANCE .............................................270 Roadside Assistance ................................................. 271
FCA US LLC Customer Center ................................... 272
FCA Canada Inc. Customer Care .............................. 272
Mexico ........................................................................ 272
Puerto Rico And US Virgin Islands............................ 272
Customer Assistance For The Hearing Or
Speech Impaired (TDD/TTY) ..................................... 272
Service Contract ....................................................... 272
WARRANTY INFORMATION.............................................273
MOPAR® PARTS ..............................................................273
REPORTING SAFETY DEFECTS ......................................273 In The 50 United States And Washington, D.C........ 273
In Canada................................................................... 273
PUBLICATION ORDER FORMS .......................................274
CHANGE OF OWNERSHIP OR ADDRESS.......................274
GENERAL INFORMATION................................................. 275
23_GG_OM_EN_USC_t.book Page 6
Page 12 of 288
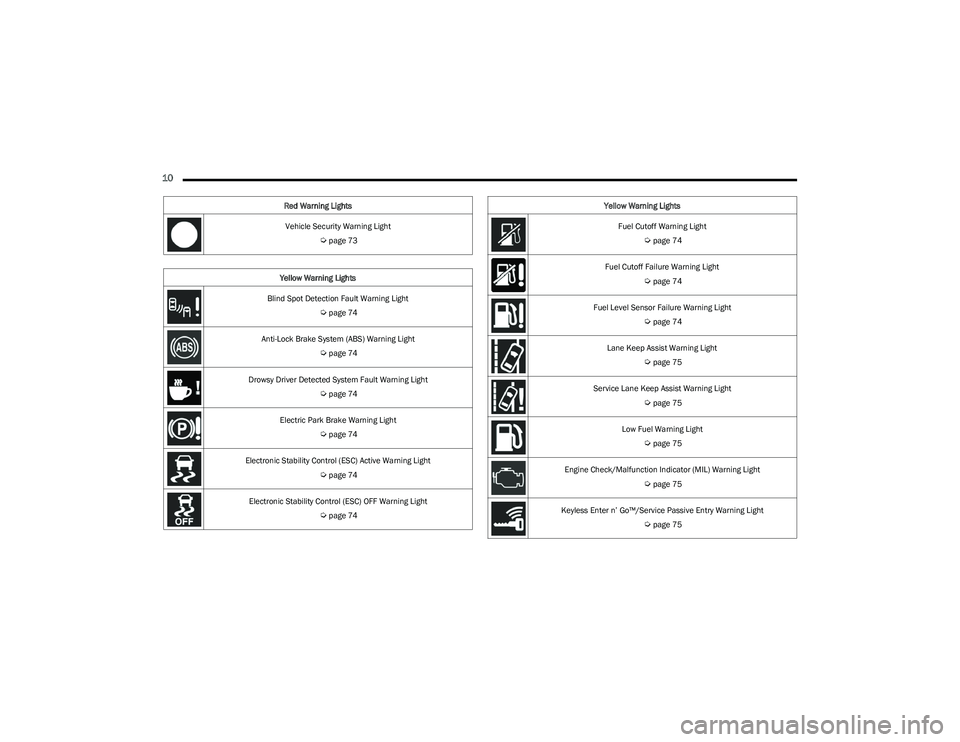
10
Vehicle Security Warning Light
Úpage 73
Yellow Warning Lights
Blind Spot Detection Fault Warning Light
Úpage 74
Anti-Lock Brake System (ABS) Warning Light
Úpage 74
Drowsy Driver Detected System Fault Warning Light
Úpage 74
Electric Park Brake Warning Light
Úpage 74
Electronic Stability Control (ESC) Active Warning Light
Úpage 74
Electronic Stability Control (ESC) OFF Warning Light
Úpage 74
Red Warning Lights
Fuel Cutoff Warning Light
Úpage 74
Fuel Cutoff Failure Warning Light
Úpage 74
Fuel Level Sensor Failure Warning Light
Úpage 74
Lane Keep Assist Warning Light
Úpage 75
Service Lane Keep Assist Warning Light
Úpage 75
Low Fuel Warning Light
Úpage 75
Engine Check/Malfunction Indicator (MIL) Warning Light
Úpage 75
Keyless Enter n’ Go™/Service Passive Entry Warning Light
Úpage 75
Yellow Warning Lights
23_GG_OM_EN_USC_t.book Page 10
Page 20 of 288
18GETTING TO KNOW YOUR VEHICLE
REMOTE START — IF EQUIPPED
This system uses the key fob to start the engine
conveniently from outside the vehicle while still
maintaining security. The system has a range
of approximately 328 ft (100 m).
Remote Start is used to defrost windows in cold weather
and to reach a comfortable climate in all ambient
conditions before the customer enters the vehicle.
NOTE:Obstructions between the vehicle and key fob may reduce
this range Úpage 275.
HOW TO USE REMOTE START
Push and release the Remote Start button on the key fob
twice within five seconds. The vehicle doors will lock, the
parking lights will flash, and the horn will chirp twice (if
programmed). Then, the engine will start, and the vehicle
will remain in the Remote Start mode for a 15 minute
cycle. Pushing the Remote Start button a third time shuts
the engine off.
To drive the vehicle, push the unlock button and place the
ignition in the ON/RUN position.
NOTE:
With Remote Start, the engine will only run for
15 minutes.
Remote Start can only be used twice.
If an engine fault is present or fuel level is low, the
vehicle will start and then shut down in 10 seconds.
The parking lights will turn on and remain on during
Remote Start mode.
For security, power window and power sunroof opera -
tion (if equipped) are disabled when the vehicle is in
the Remote Start mode.
The ignition must be placed in the ON/RUN position
before the Remote Start sequence can be repeated for
a third cycle. All of the following conditions must be met before the
engine will remote start:
Gear selector in PARK
Doors closed
Hood closed
Liftgate closed
Hazard switch off
Brake switch inactive (brake pedal not pressed)
Battery at an acceptable charge level
Panic button not pushed
System not disabled from previous Remote Start event
Vehicle Security Light flashing (if equipped)
Ignition in the OFF position
Fuel level meets minimum requirement
Vehicle Security system is not signaling an intrusion
Malfunction Indicator Light is not illuminatedWARNING!
Do not start or run an engine in a closed garage or
confined area. Exhaust gas contains carbon
monoxide (CO) which is odorless and colorless.
Carbon monoxide is poisonous and can cause
serious injury or death when inhaled.
Keep key fobs away from children. Operation of the
Remote Start system, windows, door locks or other
controls could cause serious injury or death.
WARNING!
Do not start or run an engine in a closed garage or
confined area. Exhaust gas contains carbon
monoxide (CO) which is odorless and colorless.
Carbon monoxide is poisonous and can cause
serious injury or death when inhaled.
Keep key fobs away from children. Operation of the
Remote Start system, windows, door locks or other
controls could cause serious injury or death.
23_GG_OM_EN_USC_t.book Page 18
Page 22 of 288
20GETTING TO KNOW YOUR VEHICLE
REMOTE START ABORT MESSAGE —
I
F EQUIPPED
One of the following messages will display in the
instrument cluster display if the vehicle fails to remote
start or exits Remote Start prematurely:
Remote Start Aborted — Door Open
Remote Start Aborted — Hood Open
Remote Start Aborted — Fuel Low
Remote Start Aborted — Liftgate Open
Remote Start Aborted — Too Cold
Remote Start Aborted — Time Expired
Remote Start Disabled — Start Vehicle To Reset
The message will stay active until the ignition is placed in
the ON/RUN position.
VEHICLE SECURITY SYSTEM — IF EQUIPPED
The Vehicle Security system monitors the vehicle doors,
hood, liftgate, and the Keyless Enter ‘n Go™ Ignition for
unauthorized operation. It also monitors movement inside
the passenger compartment (volumetric protection —
if equipped), cutting of battery cables, and unexpected
lifting/tilting of the vehicle (anti-lift protection —
if equipped). If something triggers the system, the Vehicle Security
system will provide the following audible and visible
signals:
The horn will pulse
The turn signals will flash
NOTE:
The Vehicle Security system is activated by the Engine
Immobilizer system, which is automatically activated
when you get out of the vehicle with the key fob and
lock the doors.
The Vehicle Security system is factory adjusted to stan -
dards from different countries.
The Vehicle Security system is a complementary secu -
rity system developed to hinder the occurrence of
vehicle theft and prevent vandalism. It does not
prevent the theft of your vehicle; the system is a deter -
rent.
TO ARM THE SYSTEM
Follow these steps to arm the Vehicle Security system:
1. Make sure the vehicle’s ignition is placed in the OFF position.
For vehicles equipped with Keyless Entry, make
sure the vehicle’s keyless ignition system is OFF. 2. Perform one of the following methods to lock the
vehicle:
Push the lock button on the interior power door
lock switch with the driver and/or passenger door
open.
Push the lock button on the exterior Passive Entry
door handle with a valid key fob available in the
same exterior zone
Úpage 23.
Push the lock button on the key fob.
3. If any doors (or liftgate) are open, close them.
When the Vehicle Security system is armed (except on
some versions for specific markets), the system will emit
an acoustic warning and a warning light (located next to
the interior door handle) will flash until it is disarmed.
NOTE:
If there is a fault with the system, the system will emit
an acoustic signal a second time.
If this occurs, wait about 4 seconds and switch off the
Vehicle Security system following this procedure:
a. Press the unlock button on the key fob.
b. Check that the doors, hood, and liftgate are closed, and then reactivate the system by pressing
the lock button.
If the alarm emits a sound even when the doors, hood,
and liftgate are closed, there is a fault with the system.
Contact an authorized dealer for assistance.
The vehicle doors can be locked without arming the
Vehicle Security system by using the emergency key in
the exterior door lock cylinder.
23_GG_OM_EN_USC_t.book Page 20
Page 68 of 288
66GETTING TO KNOW YOUR INSTRUMENT PANEL
INSTRUMENT CLUSTER DESCRIPTIONS
Use this QR code to access your digital
experience.
1. Speedometer
Indicates vehicle speed.
2. Instrument Cluster Display When the appropriate condi -
tions exist, this display shows
the instrument cluster display messages.
The display always shows one of the main menu
items after ignition is placed on.
3. Tachometer Indicates the engine speed in revolutions per
minute (RPM x 1000).
4. Fuel Gauge The pointer shows the level of fuel in the fuel tank
when the Keyless Push Button Ignition is in the
ON/RUN position.
The fuel pump symbol points to the
side of the vehicle where the fuel door
is located.
Push the center-rear edge of the fuel filler door
and release to open. 5. Oil Temperature Gauge
The temperature gauge shows engine oil tempera -
ture. Any reading within the normal range indi -
cates that the engine is operating satisfactorily.
NOTE:The Instrument Cluster Warning Indicators will illuminate
briefly for a bulb check when the ignition is first cycled.
Depending on your vehicle trim, your instrument cluster
display may vary.
INSTRUMENT CLUSTER DISPLAY
Your vehicle may be equipped with an instrument cluster
display, which offers useful information to the driver. With
the ignition in the OFF mode, opening/closing of a door will
activate the display for viewing, and display the total miles,
or kilometers, in the odometer. Your instrument cluster
display is designed to display important information about
your vehicle’s systems and features. Using the driver
interactive display located on the instrument panel, your
instrument cluster display can show you how systems are
working and give you warnings when they aren’t. The
steering wheel mounted controls allow you to scroll
through and enter the main menus and submenus. You
can access the specific information you want and make
selections and adjustments.
INSTRUMENT CLUSTER DISPLAY
L
OCATION AND CONTROLS
The instrument cluster display features a driver interactive
display that is located in the instrument cluster.
NOTE:Depending on your vehicle trim, your instrument cluster
display may vary.
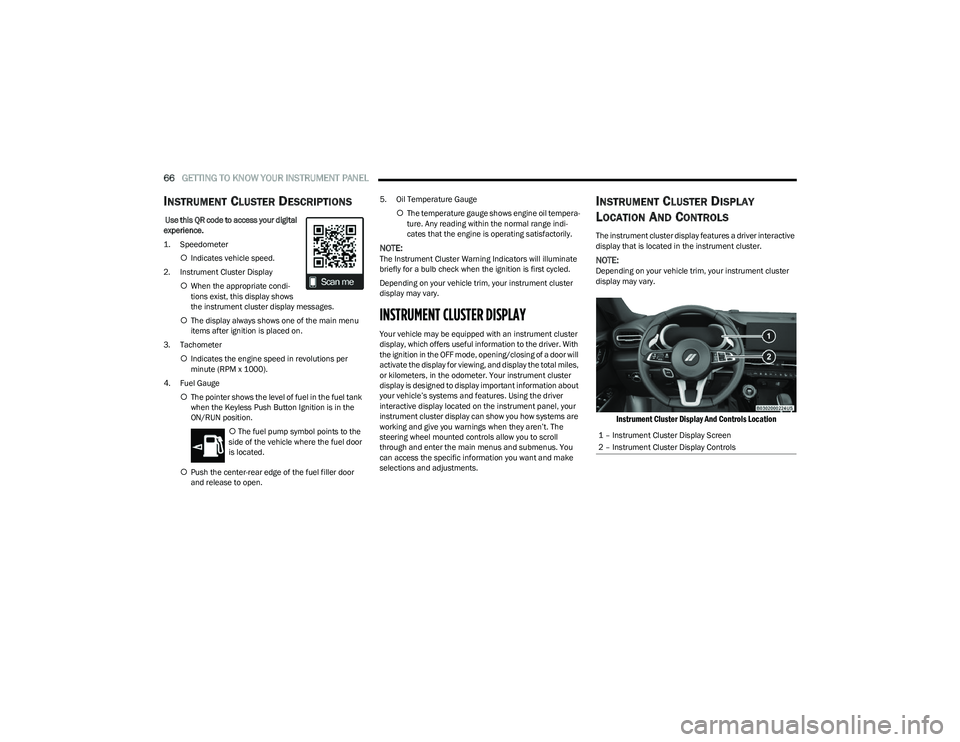
Instrument Cluster Display And Controls Location
1 – Instrument Cluster Display Screen
2 – Instrument Cluster Display Controls
23_GG_OM_EN_USC_t.book Page 66
Page 69 of 288
GETTING TO KNOW YOUR INSTRUMENT PANEL67
The systems allow the driver to select information by
pushing the following buttons mounted on the steering
wheel:
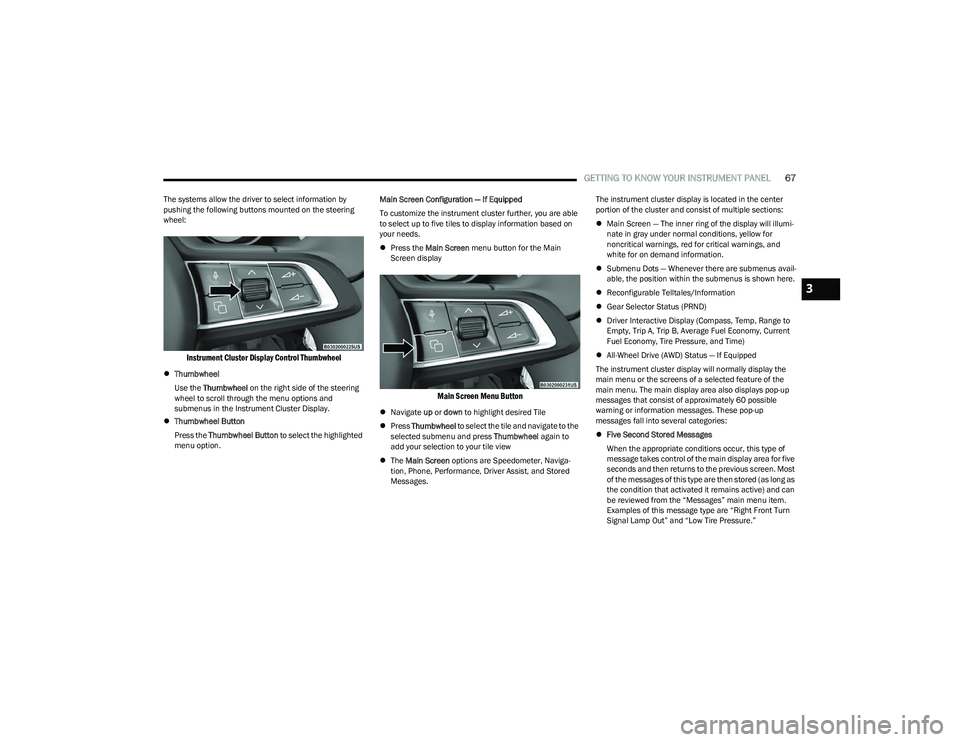
Instrument Cluster Display Control Thumbwheel
Thumbwheel
Use the Thumbwheel on the right side of the steering
wheel to scroll through the menu options and
submenus in the Instrument Cluster Display.
Thumbwheel Button
Press the Thumbwheel Button to select the highlighted
menu option. Main Screen Configuration — If Equipped
To customize the instrument cluster further, you are able
to select up to five tiles to display information based on
your needs.
Press the Main Screen menu button for the Main
Screen display
Main Screen Menu Button
Navigate up or down to highlight desired Tile
Press Thumbwheel to select the tile and navigate to the
selected submenu and press Thumbwheel again to
add your selection to your tile view
The Main Screen options are Speedometer, Naviga -
tion, Phone, Performance, Driver Assist, and Stored
Messages. The instrument cluster display is located in the center
portion of the cluster and consist of multiple sections:
Main Screen — The inner ring of the display will illumi -
nate in gray under normal conditions, yellow for
noncritical warnings, red for critical warnings, and
white for on demand information.
Submenu Dots — Whenever there are submenus avail -
able, the position within the submenus is shown here.
Reconfigurable Telltales/Information
Gear Selector Status (PRND)
Driver Interactive Display (Compass, Temp, Range to
Empty, Trip A, Trip B, Average Fuel Economy, Current
Fuel Economy, Tire Pressure, and Time)
All-Wheel Drive (AWD) Status — If Equipped
The instrument cluster display will normally display the
main menu or the screens of a selected feature of the
main menu. The main display area also displays pop-up
messages that consist of approximately 60 possible
warning or information messages. These pop-up
messages fall into several categories:
Five Second Stored Messages
When the appropriate conditions occur, this type of
message takes control of the main display area for five
seconds and then returns to the previous screen. Most
of the messages of this type are then stored (as long as
the condition that activated it remains active) and can
be reviewed from the “Messages” main menu item.
Examples of this message type are “Right Front Turn
Signal Lamp Out” and “Low Tire Pressure.”
3
23_GG_OM_EN_USC_t.book Page 67
Page 70 of 288
68GETTING TO KNOW YOUR INSTRUMENT PANEL
Unstored Messages
This message type is displayed indefinitely or until the
condition that activated the message is cleared. Exam -
ples of this message type are “Turn Signal On” (if a turn
signal is left on) and “Lights On” (if driver leaves the
vehicle with the lights on).
Unstored Messages Until RUN
These messages deal primarily with the Remote Start
feature. This message type is displayed until the igni -
tion is in the RUN state. Examples of this message type
are “Remote Start Canceled - Door Ajar” and
“Press Brake Pedal and Push Button to Start.”
Five Second Unstored Messages
When the appropriate conditions occur, this type of
message takes control of the main display area for
five seconds and then returns to the previous screen.
An example of this message type is “Automatic High
Beams On.”
OIL CHANGE RESET
Use this QR code to access your digital
experience.
Your vehicle is equipped with an
engine oil change indicator system.
A message will display in the instru -
ment cluster display for five
seconds to indicate the next sched -
uled oil change interval is due. The
engine oil change indicator system is duty cycle based,
which means the engine oil change interval may fluc -
tuate, dependent upon your personal driving style.
Unless reset, this message will continue to display
each time the ignition is cycled to the ON/RUN position.
To reset the oil change indicator after performing the
scheduled maintenance, refer to the following procedure:
1. Without pressing the brake pedal, push the ENGINE START/STOP button and cycle the ignition to the
ON/RUN position (do not start the engine).
2. Fully press the accelerator pedal, slowly, three times within ten seconds.
3. Cycle the ignition to the OFF position.
NOTE:If the indicator message illuminates when you start the
vehicle, the oil change indicator system did not reset. If
necessary, repeat this procedure.
OIL CHANGE INDICATOR SYSTEM
Your vehicle is equipped with an engine oil change
indicator system. The “Oil Change Due” message will
display in the instrument cluster display for five seconds
after a single chime has sounded, to indicate the next
scheduled oil change interval. The engine oil change
indicator system is duty cycle based, which means the
engine oil change interval may fluctuate, dependent upon
your personal driving style.
GEAR SHIFT INDICATOR (GSI) —
I
F EQUIPPED
The GSI system is enabled on vehicles with a manual
transmission, or when a vehicle with an automatic
transmission is in manual shift mode. The GSI provides
the driver with a visual indication when the recommended gear shift point has been reached. This indication notifies
the driver that changing gear will allow a reduction in fuel
consumption. When the up shift indicator is shown on the
instrument cluster display, the GSI is advising the driver to
engage a higher gear. When the down shift indicator is
shown on the display, the GSI is advising the driver to
engage a lower gear.
The GSI remains illuminated until the driver changes
gears, or the driving conditions return to a situation where
changing gear is not required to improve fuel
consumption.
INSTRUMENT CLUSTER DISPLAY MENU
I
TEMS
The instrument cluster display can be used to view the
main menu items for several features. Use the up and
down arrow buttons to scroll through the driver
interactive display menu options until the desired menu is
reached.
NOTE:The instrument cluster display menu items display in the
center of the instrument cluster. Menu items may vary
depending on your vehicle features.
Main Menu
Use the Thumbwheel to scroll Up and Down through the
Menu options. Press the Thumbwheel to enter and exit the
highlighted menu option.
NOTE:These Menu options may vary based on your vehicles trim
level.
23_GG_OM_EN_USC_t.book Page 68